Make a canopy over the porch of the house. Visor above the entrance: beautiful and original design options. Polycarbonate porch canopy: manufacturing instructions
In order not to get wet in the rain and not languish in the sun while you open the front doors, you need some kind of protection. Usually a visor is made above the porch or just above the door. In some cases, the canopy can also cover the steps and even the walkway or part of it. How to make such a structure, from what materials and we'll talk further.
Types and types
If we talk about the structure as a whole, the canopy or canopy over the porch consists of a frame and roofing material (cladding). There may also be support posts that support the outer edge of the canopy. They are optional. They are needed when there is no confidence that the structure without additional supports will be able to withstand settlements.
Precipitation is generally understood to mean snow. In regions with large quantity snow, you can either make the slope of the visor steep - so that the snow melts quickly, or you can install additional supports. You can do both, as they usually do - the safety / durability margin soothes and instills confidence.
Frame and rack materials
The frame and supports of the visor above the entrance door are made of:

The most popular material for the manufacture of a canopy frame over a porch lately is a profiled pipe. With equal dimensions and wall thickness with a round pipe (if we compare the diagonal and diameter), the profile has greater rigidity. Moreover, it has a wide variety of sections - a square and a rectangle with different sides, it can be bent into arcs, it is easier to weld and attach to walls, it goes well with elements of traditional or cold forging, the durability is the same as other steel products. In general, it is the profiled pipe that is in favor today.
What is the lining of the canopy over the porch made of?
If we talk about materials for facing the visor over the porch, there is a very wide choice. Very often, the canopy over the entrance to the house is made of the same material as the roof. And this is correct, since in this case a harmonious design of the house is obtained. With this solution, any roofing material is used:
The second option is to use the material that is used in the fence. In this case, both the design style and the decor elements should be recognizable. This will create a single ensemble with the site. Here the materials can be as follows:
- slate (usually flat, but not fact);
- corrugated board;
- polycarbonate;
- wooden plank.
And the third design option for the canopy over the porch is to put a canopy "neutral" in style and material. These include:
Glass is the least commonly used. It is necessary to use reinforced types of triplex type, and they not only are roads, but also weigh solidly, so that additional suspensions or powerful support columns are definitely required. And if we consider that sheet polycarbonate or plastic in appearance is not much different from glass, it becomes clear why glass is unpopular.
Canopy shapes
There are more than a dozen forms of visors over the front door. The easiest to manufacture - lean-to canopy... Requires a minimum of effort and materials, and can look pretty good. Its downside is that when the snow melts, the snowdrift will be in front of your door and it will urgently need to be eliminated. Other models with forward-leaning slopes suffer from the same "disease". These are excellent options for regions with little snowy winters, but with hot sun - not quite for our latitudes. Although, if you are not afraid of the need for urgent snow removal, you can do any of the options.

It is a little more difficult to make a gable visor (which is a house) and a simple arch. They are good in that the melted snow is on the sides of the entrance and, even with a large amount of it, there is no need to urgently remove it. So for regions with a lot of snow, these are the best models.
How to connect a porch visor and a house wall
One of the most difficult moments- dock the cover of the canopy above the porch so that water does not flow down the wall. Usually use standard methods roof joints - using a baffle plate. This method is suitable for any roofing material and also for sheet metal and wood. You just need to choose the right color. There are two approaches here: in tone with the wall or in tone with roofing visor. The options are equal, so it's up to you to decide / choose.

A groove is made under the baffle bar in the wall (5-7 mm deep). The edge of the plank is inserted into the recess, fastened, the seam is sealed with a moisture-resistant sealant for external use. The other edge of the plank rests on the roofing material. When water runs down the wall, it flows to the bar, from it, bypassing the joint, onto the roofing material and further into or directly to the ground - whoever has done it.
If you use metal tiles, sellers have a special wall profile. It can also be used with other materials - it is important to choose the color. The standard assembly includes rubber seals, which are placed a couple of centimeters from the outer edge. In this case, for strong wind, water and debris do not fall under the bar.

If the visor over the front door and porch is made of polycarbonate, glass or plastic sheet, the method described above is unacceptable - it looks too rough. In this case, there are two options:

There are no other good options. You can only combine the two for reliability.
How to fix if the wall is multilayer
Recently, more and more buildings have multilayer external walls - ventilated facades, insulation ... The load-bearing part of the wall is closed by a couple of layers of materials, the bearing capacity of which is only enough to hold its own weight. Nothing can be attached to them. The entire load must fall on the load-bearing wall.

Even if the outer layer is a finishing brick, it doesn't cost anything to attach to it. Masonry is usually carried out in half a brick. So it only looks solid on the outside. The weight of even the smallest and lightest canopy will not withstand, and the support columns do not help either.
Therefore, with any multilayer wall holes are made in all finishing / insulation layers, the structural elements are attached to the load-bearing wall.
Single slope visor: design features
An inclined or straight single-slope visor is the simplest thing that can be. Straight lines are rare in our country - they are not very functional, but there are a lot of single-sloped inclined ones.
At the heart of the inclined shed visor is right triangle... The right angle lies against the wall, and the length of the sides depends on the desired slope.

In the simplest case, you can weld three identical triangles from a profiled pipe (as in the figure above), make holes in them for fasteners (at least three). These three elements can be connected into a single whole with the help of the lathing under the roofing material - as shown in the figure. And you can weld cross-members from the same pipe (but of a smaller section) or strip, corner. This option - with metal lintels - is more suitable for a canopy over a porch made of polycarbonate or plastic. He is good for sheet metal- it will be convenient to weld or screw in self-tapping screws.

There is also an option with a variable angle of inclination. This is a rectangular frame with lathing lintels, to which a lightweight roofing material is attached. This frame is attached above the entrance with the help of a wall beam fixed to the wall (we described how to make the connection above).

Depending on the required angle of inclination, struts are made. They can be made of metal or wood. Fixed to the frame.
If desired, this option can be made with an adjustable angle of inclination. Make the fastening of the frame and struts to the wall movable (on hinges, for example), make several holes in the frame. By rearranging the struts in different holes, you can get a different angle of inclination. For doors, this feature is not very relevant - perhaps for glass doors - to block out too bright sun, but for windows it can come in handy.
Gable canopy frame
There are at least two ways to assemble a visor with two slopes: from two or more (depending on the length of the canopy) triangular rafters or from two rectangular frames with a crate, fixed with crossbars. The second option is shown in the figure below, and the first one will be a little further.

A canopy with a house is one of the popular options
Method one
Two quadrangles are assembled from a bar or thick board, which are united by a ridge board. The angle of inclination of the slopes is set by saws on the ridge, fixed with crossbars - a spacer bar. Since the roofing material is laid down from the ridge, the battens are packed in the opposite direction. Under soft shingles continuous flooring required. It could be moisture resistant plywood or .

Brackets are also assembled on the ground - stops that will transfer the load from the visor to a large area of the wall. It is better to assemble the structure on the ground (without fastening the roofing material). In order to raise and secure the canopy, assistants or the services of a manipulator will be required.
Method two
The second option is the assembly of individual truss structures. Maybe this option will seem easier to you - according to this principle, all gable roofs are assembled.

Here, too, a frame is assembled from a bar and brackets are needed. But the frame lies in a horizontal plane, resting on the brackets. Two or three triangles of rafters are assembled, which rest on ridge beam, and it rests against the rack, which is fixed to the frame with its second end. It turns out a mini-model of a conventional rafter system.
To improve the appearance, bevels are placed near the rack. In the photo above, they are curved, but this is far from necessary. You can simply make it out of a bar by sawing it at the desired angle. It is also better to assemble the system on the ground - it will not work exactly to connect at a height.
Made of metal
If the frame of the visor is made of a metal pipe, everything is much simpler. The pipe has a large bearing capacity, therefore supporting and auxiliary elements much less.
Cook two identical triangles - according to the size of the future canopy. They are connected with jumpers, the length of which is determined by the "depth" of the visor. To prevent the cladding from sagging, additional crossbars are welded on.

The finished canopy structure is complemented by brackets - stops. In the picture above, the canopy above the porch has only a stop without slopes. For regions with little snow in winter, this is enough, but to keep a solid mass of snow, you will need a mow or a stand. Or maybe both (as in the diagram below).

Decorative items are optional. There may be an ordinary triangle here.
Arched visor over the porch: manufacturing features
The canopy over the entrance door in the form of an arch cannot be called difficult to manufacture. It is more convenient to make this form from steel pipe, moreover, from a profile, rectangular section. With the help (you can also manually, but this is more complicated), several arches of the same size are made. They are connected with jumpers, the length of which is determined by the desired size of the roofing part.

Arched construction - the simplest of the options
The first and last arches are connected by horizontal jumpers, brackets or, as in the picture above, ordinary stops are welded to the last.
You can often see double arches with decorative and not very filling. They are characteristic of designs large sizes... Still sailing and snow load it turns out to be large and it is better to play it safe by making a margin of safety than to do everything anew.
Photo ideas


The canopy above the porch is not only above the front door, but also above the terrace.

Wooden canopy over the entrance in the form of a house - options with support posts under the tiles

Stylish design main entrance to private house sometimes creates a much stronger impression than the cottage itself. One of the most important tasks when equipping general architectural style building performs a canopy over the porch. At the same time, spectacular design is far from the only function assigned to the visor. Its main task is to ensure the protection of the front entrance from external adverse factors.


Regulatory Requirements
The porch canopy is not just a part of the roof, it is an architectural component that is responsible for a number of important conditions for comfortable and safe living in the house.
- Helps to provide the greatest comfort when entering living quarters, allowing you to shake off raindrops from clothes and an umbrella while still on the porch, or to clear snow from shoes.
- Provides maximum reliability- a properly constructed visor can withstand not only the weight of the falling precipitation, but also all kinds of loaches, for example, wild grapes, which are often used to decorate the main entrance to the house.


- Forms effective drainage. This is very important to preserve the integrity of the entire facade of the building, which is why modern awnings over the porch include special engineering Communication- water, flowing down the visor, is poured into the storage tank and through the equipped outflow system of the liquid is discharged outside the residential building.
- Performs decorative function... Stylish canopy unusual shape can become the main accent, emphasizing the unique architecture of the building, a bright note that gives the entire design completeness and conceptuality.


In order for the canopy over the door to serve faithfully for many years and does not need repairs after a couple of years, it must meet the basic technological requirements:
- the visor must withstand a large load and pressure - when calculating, one should take into account the weight of the snow mass that falls on the visor from the roof, as well as the dimensions of green spaces, which often wrap around the structure;
- it is optimal if the structure effectively protects not only the porch itself, but also the front door in the building;


- a prerequisite the effectiveness of the design is the equipment of the water drainage system, as a rule, it is performed in the form of a storage tank, a storm drainage system or a gutter;
- the design of the visor should be in harmony with the general architectural appearance of the building, take into account the peculiarities of its style and color scheme.


More precise requirements for awnings are established current GOSTs and SNiPs, namely:
- canopies and awnings in mandatory should be installed above each entrance, main or secondary, as well as on the doors of the bathhouse and outbuildings;
- canopies should be made only of materials that are resistant to combustion;
- it is recommended to use those approved by the sanitary authorities as finishing materials;
- canopies must withstand a load of at least 200 kg / m2.


Kinds
Canopies are performed in the most different options, but at the same time, any configuration requires general compliance with a single stylistic decision of the exterior, therefore, when developing a canopy project, any detail, trifle, nuance should be taken into account. As a rule, one of the following forms is chosen for the construction of the visor.
- Flat canopy- most often used for registration country house or a facade in the style of rustic or, for example, shabby chic, for this you just need to put together several boards with each other and stylishly decorate them with decorative materials.


- Dome- is different original design however, this is by no means the only advantage of such a configuration. The undoubted advantage of such a coating is its compactness, the surface of such a visor occupies a smaller area than other types of options, however, it covers the same area. This means that much less materials are required for arranging the visor, which leads to significant savings.
- Arched and semi-arched forms- such canopies are called "marquise", they are very economical, because very little materials are spent on their arrangement. Such models are distinguished by natural drainage, and in addition they withstand the pressure of snow masses.
- Gable canopy- the most simple construction, which at the same time provides a full drain.


- Three-slope option- organically combined with multi-pitched roofs, it is characterized by increased strength and wear resistance.
- Concave visor- a canopy of an unusual shape, which can become a stylish accent of the architectural concept.


Materials (edit)
Perhaps there are practically no restrictions on the materials from which the visor can be made. Metal, plastic, roof tiles and many others can be used for a stylish canopy. modern materials... Let's dwell on each of them in more detail.


Polycarbonate
This material is widely used in the creation of canopies and awnings, as well as for the construction of fences. winter gardens and gazebos.
The use of polycarbonate for arranging the visor has whole line merits:
- the material is transparent, effectively scatters ultraviolet radiation, maintaining a safe level of normal illumination;
- polycarbonate is a durable compound that does not break or crack under strong gusts of wind and pressure of snow masses;
- the substance is fire-resistant, it does not change its shade under the influence of direct sunlight, does not rot, rust and does not deform;


- the surface of polycarbonate is considered an unfavorable environment for the growth of mold, dangerous fungus and insects;
- the material is plastic, therefore it allows you to mount visors of various shapes, including semicircular and angular options;
- the modern market offers a wide selection of polycarbonate in various shades and plate thicknesses, thanks to which everyone can choose exactly the option that will best suit the design and general style Houses.


The disadvantages of the material include poor resistance to ultraviolet light. That is why manufacturers cover it with special compounds, without which the canopy can become cloudy after a short time and worsen its performance.


Plastic
PVC boards are often used to equip an effective porch canopy. It should be noted that the consumer properties of plastic are similar to those of polycarbonate, however, its cost is several times lower. In addition, the material is lightweight, which greatly facilitates its installation. The disadvantage is a rather meager color gamut, and fading in the sun, however, this drawback is successfully leveled by multi-colored films that are sold in any hardware store.


Metal
A visor made of "stainless steel" is considered relatively budget option... However, for its construction, at least minimal welding skills are required. If there is no such experience at all, then nuts with bolts and rivets can be used, although in this case it is necessary to periodically check the strength of the connections.
Canopy out of stainless steel characterized by durability and high strength, it is resistant to mechanical damage and temperature extremes. Such a canopy can protect the main entrance for a period of years... Among the disadvantages, one should single out the large dimensions and the need for regular anti-corrosion treatment.


Professional list
This material is considered a good alternative to metal, since it combines its strength and durability with the manufacturability of modern processing. Such materials are coated on both sides with a layer of special protective polymers, which significantly increase its resistance to adverse external atmospheric factors and have an anti-corrosion effect.
In addition, the professional sheet produces in a rather wide colors and texture. Therefore, home owners can not only choose the desired shade, but also, for example, emphasize the texture of wood or imitate masonry, or the structure of a brick covering. In addition, this material is simpler than steel.


Among the disadvantages are the following:
- corrugated board does not let the light of the sun through, therefore similar materials should not be used when equipping ball canopies;
- The profiled sheet has a relatively low impact resistance - in the case of, for example, hail, the integrity of the visor will not be violated, but the marks from the blows will remain.


Forging
Separately, it is worth paying attention to such a variety of metal visors as forged. These awnings are always exceptionally luxurious and elegant. They fit perfectly into exteriors designed in classic style, demonstrates the taste and status of the owners of the mansion.
Of course, forging is very expensive. However, to give the entrance noble appearance it is not at all necessary to build an entirely forged canopy, it is enough to add a few decorative elements that can transform before our eyes general form buildings.


The lack of material is associated with its installation. Such a canopy cannot be made independently, and it is better to entrust its fixation to the hands of professionals - otherwise, the entire structure in winter may simply collapse under the weight of the snow masses.


Tree
A kind of material that is not suitable for every home. Wood canopies should be used when arranging houses from natural wood, made of rough stone or brick. The advantages of wood are its environmental friendliness and safety. However, this material is afraid of water and fire, mold with fungi can appear in it, and insects often equip their holes in such structures.
That is why a canopy made of wood should be regularly treated with special fungicides and fire retardants, which allow the material to withstand all unfavorable factors external environment.


Metal tile
Many designers do not consider the use of metal tiles to be a suitable option for arranging a porch, since this is a rather bulky coating.
However, the consumer properties of such awnings are extremely high:
- they are resistant to mechanical damage;
- resistant to temperature extremes and direct sunlight;
- have a long service life;
- differ in decorative design.


Very often, metal tiles are replaced with bituminous ones - they are much lighter, and in addition, they perfectly absorb sounds, which means they create additional sound insulation. Often, such a coating is used in the country due to its low cost and ease of installation.


Glass
This material is used very rarely; it is not suitable for every home and not every family. Glass looks harmonious in dwellings furnished in the style of minimalism; in all other cases, you should give preference to other materials. Well, in addition, in families, for example, with children, it is better to refrain from using glass visors, since such a product can be damaged during active games with a ball and a racket.


Design
The general design principles of porch canopies are based on the combination of the canopy with the overall stylistic concept of the building facade, as well as with the tasks that you assign to the canopy. If you only need a structure to effectively protect the porch from wind and precipitation, then it is better to stop at the simplest and most inexpensive visor, as they say "neat and tidy." Such coatings are most often made of polycarbonate or metal profiles, however, other materials can also be used. The only thing that matters is the compatibility of color and style of decoration with the overall finishing of the facade of the building and its color scheme.


Sometimes it becomes necessary to design a visor in some kind of special design.- Russian, classic, high-tech, half-timbered or chalet. For example, for log house an opaque wooden canopy will be appropriate, fully corresponding to the style of a traditional Russian hut. However, here a forged visor will be appropriate.
When implementing high-tech ideas, you can use polycarbonate or glass, metal will emphasize the Gothic, and metal tiles will emphasize the classics.


Since the visor is quite meaningful part of the entire facade of the building, then it should be a single architectural ensemble with the porch itself, railings and steps. In addition, the canopy can be separately decorated with decorative elements, for which lanterns and flowerpots are most often used. Sometimes a canopy is used to equip a closed space that can be used as a recreation area.


Drawings and projects
The construction of the visor requires the compulsory drawing up of a drawing of the future structure, the calculations are based on:
- the selected material, which should not only harmoniously fit into the overall design of the building, but also have a sufficient degree of strength and stability;
- type of canopy - flat, shed, gable, arched, etc.;
- visor dimensions - its length, width and depth;
- location - the structure for sheds over the main and emergency exits, as a rule, varies significantly.


The main points to take into account when drawing up a drawing:
- the width of the canopy should be 50 cm more than the doorway;
- the optimum tilt angle for a pitched canopy is 20 degrees.
A drawing is really necessary when equipping a canopy. It will not only help you to correctly perform all the necessary installation work, but also allow you to calculate the required amount of materials.


How to do it yourself?
At first it may seem that building a visor is very simple - nail the frame and lay the base material. In practice, this is far from the case: installation can be done independently, but this requires at least minimal skills and experience in working with construction and facing materials... Of course, if you just want "not to drip on your head," then nails and a hammer will be enough. But in order for the visor to provide effective protection and be a stylish architectural element, you should carefully consider all stages of work, take care of a strong frame and choose the optimal shape.


The process will go much easier if the master has a finished sketch. Even if it was compiled by hand, it will in any case reflect all the pros and cons of the project.
Depending on the material used and the working area, you can choose one of the following types of fastening:
- Suspended - fixation is made on special suspensions located just above the visor. This option is optimal for materials with low weight, for example, polycarbonate and corrugated board.
- Suspended - mounted to the wall using supports.
- Supporting - contains "pillars" that rest against the foundation or the porch itself. This design is suitable for oversized visors.


At the first stage, a frame is built, most often it is made of a metal pipe having a triangular cross section. To begin with, cut metal sections of the required size, and then weld them to each other in accordance with the scheme: first, I mount the U-shaped base of the frame, and then attach the base elements.
Most often, the frame is made on the ground; in rare cases, additional components are welded onto the base, which is already suspended from the facade.


The total number of jumpers during the construction of the frame largely depends on the material used, so if the visor is made of corrugated board, then the slats should be located in increments of 30 cm.At the final stage of arranging the frame, a cornice film is attached, as well as elements of the drainage system (gutters and pipes) ...


Making straight visors is not particularly difficult. It is much more difficult to create arched structures.
For the manufacture of undulating canopies, pipes are cut with a very large margin, and then bent with a gas wrench or a special pipe bender. If there are no such tools in your home workshop, then you can recommend an ordinary grinder, it makes cuts along the entire surface of the pipe in increments of 30-40 cm, along which the pipe is bent until the required rounding is achieved, and then the cuts are welded.


If the visor is planned to be mounted from heavy materials, then the frame hinged structure should be additionally equipped with stops that extend from the outer corner of the canopy to the wall at an angle.
The next step is to drill holes with which the frame will be attached to the wall. Usually, the visors are fixed at the top and bottom on both sides - that is, 4 attachment points are obtained. However, if it comes O metal awnings, then it is worth increasing the number of fasteners.


- obliquely to horizontal bar additional bars are attached on both sides, which will become the frame for laying the outer coating;
- if the visor has large dimensions, then the crate is first laid on the beams and only then the main roofing material;
- we will immediately make a reservation that on the basis of a wooden frame, it is possible to construct visors with straight laconic geometry. It is impossible to mount wavy and spherical canopy options.


Traditionally, canopies made of metal or profiled sheet are made by professionals. They independently equip canopies made of corrugated board or plastic. The material is attached to the frame using steel screws and thermal washers. To do this, a hole is drilled on the main covering, through which it will be held on the frame. In this case, a rubber or silicone layer is made without fail. Thermal washers should not be twisted too tightly, as the sheets should have the possibility of slight displacement.
In almost every residential building above the porch there is a useful and necessary addition - a visor. The polycarbonate porch canopy becomes especially noticeable during bad weather. It protects the owners from rain and snow while they look for the keys to the door.
The polycarbonate canopy extends the life of the porch itself. The material from which the porch is built will be protected from the destructive force of moisture.
Polycarbonate visor above the entrance door
Before grabbing your head and saying that you will never do this work, you just need to thoroughly understand everything. First of all, you need to consider all possible options a visor made of polycarbonate, make a drawing of the most acceptable for your home, put down its dimensions.
Frame a certain size you can make it yourself or order. If you do the structure yourself, then you need to protect the seams after welding as much as possible from corrosion.
 This building material is used everywhere today primarily because which has an affordable price.
Comparing polymer to others building materials, such as glass, Ondulin, wood or glass, the polymer will require maintenance much less often. And this is also very important in our life.
You can add to the advantages of the material:

 If the material has to be cut with a hacksaw or grinder, then a lot of effort is needed for this. Polycarbonate does not crumble or crack in the process, but you still need to do this work carefully.
Since the sheets are flexible and elastic, they can be easily bent to the desired radius and placed in the grooves prepared in advance.
The structure of the canopy is found not only rectangular, but also arched. The second option is more common and looks very attractive.
Choice of design
The shape and size of the visor will depend on the shape of the porch and the preferences of the owners. If you take the issue seriously, then you need to read a lot of information, get acquainted with detailed master classes... This is the only way to choose the right shape of the canopy and make the right calculations.

 After reviewing the above information, you can determine the installation method. It can be supported or suspended.
If we talk about the frame, then it can be made from both metal and wood. Wood base will cost less, but it will not last long either. Steel structure should do experienced master on the special equipment... Such a structure will have a lot of weight, and aluminum is used to make it smaller.
Making your choice even in favor of the simplest design, you protect yourself and your loved ones from rain and snow for a while. But it is also important that you protect your yard, house and porch from atmospheric precipitation, which will harm any building material.
Project preparation and canopy calculation
 A canopy is made depending on the size of the porch. It is desirable to make it slightly larger than the size of the porch itself. This is necessary in order to prevent moisture ingress, and subsequently - the formation of ice on the steps.
If the distance from the house to the gate is small, then you can make a canopy along the entire length of the path. This is a great idea, because in bad weather the path will remain dry, and you can easily get into the house without an umbrella. Despite the bad weather, it will be convenient to just walk on such a path.
A polycarbonate canopy over the porch should perform the following functions:

 To make a canopy with your own hands, you need to make the right measurements. A tape measure is used for this. Given the width and shape of the visor, you need to calculate the required polycarbonate.
For a purchase, it is advisable to contact any construction supermarket, where you can choose not only the color of the future coating, but also its density and appearance. If we talk about the types of products, then there is cellular and monolithic polycarbonate. Cellular polycarbonate , if you look at it in section, it has hollow cells, so it will be cheaper than a monolithic one, the name of which fully corresponds to its appearance.
Monolithic view is a one-piece polymer sheet with high light transmittance. The material is versatile, for the poet it is often used instead of glass.
The visor for the front door can be bought both in finished form, and in the form of a set of materials intended for its construction.
We make a visor with our own hands
If you decide to make a canopy for your front door with my own hands, then you need to prepare the following materials and tools:

To fix polycarbonate, you will need special self-tapping screws with thermal washers, which provide reliable fastening.
Instructions:

The final stage of all work is the removal of the protective polycarbonate film.
Decorative properties of polycarbonate
This material, in comparison with the profiled sheet, has unique decorative properties. Sheets can be of any color and shade, their transparent or translucent structure allows Sun rays... Despite the fact that the canopy is separate construction, it should harmoniously match in color not only with the walls, but also with the roofing.
The frame structure can be made unique. To do this, you can use several options:

The most interesting design projects can be realized with the help of polycarbonate. The material is durable, but plastic, so you can make not only an arch from it, but also a dome, an awning. The porch can be made completely closed with this material. That this important decorative element to make buildings more attractive, you can use any suitable color.
 Working with polycarbonate is easy. Even the most inexperienced master can figure it out. Installing and choosing a mount - that's all the tricks.
If you assemble the canopy correctly, then it will last for more than a dozen years. This is a very profitable and practical solution.
To make the structure as strong as possible, experts recommend buying a ready-made frame. Thanks to this, the work on arranging the visor will be carried out much faster.
To make a visor over a porch made of polycarbonate with your own hands, it is not necessary to have a rich experience of finishing or installation works- enough desire and ability to use different instruments... Thanks to advanced technologies, the assembly and installation process of such a structure is greatly facilitated, so that it can be used. In addition, polycarbonate is a convenient material for cutting, it bends well, weighs little and looks attractive.
Far from one home craftsman cherishes the dream of a beautiful visor made over the front door. on their own... But not everyone knows how to make such a canopy and what is required for this. But in fact, 99% of men and even women can cope with this.
Forged polycarbonate visor
What tools do you need to use to build and install

Manual hydraulic pipe bender with a set of attachments
The selection of tools depends on the shape of the visor and the materials from which it is planned to be built:
- for single-slope and gable straight visors, this tool is useless, but if you prefer the smooth rounded outlines of the structure, then you will have to purchase or rent a pipe bending machine (manual or electric);
- the supporting frame is most often made of a metal profile, therefore an angular sanding machine- grinder with a cut disc;
- polycarbonate can also be cut with a grinder, but it is better to do it with a jigsaw, using a metal file;
- to fix the structure on the wall, holes are drilled with a perforator, in extreme cases - with an electric drill, where there is a blow function;
- it is most convenient to screw polycarbonate to the frame cordless drill(with a screwdriver) - the power cord does not interfere with work;
- electric welding is used to assemble the bearing part;
- with the help of a construction square, corners are maintained;
- mark the place for installation with an ordinary, water or laser level, using a tape measure and a pencil (marker).
Preparation of materials for the construction of the visor

Huge selection of polycarbonate colors
For self assembly the visor will need two main materials - polycarbonate and a hollow metal profile, and for fasteners - screws and anchors:
- there are two types of polycarbonate sheets - cellular and monolithic, but there is no need for a honeycomb visor on the panel - they are needed for insulation, therefore, a cast sheet is suitable here;
- panels are transparent, matte and colored, and in addition, the sheets on one side can be protected from ultraviolet radiation;
- the bearing part is most often assembled from a hollow metal profile of 20 × 20 mm or pipes of the same diameter;
- the joint between the canopy and the wall is sealed with a sealant or polyurethane foam;
- you can make a base of wood - for this you need 50 × 50 mm bars;
- to fix the supporting frame to the wall, anchor dowels with a length of 150-200 mm are needed. But here it is important that the dowel is a plastic expansion plug, but not an umbrella (molly);
- the polycarbonate sheet is attached to the profiles with white or colored self-tapping screws with a rubberized press washer.

Lightweight metal visor
Construction and installation of different types of frames
Of course, there are many more options, but all of them can be divided into two categories - straight and bent. Straight lines should include a single-slope, gable or box-shaped form, and bent ones - all the rest, where there are smooth, rounded lines.

Different shapes for awnings over the porch
Making a frame of a straight type from a metal profile
To make a straight polycarbonate visor with your own hands and install it above the porch, you first need to measure the length and width of the site - the canopy must cover it. If the porch is small, then the canopy can be made larger in area. But here it is important not only to close part of the entrance from precipitation, but also to preserve or even improve the exterior of the building, and the size is not the last thing in this.

Frame for arranging a canopy over the porch
Alternatively, the canopy can be made with a perimeter of 15000 × 1000 mm, therefore, you need to cut off:
- two metal profiles 1460 mm each (parallels);
- two 1000 mm each (horizontally);
- two 700mm each (vertical);
- two 1000 mm each (struts).
When cutting a profile, the braces and the upper ends of the verticals are best done at an angle, so the joint will turn out to be tight, therefore, more attractive. For assembly, it is most convenient to lay out the parts on the ground, and to carry out welding work using a construction square or a level. This is necessary so that the perimeter under the roof is rectangular (with angles of 90ᵒ).
If there is no construction square, then the profile is laid on the ground and level is set using stands made of any available material. Then a vertical is applied to it and welded, guided by the level during operation. To make a correct oblique cut, one metal profile is placed on top of another under the right slope, mark and cut along this line.

Grinding welding joints with a grinder
A good welder makes a clean seam, but after he has roughened the scale, there will still be a scar that will be visible even after painting. Therefore, all welded joints should be sanded - for this, use the same edging disc with which the profiles were cut. After processing, the joints are checked for strength (for fracture), so as not to accidentally weaken it by stripping the scar.
Construction of a simple curved frame

Uncomplicated curved canopy
A frame for a curved visor can be made according to the sketch given above, and for this you need to cut pieces of a metal profile with a section of 20 × 20 mm:
- 2 profiles 1900 mm each (parallels);
- 2 - 2000 mm each (arcs);
- 2 - 910 mm each (horizontal);
- 2 - 130 mm each (triangular truss);
- 2 - 800 mm each (triangular truss);
- 2 - 940 mm each (triangular truss);
- trimming metal profiles for spacers.
In this case, the base of the polycarbonate visor will be, albeit curved, but not very difficult to perform, and the assembly should begin with the manufacture of two radius trusses. To do this, of course, it is better to use a nozzle with the required rounding and if the machine is factory-made, then the kit will probably find the required radius. Otherwise, you will have to bend the profile by eye, and this will significantly complicate the task, since you will need to make two completely identical elements.

But even if there is no suitable nozzle, you can make two identical arcs, only here you should be very careful and careful.
- After bending, place a straight piece at the ends of the arc and mark the cut points to ensure a good fit.
- When both trusses are welded, place them one on top of the other before weld the straps (spacers) for symmetry comparison. In case of obvious discrepancies, it is better to redo the design.
- After assembling two arcuate trusses, it remains only to weld triangular trusses to it, horizontals and the frame will be ready for installation above the door.
- If the support on the wall from the triangles is not enough, then you can add verticals with struts, as was done for a flat lean-to canopy over the porch. For this, profiles can be cut to dimensions similar to a straight canopy, and all welding and grinding work takes place in the same order.

Forged canopy with polycarbonate roof
Assembling the wooden frame for the visor

Single-slope version of a wooden base
The straight frame is also assembled from wooden slats, moreover, the dimensions of the parts for the assembly of the structure do not have to be changed, leaving them similar to the metal profile. In the photo above, a crate is additionally made of slats, but this is more for decoration - monolithic polycarbonate can be screwed on without it. Only on the frame.

You can complicate the task a little by making a visor over the porch for two slopes, thereby making the design of the building's exterior more attractive (this option is especially good for wooden buildings). A whole system of three pairs is assembled here rafter legs, but for a polycarbonate coating it is quite possible to do with two pairs. Bent braces are also optional, although this is how it will turn out, if you can, then do it.
The assembly of wooden profiles is carried out using self-tapping screws, but, as you can see, the profile is different here, not only 50 × 50 mm. The choice of rails depends more on the desire of the assembler and the availability of material - there are no restrictions here and the main requirements are strength and attractiveness. It is advisable to treat all wooden parts with an antiseptic to increase the service life.

Fastening the frame to the wall
For convenience, they usually first attach the frame of the visor to the wall and only then mount the roofing material on it, but if you do it differently, the technology will not be disturbed by this. To fix a canopy up to 2 × 2, four anchor dowels are enough - if the plaster on the wall is dense, then you can take a length of 150 mm, but if its density is in doubt, then use bolts of 200 mm.

Anchor plastic dowel with bolt
If the visor is made with sidewalls, then the wall parallel is divided into three parts - these will be places for fasteners (two points will turn out), but when the function of the verticals is performed by triangular trusses shifted closer to the middle, then the horizontal fasteners are pushed to the edges. To mount the supporting frame, first beat off a line at the level, and then, attaching it to the wall, mark the holes for the profiles on the profiles so that there are no coincidences with the seam of the brickwork.
It is more convenient if Painting works carry out before installation supporting structure- so the wall will not get dirty when painting the profile. If, while drilling a hole in the wall, the drill accidentally moves to the side, this can be easily fixed by welding - on the profile, the hole expands into the right direction, and the excess is simply brewed. For convenience and rigidity of fastening, washers are placed under the bolt head.
Polycarbonate roof fixing
To metal and wooden profiles polycarbonate is fastened with self-tapping screws with a rubberized (for thermal deformation) press washer. But in cases where the panels are colored, you can use self-tapping screws originally intended for corrugated board - they are shown in the photo. If a protective film is applied to the panel (against UV radiation), then after installation it should be outside(top) visor.

Self-tapping screws with multi-colored heads
Self-tapping screws do not pierce the metal profile that was used for the frame, therefore, before screwing in the metal, make a hole 0.5-0.7 mm less than the screw diameter. No pre-drilling is required for wooden blocks. The step between the fastening points is left no more than 30-40 cm in order to make the coating resistant to wind loads.

In conclusion, it should be said that when installing a visor over a polycarbonate porch with your own hands, it is better to make the area of the panel several centimeters larger than the area of the frame. A 3-5 cm wide edge on the front and sides will look very good and will not be damaged by the snow load. And the joint between the canopy and the wall is sealed with a sealant or, in extreme cases, with polyurethane foam - this is for surfaces with a large relief.

If you have any doubts about your knowledge and strength, you must turn to professionals. Sometimes this approach is cheaper.
Video: do-it-yourself visor over the porch
A canopy above the front door is used to protect the entrance from precipitation, sun and other natural factors. In addition, the visor has a decorative function and serves to decorate the entrance to the house. Made by hand, it is a matter of special pride for the owners. It can be made of metal, tiles, plastic, wood, corrugated board, polycarbonate or other materials. In this article, we will consider a visor made of polycarbonate, its advantages, types and features.
Advantages
A visor made of such material has a lot of advantages:
- polycarbonate is easy to install and has a low dead weight;
- it is durable and can be operated in a wide temperature range;
- skips well sunlight- does not shade the territory;
- shockproof - can withstand mechanical shock, including strong hail;
- resistant to loads - withstands the weight of the snow mass;
- not flammable;
- easily tolerates bending, so it can take any shape;
- available in various colors.

Did you know? Polycarbonate is used in the manufacture of eyeglass lenses. These lenses are 10 times stronger than any other, and also considered the safest.
Types of polycarbonate canvas
Consider the main types of polycarbonate canvas:
 Polycarbonate sheets can also be transparent or opaque. Opaque sheets are used to create partitions, wall cladding, false ceilings, wall decorations. Mosaics made of polycarbonate stained-glass windows look very nice. Polycarbonate sheets retain their color for a long time, are resistant to scratches and mechanical damage.
 Varieties of forms of visors
All canopies consist of a frame, support elements and cover. The frame and supports are made of metal. Covering made of polycarbonate sheet.
Important! The width of the canopy should be at least 0.8 m, the length - 0.5 m or slightly more than the width of the front door.

The shape of the visors are as follows:

Important! If the length of the canopy exceeds 2 m, then the structure may fall, therefore additional pillars are placed under the central support.
Frame
Most often, the frame is made of aluminum or steel. Aluminum is an easy-to-work, ductile material. Does not corrode. Before installation, it is varnished to provide protection against environmental influences.
A wood frame is usually used for canopies of the same material. This is due to the fact that the tree is not plastic and is susceptible to the influence of an aggressive environment. Moreover, the tree is short-lived.
 A forged metal frame looks best. Can be performed in any decorative form and decorated with ornaments. Perfectly decorates as front door and the wall around it.
 Did you know? The first door canopies were used in Chinese architecture. And the progenitor of the canopy can be considered a pagoda, in which each tier is decorated with a canopy roof.
How to install the visor
To install the visor, you will need the following tools:
- welding machine;
- Bulgarian;
- ordinary drill + a set of drills;
- perforator for installing the finished product;
- screwdriver with an attachment for self-tapping screws;
- paint brush for priming and painting the finished product.
 Installation materials:
 - metal pipe for frame parts;
- polycarbonate for covering the visor;
- metal primer;
- paint for metal;
- decorative screws;
- fasteners for the finished product.

The order of work is as follows:
- Layout work. We determine the shape and size of the future canopy. If you order the manufacture of a forged or aluminum frame, then you will have to determine the dimensions of the future product at the stage of ordering the frame.
- Pipe cutting. If you make the frame yourself - we cut the metal pipe the right sizes... Remember that when cutting the pipe, you must make an additional allowance for the pipe length for bending. We bend the cut pipe into the shapes we need.
- We connect the frame parts by welding.
- We cut the polycarbonate sheet into pieces of the required sizes and shapes.
- Wall mount. We prime the metal and paint in desired color... We carry out further work after the paint has completely dried. We fasten the frame with anchors. Using self-tapping screws, we attach a polycarbonate coating to the frame.
Video: how to make a polycarbonate visor
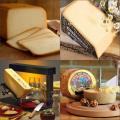 Famous Swiss cheeses Swiss hard cheese for hot dishes
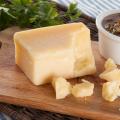 Swiss cheese Swiss cheese varieties
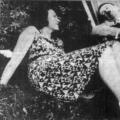 The mystery of the death of Adolf Hitler