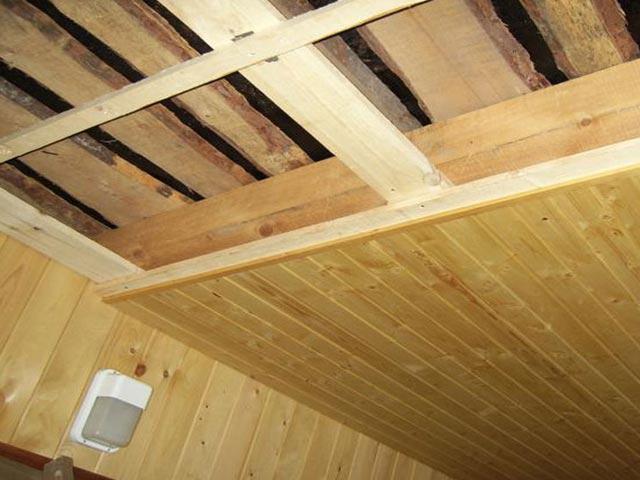
Installation of suspended. How and from which materials to make a mounted ceiling. Stretch ceilings are divided into two types
To get a suspended ceiling, first it is necessary to install the framework on which the main decorative elements are already fixed. Depending on their type, they select the installation scheme of the guide elements. Also, the frame consists of moldings, which are installed on the corners, and suspensions - responsible for adjusting the design in height. The latter may have the form of brackets, rigging from metal or ordinary wire. On the installed guide, the installation of decorative elements is made. If plasterboard sheets are used, then their putty and painting are performed.
Where to order installation of the suspended ceiling in Moscow?
Our company is engaged in mounting suspended ceilings of different complexity in Moscow. We guarantee high quality of work performed, regardless of the materials used, construction solutions, contour or destination of the room. The installed ceiling will not only be durable, but also fulfill the necessary functions. High quality is provided by phased control of work, using only professional equipment and tools, extensive experience in this area. We also always take into account the requirements of the Customer, and if necessary, we provide advice on all issues of interest.
How to align the old concrete ceiling and hide the rest of his flaws? The answer is simple - you can make a suspended ceiling. The design and installation work is quite complex, but provided that you will know exactly how to do everything and what such design consists, you will succeed.
What is a suspended ceiling?
Based on the title, it is possible to immediately understand that the suspended ceiling is a special design that is fastened to the ceiling and performing various functions, mostly decorative, of course. Such a ceiling has good soundproofing and insulation properties, as well as it is capable of changing the appearance of the main ceiling beyond recognition.


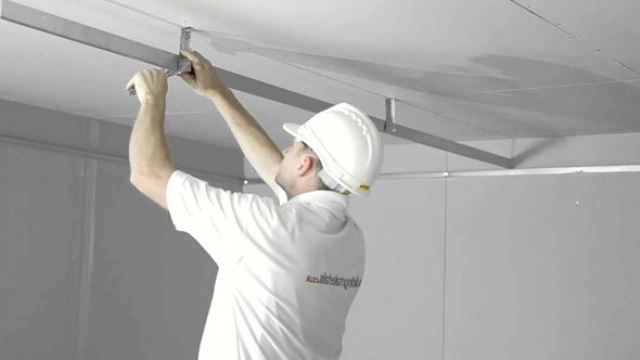
When mounting the suspension ceiling, a special suspension system and profiles are used that are attached to the ceiling. Then the material is installed on the mounted design, which will serve as a new ceiling. Repair professionals use for these purposes, as a rule, drywall.


On a note! The suspension ceiling is actually different. It can be a rack, cassette, lattice. Such types of ceilings are also called modular. However, the article will be discussed about the usual plasterboard coating - this species is still known as solid. The ceiling, which is installed without the use of suspensions, is called cumulative.

Rack suspended ceiling in the bathroom
Pros and cons
The suspension ceiling has a lot of advantages - there are much more of them than flaws.
The advantages of the suspended ceilings include:
- the ability to hide the shortcomings of the main ceiling (spots, cracks, cracks, steps, etc.);
- beautiful appearance - this ceiling changes until all the room is unrecognizable;
- the ability to realize various design ideas up to the installation of complex structures;
- convenient mounting of the backlight (as well as the possibility of installing lamps in accordance with the design plan);
- excellent sound and thermal insulation characteristics,
- easy to care - dust sufficiently brushed with a dry cloth;
- large selection of finishing surface finishes;
- ability to hide wiring and other communications inside the ceiling.

But the suspension ceiling has several drawbacks, which should be mentioned so that you know what you have.
This refers to:
- decrease in the height of the ceiling due to the installation of a suspended structure (minimum 7-8 cm);
- duration of installation (depending on the complexity of the design, the installation may take more than one day);
- fairly high finishing cost;
- the need to create a special hatch to be able to get to the communications conducted in the ceiling (if any);
- low moisture resistance of drywall, because of which it is not suitable for decoration of rooms with high humidity (such as a bathroom, sauna, swimming pool, sauna, etc.).

Calculation of components, tools, materials
To make a suspended ceiling at home, you will need materials for making frame, drywall and material for finishing coating, which will give a beautiful appearance to a new coating.
Before starting work, you should decide which frame to choose. It happens two species - metal and wooden. For the manufacture of the second option, the bars will be required that will need to be attached to the main ceiling by the suspensions. In the first embodiment, metal profiles are used to be guessed.
Prices on the suspended ceiling
suspended ceiling


On a note! There are two types of ceiling framework elements are carrier and main profiles or bars. If only carrier elements can be used in the metallic version, then when working with a wooden framework, both basic and carriers are used. Note that the manufacture of a metal frame is still more frequent and using the main profiles.

Metal profiles are made of galvanized steel and have the names of PP 60/27 and PNP 28/27. You can also meet profiles called CD and UD are their foreign labeling.

Also, for mounting the frame, the fasteners will be required - special suspensions for ceilings, dowel-nails and anchors, "crabs" -Cedinites for connecting jumpers, screws of two types ("kids" with a metal reducing and special for drywall).


Prices for plasterboard
plasterboard

Photo "Craba" for a frame of plasterboard ceiling
The main element of the finish is plasterboard, which is a few species:
- GLK - standard;
- GVCC - it is able to resist the effects of moisture;
- GKLO - refractory, in the manufacture uses fiberglass;
- GKVLO - combines the properties of the resistance of fire and moisture;
- GVLV is the highest quality plasterboard, it is also called a superlist.


As a rule, due to its price, optimal weight, as well as due to the lack of special fire-prevention requirements in residential premises for the installation of the ceiling typically use standard plasterboard GLC.

Typically, the sheet, the parameters of which are as follows:
- thickness - 9.5 mm;
- width - 600-1200 mm;
- length - 1500-2500 mm.
To calculate the number of sheets per room, it is best to use online calculators, but you can calculate this number and yourself. Knowing the ceiling area, as well as the dimensions of the plasterboard, it is quite simple in accordance with the detailed scheme of the entire ceiling construction.
Prices for the ceiling "Armstrong"
ceiling "Armstrong"

Attention! Designs made of drywall are decent weight. 1 meter square of this structure weighs about 13-15 kg. Therefore, it is better to work with the assistant.
Another trouble that is associated with the severity of the design of plasterboard is cracking the seats where the seams will pass. One whole design will not be able to set up once, again, because of its weight. Therefore, during the finish, you need to carefully follow the work.

In addition to the materials, the following tools will be needed for mounting suspended ceilings:
- screwdriver;
- perforator;
- roulette;
- laser level;
- ladder;
- simple pencil for applying.

You may also need point lamps, chandeling and other illumination elements. It is worth remembering that the installation of electrical wiring should be carried out before you proceed to the framework of the frame.
For the external decoration of the suspended ceiling, you must purchase:
- primer;
- putty;
- putty knife;
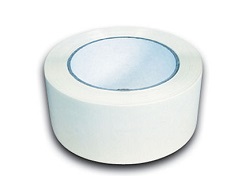
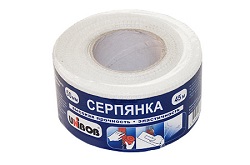
- ribbon-sickle.

Table. Approximate consumption of the number of materials per 1 square meter of suspended ceiling.
| Material | Consumption |
|---|---|
| 1 m square. |
| 1 PC. |
| 2.9 M. |
| Around perimeter |
| Around perimeter |
| 1 pcs. |
| 1 PC. |
| 2 pcs. |
| 2 pcs. |
| 0.2-0.5 pcs. |
| 2 pcs. on 1 m PP profile 28/27 |
| 23 pcs. |
| Around perimeter |
| 1.2 M. |


On a note! Be sure to make a detailed plan for installing a plasterboard ceiling. It will facilitate the understanding of the work process, as well as help calculate the required number of components and materials for the design.

Plasterboard ceiling circuit - calculation of materials

Installation of a single-level ceiling: Step by step instructions
After all the necessary materials were purchased, you can start assembly on the installation of the suspended ceiling. To start, remove all furniture items from the room that may interfere. After that, proceed to the preparatory work - the markup of the ceiling and the walls and the installation of the main elements.

Step 1. Measure the height of each angle in the room with a roulette. Thus, you will find the lowest corner in the room. Here from Him and start work.

Step 2. Make on the walls of the mark at a distance of 5-8 cm. Remember that the first option should be selected if you do not have additional lamps. If you decide to set point, then leave more space between the main and future ceilings.
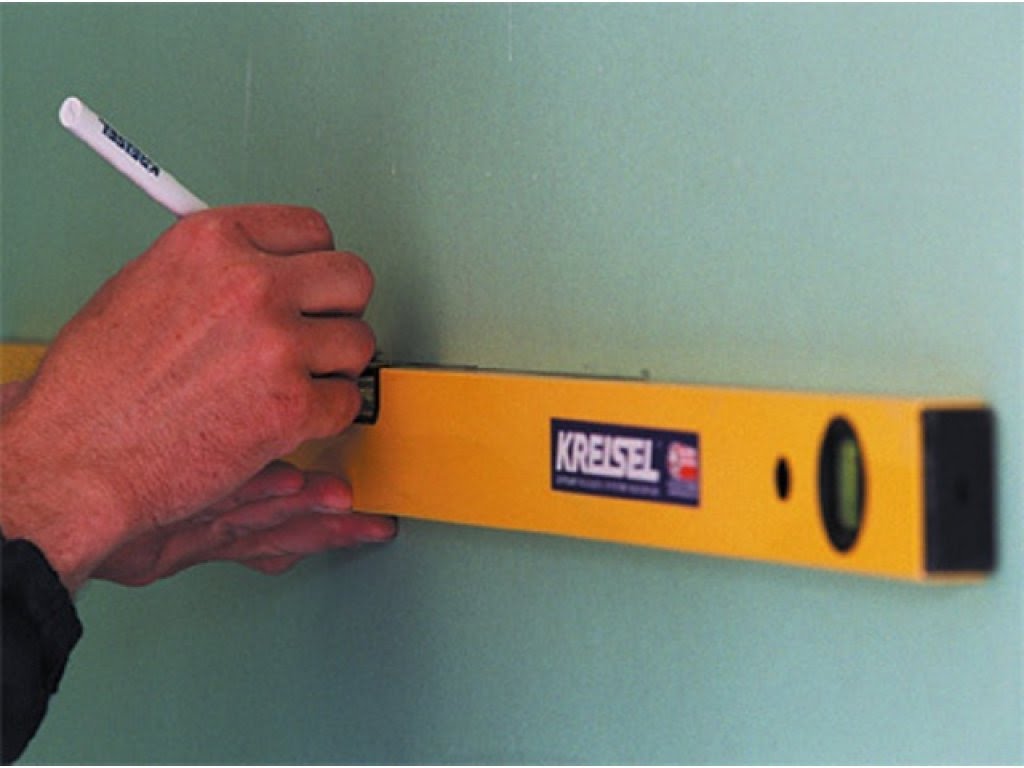
Step 3. Take the level and with it, find points in other angles at the same level. Make appropriate marks.

Step 4. Apply markup throughout the perimeter of the room, connecting the points perfectly smooth lines.
Tip! Take advantage of marking with painting cord.


Now proceed to the mounting of the frame.
Step 5. Take the profiles of PP 28/27 or UD and strengthen them along the drawn line. It is done like this: the profile is located above the bottom limit to the line, through the holes in it, make a mark on the walls. Drill holes in the walls.

Attention! Usually on profiles there are holes for fasteners along the edges, but if they are missing, drill them for a distance of 10 cm from the end of the product.
Step 6. Clamp profiles sealing tape and screw them with a dowel-nail to the wall.


Step 7. The suspensions are fastened with approximately 40 cm increments, which is why draw on the line ceiling at a distance of 40 cm from each other.

Step 8. Approximately every 2.5 m you will make jumpers on the ceiling. Based on this, calculate that the step between the suspensions will be 50 cm.
Attention! The first series of suspensions are attached close to the wall (25 cm) for the reliability of the design. And the second row - at a distance of 75 cm. Next to withstand a step 60 cm.
Step 9. To properly drill holes in the right places, apply the suspensions in the points marked, place new marks and then prepare the seats for anchors. Strengthen the suspensions and trigger their ends well so that there is no "free move". The suspensions should not be fed up to not spoil the rest of the work.
Glass ceiling prices
glass ceiling

Step 10. Start installing profiles on the ceiling. Depending on the size of the room, you may need to eliminate or shortening.

Length can be increasing by connecting two parts using a special extension. Please note that the joints of profiles should not subsequently be on the same level and far from the suspension.
And their total length should be 1-2 cm shorter ceiling length. Start the installation of each profile from the corners - screw it to the suspensions and guides with the help of screws. Then pin the middle.

Step 11. Signing two profiles in a row, go to the other side of the room and do the same job. Then secure the central.

Step 12. Install the jumpers with the help of "crabs" and screws. They are fixed every 2.5 m - where the jokes of plasterboard sheets will be turned.


Step 13. The most long-awaited stage is the attachment of the plasterboard itself. Cut the edges of the sheets with a knife at a low angle - so you will improve the result of the spatlement. Where the end is saved, nothing needs to cut.


Step 14. Start fastening the sheet from the corner of the room. At the same time, the distance between the sheet and the wall should be 0.5 cm. Fix the plasterboard to the profiles of self-drawing with a step of 20 cm. On the adjacent sheets they are screwed down "into the disintegration". Hats must be recessed in plasterboard, t. e. do not have to write down. By the way, do not install the sheets of GLCs at the same level - they must be attached with the displacement of the seams. The stakes of the plates should not be located near the corners.
Self-sufficiency is necessarily interposed inside
Video - How to make a suspended ceiling of plasterboard
Surface finish
The suspended ceiling is also good in that it allows you to use a variety of finish finish options. It can be separated, etc. But before this it is necessary to close the remaining seams. Having finished their primer and waiting for its drying, close all the seams, joints, pits from the screws with a strong putty.

Waving to dry out the putty, curse all the seams and joints with sickle, and after once again wake them. The widest seams between drywall sheets must be filled with a spacious material and wait for it to complete drying. It is possible that at the time of work on the sealing of the joints of the plasterboard on the ceiling, you will find any damage - for example, torn paper layer, which is denied the core of the sheet. Such problem areas should be eliminated in advance. You can, for example, impose a sickle and on top of apply a smooth layer of putty.
For joints it is better to leave the rounded edges of the sheets. In principle, this moment manufacturers are already thought out - the edges of the sheets have a rounded form, so that the putty will fill the seams to the maximum. The cherryanka ribbon and layer of putty must be applied in terms of plasterboard sheet. For what? The fact is that the edges of the plasterboard have a narrowed thickness so that the tape can be dried under the level of the sheet surface.
How to properly close the seams of plasterboard sheets, the edges of which are cropped independently? First of all, it is necessary to remove the chamfer, that is, fuse the cropted edge of the sheet with a special plane or knife at an angle of 45 °. As a result, a wedge-shaped groove is formed at the junction of two sheets, in which it is easy to "drowned" a ribbon-sherryanka and reliably grab the putty material.

Then, covering the entire surface of the usual, apply the finish putty on it. The ceiling is ready.
Video - Plasterboard Ceiling Puttail
And finally, some tips that will simplify the installation of the suspended ceiling with their own hands.
- Choose only high-quality materials for work. Remember that the ceiling you create far from one year, so it should serve you for a very long time.
- Do not forget about the scheme and markup. Do not hurry: it is better to spend some time on drawing up a plan and accurate calculations than to constantly suspend work in order to purchase something or vary.
- Work with GLK only in a dry room.
- Do not forget to constantly use the level.
- Use mineral wool for sound insulation. It can fill the frame before the final trim.
- Before starting work, allow plasterboard to be searched in a horizontal position.

So, following the instructions, you can create a suspension ceiling with your own hands. Work at first glance seems extremely difficult, however, if you figure it out, it is easy to understand that in fact everything is quite simple.
Armstrong ceilings (Armstrong) belong to the class of suspended ceilings that have become very popular. Most often they are found in various office space. Installing the ceilings of this type when finishing apartments is not recommended, since the stoves contain asbestos.
In the article, we will tell about the installation of a suspended ceiling Armstrong with their own hands, let's give step-by-step instructions, as well as the photo materials.
Requirements for work
- Installing the plates follows only at the end of the installation and construction work in the room, including "wet" finishing works, floor laying, installation of doors and windows.
- Work on mounting the suspended ceiling is recommended at a temperature of from 15 to 30 ° C.
- Recommended air humidity in rooms - no more than 70%.

Massive lamps and air conditioners are only needed on autonomous supporting structures.
- If laying on top of the plates of an additional layer of insulating material, or the installation of built-in luminaires is required, then it is necessary to increase the number of suspension used.
- To prevent the profile overload, the extreme suspension must be arranged at a distance from the walls of no more than 0.60 m (for the weight of the plates ≤ 4 kg / m²) and 0.45 m (for the weight of the plates ≥ 4 kg / m²).
- Between the frame and the base, it is necessary to withstand a distance of at least 120 mm. This contributes to obtaining the possibility of dismantling the plates during the operation of the Armstrong ceiling.
- The fastening step should be no more than 1200 mm.
Stages of mounting work

Starting the installation should be started after the placement of all communications for the false ceiling, since their gasket at the end of the installation will be extremely uncomfortable.
Choosing a suspension system, pay attention to the weight of equipment and communications planned to accommodate in a false ceiling. The ceiling Armstrong is designed for a load of about 6.5 kg / m².

We proceed with the consideration of the installation stages.
- First, make the horizontal surface markup of the surface of the future ceiling: Put the first mark on any of the walls of the room at a distance from the floor or the existing ceiling so that the system you are mounted can be closed by top of communication or existing protrusions. The markup should be carried out taking into account the height of the embedded accessories.
- After applying the first mark, descend the rest of the necessary marks on all walls of the room so that you can easily connect their smooth straight line. The projection of marks should be performed by resorting to the help of a special water level. You can also use a more modern laser level.
- After applying a straight level line on the walls, which sets the level of the surface of the future ceiling, you can start mounting the ceiling system.
- To the walls, along the drawn line, secure the L-shaped profile, which is usually included in the kit. To share the profile on the required dimensions can be with a metal with metal. Joiner Stuslo or Transportation Use for cutting angular connections. Fasten the profile needs a painted side down and so that it formed the shelf.

- Next, the mounting of the guide profiles should be made, which look like the letter T, only inverted. They have different lengths. At the two ends of the short profile there are small protrusions, and in long there are slots in which a short profile is inserted during installation. As a result, you should have a grille from profiles consisting of cells with a size of 600x600 mm.
- The resulting lattice fill the Armstrong cassettes, and at the same time the accessories that you decide to decorate the new ceiling. Staying best from the middle of the room. Gradually fixing the remaining plates in the direction from the center, you can perform a uniform trimming of extreme plates and thereby achieve the ceiling to look neatly.

- The guide profiles are hung on a conventional wire, a diameter of ≤ 2mm, or with the help of suspended elements (2 thin rods from the metal, which have grown through the holes in the curved plate, the so-called "petal"). If you decide to use the wire, then you need to pre-straighten it using any submitting mechanical instrument, and then form at least three loops in the fastening places to the profile system and the ceiling fastener.
- Choose dowels for screws based on the quality of the material of the ceiling overlap.
- Screws with a hook or ring are used as fasteners.
- Using the level, leve the horizontal grille. Repeat the alignment of the ceiling Armstrong in a couple of days - by this time your new ceiling will already have a full load.
Competently performed by the installation of the suspended ceiling will help to decorate any office space.
Video
Installation of a mirror ceiling type Armstrong. The focus is on the ceiling markup, alignment of the design and cutting of the mirror cassettes:
Implementation of the assembly of the design of suspended ceilings Armstrong:
Hinged ceilings are a rather popular option for decoration of residential apartments, shopping, sports, administrative and warehouse space. Today, in front of the owners of the property of such a type, it is often the question of the need to repair and upgrade its property. The installation of mounted ceilings is an excellent option for quick and inexpensive repair.
An example of a combination of the restraint of style, functionality and entertainment is the tiled ceiling systems "Armstrong". The reader is invited to familiarize themselves with the properties, advantages and order of installation of these structures.
Advantages of tiled ceilings

Of course, to make a choice in favor of the cassette finish option, you need to make sure that this type of ceiling is really worth it.
The list of advantages is rather impressive:
- Low price. This factor is especially relevant, not only for owners of major areas, but also for the owners of small apartments.
- Installation speed. One person, can safely calmly carry out construction in a large room, a living room or bedroom. Video installations of mounted ceilings demonstrates the incredible speed of such a job.
- The absence of dirt and garbage during construction. This allows not to close the premises for the repair period and continue their functioning almost without restrictions.
- The ability to hide over the cassettes to various accessories, wires and telecommunication cables.
- An extensive choice of materials for cladding and a rich color palette cassettes.
- If necessary, you can replace the plates in a matter of minutes by setting the details of another color or texture.
- The removable system provides quick access to the bearing plate, heating and tap pipes, wires and lighting devices.
- Tile systems are not scary high temperature or flooding. Native-resistant fragments change inexpensively, and waterproof from moisture will not suffer.
- Durability. The design can be adjusted in height not only during the installation process, but also during operation. In case of deflection of the ceiling plate, the plane of the tile surface can be made perfectly horizontal by simple configuration.
Easternative advantages include ease of installation. Even the newcomer will cope with this task, thanks to the simplicity of the design.
As for the shortcomings, it is one - the surface of heterogeneous and has a lattice structure.
Ceiling device "Armstrong"

The suspended ceiling "Armstrong" is a frame-based frame suspended to the carrying base and the cassettes of the square shape laid in it. In order to appreciate the attractiveness and functionality of these structures, you need to have the concept of what they consist of. In addition, the knowledge of the product parameters will help in the implementation of the material selection and calculations.
The device is pretty simple:
- Cassettes or plates. This part of the design is used to create a facial surface. They have a square shape. Made from plasterboard, mineral wool, glass, aluminum and plastic. Have different colors and texture. The standard size side of the square is 595 mm.
- Carrying profile. In the section reminds the inverted letter "T", on the shelves of which the cassettes are stacked. Produced in the form of steel strips with a length of 370 cm.
- Transverse profile. These details have a cross section, like the carrier profile. We are produced with a length of 60 cm.
- Angular profile that is attached to the walls.
- Sheds. Products intended for fastening the frame to the bearing plate. Can be adjusted in height.
- Raster lamps. In the form identical to the cassettes. Completed with luminescent or LED lamps.
In the installation process, plastic dowels and anchor hooks are used.
How to install mounted ceiling?
Surely, many household owners and apartments thought about independent repair in their housing. Before the appearance of tiled suspended systems, it was quite problematic, as it was necessary for this serious construction skills and help of one or two people.
On a note: The video on how to install the Armstrong mounted ceiling indicates that the decoration of even very large areas can be carried out alone. It will give a tangible savings of financial resources.
Tools and equipment

Installation of mounted ceiling with your own hands implies the presence of necessary devices for work.
For installation, it will be necessary:
- perforator;
- screwdriver:
- pliers;
- a hammer;
- manual screwdriver;
- building level;
- roulette;
- hacksaw and scissors for metal;
- marker;
- construction helmet;
- fabric gloves;
- protective glasses;
- ladder.
The list is small and all of the above can be useful when repaired.
Preparation of the place of work

Before installing the mounted ceiling, it is necessary to prepare a workplace.
This process includes the following:
- removal from the placement of objects that may interfere with the work;
- dismantling lighting, insulation of wires;
- removal of unstable fragments of old finish;
- processing the surface of the carrier plate with antifungal agent;
- preparation of heat insulating material.
After that, you can start making the framework.
Montage Karcasa

The frame must be installed very precisely because the permissible error for laying the plates cannot exceed 3 mm.
This process is carried out like this:
- a line is applied on the wall, which will be screwed by a M-shaped wall profile;
- the framework scheme is transferred to the carrier slab, and the venues screws are noted;
- in the walls and on the ceiling, holes for dowels are drilled;
- the guide profile is screwed onto the wall;
- hardware with hooks are joined to the ceiling;
- the hooks are suspended by the suspensions, their adjustment is carried out in height;
- bearing profiles are attached to the canopies, their alignment is carried out using a construction level;
- between carrier guides are inserted cross;
- the final adjustment of the horizontal is carried out;
- the installation of the electrical system is carried out;
- additional communications are laid.
The frame is ready, you can move to the finish finish.
Laying cassettes in frame

The process of laying decorative coating is quite simple. When the main and most difficult work is completed, the finish finish is quite simple.
It consists of such stages:
- installing raster lamps and plates with mounted lighting devices;
- connecting lighting devices, checking their performance;
- inserting into the frame and alignment of whole cassettes;
- fitting and installing incomplete cassettes.
That's not all. If it is necessary, then at any time you can change the pattern of the ceiling. It can be made matte, glossy or multicolored. The style of this surface can be changed, at least every day.
Video on the topic
Combined from GLC and panels
Today we have to figure out how to mount the suspension ceiling. We will look at two popular, affordable and practical solutions - from plasterboard and plastic wall panels. So, on the road!
About materials
Initially, we should decide on the choice of one or another material. In both solutions, the acquaintance with whom we have to have a number of common and individual features.
General features
Like any other, designs from GLC and plastic panels allow:
- Hide any defects and irregularities of overlapping;

- Hidden welded wiring, ventilation or any other engineering networks;
- Do without preparing the surface of the overlap (stripping of old coatings, grinding, etc.);
However: in raw materials it is worth treating the surface of the overlap of antiseptic primer. It warms the appearance of mold in limited ventilation.

- In both cases, on the crate or frame of galvanized P-shaped profile. The installation of GKK and panels on the bar is practiced, but completely in vain: the hygroscopicity of the wood often leads to a ceiling frame warring during seasonal moisture changes.
Differences
They relate to the operational properties of two materials.
(including green, moisture-resistant) does not tolerate direct contact with water. Gypsum is plaster: moisture makes it loose. That is why GLCs should not be used in a bathroom or toilet, which are periodically flooded by their neighbors.

After the Flood: GLK need repair
Wall panels from PVC, on the contrary, have a hygroscopic weight striving for zero and will not suffer even with a long immersion in water. After the next flood, you will have to wipe from the drills.
With heat resistance Picture of the opposite: GLCs without any negative effects tolerates heating to 100-120 degrees. PVC at this temperature is subjected to thermal decomposition, highlighting hydrogen chloride with an exceptionally caustic smell.
A practical consequence: the plastic ceiling should not install the built-in luminaires with halogens and incandescent bulbs with a capacity of over 40 W. LED and fluorescent luminaires can be mounted without power limitations.

Finally, GLC in combination with plaster putty allows you to create structures with complex curvilinear surfaces, arches and vaults. Having limited flexible cellular panels are not allowed.

Frame with curvilinear transition between levels
Frame
Montage with your own hands begins with the frame assembly.
For this we will need:
| Picture | Description |
|
|
CD profile (ceiling, 60 * 27 mm). In the domestic name system, it appears under the name of PP. It is from it that will consist of a horizontal doomle of a single-level ceiling; It is also used to make the stands of ceiling boxes and transitions between levels. |
|
|
UD profile (ceiling guide, 27 * 28) is also known as PNP. His task is to secure the horizontal crate to the walls, as well as the racks to the surface of the overlap. |
|
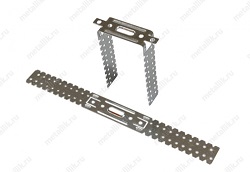
|
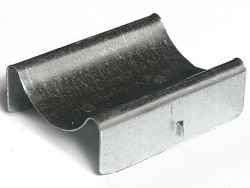
The lamp with a significant span between the walls should be kept not only on wall guides. Its additional mounting to the overlap will provide ceiling direct suspensions. |
|
|
Dowel-nails will allow reliably and with minimal time strength to fix wall guides. The most sought-after fasteners are 6 * 60 and 6 * 40 mm. |
|
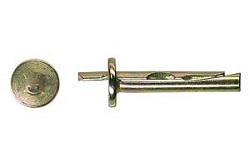
|
Anchors-wedges will perform the same functions when installing guides for a box or transition between levels, as well as suspensions. Unlike a dowel-nail, they are perfectly held in the wetting plate of overlapping and do not threaten the brunt of the ceiling during the fire. |
|
|
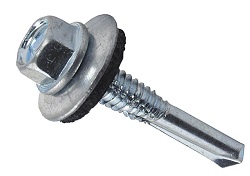
Self-timber for sheet metal will connect profiles among themselves. Their optimal length is 9 mm. The presence of drills and press washers are welcome. |


What is the order of mounting the suspended ceiling at the frame assembly stage?
Single-level
- Follow the line along which you will be attached to the walls guides ceiling profiles. Marking is performed by level (better - by laser or water) using a painting cord or a pencil line;

 Why you can not give icons
 Is it possible to give icons as a gift: Signs, the opinion of the Church
 A year ago left her husband, and now I do not know what to do