Ways and tips for leveling walls with your own hands
When renovating an apartment, very often you have to do the alignment of the walls with your own hands.
Very often the walls in old houses are curved, and in new buildings this is not uncommon.
Before tackling the alignment of walls in a bathroom or other room, you need to determine which solution is best for this.
After that, you need to purchase the necessary tools and mixtures or compositions for leveling the walls.
Professional finishers use a laser level when working.
In practice, different methods of leveling walls are used, and in order to avoid financial and material losses, it is very important to choose a finishing method and material suitable for specific conditions.
Preparatory stage
At the same time, the technology of leveling the walls involves a clear sequence of operations.
There are two ways to level surfaces - wet and dry.
In the first case, mortars and dry mixtures are used to level the walls.
In the second, the surface is sheathed with plasterboard.
The leveling of concrete walls is done using the wet method, and the surface to be painted is easier to finish with dry plaster.
If you plan to align the corners and walls with your own hands, then you need to weigh all the opportunities and resources at your disposal.
To perform such work, you need to have an idea of what a rule and tile adhesive are.
The alignment of the walls in the bathroom, as well as the corners, is carried out with a special moisture-resistant solution.
It is not recommended to use drywall in such rooms. Aligning the walls in the bathroom and corners can be done using a rule and a trowel.
In preparation for finishing work, you need to have the necessary tools and materials.
The minimum set of tools and devices should include:
- container for solution;
- Master OK;
- a ladle in order to throw in the solution;
- rule;
- grater;
- putty knife.
You also need beacons to control the evenness of the surface.
Significantly reduces the preparatory work and the laser level. When fully prepared, you can start working.
At the first stage of the renovation, it is necessary to clean the walls of old tiles, wallpaper, plaster, putty and paint.
When working on concrete surfaces, a tool such as a chisel and hammer is often used. Wallpaper and lime plaster are removed with a spatula.
For safety while working, you must wear protective goggles and a respirator.
Before plastering, the surface of the wall must be primed. The solution is absorbed into the wall and creates a tight connection with it.
Already on top of this layer, you can paint or apply a finishing solution. As a rule, the surface is primed in two to three layers.
Installing beacons
Wall alignment beacons are set in order to make the wall as flat as possible.
It is not by chance that these elements are called so, they help the workers to navigate in the case when the alignment of the walls is done for tiles or other finishing material.
First, you need to determine the points of the wall or corners that have the maximum deviation from the plane. And then, based on this value, adjust the thickness of the solution layer.
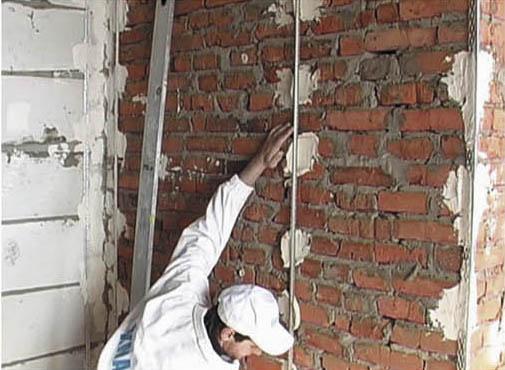
In order to properly install the beacons, you need to do several operations. First, pull the two horizontal cords parallel to the floor and ceiling.
After that, in the same way, stretch two vertical cords, and also two more - diagonally.
As a result, you get such a conditional "envelope", which gives workers an idea of the size of the depressions and protrusions that need to be covered with plaster.
You can fix the beacons with tile glue or in other convenient ways.
Beacon alignment
By setting up beacons, you can forget about the old-fashioned method of pulling the cord and use a laser level.
This tool allows you to significantly speed up the procedure for installing the guides and start basic work.
When decorating new multi-storey buildings, beacons are made from wooden slats. Their cost is minimal, and you can use it many times.
Modern beacons are perforated aluminum or steel slats. The standard length of such slats is 3 meters, and the height is from 6 to 10 mm.
Wooden lighthouses are attached to the wall with mortar, and metal ones - with the help of special fasteners. Their installation is quick and easy.
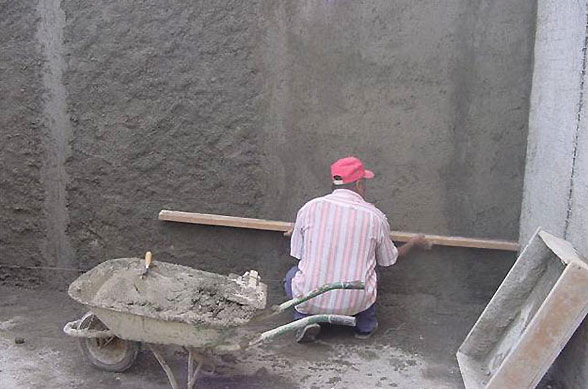
The plaster mortar, using a trowel and a ladle, is poured onto the surface of the wall between the beacons and smoothed out using a rule.
At this stage, the sequence of operations is as follows. The draft layer is sketched so that its level is below the lighthouse.
You need to wait for it to "get up" and then continue working. If you intend to apply a thick layer, then you need to use a reinforcing mesh.
If such a thickness is not required, then you can align the walls with a rotband immediately, without applying a rough layer.
To level the surface and corners, a rule or a flat board with a length of one and a half meters is used. The laser level will allow you to control the quality of the work performed.
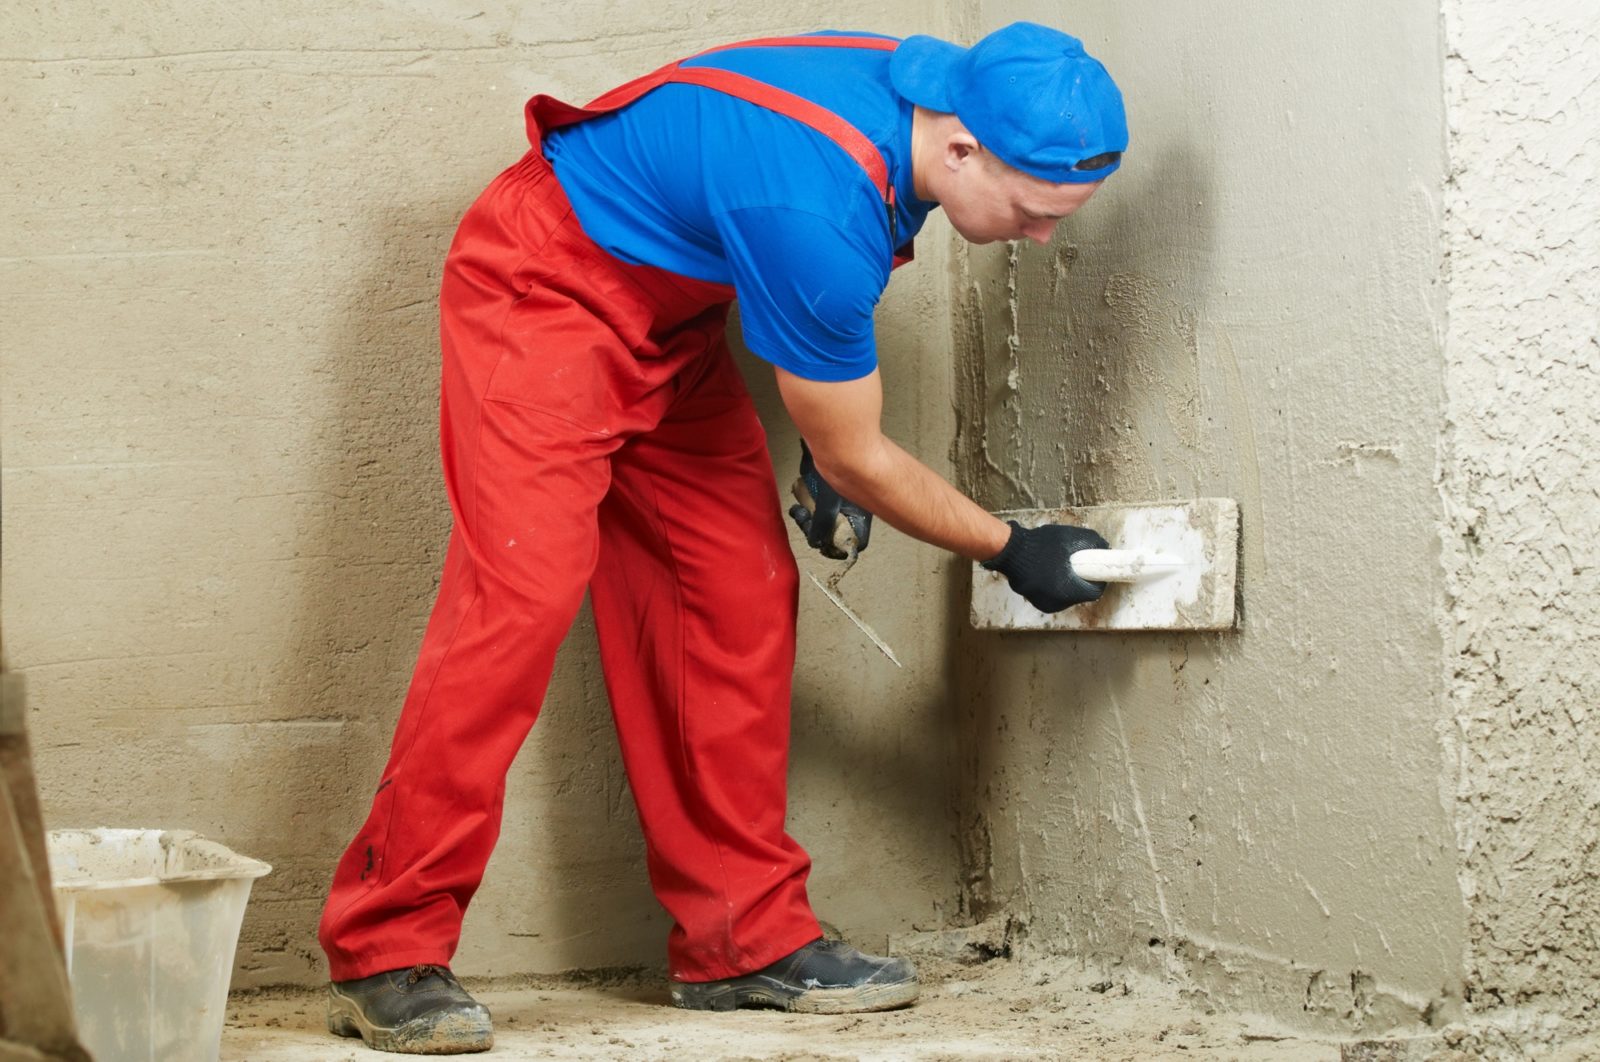
Leveling with plaster mortar
Plastering is an old and well-established way of leveling walls or corners.
For these works, you will need the same tool that is used in finishing work, the main of which is considered to be the rule.
In terms of their composition, plaster mixes are:
- cement;
- lime;
- plaster;
- clay;
- mixed.
If you knead a cement-sand mortar with tile adhesive, then the quality of such a mixture will increase significantly.
The plaster mix is applied to the wall using a rule. Rule is a universal tool for all types of finishing work.
The advantages of this method of finishing with plaster of flat surfaces or corners can be considered the availability of materials and the absence of seams on the leveled surface.
The disadvantage of this method is that the solution has to be diluted at the work site.
If the proportions of the plaster mix are inaccurate, cracks form on the surface of the walls and corners.
The alignment of corners with plaster has to be done with great care. A laser level can be used to check that the right angle is correct.
In addition, traditional carpenters' tools - a spirit level and a plumb line - are perfect. To speed up the interior decoration process, a material such as gypsum mixtures is used.
It is necessary to apply the plaster not at one time, but in several steps, layer by layer. The recommended thickness for each layer is 3-5 mm.
After applying the next layer, it is necessary to pause for a quarter of an hour and only then use a rule or a spatula. During this time, the solution will set and harden.
This finishing material must be applied quickly, within 15 minutes, until it hardens.
This glue, like the putty, is a dry mixture based on synthetic resins and special admixtures. A surface plastered in this way is not yet suitable for painting.
Leveling with putty
The final quality of leveling walls for painting depends on how correctly the material and finishing technology are chosen. Putty is applied over the plastered wall.
This finishing material has a finer structure than plaster. The rule for applying putty is no longer required. At this stage, another tool is needed - a spatula.
The picture below shows the alignment of the walls with a rotband.
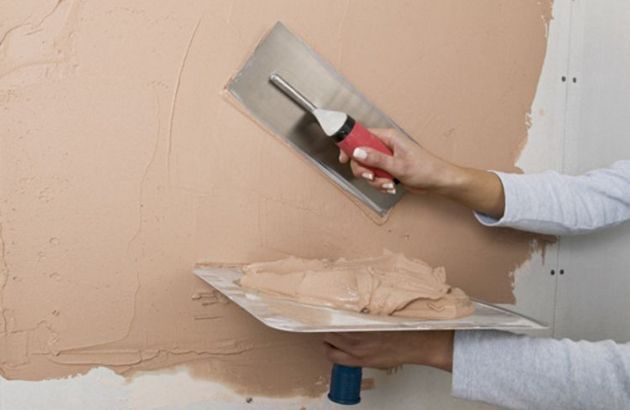
A laser level is also not needed, since the alignment of the walls with putty is done in the case when you need to tidy up a small section of the wall.
When working with putty, remember that it cures very quickly. An open can must be consumed in one go.
Plasterboard leveling
Drywall has long been used to level walls. It is a lightweight and technological material, the use of which allows you to quickly perform large volumes of work.
As a disadvantage, it can be called the fact that it increases the thickness of the wall, while it turns out to be hollow and echoing. This method is not always suitable for small interiors.
Drywall sheets are fixed in two ways - on the mortar and on the frame. The laser level allows you to control horizontal and vertical mates.
Drywall "sits" on the solution when the wall is relatively flat.
Fastening dry plaster to the frame is a longer process. In this case, you will need additional material and tools.
The wall is sheathed with a wooden or metal frame. The laser level (special tool) is again required to control the accuracy of the installation. After that, drywall sheets are attached to the frame.
Sometimes, for strength, these sheets are applied in two layers. All that remains is to putty the surface, and it is completely ready for painting or wallpapering.
 Country house facade design: a variety of stylistic trends
 Wooden ceilings - 25 interior examples
 How to make a children's playhouse with your own hands