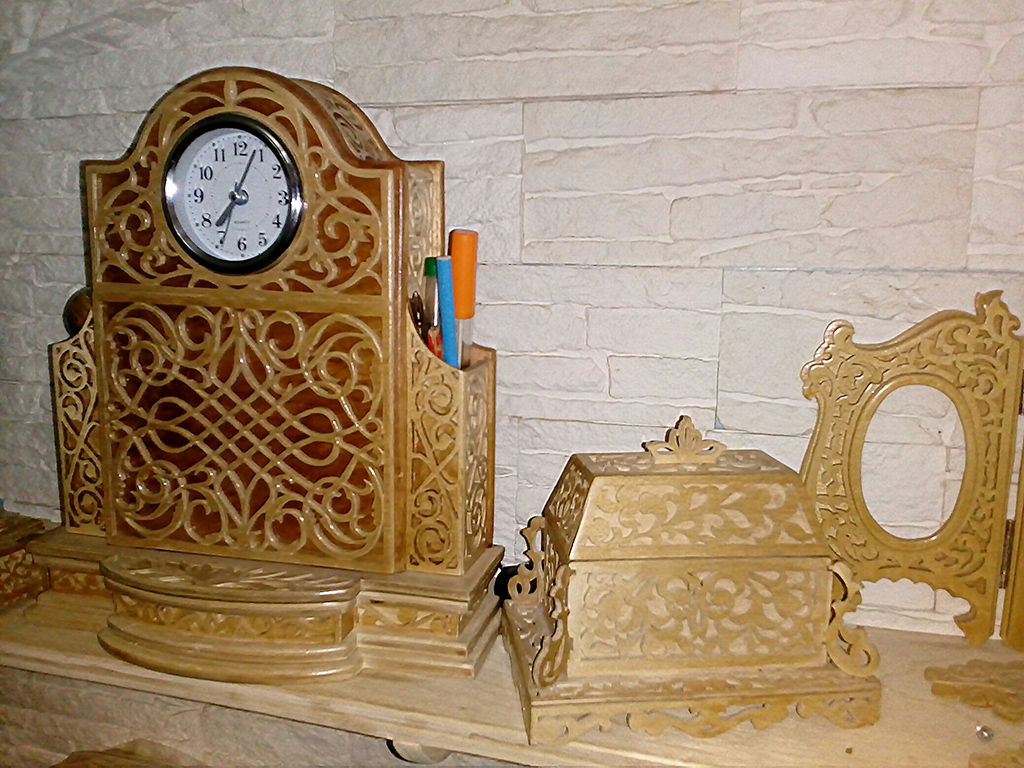
Patterns on the plywood with their own hands. Rubber thread (openwork) and stencils. Vase, stand under pencils, handles, brushes
Drinking from plywood - one of the most fascinating and useful options Leisure! It develops creative skill, accuracy and accuracy, instill labor skills and helps to master various tools.
As part of our article, we want to introduce you to sawn technology from plywood sheets and two simple articles. All drawings are attached, so if you wish, you can repeat them with your own hands, along with children who will certainly be interested in this process from beginning to end.

General sawn technology + ideas of crafts from plywood

Plywood - universal Materialused in the most different areas! From it you can create many amazing things that we will do now. Like any other creative lesson, drinking from plywood sheets begins with the preparation of instruments and material.
Such a set of tools
So, we will need:
- . It is a wooden or metal frame, in shape resembling the letter "P". At the ends of this frame there are special clamps with screws in which the sawmill is fixed.

To minimize!
Lobzic files are thin and narrow steel stripes with acutely sharpened tooths on one side.
Alas, they will easily break, so it is better to take them with a margin.
Fortunately, the price of these devices is rather low.

- Special key for fixing the peel in the jigsaw.

- Three-layer plywood sheets (the thinnest) - this is best Material For drinking something like something. But if you do not have a thin, then you can use a thick paneur (from 4 to 9 mm).

- Support for drinking. It can be made independently from a table with a thickness of about 10 millimeters. There is a stand on the table in such a way that the part with the cut from the cut over its edge. It is possible to secure it in the workplace with screws or nails.

- Schucker (coarse and fine-grained).

- Shilo, Files and Nadfil.

- Passatii - in case the sawing is stuck in the plywood - they are very convenient to pull it out.
- Hoven (suddenly you have to).
- Copy paper.

- Somewhat acutely certified pencils.
- PVA glue .

- Drawings of the future.
Drinking technology
For convenience, below is given step-by-step instructionIn which the process of working with plywood is painted in all details:
- First you need to prepare the desktop. Wipe it with a damp cloth in order to cleanse the sawdust and dust from small mounds. Check if all the tools lie in their places. The room in which your workplace It should always be ventilated and well-lit.
- Next follows the preparation of the most important tool - jigsaw. To do this, unscrew the screws, secure the ends of the file in its clips.
A pailer is inserted so that the direction of its teeth was not inside the frame of the jigsaw, and ahead with the tilt down. The slope of the teeth is easily checked - it is enough to spend your finger on them. Already the inserted file is tensioning using multiple tensioning screws.

Important!
The file must be tensioning tight, otherwise it will be bad to cut and quickly break.
In this way, the sawing is fixed in a wooden manual junk. Concerning metal tool, here this process is a little different.
First, one end of the sawmill is inserted into the lower clamp, then the end of the jigsaw, where the upper clamp is located, rests on the edge of the table. Next, you need to slightly press the handle to the handle so that the junction frame begins a little and the clips got together.
Holding the tool in this position, you need to fix in the upper clamp the second end of the sawo. After that, the junction is released: the frame takes the initial shape, the ends with its clips are again diverged and stretch the saw.
- Noticed that the surface of plywood is a bit rough, and in some places there are cracks and chips? From them you need to get rid of sandpaper, creating all defects against fibers. It should be highly smooth, absolutely smooth, silky to the touch and glossy in the light.
After that, once again check the plywood sheet - if there are no visible defects, then you can move to the drawing.

- On a sheet of paper, a drawing of the future craft is drawn. The appropriate piece of plywood is covered with a copy-sheet sheet, the drawing falls on top, is fixed with the buttons and will be burned with a sharp pencil.

- Plywood with a translated pattern is placed on the stand, and the jigscription is located so that the sawing is in the roset of the stand. Drink details up and down movements. The sawing saws only when driving down, at this time it is necessary to slightly press it forward.

Tip! Carefully follow - the sawing should move directly perpendicular to the plywood, without tilt. And when the figure you need to make a turn, then turn the plywood, not the jigsaw.
In the event that there are internal holes on the details, then drinking should be started with them, and only then move to the outdoor circuits. To cut the hole with a high quality, make a shill or drill on its edge. Further, one end of the lobzik's sawmill is released from the clamp, to grind it into the puncture made and secure the clamp again. Drinking the desired hole, remove the pail in exactly the same way.
Attention!
During operation, the sawing is very hot and, becoming hot, quickly stupid and breaks.
Therefore, periodically cool it by wiping with a damp cloth or take a break.
- Specify all dug details: holes and edges of deep recesses - a file, the rest of the surface is fine-grained skin.
- The final stages are the assembly and gluing the craft of PVA glue. There should be no difficulties here, the main thing is to deal with the drawing.
Optionally, you can also paint the product, cover with varnish or smelted a beautiful pattern on it. It all depends on your imagination!
Mercedes car model

Try to cut out this simple Mercedes model, which can be the first in your collection of toy cars. DIRECTERS DIY MACHINES FALLERS Lobzik will be presented below. Collecting the craft, look at them, or rather the numbers for which the assembly is carried out.
This is done according to the following rule: the part number 1 joins another part number 1, two to the second and so on. If any details are not inserted into the necessary grooves - sign them, or clean the ones. Was it possible to assemble the product without any problems? You can safely glue all the details with each other! 

Animal figures
Very simple, but nevertheless interesting idea. So, together with your children, you can have fun, drinking various animal figures from plywood. To do this, you only need to cut four legs and glue them to the body from two sides to give a toy sustainability. In some cases, stands are made and figures are strengthened on them. 
As a result, you can get a whole toy zoo or story scene. Believe me, the children will be delighted with such a fascinating classes, and it does not take a lot of time. Then you can ask for a wife so that she helps the guys to paint new "friends." 
Output
Predit creation of all kinds of products always captures! After all, personal labor, time and particle of creative thoughts are investing in each detail. Therefore, ready-made crafts are evaluated as a real work of art and are in the house at the most honorable places. In the video presented in this article you will find additional information on this topic. Creative flight!
Related Materials


Electric jigsaw applied by domestic masters to create beautiful products From plywood and tree. Such crafts are used in various purposes. They can be decorative or serve as items. Each home master who is interested in this occupation should be aware of the features of working with the tool.
How to use a "miracle logs", and that it can be cut with it, you should learn more.

Lobzik's subtleties
Lobzik is a universal device that is used to cut figure products from different materials. All that will need is to choose the cloth correctly. It is important to figure out, and how to cut figures complex shapes. Many novice masters need to be understood how SCOSs are made at boards and various composite elements craft. Electric jigsaws work best when cutting wood coniferous rocks. However, the thickness of the elements from which cutting is performed should not exceed 3.8 cm.

The canvas that will be inserted into the jigsaw, quite often bent and leave the beveled edges. Straight res is usually obtained when using a well-sharpened blade. It should not be added too much to the instrument during operation.

First, start the saw at the highest speed, and then select the angle of the blade. This will allow to obtain a smaller number of chips. In materials with high fragility, it is necessary to drill holes. This will allow without unnecessary risk to saw the workpiece. As a result, the parts are not formed.

To cut the cutting quickly, the coarse blades should be used. However, it should be borne in mind that when choosing such consumables subsequently, they will be heavier to sand. Blades for electric jigsaws are manufactured in such a way that the cut is performed when the cloth is up.
The right choice of blade
The choice of blades for electric jigsaw is the main point when cutting wood and plywood. Often, Lobzik lies without affairs in the farm homemade Masters. However, when you need to perform a complex pattern, this tool is necessary as never.
Quite often, electric jigsaw is used as a tool for cutting holes in a tabletop or when mounting kitchen sink. This tool is used for metal cutting. When using other saws, it is often impossible to perform tasks. Lobzik is a universal device. It can work with him both a newcomer and an experienced homemade master. As a result, you can get excellent results using different materials - plastic, wood, plywood.

How to work with a tool
Lobzik is used for a variety of tasks. Its main function is cutting curves forms in wooden products. Get smooth bends when using this tool is quite simple. The base of the tool should be kept smoothly on the workpiece. When the preparation is completed, you can start the main work. Then the engine is turned on and the device is slowly moving in advance of the line, at a distance of 2 mm from it. Thin grinding is performed later.

The saw should be moved in this pace so that the blade is easy to cut the material without any deviations. The jigscription works great with the transverse cutting board. Emphasis must be applied if you need to get the perfect cut. Mocked cuts using jigsaw is quite simple. Before work, it is necessary to firmly consolidate the workpiece.
If inclined or vertical cut is performed, the distance between the blade and the focus is set as well as on circular table. If necessary, perform an accurate and long reside workload is hardly difficult. In this case, first use circular saw. The final cutting of the element is performed by the jigsaw. It must be firmly pressed against the inside of the marked line.

Where to start
First, the workplace competently is organized. Perform this condition is especially important for high-quality cutting. If the space is equipped correctly, it will work conveniently and comfortably. This condition is necessary to create a quality product.
A stubborn design is a special machine. In the people, he is called "Lastochkin Tail." Such a table is performed from the board rectangular shape. It has a wedge-shaped incision that goes into working area. Dovetail Fasten on the edge of the table.

Work electric pubsomy It is carried out standing or sitting. The billet should be located at a distance from the eyes of 40 cm. It is necessary that the lighting lamp is installed in front of the wizard. It is placed at an angle to the surface.
Tool preparation
The sawing canvas in the jigsaw must be recorded in a strictly vertical position. Teeth should look down. Before work, it is necessary to pull the canvas well. The degree of tension must be adjusted using a frame compression. The device needs to be resting to the edge of the table. Then you should tighten the lamb with passats. When straightening the frame, the canvas stretches.

To drink with a pubsie part small size, or shapes with sharp contours, you need to choose a small sawmill. It takes to use the canvas with large quantity Patterns per inch. When using them, the jigscription does not hide when performing turns. Cropped creates neat and thin. If plywood products are performed large sizeIt is required to use the canvas that have large teeth.

How to drink a logby
To obtain a neat cut, you must perform a number of conditions:
- A hand that holds the jigsik should only move vertically.
- All movements must be made as smoothly as possible, without jerks. In addition, they must be performed with the maximum amplitude. This is necessary to use the entire canvas.
- The second hand in the process of work the blank is rotated.
- It should not be too pressing with a filling on the workpiece. Unacceptable lateral pressure on the blade.
- The artwork is carried out only when the pedel moves from top to bottom. For this reason, the opposite movement must be performed without pressure.

When working a manual jigsion, it must be conducted not by the marked line. The canvas should be carried out on the inner side of the contour. This is due to the presence of drank after drinking. After completing the work, one of the clamps should be loosen. The frame of the device should not lose elasticity.
Jewelry box
Make a beautiful and spacious jewelry box you can visit the day of lovers or on International Women's Day. To perform such a craft, you will need to use the accurate drawing. Work is divided into several stages.

Preparation of the working area
Before starting cutting out the details of the box, you should prepare your workspace. This establishes a special table. A snaps will be created on it. This is complied with such rules:
- While working at the table should not be unnecessary items.
- The device for cutting should always be at hand. For him, a certain place is given.
- Crafting table. It is placed in a ventilated room. The room should be light and spacious.

However, it is not always possible to install the table for drinking the jigsaw in the right place. TO ordinary apartment The workbench is usually placed on the balcony if it is insulated. At the same time you can work on crafts in any weather.
Choosing plywood
For the box, it is necessary to use a plywood sheet. When the workpiece is selected, you should pay attention to quite often appearing defects - cracks or knots. The workpiece is selected with a thickness that is specified in the scheme. To translate the drawing on the material, follows:
- Processing the workpiece of the sandpaper. Starting with a coarse material. Such processing ends emery paper With small grains.
- It is necessary that the surface is smooth. To do this, lock the sandpaper in the grinding device. If it is not, you can take a small bar, and wrap it with sandpaper.
- Grinding along wood layers.
- The workpiece is grinning until its surface becomes as smooth as possible.

After such training, the template draft should be transferred to it.
Transfer pattern to plywood
Before starting cutting, you should transfer the prepared drawing to the plywood blank. First you have to print a drawing on paper. For transfer it is necessary to have a traction and handle. First, the template is attached to the workpiece of scotch. Having a blank, you should think about how to cut different elements of the box, saving the existing material as possible.

Dumping the casket
During drunk, you need to adhere to some rules:
- Lobzik should be perpendicular to the product.
- It is necessary to ensure that all movements are performed as smooth as possible. Do not rush while drinking - you can make a mistake and spoil a piece of material.
- It is necessary to use a piping table.
- First you need to drink internal elements. Only then proceed to cutting the contour.

When leaving the cut line, you must adjust the supfyl line during the assembly of the product.
Tip! In the process of work, the hands will be tired. Performance drops significantly. Fingers and eyes are seriously tired. All this can lead to hand injuries. That is why it is necessary to take breaks in work.
Assembling boxes
Before assembly, you must familiarize yourself with the drawing of the product. Combining the details of the casket for jewelry does not require fine work. Before gluing different elements, you must make sure that they can easily collect together. After several assemblies, the product without the occurrence of difficulties should begin gluing parts. Typically, the composition of the PVA is used for this purpose. During operation, it is necessary to eliminate the lodges of the glue.

Assembling model of steam locomotive
When the material is prepared, and the drawing is printed, you should proceed to the process of transferring the scheme to the workpiece. In this case, it is necessary to take into account some rules of work. Many domestic masters tend to translate the drawing to the Faneur only using copy and pencil. However, you can use both "black ribbon". When choosing this tool, the drawing gluits with the workpiece. The diagram is then washed off with plywood with water, which allows you to leave only lines of markup.
You can then perform holes in the details of the future locomotive. In details of the locomotive there are parts of the grooves, cut off from the inside. To perform such elements, it is necessary to make holes in them with a manual drill or a seboard. Holes must be performed at least 1 mm in diameter. So that when creating holes, do not spoil the surface of the table, should be put under the workpiece.

Now you can drink parts. Do not hurry when drinking. The main rule is to hold the jigsaw at a right angle to the workpiece processed. All items must be performed smoothly, not allowing irregularities.
Plywood is very affordable, relatively inexpensive material for various crafts. Things made from it can have not only decorative meaning, but also be useful in our everyday life, at home.
Plywood is easily processed by building material, which is produced by gluing several layers of veneer, specially treated wood chips.

Introduction
These sheets that can be used for making crafts and structures may differ:
- the number of veneer layers is three-layer, five-layer and multilayer;
- wood breed, of which a multilayer sheet (deciduous or coniferous) is manufactured;
- according to the degree of treatment (polished from one or both sides, not polished).
Construction rates and standards
To learn more about the considered building material (On the classification of the entire plywood nomenclature, the variety of standard sizes), which can be purchased for the manufacture of many products and crafts, it is recommended to familiarize yourself with the following documents:
- GOST 3916.1-96 "General Plywood with outer layers of hardwood veneer".
- GOST 3916.2-96 "Plywood of general purpose with outer layers of veneer of coniferous rocks."
Schemes, drawings and patterns for products from plywood sheets

Drawing programs for computers
Today, without difficulty, you will find the diagram, the pattern of plywood design so that later using automated design systems to prepare any drawing (including the above-mentioned cat). Next, with the help of the plotter, withdraw on the paper sheet of the required format.
Drawing popular programs are easier in development and can be used in 2D and 3D modeling, including for plywood structures:
- Compass - Complex automated systems, with the possibility of drawing up drawings, according to the Esskdi SPDS series standards;
- AutoCAD is a two- and three-dimensional automated design and drawing system.
So, if you can not find a detailed drawing of the product you need from plywood material, then the applied capabilities of the given software Will help you make a full drawing according to any diagrams and patterns laid out on the Internet.
Kayak
Price construction plywoodFrom which the kayak is made, simply incommensurate with the pleasure that the person will receive, who made it with his own hands, loving water strings on rigorous boats. 
Kayak in Eskimos, this is the same kayak at Aleutov - the traditional rowing boat of the peoples of the Arctic. Such a boat can be a single, double or triple. We post the kayak drawings from plywood for one person. 
The algorithm for the construction of a rowing boat from plywood sheets in principle is common, with the exception of some nuances. Step-by-step order Refrigeration, processing and assembly of kayak can be viewed on the video in this article.
Plywood table - simple and functional

The clear drawings of the table of plywood with their own hands, which will be easy to implement even a person, without special carpentry skills and experience.  Table lid (1 sheet) - 1300 x 600 x 16 (mm)
  Inner wall (1 sheet) - 1170 x 400 x 16 (mm)
Plywood designer
Different drawings of the plywood designer are now gaining more and more popularity. Assembling such models from safe material Very useful lesson for children, teenagers. Such crafts will become good instances of collections, will decorate the corner of the modellers.
Tank


Stages of work on the installation of the tank model are as follows:
- Plywood is grouhed (first the medium-sized, and then fine-grained skurt);
- Drawings are neatly translated through a copy-grained abrasive leaf-grained plywood material.
- In the corners of the contour translation, the cross-cutting holes (drill 3 mm or more) are drilled;
- Fasten the pink in the jigsaw and start drinking the tank elements;

Note!
Drinking parts should be started inside the loop of the tank blanks, and only after the contector itself.

Tip!
During the assembly of plywood nodes, I have at hand different types Nadfil to fit the elements to each other at any time.
- After fitting all parts, it is possible to start their gluing (for example, PVA glue, "Titan");
Tip!
So that the nodes and elements of the tank are stronger and more reliable to grab each other, it is possible for a while after their gluing, tie into a thread or rope.
- Cannon can be done by circumcalling a wooden handle of tassels for watercolor paint. or from another utility material;
- If you wish for a tank, or on any other model, you can apply the onboard number or other inscriptions and patterns;
- For greater preservation and decorating the model, they can be covered with varnishes and paints.

Machine - Retro (old "Mercedes")

Note!
When you transfer these drawings of the car from plywood with your own hands on the plywood sheets themselves, do not forget to move and numbers.


When assembling the model itself, look at the numbers carefully.
In this case, the process is carried out according to the following algorithm, in accordance with digital notation:
- detail or node under number 1 must be connected to another number 1;
- and the item under the number 2 is mounted, respectively, with the following number 2 and so on, while the machine will not be collected.
Pistol

Drawings of a pistol from plywood models "Bulldog". When assembling, we observe the same rules as when assembling the car: the same numbers must be mounted with each other. 

Tip!
This model The pistol is better to cover from the bottle with spraying paint, for better similarities with the original you can apply layers of black paint.
Dinosaur

Dinosaur drawings from plywood, for example, presented below, can be performed when designing to perform in any, scale you need to presented in the drawing program for a computer.
Preparation of material, model elements and the assembly itself does not differ in difficulty, but you will have to stock up with some patience when working the logging and fitting the model nodes to each other. 
Salnament - "Vintage leaves"

This object in the form of grape leaves is always useful in household By direct purpose - for napkins and for storage, such as sheets of paper selected format: 

Vase, stand under pencils, handles, brushes

Drawings of vases from plywood, which can be easily cutting over the sample you need: 

Plywood Punk
It is the ease and simplicity of drinking with a jigger of plywood sheets of various configurations with different sizesMontage of them different designsallows you to perform diverse decorative panels For the walls of our housing. Any panel made carefully - excellent gift native and familiar people. 
Drawings Panels from plywood, which also performs the role of a shelf in the household: 

Some useful advice And warnings:
- When transferring patterns, the drawings on the phanee use the thinnest and sharp stiffel of the pencil. It is even better to use the used ball handle, then the lines will always be the same, and the copy paper from the ball does not break. It is convenient to carry the drawings on the phaneer using a laser printer.
- For best fastening parts, where it is possible, it is recommended that the width of the grooves match.
- There are two types of pylons with large and small cloths. Newbies will be more convenient to learn how to use a thick filling, and finely drink minor details, already having some experience and skills to use the jigsaw.
- Pilking should cut from above - down, so pay special attention to proper fastening Pilking in the jigsaw.
- Pilking can easily break, so sawing carefully, do not allow the partitions on the saw blade.
- By purchasing a popul, see that the cloves are sharp, and it should not be easily bend easily, but on the contrary it should be solid. It is convenient to work not flat, and the so-called "twisted peelings" - they can be made in any direction.
- For those who have to drink designs from plywood sheets - a hobby, no need to acquire ribbon Saw., It is enough to buy an electrolovka. Although everything is on an amateur, some masters still often resort to manual jigsikWhen "Identify the material."
conclusions
- Before choosing, acquiring and direct work with the material, from which you will cut the models, panels, designers and designs. Check out its views, classification for construction documents (GOST).
- For drinking acquisition quality instrument, Equipment and snap to it.
- Speakly approach the choice of high-quality plywood. Do not limit it to its visual inspection, tapping it on the subject of internal voids and bundles, due to poor gluing layers of veneer.
- Before the work itself, the jigsaw optimally equip your workplace. Special attention is paid to him good lightingSo that the cut is perfectly visible, markup and not tired eyes. Not bad to illuminate the place of work with a jigsaw apply a strobe. Comfortable and comfortable sawing!
Electrolovik is one of the most common manual electrical instruments. They can be processed the most different materials: Woods, plastics, ceramics, metal, etc. However, the main material with which most of the Masters of the Electrolovka works, is plywood.
With the help of a narrow milk, this tool allows you to carry out not only straight cut, but also to perform intricate patterns. And in this article we will look at several councils of specialists working with an electric bike.

Features of working with an electric bike
Electrol Rasp for puffing on a plywood looks - a very simple tool and make it with smooth saw Almost every newcomer will be able. However, if we talk about beautiful curly patterns, then it is necessary here not only to possess certain skills, but also to choose the pinks.
Main nuances
Carrying out the plywood with a plywood with their own hands, you need to know the following:
- The main condition for obtaining an even cut is to proper choice Pilking for tool. In order for the front side of the saws was without scaling, it is necessary to use a thin sawdow, the teeth of which are directed down.
- The processed item needs a durable consolidationotherwise the level cut will not work

- A few words about the saws. For electrolovikov produced a large number of Pyl, which differ from each other, both thick and design features.
Depending on this distinguish:
- Saw or side divorce. Teeth bend right and left in turn, like manual saw. In this way, peelings are manufactured with relatively large teeth. They are used for fast straight cutting. Propyl is obtained with gross edges, therefore it should be treated with sandpaper.
- Waters with padding. In this case, the teeth do not at all have a divorce. Such peelings allow you to make very thin and clean rods. Naturally, the speed of work falls. If such a pink has a small divorce, then work will go somewhat faster. However, in this case, the main emphasis is not on the speed, but on the quality of the question.
- Wavely divorce. In order for very small and narrow piles to perform wider ranges, the cutting edge of the canvas is made wave-like. For the most part, such pinks are used when working with the metal, however, they are often used when working with plywood to obtain narrow and pure cuts for a fairly short time.

Drinking the patterns of the electroll bison
Tip!
You can use patterns from embroidery magazines, knitting or cutting out of paper.
In order to move the drawing on the Faneur, you need to do the following:
- We translate the pattern to dense paper.
- Using a sharp stationery or scalpel, cutting the stencil.
- Apply stencils to the surface of the material, giving it simple pencil.
- Now you can start cutting the pattern.

In contrast to the exercise of direct propyl, sawing from plywood with an electrolyzkik has its own characteristics.
This instruction will help you to deal with all the intricacies of the work:
- To cross the curve, use a pylon with a narrow web.
- For you need to use special nozzle - Circle. The circle is fixed in the center of the circle, after which you can proceed to work.

- If you need to select grooves in a wooden billet, then instead of a rash, you can use a rashpy. It is also used for stripping uneven propil.
- In order to implement the perfect accurate and smooth cut, you should use parallel emphasis. It must be attached to the jigsaw with the help of screws.
A special guide ruler can be installed on the "ski", thanks to which the cut in parallel to the straight edge. Before you start work, you must make sure that the ruler is firmly fixed and aligned relative to the canvas. Otherwise, the movement of the peel will be incorrect, and it can break, or burn the material processed.

- If you need to produce a straight line, you can use auxiliary guide. In this case, the jigsik will move along a firmly fixed plank.
- With this tool, it is possible to carry out the contiguits under the tilt up to 45 degrees. The angle of inclination is set on the scale.

- Drinking holes. Very often, cutting out the ornaments, the master must be done in the plywood hole.
For this there are two options:
- The first option is the most simple. You need to drill a hole with a drill, after which you enter the pink into it and continue to drink the necessary pattern.
- The second option provides for the use of cut-out or plungering technology. To drill the starting hole does not follow. To do this, you need to put a tool to the front edge of the "skis", without touching the blank of the web.
Tip!
Curling sawmill should always be started in the waste part of the material.
The saw should be included in the paneur not too close to the sawing line, in order not to spoil the material.
- In the event that you need to trim the board of a large thickness and the length of the peel is not enough for this - it is necessary to use a pail with a pointed end. First we supply the workpiece on the one hand, then turn it and cut it on the other.
- To cut the curly detail, you can fix the tool from the bottom of the desktop. In the case of a uniform and smooth supply of the workpiece, you can get cut with clean, smooth edges.
 In the photo - a tool fixed from the bottom of the desktop.
 Conclusion
From this article you have learned how to cut the Phaneru with an electrolybik. The basic principles of working with this tool were considered here, which will help you in the implementation of various construction and design solutions.
In the video presented in this article, you will find additional information on this topic.
Related Materials


Many skills in people begin to hurry back in childhood. Girls are sewing and knitting the boys joinery skill. Ordinary child interests over time will grow into something more. In this regard, drinking the guys by the guys from Plywood Lobzik, as a result, over the years, acquires the features of the art.
Plywood Lobzik and Fantasy - Personality Development Elements
Indeed, plywood list in skillful hands It can become a beautiful interior item. And even for beginners who first encountered and fascinated by the execution of the original wooden craftsThis will definitely become an interesting and exciting occupation. And at the same time useful, extinguishing the skills of decorative wood processing.

Such an occupation is a great opportunity to have a great time with interest, with benefit. Relax and at the same time passionately to engage in a favorite business that makes pleasure, both the process itself and its result. In addition, the things created, which will probably subsequently decorate the house, will serve the formation of general home comfort and coziness.

The main benefits of drinking beautiful decorative elements From plywood lies in the process of human spiritual development, its refining. Mastery, skill, labor development, all this is laid in these classes.


Labor forms a person. And it works over your favorite thing doubly more interesting. Time here is no longer authority over employment. He is not noticed. And this is one of the signs of true passion.

"Exhibition" of skills
Arrangement of the house, the apartment provides for the introduction of personal lepta to the sensation of the aura of inner beauty. And sometimes outer, since the placement of items made from plywood can be located, for example, in the territory of the country area.

Of course, the result of fruitful work will always find its rightful place. Whether the carved lampshade for desktop lamp or light crafts from plywood in the form of figures located on book shelves and playing the role of dividers for books.

More complex elements are performed already with a solid consolidation of knowledge of working with wood material. To hurry and immediately begin to drink such objects, it means in vain to spend time and ruin the material.

First steps towards perfection
Starting with the simplest. And for the initial comprehension of science on a carving, choose to help certain educational literature, presented as a manual for the manufacture of decorative wooden elements From plywood sheets. Take advantage of the tips of the masters on thematic Internet sites. Be sure to see photo crafts from plywood. This in itself will be attracted to the interest in such work.


Nothing awakens the zeal to any case, as his result seen. And products made of plywood sheets, polished, treated with paints or varnish leave indelible impressions.

Separately, you need to mention this necessary element as drawings. They are needed anyway. When complicated figures are performed and when drinking the most simple details. It is much easier to work with the material when his future appearance is defined in advance.

Returning to the question of the initial steps, it is worth mentioning such important things as a careful study of the rules for using tools and materials. And of course about mastering technology. She is quite simple and a little time will leave for her development.

But in order to achieve the level of the master class, in addition to securing in the memory of the technological stages of the process of manufacture of wooden plywood crafts, Extra knowledge is needed.

Signs of this Master
This master with the go will define:
- what kind of type plywood sheet It is better to give up discharge and processing. Wood is different in quality and properties. With some easier to work, and with some kind of kinds are more difficult, due to the decrease in the sudden appearance of cracks and other negative moments.
- which thickness of the material to choose with a certain intent of the future craft;
- what fillings for the jigsaw to purchase to use them quite a long time.

This experience is folded for a longer period. But the more interesting is the progress on the path of self-improvement.


Crafts made by their own hands from plywood, first simple, non-composite, but over time, which acquire these features, confirming the high class of a home master, can become a subject reflection of the formation and development of artistic skills wooden decoration. Sometimes it is expressed very original.

During a certain temporary interval, the crafts from plywood are set in a row for each other, and then the picture of the gradual passage of the entire path from the student to this specialist is clearly reinforced.

Stock Foto Crafts from plywood


 Why you can not give icons
 Is it possible to give icons as a gift: Signs, the opinion of the Church
 A year ago left her husband, and now I do not know what to do