Homemade house for dolls. How to make a puppet lodge with your own hands - ideas from different materials. Fabric house
The range of children's goods is rich and diverse. Among the popular toys - dolls and accessories for them: houses and furniture, from the present only size. You can buy a puppet house from plywood or make it yourself, spending on this minimum of money and time.
Pluses of independent manufacture
The benefits of making a house for dolls with their own plywood hands can be attributed:
- The product made according to an individual drawing involves the use of its own sizes, design and functionality. The main advantage of such a toy is its uniqueness and opportunity to take into account the wishes of the child when the rooms are located and the design of the rooms, the choice of layout and furniture, accessories and decor.
- The house may have the necessary and convenient size, which is selected taking into account the free space in the children's room and the wishes of the child. It can be a desktop or outdoor design.
- A child can be attracted to the decoration and arrangement of the inner space at the stage of drafting the drawing - collaboration brings together, it allows you to reveal the creative potential of the baby, teaches it to make independent decisions and bear responsibility for them.
- Work with plywood is a creative and entertaining process in which the whole family can participate.

Advantages of plywood
For independent manufacture of a puppet house, any materials can be used, but plywood is used more often, as it has a number of advantages:
- A whole category of toys for children is made of wood, in particular from plywood, thanks to her pleasant to the touch, warm surface.
- The small weight of the material allows you to create large structures that even a child can be rearranged from place.
- Plywood is a durable material, so the designs from it are reliable and durable.
- The material has an affordable cost, which allows you to make a toy no worse than that which is sold in the store, but for much smaller money.
- Working with plywood is easy, it is easy to process and does not require the use of special tools or availability of professional skills.
- After assembly, the house can be painted or leaving as it is, covering a transparent varnish - the surface of plywood is smooth, with a pleasant natural pattern and a tint.

Prices for Faucery
Plywood sheet
Note!Plywood of the E0 brand is environmentally friendly and safe material. In the manufacture of goods for children, it is this kind of material.
Preparatory work
At the first stage it will be necessary to decide on the size of the structure. To do this, consider the size of the doll, which the child played - the toy should be free to fit in full growth with a margin of several centimeters to the ceiling. There should also be enough space for the placement of toy furniture - cribs, tables with chairs, kitchen furniture.
The number of floors in the house depends on the size of toys and the growth of the child. If the figures do not exceed a height of 20 cm, then in the house can be up to 3 floors. If the design is assembled under the standard Barbie doll, then more than 2 floors will not work - it is better to arrange the room horizontally.
Deciding with the concept, you can proceed to a more detailed processing of the project, having completed the design drawing on the scale on the leaves.

Drawing
Drawing of details of the house must be performed on the scale - you can draw it on a sheet of paper or in a special computer program. This will reflect the dimensions of the product, the number and size of parts, determine the methods and locations of the mounts. Also at the project creation phase, you should decide on the internal layout, shape and design of the house. This stage of preparatory work should not be skidding, as it allows you to determine the required amount of material and the product assembly sequence.
Note!For the manufacture of a house, you can use a typical drawing. It should be remembered that when changing (increasing, decreasing) of one size, a proportional change and other dimensions should be.
With independent design of the drawing, you will need to take into account the following:
- The rear wall shape is a rectangle or pentagon, which allows you to make a two-tie roof.
- So that the assembly process was easier, the base is made somewhat wider than the space inside.
- The overlapping of the above-mounted floors should have less than at the base, dimensions.
- The main elements of the design also include sidewalls, interior partitions and roof parts.

Tools and material
Production of a house from plywood is carried out in several stages. Special attention should be paid to the acquisition of the necessary tools and materials.
List of materials and tools:
- Plywood sheets, the number of which is calculated in accordance with the drawing, considering the size and number of parts. The resulting value is rounded into the biggest. On average, 3 sheets of plywood leaves for the manufacture of a puppet house.
- The roof of the house is made of plywood, corrugated or ordinary cardboard.
- For strong fixation of plywood parts, quick-drying joinery is used.
- For temporary and additional fixation of parts, you can use the assembly scotch.
- For grinding parts use sandpaper. Special attention should be paid to the end of the elements.
- The cutting parts are made using an electric jig.
- Fixation of parts when assembling a house is made using self-tapping screws.
- At the stage of preparation of the material to the discollity, the line, roulette, pencil will be needed.
Prices for popular models of electroballs
Electropolitanzik
After assembling the house, it needs to decorate. To do this, use trimming and other residues of finishing materials: wallpaper, films, colored paper, linoleum pieces, fabric, felt, laminate. Window openings are filled with transparent plastic or plexiglass.
Step-by-step instruction of manufacturing and assembling plywood house
The sequence of making a puppet house from plywood looks like this.
Table 1. Production of a doll house
| Illustration | Description |
|---|---|
| In accordance with the drawing on the surface of plywood, the dimensions of the details on which will be cut down. |
| Fragments of large size and simple shape are cut into the machine. |
| In accordance with the drawing, the required number of overlaps is cut. |
| To cut smaller parts - use the electrol holder | |
| The location of the two elements of the roof (skate) on the one hand is sicked with scotch. |
| The parts are turned over and the ends are wetted in places in contact with glue. Details are pressed and installed in the desired position. | |
| Print the frontoth. |
| For the manufacture of window and door openings, an electrolovka is used. | |
| To insert a pink from the jigsaw and start cutting the window opening, first drill a small hole. | |
| Drive the hole will have from all sides of the window opening | |
| From the inside the window and doorways are grinding with the help of sandpaper. |
| For large parts, the grinding machine is used. |
| Holes for the self-tapping screws drill with the help of a zenker drill so that the self-pressing cap was recessed into an array of the part. |
| Details are stained in selected colors. | |
| The house assembly is performed using conventional self-tapping screws, whose caps are subsequently stained in the color of the part. |


Note!The method of fastening parts of plywood depends on its thickness and sizes of elements. When the material is thin, and the house itself is not large, then the fixation of the elements can be performed on joinery and with special grooves.

Video - How to make a puppet plywood house
Features of decorating the product
Color the dollhouse of environmentally friendly paint, for example, acrylic. Get a bright, saturated or soft, pastel shade with the addition of the addition of a caloring paste into the main composition.
Prices for Coleberry Paste
Tweet pasta
After the house is assembled, you can proceed to the inner design of the walls, floor, alignment of puppet plywood furniture.

To make the realism of the design, it is electrified with the help of autonomous luminaires operating from batteries that are fixed on bilateral tape.
Growth house of plywood
This design can be used in the fresh air, and in the apartment. The house is easily going, literally for 5 minutes it is also easily disassembled on comfortable fragments that can be stored in the storage room.


In fact, it is an enlarged copy of a puppet house. Therefore, its manufacture is happening by the same technology.
Table 2. Step-by-step instruction
| Illustration | Description |
|---|---|
| First, the drawing is made with detail: the definition of dimensions, forms, the number of parts, the location of the fixation. | |
| On the scale of 1: 1 made patterns of individual fragments, which are transferred to plywood sheets. After this material is cutting out. | |
| Details are grinding. | |
| If necessary, the details are painted. | |
| The house is collected. |

Special attention should be paid to the inner decoration of the house. The design may be provided for the presence of a bench and a folding table, shelves on the wall. Furniture can also be portable plastic or wooden.

Inside the house on the floor, you can lay a soft mat or a mattress on which the child will be comfortable.
Video - Options for the manufacture of a growth baby house from plywood at the railway site
Probably there is no little girl in the world, which would not dream about a doll house. You can buy a variety of toy cottages in stores that look like real. It is worth trying to make a house with your own hands. A mini-house is designed for small dolls, other toys that the child plays. It can be made of a beautiful box with compartments, plywood, fabrics. The house will also perform a small cabinet for toys.
Making a design will not take much time, forces will require the minimum amount of materials, the child will definitely be delighted! An easy way to please the baby is to make a house for dolls with your hands from cardboard, boxes, plywood. How to do it - we will tell below.
Suspended house from the box for Lalalupsea, other small dolls
What will take:
- square box;
- color Scotch, adhesive tape;
- pVA glue;
- scissors;
- colored paper scrapbooking.
How to make a house - step by step

Outdoor cardboard house do it yourself
Before proceeding with the work, choose the suitable house drawings, it is worth understanding which material it is better to use how to cut holes, glue the rooms so that the design is durable, stable.
How to choose a cardboard box?
Important material - boxes, or rather, the cardboard from which the boxes are made. The difference in various types of cardboard is presented in the photo below:

The designs from the cardboard shown in the left shot are durable, stable, are not deformed under the weight of subsequent floors. The floor from the cardboard shown in the right picture can be pricked under the weight of the next floor, you will have to start working again.
How to cut the rooms?
Cut rooms not easy. After reviewing many photos of houses, it can be seen that some holes have a frame. This is the most convenient opening option. Remove the whole side - error! Such a room will tremble, fall apart, looks unsightly. Frame (although without the bottom) need to be cut in cardboard boxes that need to be combined, increasing the interior of the rooms. To understand what it is about, it is worth seeing visual manuals in the form of drawings below.
This is how the room from one box is created: you need to designate the future hole for access, leave 5 centimeters for the frame, cut the hole.

Step-by-step housework drawings consisting of two boxes

Room connection - wall crosslinking
For a dollhouse does not fall apart, you need to provide a solid connection of the rooms. Reliable way of connecting rooms from cardboard boxes - stitching.
Required:
- gypsy needle
- thick thread
- pliers.
Stitched cardboard with the simplest big stitches.
Regardless of whether the boxes with an open connector are combined or with the opening of the door, always follow the rule: stitch on the edge!
It is necessary to "immobilize" the boxes in the workplaces, where they can be shifted under the influence of the applied adhesive, it will be difficult to work, it is easy to spoil the final result. Below are 3 examples of stitching rooms.

| 2 boxes are connected in the drawing without holes. You need to "grab" in several places the middle, so that after gluing the cardboard does not move. |

| On the second drawing, an example of stitching boxes with a hole is shown. Note. On this and the following drawings for better visibility of the seams "hidden" some of the walls of the rooms. |

| The third drawing shows an example of stitching boxes with a hole for the door. |
Complete ceilings with floors
- Seam the ceiling and floor need close to the edge - this is a single rule for walls, ceilings.
- There is a second rule: it is necessary to immobilize "chatting" elements - parts indicated in the figure below:

Now we start sewing. First, the outer edges are sewn, then internal.

At the end, we fix the chatting items, sew along the line of their contact.
Attention. Cutting elements located on the floor of the upper floor and on the ceiling of the lower floor, if they do not overlap, we like each. The following schemes present such situations. i:

What to do if the chatting elements do not touch each other, and it turns out a hole?
- If the situation occurs on the ceiling - nothing terrible.
- If the hole is obtained in the floor - it must be closed.
There are 3 ways to close the hole.
- The first is to choose another box.
- The second is to rotate the cardboard box 180 degrees vertically (the hole moves to the ceiling).
- The third is to fill the hole, you need to insert a piece of cardboard of the appropriate size (the same thickness that the entire cardboard), then sew, as shown in the diagram below.

Forms and sizes
The above is the main knowledge about the sewing of a puppet house from cardboard boxes. Which option to choose depends on the builder. Choosing the boxes, you can manipulate the dimensions, distribution of rooms, create a tiny single-storey house or a huge multi-level villa. Below are several schemes depicting the addition of the following floors of a doll house. Boxes can have different heights, width, depth, giving a house special form.

Stock Foto Cardboard house design


Puppet house plywood, photo
Plywood house - a real challenge. With plywood it is more difficult to work than with cardboard. It is worth preparation for the work in advance. An important plan, a house design drawn on a sheet with sizes. Below are instructions, how to build a puppet house from plywood.
Project preparation
The project is advisable to draw on a sheet into a cell. Scale may look like this: 2 cells on a sheet \u003d 10 centimeters. So easy to calculate the real size of the house. The house can be made small or more design - with 2-3 floors.
- A small house in the diagram has dimensions: width - 60, height - 57 centimeters.
- The large house, presented in the picture, is in a height of 120, in width - 80 centimeters. Depth - 22 centimeters.

Calculation of the number of materials required tools
Below is the calculation for the production of a large house.
Necessary materials:
- hardwood plywood 4 mm thick, sizes 90/22 centimeters (side walls) - 2 pieces;
- plywood 4 mm, sizes 80 × 22 centimeters (lower and upper part of the structure) - 2 pieces;
- plywood 4 mm, sizes 79.2 × 22 centimeters (floors) - 2 pieces;
- plywood 4 mm, dimensions 50 × 22 centimeters (roof) - 2 pieces;
- plywood 4 mm, dimensions 30 × 22 centimeters (interior walls) - 2 pieces;
- plywood 4 mm, dimensions 60 × 20 centimeters (front wall with chimney);
- laminated fiberboard 3 mm 120 × 80 centimeters (rear wall);
- acrylic paint for wood.

Tools and accessories:
- adhesive for wood;
- hammer, nails;
- lobzik;
- sponge roller;
- line;
- pencil.
Step-by-step instruction
- Painsel painting. Plywood elements need to be covered with acrylic paint. The finished product is painted much more difficult. Gypoallergenic paints are now available, dried in 20-30 minutes. Paints are non-toxic, there are no smell, they can be used indoors.
- Construction of a rectangular carcass. When the paint is driving, you can proceed to the construction of a rectangular cottage. You will need: plywood 4 mm, sizes 90 × 22 cm (side walls) - 2 pieces; Plywood 4 mm, dimensions of 80 × 22 cm (lower and upper part of the structure) - 2 pieces. On tangentials of individual elements of plywood, it is necessary to apply glue, comparing them with each other at right angles, fasten the connection with small nails. Plywood 4-mm is very fragile, so the accuracy of ripping the nails is important. Attention, the use of glue is necessary! Without its binding properties, nails will fall out of plywood, work is placed.
- Construction of individual floors. The next step is to attach the shelves that will serve as a floor for individual floors. Shelves consist of 2 sheets of plywood size 79.2 × 22 cm each. In the project, each floor has a height of 30 cm. On a rectangular design, measure 30 cm from the base, then another 60 centimeters from the base. Draw a horizontal line, noting the location where the first shelf is attached, draw it with glue, attach to the shelf line. Make a similar work by 60 cm from the base. Then attach 2 shelves with nails to the side walls.
- Rear wall cutting. It's time to make the rear wall of the laminated fiberboard with dimensions of 120 × 80 cm. On the long sides of the plate, measure 30 cm from the top edge. Mark the center of the upper edge is the future roof. Spend 2 lines from the top of the roof to the places marked at an altitude of 30 centimeters from above, the contour of the triangle will turn out. Using the jigsaw, cut out along the drawn lines shape of a house.
- Fastening the back wall. The edges of the fiberboard are covered with glue, attach to the house, fix with nails.
- Roof. For the roof, 2 pieces of plywood 50 × 22 centimeters each were used. Lubricate the triangular edges of the Fiberboard and one shortest edge of plywood glue. Get the roof to the edge of the house, connecting both plywood leaf at right angles. Strengthen the design of nails.
- Chimney. Of the plywood size of 60 × 20 cm, cut out the shape of the chimney with the fragment of the facade. Do not forget to cut the bathroom door. The first element must be glued, then kilgle to the edge of the upper shelf and roof.
- Separate walls. The last stage of construction is the insertion of separation partitions forming separate rooms. Use 2 plywood 30 × 22 centimeters. You need to place the plywood in the space for the choice between floors. You can freely move them, changing the size, the location of the rooms.

Below is several unique puppet plywood houses made by hand.


Wooden house - master class


The products below will require experience, skill. A house of a tree will be able to make dad who will not regret the time, forces to please the baby.

Bag house with your own hands - Photo
The next house will be able to make mom. Original idea - Bag House. It is not difficult to sew it. The girl's bag will be able to take in the kindergarten, playing with girlfriends for a walk.

Video
Stores offer customers a wide range of all sorts of toys, including puppet houses. To get one of them dreams every girl, while parents can easily make a beautiful and durable house for dolls in just a few days. Moreover, the child will be able to take an active part in the process and express all his wishes about the size and design. To make a puppet lodge with your own hands from plywood, you will need a scheme that you can draw yourself or find it ready on the Internet.
Making a drawing of a puppet house from plywood with the size of all design elements
The toy house and plywood can not be built without a detailed drawing, on which the dimensions of all its parts will be applied. To do this, you must first determine the approximate dimensions of the future at home, and imagine what it will be forms.
Reduced or increasing the design, it should be remembered that all sizes should also be changed proportionally.

The house consists of such parts:
- Rear wall: has a pentagon shape. Its side sides are 76 cm, and the base is 106 cm. The upper side is an uneven triangle whose vertex is located at an altitude of 91 cm.
- Gender: It has a rectangular shape. Its dimensions 106x38 cm.
- Overlapping the second floor: a rectangle with dimensions of 104x36 cm.
- Side wall (2detali): It is a rectangle 36x76 cm.
- The inner wall on the right side: 25x50 cm rectangle.
- Interior wall on the left side: rectangle 25x43 cm.
- The left side of the roof: a rectangle of 76x39 cm.
- Right side of the roof: Rectangle with parameters 45x39 cm.
How to make a house for dolls with your own hands from plywood: step-by-step guide
Changing the parts with an electroll q. At this stage, the windows of arbitrary sizes are cut and also carefully processed by sandpaper.

Making a house step by step:
- To the base, side walls are attached with the help of self-tapping and construction glue, and then overlapping the second floor and inner partitions.
- The roof is mounted.
- A decorative tile is pasted on the roof made of cardboard, colored paper or other materials.
- Next, the house is painted with paints (acrylic, gouache, watercolor);
- Rooms are flooded with wallpaper, cloth, film.
- Floors are covered with linoleum linoleum, laminate, carpet, felt.
- Furniture and interior items are disposed.
Near the house you can make a small kindergarten placed in a box in which trees cut from cardboard will grow.
If the parts were not very smoothly and the gap was formed between them, then it can be smeared with a putty on the tree, and then paint.
How to assemble a house of plywood for children with their own hands easy and fast
A small plywood house designed for games will have to do any child. After all, he will have his own personal space. Collect the most such design is easy, if you pre-make drawings, and cut the items.

What will be needed for work:
- Plywood sheets whose thickness is at least ten millimeters. The required amount is easy to determine by folding all the areas of future parts.
- Bar for frame size 40x40 or 50x50 mm.
- Plexiglas or plastic for windows.
- Canopies for doors.
- Finishing materials (wallpaper, non-toxic paint, putty).
From the bar and plywood are made blanks and squeaks sandpaper to full smoothness. The frame is collected from the bar, and plywood blanks are attached to it. Next, windows and doors are installed. Then the house can be painted outside and from the inside or wake up with wallpaper. Furniture is entered. From the remains of plywood you can make scenery and install them around the house. Children's game house is ready.
Fasteners must be hidden so that the child can not be injured.
We make a lock from plywood with their own hands: drawings and recommendations
Plywood is one of the easiest in the processing of materials, so it can be made from it not only simple houses, but also beautiful castles for princesses and knights. To do this, we need to be patient and carefully draw every detail of the future castle. Drawings are performed by analogy with drawings of a dollhouse, but towers, balconies and terraces are added to the details. On the thematic sites there are a lot of interesting models that are easy to build yourself.

Tools required for work:
- Pencil simple;
- Line (simple and figured);
- Electrolovik;
- Screwdriver or screwdriver;
- A hammer;
- Sandpaper;
- Tassels;
- Fastening elements.
For the fence of balconies, you can use sticks from ice cream.
Beautiful Furniture for Plywood Dolls: Drawings and Methods
From plywood you can make almost any furniture in a toy house: beds, tables, chairs, wardrobes, sofas, shelves. The furniture made in drawings is obtained quite large, so it will suit both for the Barbie doll and for the puffs.
Details of furniture can be glued or combined with self-drawers and furniture cloves. Plywood is mainly taken, about 4 mm thick.

What you need for the manufacture of furniture:
- Pencil and paper;
- Lobzik manual;
- Small sandpaper;
- Liquid nails or joinery glue;
- Paints and varnish.
When assembling small furniture, it is better to use glue, because the fasteners can damage the parts.
For all parts of the furniture, you must first draw and cut the pattern. Then climb it on plywood and pubesome cutting the design elements. The edges are squear. Details must be combined with each other, and then paint and cover with varnish or using a stapler to hammer with a cloth.
Making a house of plywood for dolls with your own hands (video instruction)
From plywood you can make durable and beautiful toys that will delight the child for a long time. If there are drawings, free time and the droplets of patience, it will not be difficult for even those who have no skills in this matter. And manifesting a fantasy you can create real masterpieces that will cause surprise and delight not only in the child, but also from others.
Hello everyone! Tell me when you give your crumbs to the toy, do you think where she will live? Believe me, the baby thinks exactly about it. And all because he projects his life on them. He is played during the day, like a toy, but the evening comes and the little must go to the crib. What about his ward? What to do with him? To deliver your child a pleasure, continue the game and teach Karapuz to order, let's find out how to make a house for dolls from the box with your own hands.
Preparation for the creation of an apartment for dolls
Before proceeding to work, decide what exactly you will create. In the box "Walls" already exist. It remains to make them similar to the place of residence. Dimensions of the house can be different: it can be a two-story or one-story, with one or more rooms; Brushed homemade or purchased furniture.
What materials and tools will be needed for work:
- Cardboard boxes;
- Glue;
- Colored paper;
- Scissors;
- Pencil;
- Line.
When everything you need is assembled, you can start making.
First house
I recommend stretching on a small house from one room. Then he is not so sorry to throw it, and children quickly all bother. Look at what kind of cute and comfortable, although small. Pictures are increased by clicking.


But what a little cute house, even without wallpaper, it looks worthy, but what if you hang the curtains, throw a couple of pillows, lay a carpet? By the way, the carpet and pillows are easiest to do from felt. And not necessarily sew! Felt is easy to glue with a torque or hot gun.


As soon as you get tired, you can build at least a castle, at least a country villa. You already have experience, hand naked.


"Build" a house
From me a detailed master class with a photo. I hope he will help you!


Karapuz help will fully depend on how interested parents are interested and involved in the process. Therefore, manifest your creative processes, prepare a fairy tale or an interesting story of your crumb. Tell him a certain job or ask him about the crafts.
Furniture
Of course, the furniture dolls are simply necessary! Yes, and playing with an empty house is not interesting. What can you come up with?
Bedroom furniture
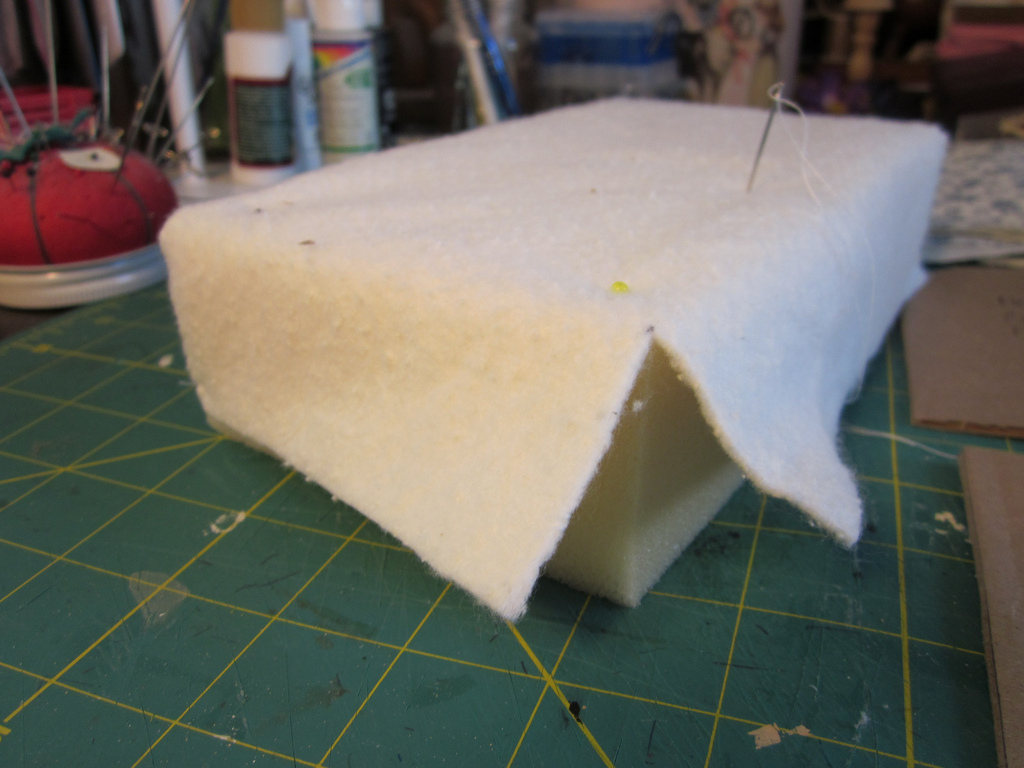
Bedroom furniture can be made of paper in origami technique, glue from cardboard and repent, but the most cozy and beautiful option is upholstered furniture from cardboard, foam rubber and fabric. It is possible to glue everything on the usual PVA, though to dry it will be long. Instead of the foam rubber, you can take a synthet or batting, on the extreme case of cotton.
Bed MK

Step-by-step photos of manufacture - increase when clicking:


Chairs
Photos are increased by clicking


Kitchen
The kitchen can be filled with a fridge, stove, worktop, beautiful chandelier and dining table. Cardboard and ice cream sticks are suitable as materials.
If there are 3 d handle, then you can make furniture from plastic.
Cardboard stove

Lockers
Lockers, shelves, fridge just make from cardboard. Bloom comfortably hot glue.


Furniture for kitchen
Furniture - chairs, the table is very beautiful from sticks from ice cream. You can cut such wands with large scissors, just carefully, they can crack in half. You can glue the glue times or hot.


Trivia for kitchen
You can land in the kitchen bird in a cage, put a box with fruit or with flowers. Detailed master classes in the photo. Increase in clicking.


Fruits, vegetables, dishes
Fruits, vegetables, dishes are easiest all make from plasticine. In order for the product does not get dirty and did not lose shape, it is covered with a transparent nail polish.
You can make vegetables from salt dough - They dry and look like a toy store. From Play Blowalso make meals, but after drying the play, it gives cracks. Therefore, I prefer to make salt dough: 1 cup of flour + 1 cup shallow salt + water, kneading very cool dough.
Also a very good option - air self-hardening plasticine (new material). It is cheap, bright when it is frozen elastic than it looks like a solid rubber. Lepim like from ordinary plasticine and leave to dry overnight.
Interesting ideas for a puppet house
Some toys are already included with the house, for example, the lol dolls it is just fabulous. From it you can copy some ideas. For example, the fact that the apartment is not limited to only the area of \u200b\u200bindividual rooms, and the lower floor usually performs. And you can do at all the courtyard in front of a house with a chaise longue and flowers.


Another interesting idea is a bag house. This option is especially convenient when you plan to travel with kids. It is only necessary to attach a handle and "shutters", which close the house, and the mobile version is ready. 
If you like to sew, then the perfect version of the soft bag is a fabric house.


And one moment. Have you thought that your handicraft is just the beginning? Over time, all new and new rooms can appear in which other toys will live.
Create, please the baby and wonder how the talented kroch you have! I hope you enjoy spending time with your child, and you can develop your friendship with him. I suggest and with our site make friends so to always be aware of the last articles! Subscribe and receive messages about what you can read on the site. Do not forget to tell your acquaintances about what you will find out.
To new meetings. Bye Bye!
All photos from the article
In this article we will look at how to make a puppet house from plywood. Early, you can always go to the toy store and buy a ready-made model there, but there are several reasons for not hurrying with such a decision and still take into hand tools with the goal of creating a small miracle for your child. So, proceed.

General provisions
To begin with, let's deal with the motivation, why at all it is necessary to take for the manufacture of a house for dolls with your own hands:
Advantages of their own manufacture
- Saving. The price of factory models is high enough, while homemade will allow to significantly save a family budget;
- Uniqueness. The project you realized will be the only one in its own way, your daughter will definitely not meet the same toy in his girlfriends;

- Compliance with desires. In your doll house there will be exactly the rooms, such shades and such decorations that the child will wish;

Tip: Connect your child to work, it will allow you to spend more time to spend time and make a homemade toy even more beloved.
The advantages of choosing plywood
So, why it should be done with your own hands, and not run to the store, we figured out. Now let's decide on the material.
The wooded plate consists of several glued sheets of wooden veneer, which determines the presence of the following advantages:
- High strength characteristics. Durable children's toys are always much longer than their garlands;
- Easy processing. Plywood is easily sawn, painted, dried, milling and fixed by nails or self-drawing;

- Aesthetic appearance. The top veneer has a beautiful original textured pattern and a pleasant eye with a warm tint;

- Low thermal conductivityThrough what warm to the touch. For a child, this is an important factor;
- Relatively low cost. Wood-layered stove does not differ high cost, besides, it will take quite a few material to perform the task under consideration.
But, speaking of the advantages of plywood, it is necessary to mention and its possible disadvantage that has an important meaning. The glue used during the production of the wood-layered plate may contain formaldehydes with high toxicity.
Therefore, be sure to pay attention to the appropriate labeling and select an environmentally friendly product, because it contacts your child with it, and the following marking will help you:
Getting to work
The instruction begins, as in most cases, with the preparation of all necessary accessories that you may be needed in the process of implementing a conceived project:
Step number 1: Preparation of accessories
- The required number of plywood sheets is 5-7 mm thick;

- Lobzik on a tree sawing;

- Joinery glue to create a roof;

- PVA glue for fixing decorative elements;
- Assembly tape;

- Paint and brush;
- Segments of wallpaper with small pattern;
- Cardboard corrugated type for roof;
- Tree rules that will serve as stairs;
- Pencil and construction roulette for applying all the necessary sizes;
- Self-adhesive film with wood pattern for floor formation.
Now you need a drawing of a puppet house of plywood with dimensions to prevent errors in the assembly process and get a truly beautiful and functional design.
Step number 2: Drawing
Drawings of a puppet house from plywood can be borrowed from the Internet, along the way, making their own adjustments, or draw everything yourself.

It is noteworthy that the installation of the front wall can generally refuse that there were constant free access to the house.
Step # 3: Assembly
Having everything you need at hand, including drawings of a puppet house from plywood, proceed to the main task:
- Location on a sheet of plywood all parts of future housing for dolls;
- According to the markup, cut the walls and other structural elements with the help of an electric bike. Also create window and door loops;

- Sand all the ends to eliminate the possibility of getting an injury on sharp edges of cuts;
- We smoke the joints of the elements of the middle of the structure and connect, fixing the location of the compound by assembly tape;
- Next we glue the back wall. Here you can already do without scotch. The protruding glue carefully remove with a clean vet;
- Then, with the help of an adhesive solution, all internal partitions are mounted;
- We produce roof installation;
- From the prepared cardboard, we cut a small "tile", after which we stick it on the roof and stain with the help of brush and paint in the desired color;
- Prayer or salary chunks of wallpaper wall, giving them an aesthetic well-groomed look;
- On the floor glue a self-adhesive film, creating the illusion of a real wooden coating;
- Cutting on small parts Wooden rules and assemble stairs from them;
- Mount the staircase span, we put the furniture and hang curtains. On this, the process of assembling a puppet house from plywood is over.

It is not worth limiting the own fantasy. You can, for example, to build another fireplace from match boxes, lay carpets from pieces of fur or wool, install a gym or even pool. All in your hands. The main thing is that the result is pleased with the daughter.
Conclusion
The process of creating a puppet plywood house is simple and very exciting, especially if you connect to him and the child itself. As a result, an inexpensive original beautiful structure will be released, which gives rise to proud of the work done. The main thing followed outlined recommendations and be careful.

Video This article will give you the opportunity to get acquainted with some additional materials regarding the information provided.
Become a wizard for a child, embody a child's dream into reality! If you have aroused after reading questions on the topic, then you can ask them in the comments.
 How to return the love of her husband to his wife - Tips of the psychologist
 Why you can not give icons