Why and how to insulate the roof from the inside: detailed instructions. How to insulate a pitched roof without removing the roof Insulated roof Is it necessary to insulate the ceiling
Roof insulation plays a huge role in completing construction works. Having built a house or cottage, you have to think about how to make the building as comfortable, warm and cozy as possible. Regardless of whether there will be accommodation in the attic or not, it is necessary to insulate the roof in any case. This will reduce heat loss and contribute to energy saving.
Do-it-yourself roof insulation
It is not necessary to carry out work on roof insulation with the help of a specialist, everything can be done with your own hands. The whole process should start with the selection necessary materials and creating a plan and scheme of work. Any roof consists of external (roof) and internal (overlapping and truss frame) parts.
All insulation work is carried out only after checking these components, and if necessary, they are repaired. Then remove excess moisture and get rid of dampness and mold.

To prevent bacterial damage to wooden structures, the inner surface of the roof is treated with an antiseptic, and to protect metal structures from rust, such surfaces are treated with anti-corrosion compounds.
Materials for insulation
Modern manufacturers offer a large assortment roof insulation materials. The most popular are:
- Mineral wool (fiberglass, stone slabs);
- extruded polystyrene foam;
- Polyurethane foam.
The material to dwell on is determined by the features of the roof. For example, pitched roofs are best insulated with fiberglass.
Fiberglass
This material has excellent heat-insulating and sound-insulating properties. Also, fiberglass is durable, the service life reaches fifty years, it is fire resistant and vapor permeable. And, of course, the price, the purchase of such material is a very inexpensive pleasure.
The most popular materials in use are mineral wool and expanded polystyrene. This popularity is due to the ease of manipulation with them.
Mineral wool
Depending on the initial type of material (stone or glass), mineral wool is divided into two types:
– the fibrous structure of the material, formed during the melting of small rock particles, as well as various slags and mixtures obtained in industrial metallurgy, make the product truly unique.
The material is not afraid of high temperatures, and is also sufficiently resistant to aggressive chemicals. 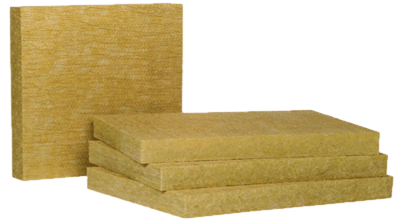
glass wool- heat-insulating material having air fibers, which have special strength. Get the product by melting ordinary glass. Like stone wool, the insulation has a high resistance to chemical products and does not burn.
The thermal conductivity of glass wool is 0.05 W/m°C at 25°C. During operation, glass wool practically does not shrink, and its fibrous structure, even after long term remains firm and elastic. 
Mineral wool has excellent characteristics in the following areas:
- Low thermal conductivity;
- Excellent sound insulation;
- Fire resistance, which is very important for the roof material;
- High environmental friendliness and durability.
Styrofoam and foam
Both heaters have a fairly small specific gravity, so their use does not make the roof heavier, and also does not provide for additional use vapor-insulating material, since neither foam nor absorb moisture.
polyurethane foam
One of modern materials is an .
It does not need to be glued or nailed to the surface, it is applied by spraying onto it. This material has excellent adhesion to surfaces, resulting in a durable, seamless construction that does not allow cold or moisture to pass through.

Ceiling insulation in a house with a cold roof
When the materials are selected, you can go directly to the process of laying the material. The peculiarity of such a process depends on the design of the roof and the future use of the attic.
If the use of the attic as a living space is not provided, then the insulation material is laid on the floor of the attic between the logs, and not between the roof rafters. A membrane is laid on top to improve vapor permeability, then it can be covered with any floor covering. 
To exclude the formation of the appearance of "cold bridges", the insulation must adhere to the lags as tightly as possible. To do this, when cutting insulation, its size must be done on 1-2 cm. wider than the distance between the lags.
Attic insulation from the inside
If it is decided to equip the attic for living quarters, you should insulate the roof with your own hands using a different technology:
- Initially, a waterproofing layer is laid to protect the insulating material from getting wet. To do this, a waterproofing membrane is laid on top of the crate and fixed with bars of the counter-crate;
- Then the insulation itself is laid between the rafters. In order to avoid the formation of gaps, during installation, the same technology should be followed as when insulating the ceiling - the insulation should be wider by 1-2 cm.
- As a vapor-permeable layer, a vapor barrier film is attached over the insulation, at the joints, it is overlapped;
- The film is fixed on top with bars, which will serve as the basis for finishing.

How and how to insulate a flat roof
Warming flat roof proceeds in a slightly different way. The beginning of work is the definition of the purpose of the premises. The intended use of the attic for a gym or some other place for entertainment suggests that the roof must be really strong in order to withstand serious loads.
- To form a small roof slope, a cement screed is made on a reinforced concrete slab;
- Then, as in the case of a pitched roof, a waterproofing layer is laid;
- Upon completion of these works, everything is covered from above with a layer of heat-insulating material (polystyrene, stone wool, extruded polystyrene foam, etc.), on top of which a layer of fiberglass or geotextile is laid.
- And the final stage is the backfilling of pebbles or a layer of gravel and the subsequent laying of floor or paving slabs.

If there is no living space under the roof, then the vapor barrier and insulation are laid in the attic, and the waterproofing layer under the roofing material. And in the case of complete non-use of the attic space of a flat roof, insulation is carried out either from the inside or from the outside.
Having insulated the roof, you will receive not only additional square meters, but also reliable protection for the house from severe frosts in winter and sultry heat in summer.
An attic is the space between the ceiling and the roof of a home. It can be equipped for living and working premises and unequipped, that is, the attic performs exclusively storage functions. Is it necessary to insulate the attic in a private house? The answer is unequivocal and obvious, it is necessary. For example, the transformation of an ordinary attic into a living space makes it possible to increase the usable area of \u200b\u200bthe dwelling, while not occupying an additional land allotment.
Many people are happy to use summer attics without insulation and enjoy the invigorating air and beautiful views condescendingly. But precisely warm room can bring true comfort early spring days or in the months of autumn bad weather. According to natural laws, heat rises and if the thermal insulation is made in accordance with all the rules, then there is enough heat even without additional heating. Everyone will agree that in a crisis, this significant savings. Attic insulation is a kind of process that represents the manufacture, figuratively speaking, of a layer cake. Each of its components is irreplaceable and performs its specific function. But regardless of whether the attic is residential or not, it must be insulated, since the house needs protection from cold air from above, as well as from all sides. Since everyone knows the truth that heat leaves the house through the walls, ceiling, floor and roof. Therefore, attic insulation measures must be taken seriously, carefully and in no case should the process be ignored. Mistakes in this matter are unforgivable, they can result in wetting of the insulation layer, and as a result, the loss of its effectiveness. If the thermal insulation is insufficient, then condensation will accumulate on the ceiling of the house and the attic floor, and this is a very favorable environment for the development of mold. Well, plus everything, the general protection of the house is also violated, which means that additional financial costs for heating will be required. Attic insulation should be done immediately after completion. roofing works. For "narrow" specialists, this work may be overwhelming, because today attic insulation- the prerogative of roofers or builders who are engaged in finishing work. This is where the main threat of poor-quality performance of such a procedure lies. Mistakes that may be made by inexperienced specialists will not be revealed immediately. The only way out of such a difficult situation is personal control of each stage of the insulation work, of course, you first need to study all the current moments. Types of insulation
Foam plastic, extruded and mineral wool heaters are used as a heater. But for residential buildings it is desirable to use mineral materials of basalt or glass wool. Their main advantage is that they do not burn, besides, they weigh little and have a low coefficient of thermal conductivity. Another advantage is their rigidity, which ensures dimensional stability and resistance to slipping.
Uninhabited attic
The main function of the insulation layer in such an attic is to keep heat in the house, while creating an obstacle to its exit through the floors. The first mistake that can occur at the stage of finishing the ceiling with plasterboard is the lack of vapor barrier. It should overlap (10 cm); the seams must be connected with self-adhesive tape. If the vapor barrier layer is not laid under the insulation, then after 3-5 years, the entire insulation will become unusable. Why? Because warm air rises up, it is saturated with moisture and, getting into the cold zone, this very moisture condenses. The insulation is saturated with water and the process of decay begins. Only after following this procedure, you can start laying the heat insulator. For warming attic floor Loose or fibrous heat insulator materials are best suited. They perfectly close all the cracks, thereby forming a dense layer of insulation. It can be ecowool, mineral wool or expanded polystyrene granules. Warming of attic floors is also possible with expanded polystyrene sheets, while the remaining gaps are blown out mounting foam. Mineral wool is the most common material used in residential and non-residential attics. Insulation installation - recommendations:
If the floor beams are not very thick, then after they are filled with insulation, you can fill the rails perpendicularly on top of the beams, and place an additional layer between them. As a result, such slats can be used as floor lathing in the attic; - if the distance between the beams and the width of the slabs is different, then you can resort to the use of triangular slabs. The meaning is that two triangular plates are combined relative to the adjacent diagonal, which means they fall into the interbeam space. But we should not forget that the quality of such styling will directly depend on right technology cutting corners; - if the length of the insulation roll is shorter than the length of the overlap, then the pairing can be performed as follows: at the junction, the missing part is laid on top of the already laid insulation and cut off at the joint level. In this case, the cut off part turns out to be a little longer, and this is what is needed for a tight and high-quality docking. residential loft
This is a more time consuming and complex process. Insulation begins with checking the integrity of the film, which is located under the roof. If damaged areas are found, they must be sealed with a special repair tape. Such an operation does not make sense if plywood or plank flooring is already nailed to the rafter legs. The next stage is the fastening of the remote rails to the rafter legs. These slats create a gap between the film and the insulation (3-5 cm). The space left will provide ventilation for the insulation to dry and ventilate it. A similar measure applies to films with vapor permeability
It is undesirable to use too wide strips of insulation when laying it in the inter-beam space. There will be a strong compaction of the material, and its heat-insulating properties will decrease;
When insulating, you need to use the same type of material, since a violation of uniformity reduces quality indicators;
It is impossible to delaminate the plates to reduce the thickness;
The manhole cover that leads to the attic must also be insulated at the level of general thermal insulation: in order to avoid strong heat losses;
Replacing the vapor barrier film with a sealed one is a gross violation of technology. Moisture will accumulate in the thermal insulation layer and the effect of this will decrease. In addition to all of the above, I would like to note the argument that new materials with unique characteristics and properties appear on the building materials market. One of them is polyurethane foam. This is a revolutionary material, a seamless insulation that is not afraid of mold and fungus, does not rot. Plus, it is environmentally friendly and has a low coefficient of thermal conductivity, which means that the thickness of the coating will be less than that of mineral wool or expanded clay. As you can see, the insulation options can be different, the main thing is that the work is done with high quality, then the maximum benefit will be achieved.
In order for the roof to perform its functions qualitatively and serve for a long time, it must be insulated. There are many materials and methods for installing a heat-insulating layer, and the choice of the appropriate technology is always carried out individually. This article will discuss how to properly install insulation on the roof of a private house.
The need for roof insulation
Of course, the final decision on whether to insulate the roof is made by the owner of the house - but before that, you need to weigh all the pros and cons. The latter include additional costs for the arrangement of the roof and the effort required to install the heat-insulating layer.
However, the financial costs and efforts will pay off in the future. The main advantage of roof insulation is that after installation, the level of heat loss of the entire building is reduced by an average of 15%. If the under-roof space is not intended to be used as residential, then the roof itself does not need to be insulated - the thermal insulation of the roof of the house in this case will be mounted on the floor of the attic or the ceiling of residential premises. In order for the structure not to rot, high-quality ventilation of the roof will be required.

The most relevant roof insulation will be when arranging a residential attic, especially if the building is located in a region with a harsh climate. In such cases, if the attic is to be used all year round, you will have to pay special attention to the issues of its insulation and heating. Less stringent requirements are imposed on the insulation of summer attics.
How to properly insulate a flat roof
When insulating a flat roof, it must be borne in mind that thermal insulation can be both on the inside and on the outside. It is advisable to start with external insulation, and after the first winter, decide whether it makes sense to insulate the roof along the rafters from the inside.
roofing cake flat roof consists of:
- vapor barrier layer;
- insulation layer;
- waterproofing layer;
- Bulk layer.

For arrangement external thermal insulation most often used basalt mineral wool, which is optimally suited for these purposes. However, you can choose from any type of rigid insulation - for example, expanded polystyrene would be a good option. It is also worth remembering that roofing that is prone to fire cannot be insulated with polymer heat insulators.
Pitched roof insulation
The thermal insulation of the pitched roof is installed on the truss system. Before laying the insulation on the roof, it is necessary to design it in advance in order to avoid installation errors.
The pitched roof consists of the following elements:
- roofing;
- waterproofing layer;
- Thermal insulation;
- vapor barrier material;
- Interior decoration (optional).

As a heat-insulating material, mineral wool is most often used, which has high performance characteristics and is relatively different low cost. The main disadvantage of mineral insulation is the ability to absorb moisture, due to which the thermal insulation properties are lost over time. In addition, the presence of moisture under the roof leads to the gradual destruction of wooden parts.
To compensate for the described disadvantage, the design must be supplemented with ventilation, hydro and vapor barrier. The insulation itself on the roof of the house is laid on the wrong side of the roof during its arrangement or repair. If we are talking about repair, then damaged wooden elements it is worth replacing, and new ones are treated with protective compounds before installation.
In addition, for effective insulation and reliability, the roof must be well ventilated, so you need to equip ventilation ducts between:
- layer of waterproofing and top coat;
- Thermal insulation and waterproofing layer;
- Vapor barrier material and inner lining.
Materials for insulation of pitched roofs
For roof insulation, various materials can be used, among which the most popular are:
- Mineral wool;
- glass wool;
- polyurethane foam;
- Styrofoam.
The characteristics and features of the materials are different, but they all adequately protect the roof from temperature effects. It is only worth noting that it is best to select materials released in the form of plates - they are much more convenient to mount.

For the arrangement of the waterproofing layer, an ordinary roofing material or a special waterproofing membrane is most often used, which does not allow water to pass through, but ensures the removal of moisture from the heat insulator. When installing waterproofing, you need to ensure that the tightness of the material has not been violated.
Vapor barrier can be equipped from different materials, among which:
- Ruberoid;
- Polyethylene film;
- glassine;
- foil materials.
However, if we are talking about a high-quality vapor barrier layer, then the best option there will be a vapor barrier membrane that works on the principle of one-way moisture transmission - condensate is removed from the insulation and does not enter the internal cavities of the roofing pie.
Roof insulation algorithm - how to lay thermal insulation
Installation of a roof with insulation is reduced to the following sequence of actions:
- First, the installation step is measured rafter legs. Plates of heat-insulating material are cut in accordance with the dimensions obtained, but 1 cm is added to them - this will enable the insulation to stay in place on its own. You can simplify this stage of work when arranging new roof, calculating it so that the distance between the rafters corresponds to the width of the insulation boards.
- A waterproofing layer must be installed in the space between the rafters and the finish coat. The membrane must be attached to the rafters so that it envelops them. For fixation, you can use construction stapler, with which the waterproofing is attached to the rafter legs and the crate. Waterproofing material must be brought to the eaves so that the collected moisture goes beyond the roof. The described method of fastening does not allow to equip full ventilation, therefore, only a special waterproofing membrane should be used as a material.
- If the waterproofing is already installed under the upper part of the roof, then nails are driven into the rafters every 10 cm so that the distance between them and the membrane is at least 3-5 cm. waterproofing and thermal insulation material. In the event that the insulation itself is fastened with a cord, then the nails will also need to be hammered along the outside of the rafters.
- When using heaters released in the form of plates, installation comes down to inserting them into the space between the rafters (naturally, they will have to be squeezed a little so that they go into the gap). More rigid materials must be carefully adjusted to fit the gaps in the rafter system before properly insulating the roof. For maximum efficiency, it is worth installing a two-layer insulation.
- When installing narrow fragments that require joining along one of the planes, you need to make sure that the joints of the first and second layers of thermal insulation do not coincide with each other. The thermal insulation layer should not extend beyond the rafters, and if this happens, then the rafters will have to be stuffed additional beam.
- To fix the insulation, a cord stretched between the nails or a crate made of slats can be used. These slats need to be nailed to the rafters at a distance of 30-40 cm from each other. In this case, the vapor barrier layer must be fixed before the crate is installed - due to the thickness of the rails, an air gap is provided.
- When installing a vapor barrier, you need to make sure that the material is installed tightly. To do this, the joints must be closed with two layers of adhesive tape. Particular attention should be paid to the points where the material is connected to the wall and chimney. When all structural elements are installed, you can proceed to the final stage - the installation of the skin.

Conclusion
Roof insulation is a very important part of the structure, which allows you to increase the thermal efficiency of the roof. Knowing how to properly lay the insulation on the roof, and the high-quality performance of all work will allow you to create a reliable and high-quality structure that will perform its functions throughout the entire period of operation.
January 19, 2017
The correct construction of the roof determines how high-quality its operation will be. This applies not only to the choice of roofing material, but also to the presence and correct installation waterproofing layer. What is the right way to avoid mistakes?
The roof is insulated both during the construction of the roof and during repair work. The technology for installing insulation directly depends on the type of roof, the type of insulation and the purpose of the attic space.
This material is used to minimize heat loss. For best effect it is necessary to choose the right insulation and lay it in accordance with the installation technology. Properly performed work on roof insulation increases the thermal efficiency of the structure by 15%. Thus, in attic room or in the attic you can live all year round.
The highest demands are placed on residential attics, which are located in regions with frosty winters. For summer attics or attics, you can use a thinner layer of thermal insulation material. In the roofing cake of a non-residential attic space, there is often no insulation. It is laid on the ceiling of the dwelling located below. In this case, the space is well ventilated, and this prevents premature decay. truss system.
Thermal insulation for a flat roof
How to insulate a roof minimum angle slope? Conduct installation work can be both inside and outside. Many experts recommend that you first perform external insulation and winter. Exactly winter period and will determine the need for the construction of additional internal insulation.
The roofing pie of a flat roof consists of:
- Vapor barriers;
- insulation;
- Waterproofing;
- A layer of loose building materials coated with a cement-sand mixture.
For external insulation, most often used basalt wool. Rigid insulation materials such as polystyrene foam are also used. Polymer insulation cannot be used in the construction of roofs with high fire safety requirements.

Insulation for pitched roof
The construction of the roofing pie of the pitched roof differs from the previous version. Insulation is laid on the rafters. This configuration of the roof requires attention and knowledge in the installation. insulation material. Incorrectly performed work can damage the wooden structures rafter system.
But how to insulate the roof correctly? First you need to choose a material. Most often, mineral wool is used. It does not support the combustion process, is easy to install, and is characterized by an affordable price. The disadvantage is the ability to accumulate moisture, which further reduces the thermal insulation properties of the material and the decay of the wood of the truss system. Therefore, when constructing a roofing pie, it is necessary to properly position the hydro- and vapor barrier of the roof.
The heat insulator must be laid from the side of the attic. If you are doing repairs, then you need to check the condition of the truss system. If you find structural elements in which decay processes are present, they should be replaced immediately. Remember that all wood must be treated with an agent that prevents the penetration of insects and protects against fire.
The roofing pie of the pitched roof consists of:
- roofing material;
- Waterproofing;
- thermal insulation;
- Vapor barriers, interior finishes.
When performing installation work, it is necessary to provide for the presence of an air gap in which air will circulate. For high-quality circulation in the roof, it is necessary to make special vents under the ridge and in the roof overhang. Layers need to be created between such layers:
- Interior decoration and vapor barrier;
- Waterproofing and roofing material;
- Waterproofing and insulation.
We learned the features of the construction and insulation of roofs of various types.

Construction of a heat-insulating layer of a pitched roof
Glass wool, slab polymer materials, mineral wool are used for the construction of high-quality thermal insulation of the house. The methods of their installation are almost the same, but experts say that the material in the form of plates is much easier to mount, especially if necessary. Remember that the installation of the roof takes place at a height. Therefore, you must take care of your safety. Stand on the roof with confidence.
For the manufacture of a waterproofing layer, roofing felt and a waterproofing membrane are most often used. The latter is advised by experts, because it does not allow moisture to pass through, but it can remove moisture from the insulation layer. Also use glassine, foil materials. The latter are laid in such a way that the foil side is placed towards the attic.
Many experts argue that it is better to use a vapor barrier membrane in a roofing cake. It has the ability to "breathe".
Pitched roof insulation
How to insulate the roof of this configuration, because it is she who is the most popular? Actually, it's very simple. First of all, you need to do some calculations. To do this, measure the distance between the rafters. Given the data obtained, it is necessary to cut the insulation boards, leaving an additional 1 cm on all sides. Thus, the heat insulator will be fixed at a distance between the rafter beams. The fastening of the tile material will be completely easy if during the design it was planned to use this particular material.

If there is no insulation between the finish coat and the rafters, waterproofing should be installed. It should envelop the rafters from almost all sides. Fastening is carried out to wood using a stapler. Waterproofing must be removed under the overhang from the underside of the roof. This will ensure reliable moisture removal. Insulation in this case is laid close, without a layer. In this embodiment, it is better to use waterproofing, which has the ability to "breathe".
If you chose cotton slab insulation, then it must be pressed a little between the rafters. If stiffer materials are used, then they must exactly match the distance between the rafters. Experts recommend laying insulation in 2 layers. If the width of the rafters does not allow a double layer to be laid, then an additional beam is nailed to them, increasing the width.
Thermal insulation should not protrude onto the plane of the rafter legs. Between the rafters, it is fixed with a stretched cord, previously fixed on nails. They are typed in increments of 10 cm, at a distance of 5 cm from the waterproofing. You can also use a counter-lattice for fixing. In this case, the slats are stuffed in increments of 40 cm between the rafters.
The vapor barrier should be stretched with an overlap of 10 cm, gluing the joints with a special double-sided adhesive tape. Particular attention should be paid to the installation of a vapor barrier around the chimney.
The final stage is the lining of the roof from the inside.
Features of the construction of the roofing cake are known, but how much does it cost? It depends on the type of materials used in the construction. Remember that a well-insulated house will pay off in the near future, saving a large amount funds during the heating season.
To understand how to properly insulate a roof, you need to understand its types. The most common types of roof structures are cold attic and attic. In the first case, insulation of the ceilings of the upper residential floor(air attic space does not warm up, hence the name). In the second - laying thermal insulation along the roof rafters. In today's article, we will analyze in detail the process of warming the roof of a cold attic.
The cold attic is the most common, time-tested roof structure that has been used around the world for decades. Widespread due to its simplicity, availability of materials and ease of installation. In addition, in the cold attic there is access to inspect the load-bearing structures of the roof, so possible leaks are easily localized and eliminated with improvised means.

Rice. 1. Cold attic insulation system: 1. Floor beams 2. Stone wool insulation 3. Vapor barrier film 4. Superdiffusion membrane 5. Sparse lathing 6. Inner lathing
As the basis for the attic, wooden floor beams and reinforced concrete slabs are most often used. Depending on the material chosen for the ceiling of the residential floor, the insulation system will differ. Wood is one of the best building materials, which has a number of undeniable advantages: lightness, strength and flexibility. However, the wood is sensitive to moisture: waterlogged wood during operation can bend in an unpredictable way if it picks up moisture and then dries. Therefore, wet wood is not used in construction, and dry wood is carefully isolated from possible waterlogging during operation.
The ability of wood to absorb moisture affects the choice of all cold attic materials. So, when choosing a heater, preference should be given to a vapor-permeable material based on mineral wool: this material will pass all the wet steam through itself, leaving the beams dry. When choosing between glass wool and stone wool, one should remember the ability of the latter to protect the entire structure from impact. open fire. The sintering temperature of glass wool fibers is only about 600 °C, and this temperature is reached already 5 minutes after the start of ignition. Therefore, only stone wool can protect bearing structures, prolong the life of the house and, in the event of a fire, give more time to save people and property.
It is also worth recalling here that any organic heaters (foam plastics, polyurethanes) burn, so it is better not to use them in the construction of wooden or frame house. The burning of some of them is also accompanied by the release of toxic vapors into the atmosphere, the "splashing" of the melt, which poses an additional danger to people. The use of organic insulation in the floor construction requires mandatory protection with a cement-sand screed.
Many questions in the insulation system are caused by the use of various building films. Due to their incorrect location in the structure, the floor beams can begin to rot, which is why they subsequently lose their bearing capacity and collapse after a few years. To prevent this, when arranging a classic cold attic with wooden beams, it is customary to use two types of building films, which we will conditionally call “Internal” and “External”.
The “internal” film is laid from the inside of the heated room and prevents water vapor from entering the insulation from the room. Such a film is called a vapor barrier. When installing it, it is necessary to carefully glue all overlaps with butyl rubber tape, achieving tightness over the entire area. Interior decoration is carried out with a technical gap of at least 3 cm - to prevent local condensation of moisture on the vapor barrier.

Rice. 2.1. Cold attic ventilation scheme
The “external” film performs other tasks: it protects the insulation from moisture from the outside (snow, rain, fog), allows water vapor to escape from the system (if it suddenly appears there) and prevents heat from blowing out of the insulation. Some of these functions can be trusted to the usual polyethylene film, but it will not work to complete all tasks at the same time. Most films either have low vapor permeability - and therefore must be installed with a second ventilation gap, or low water resistance - and therefore do not protect against water ingress into the insulation. The only type of film capable of solving all the tasks at the same time is called the "superdiffusion membrane". Such a membrane has a vapor permeability that significantly exceeds the parameters of the insulation, which allows it to be mounted close to it. And high water resistance allows you to protect the system from the ingress of external moisture in any form.
Thus, the insulation must be protected vapor barrier film from the inside and a superdiffusion membrane - from the outside. It is good practice to lay a sparse lath of boards on top of the "top" membrane to prevent damage to the film or crushing of the insulation when walking in the attic.

Figure 2.2 Consequences of lack of ventilation (1 year, Minsk region)
Figure 2.2 Consequences of lack of ventilation (1 year, Minsk region)
Concluding the consideration of the design of a cold attic, it is imperative to pay attention to the issue of ventilation. Right organized system ventilation of the roof of the house (Fig. 2.1), despite the possible variety of execution, must have three mandatory components: an entry point, ventilation channels and an exit point. The channel for ventilation in a cold attic will be its entire volume. For normal operation, the temperature inside the cold attic must be equal to the street. For these purposes, the filing provides entry points for cold air - the so-called "vents". And in the upper part of the attic, you need to make air outlets using dormer windows, ridge or point aerators.
Most often, in practice, one has to deal with a situation where ventilation is disturbed: all the vents are filled with insulation, and air from the street does not get inside. The second common mistake is the lack of dormer windows or aerators in the roofing. When arranging ventilation, it is worth remembering that the area of the outlet openings should be 10% larger than the area of \u200b\u200bthe inlet openings. In this case, sufficient traction will be created. If the ventilation of the roof is broken, then the truss system is subjected to waterlogging, and the roofing material is subjected to additional overpressure from inside the room. This can lead to rotting of the truss system and loss of it. bearing capacity(Fig. 2.2.), premature destruction of the roofing. Therefore, effective ventilation is a prerequisite for the normal operation of a cold attic system.

In the case of installing a cold attic on a base of reinforced concrete slabs, the system can be simplified. Since reinforced concrete is vapor-tight and is not afraid of exposure to open fire, insulation can be made from organic materials. Here you have to choose from two types of polystyrene foam and polyurethane foam. Polyurethane foams are increasingly appearing on objects, but the sprayed compositions do not always have the declared stable properties after solidification, and their strength is sometimes insufficient for the dynamic effects of a pedestrian load. The well-known granular expanded polystyrene (EPS) is still used in construction today. However, it has already been replaced by more modern extruded (extrusive) expanded polystyrene (XPS), which is characterized by lower thermal conductivity (which reduces the required insulation thickness by 25%), reduced water absorption by 5 times and increased strength. When arranging a cold attic according to reinforced concrete slabs With the use of XPS, there is no need to spend money on the purchase and installation of building films: the material endures all external influences, is not afraid of blowing and even soaking.
For determining required thickness thermal insulation, we will use the technique, which is described in detail in the TCP 45-2.04-43-2006 “Construction heat engineering. Building design standards. According to this document, the minimum requirements for the thermal resistance of the structure are established. For a roof, it is taken at least six, and is calculated by the ratio of the actual thickness of the construction material (in this case, thermal insulation) to its thermal conductivity. Thus, the answer to the question "How to insulate the roof of a house?" - obvious: the required thickness of the insulation is calculated by multiplying the thermal conductivity of the material by six. This simple math will allow you to create a cold attic that fully meets all applicable standards. For complete insulation in our climate zone need 25 cm stone wool. And when using extruded polystyrene foam- 20 cm will be enough. In a similar way, you can calculate the required thicknesses of the rest thermal insulation materials. For comparison: to get a similar indicator by backfilling expanded clay - you need a layer more than half a meter thick!
In the next part, we will tell about the device and proper insulation attic (warm attic).
Text: Andrey Povarnitsyn
Roof attic insulation required condition, otherwise it will be uncomfortable to be in it: in winter it will be cold in it, and in summer it will be unbearably hot. Why do we need such an attic if it has unsuitable living conditions? If the attic is insulated, then you can spend the night in it and spend time with your family, for example, in the country, or simply store some things on it without fear that they will become unusable. The technology consists of the following stages.
First you need to arrange steam and waterproofing and ventilation of the roof. After all, without this it will be impossible to apply a layer of insulation in accordance with all the rules. should be applied with high quality, considering. It is applied from inside the attic so that in winter warm air, rising from the bottom up to the attic, does not harm the structure. mansard roof: did not create mold and did not activate the process of rotting of boards and damage to wood due to the penetration of microorganisms into it. prevents water from precipitation (snow, rain and hail) from entering the roof, protects against mechanical damage and other falling objects.

As a rule, foam plates with a thickness of 10-15 cm are used. The use of expanded polystyrene is characterized by several advantages, namely:
- The insulation does not sag, and the attic looks beautiful.
- Tight fit of foam boards.
- The heater does not delaminate.
- The attic space retains its insulating functions.
The attic insulation process is divided into 2 stages:
- Wall insulation.
- Warming slopes.
Walls must be insulated both from the inside and outside. When insulating slopes, a frame is used, which is insulated with polystyrene foam. Also, the frame is subject to waterproofing and vapor barrier. Styrofoam is a heater that does not allow moisture to pass through the roof, which by itself is good for roof insulation (attic floor). Even if there is a crack in the foam, it still protects the roof well from moisture getting into it, but still you should not take risks and allow damage to the foam and mechanical damage in it.
Features of thermal insulation of the attic
Warming process mansard roof attic space is carried out according to the following scheme. The first is to properly install the vapor barrier and waterproofing. The second rule is that it is necessary to insulate the entire room with foam plastic, and not its individual parts, because it is complete insulation that will give the result, and partial insulation may be completely useless. The third rule: if there is no ventilation, then the ingress of condensate can aggravate the situation and not give the desired result from the roof attic insulation process. Insulation for the attic can be like this:
- Mineral wool for the attic is the most common and effective material for attic insulation. Either mineral slabs or mats are made from cotton wool.
- Vapor barrier films - overlapped and sealed with adhesive tape. Vapor barrier is an important condition necessary before the process of insulation.
- Expanded polystyrene or polystyrene, polyurethane foam and other bulk insulation.
- Penoplex - perfect option for the attic.
There are many materials for insulation, the choice is large, for every taste and budget, but it is worth considering all the individual characteristics of the attic, opportunities and other factors. The main thing in this matter is to approach the process correctly. And then the house will serve you long years It doesn't matter if it's a cottage or a home. https://www.youtube.com/watch?v=0OND8d5LNeQ Attic insulation should be given more attention than insulation of the house itself, since the attic is protection from the outside from all unpleasant atmospheric factors.
Not at all a simple knot, as a rule, we often ignore it, both by roofers and façades. They often do it badly, because it closes hemming material If you can't see why try. Let's figure it out.
Just imagine last crown boxes at home, the ends of the rafter legs fall outside the perimeter of the well of the house, pockets are formed between them, to plug these pockets they push in, a sawn board on the knee, and that’s it, the fit at the board is bad, they put it in order to be, but in the case of insulation along the rafters this node is the completion of the wall and the contour of the insulation along the rafters. Meanwhile, in a given place of the wall and roof, processes of increased danger always occur, for example, with outside in winter, warm air flies there from ajar windows, and from the inside, this unit is a leak of warm air from the room with a poor-quality vapor barrier, which ultimately leads to the formation of icicles on the eaves. And for a number of other reasons.
Poor thermal insulation of ceilings. Poor attic ventilation. On the warm roof done wrong roofing cake. Natural factors during thaws. Improper use of the attic space.
What I am talking about in this article is just one of the stages so that this does not happen to your roofs.


In fact, there is nothing particularly difficult, you just don’t need to rush and do everything carefully, carefully. Of decisive importance is the material with which you work and accessories, as a rule, all connections are glued and sealed, and it is best to use materials and accessories from one manufacturer, this will guarantee the long-term operation of these units.


The hero of this article, who is also a “craftsman in the frame”, on whose behalf the story is being told, is Candidate of Technical Sciences Valery Pavlovich Treskov. He recently retired, having worked for several decades as an assistant professor at the Moscow State University of Civil Engineering. But he is not a professional builder. His profession is an engineer construction machines. So warming for him is amateur performance. And in this article he shares his personal experience on the device of the internal pitched roof.
How it all started
Two years ago, we inherited land and decided to build a house there for year-round use. We chose a project at the company and ordered her to build a house from.The house was built, and when they began to settle in, it turned out that it was too small even for a small family. Therefore, the second floor was decided to equip a bedroom in it. We studied the instructions of different companies for roof insulation, received an exhaustive consultation at the company's Design Center and began to think over the insulation project and purchase material.
On the second floor, it was necessary to insulate two gables with windows and both roof slopes, without taking off. It is about the work on the slopes that I am going to tell in detail.
The roof in our house consists of unevenly installed (in increments of 550-620 mm) rafters with a section of 100x20 mm. On the rafters there is a crate 80x20 mm with a step of 350 mm. Laid on top of the rafters, and along it -.
Complete roof insulation system consists of the following layers (from top to bottom):
- crate,
- ventilated gap to remove water vapor from the insulation,
- windproof membrane,
- vapor barrier membrane
- finishing layer for the interior.
We bought Light Butts Scandic insulation, wind and vapor barrier membranes, galvanized nails different sizes(2x15, 2x30). And the work began.
Ventilation device
The first thing to do when installing is ensure a constant ventilated gap between the roofing material and the membrane, which is 20 mm. It will be easiest to maintain the accuracy of the gap with the help of rails 20 mm wide, which are nailed on the sides of the rafters close to the crate.This is what the roof slope looked like from the inside before the start of insulation work: 
Reiki I sawed from scraps of boards left over from the construction site. The length turned out to be about 30-60 cm. I baited 2-3 nails 2x30 into each rail so that their sharp ends did not protrude from reverse side. And pretty quickly nailed the slats on the sides of the rafters.

Where the rafters were attached to the posts, it was not possible to nail the slats. So I:
- unfastened each rack from the rafters,
- shortened by about 45 mm from the crate parallel to the rafters,
- fixed the rack to its previous position with a clamp and attached it back to the rafter with a screw.


Then I started assembling windproof vapor permeable membrane type A:
- Cut out a piece first. windproof membrane 50 mm wide more than the distance between the lags and 200 mm high.
- Then he attached the membrane with the same slats to the sides of the log, and below - to the wall beam. At the top, the membrane has not yet been fixed - it simply adjoined the longitudinal beam connecting the logs. So I nailed the slats to all the rafters on this side of the roof.
- Then he began to fix the membrane between the rafters. Since the distance between them is different, I measured the width of the canvas each time and cut off 50-60 mm more. The membrane was pressed with the same rails, but the driving step was reduced in order to tightly press the membrane to the rafters. I already hammered 3-4 nails into the rails for strength. The edge of the stretched web protrudes from the edge of the rail by the same amount.
- Next stage - increasing the width of the rafters. This operation in my case turned out to be forced, because the initial width of the rafters was not enough to lay the required number thermal insulation boards. I bought boards 140x20 mm 3 m long on the building materials market. I cut them in half lengthwise and got boards about 70 mm wide. I attached these boards with screws at the bottom to the rack, and at the top - to the ceiling board. Then these boards were additionally fixed wooden lining: at the bottom of the rafter and in two places between the post and the ceiling board. Thus, I increased the width of all rafters.
Stage of laying insulation
This operation had to be done by two people, since one person cannot hold all the components of the system at the same time. The size of the soft plate "Light Butts Scandic" is 600x800 mm.You can choose a heater for a country house on our market. and compare the offers of the largest online stores.
Unbranded Thermal insulation building tow 10kg
829 rub
LOOK
OBI
ROCKWOOL Thermal insulation ROCKWOOL LIGHT BUTTS SCANDIC 4.32 sq.m
1 099 rub
LOOK
OBI
Basalt thermal insulation 2 pcs 1200x500x5 mm Basalt thermal insulation 2 pcs 1200x500x5 mm
309 rub
LOOK
OBI
ROCKWOOL Thermal insulation ROCKWOOL Light Butts Scandic 50 mm 800x600 mm
649 rubles
LOOK
OBI
We started to insulate the opening with a distance of 600 mm between the rafters. The first half-size 600x400 slab was laid down. And they realized that the most difficult place is the connection of the rafters with the lower lags. Here a niche appears, it seemed very difficult for us to insulate and further finish it.
Therefore, we decided to arrange a ledge two widths of lining high- approximately 180 mm. At this height, the lower longitudinal bar 50x50 mm must pass to secure the overlapping fourth layer of insulation. Therefore, before laying insulation layers, boards with a section of 100x20 mm and a length of 350-400 mm were vertically attached to the rafters and logs (180 mm for lining, 50 mm fastening to the log, about 120 mm - for fastening to the rafters), in which a triangular nest was first sawn out under bar.

After laying the second plate of the first layer and holding them, they laid the second plate 600x800 mm on them. And she was held by slats inserted into the gaps between the main and additional rafters. For holding the second layer, this is a fairly simple workable solution.

I will elaborate on the process plate fixation.
- Nails 2x20 with large hats were hammered along the rafters, without finishing 2-3 mm to the end. The pitch of the nails is approximately 300 mm. On adjacent rafters, nails were driven in with a half-step offset.
- A thin strong twine was tied to the lower nail.
- The first slab of the third layer was laid.
- Gradually removing the slats holding the first two layers of slabs, we laced the slab of the third layer with twine through the nails and fixed it on the last nail.

The slabs of the first, second and third layers were laid sequentially and laced again. And so to the very top of the opening. This technique made it possible to keep the plates well in an inclined suspended position.
Then the nails for lacing were hammered into the board to the cap, and the string was not removed. Now the surface of the third layer of insulation is ready for laying the fourth layer of insulation, which we had to lay in horizontal rows, overlapping the rafters with them.

For the installation and fixing of the last, fourth overlapping layer of insulation, we provided for the fastening of bars with a size of 50x50 mm horizontally to the rafters along the entire length of the second floor.


As a result, we got a surface with straight parallel bars, fixed with a constant step.
Preparing, laying and fixing the overlapping layer of thermal insulation
- In the center of the bars with outer side hammered nails 1.5x20 in increments of 300-400 mm, but not to the end, and so that the caps protrude by 2-3 mm.
- Hammered nails on neighboring bars half step offset.
- A string was tied to the extreme nail of the bar and, having laid the slab neatly flush with the bar in the opening (it is 10 mm wider than the opening), they laced the opening with a “snake”.
- Having fixed the twine, they laid the next slab horizontally, secured it with lacing, and so on.
- Then they moved to the next row, and so on to the very top. The top row is narrow, therefore, having cut off the required width of the slab, we installed and fixed it as usual.


Membrane installation
After laying the last layer of insulation, we proceeded to installation vapour-tight membrane type B. The membrane was fixed on the bars with a stapler and a bracket 10.6x8. We measured the length - the distance between the outer edges of the second and upper bars - and cut off the canvas from the roll with a length of 30-40 mm longer.
The membrane web was attached as follows:
- At the beginning, the middle part of the membrane was shot to the bottom bar.
- Then, slightly stretching the canvas, to the upper, middle and to the rest of the bars.
- Then, from the central (fixed) line to the right and left diagonally up and down, sections of the membrane were pulled, straightened and attached to the bars (this is how wallpaper is straightened when pasted on a wall).
- Further, sagging areas were additionally attached, wrinkles were removed (if they appeared), and as a result, an evenly stretched canvas was obtained, ready for sheathing.

The first canvas is reinforced.

The lining for beauty was attached to the bars with inconspicuous finishing nails 2x60. Since the length of the lining was about 3 m, it was decided, for reliability, to fasten it to the lower, second and upper bars with ordinary 2.5x50 galvanized nails.

Subsequently, they also nailed to the middle bar, removing the sagging of the lining of the lining with an ordinary nail (without hammering it to the end).

When upholstered with clapboard, special attention was paid to the first board - it must be strictly in a vertical plane. The rafter board was taken as the basis. It is more convenient to nail the lining together, but you can do it alone. In the latter case:
- I nailed a rail to the ceiling boards at a distance of 30-40 mm from the bar, so that the lining canvas could freely pass into the gap.
- At first, the canvas rested at the top on the rail, and at the bottom - on the floor. The lower part of the canvas was inserted into the groove with a comb and, pressing the canvas against the lower bar, pushed it down to the stop into the horizontal lining.
- Then he gently tapped the edge of the canvas with a hammer to completely connect the canvases and finally nailed lower part lining canvases.
- Then he inserted the comb into the groove along the entire length of the canvas, knocking, tapping on it until all the cracks disappeared.
- Further, pressing the board to the indicated bars, he nailed it to the latter.

After nailing 5-6 canvases, I marked the points for driving the finishing nails (the points should be on the same horizontal straight line) and hammered the finishing nails at a slight angle so that when the canvas was pressed against the bar, the gap between the canvases with the clapboards decreased. And using the same technology, he nailed the next batch of canvases. Using the same method, we insulated another roof slope.
Other Helpful Resources
 Actions of the lender if the debt is not returned
 Why did Lera Kudryavtseva and Sergey Lazarev break up?
 IQ test result: what do the scores mean?