Dollhouses for girls from plywood. My puppet house. Furniture for a doll house
All photos from the article
In this article we will look at how to make a puppet house from plywood. Early, you can always go to the toy store and buy a ready-made model there, but there are several reasons for not hurrying with such a decision and still take into hand tools with the goal of creating a small miracle for your child. So, proceed.
General provisions
To begin with, let's deal with the motivation, why at all it is necessary to take for the manufacture of a house for dolls with your own hands:
Advantages of their own manufacture
- Saving. The price of factory models is high enough, while homemade will allow to significantly save family budget;
- Uniqueness. The project you realized will be the only one in its own way, your daughter will definitely not meet the same toy in his girlfriends;
- Compliance with desires. In your doll house there will be exactly the rooms, such shades and such decorations that the child will wish;
Tip: Connect your child to work, it will allow you to spend more time to spend time and make a homemade toy even more beloved.
The advantages of choosing plywood
So why should be done own handsAnd not run to the store, we figured out. Now let's decide on the material.
The wooded plate consists of several glued sheets of wooden veneer, which determines the presence of the following advantages:
- High strength characteristics. Durable children's toys are always much longer than their garlands;
- Easy processing. Plywood is easily sawn, painted, dried, milling and fixed by nails or self-drawing;
- Aesthetic appearance. The top veneer has a beautiful original textured pattern and a pleasant eye with a warm tint;
- Low thermal conductivityThrough what warm to the touch. For a child, this is an important factor;
- Relatively low cost. Wood-layered stove does not differ high cost, besides, it will take quite a few material to perform the task under consideration.
But, speaking of the advantages of plywood, it is necessary to mention and its possible disadvantage that has an important meaning. The glue used during the production of the wood-layered plate may contain formaldehydes with high toxicity.
Therefore, be sure to pay attention to the appropriate labeling and select an environmentally friendly product, because it contacts your child with it, and the following marking will help you:
Getting to work
The instruction begins, as in most cases, with the preparation of all necessary accessories that you may be needed in the process of implementing a conceived project:
Step number 1: Preparation of accessories
- The required number of plywood sheets is 5-7 mm thick;
- Lobzik on a tree sawing;
- Joinery glue to create a roof;
- PVA glue for fixation decorative elements;
- Assembly tape;
- Paint and brush;
- Segments of wallpaper with small pattern;
- Cardboard corrugated type for roof;
- Tree rules that will serve as stairs;
- Pencil and construction roulette for applying all the necessary sizes;
- Self-adhesive film with wood pattern for floor formation.
Now you need a drawing puppet Domika From plywood with dimensions to prevent errors in the assembly process and get a truly beautiful and functional design.
Step number 2: Drawing
Drawings of a puppet house from plywood can be borrowed from the Internet, along the way, making their own adjustments, or draw everything yourself.
It is noteworthy that the installation of the front wall can generally refuse that there were constant free access to the house.
Step # 3: Assembly
Having everything you need at hand, including drawings of a puppet house from plywood, proceed to the main task:
- Location on a sheet of plywood all parts of future housing for dolls;
- According to the markup, cut the walls and other structural elements with the help of an electric bike. Also create window and door loops;
- Sand all the ends to eliminate the possibility of getting a child injury about sharp edge sections;
- We smoke the joints of the elements of the middle of the structure and connect, fixing the location of the compound by assembly tape;
- Next we glue the back wall. Here you can already do without scotch. The protruding glue carefully remove with a clean vet;
- Then, with the help of adhesive mortar, mounted and all internal partitions;
- We produce roof installation;
- From the prepared cardboard, we cut a small "tile", after which we stick it on the roof and stain with the help of brush and paint in needed color;
- Prayer or salary chunks of wallpaper wall, giving them an aesthetic well-groomed look;
- On the floor glue a self-adhesive film, creating the illusion of the present wood coating;
- Cutting on small parts Wooden rules and assemble stairs from them;
- Mount the staircase span, we put the furniture and hang curtains. On this, the process of assembling a puppet house from plywood is over.
It is not worth limiting the own fantasy. You can, for example, to build a fireplace from matchboxes, Singing carpets from pieces of fur or wool, install a gym or even pool. All in your hands. The main thing is that the result is pleased with the daughter.
Conclusion
The process of creating puppet plywood Domika A simple and very exciting, especially if you connect to him and the child itself. As a result, an inexpensive original beautiful structure will be released, which gives rise to proud of the work done. The main thing followed outlined recommendations and be careful.
Video This article will give you the opportunity to get acquainted with some additional materials regarding the information provided.
Become a wizard for a child, embody a child's dream into reality! If you have aroused after reading questions on the topic, then you can ask them in the comments.
Plywood is a wonderful material that has an extensive area of \u200b\u200bapplication. It is suitable for the arrangement of floors, construction formwork designsmanufacturing decorative jewelry To create a coziness in the house and garden, including children's toys.
Note!Despite the fact that you are facing the task of making a children's toy, the features of the construction of a small plywood building are in many ways similar to engineering and technical characteristics Real structures.
In this case, the material from which the puppet house from plywood will be performed with their own hands is the plywood of the FC brand.
Eight Millimeter Plywood is taken for:
- side walls;
- floors;
- ceilings;
- partitions.
For the manufacture of back wall It is better to take more than a thin material - 3 mm.
Preparatory stage of manufacture
The house for plywood dolls will not require too much tool tool, many of them can be at home, so you do not have to spend too much.
Take care of availability:
- lobzik;
- fine-skinned hacksaw;
- drills (well, if she has a rack);
- file;
- two clamps;
- solder.
In addition, you will not hurt to acquire a manual disk saw, which will accelerate the performance. You need a screwdriver and hammer as auxiliary tool. It will also require a set of nails, screws and adhesive composition.
Materials:
- leaf plywood standard size (1525x1525 mm) 8 mm thick;
- plywood sheet of standard size 3 mm thick;
- round rail (0.6x1000 mm);
- square rail (10x10x1500 mm).
In addition to the materials for the construction of the body, you will need items to organize lighting in the house.
Lighting components:
- light diodes (warm white light, size 5050, 3,000 K);
- fRC flat cable (34 veins);
- tamblers (MTS-102 A1);
- pBS power supply 5-0.5 (plug 2.5);
- resistors;
- power socket designed for DS-026C 2.5 panel.
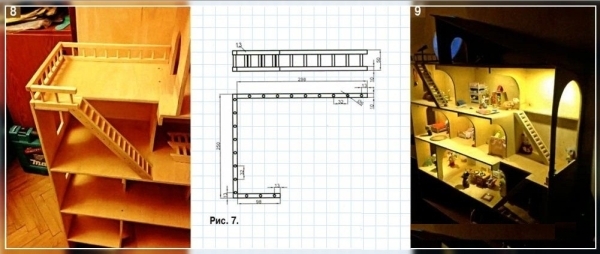
Production of house components
The following for a puppet house, with their own hands from plywood, the scheme fully reflects the features of the laying of a toy building, which will facilitate the manufacture of all parts.

Note!Performing parts markup on a sheet of plywood, do not forget that the elements must be placed rationally. In addition, consider that FC plywood can have one side cleaner and neat than the other. Therefore, when marking the ceiling, the clean side should be placed on top, and on the side walls - outside.
Use in order to make a puppet house with your own hands from plywood photos that you will find in this article. They fully reflect the order assembly.
The design of the house has eight partitions. These parts are made of rectangles with the 200x247x8 mm parameters. All the necessary cuts on these elements are performed using a jigsaw based on the diagram below.

After the manufacture of partitions, it is necessary to handle the edges of these parts with a file to get rid of irregularities and defects, as well as too sharp faces, because you are making a toy with which your child will play.
Execution of shelves that are essentially inter-storey overlaps, carried out with a hacksaw. To do this, you need to make rectangles: four of them with parameters 894x247x8 mm, one - 894x222x8 mm. You can choose the width of the lower shelf yourself, based on the sizes of your plinth. In the upper shelves it is necessary to make cuts designed for stairs, which will partially be performed using a hacksaw.
Note!By drinking out the side walls, do not forget that there will be a small bevel on the lower edges. Cutouts that are performed under the plinth are made on the place based on its size. The windows placed on the side parts of the house are made up with a jigsaw. To do this, you need to drill holes so that you can enter the punch. After execution window Operactions Clean their files.
From how thorough and careful will be the manufacture of parts, not only the external attractiveness of your product will depend on, but also its stability, as well as strength.
Take advantage of performing a puppet lodge with your own hands video, other options for designs can be made of plywood. One example is indicated below.
Home Assembling Works
After you manufacture all the details, it will be possible to start assembling the structure of the structure. The first thing to be done is to consolidate the partitions with the help of screws to the shelves. To fix each detail, you need to use three fixing elements (self-sufficiency), drill auxiliary holes for them and do not forget to take into account the location of partitions that should be placed one above the other.

After the design of the plywood sheet with a thickness of 3 mm is collected, the rear wall of the house is cut. It is fixed with small shoe carnations to partitions (to their back edges) and shelves. Then the roof is fixed.
To perform stairs, take the long trunks of plywood with a thickness of 8 mm and cut down with a disk saw on the strip (20 mm). After that, they can be revealed to the basic elements of the stairs: steps and theetics. When assembling the staircase for fixing elements, use carnations, glue and clamps. Do not forget to control the installation angle of steps.
As for balcony fencing, this element is equal to the size of the section. To make them take the rails with parameters 10x10 mm and rounded sticks (0.6 mm), which will perform the role of baluster. After performing a pair of regards for these sections, make holes in them for the placement of balasine.
Balasine sticks are fixed in these holes with adhesive composition. Try to align the design before glue thickens, because it is very important that all the elements have the right level accommodation.
Note!To make it easier for you to level it, it can be put between flat sheets of plywood with strut using clamps. This will exclude the possibility of screw skew to the moment until the adhesive dry.
Lighting work
The lighting system is a dozen light diodes that need to be placed in the houses of the house and on its floors. Network adapter serves for them feeding. The output voltage is 5V, the maximum current of 0.5 A. in the amount of consumption level will be 0.35 A.
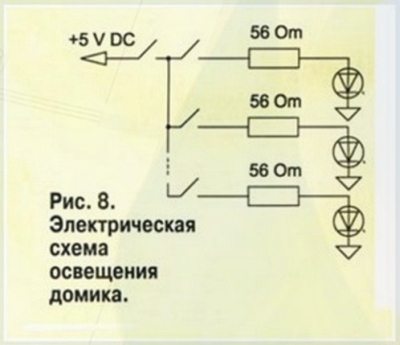
In the role of switches will perform a tumbler, which should be placed on the side wall of your house on the right side. From the inside of the house of the house, the contacts that are planted should be closed using removable casing fixed by self-draws.
To make the casing, you need to take a plywood plate with the 200x247x3 mm parameters. On the sides you need to glue two parts with a size of 20x200x8 mm.
After conductors are swept to light diodes, they can be pasted into the holes that need to be made in the walls of the rooms in the area of \u200b\u200bthe ceiling and fasten at the placement of the chandelier, as in ordinary house. It is best to use cyanoacrylate glue, the wires must have PVC isolation.
Each child loves to play with her toys, and especially build them various houses. At the same time, the most diverse materialswho were at hand ( cardboard box, stool or blanket).
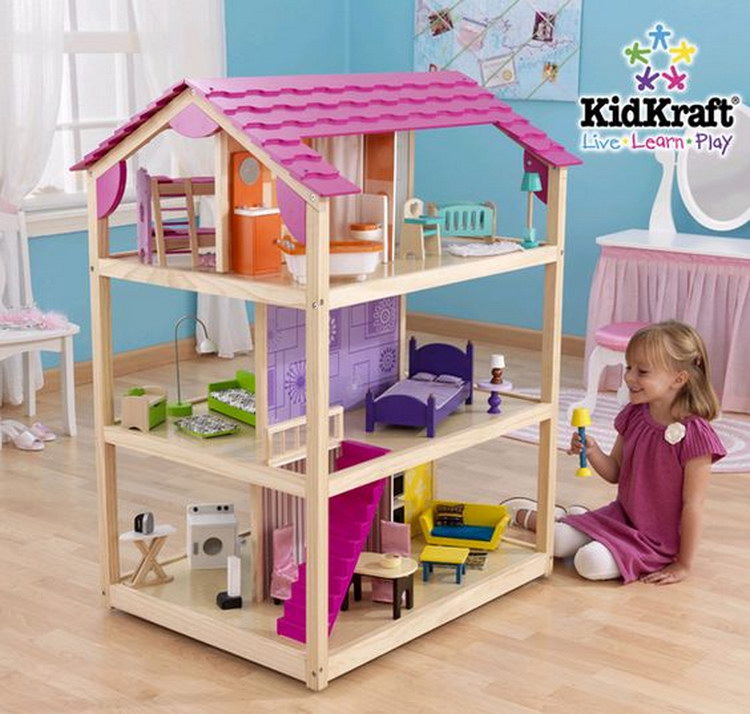
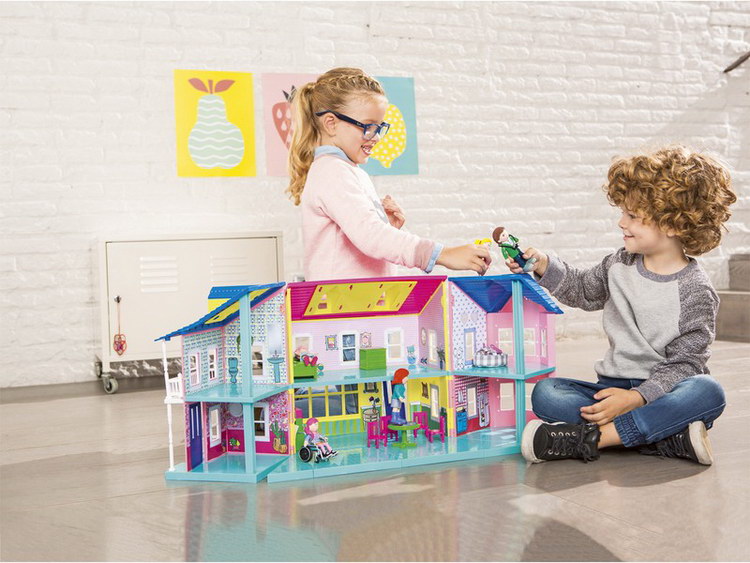
Today in the market of children's goods there are a large number of ready-made toy houses, and the variety of species, sizes and materials used for their manufacture can affect both adults and children. At the same time you can choose how large dollhouses and small ones.

Large dolls
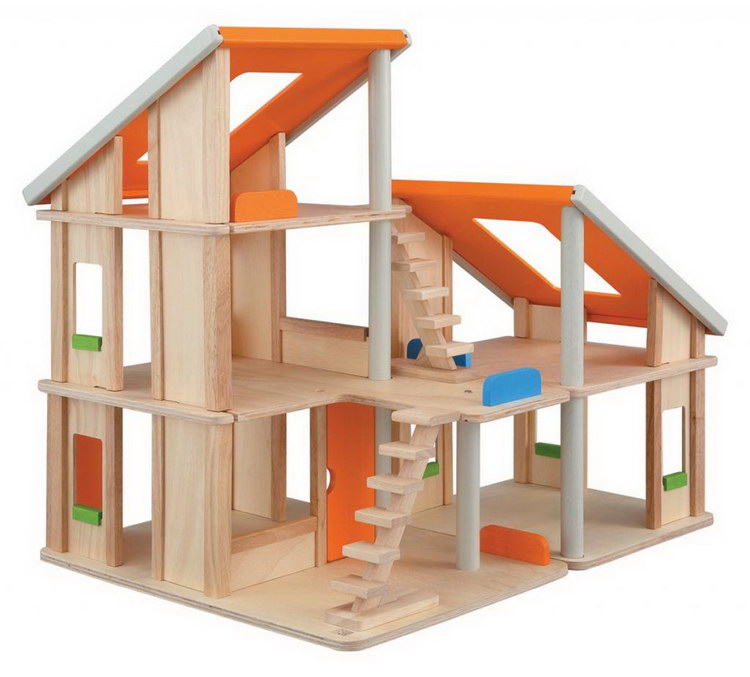
The most popular doll houses (gaming houses) are considered at home. from wood or plastics.As a rule, they are installed in the garden, in the country or in the yard of their own home. So the child can spend more time on open airPlaying with your toys and dolls.

As for the design, you can say such houses for dolls are made in the form of a castle or fortress. Also in the market of children's toys can be found two-storey models of houses with a variety of horizontal barns and slides. They have a strong base and are very durable. The roof will close the child not only from the rain, but also from the scorching sun. The dimensions of such structures are quite large, which in turn allows you to accommodate in them not only all toys, but also a large number of friends! However, before buying, it should be noted that such gaming houses should be purchased to children from the year and older.

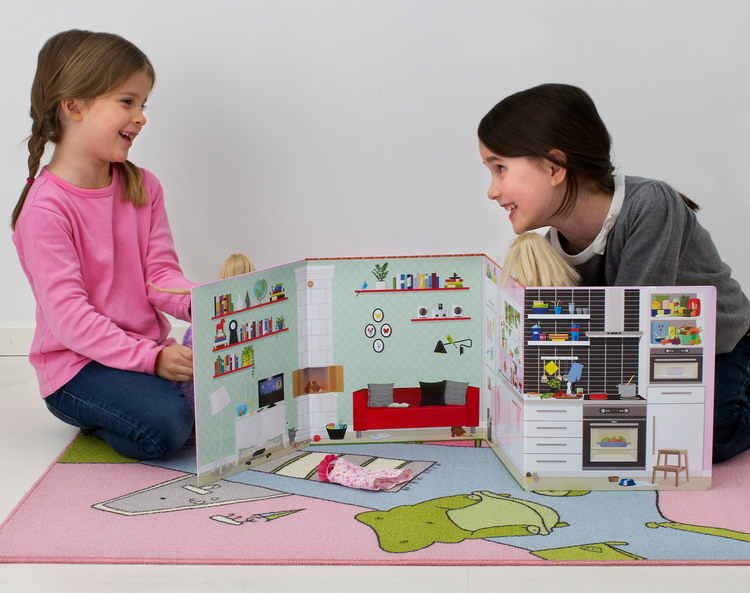
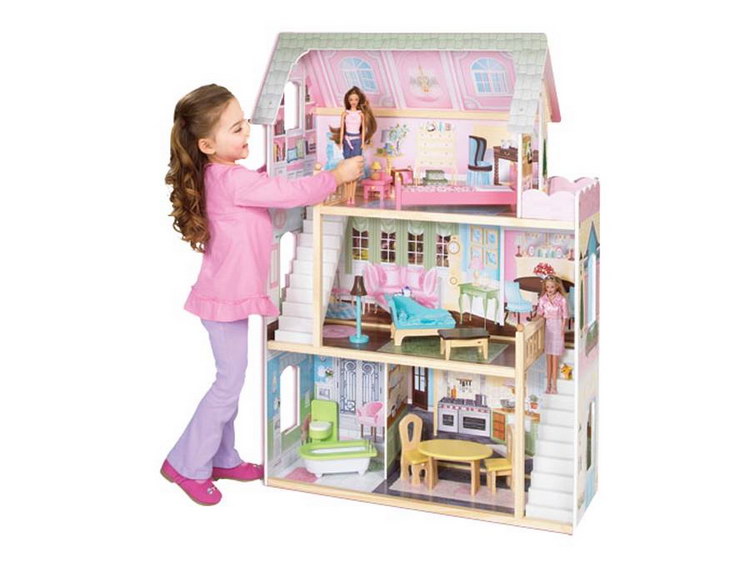
If you want to make a gift daughter, you can buy for her house for dolls.This is the so-called compact option that provides for the game in the room. They can be installed in any room - children's, living room or gaming. Usually they are made in the form of a palace for the princess, gingerbread house or a beautiful mansion. Such doll houses The child will fold all his toys and independently bring order in it. These houses do not have sharp corners, thereby being absolutely safe.
Buy a similar wooden houseyou can in the network toys Imaginarium - the wooden doll house Amanda, the price of the question is 16900 rubles.
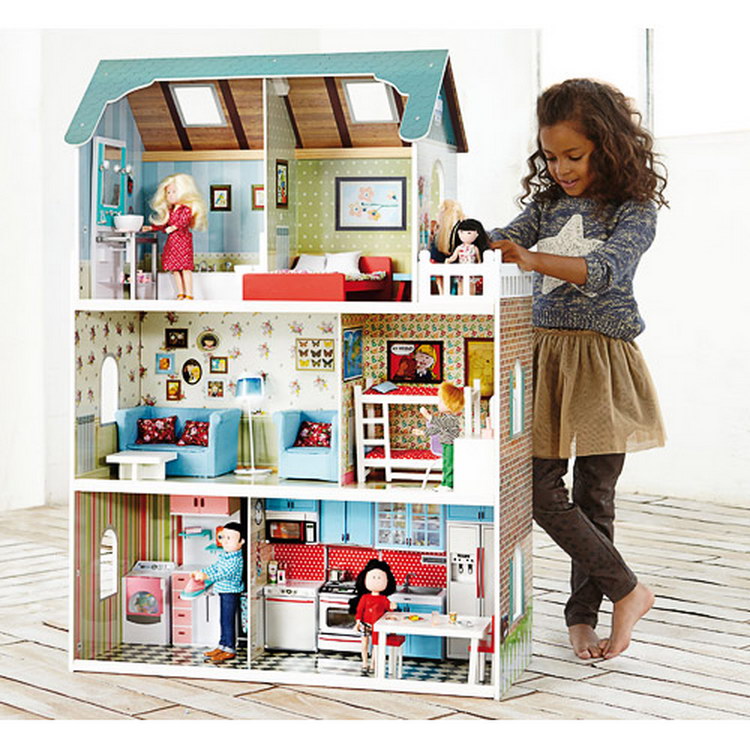
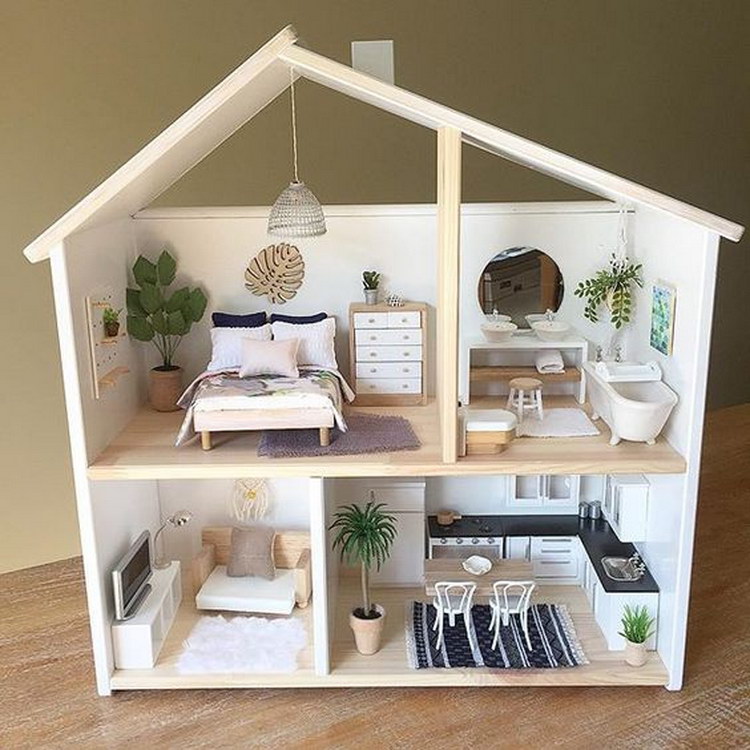
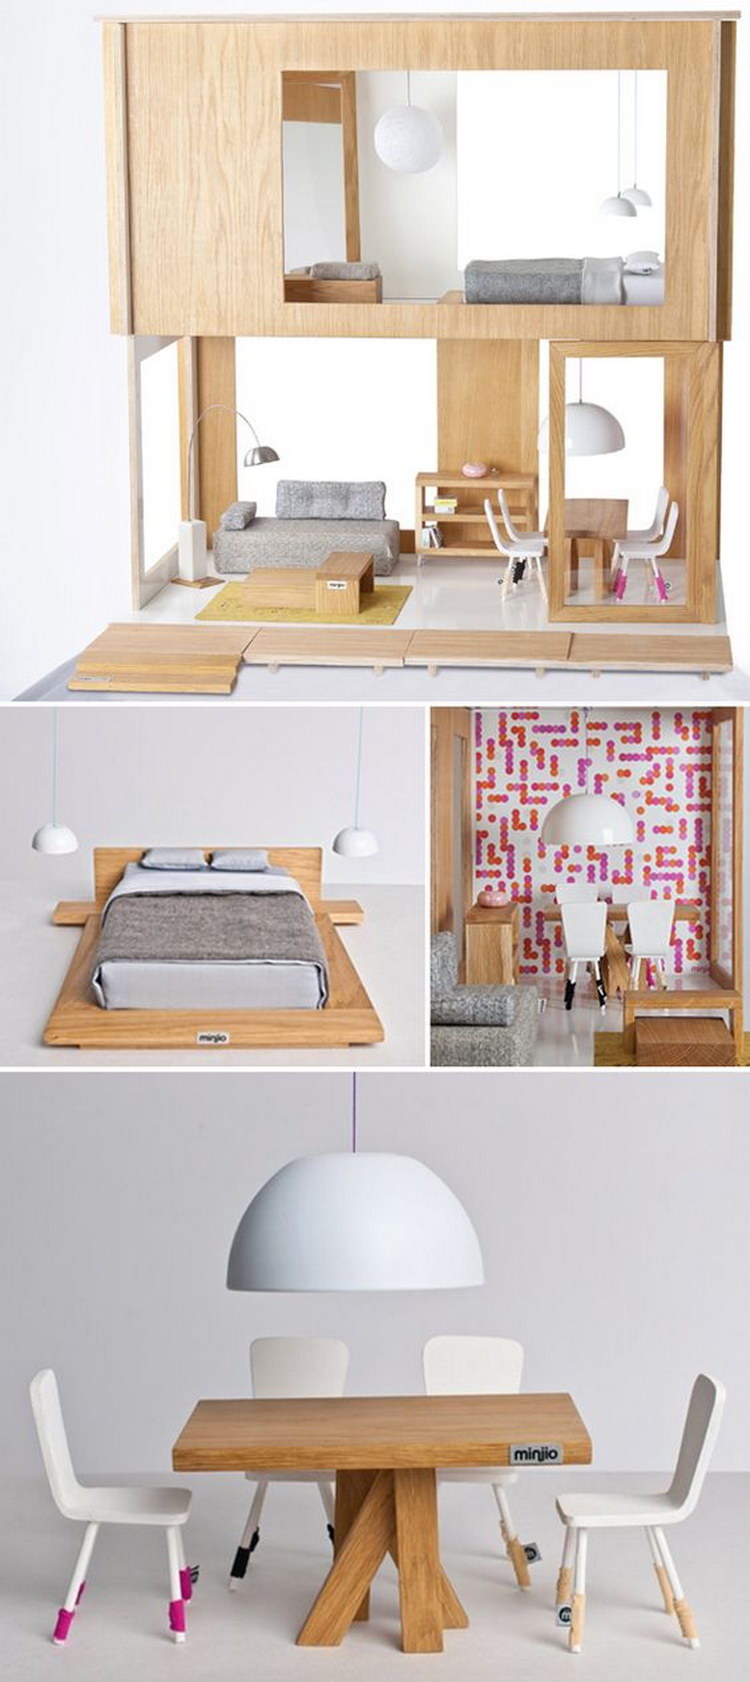
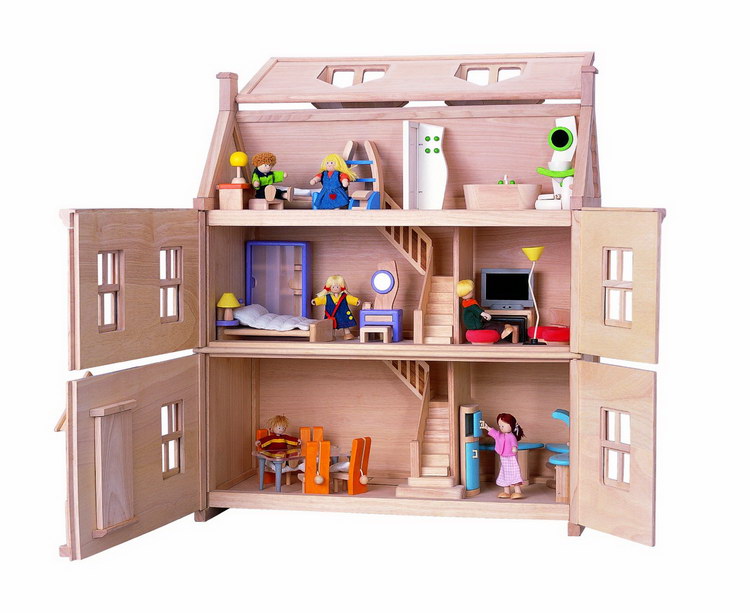
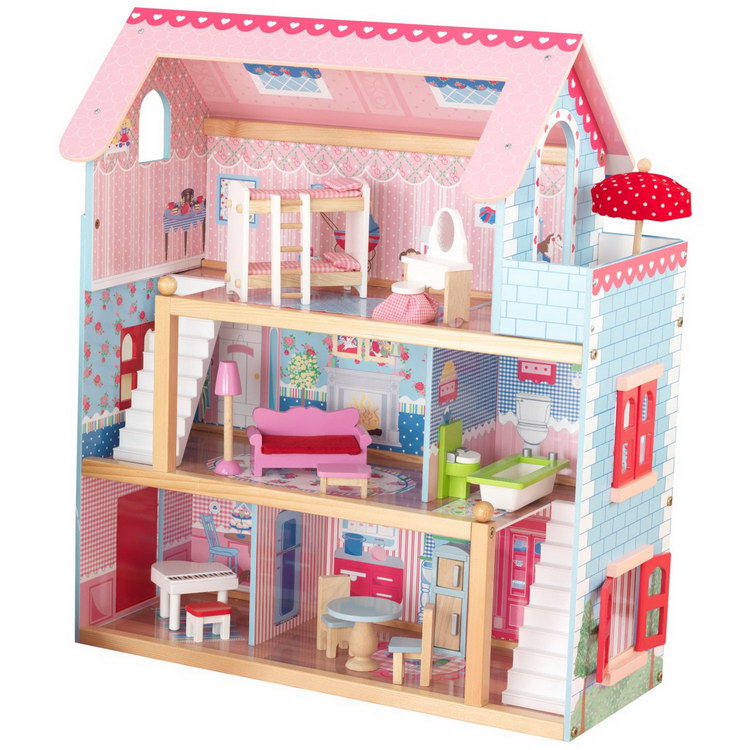
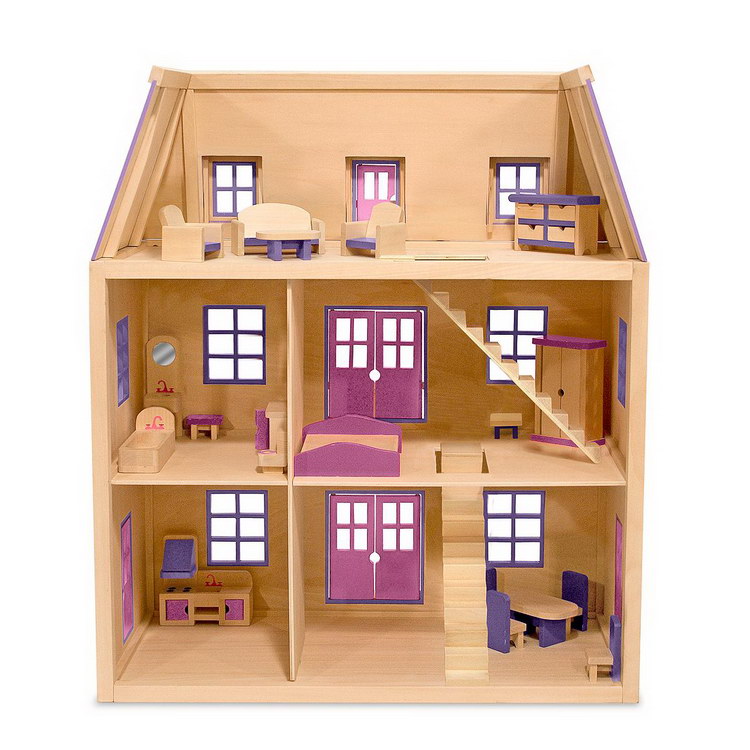
Small doll houses
They are also manufactured and various material. More often meet models performed From wood. They are ideal for games with dolls. As a rule, wooden doll houses are better to acquire with toys to eliminate the need to look for dolls suitable for the size of the house. A variety of accessories ( appliances, Furniture, dishes) can also be purchased additionally.
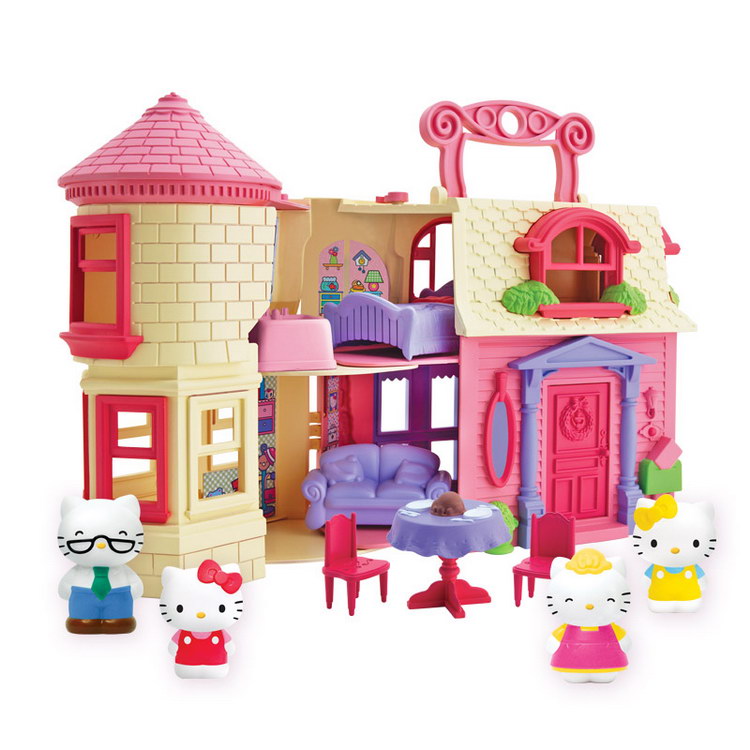
Popular puppet houses are kits made from plastics, Since the kit already has all the necessary accessories and furniture. They are manufactured with all sorts of sound and light effects. As a rule, manufacturers use very bright colors for their design. Externally, such structures are made in the form of a palace (castle), country house or farm. To a number of models, manufacturers additionally produce various interesting extensions, swimming pools, guest houses, gazebos, balconies or terraces, so during the game the child can show fantasy and create comfort yourself.
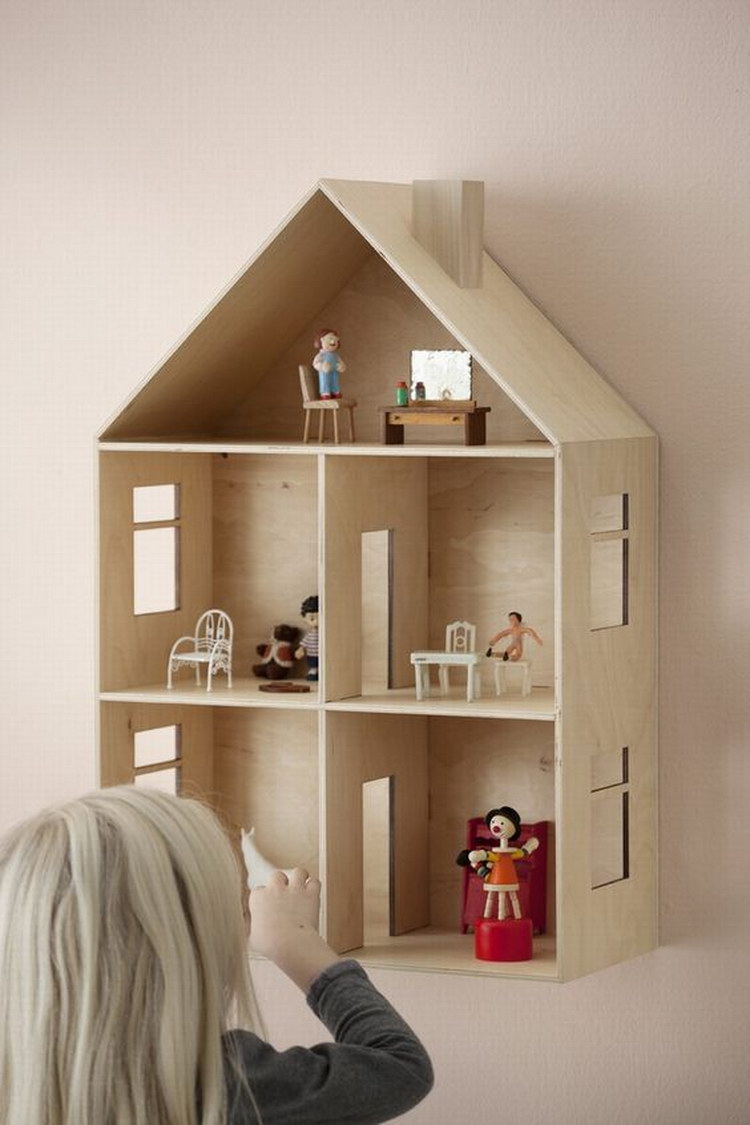
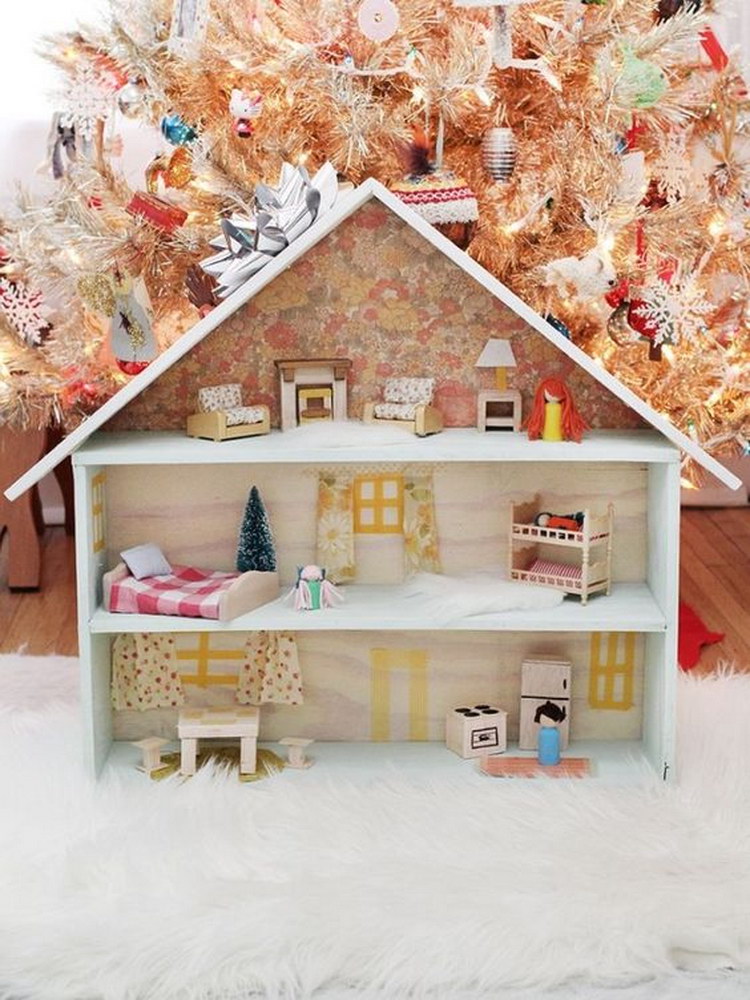
Inexpensive puppet house
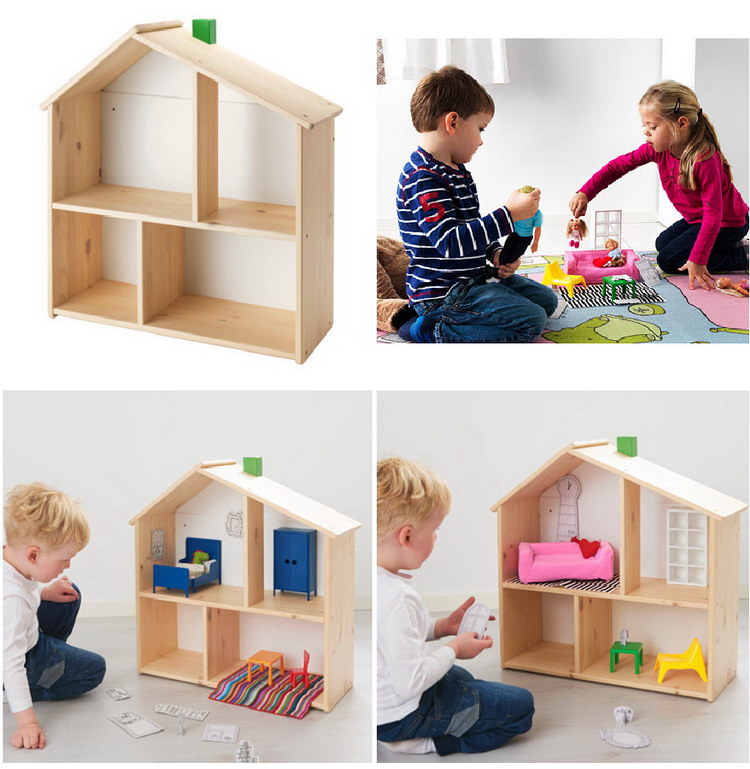
On simple doll houses from Ikea, it is not quite sorry to throw money, given that they are made of safe materials.
For example, the ski house is made of 100% recycled solid cardboard, paper, polypropylene.
Or Flissat - the house-hinged shelf is made of an array of pine. In these houses, it is convenient to purchase furniture.
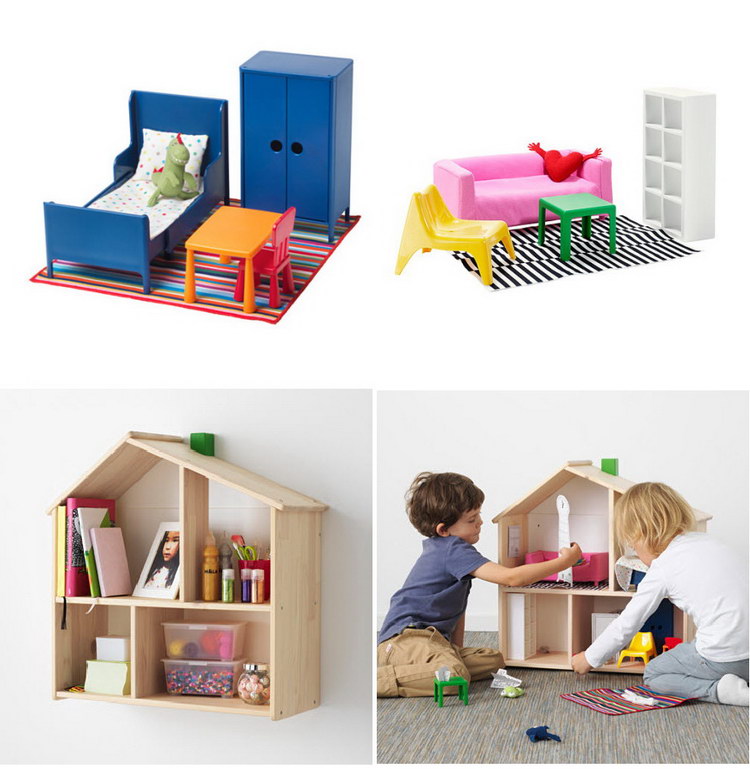
Here is a soft and pretty big farm-house lunch sold earlier in IKEE, very comfortable, because it consists in the chest.

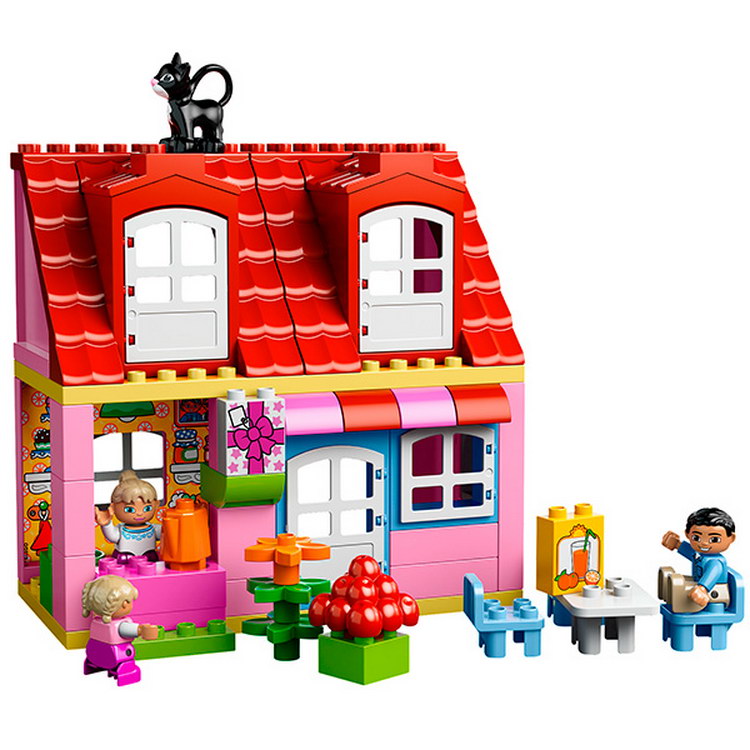
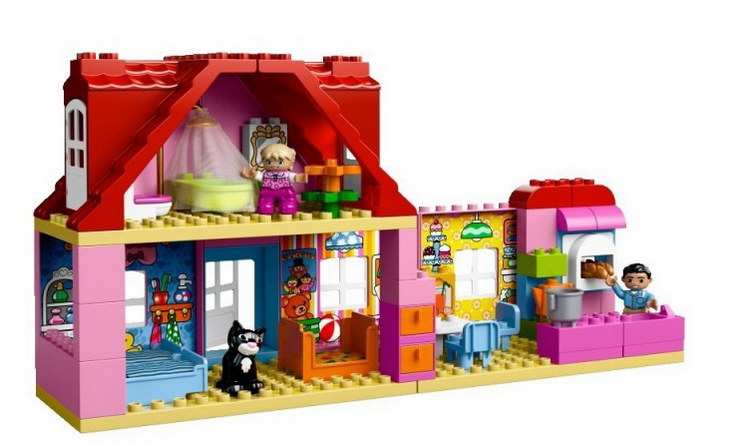
But we would advise to refrain from plastic. Children quickly arrive bright colors and the impossibility of alterations. The exception is LEGO Duplo - a puppet house that it is a designer.It can be easily disassembled and collecting again, choose the buildings. Even the smallest children can play such a house, because there are no small parts there.


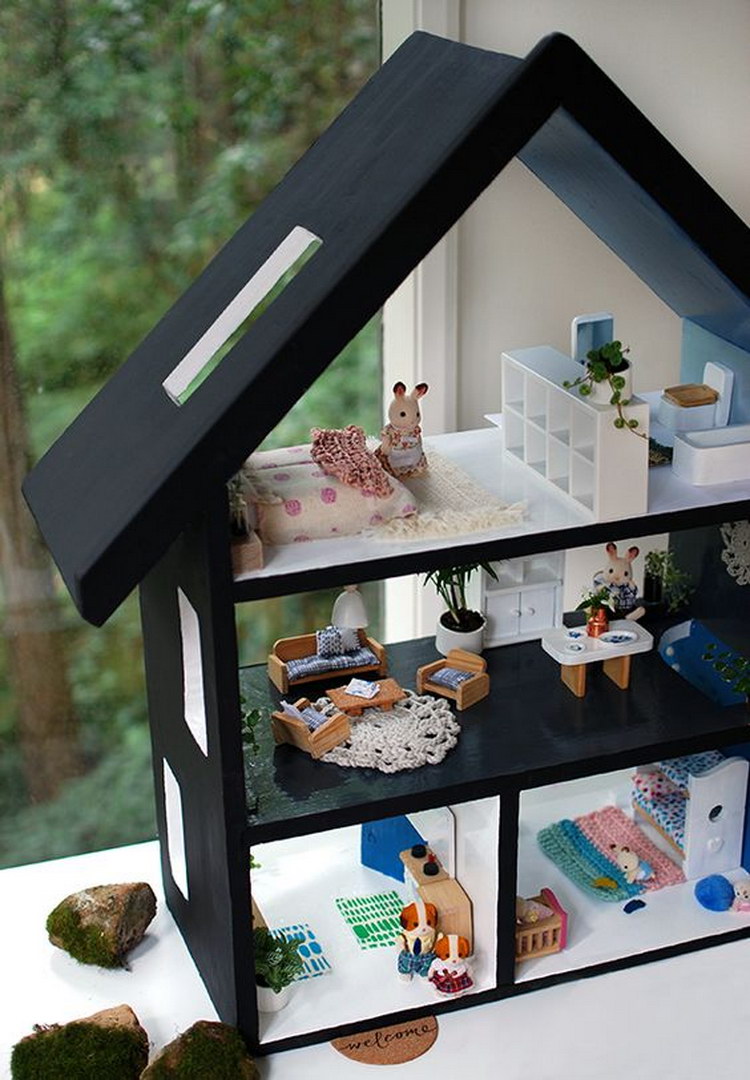
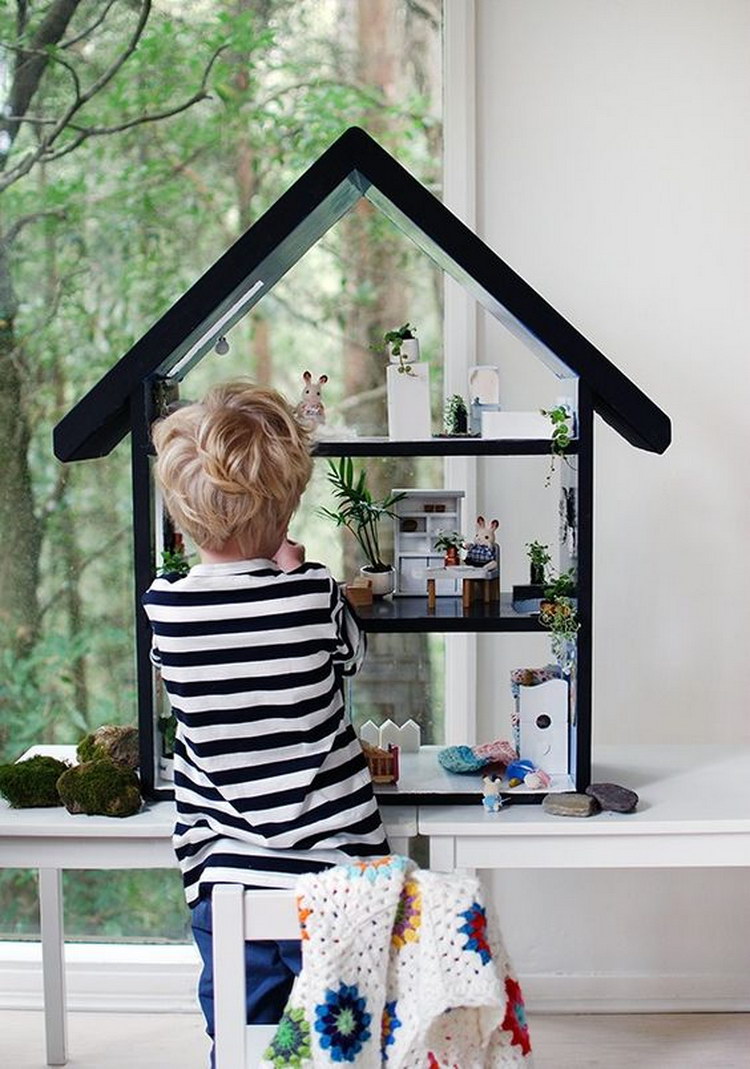
Original ideas for creating a doll house do it yourself
By the way, puppet houses can be made independently, you just need to show patience and enable fantasy. On the Internet you can find a lot of a variety of master classes, as well as drawings on the manufacture of doll houses with your own hands. This process is extremely entertaining! Try to connect to the process of its creation of a child, then the house for dolls will fully comply with all its interests and wishes. Such work will not only bring the joy to your tea, but also will develop its creative potential.
We offer to your court several interesting ideasHow to create a puppet lodge with your own hands.

Puppet house from the old locker
If you have an old locker, do not hurry to throw it away, everything you need is to paint it outside the paint (choose paint with high ecology), and the inner part is caught by wallpaper. So, you are ready for a carcass of the future house! Do not forget to divide it on the rooms and, of course, place the windows. It will only remain filled with furniture (you can buy ready-made, or make it yourself) and send dolls in places.
House from the old bookcase
To arrange it, you will need cardboard and beautiful paper. Bookcase We place near the wall, with the help of a tape on the wall "Testing" a pipe and a roof (of course, you can draw it to the marker, but it is easy to remove it, if necessary).

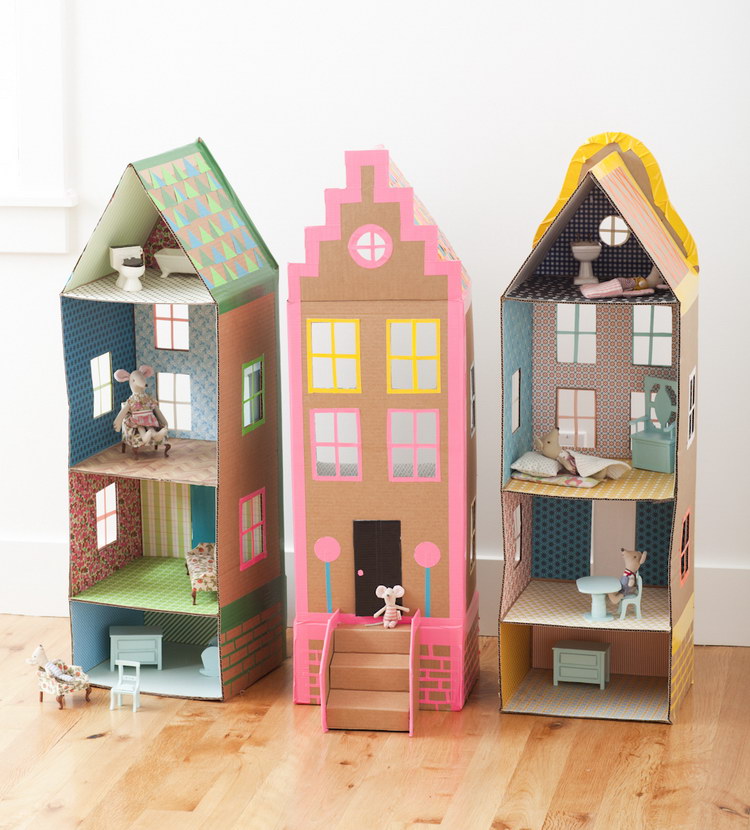
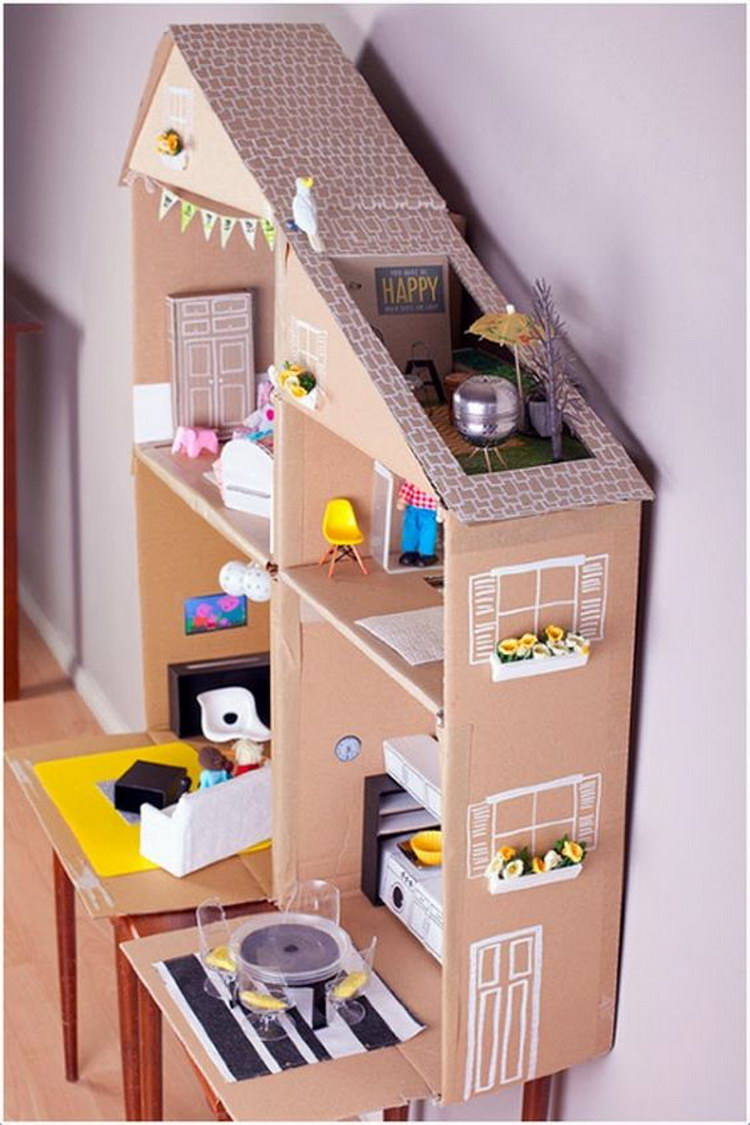
House of cardboard boxes
For its manufacture, you will need: cardboard boxes various size, wallpaper pieces, packaging paper, pencils or markers. Cardboard boxes glue with each other, giving them the shape of a house. With the help of wrapping paper and pieces of wallpapers interior interior, and pencils (wovers) draw windows and various accessories. Of course, such a house will not be very strong, but it will allow your child to show all his creativity and fantasy.

Puppet house from MDF (plywood)
In order to make and collect such a house, needed men's power. You need next materials: plywood (MDF), PVA glue (to glue the details of the house), jigsaw (manual or electric), ready-made drawings (they can be in large quantities Find on the Internet), remnants of wallpaper, linoleum, bright rags and, of course, patience. And to ready house It turned out to be mobile, it is possible to attach wheels to its foundation, this will subsequently move it to any room.

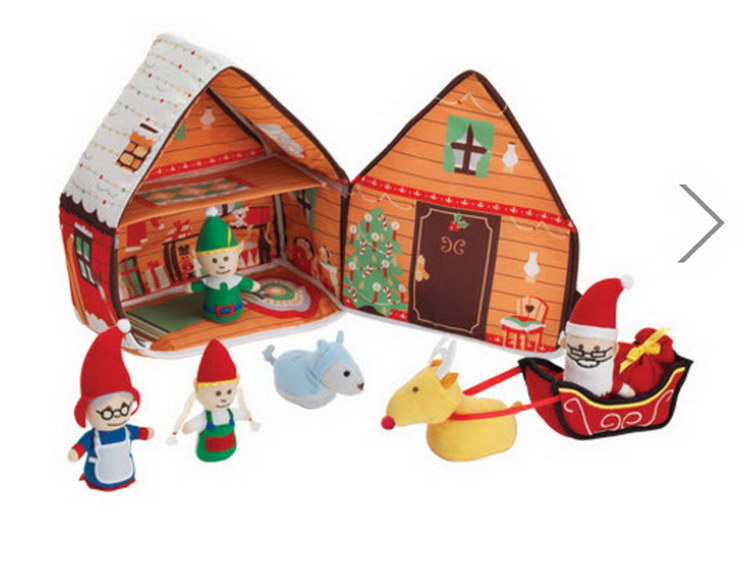
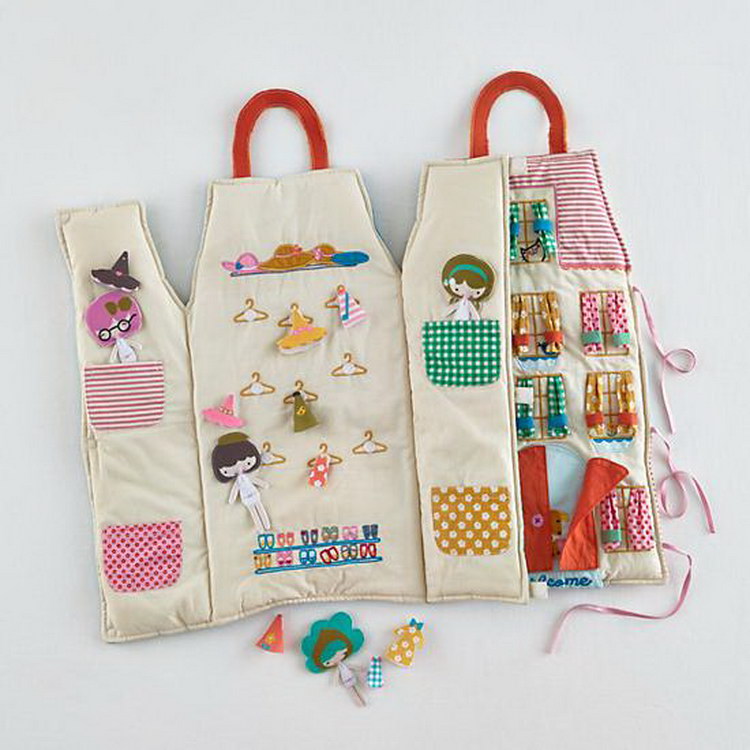
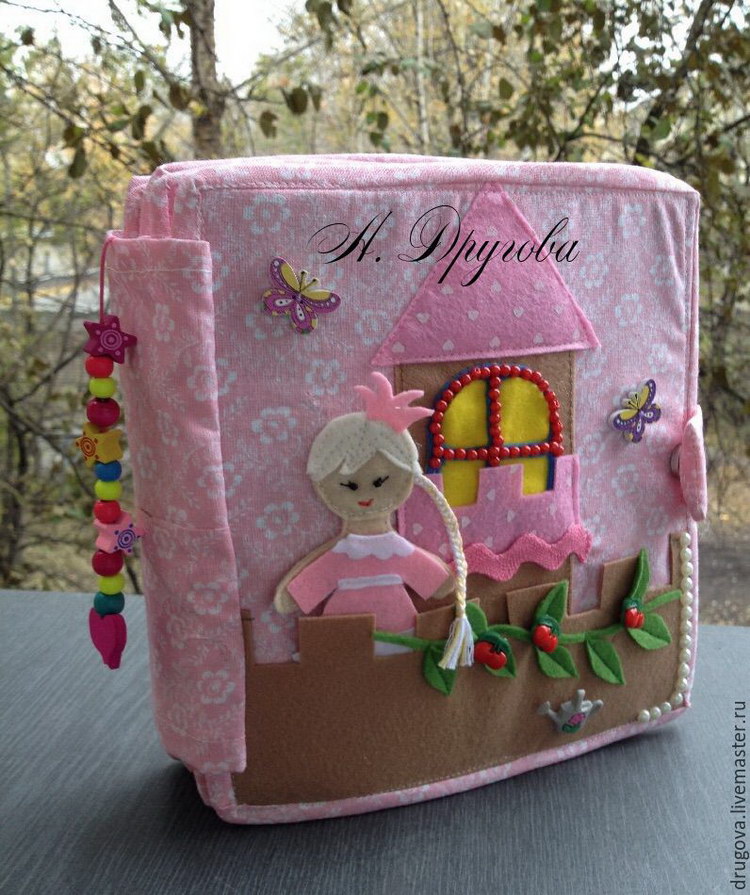
House for textiles dolls
Perhaps this option is the most convenient and safe, while it is no worse than the previous ones. All that is needed for its manufacture, bright textiles, filler and finished patterns (they can also be found on the Internet). Chief Principle Its creation is that individual parts from the cardboard are shedding with cloth and then assemble into a single constructive `Yu. The advantages of such a house are that it can be calmly wrapped and take with me on the road. Often it is decorated in the form of a handbag.
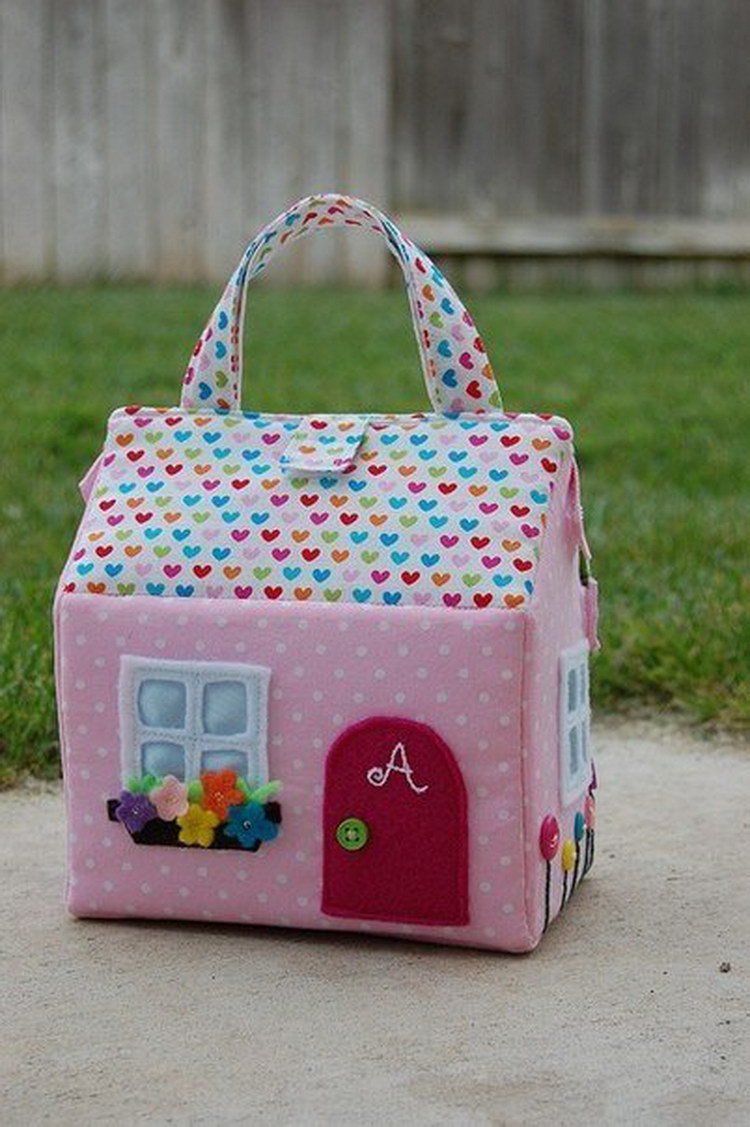


![]()


Buying or manufacturing a house for dolls with your own hands, you should remember that it is not just a whim, but also very informative and developing toy for your child,which allows you to develop a shallow motorcy, master communication and domestic environment, has a positive effect on the nervous system.
House for dolls - Photo


What do you need a little girl for happiness, except doll? Of course, a puppet house! Make it is not at all difficult, but how much joy it will deliver your crumb! So, the attention of parents is offered step-by-step instructionHow to make a house for dolls.
Master class on making a puppet house with their own hands
Most homemade houses For dolls is made of plywood or chipboard. You can also remake the house unnecessary book regiment or kitchen cabinet. The design of the puppet house is usually the "box" with the opening front wall or without it without it, so that the child is more convenient to play.
So, proceed to construction!
1. Place a sheet of plywood according to the scheme, and with the help of the jigsaw, we cut the following parts for a doll house:
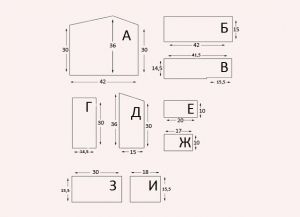
- A - rear wall;
- B - floor;
- In - second floor;
- G - side wall;
- D - front wall;
- E - interior Wall (on right);
- F - interior wall (left);
- S - roof (left part);
- And - the roof (right side).
2. All these elements need to be copped with each other, as shown in the figure. So that the connections are invisible, use finishing nails. Lobzik Gently cut down the windows, focusing on the width of the walls.
3. If, when assembling parts, slots were formed, gently tempt them with a putty, and then grab these places in shallow emery paper. The house is ready for painting! That's how it should look at this stage.
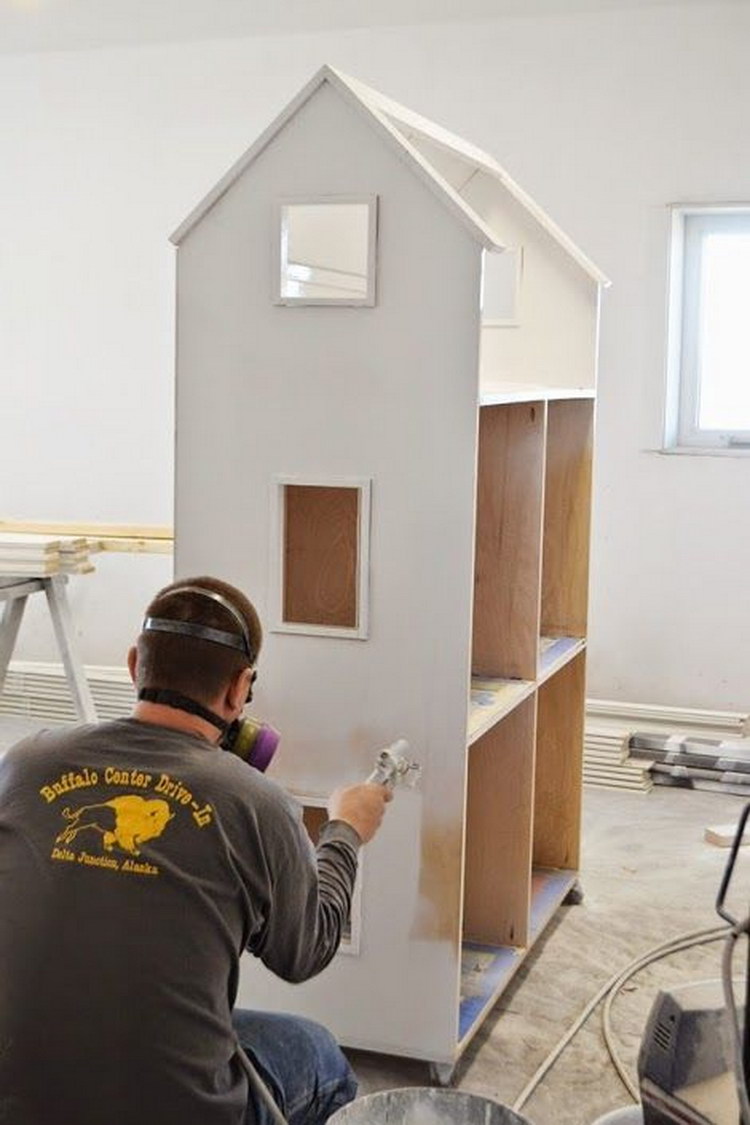
4. Start the walls with outsideAnd then paint them with bright paint. You can also cover the soil layer and ceilings from the inside.
Do not forget to ask the girl, what color of the walls it prefers - after all, she is a future hostess of this house! Use for external finishing work water-emulsion paint and pigment dye.
5. The next step is the creative design of the house. Decorate the building from the inside, giving each room uniqueness. Pick up decoration Materials For a puppet house in such a way that they are harmonized with each other and with the situation as a whole. For the design of the walls, you can take trimming of real wallpapers of various colors and textures or use the faded materials - self-keys, beautiful wrapping paper, etc. Appropriate place and flooring. It can be a fluffy rug, a striped knitted track or a piece of real linoleum. Adhesive coating to the floor so that it does not slide. Door and window openings can be made from photo frames or ordinary wooden Reques, gluing them in the form of a rectangle.
Furniture for a doll house do it yourself

6. While we do with your own hands a puppet house, do not forget to gradually think about the furniture issue. Make the situation of each room with decent princess, which will dwell in it. Of course, ready-made doll houses with furniture are sold in stores, but you agree, much more interesting to make such a grandiose toy on your own child.
For example, a pretty bed for dolls can be made of two or three trees, adding this composition with a piece of foam rubber (mattress) and sewing a real miniature bed: soft pads stuffed with syntheps, quilt. Wonderful chairs are obtained from cropped plastic bottles (frame) and sponges for washing dishes (soft part). It should only be sewed to decide the design of a beautiful satin cloth, and no one can guess what such an armchair is made.

From the back of the back of the house, you can spend paintings by imitating the view from the window.
In the bathroom, the dolls, of course, need mirrors and lockers, which can be made of small cardboard boxes, giving them rigidity and placing beautiful napkins.
Decorate the house windows small flower pots, "Disembarking" there are multi-colored bright flowers From satin ribbons or corrugated paper.
Here is such a wonderful house for dolls can be made, having a little time in stock, a droplet of fantasy and a great desire to make a pleasant surprise to your child!
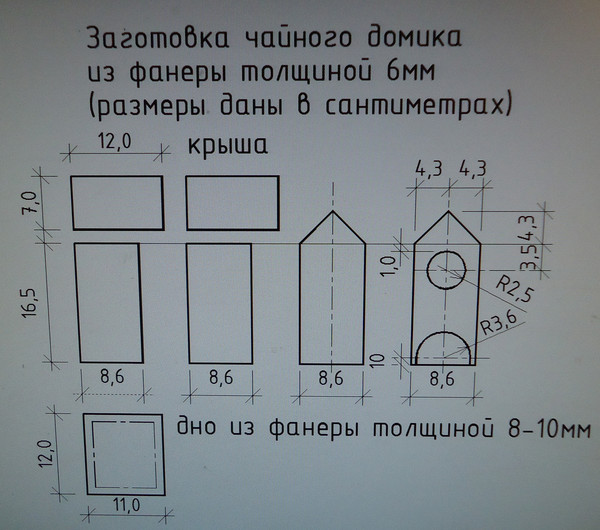
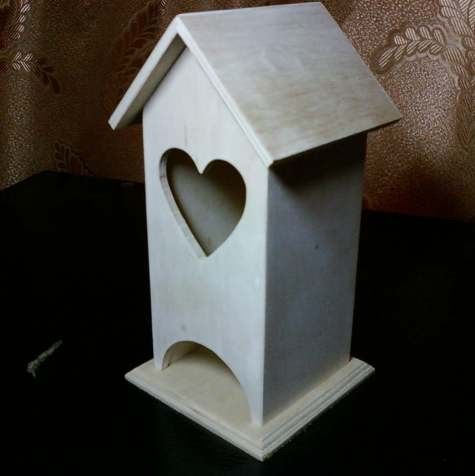
Is it difficult to make a tea house from plywood with your own hands? What fane is preferred for him? What from additional Materials And the tools will need? Let's try to figure out.
In the photo - homemade tea house. Material - plywood.
Why it is necessary
We will be sincere: there is no logical justification for the creative process and can not be. Yes, beautiful and stylish -Domik For tea in practical terms, nothing is better than standing on kitchen table Open cardboard box with tea bags. Yes, it is possible that none of the guests will not pay attention to the decoration of the table you created.
However, is it worth it because of such trifles to deny yourself the pleasure of creating a beautiful thing?
The cost of our project will be minimal: glue and paints and varnishes will be required in minimum quantities; A small sheet of plywood will not put you on the edge of bankruptcy.
It is useful: in construction stores Plywood is sold, as a rule, with sheets of 1525x1525 or 2500x1250 millimeters. In addition to the fact that the price of such a sheet is considerable, the problem of delivery will also come to. For our purposes, substandard trimming or remains of an old box from the parcel will be more suitable.
Materials and tools
So what will required for?
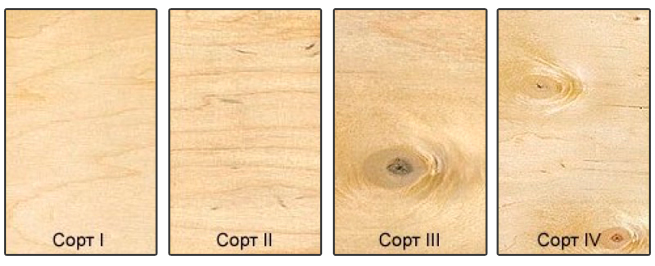
- Actually plywood. Optimal thickness - 6 millimeters for walls and roofs, 10 millimeters for base. However, if you have a thickness of 4 or 12 millimeters at your disposal - there is nothing wrong with that.
The variety in this case does not matter in this case: even if the veneer surface is covered with bitch, you can always choose from them the plot of the required size, and we will have a spacure at hand.
- Putty. Optimal option - acrylic finishing spacure on wood.
- Sandpaper. Such a pair of sheets - with medium and small grain.
- PVA glue. Plywood is perfectly glued and other universal adhesives or silicone sealantsBut the unpleasant problem is connected with them: in most cases, the paint does not lie on the surface of the adhesive seam.
- Paints. Usually recommended to use compositions on acrylic basis, However, if ready product It will be covered with varnish - suitable and gouache, and watercolor.
- Brushes. The thickness depends solely on the complexity of the drawing; For varnishing, you can recommend using a brush width of at least 30 millimeters with the most soft bristles.
Now about the details:
- The choice of varnish depends on the type of paint used. Acrylic lacquer will be better on acrylic; The painted gouache or watercolor surface can be lacquered by nitrocellulosic or polyurethane varnish. The last most durable and wearless.
- In order to transfer a drawing from paper to the surface plywood sheet, Copy will need.
- Cut details better hand Lobzik; However, with a well-known skill, it is possible to do this with an electric bike with a web for metal, and even a grinder with a disk saw installed.
- To process edges, you will need the middle file and flat feet.
- Print the drawings of parts in a natural size on the printer and with the help of a copyage tolerate the image on the Phaneur. As an option, the circuit can be drawn on a sheet of paper using a ruler and a square according to the dimensions specified in the drawing, after which again moved to the plywood sheet.
Getting to work
Production of plywood details
Tip: Draw directly on plywood. Inevitable blots will prevent you from cutting parts exactly along the lines.
- Drink the details along the contour. Electrolovka or disk Saw. When drinking complex surfaces will have to be used as a cutter, choosing recesses at right angles to the edge of the part. It is better not to bring the cloth to the contour by 0.5 - 1 millimeter: the residue of the material will be removed with the file.
- We process the detail with a file, then bring the corners with a supfyl. The ends of the parts should be strictly perpendicular to their plane.
- We grind the outer and inner surface with sandpaper: first the range, then fine-grained.

Assembly
As already mentioned, tea houses from plywood are assembled on polyvinila acetate glue. It is applied to the ends of the connecting parts; Then the details are pressed together and fixed by 3-4 hours with painting tape or hair bands, for cash packs, etc.
Important: Depending on where it is planned to lay packets with tea, the roof or the base of the house remain without adhesive fastening. To prevent the random displacement of the parts relative to each other, the split fastenings of the spike groove are used.
Excess glue is generically removed with a napkin or a rag. Otherwise, the remaining untidy drips will require re-grinding the product.
Shpaklevka
The slightest irregularities and visible seams on the joints of the parts are sweeping. It is better to use a narrow steel spatula: rubber will inevitably leave flaws on the depressions.
After drying, the putty angles will have to be pulled again. If necessary, the cycle of shtlocking and grinding can be repeated 2-3 times.
Color
For acrylic paints Phaneur is better to pre-harb. This goal can serve as a water diluted with water and pair of white paint layers.
Then an arbitrary drawing is applied on a white background. Watercolor or gouache can be painted without preliminary primer.
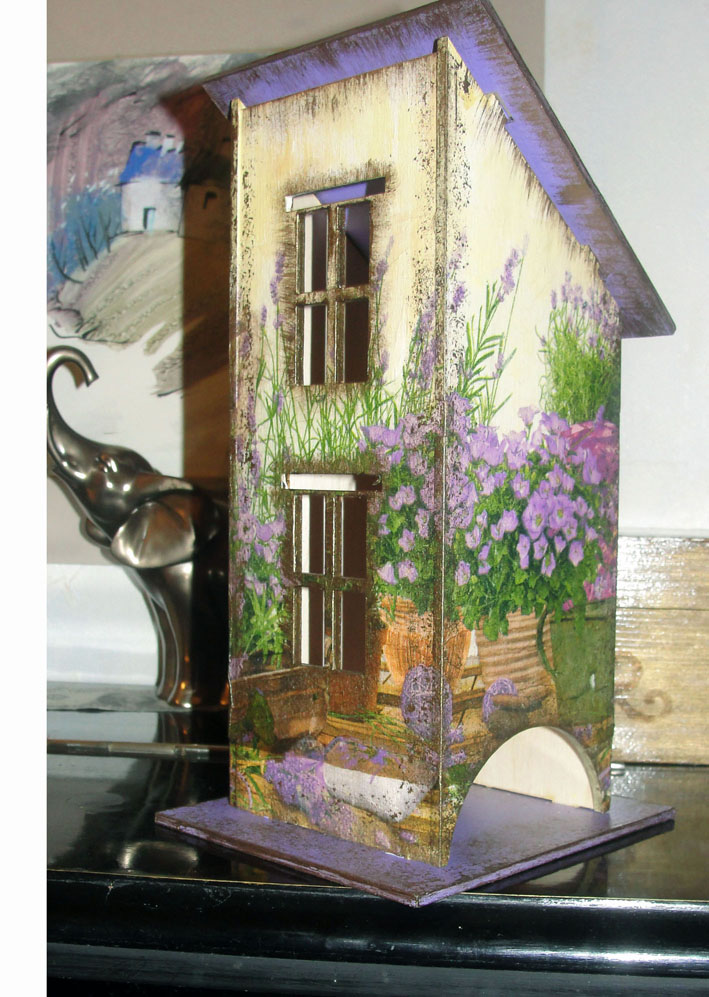
One potential problem is associated with painting water-soluble paints. Plywood is a hygroscopic material, and it can be a story. Avoid this helps simple instruction: The house is painted completely assembled, with a mounted roof and installed on the base.
When painting, you can apply several curious artistic techniques:
- The drawing is easy to make relief. To do this, adopt on the surface of the wall or roof of the house template, apply one or two layers of putty; After drying it through the same stencil, paint is applied.
- If the semi-dry brush applies thin flat color to the base color (for example, the ocher on the white base), the surface will look more old.
- On the prepared base with the help of diluted PVA glue, you can stick a finished paper pattern, which is then covered with a protective layer of varnish. Of course, the paper should be fine: cutting out of a dense glossy magazine will look at least rude.

Lakovka
There are no special tricks in varnishing tea house. Varnish is applied with two three layers using a soft brush. It is better to lacquer the walls of the house one in a horizontal position: in this case it is easier to avoid untidy drills. Of course, the excess varnish should not flock along the side walls.
If the drips still appeared - not trouble. The problem area is grinning with a null paper, after which it is lacquered by a thin layer.
After the varnishing of the spikes and the grooves of the removable cover or the base may well refuse to combine: thanks to the paint and lacques of spikes have become noticeably thicker. So that the product in the disassembled form looks neatly, it is better not to negotiate the spikes, and slightly expand the grooves supfil.
The surface on which the drawing carved from paper is pasted is to be lacquered at least 5-6 times with intermediate grinding after 2-3 layers. Why do you need it?
- Numerous layers of varnish will make the wall on which the glued pattern is distinguished, smooth.
- Grinding is needed in order to avoid the influx and uneven distribution of varnish.
Output
Success in creative work!
 Why you can not give icons
 Is it possible to give icons as a gift: Signs, the opinion of the Church
 A year ago left her husband, and now I do not know what to do