What makes doors for a wardrobe coupe. What materials are the furniture done from? Chipboard, mdf, fiberboard. Simple solution available to everyone
Specialization: Master in the construction of plasterboard structures, finishing works and laying outdoor coatings. Installation of door and window blocks, finishing of facades, installation of electricians, plumbing and heating - for all types of work I can give detailed consultation.
Doors for the wardrobe coupe - the main part of the construction, which is visible to everyone. Therefore, if you decide to build on your own, this review will tell you how to organize work properly to get the best result. I'll figure out the very following important momentsThat you need to know everyone who independently collects a wardrobe.
Description of the workflow
In a small review, tell about all the nuances is unlikely to succeed, but we will analyze the highlights so that you can understand the workforce well. First we will study what it is necessary to work, then consider the assembly process.
Required materials and components
First, we carry out all the required calculations:
- Making a sketch of the cabinet. We must clearly represent all the sizes to calculate the materials on the door. If the design is located in a niche, then you need to remove its size. It is best to make a drawing so that you clearly imagine the final result;

- The width of the flaps is determined. We will consider the design in which 2 doors, but if you have 3 or 4 doors, then the technique will be the same. We need to know the exact width of the opening - from the wall to the wall, in which the doors will be driving. The elements must overlap each other by 50 mm, this should also be taken into account, that is, the width is divided into 2 and 50 mm is added to the result, in the diagram below everything is shown very clearly;

- The height of doors is calculated. For this, the total height should be subtracted from 16 mm from above and below, it is such a size that we will put a lining that we will put. Between the door web and guides should be a lumen of 15 mm from above and below. That is, if we have a height of 2 meters, then the calculation looks like this: 2000-16-16-15-15 \u003d 1938 mm.
The following materials are needed for work:
| Illustration | Description |
 |
Filling doors. So called the material that will be used for the design of the facade, the design depends on the selection finished design.
There are several basic options:
|
 |
Profile vertical. Serves with handles and placed on both sides of each sash. May have different colors, Sold in planks Long 270 cm. The cost of the unit on average is 700 rubles. |
 |
Upper and lower horizontal profile. Sold with chunks to multiple meter, the length of the element can be 1.2 and 3 meters. The cost of the high profile route starts from 150 rubles, the lower - from 300 rubles. |
 |
Door accessories set. It includes everything you need to install one sash. The number of sets depends on the number of doors. The price of one set on average is 2000 rubles. |
Prices are relevant in the fall of 2017
Important! Do not save on the accessories and never buy the cheapest options. Take products at least from the average price segment.
How to collect doors
The assembly is made in such a sequence:
| Illustration | Stage description |
 |
A vertical profile is prepared. First of all, it is cut to the desired length. Then at the site of attachment of the lower profile, holes are drilled according to the data shown in the photo. In the outer part, the diameter is 10 mm, inside - 6.5 mm. It is necessary in order to hide fasteners inside. |
 |
The hole under the top profile is drilled. It's all easier here, since it is only one thing, all sizes and indents are shown in the picture. |
 |
On the perimeter of the mirror put on the seal. It must be put with a small stretch and do not cut on the corners, but just wear further. |
 |
On the top is a profile. It gently bursts with a rubber hammer.
|
 |
Wear a vertical profile. It also boils with a rubber hammer, after which the elements are fastened with a screw, which comes in the kit, it is not necessary to twist it until the end. |
 |
Top roller is put. It is located under the screw screw. That is, the screw fastens the profile and at the same time holds the top roller. |
 |
Connect bottom part and handle. Here you need to screw the screw into the upper hole. |
 |
The lower mechanism is put. The roller moves into the profile and is fixed with a screw through the bottom hole. |
 |
Seal brushes are inserted into vertical profiles. |
 |
The installation of sash is made. At first, the top roller starts, then the door is raised and the bottom roller is put in the appropriate groove. |
 |
Door adjustment. Using the bottom screw, the horizontal position of the sash is set. |
Output
Now you know everything about the assembly and installation of doors for cabinets. The video in this article will help even better figure out the topic, and if something is unclear to you - ask in the comments.
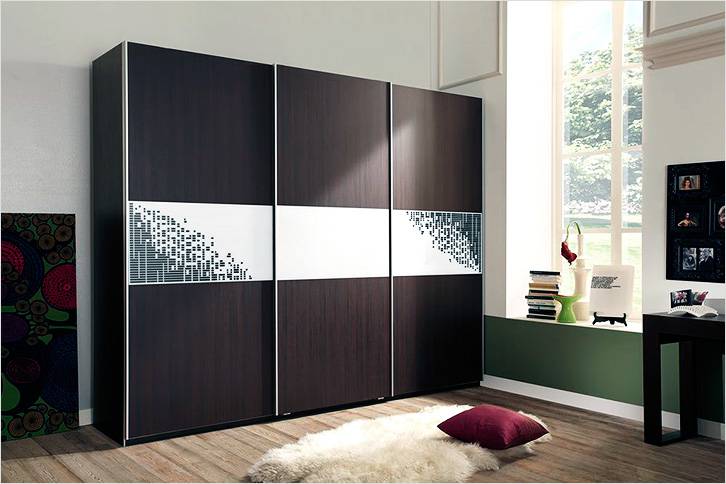
The door-compartment is a convenient and practical design, which when opening does not occupy a lot of space. Such devices are installed not only on the cabinets, but also in the dressing rooms, bathrooms, or storage rooms. The sliding door perfectly separates the space of the cabinet or dressing room in the hallway, living room or bedroom, as they organize enough comfortable and convenient access to things.
If you want to install and make the door coupe with your own hands, the first thing you need to prepare the opening, where the door will be mounted. Immediately it is worth noting that all the edges of the canvase should be strictly perpendicular and vertical. Accuracy geometric lines You can check with a level. And as soon as the opening is prepared, you can be taken for the device the door itself.

general information
During the work of the calculations, it should be borne in mind that the blade in the dressing room or the cabinet must be installed on the shoulder and it is desirable that the allowance is at least 25-30 mm. In addition, special attention should be paid to the type of sliding design. To date, you can install the door-compartment of such species:
- rail;
- suspended.
Based on the names, immediately becomes clear what is the constructive difference between both types of devices: in the rail, the main load is created on the lower guide, in the suspended - on the upper one. Each optional has its advantages and disadvantages. However, if you intend to build in a closet or a dressing room, a sufficiently sweaty door, it is better to give preference rail construction. Otherwise, the upper guide, which will be subject to the main load, will very soon begin to "smile", flexing under weight door canvas.

Algorithm of action
Before working for work, you need to familiarize yourself with the rules for calculating the size of the sliding structures, the necessary fasteners, as well as building materials that will be required to build a sliding door-coupe. The entire process of manufacturing the device can be divided into such steps:
- calculation of the size of the door canvase;
- making frame framing;
- installation of framing in the opening;
- installation of facilitation of the canvas (mirror, glass, decorative elements);
- installation of prepared fabric with accessories in a closet or dressing room.
The most important and responsible stage of the work is precisely the calculation. It is not so easy to produce it, because for this it will not enough to remove ordinary measurements of the opening. Similar scheme would only come in case of installation swing doors And then with some nuances.

How to make a calculation?
In order not to get confused in this difficult case, select several stages of calculations:
- Measurement of the width of the canvas;
- Measurement of the height of the canvas;
- Calculation of the number of necessary materials.
Determination of the width:
The drawing clearly demonstrates that the door-coupe must be installed with other canvases. As a rule, at least two sash mounted in a dressing room or a closet, and in some cases more. To correctly measure the width, it is worth using the formula:
(H1 + H2 * K) / P, where
- H1 - the width of the doorway;
- H2 - profile width;
- K - the number of overhearst between adjacent canvas;
- P is the number of cloths.

Height Determination:
Suppose the height of the room is 241 cm, and the width of the lining in the upper and lower part of the structure under the guide profiles of 1.7 cm. In this case, the gap between the door-compartment and the guide will be 1.5 cm. Similar parameters will also be at the bottom of the structure. Then the calculation of the height will look like:
241-1.7-1.7-1.5-1.5 \u003d 234, 6 cm.
The number of desired building materials:
The height of the entire design is determined by the length of the handle profile. In this case, framing profiles for the lower and top edge Sold only by a honey. In accordance with the width and height of the wardrobe, you need to purchase two segments to install the upper and two to install the lower profiles.
Elements for assembling doors
To do sliding design For a dressing room or a cabinet, it is not so difficult, however, it is very important not only to comply with the correct calculations, but also to purchase high-quality and reliable fittings. And before you buy all the necessary items, it is worth considering such features:
- Weight of the canvas. Rollers intended for skipping doors are able to withstand up to 80 kg of weight. It is worth paying attention to the selection of material to create the door leaf;
- Hue profiles. Since the profiles located at the top and the bottom of the design will be partially visible, pick up the parts suitable for the wardrobe or closet.
So, as shown in the drawing, to make the door of the cabinet with their own hands, it will take such elements:
- Horizontal (upper, lower) and vertical profiles;
- Intermediate profiles;
- Upper and lower guides;
- Upper and lower roller systems;
- Anti-type brakes;
- Silicate seal (for installation of glasses and mirrors);
- Schlegel (damper material, providing a silent slide of the rollers).

Looking at the drawing, you can understand which sequence to install all the necessary door-coupe elements. But if you first encounter such a task, consider the steps in more detail:
- Installation of upper and lower tracks. On the front of the extreme line at the top and bottom of the opening it is necessary to establish horizontal guides;
- Installation of "stops". Before mounting the bottom bar, you need to install limiters that will prevent the doorway from the entire design;
- Installing the canvas in the opening. The rollers located at the top of the canvas are inserted into the rail guide first. After that, slightly pressing the lower rollers, they are inserted into the lower track;
Adjustment after installation:
- If the door installed in the opening dangles, you must twist the adjusting bolts. This will provide a more dense pressing of rollers to tracks;
- Then it is necessary to correctly set the brake elements. Using a screwdriver, move the stopper inside the track so that the door, being in the closed position, did not carry out the cargo;
- After mounting the canvas with your own hands, open several times and close the door to check the smoothness of the stroke of the canvas inside the guides.

How to make the door of the coupe on the video can be viewed in the presented movie. In this video, the wizard will tell about important nuances of the installation of retracting systems, and also clearly demonstrate the technique of installation.
Conclusion
Make yourself a door-compartment on a dressing room or a wardrobe is not so difficult. But that the design is durable and reliable, it is necessary to clearly follow all stages of work, as well as make an accurate calculation of the dimensional dimensions and guides. Taking advantage of the drawings and photos presented in the article, you will be able to work without much difficulty without attracting the master.
The built-in wardrobe is not in vain is widely popular. The sliding wardrobe not only has a greater capacity, which is at least the minimum of useful living space. It is capable of performing other useful functions in the interior, and it is not so difficult to make it with your own hands.
What does the coupe mean?
In the common parts of the ancient European cities, the streets were very close, and the sidewalks were sometimes impossible to open the door the door of the carriage. Because of this somewhere in the XVII century. Coope coins with sliding doors appeared. The legend attributes the invention to the coupe from the court Kareti Master France Zhanto. But, most likely, this is only a legend - Zhanto is glorifying that he invented the steering trapezium, which allowed to do sharp turns without risk to tilt.
The carriage-compartment - the concept is pretty playful: the part of the city distant from the well-maintained quarters visited mainly for secret dates. The word "Coupe" some linguists are derived from "coupe" - steam, extra-wedliness; Marriage - "MARRIAGE", from here - famous Majaze gamblers, lady with the king of one suit.
Then the sliding doors had to fit the railway workers for the wagons of the 1st grade and sleeping. And in the furniture case, the wardrobe is considered anything with sliding doors. So the wardrobe is not necessarily embedded. A built-in wardrobe may not be a coupe.
What is useful as a wardrobe?
The main types of direct cabinets are shown in the picture. Need to immediately notice that radi-wardrobesin which the facial surface of curvilinear requires high furniture professionalism, and it's better not to be taken from the cap. Therefore, radius cabinets will still leave aside.

First of all, the wardrobe can be arranged in a niche, the first pos. left. Make a closet of this type is not much more complicated than a stool. Expenses are minimum; After all, three walls, the bottom and the tire already exist. An uncomfortable place turns into useful.
Second left - In fact, the same cabinet in a niche, but a niche is in full width of a deaf wall. Thus, it is possible in a small-sized apartment, practically without reducing the living space. The visible volume of the room can be even expanded, respectively, by separating or reagreeing the doors.
Next in order - in the opening interior partition. Completed reception with free planning apartments in modern monolith houses. It gives convenience and allows a lot to save on expensive construction and plastering and finishing works. Economy, by the way, and described above - the inside of the cabinet can be made of chipboard, and the doors too; They most often go under the decor and decoration.
Extreme right wardrobe - already corpus, so the material is needed for it. These are mainly used to zoning budget odds or, on the contrary - expensive penthouses without interior doors.
And finally, the wardrobe, like the usual, can be straight and angular, leaning towards the wall or the across it. The latter, as stated, are used for zoning. They have two faces, and there are no rear at all. Often are made by double sided, with doors and there, and here, for the convenience of accessing content. The chulad can also be turned into a wardrobe, replacing the shift door.
We will consider in more detail the cabinet built into a niche; The rest will touch Casual. It is easier to make it the easiest way, and the savings of the money goes the greatest. In addition, most likely you will not need a special tool and require solid sovereign operations. Why? We do and before that.
In general, the procedure for manufacturing a wardrobe is as follows:
- Selection of material;
- Determination of the degree, nature and method of placing filling;
- Door design, with a choice of suspension method;
- Selection of the method of suspension shelves;
- Preparation of a niche;
- Measurements and drawing;
- Purchase of fittings, materials and sawing blanks;
- Assembly of the cabinet and installation of internal lighting;
- Exterior finish.
Materials
The design of the cabinet should be started from the selection of the material. The whole process of manufacture depends on it, and depending on the choice, it can fundamentally change.
Tree and lining
Tree is traditional, but in our time and prestigious furniture material. But for the built-in wood cabinet - far from the most suitable. Humidity in niche will necessarily be higher than in the room, and the tree will go bored; The decorative role in this case is minimal. If it still needs a wooden wardrobe - wood for it should be straight, without twisted, bitch, cracks, aged and thoroughly impregnated with a hot oil or a water-polymer emulsion.
Note: It is not at all necessary that there were damp in niche. For wood warning, the difference of moisture difference from the deaf wall to the doors and its sharp jumps when opening are opened. Because of this, the cabinet wooden cabinets put in the niche is not recommended.

Lining for a cabinet in a niche, plastic or MDF, can be used without its preliminary preparation, but another limitation appears - the door frames of the door. They have to be made from wood, with the same conditions and requirements, as indicated above, plus - carefulness of manufacture. It is also necessary to glue the boards of the lining together, but this is not a problem: there is a spool, there is a groove under it, and the PVA holds fine. In general, the wardrobe can be recommended only for those cases when the wardrobe in the niche should organically fit into the interior, as in Fig.
Plasterboard

Plasterboard - excellent, easy to work finishing material With wide opportunities. Designers and self-delicate amateurs create real masterpieces from it. But as the basis for the cabinet of any GLC design is completely unsuitable. It is possible to make a wardrobe from drywall, see rice, but difficult. Tell me why.
Plasterboard - rather heavy, fragile and at the same time not very durable material. It is intended exclusively for finishing and part carrier designEven weakly loaded, can not. Simply put, the plasterboard can not hold anything; On the contrary, he must be attached to something and should hold something. A piece of drywall 400x400 mm, laid by the plastics on the frame, for six months, in itself, it seeks noticeably on the eye. The sheets of GLC on that are unacceptable when stored is stored vertically or lean to the wall.

That is, it's easy to chop down and bind over yourself, how, let's say, laminate (see the next), it is impossible. Each shelf must be a boxed spatial design, for which you need difficult carcass (See Fig. Right). But the construction obtained as a result of the assembly (see the next. Fig. Left) with proper geometry and proper strength will be far from aesthetic; Need another putty and decorative finish.
Note: for the cabinet frame of the GLC, the tree is not suitable - the cavities of the finished design will tighten the moisture. For the frame there are only regular C- and U profiles with a regular fastener.

Then - doors. You can't do it from GLC - fastenings will be cut through just under the weight of the sash. And in the doors just the essence of the wardrobe. Doing the drywall shelves of the cabinet with the doors - Martyskin work and a decrease in the useful volume. No wardrobes from GLC does not happen, and the wardrobe with the shelves does not make sense.
In fact, the plasterboard cabinet is not furniture, but building structure, and is performed on the construction, and not furniture technology. But at the same time, it may have outstanding aesthetic advantages and be the most significant object of interior design.
Laminate, MDF, Fiberboard
This is the very suitable materials . The manufacture of a cabinet of them may be elementary simply with minimal cost, see sawing. These materials have all beneficial features Woods and at the same time are insensitive to gradient and jumps of humidity. In the process of their manufacture, the microstructure of the tree is converted to another. ONLY NOTE: DVP need to take medium or high density. The rear wall of inexpensive cabinets are often made from the Fiberboard of the low density, similar to the thick cardboard corrugated on one side, but in her niche will soon behave.
Filling
The internal filling of the cabinet determines its inner layout. There are four rules here:
- Raw - to the side separately.
- The right and petty - before your eyes.
- Dry - higher.
- Valuable - in the boxes.
For example, the section for outerwear is located in the middle incorrectly - dampness will go to the sides. If you place the side, moisture from the clothes will go there, much more - out. In the bedroom, drawers or shelves for bed linen are not necessary immediately above the floor - dust and moisture concentrate about 40 cm above its flooring. Well, what a wallet or a smartphone in appearance near the input is not necessary, and so understandable.
The ultimate goal of placement of content is to get the minimum width of the shelf; This will be needed to calculate the door. The placement procedure is quite responsible, the convenience and durability of the cabinet depends on the successful layout.
Video: Internal layout of a wardrobe
Doors
Doors - salt of the wardrobe, the most complex and responsible item. Significant moments three:
- The number and width of the sash.
- Construction of suspension.
- Stoppers of sash.
Sash
At this stage, the task is to find the number of sash at a given width of the opening of the cabinet. The smaller the sash, the cabinet is more convenient, but the likelihood of skewing and jealing above. The maximum allowable width is 600-700 mm; With a greater sash, there may be tight just because it will be very heavy.
The overest of the door of the wardrobe must be within 50-70 mm. With too small, overhearst, you will have to open or open-close the doors carefully, or compensate with the slits. With too much overhell, the internal layout of the cabinet makes it difficult, especially if it is intended to the hallway or other close room.
At the same time, the width of the door should not exceed the width of the narrow from the shelves, otherwise it may be inaccessible. We also take into account the permissible overlap and take 40-50 mm on lateral profiles; Without them, the doors will bite the wall. In general, the procedure is as follows: based on the maximum on the width of the door, pre-determine the amount of overlaps (one less than the door) and check the resulting width of the door. It does not fit at maximum - you need to do the door one more, and so, until everything comes.
Example of calculation:
Width of the opening - 1.75 m; The narrowest shelf is 0.45 m. A two-dimensional wardrobe will no longer succeed, it does not come out for convenience and at the maximum allowable width of the door. Then we put two overweights, it will give 100-140 mm per minus to the mind, and still put 50 mm on the sidewalls. Total - 150-190 mm, 0.15-0.19 m. On the door remains 1.75 - (0.15-0.19) \u003d 1.6-1.56 m. We divide on 3, the width of the door leaves 0 , 53-0.52 m. A lot of what to do? I estimate with 3 overweights (4 doors). It turns out 37-39 cm on the door. But making 4 doors more difficult and more expensive (an extra set of fittings), so it makes sense to return to the sketch of accommodation and recompound the inside so that the narrowest shelf has been 55 cm.
Suspension
Three suspension systems of the cabinet doors are widely known: double-touch with lower support, double-touch with top support and monorail. Each of them has its advantages and disadvantages. The choice is determined by the size, appointment of the cabinet and the financial capabilities of the Customer / Master.

Nizhny rail
The most common system; Schematically, its device is shown in Fig. Right, and the design of the upper and lower rails - in fig. left. Supported - lower rollers, upper - prevent sash dull. This system is also the most reliable: almost never the flaps are not covered and do not hurt each other.

The lower rollers are very loaded, so when self-assembly must be observed certain rulesWhat illustrates Fig. below. Rollers are made by plastic, and when buying needs to be viewed to take polypropylene; For sale a lot of cheap polyethylene in a low-quality metal carriage. If the rollers are propylene, then it is possible to do not look at the metal; And steel, and aluminum equally reliable.
Mounting of the sash is made simply: insert the top into the rail grooves, lifted until the stop is inserted into the groove - ready. However, the system with the lower support has flaws:
- Sensitivity to sex, and the weight of the cabinet is strengthened. On the old wooden floor of the lags after a while the doors can start riding themselves, or even fall out.
- Sensitivity to dust and dirt. The loaded surface of the rail is located in the dusty air layer, the rollers roll and the dust are torn, the tubercles are formed into the lower rail, after some time the doors begin to rotten unpleasantly, and you need to clean the rail with rollers.

Upper rail

Here the support is transferred to the upper rail, see fig. on right. Concrete ceiling It does not seek, and the properly decorate is not dust, so the flaps go quietly and smoothly. Accessories of this type is not difficult and not the road, and the installation differs from the previous one just the fact that the sash during the installation needs to be tilted. There are three shortcomings, but two of them are significant, so the suspension with the upper rail has not received a large distribution:
- Be sure to need a lower guide, without it, the sash will inevitably beat and rub each other.
- With a random push or naja on the sash, its rollers overlook the groove and the sash falling inside the cabinet.
- The top rail is not very tough, so in some cases it is required to level the ceiling at the place of the suspension.
Monorail
The feature of the system is that in each carriage - 2 pairs of rollers (see the next. Fig.), And the suspension of each sash goes into a separate guide. Steam rollers together with a heading profile to some extent parhed the root of the door. Due to this, with a careful circulation, you can do without the bottom rail and do not touch the floor. But it is impossible to push the sash inside, at the same time they will take each other. Therefore, the lower guide rollers with the rail under them are sold to Monorails.

A wardrobe is suitable with such a suspension primarily in the bedroom where they enjoy adults, and neatly. Durable and accurately adjustable suspension allows you to make wide flaps, and this, in turn, is placed in a deaf wall and a wardrobe, and a dressing room. Hard box rails allow in most cases to do without aligning the ceiling. Major shortcomings of Monorail Four:
- Complex and expensive fittings.
- The need for a decorative pad at the top, because Between the sash and the rail remains a wide clearance.
- Complex installation: you must first enter the carriages in the rail with the rollers, then attach the rail to the ceiling, and then hang the door. Assistant is needed to hide the sash in Montorels.
- After the sash suspension, adjustment is required.
Stopor.
It is desirable that the doors of the cabinet do not ride themselves in itself, and so that they should not be carefully moved to the place. In a two-rolled closet, the task is solved by magnetic latches on the sides. But on the middle flaps of the latch to put nowhere: the casual magnet does not hold. Therefore, the main type of latch cabinet-compartment is mechanical.
Basically, two varieties are used: the removal in the support rail and a flat curly spring. If you do the cabinet yourself, then the excavation is not suitable: such railings are manufactured in the factory setting conditions under standard cabinets.

The spring retainer shown in the figure is easy to do on its own and install on the place in the cut-off guide. The principle of its action is simple: the mustache is slightly protruding and the video is blocked between them. And when the roller is rolled to the edge of the springs, the grinds are resting in the sides of the groove, which prevents the shift of the latch. To make a latch in place, you need to press both the mustache at once.
But all latches for wardrobes have a common drawback. When opening / closing the door, the effort and so acts in advance, and the latch resistance is even more enhanced. Most breakdowns of the wardrobes occur just because of the latch.
Therefore, the best stopper for the door wardrobes is a thoroughly aligned support rail, high-quality fittings and accurate use.
Fastening shelves
For the cabinet embedded in a niche, the shelves suspension methods in the housing furniture are good or not fit at all - not to get to the sidewalls outside. A rigid framework is either built in a niche, which is difficult and expensive, or use special adjustable suspension systems like shown in the figure. It is easier, but also silent.

Meanwhile, the simplest and cheapest method of fastening the shelves - on the segments of the ordinary plinth, outdoor or ceiling, see fig. on right. Plinth from MDF, as is known, produced in a huge range of sizes, textures and profiles. To fasteners, the shelves have not rushed into the eye, the segment of the plinth can be taken shorter of the depth of the shelf by a third, and its end is also cutting out. Far from the edge of the shelf screws in this case should be turned on top through the shelf board.
Note: the upper and lower partitions in the closet can be fixed to the floor and the ceiling in the same way, for reliability, not shortening the segments of the plinth. Their ends if you take ceiling plinth Small size, completely close the upper and lower guides, and together with the shelves, fixed in the same way, is formed very durable and rigid design. Which, in addition, and support the boarded floor from the seating under the weight of the door.
Niche
Professor's furniture makers are rarely and reluctant to make the built-in furniture on the place - the work cannon, unprofitable. Custom built-in furniture - most often the same case, which is brought and collected in niche. And here the home owl opens a great opportunity to simplify and reduce its cabinet, making it stronger and more good and more good.
Diagonal
The necessary condition for the success of such a venture - the opening of the niche should be rectangular, and the floor and the ceiling at the installation site of the door are horizontal. Here may have to pay a little time construction work, but the volume is small, and the complexity is low.
Note: under the monorail suspension is quite ordinary building horizontal ceiling. Rail align with gaskets. But not adjusting the flaps after! In the inclined guide and vertically hanging flaps will go through the sidelines.

The floor and the ceiling are checked by the level, but what about rectangular? The usual method in construction - the cord on the diagonals - it fits badly. The fact is that the furniture accuracy is higher than construction. In the finishing works, it is permissible 3 mm / 1 m. In furniture, if the seam of 2 m long will disappear along the length from a millimeter for two, it is already marked by the eye. And any stretch cord, and it is uncomfortable to wake them in the vertical opening; Here without great experience and construction accuracy will not work.
The way to measure the diagonal of the opening is not that with the furniture - with machine-building accuracy - there are, see fig. Everything is very simple: two rails with pointed ends. The angle at the top is less than 45 degrees, and better - 20-30, if only the material of the rail was strong enough. Reiki rings from "cash" rubber bands sold in any stationery store.
Measurement procedure - elementary simple:
- Insert the device into a diagonal until the ends of the decks in the corners are stopped.
- We make risks with a pencil or nail, as for pos. one.
- We insert into another diagonal, push / shift until you stop.
On the discrepancy of halves risks, the magnitude of the inequality of diagonals is immediately visible. Limit accuracy - half the thickness of the risks, i.e. You can achieve 0.15-0.2 mm. And in order to collect a closet without problems, you need up to 3 mm in opening 2x2.5 m.
Note: if a seat is preparing for a closet - a zoning partition, standing perpendicular to the wall, will have to be measured and adjusted with 8 diagonals - under a pair of on the face and rear, and two pairs inside between the upper and lower opposite angles. In the width of the cabinet from the wall two perpendicular, and instead of missing the sidewalls put two rails or a piece of plywood.
And now, what prevents the use of the walls of the niche, its floor and the ceiling as the same for the cabinet? It is necessary only to not dust. And it is not difficult to achieve this and not expensive:
- Old wallpaper or paint remove gel surface-active (surfactant) washes. It is not toxic, does not smell, and the old coating can be removed by a spatula after 10-40 minutes.
- Walls 2-3 times, with an interval per day, with the help of a foam roller we impregnate the water-polymer PVA emulsion.
- Praying acrylic enamel.
A niche prepared in this way is not dusting 10 years old, and the old plinth is not needed from the floor. Damage strong acrylic enamel not easy. And costs are less than on a sheet of simple, non-laminated fiberboard for the rear wall.
Note: the eyes visible small irregularities of the walls can be removed by the abrasive grid on wooden Bruke. It is better to do that after the first impregnation of PVA - there will be less dust.
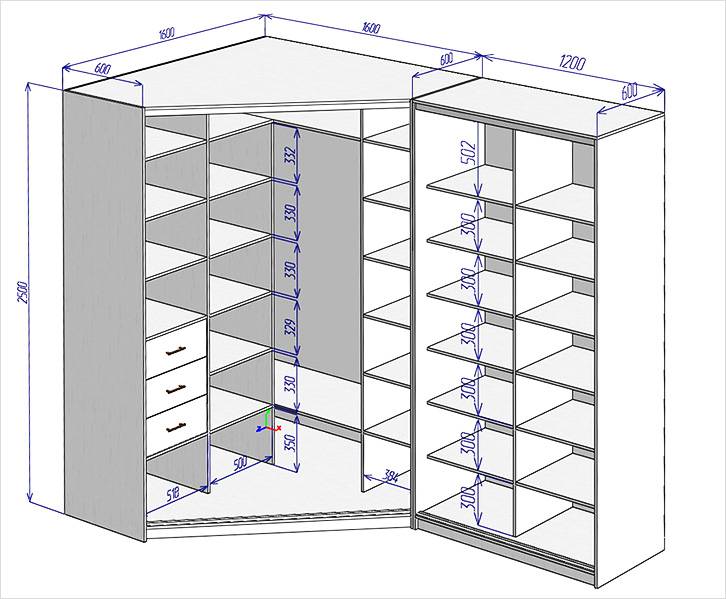
Dimensions and drawings

Shelves and partitions with this method of manufacture, of course, have to be cut on the place. To do this, you will have to draw the view of the cabinet from the facade, as follows as shown in the figure. Then on the ceiling, for any suspension method, repeat the line at the installation site of the guide. Then, from her ends on the plugs, repel the vertical on the walls, and from this imaginary plane to measure the configuration of each shelf and partitions around the place. From the resulting depth of the shelves / partitions, it is necessary from the front to deduct the width of the support profile + 20 mm.
What is the meaning? The feature of finishing works is such that layer of plaster / primer to inner corners It turns out thicker. This happens because in the middle of the wall or the outside angle freedom of movements tool is greater. The difference in the width of the room in the middle and between the angles rarely exceeds 10 mm and is not noticeable to the eye, but for furniture and 2 mm - too.
Niche configuration - in general, low truncated rectangular pyramid, tilted on side. Accordingly, the shape of the shelves with partitions in the plan will be close to the trapezoid. But is it possible to cut them with the right accuracy? Nowadays, it is quite possible, and the joinery of the house does not have to do. And the logs with the circular is not needed. Templates and patterns - too.
Sawing and fittings
The fact is that now the cutting of the blanks is easier and cheaper to just order. It is hardly in every town there is a furniture shop with a computer and a specialist who owns Acad, there would be an accurate drawings. Many furniture makers are seized and sawing with computer control - the cost of sawing so hard is almost independent of the size and complexity of the part, and on the always demanded non-standard smallers, it pays off well.
Furniture makers material buy at wholesale prices, therefore, counting common Square, the cost of billets is 20% and less less than with self-procurement of material in retail. Many give a discount on trimming (robotic - almost everything); After all, they will not lie in the cheek, but they will go into business.
Note: laminate thickness or MDF for a cabinet - not less than 16 mm. For the door on the monorail - at least 25 mm.
Also, the standard service for sawing is the edge, i.e. Seal the ends of the PVC boards. For the embedded cabinet, it is clear that only front ends needed - it will be cheaper. Thickness PVC edges Maybe from 0.2 to 2 mm. If you want a thick edge, it is necessary to take it in the drawing of its thickness from the width of the board.
Assembly, light, finish
Cabinet assembly techniques, actually already described. It is necessary to supplement only about the door pendant. The described suspension systems are not the only on the market. Technique develops, existing ones are improved, new ones appear. But each more or less decent quality is required specification with an indication of installation sizes and tolerances, that on the rails, etc.
Therefore, before ordering the cutting of the door, look again - what around is sold, which is more suitable for you. The final size of the flaps depends on the method of suspension, and the necessary gaps are negotiated in the Suspension specification.

On internal lighting. Cabinets are made from combustible materials, so the inner light is better to do on low-power 12 in halogens. The cabinet lamps are powered from an AC / DC adapter in double insulation. Run into the cabinet the wiring by 220 V, and even constant is completely unacceptable!
As for finishing - mirrors, scenery, painting and drawings, this is a matter of taste. One Note: Glass mirrors on the doors from wood materials Hang undesirable, painfully fragile and heavy. Better mirror acrylic. Or solid mirror doors, but this is a separate conversation, and very expensive.
How much can you give?
Now I will estimate whether it will be inexpensive homemade cabinet in niche. And whether the savings will cost spent time and effort.
If you make a wardrobe in a niche of the hallway as described above, the materials will take 5-8 thousand rubles, including the payment of sawing. Well, 10,000, if, as they say, from the nest. Time - 2-3 pairs of weekend for homemade Masters Middle hand. And the order of the wardrobe in the same niche is less than 12,000, it is unlikely possible. Most likely, from 20,000. The term of execution is 2 weeks.
Savings on the wardrobe in the entire wall of the bedroom turns out even more. Here, the ratio of homemade / custom value is typical of the regions, 13,000/32,000 leaves. But for the manufacture of this requires the skills more serious.
But the closet partition is not so profitable to do this: the advantages of debugged technology and the pros are affected. And the work is difficult - the skillful master from the month will have to tinker, if you still do not have to redo. It will give out no more than 2000 on the cabinet in the middle area.
(No ratings no)
The wardrobe is a very popular variety of cabinets, because it is not only spacious, but also takes enough space. This piece of furniture is quite functional.
In this article we will tell you how to make a wardrobe with your own hands.

What is a coupe
The concept of the coupe first appeared in France in the century of horse crews. At that time, urban streets where the simple people lived, were so narrow that it was not always possible to open the door of the cart. This led to the appearance in the 17th century a carriage-compartment with sliding doors.
It is believed that the first wagon-compartment was invented by the French Master of Karet Master Zhanto. Is it really unknown.

The crew of the coupe was attached to flirty and frivolous concepts, because such a type of transport was usually used for secret meetings with ladies. Part of specialists in the field of linguistics believe that the coupe happened from the word "coupe", which translated from French means an extramarital connection.

After time, the door-coupe began to apply for trains of trains. As for the furniture industry, the wardrobe is called any wardrobe with sliding doors.

Types of cabinet
- Sliding wardrobes can be:
- Radius;
- Built-in;
- Cabinet;
- Straight;
- Corner.

Production technology of the built-in wardrobe do it yourself
Instructions how to make a wardrobe with your own hands:
- We choose the material;
- Determine the degree, nature and technology of how the cabinet filling will be placed;
- We design the doors, choose the suspension version;
- We choose technology for mounting shelves;
- We prepare a niche;
- We make the necessary measurements and drawings;
- Acquire the necessary materials and accessories;
- We drink the required billets;
- We collect a wardrobe and mount the internal luminaires if necessary.
What makes a wardrobe
Before starting to design a wardrobe, it is necessary to determine the material, because it depends directly from it, as this technology will be manufactured by this piece of furniture.
From wood and lining
Wood is classic Material For the manufacture of furniture. Today it is very prestigious to have headsets from a natural tree. But for the wardrobe - this is not the best choice, since because of more high humidity The tree can begin to deform.

If you still want to make a wardrobe wooden, then choose a long-layer tree that does not have twisted, bitch and cracks. It must be processed by special compositions.

Lining can be made of plastic or MDF. It is not necessary to pre-prepare it. But the frame of the cabinet doors still have to make wood.

From drywall
The wardrobe from GLC is possible, but it is quite difficult. In fact, it will be a building structure, not a piece of furniture.
From laminate, mdf, fiberboard
These are optimal materials for the manufacture of such a type of furniture. Of these, the wardrobe at home can be done easily and simply. They have all the advantages of the tree and do not have its flaws.

Almost a nuance, the Fiberboard is preferably choosing density above average.
What makes filling
The filling depends on how the space of the cabinet will be distributed, where the shelves and drawers will be located. Specialists advise follow the following recommendations:
- Wet space side;
- The necessary small one - at the level of the view;
- Dry - on top;
- The most expensive is to distribute to the boxes.
The purpose of the filling planning is to achieve the smallest width of the shelves, which will be required when calculating the doors. To the distribution of the internal space of the cabinet, it is necessary to approach responsibly.

Filling the cabinet significantly affects how comfortable it will be comfortable and how many years will serve.

Cabinet
Doors - the most complex and demanding the most responsible approach detail of the cabinet. It is necessary to determine how much the flaps need and what width, with the design of the suspension and stoppers.
Note!


The smaller the doors in the closet, it is more convenient to use. But at the same time risks of pumping and stroke increase. The greatest width that is allowed for sash - 60-70 cm.

In addition, the doors should not be wider the most narrow shelvesOtherwise, it will not be possible to get to her. It is also desirable that the sash overexpose no less than 5-7 cm.
Such a necessary thing, like a wardrobe, optionally buy, can be made independently. On the Internet it is easy to find the drawings of the most different models Wardrobes coupe. Cabinet made with your own hands will be the subject of your pride.

Photo of a wardrobe with their own hands


Note!


Note!


Furnishing housing is a final step that combines all repair and design stages. IN modern furniture Several most important qualities should be combined: operational functionality, appearance as such, compliance with the general design idea.
Computer coupe or their elements are present in almost every housing. The convenience and functionality of this furniture is indisputable, and for such design styles, as minimalism, Urban, High Tech and are indispensable at all. The article provides comprehensive recommendations for independent making cabinet compartment.
Benefits
Examined the pros and cons of this class of furniture, we get a complete picture of contemporary concept Wardrobe with door opening coupe.
| Benefits | |
| Ergonomics | Standard structures require the presence of "deaf" zones for opening. In the door coupes, when opening-closing moves in one plane on the guides. The room is significantly saved. |
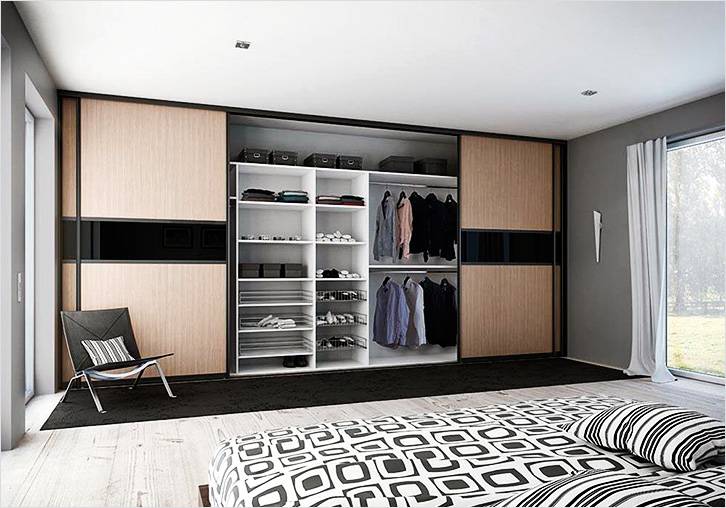
| Capacity | The ability to arbitrarily configure the internal space (filling), which determines the capacity. The only requirement is ergonomic feasibility. |
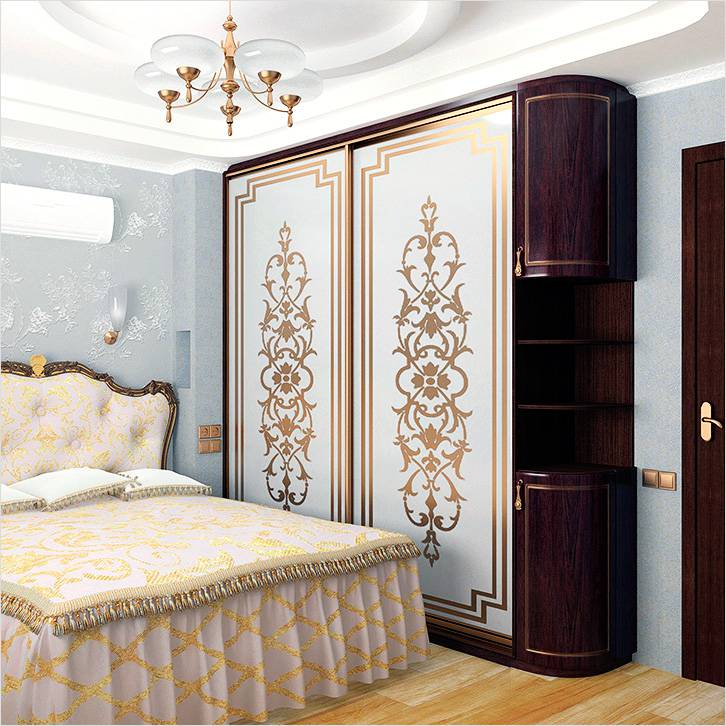
| Universality | Fits into any interior. Various methods Design and decorations allow you to install a wardrobe in the bedroom, kitchen, living room, etc. |
| Functionality | Inside, in contrast to ordinary cabinets, you can store overall objects, household appliances. Embed various devices - ironing board, workshop, countertop, etc. |
| Perfect solution for narrow premises | For narrow passes and corridors, the wardrobe compartment is often the only solution. Only it can be put in such places and comfortably operate. |
| Zoning | Double functional purpose. Using such furniture, you can easily zonate the room, that is, it can also perform the partition function. |
| Variety of designs | No restrictions for internal filling. A large number of Materials for the manufacture of facades, which allows you to embody any designer plan. |
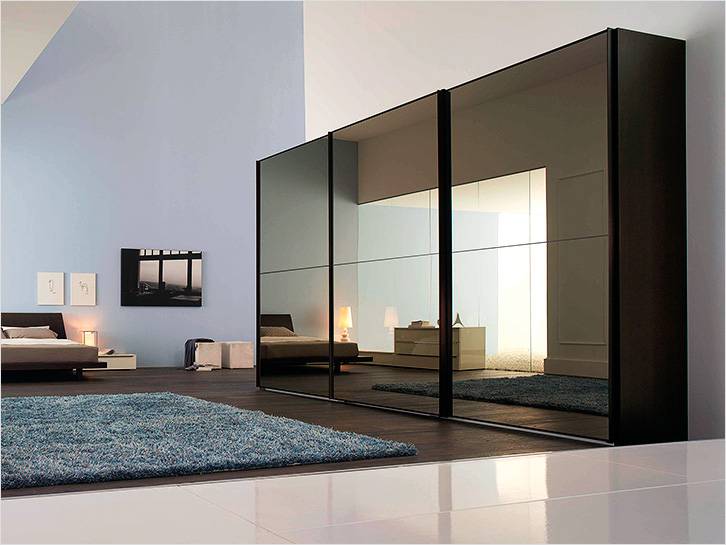
| Using a mirror | On the facade you can install a mirror. This will improve the functionality of the room and visually will expand the space. |
| Reliability during operation | Moving on the guide doors will serve much longer than opening on the loop. |
The disadvantages are significantly less, but they are:
| disadvantages | |
| Out of system sliding system | It occurs only in the case of acquiring a poor-quality sliding system. |
| Need for additional lighting | If the size is large, it will be necessary to carry out additional light, it significantly increases the operational comfort. |
| The need to clean the guides | Over time, the lower guides are clogged, which can be an obstacle to the movement of the roller. Therefore, sometimes it is necessary to clean the grooves of the guides. |
| The mirror is quickly dumping | If a mirror is applied in the finish, it will have to be often washed from stains and traces of hands. |
| No possibility of permutation | When designing dimensions are associated with a specific location of the cabinet. Not suitable for frequent permutations. |
Varieties in form
There are several varieties, they have constructive and external differences:
- built-in;
- separately worth it;
- corner;
- diagonal angular.
Consider each of them separately.
Built-in
When building such a cabinet, there is no top, rear wall and base. Only partitions are manufactured. The entire design is screwed directly to the ceiling, walls and semi. Metal corners are used as fixation.
This is a stationary design, and it is an unchanged part of the interior created.
Standing separately

It has sidewalls, upper, lower, back and sliding doors. This is a full-fledged piece of furniture. It is possible to move it, it is not attributed to any elements of design.
Angular

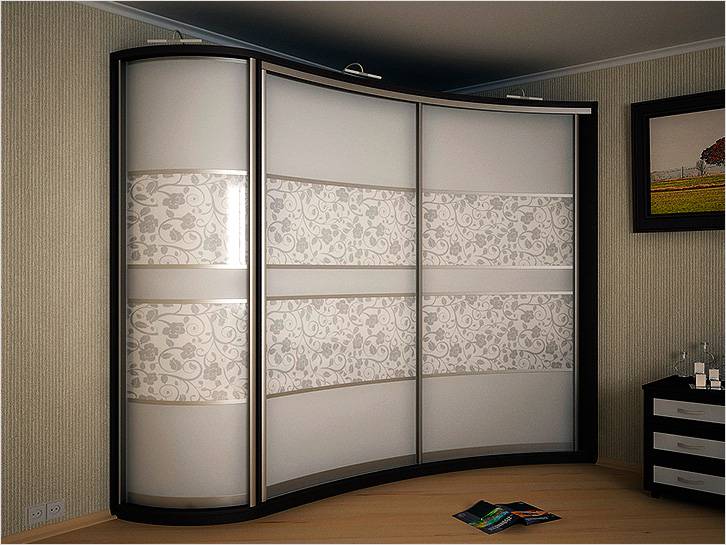
Excellent solution for small apartments, where the roads each meter. Repeats the form of an angle and allows you to rationally use space space.
Diagonal-corner

This is a variety of angular, but the facade does not repeat the form of an angle, but is done diagonal. Increased capacity of such a design determines its frequent use as a dressing room.
Material used
Furniture with a sliding door system is manufactured from a variety of materials. The table shows the main ones:
|
Material |
|
|
|
The most common and frequently used. Plate chipboardHaving a low price is quite sufficient. A huge selection of textures, colors, drawings allows you to make the facade piece for any design solutions. There is one, but essential, disadvantage - is seriously fine processing. For this reason, out of chipboard or chipboard make predominantly simple designs. |
|
|
Eco-friendly material, easy to handle. The variety of facades coatings are no less than that of chipboard. Practical and affordable material. |
|
|
Expensive option but natural tree Long stay long. Great decoration in any interior. |

Types of construction
Classification by constructive differences Next:
- embeddable;
- corps.
Embedded . There is no need for upper, lower and side parts. Their function is performed by walls, floor and niche ceiling. For the manufacture, you can use drywall, which will reduce the total costs of the product.
Corps . The main difference from the ordinary cabinet is the door opening method. If necessary, you can move. Transportation (relocation) without disassembly is possible. Minus - increased consumption of materials, as the side, lower and upper walls are made, the back of the bottom.
Now consider the organization of the inside of the cabinet.
Constructive features

When designing, ergonomic and operational specifics should be taken into account.
Consider the main structural elements of the cabinet coupe.
Width of doors
Selection of doors size depends on factors:
- manufacturers of sliding systems are limited. defined dimensions. Some systems allow you to make a waiter to 120 cm wide;
- the width is affected by the number of internal sections. Each section should be free access;
- personal preferences are affected. There are no special rules if it does not go beyond the limitations listed above.
The optimal width, spent in practice - is from 600 to 900 mm. Such a size provides the most comfortable conditions for use.
Sliding systems

Sliding systems are classified according to two main criteria:
- profile material;
- the principle of exfoliation.
For the manufacture of profile of the mobile system, aluminum or steel are used. The material of the sliding system is selected, as a rule, the same as applied to the door frame. Steel structures Cheaper, but in most cases, preference is given to aluminum.
Constructively produces two types of systems - the lower and top-water. In the Lower Hall - the door with the rollers moves along the rail. In the uppergeneration - its rollers are moved along the upper guides.
Height

The height is selected arbitrary. The only restriction may be ceilings or small growth of the owners of the apartment / house. Designs are manufactured from both the ceiling to floor and less height.
The standard length of the material used for the walls is 270 cm. The standard apartment has a ceiling height of 260-270 cm. Practically coincident dimensions allow not to cut and not increasing the design elements.
For ceilings above 270 mm (if you wish to have a cabinet from floor to ceiling) there are two solutions. The first sheets of material are joined to the required length. The second is going to Andresol. The sheets can be shy on high-precision equipment specializing in such services.
Depth of the shelves

The depth of the shelves determines the daily convenience of using the cabinet. The optimal and recommended indicator is 60-70 cm. Usually in the cabinet there is a bar for her shoulders, the width of which is about 48 cm. The depth of 60 cm completely eliminates the contact of the inner surface of the door and clothes hanging on her shoulders. Most furniture accessories (boxes, trays, etc.) has a width of 50 cm. It should not be done deeply, since it will be inconvenient to get under the wall when placing things.
Not always, the size of the premises allow you to install furniture with the maximum recommended depth of the shelves. But at the minimum depth there are limitations. Optimal option Maybe the depth is 40 cm. Considering that 10 cm goes under the mechanism sliding doors, You can buy a small width of 30 cm wide. Alternatively, mounting a suspended rod (rod), perpendicular to the doors and the rear wall, in this case, the width of the plated shoulders is not limited.
Such a solution is much better than completely abandon the installation of the cabinet, especially since such a "narrow" design for small-sized apartments - The perfect solution.
Length
When designing the closet length is chosen in accordance with the place of its further installation.
Shelf altitude and rods
![]()
The height between the shelves is 250-350 mm. The choice rule is simple: more depth Shelves - more distance between them, less depth - the distance is less. This dependence is associated with the convenience of accessing the stacks of linen located in the depth of the shelf (at the rear wall).
When designing the mezzanine, it is necessary to take into account the size of things perceived for storage on it. If these are suitcases, the height of the mezzanine should be equal to the height of the suitcase, plus a small supply.
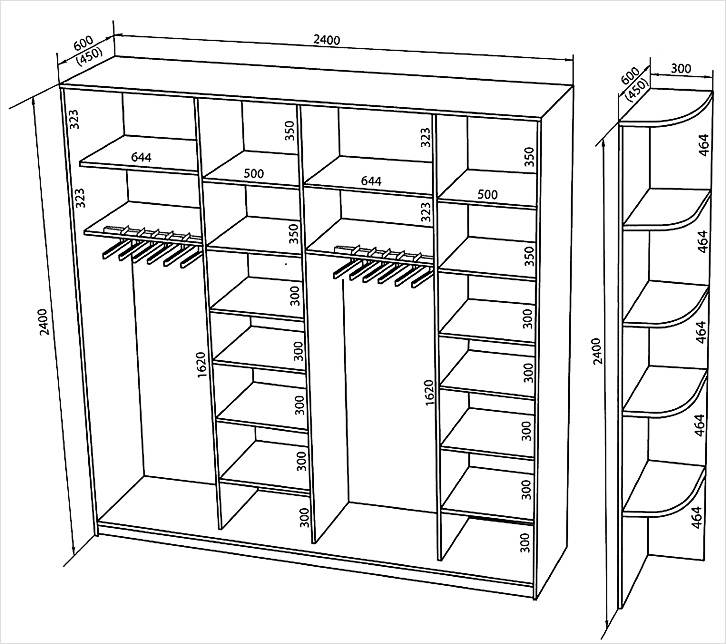
The mounting height of the bar for the shoulders is determined by the length of the clothing placed on it. Maximum height It will be equal to the longest thing. Averaged Length of Typical Wardrobe Items:
- shirts - up to 100 cm;
- jackets - up to 110 cm;
- long clothing - up to 130 cm;
- cloaks and coats - up to 150 cm.
These calculations are approximate, since the length of clothing depends on growth, style and other parameters.
Video:
Schemes and drawings
Schemes show various projects and furniture assembly technology:


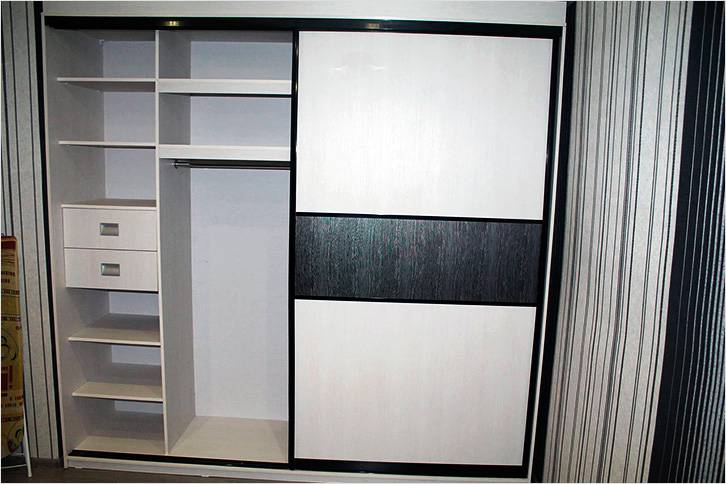
Device inside
When designing the wardrobe, the coupe, first of all, the zoning of the indoor space is made. The figure shows the universal division scheme for the storage area of \u200b\u200bvarious things:
![]()
Buying ready productIt will have to agree with the configuration of the filling proposed by the manufacturer. Independent manufacture will make it possible to maximize the size, functional purpose, location of various zones and much more, which, ultimately, will ensure maximum operational comfort.
Below is a table with examples of frequently used internal filling items and zoning a wardrobe with their help.
| Zoning | |
|
|
Shelves are one of the main filling elements. They can be stationary and retractable, solid and ventilated, half and all depth, etc. |
|
|
Boxes - the second largest cabinet element. |
|
|
Rod Suspension - needed for clothes on her shoulders. Production material is different, more often metal. |
|
|
Convenient storage baskets. All things are clearly visible in them that creates a certain convenience. |
|
|
This device is called - the trouser. Pants are always ironed and ready for dressing. |
|
|
Rod (hanger) for storage of ties - it is convenient to choose, do not impenetrate, the correct suspension protects against the change of form. |
|
|
Convenient placement of belts, as an alternative - storage on the shelf in rolls. |
|
|
Compact and convenient storage of underwear. |
|
|
Placement of bed linen, towels, some clothes in the stacks on the shelves. |
|
|
For storing blouses, light blazer, short sundresses highlights a significant part of the internal volume. The opening is installed in the opening. You can make several such departments - for short and long things. |
|
|
Department for accessories - bracelets, watches, glasses, etc. These items are recommended to be stored in drawers. Inside the space can be divided into separate cells. |
|
|
Shelves for storing shoes. In the upper (antlesol) part, you can place shoes in boxes. |
|
|
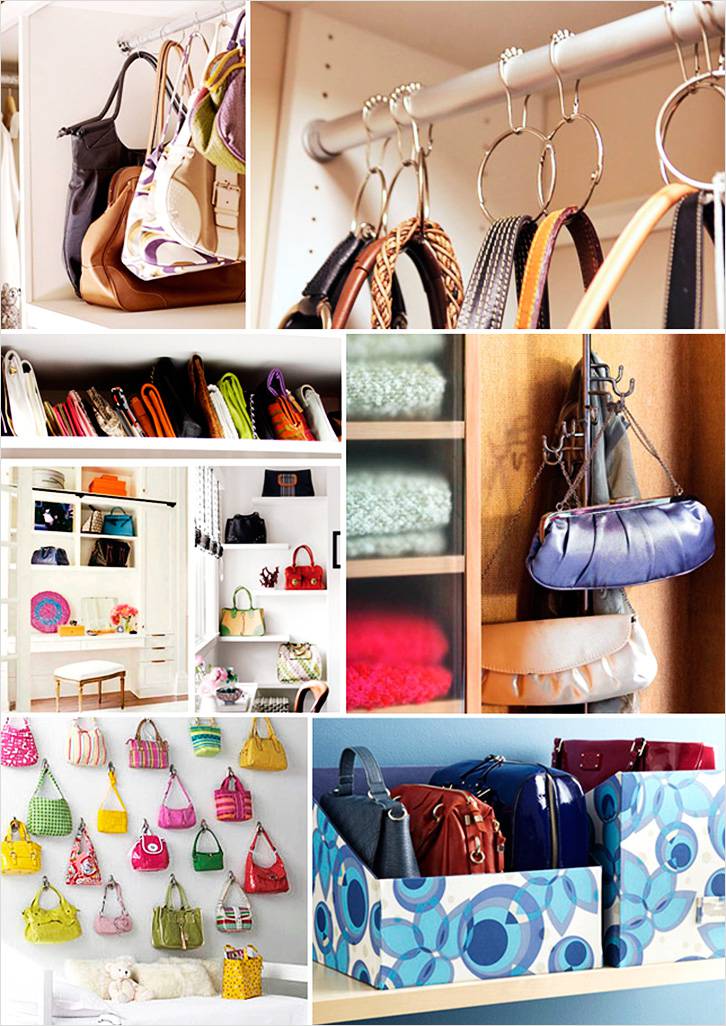
Hooks, suspensions, carbines, rings and other bags for bags. |
| Hiking suitcases | Rarely used (once a year during the holidays), place suitcases on distant (upper) shelves or mezzanine. |
|
|
One of the options for bed linen. The width of the shelf is up to 80 cm, height - up to 60 cm. |


Characteristics of the main filling items:
- retractable and stationary shelves. For convenient use, the distance between them is from 350 to 450 mm;
- retractable boxes. Two types - fully retractable (100%), partially retractable (80%). Can be equipped with closers providing smooth semi-automatic closure of the box;
- antresoli known as hard-to-reach shelves. Located at the top. They are stored rarely used and overall things;
- the rods are necessary for her shoulders. Mounted in the width of the cabinet;
- pantographs or special "furniture elevators". Thanks to them clothes are stored on required level And easily put forward a special barbell. There are electrical or mechanical;
- baskets are convenient for storing small things. Tools with rollers and guides.
Facades
Thoughtful to the smallest internal filling will be dramatically dissected with unsuccessfully selected facades. It is the facades that give all the cabinet a special finished look. Consider several options for their execution.
Mirror

The mirror visually increases the space and makes the room lighter. It can be solid or divided into several parts. The large weight of the mirror determines the need to select high-quality and reliable rollers. Such a facade creates additional services for maintenance - the mirror is quickly dirty. It will have to regularly wipe and wash, especially if there are small children in the family.
For facade mirrors, a variety of trim is used - sandblasting patterns and drawings, spraying all kinds of shades (silver, emerald, gold, etc.) for glass, printing color images and much more. In order to safety, the mirror from the inside is covered with shockproof (arm) film. If the mirror breaks, the fragments will not scatter.
Glass

The glass is no less popular than the mirror, the facades are equipped with unbreakable. Preferably used matte glass with a pattern. The vertical, horizontal strips, dividing the canvas on separate squares, look original.
MDF and DPP

These materials are laminized by the film. The facades look massively and hard. For their installation, reliable roller systems will be needed. One of the advantages is a huge selection of colors, shades and patterns, on the texture - from matte to brightly glossy.
On MDF and chipboard facades can be photographic.
These are the main types of facades used in the manufacture of cabinets of the coupe. You can combine them with each other. This article provides photos with a considerable number of original ideas for the manufacture of facades.
Step-by-step manual instructions
Application edge ribbon
After cutting all the elements, the edge ribbon is pasted the ends of the plate. Sequence of operations performed:
| Instructions for gluing the edge to the end of the blanks | |
|
|
If there is no assistant, you can use a unaccompiece. It will take a small box and quick-pressure clamp. The clamp presses the board to the box, providing the stability of the workpiece and the convenience of the ribbon ribbon. |
|
|
One side of the edge ribbon has an adhesive surface. Woke up to a high temperature easy to glue it to the workpiece. |
|
|
Cut the edge of the required length. At the edges, leave the reserve of 1 cm. Cut after sticking can be ordinary scissors. |
|
|
For gluing, the position of the temperature sensor is installed on "2". |
|
|
For security purposes, put on left Two gloves. There should be no coils on the palm. |
|
|
Iron in the edge ribbon, and hold it with your left hand (even). |
|
|
We carry out the iron in the opposite direction, simultaneously with the hand in the glove tightly press (smooth) the edge ribbon. |
|
|
Hand smoothed the edge a few times. |
|
|
The use of a special roller. Print the edge ribbon with iron and hire a roller. Very comfortably. |
|
|
Cooled tape sharp knife From the end gently cut the remnants. |
|
|
We get such a cut. |
|
|
We repeat the procedure for all the ends of the workpiece. Measure the ribbon with a margin of 1 centimeter, from each edge. |
|
|
We glue the iron and smoothing. |
|
|
Cutting the cooled edge. The edge on the adjacent face is already pasted, make cut very carefully. |
|
|
From all sides, we cut off the longitudinal remnants of the protruding edge. |
|
|
Result. We glue the edge ribbon the ends of the remaining billets. |
|
|
All sections are stitched by a special bar. The inner part is filled with foam rubber, outside - small abrasive. |
|
|
Grinding cuts is made only by longitudinal movements. |


The processing of the main elements is carried out similarly.
Assembly
According to the project, details are reproduced. This operation is best done in the workshop on a special format machine. After cutting and edge stickers, we collect a wardrobe:
| Frame assembly instructions | |
|
|
To work will need to assemble additional deviceconsisting of a metal strip and two connected cuts of the board. It turns out a corner with a metal guide. Two quick clamps will be required. With this device, it is very convenient to connect the blanks at a right angle. |
|
|
We make a test of the as a carbon - there must be 90˚. |
|
|
Decoration from the top edge of 70 mm. |
|
|
The example uses a 16 mm stove, so 9 mm must be retreating from the edge. Why not 8 mm? Because the stove protrudes on 1 mm per edge, forming a small side. The middle of the adjacent plate is at a distance of 9 mm. |
|
|
Mark for drilling. |
|
|
Such a mark is placed and below. |
|
|
Using the drill, make holes for fasteners. |
|
|
Special drill replaces three at once. It allows you to make the main hole, the belt and remove the chamfer for one operation. |
|
|
Drilling. |
|
|
Spin the confirmate screwdriver. |
|
|
Securing the sidewall, according to the project, placing the installation location of the shelves. |
|
|
Next, using the square, put the marks from two sides to the holes for fastening the shelves. |
|
|
Marks for which holes for confirmation will be drilled. |
|
|
The device collected at the beginning of work is convenient to use for fastening the shelves. Measure the tape measure 1/2 of the stove thickness. The thickness of the plate is 16 mm, so the label is retreating 8 mm. |
|
|
At this level, we install the shelf using quick-release clamps. |
|
|
It is clearly seen here that the label is in the middle of the end of the workpiece. Everything is ready for drilling. |
|
|
Drills. |
|
|
Spin confirmates. |
|
|
Similarly, set the remaining shelves. |
|
|
Install the crossbar. And screw each shelf with configmatics. |
|
|
Fixing crossing flexible clamp, twisting it with confirmates from above and below, after fixing each shelf. |
|
|
So the bottom of the cabinet compartment is assembled. Clamp clamping the lane from the plate and with the end we fix it with the confirmation. |
|
|
Bottom Drill shallow holes for installations of furniture legs. |
|
|
We twist the metal sleeve with the outer and internal thread. |
|
|
Using the hexagon, pull up (blend) to the required position. |
|
|
In the sleeve we twist the leg with a plastic support. Due to this, the furniture can be moved and smooth in terms of level. |
|
|
Two parts of the support leg assembled. |
|
|
After assembling the cabinet on its back side, the NPP sheet is attached by ordinary cloves. |
|
|
Filling Fiberboard is starting from above. Tilting the cabinet from side to the side, we achieve an angle of 90 and a sidewall and top plank. You feed the side and lower sides of the Fiberboard sheet. |
|
|
When assembly, plastic furniture corners were not used. Why? The use of confirmation is much more practical, as it is screwed into the stove for several centimeters and reliably connects the structure, giving it additional rigidity. |
|
|
Confirmate caps are closed with a decorative plug. |


In the same operating sequence, you can collect a wardrobe of any configuration.
Video:
Making doors
The door consists of a frame, metal guides and roller systems. To order it stands in a company professionally engaged in similar systems. Specialized software For the specified sizes, it calculates all the elements and give the full specification for the assembly. Mirrors or plates from other materials for fastening in frames are cut into the size of the doors.
| Elements for sliding system | |
|
|
|
|
|
|
|
|
|
|
|
|
|
|
Vertical stands / handles for the side parts of the door. |
|
|
Sealing gum for mirrors. |
|
|
Self-adhesive brush for mitigating doors when they open / closed. |
|
|
|
|
|
|
|
|
Staples for fixing doors in extreme positions. |


The main parts for assembling doors are made of aluminum. All metal components must necessarily be covered with a protective film that protects them from scratches during transportation.
Build sliding system
Consider a step-by-step assembly of the door leaf. In our example there will be two sashs from the mirror.
| Door assembly instructions | ||
|
|
The door is located in a horizontal position and provides free access from all sides. | |
|
|
In the upper part of the vertical rack, at the same time serving and handle, drill the two mounting holes. | |
|
|
Lower - diameter of 6.5 mm. | |
|
|
Top hole - 10 mm. Through it will be attached to the top profile of the doors and a roller. | |
|
|
Lower part of the same vertical profile. Top hole - 10 mm, lower - 6.5 mm. The distance from the edge of the first hole is 7 mm, the second is 43 mm. Closer to the edge will be attached the bottom roller. The second hole is for a screw connecting with the profile. | |
| Installation of profile | From above, you fix the rubber sealing profile, gently inserting it. | |
|
|
The procedure is performed sequentially on all faces. The rubber seal on the corner is not cut off, but continuously laid throughout the perimeter. | |
|
|
This screw is not tightened to the end. Later, top rollers will be installed in it. | |
|
|
Install the top rollers and drag the screw until you stop. | |
|
|
Mounted in the bottom of the door rubber seal. | |
| Also spinned screw with the top roller | At the top, we fix the second couple of rollers. | |
|
|
Install the bottom roller. We press the spring on the roller and gently insert it into the hole, fasten the screw. | |
|
|
The screw is delayed by a hexagon. | Ready wardrobeCabinet with installed first door. |
|
|
In the same sequence, we collect and mount the second door. | |


Additionally set auxiliary elements - Pipe for the shoulders, etc.
Video:
 At the end should work out like this
We offer to familiarize yourself with the schemes and drawings. They will help create their own project.
Video:
Video:
Photo


 Why you can not give icons
 Is it possible to give icons as a gift: Signs, the opinion of the Church
 A year ago left her husband, and now I do not know what to do