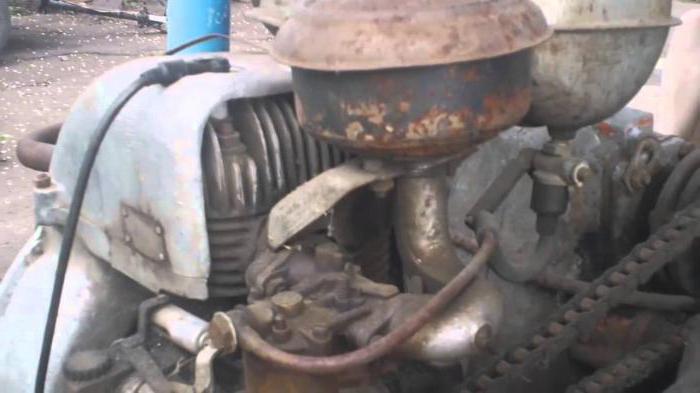
What to make a shovel blade on a walk-behind tractor. Blade for a walk-behind tractor: factory and home-made varieties - design differences. Getting Started
The harsh Russian winters with abundant snow force people to adapt to the realities of life. And snow removal is an integral part of winter life for many Russians. Removing snow manually is troublesome, long and difficult. Therefore, the Neva walk-behind tractor, complete with a hinged blade for cleaning snow, will help in this work.
This brand has a large assortment of various attachments that are designed to perform various types of work.
Snow removal is not a problem for those who have special equipment for this. After all, manual labor is no longer relevant, and in the 21st century, technology comes to the rescue in many aspects of life.
You can, of course, buy a specially designed one for cleaning snow, but usually its cost is not justifiably high, besides, except for cleaning the snow, you will not use it anywhere else on the farm.
A budgetary and versatile option would be to purchase a blade for a walk-behind tractor. It is a bucket without sides and can be tilted to one side.
When driving on snow, the blade will throw snow to the side, clear the path, leaving behind a flat strip without snow.
But besides snow removal, there are other options for using the blade - it can also act as a shovel for leveling sand and gravel mixtures in construction, or simply help level a loose surface.
One blade model is presented on the official website of the Neva motoblock manufacturer.
Hinged motoblock knife (ННМ)
The position of the knife is adjustable. It can be either straight or at an angle.
- It is possible to turn the blade to the left or right at an angle of up to 25 °.
- When working with a straight knife, the width of the processed surface is 90 cm.And when turning the slope, it decreases to 81 cm.
- The average speed of the walk-behind tractor with the knife installed is 3-4 km / h.
- Based on this, productivity can vary up to 0.36 ha / h (when working with a straight blade), and up to 0.33 ha / h when working with a tilted blade.
- The knife is made of durable high quality steel. And the whole structure has the following overall dimensions: 90 cm long, 42 cm wide and 50 cm high.
- Before starting work, be sure to check all connections. They should be well tightened.
"Red October", if used correctly, guarantees uninterrupted operation of the knife for 5 years.
Do-it-yourself blade for the Neva walk-behind tractor, detailing, diagrams
If you have a grinder, welding, drill and some consumables at hand, then you can make a blade with your own hands.
For this you will need:
- A barrel with a volume of 200 liters (you can take it out of oil);
- 40 × 40 square tube;
- Mounting bracket;
- A semicircle for creating rotation angles.
Manufacturing process
The main working part is the blade itself. To make it, you can take an ordinary steel barrel, then cut it into three parts. Next, take two of them and weld them together along the edging. The result is a 3 mm steel blade, which is usually enough to withstand domestic loads.

A knife is installed underneath to ensure better grip of the snow. It allows you to trim the bottom layers of snow. For its manufacture, a steel plate 5 mm thick is taken. Since it is she who has the main load, it must be strengthened. Holes are drilled at a distance of 10 cm, they are necessary for installing a rubber fuse. This is a special gasket between the knife and the bucket itself, thanks to it there is no friction between metal and metal.
Around the middle of the dump, a 40 × 40 square pipe should be welded. And a semicircle is welded to the pipe, which is necessary for turning the blade. Then holes are drilled in the semicircle and the pipe, which will be necessary to create the angle of rotation and fix the blade in the desired position.

The next part is the holder. For its manufacture, an L-shaped structure should be welded and connected to a pipe from the blade. It will serve to secure the bracket.
This bracket connects the walk-behind tractor and the shovel blade. Its height can be adjusted using bolts and a hitch.
Video reviews
Below is a video on the work of the factory blade with the Neva walk-behind tractor:
Here is a video example of how you can implement and use a shovel-blade for motoblocks "fast":
The use of motoblocks in everyday life has already become commonplace. It is a versatile assistant that is unpretentious and easy to use. With its help, you can perform many operations that we do every day - this is the cultivation of the land, transportation of goods, chopping of firewood, it is even useful for clearing snow.
The range of use of the unit depends on your needs and directly on the variety of attachments. But it is not always possible to buy it. The craftsmen have come up with a way to create a homemade snow blower for a walk-behind tractor. Therefore, we will consider the option of how to do it yourself and not spend a huge amount of money on its purchase, because it was the small costs that made the do-it-yourself dump for the walk-behind tractor so popular among the population.
The principle of operation of the snow blower and its features
In order to build something, you must first understand how it works. A snow plow for a walk-behind tractor simply bites into the thickness of the snow cover and, thus, clears its way without putting in huge efforts. It has been verified that up to 12 cubic meters of area can be cleaned in a minute of work. In this case, the mass ejection from a special pipe for disposal is carried out at a speed of 70 km / h.

Therefore, we can say with confidence that snow removal with a walk-behind tractor is a fairly effective way to clear an area. It allows you not only to clear the road, but also to remove the snow as far as possible so that it does not interfere with the movement.
Before you start making a snow blower for a walk-behind tractor with your own hands, you need to clarify all the necessary and important information about the upcoming work.
Will the engine be gasoline or electric? To do this, it is necessary to clearly indicate the place of use of such a shovel for snow removal. If you do not plan to go outside the yard, then the electric motor will be enough for you. But in the case of long-distance cleaning work, it is better to use a standard gasoline engine.
What type of snow removal equipment will be? It can be of several types, which can significantly affect the quality of the work performed in the case of an incorrectly selected option.
- Snowmobile bedozer. The work is carried out on the basis of the front blade. This option is ideal for snow that has stuck together or has been lying for a long time.
- Auger snow blower for walk-behind tractor. The snow falls into a special pipe thanks to the gripping of the auger. And already from there it flies a considerable distance.
- Snowmobile fan. Such a snow blower model uses special blades for work. They lift and direct the snow mass into an inclined pipe, which throws it to the side.
- Snowmobile vacuum cleaner (air-ventilated). The principle is pretty simple. The snow-plow motoblock sucks in snow and throws it out at high speed from the other side.
Vehicle modification options
The "mounted snow blower" modification will be useful to any person living in their home. With its help, you can turn an eternally idle walk-behind tractor in the winter into a functional technique by attaching a snow blade. At the same time, the variability of the nozzle is amazing - you can use special brushes to clean the passages from snow, attach a rotary nozzle, which will collect the sediment into a special tank. It is worth watching the following video to make the process of creating a nozzle easier:
Rotary snow blower
 It is most successful to use a screw nozzle. A rotary snow blower for a walk-behind tractor will perfectly cope with any kind of snow. It can be a shallow cover or a well-compacted layer.
The front section of the snow plow has a large bucket and a funnel. With its help, snow is collected in huge quantities. Inside is the auger itself - these are two conveyor screws. They transfer the snow mass further to the pump. Each of these screws has blades in their design that rotate around the screw itself.
The blades begin to move as soon as the motor starts. Due to its position, the blade effectively cuts into the snow cover, and the next one immediately rises in its place. The screws also rotate, and they provide several important functions: crushing the mass and transferring it to the pump. This is where there is a small peculiarity. The conveyors themselves are at an angle to this pump. This ensures that the snow gets to it. The air pressure at high speed pushes the snow out very far from the walk-behind tractor.
At the bottom, the shovel for the walk-behind tractor has a scoring plate. If a do-it-yourself snow plow for a walk-behind tractor is made on the basis of an air-cooled electric motor, then you should pay special attention to protecting this area from unintentional contact with snow.
Required consumables
When creating equipment for cleaning snow with your own hands, you will need different materials and tools. Therefore, take care of this in advance so as not to be distracted during the manufacturing process:

- profile pipe;
- conveyor belt;
- bolts and nuts;
- spray paint;
- chains;
- pliers;
- welding machine;
- screwdrivers and hammer;
- vice;
- file;
- Bulgarian;
- a set of keys;
- drill;
- electric hacksaw.
Having all this at hand, you will quickly make a snow blower for a walk-behind tractor with your own hands. But do not forget that you also need a correct circuit. This will be the key to the correct homemade blade.
Snow blower with electric brushes
 To clean the snow with a walk-behind tractor easy and safe, the homemade product must meet all the necessary parameters. For those who do not have an engine, a Honda engine with an auto transmission, with a power of 6.5 l / s and a gear ratio of the gearbox, is suitable. For the snow thrower, a 16cm plastic sewer pipe and a half-inch pipe will work. The steel plate must be adjusted to 120 mm by 270 mm. The total width of a homemade blade for a walk-behind tractor is in the region of 65 cm.
With this size, the snow blower is easy to store. And the compact dimensions have high maneuverability. This will make it easy to clear even narrow paths in hard-to-reach places.
To determine which drawings will be needed, it is enough to present the unit in full. The design of the device itself consists of three units - a handle, a bucket for a walk-behind tractor and, directly, a motor. The necessary diagrams for making a do-it-yourself blade shovel for a walk-behind tractor are easy to find on the Internet and understand them. It describes in detail how to make a do-it-yourself blade for a walk-behind tractor and what needs to be done for this.
In order to make a shovel, you can take a part from an ordinary tin barrel or from a gas cylinder. Such a shovel will be durable and comfortable.
Having made a do-it-yourself blade for a walk-behind tractor, you will not only simplify the process of snow removal, but also significantly save your family budget. After all, why buy expensive equipment if you know how to make a snow blower? This attachment will be an excellent helper in any household.
The snow blower is an indispensable machine in winter at any summer cottage (read). If the list of your irreplaceable iron assistants already includes such a device as a walk-behind tractor, then try to make a home-made snow thrower for it with your own hands.
A snow blower can also be made from a chainsaw. Find out how -.
To make a snowblower from a walk-behind tractor, you will need the following tools:
- A set of keys.
- A set of bolts with nuts.
- Drill with a set of drills.
- Angle grinder.
- Screwdriver Set.
- Hammer.
- Pliers.
- Vise.
- File.
- Electric hacksaw.
- Chain kit.
- Welder.
- Metal sheet.
- Profile pipe.
Types of snow blowers for motoblocks
In order to properly make a snow blower yourself it is necessary to distinguish between their types and principle of operation each of them.
Rotary snow blower
Rotary snow blowers are considered the most powerful in the entire range of snowblowers on offer. Machines of this type are capable of throwing snow over a distance of more than 12 meters. Read on How to make a rotary snow blower.
A home-made rotary snow blower for a walk-behind tractor is a metal box with a screw shaft located in it. The rotating shaft is considered the main working mechanism of the snow blower.
As additional accessories in the manufacture of the mechanism, you will need controls and clutches, as well as some spare parts of the drive. Read about spare parts for a snow blower -.
A rotary snow blower for a walk-behind tractor starts moving only due to the work of the shaft of the walk-behind cultivator, the torque of which transfers its energy through special adapters. Such adapters are sold in all shops specialized in the sale of garden equipment.
For more details, see the video:
The principle of operation of such a mechanism consists in capturing and moving snow into the mouth of the machine due to the operation of the screw-rotor device. The possibility of operation of such a device is obtained due to the flexible connection of two shafts with the help of a strong one.
Another important mechanism in the design is the impeller, which is necessary for ejection of the snow mass through a special hole brought out to the top.
The shaft is a piece of pipe around which a gear unit - auger - moves in a spiral. In order to maintain a constant torque, and therefore efficient production of work, the shaft is mounted on bearings.
The toothed auger is made of metal but in the form of equal and equidistant from each other blades. From below, to the bottom of the shovel, a plate with a sharp edge is attached to cut the snow cover.
For the manufacture of a knife plate, a sharp metal sheet is used, with the help of which the snow layer is trimmed and folded back.
Blade parts are made of steel, then welded with a welding machine. A knife is attached to the bottom of the blade by welding. Using rods and brackets, the blade is fixed to the walk-behind tractor. Traction mechanisms are held in the holes of the blade and are attached to the controls through the tubes.
The fan blade snow blower consists of following mechanisms:
- Drum and bearing.
- Impeller.
- Blades. They are located along the axis of rotation.
- Blades welded to the drum.
- Sheet steel bucket.
With the help of a torque transmission system, the drum axle is connected to the motor shaft.
The snow mass, falling into the box, moves strictly along the guides to the blades, which throw it out.
The principle of operation of a rotary and auger snow blower for Agro and Cascade walk-behind tractors
Snow thrower for Agro or Cascade walk-behind tractors looks like a huge bucket, which rakes the snow inside the machine and moves it in a thin stream onto a special screw conveyor - auger.
Below is a video of the auger snow blower for the Agro walk-behind tractor:
The mechanism consists of two paired non-cast screws made of strips with sparse teeth located along the outer edge of the strip. This design makes it possible to connect the bucket halves in such a way as to provide the greatest coverage of the snow mass.
Below is a video of a snow blower for the Cascade walk-behind tractor:
The screws are screwed to the center of the shaft where the snow falls. The force of rotation of the shaft is so great that it is capable of crumbling even hard layers of snow into small lumps.
To ensure that the throwing barrel is always free and not clogged with snow, the screws overlap- this makes it possible to maintain a constant slow motion of the movement of the snow stream.
Auger snow blowers are called single-stage, since from the moment the snow mass enters the unit until it is thrown out, it is required to go through one stage of processing - movement along the conveyor.
Another type of snow blower is considered two-stage, that is, such machines consist of two main working elements - a screw and a screw. Such models of snow blowers installed on Agro and Ugra walk-behind tractors, and the advantage of such a mechanism is the long range of snow throwing - up to 25 meters.
Features of the manufacture of dumps
To make a homemade blade for the Salute walk-behind tractor, you will need following tools:
- Drill with a set of drills.
- Bulgarian.
- Welding machine.
As a material for the dump, an ordinary steel barrel with a capacity of 200 liters will do. This barrel needs to be cut into 3 equal pieces that will act as curved blade segments.
The two parts must be connected by welding to each other, as a result of which the necessary for for making a blade a product with a thickness of 3 mm... This thickness is considered optimal to provide the required rigidity of the equipment.
The nuances of making a homemade snowblower with your own hands
In the manufacture of a blade for the Salyut motor-cultivator, it is necessary to strengthen the lower edge with a knife part. For this prepare a metal strip with a thickness of at least 5 mm.
The length of the strip is equal to the length of the bottom of the blade. Further, holes with a diameter of 6 mm are drilled in the prepared blank for the knife, which must be positioned every 12 cm. With the help of these holes, rubber is attached to the blade.
Making a blade from a barrel
A square pipe with a side length of 40 mm is welded to the dump already prepared from two parts of the barrel in the middle. This element will strengthen the structure of attachments
Then to the central part of the pipe it is necessary weld a semicircle with pre-drilled mounting holes... The semicircle should be made of a thick sheet of steel.
The holder-holder for a homemade blade is L-shaped. One of the ends of this component is attached to one hole in a semicircle, and the other is screwed to the construction of the walk-behind tractor with bolts.
The blade height can also be changed, for this bolts are used that need to be screwed to the section of the profiled pipe.
Features of the manufacture of different dumps
Blade for walk-behind tractor can be made of steel sheet with a thickness of at least 3 mm, the size of the device upon completion of work will be 85 * 22 * 45 cm.
Internal auxiliary posts should be made of a material of relatively large thickness, since they protrude in the form of a kind of stiffening ribs. Holes are also drilled in them for attaching the shovel to the rods of the walk-behind tractor.
Blade for motoblock Neva
A blade for a snowblower from a Neva walk-behind tractor is made using exactly the same technology. A bracket mounted on the runners of the walk-behind tractor can be used as a blade attachment. The bottom of the hinged support located in front is also attached to them.
For fastening use bolts nomenclature M 10... The shovel knife for the Neva motor cultivator is bolted and has dimensions of 0.3 * 10 * 85 cm.
The final stage
To prevent the device from cutting into the ground, the edge of the blade is sheathed with metal. With the dimensions of the main device - a blade 45 * 22 cm, it will look like a bucket externally.
To extend the life of your homemade device, it is necessary during the first use check the condition of the fastening of the elements every 25-30 minutes of work.
Take time to check the tension of the V-belt each time you use the machine.
Check and retighten all screw connections at regular intervals.
Timely and consistent performance of such device maintenance will allow your DIY snow blower to operate reliably and efficiently throughout many winter seasons.
Each master is quite capable of making a snow blower for a walk-behind tractor on his own, and experiment with sizes and materials to learn how to make snow throwers for different models of walk-behind tractors.
To avoid the formation of corrosion on your unit, do not forget to frequently treat metal surfaces with special chemical solutions. Compliance with all of the above recommendations will allow you to avoid costly repairs to the device or the purchase of a new unit.
Learn how to make your own electric snow blower.


It could well be crafted by any DIY craftsman who has some experience with metal. With this add-on, you can regularly and easily rid the area of snow drifts. This applies not only to private use, since the device will be able to handle a very impressive amount of work. And such manipulations are quite inexpensive, which cannot be said about factory-made equipment.
The need to use a blade
This solution eliminates the need to use a shovel, which is a rather laborious task. Before proceeding with the manufacture of an addition to an existing walk-behind tractor, it is necessary to consider the design features of a snow blower, which consists of three parts, namely: a mount, a snow shovel and a steering angle correction device. The attachment point is responsible for fixing the shovel on the tractor frame. Having made a blade for a walk-behind tractor with your own hands, you can do such work on the site as cleaning up garbage and leveling the soil surface. If it is necessary to carry out the last of these works, it will be possible to transfer the soil from one place to another.
Blade design features

If you decide to make a do-it-yourself blade for a walk-behind tractor, then first you need to familiarize yourself with the design features of this attachment. The operation to correct the position of the element is completed by setting the required angle and fixing the blade in a certain position. In this case, cotter pins are used. It should be noted that the width of the shovel of the described equipment, as a rule, is equal to the limit of one meter. This indicator can be considered relevant when the bucket is made of metal with a thickness ranging from 2 to 3 millimeters. You should take advantage of the experience of professional manufacturing companies that use high-quality steel in the process of manufacturing dumps. When a do-it-yourself blade for a walk-behind tractor is made, it can be additionally equipped with metal attachments in the form of knives, which will be most conveniently used for leveling the ground. Among other things, you can equip the equipment with rubber attachments, which are indispensable when clearing snow. Shovels should not be equipped with spring damping mechanisms, this is due to the fact that the speed of movement is low enough, therefore, protection is not required from contact with an uneven soil base. The walk-behind tractor does not need swivel-lifting devices at all, which can reduce the cost of a set designed for snow removal.
Blade manufacturing features

It is not difficult to make a blade for the Salyut walk-behind tractor on your own, and you will have to use a welding machine, a grinder and a drill. It is not worth looking for a metal of suitable quality for a long time, because for this you can prepare an ordinary steel barrel, the volume of which is 200 liters. The container needs to be cut into three equal parts, which will make it possible to obtain three segments, each of which has a curved shape, which is exactly what is required. It is these blanks that will be used to make shovels. Along the contour, two previously prepared elements must be welded together, which will make it possible to obtain a product whose metal thickness is equal to three millimeters. This indicator will be enough to ensure the required rigidity of the equipment.
Nuances of work

When the blade for the Salyut walk-behind tractor is made, the lower part of the element can be reinforced with a knife. To do this, the master must prepare a metal strip, the thickness of which is 5 millimeters. Its length should be equivalent to that of the blade. At the next stage, 6 mm holes should be made in the knife, placing them 12 cm apart. These manipulations are necessary to fix the safety strip, which is made of rubber. Motoblock "Salute" is supplemented with attachments by means of a technique that assumes a fairly simple design of fasteners. Any master can do such work at home. To the dump, which is made of two barrel elements, a square pipe with a side of 40 millimeters must be welded to the middle of the height. This will strengthen the device. The Salyut motor-block will be equipped with attachments that will be quite convenient to use. At the next stage, a semicircle made of thick steel must be welded to the pipe, or rather to its central part. Three holes are pre-drilled in it, which are needed to fix the angles of rotation of the manufactured element.

When a shovel-blade for a walk-behind tractor is made, the next step is to mount the holder, which has an L-shape. Insert one end of this element into the hole located in the semicircle. The other end is fixed to the walk-behind tractor frame with bolts. The bolts should also be used to adjust the blade lift. They are screwed into the holes in the section of the profiled pipe, which is located on the coupling device.
Features of making a blade-blade

A drawing of a blade for a walk-behind tractor will allow you to figure out what design features the manufactured element will have. Thus, the dimensions of the device are 850x220x450 millimeters. The shovel must be made of steel sheet, the thickness of which is 3 millimeters. The racks, which are located inside, must be made of sheet steel of impressive thickness. These additions act as stiffeners. Holes must be drilled in them to fix the blade to the rods. It is important to ensure that the equipment is vertical in relation to the front of the walk-behind tractor.
The dump for the Neva walk-behind tractor can be manufactured using the same technology. To fasten the element, use a bracket that is installed on the legs of the walk-behind tractor. The base of the folding front support is fixed to the latter. In this case, you need to use M10 bolts. Additionally, the equipment should be reinforced to the walk-behind tractor using adjusting rods, the number of which is limited to two. When not in use, they allow the brackets to be relieved. The blade-blade for the walk-behind tractor is fixed to the bottom with bolts. The knife should be 3x100x850 mm in size.
Final work
The bottom should be sheathed with metal in order to prevent the element from cutting into the ground. The depth of the bottom can be whatever you choose yourself. If the height of the main element is equal to 450 millimeters, and the depth is equivalent to 220 millimeters, then such equipment will look more like a bucket.
Conclusion
If you decide to make your own blade, which will be used in conjunction with a walk-behind tractor, then it is recommended to take the above rules as a basis. Each master can independently experiment with the dimensions, which will allow you to equip motoblocks of different brands with attachments. Among the most famous are "Salut" and "Neva". At the same time, snow removal will not only be easy for you, but also quite enjoyable. It is important to take care that the metal is not damaged by corrosive processes. To do this, its surface is often treated with special primers that transform rust. The base can then be coated with a special frost-resistant paint. Such manipulations will extend the life of the elements, eliminating the need for repairs or the purchase of a new snow removal device.
Everyone who lives in a private house has a need to clean the area from snow in winter. It is especially hard for those who have a car, including me. In addition to the paths, the race must be cleaned. Remembering the winter of 2016–2017, there was a lot of snow then compared to this winter. I decided to make a shovel for a walk-behind tractor, thereby facilitating the task of cleaning the territory. After looking through the options for factory, as well as homemade shovels on the Internet, I decided to do it myself. This option is less expensive, the more the material is.
To make a shovel you will need:
Materials:
- profile pipe 20 × 40 mm.
- iron sheet 6 mm.
- iron sheet 1.5 mm.
- corner 50 × 50 mm.
- corner 40 × 40 mm.
- strip 4 × 40 mm.
- iron rod 10 mm
- bolts, washers, nuts 10 mm.
- bolts, washers, nuts 8 mm.
- conveyor belt
- dye
- LBM (Bulgarian)
- welding machine, electrodes
- drill, drill
- hammer
- pliers
- wrenches, etc.
All the materials are there, you can get to work.
Shovel size 1000 × 450 mm. I cut the profile pipe following sizes:
1000 mm. = 2 pcs.
450 mm. = 2 pcs.
370 mm. = 1 pc.
I cut all pipes, except for the one that is 370 mm., At an angle of 45 degrees. I weld. I clean the welding seams on one side, where the 1.5 mm iron sheet will be welded.
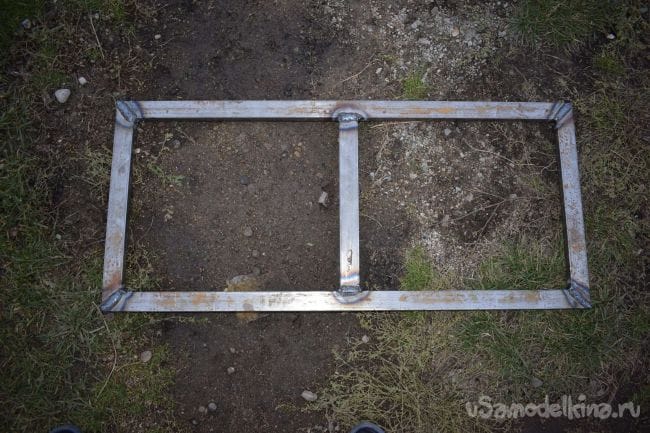
I cut 6 mm from a sheet of iron. two plates 200 × 100 mm in size. (since the used sheet already had holes, they do not need to be drilled).

I weld these plates to a frame made of a shaped tube in the center, as shown in the photo.

I cut four strips 4 × 40 mm. approximately 400 mm. I weld them on one side to the plates on the other to the profile pipe. They serve to strengthen the structure.
Now I cut off four corners of 40 × 40 mm. 20 mm long. They will serve as a limiter for the rotation of the shovel (initially I did not want to fix the shovel with anything, it turned out to be inconvenient). I make markings, weld to 6 mm plates.
I drill 10 mm holes. for attachment to the bracket.
I weld on a 1.5 mm iron sheet.


I turn to the manufacture of the bracket. I decided to make it from a corner of 50 × 50 mm. Welding together in such a way that a shaped pipe is obtained. I decided to abandon the use of a profile pipe in this unit, because of the non-standard dimensions, and in my opinion, there will be a weak design. In my case, the width of the bracket is 47 mm, the length is 500 mm. I cut off one shelf at each corner by 47 mm. I weld together.

I drill 10 mm holes. for attaching to a walk-behind tractor, and for attaching a shovel. At the point where the shovel is attached to the bracket, you need to grind off the welding seam so that it does not interfere with turning the shovel.

In the same way, I weld two more corners, it is not necessary to cut the shelf on them. I drill 10 mm holes. for attaching the shovel at the bottom, just like I did before.

I weld all parts of the bracket. It turned out not quite exactly as we would like, it does not affect driving performance.

Now you can paint all the structures.
After assembly, I drilled two more holes each to fix the shovel at the desired angle.

To fix the shovel at an angle, I use 10 mm round timber, 70 mm long, with a washer welded on top.

This is what the assembly looks like. The angle turned out to be not large, but as practice has shown, this is quite enough.

Tighten the nuts on the bolts until the shovel turns freely. Lock or use self-locking nuts (which are plastic inside).

I fixed the conveyor belt to the bottom of the shovel. Carrying out tape 50 mm. below the shovel. Bolted with 8 mm plates. The pitch between the bolts is 100 mm.
 Poroshenko Petr Alekseevich
 Premonition of the Apocalypse: World War III in the predictions of analysts and the Holy Fathers
 Hereditary prisoner petr poroshenko-waltsman