How to fix OSB on concrete floor. Ceiling from OSB Plate: Mounting and Finishing Features Installation of OSP on the wall
Due to the fact that the OSB plates have excellent physico-mechanical characteristics and a relatively low price, they have become quite popular in the construction sector, which is growing steadily annually. The reasons for which the material has become such a common set:
- simplicity;
- excellent moisture resistance;
- low price;
- durability;
- environmental friendliness;
- strength.
With all this, OSB plates can be used in almost any part of the building: when the roof improvement, for the facing of the walls (internal, external), as outdoor coatingFor diverse construction work etc. However, applying this material you need to know not only how to lay it on the floor, mount on the wall, mounting methods and other nuances, but even to which side to secure OSB, because it is very important when the surface is arranged.
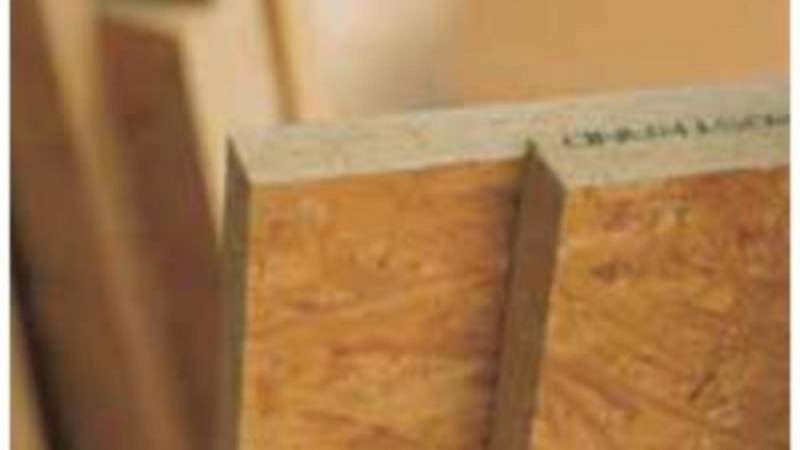
Differences between the inside and face side of the OSB
This type of material exists (like fabrics) facial and "outstanding" side. What do they differ and what role are played when installing an OSB? It is possible to distinguish one side of the material from the other, if you look closely to them - on the front side of roughness there are practically absent, veneer large size And you can even say that it shines a little bit. The outstanding side that has no such smooth and smooth surfaceconsists of small wooden fractions (chips). A, in general, this material is Sherchaway plywood. Depending on this, the OSB is screwed as follows:
- In order to establish an OSB plate outside the building, you need to deploy them to the front side into the street, respectively, the invalid side inside the building.
- With the arrangement of floors in the house, the material is stacked up (to the sky) face, and at the bottom (to the ground) - the wrong one.
In principle, on this all science and ended, nothing complicated, but the process of laying and choosing a side on the material is very important.
The main scope of application of OSB plates is the arrangement of structural elements of the building: roofs, floor, walls. At the same time, the installation of OSB plates has some features whose knowledge will help to make the trim quality and durable. Before starting installation, it is necessary to determine the choice of hardware, which will play a major role when fixing the OSB.
Content:
Applied nails and screws
There are many varieties of nails that are used depending on the place of fastening the plate and its weight:
- finishing: Used where the disguise is desirable and the probability of pulling is minimized. Frequently used together with glue.
- round without a hat: Need when flooring, when installing frame structures and when fixing the plates having a tongue compound
- with a hat: apply where there is no need for disguise;
There are also special nails having cutting or screw type cutting. Such hardware is better held with a knitted stove, but it is bad to pull out.
It is best to mount the panels through screws designed to work with the tree - the reliability of the attachment increases sharply. At the same time, it is allowed to use a much smaller number of screws, if compared with the number of nails. If necessary, the screw can be easily turned off, swing the screwdriver to the reverse.
Roof finish
Before the installation starts, it is necessary to make sure in parallelism of the crate or stropile legs. The surface should be aligned, and non-compliance with this requirement leads to the impossibility of a reliable compound of the groove-crest.
If the plates prepared for the installation fell under the rain, then they need to dry them before laying.
Before installation, make sure that the attic space has appropriate ventilation ( total area The ventilation holes should be at least 1/150 from the entire area horizontally).

The greatest part of the operational load should go to the long axis of the plate. The articulation of short ends should be carried out on the roof backups. Long sides are joined on the auxiliary supports, the compound method is a groove-comb or n-shaped brackets.
If the plates of the edge are smooth (that is, there is no spike and grooves), then a 3-millimeter dialing gap should be left. This will give the opportunity to change the size when the temperature drops without prejudice to the quality of the coating.
The stove should lie at least on 2 supports (on them and should have a connection). The following is the dependence of the distance between the elements of the crate from the OSB thickness (for roofs having no more than 14 degrees):
- 1m: Plate thickness from 18 mm;
- 0.8 meters: Thickness from 15 mm;
- 0.6 meters: Thickness from 12 mm.
When laying the slab next to the chimney, it is necessary to observe the norms installed by SNOP. High-quality mounting of the OSB plate to the rafters is possible using ring nails from 4.5 to 7.5 cm long, or a spiral length of 5.1 cm. The distance to the edge of the plate cannot be less than 10 mm.
Installation of OSB on the walls
Installation can go in two ways: in a horizontal position or vertical.
When walking around windows, door openings It is necessary to leave a gap of about 3 mm.
With a distance between the walls of the wall at 40-60 cm, the casing of 1.2 cm walls was recommended. If thermal insulation is needed, then it should be organized before fastening the plates. As a heat insulating material, preference is worth paying mineral wool.

For fastening the plates, two-link spiral nails (51 mm) or annular length from 4.5 to 7.5 cm are used. To drive them every 30 cm into intermediate backups. At the places of connecting plates, nails are driven every 15 cm. With the edge of the nails should be clogged with a pitch of 10 cm (no closer to 1 cm from the edge).
Dilatation gaps should also be left:
- between upper edge Plates and Venetic Beam: 1 cm;
- between the lower edge of the plate and the foundation wall: 1cm;
- between plates that do not have a groove combustion compound: 0, 3 cm.
Laying on floor
Before laying the material, it is necessary to make waterproofing (if the floor is made on the first floor).
Connect OSB plates on lags. If there are no grooves and crests, keep the same gap of 3 millimeters. If the floating gear arrangement is envisaged, then leave the gap between the wall and the edge of the plate in 1.2 cm.

Must be placed perpendicular to the lags. Long edges of the plates must be connected with each other by means of a groove and crest, and when they are lacking - n-shaped brackets. It is desirable that the connection lay on the auxiliary support. Short sides of the plate must be connected to lags. The following is the dependence of the thickness of the plate from the distance between the lags:
- from 1.5 to 1.8 cm: distance between lags no more than 40 cm;
- from 1.8 to 2.2 cm: no more than 50 cm;
- from 2.2 cm: distance - 60 cm.
For the attachment, the same types of nails are used, which requires the lifting of OSB walls and the roof improvement. On intermediate supports, nails are clogged with a pitch of 30 cm, in the joints of the plates - with a step of 15 cm.
To increase the rigidity of the entire coating, giving it a holistic type, you can glue the plates to lags. Also, it will be useful will be the sizing compound of the groove comb.
Use only synthetic glue (compositions on water based Ineffective due to the presence in the structure of the paraffin plate).
Finishing OSB.
After consolidation it will be needed. The most common way is putty. This method allows you to seal all the slots in places of compounds to prevent moisture penetration. Plus, a qualitative work will help to prepare plates for possible further trim (for example, varnish or coloring).
To obtain aesthetically attractive species, it is better to use plates specially polished by the manufacturer. In this case, it will have to spend less time and material to the future finish.
Before carrying out work, you should walk on the stove of the sandpaper with a shallow notch, and then cover the surface of the primer (it should not be on a water basis). Next you need to choose than to put the OSB. It is better if the composition you choose is colorless. To do this, use one of the types of putty:
- on a plaster basis;
- acrylic;
- latex.
After completing this stage, you can think than to separate the walls from the OSB. For example, it may be varnishing. The slab should be lacquered in 3-4 reception with a complete drying of each layer. The coating of the lacquer will give the shine of the surface and will provide reliable protection From the penetration of moisture.
Another way to finish is painting. Use paint that does not contain in its composition of water. After, it can even be laminated or separated by a special film.
Most ways of finishing the house are available after the casing of the OSB walls with a stove with compliance with the technologies and recommendations of the manufacturer.
Installation of OSB on the walls is carried out at the final stage of building a building. Depending on the designation of the construction, the covering is carried out on the internal and external surfaces. When repairing the OSB slab can be used to align the floor. In addition, this sheet material is great for creating solid base under the stacking roofing on the roof. Today, oriented chips are one of the most sought-after materials in private and commercial construction.
Features of OSB plates
This construction material It appeared relatively recently, thanks to the inventions in the field of chemistry. OSB plates are glued and pressed wood chips. A synthetic polymer resin is used as a binder. The chips are stacked in different directions. During the pressing, wood soak adhesive composition. The result is products that are distinguished by high strength and resistance to moisture. Various additives in the adhesive makeup make it possible to use an OSP even outdoors.
Based technical characteristicsProducts are divided into classes:
- Standard. Used for the manufacture of furniture and inner premises of rooms with normal humidity.
- Reinforced. The thickness of the slab allows them to be used to create partitions, walls, ceilings and floors.
- Moisture-resistant. This material is used to finish the premises with high humidity (pools, showers, bathrooms).
- High-strength moisture resistant. Plates of this class in terms of strength are not inferior to glued bruus. Of them create bearing structures that are experiencing increased load.
Finished products can have a rough surface, polished, covered with laminate or varnish. To create monolithic surfaces, the plates are equipped with locks on the ends. OSP thickness varies in the range of 8-26 mm.
Advantages of oriented chipboard:
- High strength, which is achieved by using a composite material. OSP partitions are more reliable than made of drywall and foam blocks. They withstand a great shock load.
- Environmental purity. In the manufacture, components are used, safe for humans and ambient. The release of harmful evaporation does not occur even at high temperature.
- Presentable appearance. The adhesive composition emphasizes the natural beauty of wood. Large chips creates a beautiful and interesting picture.
- Resistance to rotting, mold, exposure to insects and rodents, thanks to the factory impregnation with an antiseptic.
- Water resistance. Products without consequences transfer long stay in a wet environment.
- Flexibility. This quality allows plates, not cracking and not breaking, change its shape during the deformation of the house.
- Durability. Since OSB is resistant to the influence of external factors, their life can be 50 years and more.
- Available cost. Production uses woodworking and inexpensive products of the chemical industry are used.
A certain minus OSP is their complete airproof. This property must be considered when carrying out construction. Solve this question will help a competently equipped ventilation system.
Preparatory activities
OSB are fixed on the frame made from a bar or steel profile. To improve the insulating features of the finishes, it is recommended to use the insulation. Before starting the premises of the premises, you need to spend a small preparatory work. First of all, you need to prepare a tool.
In order to carry out the installation of OSB, it will be necessary:
- perforator;
- level;
- scissors for metal;
- electrolovik;
- screwdriver;
- steel profile and suspensions;
- metal screws;
- plastic dowels;
- acrylic sealant;
- antiseptic solution;
- oriented chipboard with a thickness of 8-10 mm;
- basalt wool;
- painting brush;
- rubber spatula.
It is worth thinking about finish coating Oriented chipboard. For this you can use varnish, acrylic paint or washable wallpapers on any basis. Surface is allowed ceramic tiles, cloth or skin.

Before starting work, you need to handle the walls by an antiseptic. After the sheaving in the resulting cavity there should be a healthy microclimate.
Installation OSB on the walls
In order to stripped the walls unique material, no need special skill. Just be attentive enough.
Work is carried out in such a sequence:
- A diagram of the OSP layout on the surface is made. Plates can be attached in any orientation. Cutting is carried out so that there are less waste.
- Placement on the walls for fastening the frame. It is advisable to choose a step between vertical racks 58 cm. Width of the insulation 60 cm. It will be well kept between the racks without additional fixation.
- Drill holes in which plastic dowels are inserted.
- With the help of steel suspensions, guide and carrier profiles, a frame is collected. It is checked by its verticality and strength.
- OSP plates are cut on the workpiece. They are screwed to the frame. The recommended step between the screws is 15 cm. The edges of the plates must be on the carrier profile. This will help to avoid the appearance of cracks at the finishing finish.
- Seams between the plates are closed acrylic sealant. For this, used mounting pistol and rubber spatula. Squares and grooves over self-draws are closed with a putty on a tree.
- The surface is grouped and polished by sandpaper.

In construction and repair for plating walls and ceilings, various are often used sheetworks. One of these materials - oriented chip plate (OSP), which is on sale also under the English name OSB (Oriented Strand Board).
OSB: what it is and how to use it
OSB is produced wood chips and large shavings, gluing them at high temperatures with synthetic resins.
The stove consists of several layers, usually 3-4, with different chips orientation.
In the outer layers, the chips is located along the long side of the sheet, in the inner side - across. In its characteristics, the OSP is close to plywood, but it is less.
Benefits and features
A distinctive feature of an OSP is a high strength due to cross-arrangement of wood fibers. For strength, the slabs are superior to MDF, chipboard and wood, a little inferior to the plywood. Plates show high resistance to chemicals. Some manufacturers are used in the production of plates special impregnations - antipyrenes that reduce the flammability of the material. OSB Plates are easily processing, it will take a conventional woodworking tool to work with them.
How to calculate OSB plates
 Mainly distributed 2 stove size 2440 * 1220 mm (American standard) and 2500 * 1250 mm (European). There are OSP and other sizes, but they are much less common and produced, mainly under the order.
 To calculate the number, the easiest way to draw a wall plan on the cellular paper, making the size of the cell for 250 for the plates of the European standard or 300 mm - for American. Then, on the plan to draw OSB plates and calculate their quantity. Place sheets are better in checker. It must be taken into account how the surface will be separated later.
If we plan to cover, for example, siding on the street or GCL indoors, it is allowed to dock in non-zero cuts, but if painting is provided - try to stick the slabs with factory cuts. It is desirable to reduce the number of joints to a minimum. For example, a wall fragment with dimensions of 2.4 m per 1.2 m is better to sew one sheet, and not 3 pieces of 0.8 * 1.2 m, because it is quite difficult to produce perfectly smooth cuts, and even a small deviation from straightness forms a gap. You need to add multiple sheets for the reserve in case of marriage or errors when cutting.
An easier way is to divide the surface area on the leaf area. In this case, "about the reserve" it is necessary to take at least 20% of the quantity. The resulting number is rounded into the biggest.
What is the OSB-slabs for exterior walls
 OSP make 4 species:
- OSB-1 - Used only in dry premises.
- OSB-2 - Used as structural material in dry rooms.
- OSB-3 - can be used both indoors and outside. Use under conditions with high humidity. Strength allows the use of OSB-3 as a design material.
- The most common class OSB-4 is more durable and moisture-resistant than OSB-3.
Only 3 and 4 classes can be used to cover the outer walls.
Installation outside: doom
 The walls of the walls can be carried out in several cases:
- In order to align the existing walls, hide defects (cracks, shocking plaster, etc.) and simply as a cladding.
- For frame construction - To protect the insulation from wind and precipitation, as well as an element of the carrier system.
- When insulation of the walls - to protect the insulation from atmospheric phenomena.
In all 3 cases, OSB sheets are attached to the crate. The lamp is performed from a wooden sawn timber of various sections, depending on the task. Most often use non-stroke bar coniferous rocks natural humidity cross section 50 * 50 or 40 * 50 mm. It is allowed to mount an OSP to a metal frame.
When insulation, the lamp is performed with a step, a multiple width of the insulation minus 20 mm, without a heater - the step is chosen in such a way that the sheets of sheets accounted for a bar, several additional racks are added between the joints with a distance between them at least 600 mm.
When the walls are trimmed, the use of a vagaire-proof film, compliance with the recommendations of its manufacturer, in particular, the distance between the membrane and the OSP.
How to mount panel wall
 OSB plates are usually attached to the wall through the tree screws in the wood, when used in the framework of bars or metal when mounting a metal profile frame. The length of the self-press should be 25-45 mm.
It is allowed to mount the osp directly on the wall. For this, the holes are drilled in a sheet carved in the size, set the sheet to the place, the perforator is dried with the wall in the planned places, the dowels are inserted and screwed up the screws. When attaching on wooden base Hardware is spinning without prior drilling.
Fix the screws in the same selected direction, for example, to the left-right-up, otherwise the OSB leaf may bend.
How to arrange from OSB outside beautiful
OSP has a rather interesting texture that leaves many finishing options. At the same time, it should be remembered that OSB is 90% consists of a tree, so the material is subject to the same hazards as wood. On the plates may appear mold, mold, to a small extent they are susceptible to rotting, resin can collapse under the influence sun ray, ends of the panels absorb moisture.
 OSB-stove is treated with wood compositions for outdoor use. The composition should provide protection against ultraviolet. To preserve color and textures, the surface is covered with colorless varnish and antiseptic impregnations, to give wood shades - decorative antiseptics, for painting in various colors - facade paints for wood.
To get a smooth surface of the wall of the OSB, plastered and put off. Before applying plaster, the surface of the slab must be protected from moisture with special primers or pergamin, then fasten plaster grid and plaster. Perhaps applying decorative plaster or painting.
Also, the walls from the OSB can be covered with any kind of siding or facade panels, block house, clapboard, etc.
OSP Material for internal works
OSB indoors are used to cover walls, ceilings, for a roughing floor, as a design material in the manufacture of built-in furniture, to create decorative elements, boxes, technological cabinets. IN frame house building The inner covering of the walls of the OSP increases the strength of the structure.
Stroke work
 Sheaving walls OSB Consists of the following steps:
- Marking.
- Device crate.
- Laying heat sound insulationif provided for by the project.
- Fastening of solid sheets of OSB.
- Dumping OSB in size.
- Fastening the rest of the sheets.
Instruments
To cover the walls of the OSP, you will need:
- Hacksaw, circular Saw Or jigsaw for cutting material.
- Screwdriver.
- Level.
- Marking tool (roulette, square, pencil).
- Perfore reserving of brick walls.
- Chisel.
Options for interior decoration
An unusual OSP structure allows you to create a rather attractive interior. Plates can be used without finishing, but it is better to cover them with a varnish to improve operational properties. OSB can be painted with wood paints, process decorative impregnations For wood. To obtain a smooth surface of the panel, you need to sharpen with putty for wood, after which they can be painted or caught by wallpaper.
How to make a crate under OSB
 When the device, the crates from the bars will first fasten the ram around the perimeter, then install vertical stands With a step of 406 mm with a width of a sheet of 1220 mm and 416 mm with a width of a sheet of 1250. If you need to stick the sheets on the inside of the joint of the junction of the horizontal bar.
Bruks are attached to the wall 2 ways:
- Directly through the bar. When attaching to concrete, brick, slag block and aerated concrete walls In the bars, the holes are drilled along a dowel diameter in a step of 300-400 mm, stick the wall to the wall, the perforator through the finished holes the holes in the wall are dried, the dowels are inserted and screwed up the screws or use anchors. It is more convenient to first fasten the bar on the edges, after which it can not be kept and calmly fixed in the other outlined points. When attaching on wooden walls The bar is attracted by selflessness without drilling holes. Self-tapping screws better use "white" or "yellow", because With an excessive force, the "black" hat is laid down and it is very difficult to extract such a self. For adjustment of the vertical frame, wood linings are used.
- On galvanized corners or P-shaped fixing profiles. In this case, first place the position of the bars, the elements of the fastener are installed on this markup, then the timber is attached with screws.
When used for the metal profile frame around the perimeter, the guide profile is fixed, on the plane - the rack. Fastening profile to the wall is carried out on special suspensions.
Racks and guides on the walls should be strictly vertical!
Whether a frame case with an OSP cover is obligatory inside
 OSB plates can be fixed directly on the wall, but it is better to use the crate. This is allowed to correct the slope or curvature of the wall, lay the minorvatu to improve heat and sound insulation. Also a doom is created air padThrough what space between the wall and the OSB stove is ventilated.
Installation of OSP Plate
OSB fasten orienting a long side vertically to reduce the number of horizontal joints. When fastening the first sheet, it should be controlled by its position in terms of the level, otherwise the slots may appear in the corners of the walls. The rest of the fixing rules are the same as in external work.
What should be the thickness
 OSP is of different thickness: 6, 8, 9, 10, 12, 15, 18, 22, 25 mm.
Sheets of 6 and 8 mm thick are used to cover ceilings and structures that are not subjected to mechanical load. OSB-plates with a thickness of 6 mm can be used for curvilinear surfaces with a large radius of curvature.
Plates with a thickness of 9-12 mm - the main tailing material For lining of walls and ceilings, both outside and indoors, for a device of a solid crate under the roof.
18 mm thick material and more used for the manufacture of furniture, carrier structures and draft floors.
Work examples
 Mansard, sheathed OSB
 Built-in racks from OSP
 Corner for recreation from OSP
 Shepacle on OSB
Operation of OSP finishes: Features
Walls from OSB-plates do not require any special care, it suffices to comply with the rules common to wooden surfacesFor example, not allow the prolonged exposure to moisture.
OSB is a modern high-tech material, with proper installation capable of leaving for many years.
Useful video
Before talking about the technical details and intricacies of the inner cover of OSB or OSP with plates (they are OSP, OSB sheets), it is worth thinking about the feasibility of this event. Installation of OSB plates indoors occurs in two cases, namely:
- If you have frame house And the frame will not be caught yet.
- If the design and texture of OSB plates are decor element.
If you just need to level the walls, then drywall is better suitable for this purpose, as it is cheaper and more convenient to work with it in the installation process and further finish.
The technology of the external skin of the house is set forth in the article :. Here we consider the question right mounting Osb slabs on the wall inside the house.
Selection of plates for mounting ox on the walls inside the house
When using any material inside the house, including OSP plates should pay attention to its harmlessness for the health of the inhabitants of this house. For 34 years, the plates have passed since the appearance of OSB and all these years disputes on the environmental friendliness of OSB plates are not stopped. In fact, there are bases for these disputes, since indeed when gluing chips, polymer resins containing formaldehyde are used. But formaldehyde is also found in many other surrounding things, for example in tissues in furniture from LDSP, combustion products, etc.
OSB plates on the walls inside the house.
To eliminate the poisoning of people by formaldehyde, the enlightened Europeans established control over the production of OSB plates and divided the harmful plates into classes. Plates with formaldehyde E1 emissions are harmless to human health and are used in the construction of residential buildings. Therefore, when buying OSB panels, choose a reliable and verified manufacturer, since your health may depend on this. Better than any words about the ecology of OSB panels will say the Austrian four-star Hotel Arlmont, the internal finish of which is replete with OSB panels.
 Hotel Arlmont, interior decoration Used OSB sheets.
 OSB Plates are divided into waterproof classes:
OSB-1 - Plate class most affected by moisture, and has the lowest strength. Such plates are used to produce furniture.
OSB-2 - Plate class with the same moisture resistance as OSB-1, but more durable. Such plates can be used to cover the walls in dry rooms.
OSB-3 - Moisture-resistant plates with high strength. They are suitable for mounting in wet rooms. But with long-term contact with water deform.
OSB-4 - plates possessing maximum moisture resistance. They are able to withstand long-term contact with water.
OSB4 plates are not widely popular because of its price, which will have a two times higher than that of OSB3 plates. Therefore, OSB3 plates are widely used. If they are handled by primer or paint paint, then such plates become resistant to long-term contacts with water.
More than O. various characteristics OSB sheets can be found in the article :.
Out of the walls of the frame house from the inside
Before proceeding with internal trim frame house, It is necessary to insulate the walls, close the frame outside and the insulation of vapor barrier.
Wall insulation is recommended mineral Vata., and better slab, as it is easier to work with her than with polystyrene foam, it is better kept in vertical structures And it does not settle down what happens with fiberglass insulation. Other insulation are not excluded and also suitable for the insulation of the walls of the frame house. More than S. various insulation You can get acquainted in the article :.
After insulation of the walls, they must be closed with vapor barrier. Parosolation membrane Protects the wall from penetration into her moisture, which will save the frame of the house and the insulation dry. Parosolation is attached by a regular construction stapler, with an overlap at 10-15 cm and glued together with a special double-sided scotch.
 An example of a frame of a frame of a frame house. From the inside, the frame was laid parosolation filmOutside it is fastened with osp plates.
 The sheath itself is made as follows, the sheets behind each other alternately are screwed to the frame of the house. The gap between the sheets is 3 mm. The sheets are screwed by self-drawing on a tree with a length of 35-40 mm. All holes (for windows, doors, mounting holes) are cut with a jigsaw.
Decorative wall cover OSB plates and crate device
It's best to use as a dory metallic profile As for hyposkarton. It is easy to install and is not prone to deformities like a tree. When choosing wooden bars for the crate, it is better to use bars from the dried tree, because such bars are less bent and twisted while drying. Installation technologies in both cases are not fundamentally different, so we consider them on the example of the lamb of metal profiles.
In order to sew inner walls plates OSB., It is necessary to start with the installation of the lathes on the walls of the room.
The gearbox installation technology looks like as follows:
1. First, you need to install the starting profile that is mounted on the adjacent walls, the floor and the ceiling as in Figure 1. The profile should stand strictly vertically and closed around the perimeter with the upper and lower profile.
 Figure 1. Starting profile is mounted to the adjacent wall. And closes with the top and bottom profile.
 2. After installing the starting profile, you must make markup on the walls for the suspensions. Since the suspensions will keep the vertical racks of the crates, it is necessary to place in such a way that two one-piece OSB sheets are closed in the middle of the profile, you also need to install one profile in the center of each solid OSB sheet.
 The suspensions are attached to the wall. It is attached to the doom.
 3. Mount the profile. It is important when fixing a profile on the suspension, control the plane of the crate of the rule so that the "pits" or "beam" on the wall are not formed.
 Installation of OSB plates on inner wall Using doom.
 Why you can not give icons
 Is it possible to give icons as a gift: Signs, the opinion of the Church
 A year ago left her husband, and now I do not know what to do