How to level the walls with your own hands: Step by step instructions
Even in modern buildings, the walls sometimes are uneven - certain small differences are normal, which is for the factory manufacture materials, which is for monolithic reinforced concrete. In the old houses, the curvature of the walls can reach several centimeters as horizontally and vertically.
Small differences are invisible to the eye and are not critical, however, significant irregularities look unprepacently and can interfere with the installation of wall coverage - wallpaper, tiles, etc.
Large irregularities of the wall will be noticeable with the naked eye, however, more accurately determine their degree will help a long level or rule. They are applied to the wall first vertically, ranging from the angle of the room, and in increments of 30-50 cm from the place of contact of the tool are marked with the wall.
Next, the same is repeated in the horizontal direction from the floor to the ceiling. Thus, the most convex walls of the wall become known. The depth of the recess is determined using a bubble level. When gaps within the age of one and a half centimeters, it is possible to align the walls with plaster, or, with large drops, plasterboard sheets are performed.
Ways alignment methods
Minor fluctuations in the thickness and slope of the walls can be ignored, they will not deliver significant inconveniences. Single large convexities can be knocked down with a hammer or chisel. To achieve a smooth surface will help her squeak.
In the case of large drops, do not do without more radical methods, including the main:
- Plaster.
- Plasterboard sheath.
- Glowing plasterboard.
Plaster
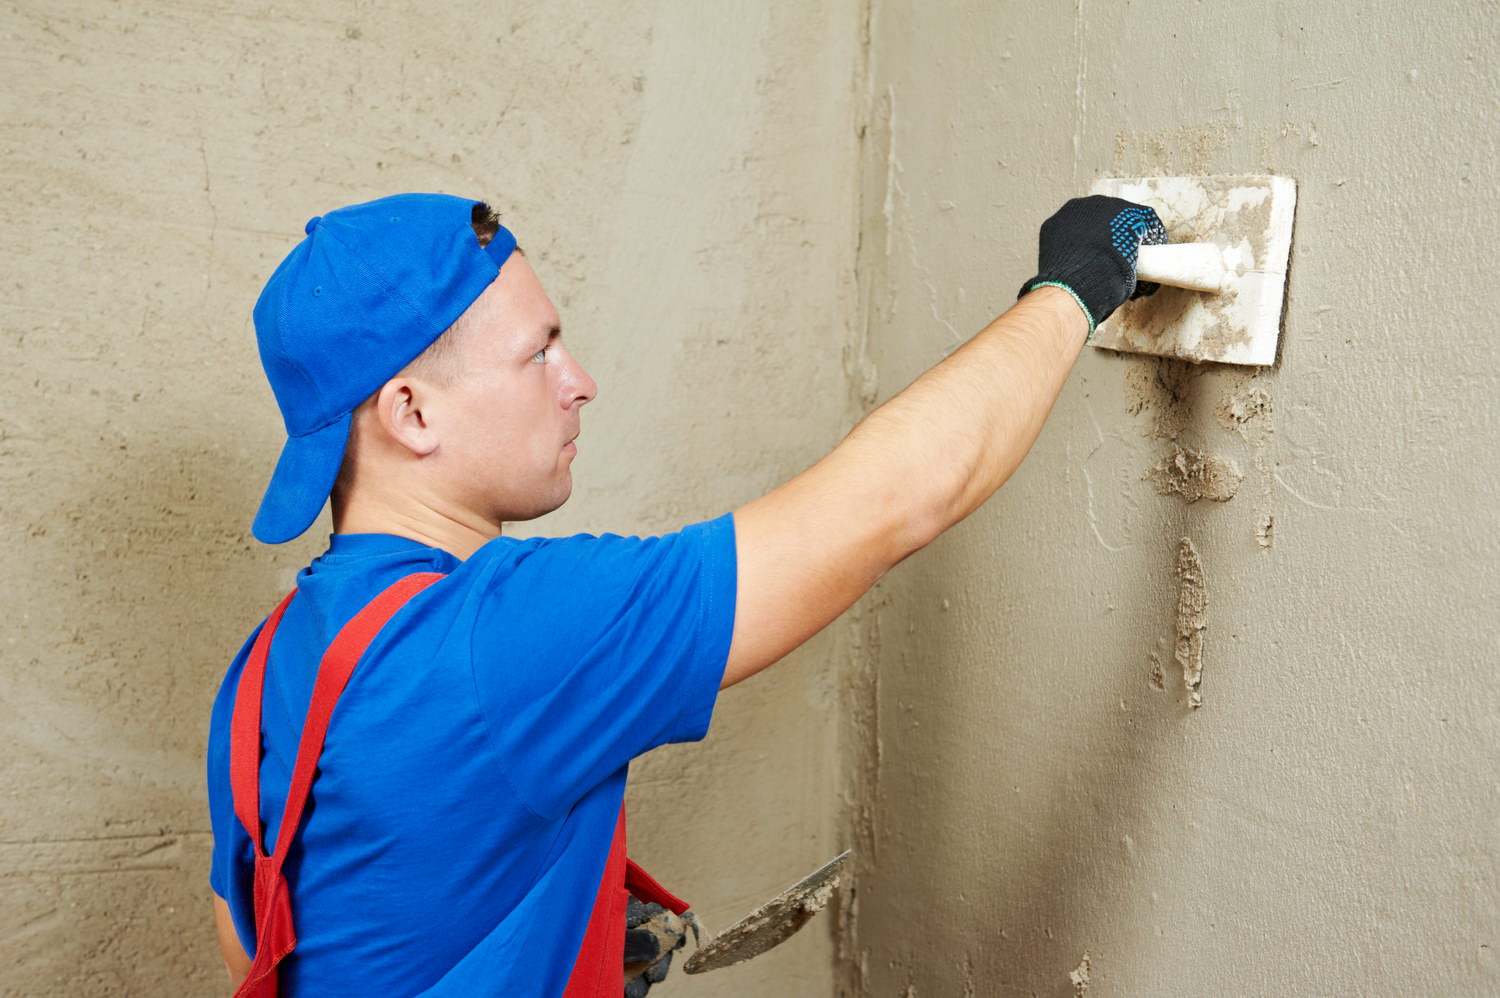
The walls are equalized by the layer of plastering mixture on them.
Pros:
- Cheap material.
- Universality plaster (it can be applied to any materials that are prevented for its better clutch)
- You can use decorative plasterBy creating an interesting volumetric surface texture. In this case, there is also no need to achieve the perfect alignment.
Minuses:
- This is a very dusty process.
- Thoughtfulness.
- Plaster Long dries.
- With large height differences, the material consumption is huge, which increases the load on the overlap and is economically unprofitable.
Casting plasterboard

With this method of alignment, the vertical surface of the room is placed by sheets of plasterboard.
Pros:
- High speed work.
- No dust.
- Obtaining immediately smooth and smooth surface (There is no need to hide and).
Minuses:
- Applicability only with small irregularities.
- Large drywalk floor sheets, so uncomfortable in transportation.
- The inability of the material withstand heavy rimmed structures.
- Sheets can come off.
Plasterton covering

This method differs from the previous method by mounting drywall. In this case, the framework of the metal profile is made, on which the shears of the skin are attached with the help of self-samples.
Pros:
- Rapidity.
- Clean in the process of work.
- Alignment even very curves walls.
- Additional heat and sound insulation (due to air between the wall and sheets, but you can also add a heater).
- Creating multi-level structures, niches, arches, etc.
- You can hide the layout behind the sheets of drywall All communications.
Minuses:
- The inconvenience of the transportation and installation of the material (the sheets are large, alone they are difficult to position exactly. Also with them it is inconvenient to work in close room like a bathroom).
- A significant reduction in the useful area of \u200b\u200bthe room (from each wall can be "eaten" to 10 cm).
- In the gap between the drywall and the wall, the dust accumulates, rodents and insects can be reached.
- The hidden wiring is very inconvenient to change or repair or repair, you will have to dismantle a significant piece of the wall, restrict ourselves to the stripping of the narrow channel, as in the case of an excavated wall it will not work.
Necessary materials and tools
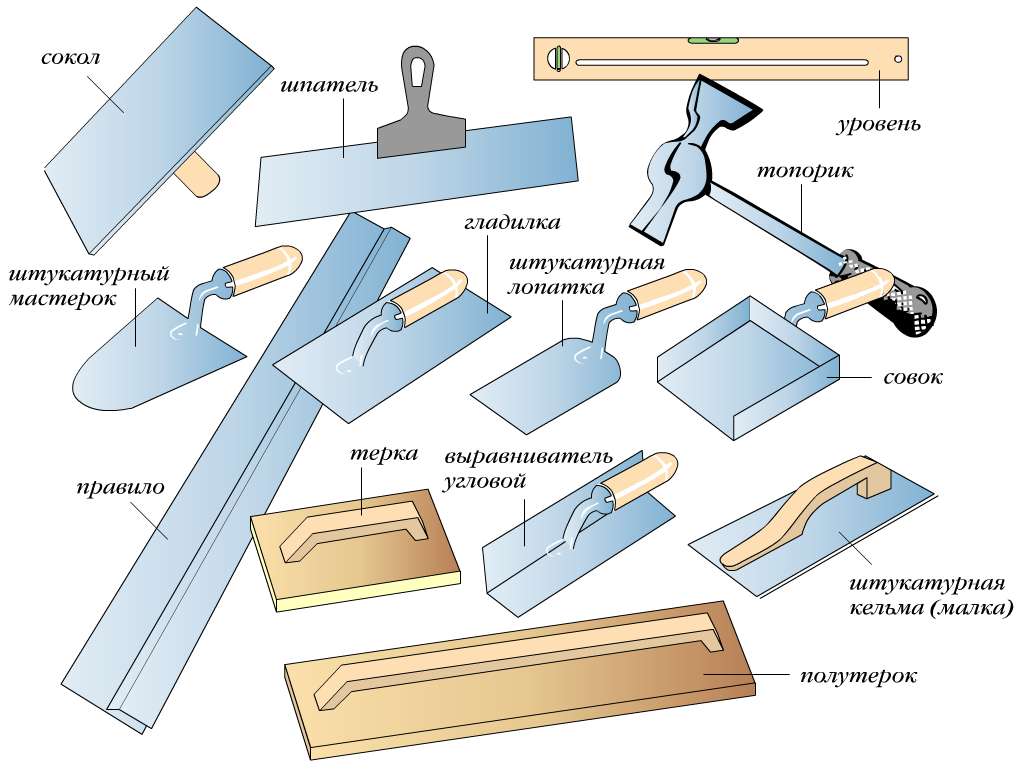
For shuttering:
- plaster;
- water;
- capacity for stirring;
- mixing nozzle on a drill;
- means for dust protection (mask, glasses);
- skar;
- putty knife;
- rule;
- level;
- metal beacons;
For mounting plasterboard:
- metal profile and a variety of fasteners for it in case of mounting frame;
- glue in the case of layers of material;
- plasterboard sheets;
- scissors for metal;
- screwdriver;
- drill;
Leveling technology do it yourself
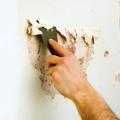
 Before leveling the walls, it is necessary to clean them from the old coating - to scrape the paint, knock down the old tile. Even very old wallpaper is easy and without dust are separated from walls with whole pieces or dismissed the spatula if they are pre-sprayed from the sprayer with ordinary water or wipe the wet rag.
For better adhesion (clutch), the surface can be projected, and the wooden walls are impregnated with an antiseptic to protect against rotting and insects.
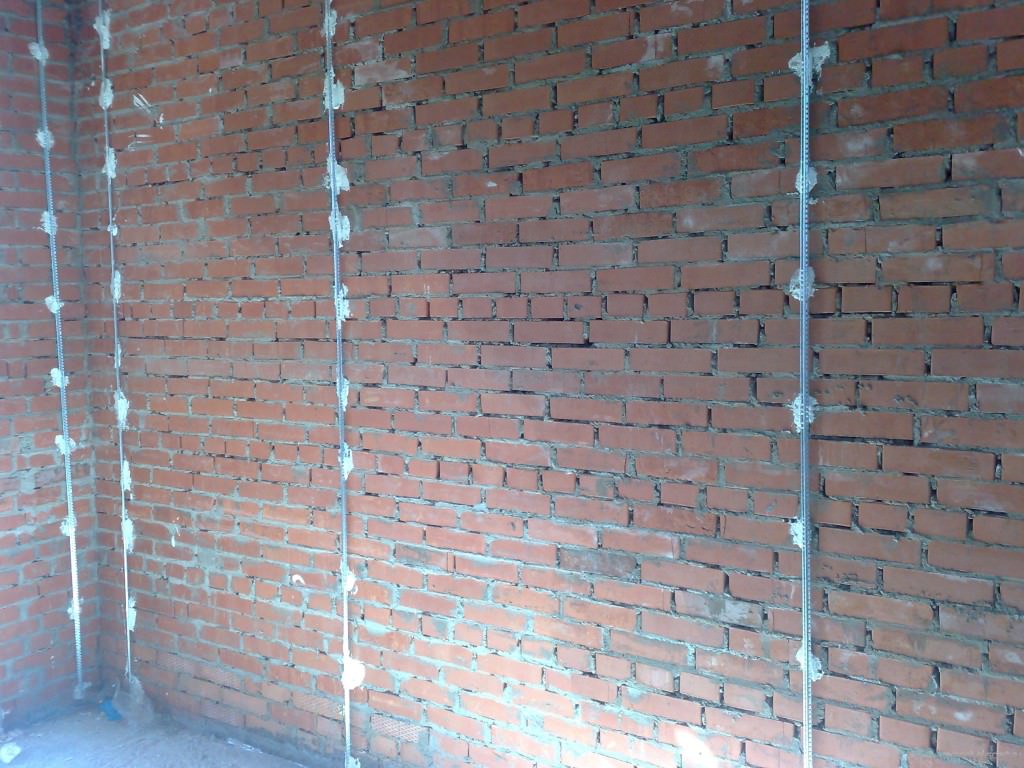
After drying the preparation, according to the previously conducted markup on the wall in a step of 30-50 cm, metal beacons are attached to the solution. Their smooth laying is checked by the level, and the relative position with the help of the rule. If necessary, part of the beacon is removed deeper or lifted by adding a solution.
The mortar for plaster is thoroughly stirled by a moxing plant on a drill. You should not immediately breed a large amount of mixture, because She quickly begins to stick.
On average, plaster dries 1-3 days, the exact time depends on the microclimate of the room and the thickness of the layer. In order for the material to be uniformly, it is desirable to carry out in the absence of heating in the room, and do not try to dry the plaster with heating devices. By drying, the walls are shiny, if necessary, the smallest irregularities are sweeping, and when the shplanke will freeze, you can move to the finish coating of the walls.
Although the premises would be good to ventilate, in the process of work and during drying, no drafts are unacceptable, otherwise the material will dry up unevenly, will begin to settle down and crack.
Metal profiles are screwed to the floor and ceiling. The carrier profile is vertically inserted in them, which is connected to the walls of P-shaped fasteners.
Several side of the carrier profile is also attached in a horizontal position. Between themselves perpendicular fragments are connected by cross-shaped lining.
Next, to the profile with a screwdriver on the self-tapping screws, plasterboard sheets are attached. It is impossible to achieve an ideal joint, the cracks will subsequently be covered, you should only try to make them not too big.
For a raw climate or premises with high humidity (kitchen, bathroom), it is recommended to use moisture-resistant plasterboard.
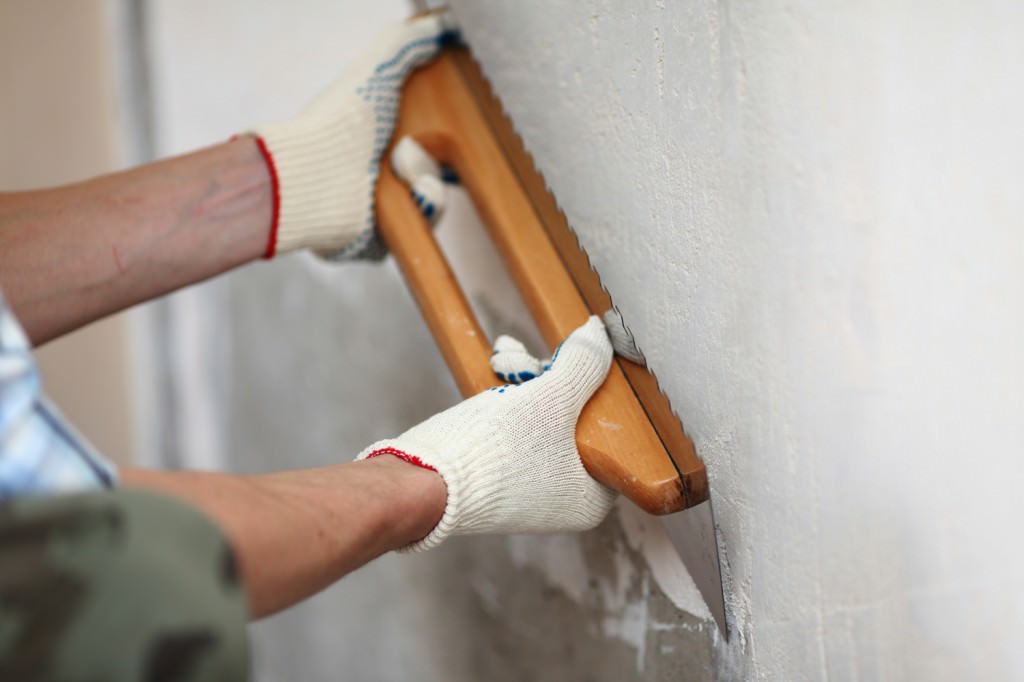
Next, all the places of compounds, screwing the screws, minor chips and other surface defects are shaking. The dried putty is echoed by a finely abrasive skin and then you can arrange a picker coating - glue wallpaper, tile, painting walls, etc.

- Swimmed wallpaper will easily go away from the wall.
- To protect the unrestracted premises from dustThe passage to the room can be driving a wet sheet.
- Protect face from plastering dust Assist glasses and mask (You can use medical).
- Wiring of all communications can be hidden behind the sheets of drywall, I am built there lighting lighting.
- Plasterboard is easy to cut An ordinary stationery knife.
- In the case of large irregularitiesThe alignment of plasterboard will cost much cheaper.
- What is plastering that mounting sheets of plasterboard Performed from below.
- Watching can be carried out not only manually, but also in a machine way. The mixture is poured into the device and under pressure through the nozzles splashes onto the walls, manually need only to fill the surface by removing the excess plasters. This option will allow to align the walls faster and easier, but requires special fairly expensive equipment.
- Skuring manually - the process is long and dusty. Nor defend, but the particles of plaster are so small, which is capable of getting everywhere. You can use the grinding machine that will make the process faster and less dusty, because It has a container for collecting dust.
 Alignment of walls
 Green curtains for calm in the house
 Curtains on the doorway