Antique keys. Do-it-yourself wall key holder: execution options, master class. Ideas for inspiration
With the help of the correct implementation of the corresponding project, it is possible to ensure convenient storage important things and A high-quality wall key holder with your own hands will be made quickly and without extra costs after reading this article. There are general thematic data and photos in particular good decisions. Some production technologies are described in detail. Therefore, any person will reproduce them exactly even without previous experience in performing similar work operations.
To formulate a list of requirements for this design, it is necessary to make several clarifications for the intended purpose:
- The decorative wall key holder is installed in the entrance area, in a visible place. Its aesthetic characteristics should.
- The direct loads from the keys themselves are not great. However, with intensive use it is difficult to rely on very gentle handling. Possible mechanical influences should be taken into account.
- Useful stability decorative coatings to changes in humidity and temperature. The differences in these parameters are especially great in the hallways of private houses.
- Ensure good visibility of all objects. If necessary, install.
- In some cases, it is necessary to equip the structure with closing doors.
Taking into account the features noted above, various traditional solutions can be considered.

One glance is enough to check if the items are in their places. An additional "plus" of this design is simplicity. decorative design choose individually. But a base with several hooks can be created in just a few tens of minutes. Of course, you will have to provide a suitable fixing system on the wall. But this task is not difficult to solve using ordinary screws with dowels, other standard ones.

They provide some protection against theft during employee visits. courier services and other strangers. For good review a glass insert is installed in the door. If necessary, inside


In this modification, the free space inside the door is rationally used. A mechanism was installed there that performs decorative and practical functions at the same time.
For your information! Such a project is not too difficult to implement on their own. You just need to purchase a watch that matches the product in size. It is better to choose an electromechanical or electronic model in order to reduce the operational burden on users.

It must be remembered that such accessories should not interfere with free movement. To store a large number of keys, you can use the internal volume, or open shelves.


It is not difficult to make a wooden wall key holder at home
One of the main advantages of this material is the ease of processing. A beautiful and functional housekeeper made of wood with your own hands can be made using the simplest carpentry. To give the desired size and shape, chisels are also used. Ideal flat surface created with a planer, sandpaper. Interesting natural cut lines are preserved using clear varnish. If necessary, decoupage or other decorative coating techniques will be used.

In the example in the photo, you will need to find a birch log that is suitable in size. After cutting and stripping the ends, hooks are screwed in from below. This completes the manufacturing process of the device.
This product is a suitable illustration of the shortcomings simple solutions and the material itself:
- Primitive appearance imposes significant restrictions on compliance with interiors.
- Without treatment, the log will become a source of pollution.
- If the product is not treated with a deep primer, the structure will be quickly disturbed by changes in humidity and temperature.

Buying a wooden wall key holder in a store is not difficult. But it is much more pleasant to create the desired product yourself. With the correct implementation of plans, it will become a source of pride, which will be shown to guests.

This example shows that the key holder, with the appropriate equipment, can be used to store jars and smartphones, gloves and other small items.
Reliability and durability of metal wall key holders


Metal products are highly durable. They retain their functional characteristics for many years of operation in excellent condition. Using special technologies parts are made from these materials complex shape. The only drawback can be called destruction by corrosive chemical reactions. To eliminate such negative manifestations, apply different kinds decorative and protective coatings.

Metal is more difficult to process than wood. For the manufacture of some products, you will have to master welding, casting, and other complex technologies. You will have to equip your home workshop accordingly. Even without careful analysis, it is clear that the total investment will be significant.
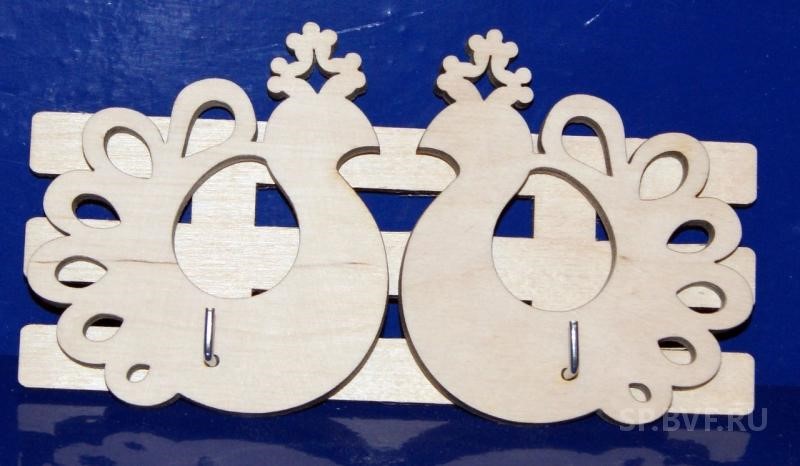
What is good about do-it-yourself plywood housekeeper
This material is better than the options discussed above for the following reasons:
- Plywood is created in the factory, so the thickness and other characteristics are known exactly.
- If you purchase a moisture-resistant variety, you can prevent damage by appropriate external influences.
- The outer surfaces, even without processing, are quite even. They are well suited for applying images using different techniques.
- Unlike metal, plywood is not difficult to process.
- Even large products from it weigh a little.

These original key fobs are a convenient means of identifying whether keys belong to different users.

ordinary jigsaw you can cut such a wall key holder with your own hands from plywood. It is easier and faster to create similar products using power tools

Persistent drawings and inscriptions on plywood are created using pyrography (burning)

You will need to purchase a special tool kit

After mastering the technology, it will be possible to create independently similar and more complex images. For better preservation, the drawings are covered with a transparent varnish.
Important! When using plywood, the relatively low hardness of the material is taken into account. Attachment points for hooks, other additional details may loosen over time. Also, one must not forget about the limited resistance of wood to moisture and microorganisms. To protect against them, special impregnations are used.
Quick creation of do-it-yourself key holders from cardboard


These pictures explain the algorithm for creating a functional . It will take a preliminary compilation of a list of necessary components. In order not to be mistaken, you should prepare the project in advance. It is enough to make a freehand sketch with dimensions and other design parameters. You should also choose and master the application of beautiful persistent images in advance.
This material itself is inexpensive, but you will have to take into account the additional costs of production technologies. We must not forget about the limited resistance of cardboard to mechanical stress, high humidity

In this photo of a do-it-yourself wall-mounted key holder, only a container for small things is made from the box. A solid base and decorative overlays are made of plywood. Metal hooks with the desired aesthetic characteristics are purchased from the store.
Examples from other materials
The parameters of the pocket accessory are selected taking into account the size of the keys
Photo of a do-it-yourself wall key holder made of leather
This complex three-dimensional composition is made of wood and papier-mâché. Having fixed the hooks at the bottom, it is not difficult to transform it into a full-fledged key holder.
Factory made plastic
Stained glass window
Fabric key holder
These examples clearly demonstrate the wide possibilities when using different materials. Quite often, masters use combined designs. When preparing the corresponding project, the following general recommendations should be taken into account:
- The power frame is calculated taking into account real future loads.
- Dimensions are selected so as to exclude obstacles to the free movement of people.
- All parts of the product must be designed for the respective operating conditions. If necessary, they are protected from adverse external influences.
- In any case, it is necessary to consider the whole complex of works. Some complex components (hooks, locks) can be purchased from the distribution network, or ordered from a specialized workshop.


Do-it-yourself key holder: a master class and useful recommendations
Before making a pocket key holder with your own hands, you need to decide on the method of fixing objects inside it.


In this example, you can consider some of the components:
- button for locking in the closed state;
- a carabiner can be attached to this useful accessory to the belt;
- rivet;
- device with rotary elements for keys;
- edges to prevent wear.
For manufacturing, you will need not only leather and the special metal fittings listed above. The drawing of the workpiece and cutting will not cause significant difficulties. However, a quality seam.


To make a do-it-yourself wall key holder made of wood, you do not need to purchase expensive specialized equipment. A suitable blank can be a completely free snag of a special shape, found during a walk in the forest. When buying a small board, plywood in a hardware store, significant costs will not be needed. You can also buy standard fasteners, hooks, varnishes and paints.

The following description will help you create such a housekeeper in the hallway with your own hands without errors:
- After clarifying the dimensions, you need to buy plywood (up to 10 mm), rings with key chains.
- Make drawings of individual parts in life size. With its help, patterns of the lower and upper parts, key rings are cut out of thick paper.
- They are applied to a sheet of plywood and outlined with a pencil.
- Cutouts are made along the marked lines with a jigsaw.
- Surfaces are polished sandpaper. Drill holes in the key rings for the subsequent installation of rings.
- The "house" and the base are fastened using PVA carpentry glue.
- "Hearts" and other decorations can be applied using burning devices.
- Products are varnished. After drying - fix on the wall.

When creating a wall key holder with your own hands, it will help to improve the decorative parameters of the product without extra costs and personal artistic talents. So this technology worth studying in detail:
- Surface preparation removes chips, bumps.
- Apply 2-3 layers of white paint, which forms a neutral color background and eliminates minor defects.
- The pattern you like is cut out of the napkin, the edges are made uneven.
- Having attached such a blank in the right place, it is applied (transparent PVA). Movements from the center to the sides remove air bubbles.
- After drying - varnished.
Article
How to ruin your mood without leaving home? Very easy, just forget where you put the keys! It is especially insulting to be late because of such a trifle for an important meeting.
Keep the keys in one place, so as not to waste time and nerves looking for them at the right time.
If you are tired of wasting time looking for the keys to your apartment, car, office, garage, basement, there is a simple solution that will allow you to forget about this problem once and for all.When a housekeeper hangs in your hallway, there is more order at home.

Checked: the sight of empty hooks is the best reminder that you need to look for right now, and not just before the exit.
A wall-mounted key holder will not only become a permanent meeting place for all your keys, but also decorate the hallway: there are many design options for this item that is necessary in every home.You don't have to go to the store to find your dream housekeeper, you can make your own! In this article there are several workshops available in which you will find ideas for making it.

You will have to try a little, but the result will meet your expectations.
- A key holder of a style, size and color suitable for your interior is a rarity. It is enough to go in search of her once to be convinced of this. You will save time if you do it yourself.
- Only a housekeeper created for the house with your own hands can become the embodiment of your individuality and love for loved ones.
- You will be sure that your wall key holder is made of durable and quality materials because you chose them.
- You will not only enjoy creativity, but also surprise your guests with a beautiful and unusual thing in the hall.
- Finally, a housekeeper made with your own hands from improvised materials will cost less!

"Keepers of the keys" are very diverse. You can choose them for a variety of interior and style of the hallway.
Deciding on design and construction
How to make a house key holder? Very simple! We have selected design solutions, thanks to which you do not have to spend money on expensive materials: almost every apartment has everything you need for work.
Materials and tools:
- Plywood, piece of chipboard, leather, frame;
- Acrylic paints, stain;
- Hooks and hangers;
- Drill, jigsaw and pressure roller;
- Screwdriver, spatula, awl and needle;
- Sandpaper;

To realize the most daring ideas, you need only a few materials and tools.
Master class number 1: a key holder from a saw cut of a tree
Do you want your key holder in the hallway to look stylish? This master class simply and clearly describes everything that is required for this.

A few simple steps - and it can be hung on the wall.
What you need:
- Spil,
- Alcohol or water stain,
- Abrasive sponges or sandpaper of medium or fine grit,
- Acrylic lacquer,
- Printout of the mirrored image,
- Wide synthetic brush
- pressure roller,
- hooks,
- Hangers - 2 pieces,
- Drill,
- Crosshead screwdriver.
Key holder from a saw cut - suitable option for those who like to work with wood. You can use a saw cut of any tree species, but it is better if it is pine.

Its wood is easy to process and has a beautiful pattern.

Master class number 2: a key holder from a branch
This master class is for those who often visit nature and simply love eco-style in the interior! A lot of materials are not needed, the main thing is to find a suitable branch.

This housekeeper is sure to impress your guests!
What you need:
- dry tree branch,
- wood stain,
- Acrylic paints (optional)
- jigsaw,
- Drill,
- Hangers.
There are no two identical branches, which means that your housekeeper will certainly be special!

This key hanger is easy to make.
- We take the branch of the tree we like, wash it, dry it, saw off all that is superfluous. Now we need to decide whether we will save the bark. Option A: remove the bark, using sandpaper if necessary. Option B: the bark remains, we remove only its damaged areas.
- With the help of a jigsaw, we will make a saw cut from the side where the suspensions will be and with a drill we will drill recesses for self-tapping screws.
- With a wide brush we apply a stain on the housekeeper: it will not only shade the tree, but also serve as an antiseptic. After that, leave the branch to dry for about an hour.
- If we have an option without bark, we simply cover the branch with acrylic varnish. If you chose the option with bark, first we will impregnate the branch with varnish, diluted with water in a ratio of 1: 1, and after drying - undiluted.
- If desired, the surface can be walked with a dry brush with acrylic paint suitable shade. The result must be fixed with a finishing layer of varnish.
- Knots will serve as hooks for keys. It remains to screw the hangers.

You can be proud of the results of your work: the housekeeper is ready.
Master class number 3: a housekeeper from a picture frame
Do you have at home old frame from a painting or a photograph? Don't rush to throw it away: a framed key holder is a great way to decorate your wall and define a permanent place for your keys!

This master class describes not only how to make a key holder, but also how to decorate it.
What you need:
- Frame,
- Suitable piece of plywood
- acrylic primer,
- Acrylic paints,
- Wide synthetic brush
- Sandpaper of medium and fine grit or abrasive sponges,
- decoupage card,
- transparent file,
- Decoupage glue (or stationery pva),
- Acrylic lacquer.
- Key hooks and hangers,
- Drill,
- Crosshead screwdriver,
- Jigsaw.

Necessary materials for work.
To get started, we need to know inner dimensions frames. Using a jigsaw, cut a rectangle of the desired size from a piece of plywood.We take a thin drill (with a diameter of 1-2 mm less than the screws on which we will fasten the fittings) and drill all the necessary holes.We cover the plywood with acrylic primer or white paint. When the primer is dry, sand it with medium grit sandpaper (No. 600-800) and wipe it with a damp cloth.

For the frame, use paint that matches the color.
Now we will decorate our product using the decoupage technique. Place the image on a stationery file face down and moisten it well with water, smoothing the bubbles formed on the surface from the center to the edges.Apply glue to the primed plywood base and immediately attach a file with a decoupage card. Again, smooth the card from the center to the edges (it is convenient to use a pressure roller). Now the file can be removed.

If small folds remain somewhere, the pattern can be smoothed out with wet (!) Fingers. Let dry for 2 hours.
Now you can tint the frame with diluted acrylic paint. Apply acrylic varnish with a synthetic brush.We insert plywood into the frame, fasten the hangers and hooks.

If you have a lot of keys, this key holder will keep them in order.
Additionally, you can hang tags with numbers. And to make it easier to navigate, it’s enough to stick signs under each of the keys with the inscriptions “From the basement”, “From the dacha”, etc.
Master class number 4: key holder made of plywood or chipboard
Do you have plywood 6-10 mm thick or a piece of chipboard? Are there any shelves left from the old nightstand? It is worth arming yourself with a jigsaw, and you will have an exclusive wall key holder made of materials that you did not even hope to use!

It is much more aesthetic when there is an original little thing in the hallway.
What you need:
- Pattern,
- jigsaw,
- Drill,
- wood putty,
- Putty knife,
- Key hooks and pendants.
We find a suitable picture on the Internet, set the desired dimensions and print it. Simple generalized forms look spectacular: a fish, a key, a leaf, the contour of a flying bird, cats ...

For novice designers, it's great to try your hand at creating public key holders.
The pentagon easily turns into a house for keys. Even an ordinary circle can be beaten if, by adding a few details, to build from it, for example, a similarity hot air balloon. We cut out the figure along the contour and circle the resulting pattern with chalk or a simple pencil.Now you need a jigsaw.

Carefully, slowly cut out the selected figure along the contour.
It happens that chips form on plywood when working in this technique, especially if the plywood is not of its first youth. It is in our power to make the surface and even the ends of the key holder smooth. We arm ourselves with a spatula or palette knife and apply on problem areas wood putty. We are waiting for complete drying.

We sand with sandpaper, first medium, and then fine grain, paying special attention to the ends.
With a drill we make recesses for suspensions and drill holes for self-tapping screws on which the hooks will be held.

Turn on full power fantasy and create!
A do-it-yourself key holder can be decorated using the decoupage technique, as described in the previous master class (in this case, we will additionally need glue and a suitable pattern).

It remains to screw the fittings and hang it on the wall.
Master class number 5: leather key holder
How else can you make a key holder? If you think that the best place for keys is a pocket, our master class is for you.

The key holder, made in the described technique, will not require much effort.
What you need:
- Pattern,
- Thick leather (an old bag will come in handy),
- Lining,
- Lightning,
- strong threads,
- thick needle,
- Awl,
- buttons,
- Key carabiner,
- Scissors.

What materials to use and how to decorate the key holder you decide for yourself.
The more keys you have, the larger the pattern should be. Exactly according to the pattern, we cut out all the details from leather and suede. Connectingdetails of the outer part and lining.

To make the product look neat, trim the edges with scissors.
It remains to unscrew our key holder and admire the result. We attachcarabiner - and a leather key holder in your pocket!

Now, no matter how many keys you have, they are all in one bunch.
Decorating the housekeeper: ideas and solutions
Your housekeeper is almost ready. It's time to add some more charm to her! Shabby chic or Provence, cyberpunk or country, ethnic style or retro, painting or embossing... It's up to you to decide in what technique and in what style the key holder will be decorated.

This can be done with the help of improvised materials, so we are collecting ideas.
If the old clock is broken, you can use several gears, 5-6 unnecessary keys and a little glue - and your steampunk key holder is already decorating the hallway! If you are into decoupage, you may have craquelure polish and wax patina.

This is enough to give the product the look of an antique: you get a retro-style key holder.
Stencil and putty - and the key holder is covered with a three-dimensional pattern. Got small nails and thread? Take a hammer, draw a few lines on the board, drive in nails and wrap them with thread - your panel key holder will be super stylish! If old forks or spoons remain, bend them and nail them to wooden base- the housekeeper is ready to take its place on the wall.

Ideas are everywhere, you just have to look around!
Twine scraps, buttons, chains, beads, castings made of plaster or self-hardening plastic, cardboard cuttings, ice cream sticks, splinters ceramic tiles- any little thing that lies idle at home can become final touch for something you will be proud of.

The time you could spend looking for keys is now put to better use!
Everyone knows the problem of finding keys before leaving the house. And it seems that we always try to put them in their usual place, but every time they disappear somewhere. How to solve this problem? There is one proven method, or rather a tool or household item - this is a housekeeper. It is she who will ensure the safety of the put keys.
Now, before leaving the house, you do not have to check all your pockets or handbags, it will be enough to look at the wall or bedside table, and the problem is solved. But then another problem arises, how to determine its model. The modern market for this purpose is very large, so making a choice can be very difficult. The ideal solution would be to make a key holder with your own hands, but first, let's figure out what types of these necessary interior items are and where is it better to hang them?
In most families, it is customary to keep the keys in the hallway. This means that there should be no issues with the placement of the key holder. Choose a wall or bedside table for this and fix it in the designated place.
The location of the housekeeper should be chosen taking into account the wishes of all family members, taking into account the capabilities of each.
If you decide to purchase a key holder in a store, then think over in advance the place where it should be located. Based on this, you will choose the dimensions of the product. Another thing is if the key holder will be made at home, then you can “try on” it on the wall or on the bedside table during work.
If you have not yet chosen a key holder model for your apartment or house, then we will help you with the choice by describing the most popular varieties and listing their advantages and disadvantages.
Desktop type key holders
If your hallway has bedside tables or shelves, then you can easily place a desktop-type housekeeper on them. If it turned out to be problematic to purchase a finished product, then you can take an ordinary vase or box, from which it will be convenient to take the keys. finished products this plan is also very much, it is enough to visit the shops. 
Wall type key holders
 The simplest and most popular version of key holders is wall models. They are a rigid base on which there are several hooks. This option is often used by home craftsmen, just connect your imagination, and your apartment is decorated original item interior.
Such keys can be different types and forms. Therefore, when choosing them, you need to focus on the design of your interior.
The key holder should not stand out in the interior, it is better if it becomes an original addition to it and handy item everyday life.
Key holders within
 Such key holders look very aesthetically pleasing in any apartments or houses. Their background can even be a photograph, not to mention a beautiful landscape. The only thing to consider is that a picture or photo can get scratched over time, so they need to be protected with something.
If you install a more rigid base instead of a picture, and attach several hooks to it, then you will get an excellent key holder design. You can use another option, when the key hooks are attached directly to the frame, and a beautiful picture is placed inside. But this requires a frame made of more durable material, a cast or overhead bar will not withstand such an onslaught.
Key holder locker
 This is another option for a wall-mounted type of key holder. If you are not a supporter of the fact that the keys are freely available to everyone, then you can try to find a more secluded place for them. The key holder in the form of a locker will perfectly cope with this task. If you are a supporter of handmade products, then all the better, because there are a lot of ideas for incarnations.
The locker can be such that it can fit not only the keys, but also other items that are in frequent use. The cabinet itself is decorated beautiful pictures, photos or decorative elements. Clocks can be placed on the front.
The next advantage of this option is the ability to install a secret lock on the locker. Of course, this is already an excess, but for some it is a way out.
housekeepers
 This version of the key holder is a variation of the locker model. And although the model is somewhat rustic, its roof gives it a special charm, which is why the product is very popular.
This design has several advantages. For example, compact dimensions, you will agree that the cabinet on the wall takes up a lot of space. But most importantly, the housekeeper fits perfectly into any interior, especially since when making it at home, you can use fragments and details to decorate it, which were used during the repair of the hallway.
Key holder-organizer
Organizers have become popular not so long ago, but now they make our life easier and more planned. Oddly enough, key holders can also be with this function.
Such a model will be appreciated by all family members, except that the keys will be in permanent place, it can accommodate other useful items reminders, receipts or notes about upcoming purchases.
If you wish, you can also place a reminder board there, on which you can write something and then erase it. Several shelves or pockets are useful for storing other things, glasses or pens for writing. 
Decorative key holders
All handmade models can be attributed to decorative key holders. Agree that it is very difficult to repeat a purchased product in terms of its design, and why, but to make something according to own project will be much more interesting. Especially if a person has a good fantasy and a sense of proportion.
Here are some examples of wild fantasy:

How to make a key holder from a photo frame
If, after reading our article, you are on fire with the idea of making a housekeeper with your own hands, but there was nothing suitable at hand except for a photo frame, then do not despair, and feel free to get to work, this is exactly the material that you need. 
What you need to prepare for work besides a photo frame:
- several hooks;
- glue;
- 2 brushes;
- dye.
The work can be divided into several stages:
- First of all, you need to choose the color of the key holder. To do this, compare the design of your interior with one or another option. Experts recommend not making an exact binding in the design, otherwise you will have to look for another key holder in case of repairs in the hallway.
- If the frame already has some kind of coating, but it is very old, or peeling, then it needs to be cleaned, sanded and re-coated with the chosen color.
- After the paint on the frame has dried, you can start hanging hooks on it.
- Now your the main task decide where and how such a key holder will be attached. The place for it is chosen in such a way that it is convenient for all family members to use it. Therefore, the height of the frame is calculated depending on the growth of the smallest in the family.
If you have great knowledge in carpentry, you can use your knowledge and make a housekeeper yourself from the remains of a tree. And we will analyze a simpler version of the product, made of plywood. 
How to make a key holder out of plywood
To create a key holder from this material, you need to make a lot of effort. But first, draw on paper what you want to end up with. Look for implementation ideas on the Internet or think over a scheme for plywood blanks.
There is only one way to make this task easier. In order not to engage in sawing plywood blanks, you can purchase them at ready-made. Then you just have to find the basis for the key holder and skillfully distribute all the elements on it.
If you do not like easy ways or the work itself is a joy to you, then all blanks can be made according to your own drawings and diagrams. To do this, you need to prepare:
- plywood or fiberboard;
- acrylic paint;
- napkins on fabric;
- paper napkins;
- brushes;
- glue;
- several hooks;
- sandpaper.
The process of making a key holder can be divided into several stages:
It is no coincidence that acrylic paint is used for these works. It dries very quickly, which allows you to start further work after a short period of time.
As a design, you can choose any technique. Someone loves decoupage, and someone is closer to mosaic or painting, but in one case or another it is better to give preference to a proven option so as not to spoil the product.
We will analyze the design option using decoupage.
If this is your first work, then take as a basis small drawings that will not occupy the entire surface of the future key holder. Let these be the key fragments of the drawings, which account for all the attention.
How to perform decoupage on a key holder:
- Cut out the desired size from the tissue paper with your hands. Carefully separate the two lower layers, and attach the first layer, with a pattern, to the surface of the key holder.
- Take decoupage glue. If it was not at hand, then you can always replace it with ordinary PVA, diluted with water, in a ratio of 1: 2. Mix these two components and, using a brush, gently start applying it to the drawing attached to the plywood blank.
- Work begins with the central part of the fragment in order to exclude wrinkles in the material.
- After drying adhesive composition the entire surface is varnished in several layers. When applying the next layer, the previous one must dry.
- After the last layer has dried, you can begin the process of attaching hooks. How they will be located will depend on your imagination.
It remains to attach the key holder to the wall and the work is ready. Now your keys will always be in their place. There are many more options for making key holders, you can see one of them in the video below:
In conclusion, we can say that the key holder is an indispensable piece of furniture in every family. To exclude everyday searches for the loss, it is better to take care of their storage place, especially since the key holder can effectively complement the interior of your hallway with its appearance. There are a lot of options for this product, from banal decorated jars on a nightstand to cabinets with secret mechanisms. What you want to see in your hallway is up to you, especially since such a product can be easily made by hand.
It is great if in your house each item has its own place. This is especially true for small things, and striving for something to collapse and get lost. First of all, this applies to keys. They are not always easy to find if they are thrown in an unusual place, even if it is in plain sight.
The solution to this problem is the key holder - a special item in which the keys are stored. It may look like a locker or a small wall shelf with hooks.

Types of housekeepers
All varieties of home key holders are wall-mounted, since it is quite convenient if they are located at eye level. This makes them much easier to use. Key holders can be wooden, metal, leather, plastic or glass.


The most common key holders are made of wood. This model is distinguished environmental Safety and originality. They can be made of valuable wood and decorated with intricate carvings. Made by hand, wooden key holders can look like real works of applied art.

Metal products are usually not intended for home use. They are most appropriate in schools, offices and various offices, i.e. in those places where there is a need to store a lot of keys.

Royal key guards, made of metal alloys, can add solidity to your home. They will fit perfectly into the environment, decorated in such styles as hi-tech, techno and loft.

Do you want to give your hallway a special charm? Stop your choice on a leather key holder. Its main difference is small size. Therefore, owners of small hallways usually prefer to purchase such a model.

Photos of wall key holders clearly show that they are divided into open and closed. The closed key holder is a small cabinet with hooks for keys, and the open one looks like a shelf.


Today, manufacturers offer multifunctional key guards, the design of which may include a shelf for correspondence, a chalk board, etc. In addition to dividing by type of design, key storage products are divided depending on their purpose - into home and office.

In our country, wooden key holders are the most popular. They can be purchased ready-made in most souvenir shops or made by hand. It is possible to make a housekeeper with your own hands from pieces of a board, pieces of plywood or from branches.

Finished products delight the eye with an amazing variety design solutions. Collage key holders decorated with appliqué look amazing.

Variations made by hand from noble breeds tree. It can be oak, walnut or teak wood. Such models will be appropriate for a hallway designed both in modern style and in a classic style.


Key holders with leather inserts look no less decorative. As an additional decoration, chrome-plated metal elements can be used for them. As a result, such products are distinguished by an elegant and stylish appearance.

What is better - open or closed key holder? The advantage of the first is ease of operation (no need to open anything in order to hang or remove the key). The advantages of the second are a more favorable appearance and the ability to disguise individual unaesthetic details of the hallway (meters, doorbell mounts, etc.). Therefore, when choosing such items, it is better to focus on your taste and interior style.

The solidity of the setting will be added by the key keeper in the form of a regular quadrangle with glass door. And the product, decorated using the decoupage technique, will always look great. It is sure to please all family members. The motifs of vintage or fairy tales can act as the subject of the picture.

Some housekeepers immediately stand out in the interior due to their brightness and beautiful appearance. Others are difficult to spot at first glance - they can hide in other details of the situation, i.e. be secret.


An example of the latter is the key holder built into the watch. This extraordinary design idea will appeal to all those who like to receive guests and those who prefer not to keep the keys in plain sight.


Where is the best place to place the key keeper
Everyone knows that the housekeeper's place is in the hallway. But where exactly should it be hung? There are no hard and fast guidelines here. For its location, any free and convenient place is suitable.

It would be optimal to place the key holder closer to front door or hangers for outerwear. Gathered, put on a jacket or coat, grabbed a bunch of keys - and out. Or vice versa, they returned, closed the door behind them, removed the key. This location of the key house minimizes the risks of leaving them in another place and forgetting about it.


Instructions for making a key holder-planter
You will need:
- board from fiberboard (base);
- old planter;
- putty;
- putty knife;
- a set of acrylic or gouache paints;
- aerosol varnish;
- glue;
- subtle matter;
- hooks;
- decor (beads, glass beads, ribbons, feathers, braid, lace, decorative figurines).

In order to make a key holder, you need:
- Take the base and apply a little putty on it.
- Until it dries, draw a markup stylized as brickwork.
- Cover the base with paint, and then with a protective layer of varnish.
- Soak the fabric in PVA glue.
- Pull the fabric over the pots, forming beautiful folds.
- Paint the resulting blank in dark colors. After the paint has dried, apply gold or silver patterns.
- Engage in decorating.
- Glue the pots to the base, decorate the surface additional accessories. Place the finished housekeeper in the frame and attach the hooks.
- Put live or artificial flowers, dried herbs, leaves, or beautiful feathers in a pot. The key holder is ready.

The key holder is a great solution for keeping order in the hallway. In addition to its intended purpose, it can play the role of one of the key interior details, without which it is impossible to create a cozy atmosphere. A well-chosen key holder will bring the necessary zest to the hallway and add charm to it.

Photo of a wall key holder


You found yourself in a funny situation when, when you left the house, you could not find the key. Well, it happens. That is why we suggest trying to make a wall key holder with your own hands. By hanging it on the wall near the front door, you can be sure that the keys and other little things will always be in one place. Do-it-yourself key holder will add warmth and comfort to your home, because this is a key holder self made- there is no one else like it.

Such key holders come in different types - the key holder is open and closed. A do-it-yourself wall key holder can be made of wood, cardboard, paper tubes, corks, branches, boxes, polystyrene, and so on. It all depends on your imagination and artistic taste. An open foam key holder in the shape of a cat is our first master class.
It often happens that when we buy appliances or furniture, all this is brought to us packed in foam. But the foam - interesting material for crafts. Figures are cut out of it, glued fairy houses, letters for the celebration, and even lamps. So our master class today will be called: “How to make a housekeeper with your own hands from foam”. Decorative key holder in the form of a cat or a cat is a great option for your hallway.

For work you will need:
- Polyfoam 50 mm thick.
- Cotton wool.
- PVA glue.
- Cardboard of the right size.
- Glue made from potato starch.
- Accessories - hooks for the key holder and rings for mounting on the wall.
- Acrylic putty.
- Acrylic paint - white and black.
- Knife or scalpel.

In the process of work, we need a starch paste. But you need to take into account the fact that you need to prepare the paste when necessary, since it is stored for no more than 5.5 hours and is used in a warm state. Before you start work and make a craft - a do-it-yourself housekeeper in the hallway, we will cook a paste.
- For a paste, pour 10 tablespoons of water into a ladle or bowl.
- In another dish we breed 1 table. a spoonful of starch and 2 tbsp. spoons of water from a bucket. Stir until thick cream. It is necessary that there are no lumps.
- We boil the water in the ladle and pour it in a thin stream, stirring vigorously, into the dishes with the finished mass. If the glue is too thick, add another 1-2 tablespoons of water at this moment.
- While the paste cools, a film forms on top - it must be removed with a spoon.

Preparing workplace: we put thick cardboard on the table, newspapers - there are always a lot of crumbs from the foam. Blank key holder - that's what we do at the beginning. On a piece of foam that we cut out for ourselves, we draw with a pen a sketch of the cat housekeeper. Below - an oval, above - a circle (you can use a saucer for stroking).

We start cutting according to the outlined sketch. If you do not want there to be a lot of crumbs from the foam, you can heat the knife (in the future it is better not to use this knife for eating) over the gas - the hot blade cuts faster. Just take care of good ventilation in the kitchen - otherwise you will breathe chemistry.


Create volume: select the head, paws, torso of the cat.

Primer with PVA glue and a brush. After priming, you need to let the product dry.

We cover the product with an “open housekeeper” papier-mâché made of cotton wool (we put cotton wool on the workpiece, and then moisten the cotton wool abundantly with a paste and a brush, and iron it with a brush). In the process of work, if a flat part is needed, then we press the brush harder, and if a three-dimensional part is needed (a head, for example), we barely touch the fleece with a brush (only for wetting with a paste).

We do all the details in the same way. Eyes and nose - balls, molded last. We will leave the product for the night - the key holder blank should dry well.

On the reverse side workpieces make holes for loops. Loops are needed in order to hang the finished work on the wall.

Fix the loops on the back side with acrylic putty.

Finished with white acrylic.

Attach key hooks. Hooks and loops can be made independently from thick wire, or you can buy ready-made ones at a hardware store.

Cardboard can be glued to the inside - this way the open housekeeper looks neater on the wall.

Coloring acrylic paints. Leave to dry until morning and then varnish.
On the video - a housekeeper as a gift Cat, do it yourself:
V this moment we are interested in housekeepers cats and cats. We know that there are many varieties of this decor: an open key holder, a magnetic key holder, a key holder with a shelf, a loft key holder, a birdhouse, pocket, desktop (a small box or chest for keys), a key holder - a box with a lid and without, and so on.


Key holders are original with silhouettes of cats, cats and kittens, you can make your own from wood, plywood or thick cardboard. It is even easier to glue figures of cats and cats from felt, cardboard, salt dough, polymer clay.


Do-it-yourself product kittens from a metal shelf and felt figurines. This item is suitable not only for keys, you can also hang brushes, a tongue for shoes, and so on on hooks.


Wall-mounted key holders in the hallway will add warmth and comfort to your home. Open key holders with your favorite cats are always popular and in demand. In addition, open key holders are suitable not only for keys, but also for other small things, handbags, belts, and so on. Why not spend an hour or two working on interesting home decor.

 Diseases transmitted through the blood of a sick person to a healthy person What infections are transmitted through the blood
 What you don't know about okroshka Where and when did you come up with okroshka
 Colostomy closure - reconstructive coloplasty