Making kitchen furniture with your own hands. How to make a kitchen set with your own hands? Detailed instructions. Facades and fittings
Today, the kitchen is the place where the whole family most often comes together. Long gone are the days when the entire population of the apartment gathered in the living room in front of the TV. The fact is that now it has become more convenient to find all the movies and programs to your liking on computers or tablets. Nevertheless, a common breakfast, dinner, and just evening gatherings with tea remained, that is, the importance of this room cannot be underestimated. Naturally, all of the above does not apply to those people whose apartments have a separate dining room. In addition, food preparation and storage of all utensils are also very important, and convenience and comfort cannot be neglected in this regard.
How to make a kitchen with your own hands. Step-by-step instruction
Now we will not analyze the situation when the room intended for the kitchen is not prepared for this purpose at all - that is, there are no pipes, electricity and other things in it.
It is best to take for reality a room with which you can work. Walls have already been erected in it, laid flooring, the ceiling is made and communications are carried out.
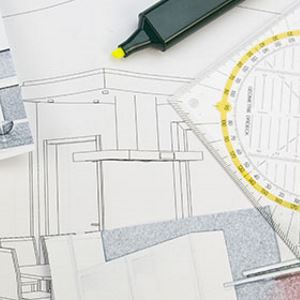
Planning
First of all, draw a plan of the room on paper. First, a general one is created, since it will be necessary to measure the height and width of the walls, any walls, window sill gaps, etc. (the latter, by the way, can later be used as part of the countertop). In addition to all of the above, household communications should also be included in the plan. It should indicate where there is wiring, where the gas pipe goes, and also note the water supply and more.
But before you wonder how to make a kitchen with your own hands, you need to decide on its shape. It can be linear, that is, lined up along one wall, L-shaped or corner, or U-shaped. The latter type is usually chosen when a room with a separate entrance is allocated for the kitchen.
Already now, decide where you will store the dishes, where you will put the refrigerator, where you will place the work surfaces, stove, sink, and also how the cabinets will stand. Naturally, the stove should be placed closer to the gas pipe, the refrigerator or electric stove - to sockets, and the sink - closer to the water supply. This is logical, so you can avoid unnecessary costs.
Drawing of the future kitchen
Here you need to display all the products that will be used. That is, each bedside table, cabinet and sink must be drawn. Dimensions also need to be affixed - this avoids confusion. Particular attention should be paid to the height of the countertop. It is determined by the height of the person who will most often work in the kitchen. You also need to correlate the dimensions of future bedside tables, drawers, tables and stoves with the countertop.

It should be displayed in the drawing what materials the future pieces of furniture will be made of, not only their facades, but also the frames. Again, the countertop needs special attention. Then, separately, choose household appliances.

There is a way to make your choice easier. It will come in handy, because in a two-dimensional drawing it is not always possible to determine how certain devices, surfaces, etc. will look. Therefore, you can use fashion magazines, or ask friends whose existing options designs you like, how to make a kitchen with your own hands. Photos from magazines will help you deal with many difficulties. Suitable design will definitely be found. In addition, today there are a sufficient number of programs, having worked with which, you can create a three-dimensional, even interactive, kitchen drawing. No special skills are required here (if you have already old enough children who understand computers, entrust it to them. This way you can save time and let the children know that they are trusted).
Materials for making furniture
How to make a kitchen with your own hands so that it is durable, comfortable and of high quality? In fact, there is nothing complicated here. The easiest way will be with lockers, which, in fact, you need to do yourself.

Sidewalls are best made from 16 mm MDF - it is suitable for both cabinets and shelves or cabinets. The side walls of the boxes can be made from half a centimeter fiberboard. The main thing is to purchase its laminated version. The back walls can be made of plywood - they are the most unused, and generally remain almost invisible. In addition, if any problems arise, they are easy to remove or replace. Doors, if you do not have the proper experience, it is better to buy separately - they are sold in building supermarkets, and therefore this will not be a particular problem (and it is better to pick up doors first, and only then make cabinets, instead of adjusting everything at the last moment).
A separate issue is the countertop. It is also best to purchase it separately. It will be good here a natural stone or material similar in composition and properties. If you want to do this yourself, then you can use a thick chipboard, about three centimeters (but a little more is better). Before installation, you need to cover it with several layers. protective equipment so that the tree is not damaged due to excess moisture.
In addition, you will need all sorts of fittings - the list is quite long. Here are euro screws, and hinges with handles, ball or roller guides, legs for cabinets, edges, as well as shelf supports, and, of course, corners. The most important thing here is not to forget to buy something. These are all trifles, but they can become decisive in the question of how to do it. cozy kitchen with your own hands.

Even more important here is only the purchase of household appliances - few people can make a sink or stove on their own, and therefore they must be purchased separately. It is better to start choosing right away, since the dimensions of the same stove must match the rest of the work surfaces, otherwise it will look pretty ridiculous.
Required Tools
These tools will be needed not only for those who are going to do the whole room from start to finish on their own, but also for people who are annoyed by minor defects and other troubles. How to make repairs in the kitchen with your own hands? This question is much more common than the one above. But you will need quite different “helpers” here - from power tools this is a drill and a screwdriver, as well as a jigsaw (the latter is for those who will cut the purchased tree themselves). In addition, you will need a tape measure, a pencil, a building level and a square. A construction knife, a hacksaw for wood, as well as sandpaper. In addition, there is another important point in the form of screwdrivers and wrenches - doors, as well as some other parts, must be carefully screwed to the walls or floor.
How to make a corner kitchen with your own hands?
In fact, the action plan described above is also suitable for a corner kitchen. But they are more common than linear ones, simply because for small spaces this is the only way to build a comfortable and large work surface.
Differences begin exactly where you think - in the corner. It is this place that will have to be thought out more carefully than the rest, simply because if you make just a right angle, most working surface will be unavailable. So you have to go out and work on these places longer, making a smooth transition from one surface to another. In addition, the same should be done with hanging and floor cabinets.
Summer cuisine
Naturally, in the country it will be slightly different from its urban counterparts, but not so much that the work plan becomes completely different. So the usual country kitchen will be almost the same as the one in your apartment, and therefore you just need to follow the above plan. But the summer room is something completely different.
So how to make a kitchen in the country with your own hands? It is usually distinguished by the absence of walls, and also by the fact that it stands right in the courtyard, on the site. It is not hot there, and therefore this design is ideal in the period from late spring to mid-autumn. Naturally, both the construction and the layout will vary significantly.
The first difference here is the foundation. It must be strong enough to support the weight of not only the structure, but also all people. Sometimes this number can reach a dozen or even a dozen, which together has a significant weight. Therefore, the foundation is best made of stone. The building itself is built of wood - it is light and when processed protective compounds can withstand both weather and climatic conditions, as well as operational features such as heat and an abundance of moisture.
The walls, even if they are erected, do not cover the kitchen from all sides - usually from three. In addition, they are solid somewhere in the middle (this is done to cover the furniture), and then you can already equip a wooden grid or even use columns, leaving open space. A gable light roof is usually laid on top with appropriate additions in the form of drains for water and other things.
It is also easier with furniture here - there is no need to make places for storing utensils. So everything will consist of a work surface, a stove (often electric), a brazier that can be made removable, and also, in extravagant versions, an oven. In addition, if the summer room is large enough, then it can also serve as a gazebo and an external veranda.
For children
How to make a children's kitchen with your own hands? In fact, it is difficult to realize the connection between real and children's cuisine. Nevertheless, it exists. Children develop, and therefore they have new interests. If you want to involve them in cooking in the future, then it would be wise to give them a children's kitchen. In addition, such a toy will occupy them for some time.
So, such kitchens are on sale, but with your own hands it is best to make them from an old chest of drawers or a large cabinet. The doors need to be removed. Everything else depends on your imagination and ingenuity.
For example, you can make something that looks like a smaller version of the kitchen. That is, we take as a fact the presence of a large chest of drawers. The doors have already been removed, and all the shelves have been taken out - you can get to work. You need to put one central shelf somewhere at a height of a third of the total height of the chest of drawers. The stove will be located on the right - you will need to make curly switches, similar burners, an oven door, and so on. On the left is the sink. Between them there is a surface where you can make a locker. All this is painted, decorated and brought into a divine form. If you have a daughter and you are wondering how to make a kitchen for dolls with your own hands, then the same plan will do. Only in a smaller version, of course.
Hood
Well, in this matter, you need to understand that making a hood yourself is quite difficult - it requires certain special skills that most of us do not have today. Therefore, the option of installing a hood will be considered. This is not so easy - the main part is located above the stove, and it is she who works by pulling air. The air duct itself is usually made of corrugation in the form of a pipe. It is he who takes the air out into the street through the work done in outer wall ventilation.

If you are still worried about the question of how to make a hood in the kitchen with your own hands, then you will need the same corrugated pipe and several fans. In addition, you will need to carefully cut the holes for the pipe, since everything must be airtight.
Ceiling
How to make a ceiling in the kitchen with your own hands? Before proceeding to work on it, it will take quite a long time to determine which type is best to choose. It is not easy, because there is simply no ideal option. The problem here is that the humidity and temperature in the kitchen fluctuate over a fairly wide range. In addition, you also need to take into account how easy it will be to wash the ceiling - at least a few times the splashes will fly there as well. Yes, and you need a material that minimally absorbs odors.

The first option here is plaster. You can get by with a couple of working hands. You can wash the plaster quite often, it does not burn. True, during flooding, such a ceiling will not protect you at all: at best, these will be stains, and at worst, fallen off parts of the finish. Next comes the suspended ceiling. Here it must be remembered that wooden crate does not fit. If you use a cassette design, then you can not be afraid of humidity and temperature. In addition, you can install comfortable lighting. There are also disadvantages - nothing will be washed from such a ceiling. But the undoubted plus here is the easy replacement, so the question of how to make repairs in the kitchen with your own hands will not arise at all. It will only be necessary to purchase a few panels and put the damaged ones in place. The last view - stretch ceiling. This is a very good option - they do not burn, but only melt, which increases fire safety. In addition, such ceilings will protect you from flooding - unless it is very large. At this point, the question of how to make a kitchen renovation with your own hands can be considered closed. The photos presented in the article will help you understand this issue.
Conclusion
In general, you should have already understood that making a kitchen on your own is real, even if it is not very simple. Questions that arise can be solved with the help of our article.
The most important thing when renovating a kitchen - careful planning. This allows you to avoid many problems and solve the question of how to make a kitchen with your own hands.
If you look at the kitchen set market, you can find a huge number of original design solutions that win the hearts of many housewives. However, the prices for such works of design thought are exorbitant. Under such circumstances, willy-nilly, one has to think about alternative options. Some decide to make a kitchen set with their own hands. To do this, today there are kitchen fittings, and building material, and tools - in general, everything. And, as practice shows, a home-made kitchen set is in no way inferior to a purchased one, especially in quality. And this is not even taking into account the price, because in any case it is more profitable to make a set for the kitchen on your own. If you decide to accomplish such a feat, then you will have to work hard not only with your hands, but also with your head.
Headset manufacturing methods
There are several directions, following which you can realize your plans. For example, to prepare all the necessary details, you can contact a specialized company that provides cutting and edging services. This is a good option, since you choose the size of the kitchen set yourself.
Another option is to purchase ready-made parts. We can say that this is the easiest option. But in this case, your kitchen set will be standard. There is another solution, which consists in the complete manufacture of a kitchen set with your own hands, starting from measurements, cutting and ending with assembly.
Simplicity and functionality of the design

If you prefer the latter option and want to do all the work yourself, then in this case you should consider the design of the headset. As a rule, it is best to choose a simple, functional and convenient design. This category includes a classic kitchen, the cabinets of which have drawers and swing doors. This design has many advantages. Here are some of them:
- Possible modular assembly. In this case, each element is designed and assembled separately.
- Such a set will be a suitable solution for both large and small kitchens.
- Exists a large number of building materials that allow such a project to be implemented.
- This furniture is durable, practical, roomy and comfortable.
- Even a non-professional carpenter can create such a design.
- IN classical kitchen you don't have to work with curved lines, which makes the job easier.
- Simple mechanisms are used.
- You can easily choose the right fittings, facades and countertops.
Among other things, such a kitchen set, if necessary, can be altered or upgraded, since you will personally know the location of each bolt!
What to make?

The next preparatory step is the selection of the appropriate material. In general, kitchen sets are made from different materials, here everything will depend only on your financial capabilities and wishes.
- An array of wood. This material is the most expensive, but also the most durable and strong.
- Painted MDF. Availability in price. Has excellent performance.
- Laminated chipboard. One of the cheapest materials that is in the greatest demand, even among Italian craftsmen!
- Postforming. Postforming boards are wear-resistant and practical material. What is most interesting, you can choose any color and texture of the surface.
- Chipboard without coating. It is used for making individual elements kitchen set, for example, for the side and back wall.
When choosing a material, it is worth looking at ready-made kitchen sets in furniture stores. This will allow you to imagine what kind of furniture will turn out from a particular material.
The eyes are afraid, but the hands are doing: let's start measuring
The production of a kitchen set begins with measurements. First you need to decide what type of headset will be. In fact, the kitchen set can be divided into two types: angular and straight. As for direct kitchens, it is a little easier here. Along one wall there will be several bedside tables and hanging cabinets. In some cases, the headset is placed parallel to each other on two walls. Here, the measurements are quite simple. You need to measure the length of the wall.
When measuring, it is important to take measurements with a tape measure in several places, for example, at a height of 200 mm from the floor, at chest level and under the ceiling. This is due to the fact that slight deviations can be observed due to the curvature of the walls.
As practice shows, the discrepancy between such measurements can be up to three to four centimeters. Using modern Construction Materials these discrepancies can be leveled. Start taking measurements when the old furniture is already dismantled, then you will have free access to the wall.

When measuring, one often encounters difficulties. For example, gas or water pipes can be located on the walls - all this will need to be taken into account when installing the kitchen, cutting out the appropriate holes. The easiest way to do this is with an electric jigsaw. As for the sink, then usually the cabinet for it comes without a back wall, since in this place there is an interchange of sewer and water pipes. The main rigidity of the cabinet is achieved thanks to the metal corners.
Among other things, it is important to take into account the presence of a gas stove in the measurements. Based on the measurements, it will be necessary to make appropriate adjustments to the design configuration of the cabinets and cabinets. After all, to gas stove gas pipes will fit. This is especially true when you want to make a single countertop.

The hood is closed with a specially made locker. To do this, you need to make a special cutout in the back of the cabinet. As for the measurements of the corner kitchen, the whole process follows the same principle.
Small production of big parts
Where you can feel complete freedom is when choosing the color and design of the kitchen set. You should think over and draw up a figurative "cutting map" according to the finished drawing. In order to avoid mistakes and carry out the correct order of individual elements or cut them yourself, it is important to know about several nuances of cutting according to the drawing. The diagram below will help you with this:
This is what a standard wall cabinet will look like:
- Horizontal.
- Side wall or side.
- Shelf.
- Back wall.
One of the features of the horizontal is its size. Based on the scheme, the horizontal is located between the side walls and is connected using confirmation screws. Accordingly, suitable holes will need to be made in the details. Here, for example, holes in the side blank:

When measuring each detail, it is important to take into account any nuance, otherwise the sawing process will be carried out incorrectly. In most cases cabinets are made standard size. The width is a multiple of 100 or 50. Therefore, the width can be:
- 250 mm.
- 300 mm.
- 400 mm.
- 800mm etc.
It is important to take into account the thickness of the chipboard; for the case, a material with a thickness of 16 mm is used. Accordingly, the horizontal of a cabinet with a width of 800 mm inside will be 768 mm. This is due to the fact that the side wall will occupy 16 mm each on both sides, it turns out like this:
768 mm + 32 mm = 800 mm
But these measurements are for when you are making standard kitchen. Today you can not adhere to the standards and make the dimensions of the cabinets at your discretion.
As an exception, a cupboard for dishes should be mentioned. It is manufactured to the same standard. Although today this element can be made to order.
If we talk about shelves, then there are also some subtleties that are important to consider when measuring. The shelf can be fastened in two ways: tightly or laid on special shelf holders. In the first case, the size of the shelf will be identical to the horizontal width. In the second case, the size of the shelf should be 3 mm smaller for its free installation.
Well, the back wall also needs special attention. It is made from fiberboard. The area of the rear wall should be slightly smaller than the entire body. For example, if the dimensions are 700 × 600 mm, then the back wall will be 695 × 595 mm. Why? There are two reasons for this:
- If the rear wall protrudes beyond the dimensions of the case, then it will interfere with the tight connection of the modules.
- When sawing, fiberboard “plays” on the machine, so an error may occur in big side by a few millimetres.
The principle of measuring tables and cabinets is practically no different. There is one caveat that concerns fittings when it is complex or the design of the finished module is also complex. In this case, you will most likely need the help of specialists. The scheme of thumbs can be of the following plan:

We give the blanks a finished look
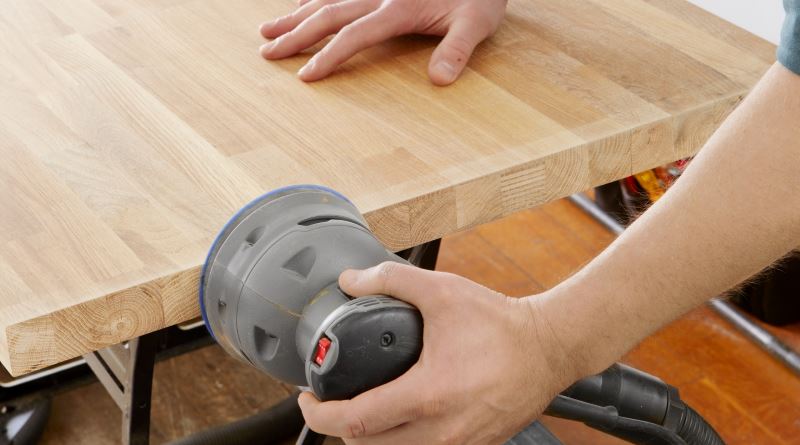
When all the blanks are cut out, it is not yet time for assembly. It is important to carry out preparatory work, which includes edging. What it is? This is one of key elements finishing of each workpiece, which reliably protects the edges from the penetration of moisture, chemicals and other liquids into the workpiece. The edging also protects against chips and other mechanical damage.

Thus, each end on the kitchen set must be processed with a special edge. There are several varieties of them. But when it comes to practicality and durability, it is best to use a plastic edge.
If this stage of work is difficult for you, then seek the help of professionals!
When buying an edge, choose the color that matches the body. Until the moment of installation, the edge should be stored in a dry place, since on the reverse side it is treated with a special adhesive that melts under the influence of temperature. Its gluing is carried out using a household iron. In no case should you use a hair dryer, due to the unstable temperature supply. And in general, the hair dryer will not withstand the duration of the period of gluing the edge.
Now we will sequentially consider how to glue the edge with an iron with your own hands.
So, for work you will need:
- Iron.
- Two pieces of fabric.
- Small file.
- Stationery knife.
- Edge.

- First of all, set the thermostat on the iron to medium.
- The workpiece can be placed on the table horizontally, end up or rested with one end against the wall. Next, with a margin of two to three centimeters, cut off the edge and attach it to the end.
- Fold the first piece of fabric several times. Through it you should heat the edge. This technique will prevent overheating of the edge and prevent damage to it. Accordingly, the iron will be protected from accidental contact with glue on its sole.
- It takes a few seconds to heat up. After heating, the edge is pressed with another piece of fabric, it remains only to wait for it to cool.
- As mentioned above, the chipboard thickness is 16 mm, and the edge has an average of 20-23 mm. For this reason, after gluing, protruding residues should be cut off with a clerical knife.
- At the final stage, process the joint of the part and the edge with a file. Thanks to such a simple operation, the angle will not turn out to be too sharp.
This is the sequence in which the edge is glued.

For work you will need:
- hacksaw,
- hammer,
- electric plane,
- jigsaw,
- plumb line,
- level,
- ruler,
- roulette,
- clamp,
- workbench or reliable table,
- screwdriver,
- screwdriver,
- vise,
- jig for making holes for dowels,
- crowbar,
- sandpaper,
- a set of needle files and files,
- construction and stationery knife,
- a set of drills and an electric drill,
- pliers,
- safety goggles and gloves,
- robe.
If possible, it is best to use for measurements laser level. It will save you from errors that are usually found at the end of the work!
Assembly of the lower part of the kitchen set
Before starting the assembly, all parts must be sorted. Next, set aside those parts that will be needed first. If you decide to assemble the cabinet first, then you will need the following parts: side wall - 2 pieces, rack - 2 pieces, back wall - 1 piece and bottom - 1 piece. Other elements of furniture are sorted according to this principle.

Each part must be assembled in stages. For example, mounting holes can be made in advance or directly at the time of assembly. There are no conventions or rules here. In this work, accuracy is important, otherwise it is very easy to damage the chipboard. In each part, all holes must exactly match. You can start the assembly from the box. It is equipped with roller guides, which are fixed from two outside parties boxes on the sides. Then the whole box is assembled. The holes from the edge should be at a distance of 7 cm. After that, holes are made for the shelf supports. Connect the two racks and the bottom, and then screw the upper ribs, to which the countertop will subsequently be attached.

At this stage, check the diagonal of the drawer box. It must be equal on both sides.
Now it's time to mount the back wall. As already mentioned, its size will be less than the width and height of the box, respectively, by five millimeters. To begin with, fiberboard is nailed to a long wall. The diagonal is checked. Corrected if necessary. It is finally fixed with several nails. The pitch of the nails can be 100 mm. If you want to make a stronger fixation, then use screws. If the cabinet will stand on legs, you should turn the cabinet upside down and screw them. Install the box in place, and the cabinet is completely ready! According to this system, all other elements of the lower part of the kitchen unit are assembled.

Assemble the nightstands gradually so as not to clutter up the kitchen.
At the final stage, it remains to mount the countertop. It can be integral or consist of several parts. In the latter case, special connections should be used for its docking.
According to this principle, the upper part is also assembled, which consists of lockers and pencil cases. The only difference is that the cabinets will need to be screwed onto the hanging brackets.
Installation of upper cabinets

When the entire assembly is completed, it remains to install everything in its place. To install the top of the kitchen set, you will need:
- drill/hammer drill,
- long level,
- roulette,
- ruler,
- screwdriver,
- hammer,
- clamp,
- wrench.

There are several options for hanging cabinets. For example, you can mount a mounting plate on the wall. Similar - screwed on the cabinet. Immediately before fixing the bar, it must be checked for evenness. It will also be necessary to use intersectional screeds. They are used to connect modules to each other.

So, the installation process will take place in the following order:
- On the hinges, the hook is mounted in the middle position.
- In order for the hook to hook onto the mounting rail, the inside of the side walls of the cabinet must protrude a few millimeters beyond the rear wall of the cabinet.
- After, measurements are made under the holes on the wall for the hinged rail. When calculating the height, decide whether the cabinet will butt or overlap with the backsplash.
- The mounting rail will in all cases be below the top edge of the cabinet.
- In order not to miss, you can first attach the cabinet to the wall at its future location. The assistant can put the appropriate mark on the wall.
- Using a level on the wall, draw a straight horizontal line that will point to the top edge of the cabinet. It is not recommended to take measurements from the floor. There is a possibility of inconsistencies.
- At this stage, mark the drilling site.
- Insert the dowel into the hole.
- Using fasteners, fix the mounting rail.
- Now you can hang the cabinet.
- Using a level, check the evenness of the cabinets among themselves, if necessary, using screws, adjust on the hinges to the level.
- Clamp all the cabinets together, starting from the corner. Insert wooden or cardboard pads between the clamp and the cabinet.
- Next, drill through the holes between the cabinets for the intersection ties.
- To avoid chips, hold a wooden beam at the exit of the drill.
- Cross-sectional screeds will pull together all the cabinets.
- Finally, put the fronts in place using the special screws and hinges.

In the process of performing this work, observe safety rules. This will keep you from getting hurt!

A simple method for making a new kitchen set
There is the easiest option for making new furniture for the kitchen. If your old furniture suits you, then it can be taken as a basis for new kitchen. It's very easy to do this:
- Start by taking your old furniture apart. Remember which parts were used in which designs.
- brush old surface sandpaper. Rinse off the dust well and "bring to life" each element.
- Now take all the measurements from the doors, facades, sides and shelves. These dimensions should be transferred to new blanks.
- As a result, you will be able to cut a chipboard sheet into the necessary details of the future kitchen.
- Then it remains only to mount all the parts according to the above instructions, install new fittings, and you can start using the new kitchen.

In order to finally give your preference to this option, it is advisable to think several times: do you like the current design, do you need to change anything in height or width, and so on. During the transfer of dimensions, you will still have the opportunity to correct something.
As you can see, this is the simplest and most primitive method of making a kitchen set with your own hands. In fact, the kitchen will have the same format and size, only in the foreground and inside there will be completely new facades and fittings. This option is preferable for those who have limited resources and will not be able to buy a new headset if there is no time or desire to develop a project from scratch.
So, to make a kitchen set is quite within the power of everyone. Most importantly, do not stop half way. Leave your comments at the end of this article and share your personal experience!
Video
Here is the process of assembling a kitchen set, performed by professional craftsmen:
A photo


The kitchen set gives the design of the room a complete and holistic look. The functionality of the furniture is achieved thanks to the spacious and ergonomic storage devices, fittings and original decor. Non-standard layouts require the use of individual solutions and design ideas.
Do-it-yourself kitchen set is not difficult to make if you have hands and a tool
The cost of furniture to order, or presented finished products not always available to the consumer. Handmade production technology involves assembling a new headset, or updating old furniture. The project of the future design will require the correct measurements.
Production of a kitchen setwill create a presentable design of furniture with the desired configuration.

Kitchen furniture design: measurements, calculations, diagrams, drawings
Payment kitchen furniture do it yourself on paper using a tape measure and a pencil. Modern programs are also available that allow you to create a headset based on exact parameters and dimensions. The project reflects the format and type of construction, the location of communication lines.
It is important to think over the location of the working triangle in advance. sink size, hob ovens and other large household appliances are taken into account at the project development stage. independently, you can use the PRO100 program. As a result, a drawing will be drawn with detailed description configuration. Having basic skills in descriptive geometry, you can easily calculate furniture for the kitchen without using programs.
 Do the project in advance, it is advisable to contact a specialist
Having calculated the furniture for the kitchen on your own, and having compiled a preliminary list of structural elements, you can begin to manufacture blanks. Specialized furniture production that performs material cutting will help save time and effort.
Variants of furniture designs with facades, countertops: angular, rectangular and others
On the initial stage planning, you should decide on the type of kitchen set. It is recommended to give preference simple products to create a homemade kitchen set with the desired functionality. The choice depends on the area and layout of the room, personal preferences. There are several options for furniture designs:

 The design according to the rules will allow you to make the room according to your needs
Homemade furniture for the kitchen organically embodies classic models in the form of floor pedestals with a shared table. The product is equipped with capacious drawers with sliding mechanisms, allowing you to conveniently store and use dishes, kitchen utensils. The advantages of a simple modification are:
- versatility of use in small and spacious rooms;
- minimal time and the possibility of modular assembly;
- capacity and comfort of use;
- there is no need to perform complex cutting, specialized fittings.

Materials for the manufacture of the headset: plywood, MDF, wood, chipboard
Today, craftsmen make kitchen sets using various materials:
- Chipboard and MDF (distinguished by a huge species diversity, to enhance quality characteristics lamination applied).
- postforming (variations of color solutions, wear resistance and practicality of the material allow you to create original designs);
- array (do-it-yourself kitchen set made of wood has a presentable appearance and strength characteristics).
Homemade kitchens are predominantly made from MDF, or laminated chipboard. The material is easy to process and does not require the use of special devices for cutting. You can save costs by using uncoated chipboard when assembling the side parts, the back wall is made of fiberboard.
 Chipboard is popular in the manufacture of furniture
Do-it-yourself plywood kitchen furniture has a lot of advantages. The material is easy to process, convenient for installation and operation. Special coatings are able to protect the base from moisture. The appearance of the product, with the original and correct execution, is difficult to distinguish from expensive options.
Production of furniture parts to order
It is possible to make furniture from chipboard yourself when you perform accurate marking and cutting of the material. Making parts to order will help reduce time costs. At home without availability special equipment it is difficult to ensure the quality of the cut and finish the edges.
You can independently perform edge processing using a household iron. It is important to choose the material for the edge that matches the color of the furniture body. back side tape contains an adhesive composition that will allow you to firmly glue the edge to the part.
Non-standard parts are produced using technological installations, allowing you to create an original decor set. Manufacturers offering services for the manufacture of elements of furniture structures provide a wide selection of colors and materials.
Manufacturing methods based on an old headset: rework, restoration, painting, updating
 Before and after - see the difference
An old kitchen set can become the basis of a new product. Proven techniques allow you to redesign the design, while maintaining the geometry of the project. It is important to make sure that the solution is correct by evaluating the functionality and dimensions of the product. Making a kitchen set with your own hands from an old design is quite simple, you will need:
- disassemble the product into its component parts;
- perform cleaning and surface treatment;
- make measurements of facade elements;
- replace wear parts of joints and fittings with new ones;
- order the production of facade parts and perform assembly.
Acceptable options for updating an old headset can be painting the facade, decorating using decoupage technique, or pasting with a special film. If the surface has no defects and requires a change in design, these methods will create a stylish look for the headset. Self-adhesive film will change the color and texture of the surface, enhance the wear resistance of furniture.
The original fittings will become a harmonious addition and will advantageously transform the facade of the furniture.

In the form of using the old furniture frame, they allow you to rationally use the basis of the structure, significantly saving money. Furniture is manufactured according to standard schemes, therefore, if there is a functional set, it is enough to update the facade.
Do-it-yourself kitchen furniture from scratch will require time, effort and skill. Keeping the body of the old headset can guarantee the quality of the result. Modern materials for finishing the facade will allow you to transform the interior, performing the function original decor furniture.
 Decorating furniture is a troublesome but interesting procedure.
Tools for the production and installation of kitchen furniture
When deciding to make kitchen furniture yourself with your own hands, you should stock up on the necessary tools:
- measuring instruments: tape measure, ruler, plumb line, level;
- devices for fixing parts: vice, clamps, table, or workbench;
- tools for processing and cutting: electric jigsaw, saw, planer, drill hacksaw;
- hammer, screwdrivers, pliers, screwdriver;
- set of files, large sandpaper, crowbar.
The choice of fittings will require careful attention. The quality of the mechanisms and fasteners will ensure long and comfortable operation.
You will also need hinges, handles for cabinets and drawers, legs for cabinets, roller guides. Robust design will not tolerate economy and low-quality materials.
When creating furniture with your own hands, you should remember safety precautions. It is recommended to purchase a respirator, goggles and gloves. Woodworking is dusty and is accompanied by the formation of chips, which can be harmful to health. To avoid errors in measurements, replacing the tape measure with a laser rangefinder will help.
 Tools must be of high quality so that everything can be done quickly
Step-by-step assembly of a kitchen set: how to do it yourself
Help from scratch phased plan works. Having completed the design and prepared the necessary tools and materials, you can begin to manufacture the elements, or order cutting in the furniture workshop. On the finished parts, mark the fasteners and prepare the holes.
In accordance with the developed drawing, cabinets are assembled in stages. Properly assemble and make a kitchen set, initially provides for the manufacture of a frame with installed fittings. Roller guides must be installed on both sides at the same height, in order to avoid distortion of the boxes. The material is easy to damage and spoil the appearance of the product, so you will need to make accurate markings for fasteners.
Then the boxes are mounted, and the facades are fastened. Reliable fixation of parts will ensure the use of screws. The rear plane of the body is covered with plywood, or fiberboard. Finally, support legs are mounted, if the stylistic decision provides for their presence. It is recommended to make a kitchen set with your own hands thoroughly, carefully fixing the connections.

The rear planes of the pedestals made of inexpensive materials make it easy to make holes for communication lines. After assembling the modules, the furniture elements are connected and fixed with clamps. A regular check of the structure with a level will help to make a kitchen set with your own hands, avoiding displacements. Next, overall household appliances are installed and a kitchen worktop is mounted.
It is profitable and rational to make furniture for the kitchen yourself, thanks to the creation of an individual design. After fixing the countertop, it is possible to install the sink and connect the plumbing lines to household appliances. The final stage provides for the installation of hinges and fixing the doors of the facade.
WATCH VIDEO
Guided by the generally accepted rules and secrets of the masters, you can make kitchen furniture with your own hands, or update an old set. As a result, the room will acquire a new shape and functional environment. The kitchen set, made by hand, will emphasize the individuality and style of the interior.
The kitchen furniture market is striking in its diversity. Incredible design solutions win the hearts of hostesses, versatility delights, and only exorbitant prices make most of us descend from heaven to earth and think about an alternative.
If you have a masterful vein and you like to work not only with your hands, but also with your head, the ideal option for you would be to make a kitchen set with your own hands. Whole necessary material, all the accessories and tools that you may need in the course of work, you can easily find in stores or markets.
And, believe me, the quality of your homemade kitchen set will not be inferior to factory counterparts, but the price of the final result will pleasantly surprise you.
With the desire to make a kitchen set on your own, everything is clear - you are ready to completely immerse yourself in work and, perhaps, surpassing all expectations, create something "brilliant" and as functional as possible. Okay. Let's decide how you will do it.
 There are several ways to implement your plan.
- You can purchase ready-made parts for a kitchen set and assemble them, guided by the assembly recommendations. This is a very simple option in which you get a standard kitchen.
- You can contact one of the specialized companies that will help you with the project, cutting the necessary details, edging. You will only need to pre-set the dimensions and then assemble everything yourself.
- You do all the work (measurements, cutting, assembly) yourself and as a result you get an exclusive, high-quality and practical headset.
So, you have settled on the last option, which means you need to “turn on” your head, arm yourself with a pencil and a ruler, and finally get down to business.
The simplicity and practicality of the design is the key to comfort. The work triangle rule
The first step in creating a kitchen set is the choice of its design.
- - a classic version of the kitchen room of any size and layout. The kitchen set, located in one row, will surprise you with its ergonomics, symmetry and functionality.
- double line kitchen – perfect option for a through or elongated kitchen. The furniture is located along two parallel walls.
- corner layout- suitable for almost any room. The set is located along two walls, while saving space.
- U-shaped layout- is the most convenient and safe, but is only suitable for large kitchens. Placement of furniture and equipment in a similar way determine the most comfortable work.
- Island or Peninsular- preferred for large room. Ideal for zoning. The island/peninsula accommodates a sink, stove, workplace or serving table.

The rule of the "working triangle" is quite simple, it consists in the visual unification of the main elements of the kitchen. These elements include a stove, sink and refrigerator.
Three main areas - food preparation area, washing area and food storage area - are the basis for organizing kitchen space. Them correct design in the future will affect the ergonomics of the entire kitchen.
Ideal material
The next step on the way to your goal will be the choice of material from which your headset will be made.
- Chipboard chipboard. In fact, these are pressed wood chips and sawdust impregnated with a substance based on formaldehyde resin. This material has a lot of advantages: availability, strength, light weight, moisture and water resistance, resistance to chemicals and mechanical stress, ease of maintenance. Ideal for wall cabinets.
- MDF fibreboard. MDF is a material made from pressed sawdust "bonded" with resins. Rarely used in the manufacture of frames, shelves and walls, a headset is more suitable for facades.
- Natural wood - solid wood. Most often, for the manufacture of kitchens, an array of oak, beech is used, there are also models from pine birch. They are distinguished by density, strength and flexibility, as well as an amazing noble texture. The material is not cheap - be prepared for this.
These are the main materials used for the kitchen. More front options.
Characteristics of the material used for the facade of the kitchen
Material name | "Pros" | "Minuses" |
| Painted MDF |
|
|
| solid wood |
|
|
| MDF covered with PVC film |
|
|
| Plastic |
|
|
| Frame MDF |
|
|
| Laminated chipboard |
|
|
| Aluminum profile at the base of the facade |
|
|
Each material is unique in its own way, each has its own distinctive features.
Do not judge the appearance of the item you are interested in by the photo - go to furniture store and visually verify the correctness of the choice or vice versa.
Let's start, perhaps the most milestone- measurements. At this stage, you should already decide what design your headset will be and where exactly its main elements will be located.
 We start measurements with the most important distances - the distances between the walls. We designate ledges, battery, window and door openings. Do not forget to measure the location of the switch, sockets, drain. Everything is repeatedly checked and transferred to the drawing.
When measuring, measurements must be taken at several levels - closer to the floor, at waist level, near the ceiling. Small deviations due to uneven walls are possible.
These very “irregularities” are best corrected, but you can simply take them into account when designing lockers.
Pay attention to water or gas pipes - the subsequent installation of the kitchen will be difficult if these nuances are not taken into account.
First, create a schematic drawing, not to scale.
Take measurements of the main household appliances, add a gas pipe to the plan and, accordingly, the dimensions of which will depend on the dimensions of the adjacent cabinets and cabinets.
Now we calculate the height, width, depth of each individual element, write it in the plan.
Calculation of each individual element
When the overall dimensions of the future headset are known, we will determine the dimensions of its individual elements. The figure shows an example of "cutting" the cabinet for the oven and hob. Similarly, we calculate each detail of each locker.
For ease of calculation, we will draw a cabinet and “divide” it into boards. Write down the dimensions of each.
Note! Payment internal shelves carried out as follows: we subtract 32 mm from the width of the cabinet (the thickness of the chipboard is 16 mm., You have two boards) - we get the width of the shelf.
Let's make a list of everything you need and go to order, not forgetting about the accessories. As a rule, in the workshop where the cut is carried out, the adhesive edges are also handled. It is unlikely that it will be possible to achieve an ideal result with gluing on your own, which means that we order this service as well. Drilling holes is also not worth taking on.
The final stage - assembly
So, all the materials were brought from the sawmill workshop. We lay out all the elements for each cabinet, while checking the complete set, and proceed to assembly.
Advice! Make sure you have all the necessary tools for assembly. If something is missing, it is better to get it in advance than to run around the shops in search of this or that item.
You will need:
- drill;
- hammer;
- roulette;
- pencil;
- drill for holes for confirmation;
- screwdrivers;
- confirmation key;
- screwdriver
Each detail of each individual cabinet is mounted in stages. There are no strict rules in this process, the main thing is accuracy and accuracy, otherwise the damaged chipboard will have to be changed and the work will stop.
It is better to collect cabinets gradually, without cluttering up the kitchen. The assembly of the lower part of the kitchen set is completed with the installation of the countertop. If the countertop is not solid, but consists of several parts, it will be necessary to use a special connection.
The optimal height for hanging elements is 135-140 cm from the floor level. This is the mark of the lower edge of the wall cabinet, here the wall border is fixed.
We raise one of the cabinets and mark the attachment points on the wall. We remove the cabinet again and use a drill to make holes for anchor fasteners, they will firmly and securely fix the heavy structure. We fix the first and subsequent elements of the headset according to this algorithm.
For a man who first took up self-assembly furniture, the process may seem complicated, but do not be discouraged - look at the materials, assembly instructions again, and you will succeed.
finish line
Kitchen cabinet assembled and installed. To get the "perfect picture" we mount electrical appliances and equipment. That's all. Job is done.
Your relatives will rightfully appreciate “your creation”, and it will delight you for more than one year. And if you want something new, go ahead! Are you already an expert in this issue- hold on.
(Photos of the kitchen are available to enlarge)
Preface.
I continue Full description the process of designing, manufacturing and installing a kitchen set. I proceed to the third part of the description, to a detailed description of the nodes and constructive solutions. Consider the drawings and assembly diagrams of the project. Drawings of kitchen furniture.
Part 3
Drawings and assembly diagrams of kitchen sections.
For a more convenient consideration of each element, let's number the kitchen sections, starting from the bottom, so that everything goes in order and there is no confusion. For #1. Let's take the main section, which sets the whole look and size of the kitchen - this is a kitchen pencil case. Kitchen drawings:
In the description of kitchen sections, in the drawings there will be no dimensions for fasteners, there will be only the dimensions of the parts themselves. A lot has been written and said about fasteners in other articles on this site. I will give fasteners only in those places where there are some special moments that need to be told about.
Section #1. Pencil case.
 |
|

Detailing with an edge mark, compiled according to the drawing and assembly diagram of the canister.
| title | X size | U size | PCS | note | |
| 1 | Sidewall right. | 2320 | | 630 | | | 1 | |
| 2 | Sidewall left. | 2204 | | 630 | | 1 | |
| 3 | Bottom detail. | 630 | | | 150 - 160 | | | 1 | |
| 4 | Connections. | 630 | 488 | | | 2 | |
| 5 | Shelves, removable. | 550 | 486 | | | 3 | |
| 6 | Base plate - connection. | 564 | | | 100 | | 1 | |
| 7 | Door, false wall. | 1340 | | | 484 | | | 1 | |
| 8 | False wall. | 2220 | 60 | 1 | attached to the left side |
|
facades. |
|||||
| Frame facade, glass. | 1365 | 516 | 1 | AGT profile. | |
| Lower blank facade. | 848 | 516 | 1 | Facade MDF (PVC). | |
The strange design of the sidewalls and the bottom of the canister was made for such reasons that when the canister is installed and pulled together by intersectional ties with the adjacent section, then when installed plinth it will be very problematic to adjust the installation of the pencil case on curved floors. And so there are no opportunities and access. It would be possible to completely abandon such an ersatz bottom, but in the future the customer planned to install a 150 mm cargo mesh in this gap between the boiler and the sidewall in order to fill the space as usefully as possible.
The back wall of the canister is at the same time a door for access to communications, an exhaust duct and an inspection hatch. To do this, the removable shelves are removed and the door-wall opens freely. The door is installed on furniture inset (internal) hinges . Shelf holders are not an obstacle to opening.
Section number 2. hob and oven.
 |
|


Detailing of the section with an edge mark, compiled according to the drawing and the assembly diagram.
| title | X size | U size | PCS | note | |
| 1 | Sidewall. | 704 | | | 580 | | 2 | |
| 2 | Bottom. | 580 | | | 600 | | | 1 | |
| 3 | Connection. | 580 | 568 | | | 1 | |
| 4 | Side of the box. | 550 | | 40 | 2 | |
| 5 | Box details. | 510 | | 40 | 2 | |
| 6 | Box cover. | 476 | | | 542 | | | 1 | |
| 7 | Opening plate. | 70 | | | 542 | | | 1 | |
| 8 | Bottom of the box. | 550 | 542 | 1 | Laminated fiberboard - 3 mm. |
|
Facade. |
|||||
| box front. | 120 | 596 | 1 | MDF. | |
| Drawing: | Scheme: | Boxes: | Guides: |
 |
 |
 |
 |
Fronts are fastened to drawer panels with self-tapping screws and fixed with through screws of furniture handles. Cm. .
Detailing box section.
| title | X size | U size | PCS | note | |
| 1 | Sidewall. | 704 | | | 580 | | 2 | |
| 2 | Bottom. | 580 | | | 260 | | | 1 | |
| 3 | Connection. | 228 | | | 70 | 2 | |
| 4 | The side of the small box. | 550 | | 100 | 4 | |
| Side of a large box. | 550 | | 140 | 4 | ||
| 5 | Small drawer panels. | 170 | | 100 | 4 | |
| Large drawer panels. | 170 | | 140 | 4 | ||
| 6 | Bottom of the box. | 550 | 202 | 4 | Laminated fiberboard - 3 mm. |
|
facades. |
|||||
| Facade of small drawers. | 140 | 256 | 2 | MDF. | |
| Facade of large boxes. | 215 | 256 | 2 | MDF. | |
Extended information:
Section 4. Wash cabinet.
 |
Sink section. Made without a back wall for access to communications. Section width 580 mm, 2 cm less than standard module for kitchen sink . Despite the reduced dimensions, the section is well suited for the installation of a sink provided by this project. This standard round sink with a diameter of 510 mm . and 200 mm deep.
|

Detailing sink sections.
| title | X size | U size | PCS | note | |
| 1 | Sidewall. | 704 | | | 580 | | 2 | |
| 2 | Bottom. | 580 | | | 580 | | | 1 | |
| 3 | Connection. | 548 | | | 70 | 2 | vertical |
|
Facade. |
|||||
| Facade to the kitchen section. | 716 | 286 | 2 | MDF film . | |
Section number 5. Dish dryer cabinet.
 |
The upper kitchen section is designed to install a built-in dish dryer. The back wall of the section is made in the form of a hinged panel for access to communications located behind the kitchen. Dryer for dishes, frameless, metal with white acrylic coated.
|
Drying for dishes frameless with acrylic coating and fastening fragment.


Extended information:
- Installation of a framed kitchen dryer for dishes .
Design. The rear wall of the section is made in the form of an opening panel - a door that is attached to a vertical bar with a equilateral loop . The need to use vertical slats is due to the fact that the opening of the door can be prevented by fasteners for drying. The slats allow you to move the panel opening axis away from the fasteners. planks different widths. Narrow, right (see sketches) plank 40 mm wide. The left bar is slightly wider, 60 mm wide. This width is necessary for the installation of furniture equally spaced hinges on which the door opens (see sketch: Rear view).
The loop is equal, photo and installation diagram:


Detailing sections for drying dishes, made according to the drawing and assembly diagram.
| title | X size | U size | PCS | note | |
| 1 | Sidewall. | 920 | | 340 | | | 2 | |
| 2 | Connections (top, bottom). | 468 | | 340 | 2 | |
| 3 | Shelf. | 466 | | | 270 | | | 1 | removable shelf |
| 4 | Strap for hinges, wide. | 888 | | 60 | 1 | for attaching hinges |
| 5 | The plank is narrow. | 888 | | 40 | 1 | for removal from fasteners |
| 6 | Opening panel. | 884 | | | 364 | | | 1 | rear panel - door |
|
Facade. |
|||||
| Facade to the kitchen dryer. | 916 | 486 | 1 | MDF film . | |
Section number 6. Section kitchen corner, under the gas counter.
 |
Top corner section designed to hide the gas meter. The design of the section makes it quite convenient to use all the remaining free space; for this, two shelves cut at an angle are placed inside. The front narrow sidewall of the section is made of the facade material, i.e. from film MDF, without gaps, according to the dimensions of the body part. |
The main details of this section are: ties (details #2) and shelves (details #3), one side of which is cut at an angle, which forms the corner section itself. The facade is fixed with two corner hinges at +30 o, The springs and the hinge stroke are quite enough to tightly pull the facade to the body with an incomplete stroke (at -1 o) of the hinge.
The narrow sidewall of the section (item No. 5) is made of MDF, as are the kitchen facades. It is attached to the ties (No. 2) and the right rear pillar (item No. 4) of the section with the help of dowels so that the fasteners do not come out on the front side.
The drawing does not indicate the dimensions of the installation of the shelves, and this is correct. Shelves are planned to be installed in place, depending on how the gas meter hits. It is also better to cut the shelves for the meter pipes in place, because when designing there is a high risk of not guessing exactly how much to cut. So cut the shelves and install shelf supports under them better during installation. More on this in the description of the installation of the kitchen.
Extended information:
- Typical 45 degree kitchen corner section .
Detailing corner section, made according to the drawing and assembly diagram.
| title | X size | U size | PCS | note | |
| 1 | Sidewall left. | 920 | | 340 | | | 1 | blends with dry |
| 2 | Connections (top, bottom). | 620 | | 328 | 2 | cut at 149 (31) degrees. |
| 3 | Shelf. | 618 | | 310 | 2 | cut at 149 (31) degrees. |
| 4 | Racks back. | 888 | | 140 | 2 | for wall mounting |
| 5 | Sidewall front (narrow). | 920 | 160 | 1 | facade material MDF |
| 6 | Back wall. | 918 | 342 | 1 | Laminated fiberboard - 3 mm. |
|
Facade. |
|||||
| Facade on the corner section. | 916 | 327 | 1 | MDF film . | |
Section number 7. Extraction section.
 |
The last section in this project is the hood cabinet. The design is very simple, sidewalls, ties, shelves. It is installed between the pencil case section and the dish drying cabinet. An addition to the section is an opening panel for access to gas valves.
|


Section depth 300 mm. In the case of a hood drawer, it makes no sense to make a depth of 340 mm, since it will not rest on the working panel. The section will be attached to the intersection ties between the canister and the section for drying dishes. In addition, if you make a depth of 340 mm. and fix the hood to the full depth, then the backlight in the hood will work at the end of the working wall. And so, nothing prevents the hood.
During the implementation of the project "live", problems arose with this section, more precisely, not with the section itself, but with the hood. At first, a suspended hood was designed, as in the sketch. But when all the sections were ready and the kitchen went for installation, it turned out that the customer had purchased a hood not at all according to the project, but a built-in telescopic hood. Under the telescopic hood cabinet design somewhat different. The way out of this problem was found simple and without losses, incl. and in appearance. More on this in the sequel, which describes the installation of the kitchen. It was only necessary to cut out a small part from the remnants and slightly cut the opening panel (part No. 6).
The difference between suspended hoods and built-in:
Door panel for access to gas valves. Project scheme. It is mounted to a horizontal bar on internal (inset) hinges, which, in turn, is attached to the work wall made of a table top on confirmats. As a stop for the closed door, so that it does not fall inside, there is a furniture plastic corner(see photo), screwed to the adjacent section, the same plastic corner serves as a handle.
| Door scheme: | Calculation and side view: | Door for access to pipes: |
 |
 |
 |
Detailing section under the hood, made according to the drawing and assembly diagram.
| title | X size | U size | PCS | note | |
| 1 | Sidewalls. | 620 | | 300 | | | 2 | |
| 2 | Connections (top, bottom). | 568 | | 300 | 2 | |
| 3 | Shelves. | 566 | | | 280 | | | 2 | |
| 4 | Back wall. | 618 | 598 | 1 | Laminated fiberboard - 3 mm. |
|
facades. |
|||||
| Facade on the corner section. | 614 | 296 | 2 | MDF film . | |
The hood is attached to the bottom connection of the section using self-tapping screws 4x16, from inside the hood through its body. Previously, before installing the hood, a hole for the exhaust channel is cut out in the lower connection.
When calculating the height of the facades for this section, it is necessary to take into account the additional clearance along the bottom of the facades. Usually facades, in height, are made by 4 mm. smaller than the body, and when installed on the upper section, they are aligned with the lower edge of the body. In the section intended for the installation of the hood, it is also necessary to provide a gap from below, between the facade and the hood body. For this 2 mm. quite enough. Thus: case 620 mm, minus 4 mm (standard clearance), minus 2 mm (additional clearance) = 614 mm.
Kitchen, general view.
The description and drawings of the kitchen sections for this project have ended. Let me remind you that due to the abundance of pipes, ventilation, boilers and other communications, it was decided to design the kitchen in such a way that it moves away from the far wall by maximum size communications, i.e. by 130 mm. Close all communications working wall made of the same material as the kitchen worktop. Detailed description measurements of the premises and the choice of the project, see the first part of the article.
| Scheme: | Project: | Kitchen project, floor plan: |
 |
 | Drawings of standard kitchen sections. Lower standard sections.
 Actions of the lender if the debt is not returned
 Why did Lera Kudryavtseva and Sergey Lazarev break up?
 IQ test result: what do the scores mean?