Repair of the kitchen with their own hands - a detailed description of all stages of repair with the photo and description. How to quickly make inexpensive repair in the kitchen with your own hands simple repair kitchen with your own hands
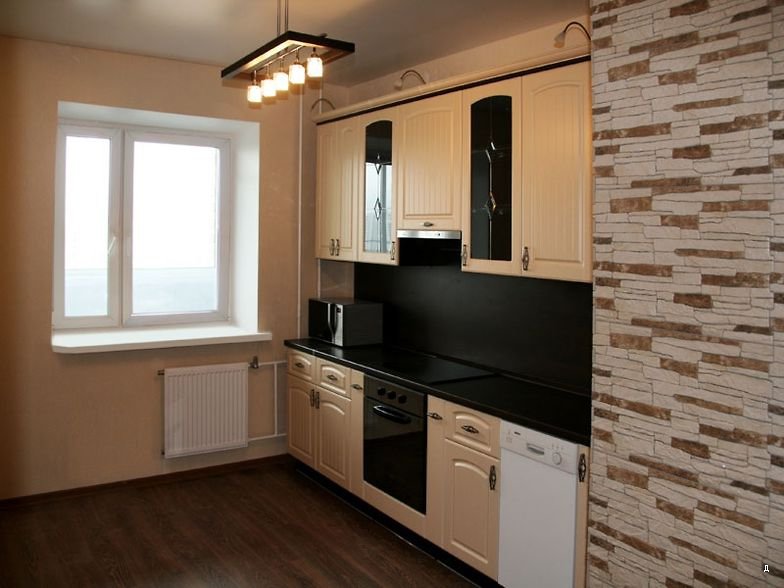
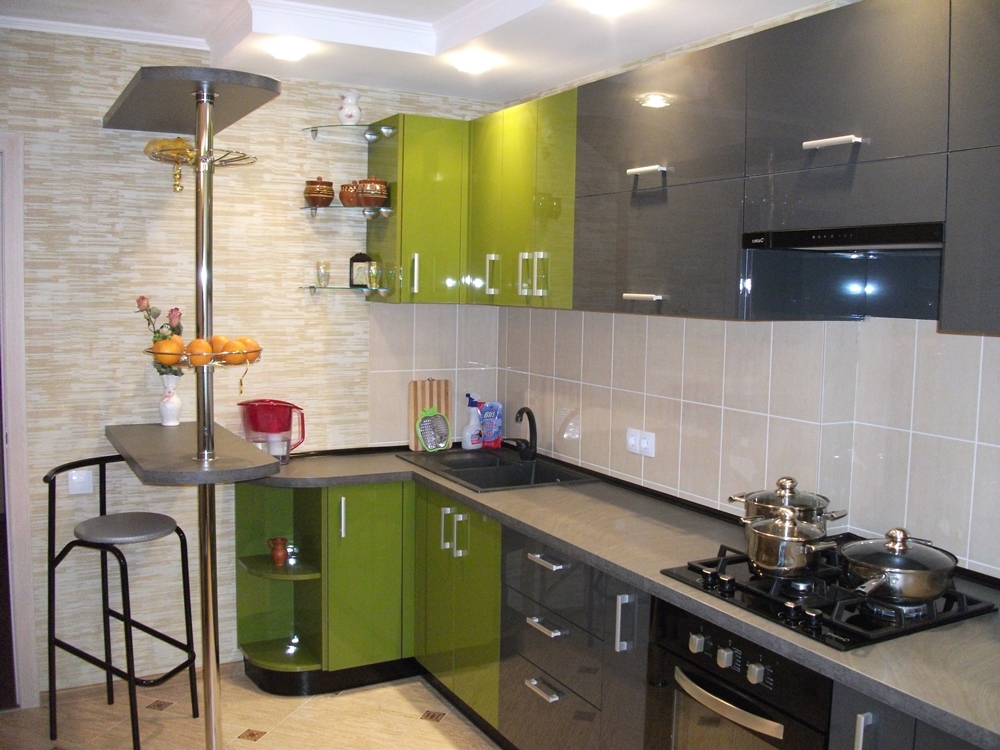
Take a look at the drawing below. On the left - the kitchen in Khrushchobe (it is the "Khrushchev refrigerator"), a panel house of the infamous 464 project. Right - the same renovated. Make such a repair of the kitchen with their own hands the unprofessional builder alone, with episodic little help of home, it is quite possible. The total cost of work, starting with the removal of the former "junk" - about two monthly salaries, parts as the works were produced; The duration of repair is 3.5 months, on weekends and evenings. Twice a hour and a half in the kitchen will need to turn off the electricity, four times the food for 3-7 days will have to be prepared on the electric stove, and wash the bathroom dishes.

Photo: Kitchen in Khrushchev before and after repair
But before you say, like Gagarin: "Let's go!", We will need three more thoughts, meetings and disputes. The kitchen is a very difficult object for repair, and its modern repair, and for a long time and inexpensive, should be thought out to the smallest detail. We will try to help with our readers.
What is the difficulty?
When preparing the repair of the kitchen, you need to remember all the time about the following features of the room:
- High humidity - evaporation when cooking and / or washing.
- Increased temperature.
- Availability of powerful heat sources: Only the stove gives more than 10 kW of thermal power.
- Aggressive atmosphere - when cooking also evaporates fat, its hydrolysis products with frying, other volatile substances from products.
- Sharp fluctuations in the above factors; For decoration and furniture, this "beats" is stronger than consistently high values.
- Increased room hygiene requirements: Installing the organicists and its accumulation in Zakulkes creates favorable conditions for the reproduction of microorganisms, especially in warm wet air.
- The presence of gas devices; It is necessary to pay special attention to ventilation.
- High premises: The attendance coefficient and the inhabitability of the kitchen is higher than any other room.
- Small room area and low ceilingIf it is a simple kitchen in a typical house.
- Indoor fragile, beating and packing items.
Stages of a big way
How to start repairing the kitchen? What to do first, and what then? When to buy materials, and how to distribute cash flow? We will briefly with the stages, and then to each item we will give an explanation.
- Measurement and audit of the condition of the premises;
- Development of equipment placement scheme;
- Design design, furnishing plan and final choice of furniture;
- Cleaning of the room;
- Stripping walls, ceiling, floor;
- Revision and repair of the base floor;
- Revision and basic ceiling repair;
- Relaying communications;
- Refinement of ventilation;
- Replacing the window and doors;
- Ceiling finish;
- Wall decoration;
- Flooring;
- Installation of plinths;
- Installation of equipment;
- Furnishings;
- Solemn banquet, if there are still strength.
These work will have to be fulfilled in full, possibly with unforeseen complications, if the kitchen is repaired in Khrushchev. In houses of old or new buildings, some stages, especially on the ceiling and sex, will be easier. But still, the repair of the kitchen is the limit of complexity and labor intensity for a home master, so, after reading the article, think well: is it forces? Is it not better to continue financially and entrust this work to professionals?

Measured and revision
It is necessary to remove the following dimensions:
- Length Width Height.
- The window and door are the dimensions of the openings and the distance from the walls, the ceiling, the floor (for the window).
- Andresol - dimensions, location, material.
- The sockets (group) are the distance from the floor and walls.
- Submission of water supply and taping of sewage - the same.
- Gas riser is the same.
- Ventilation extension is the same, plus a revision of the ventilation device, see below.
- Eaves, stucco, protrusions of the slab overlap, if available - the same.
The accuracy of measurements is not worse than 0.5 cm. Repair of small cuisine needs to be done by exactly plan, see below. Otherwise, the accumulating error may eventually give a non-closing door, or constantly the dishwashes of the dishwashed elbow to the floor, or some other non-resistance.
When revision, the ventilation device needs to be an external inspection and / or thin flexible twist to determine whether the building is provided by a separate ventilation stroke for the kitchen. If the outlet is on the vertical box in the wall, then yes, and it is good. If the ventilation move goes towards the bathroom and the toilet, it is not very good, but fiximally, see below.
Planning and project
As a result of the procedures described below, you must have a plan for accommodating furniture and equipment in the kitchen, see Figure:

Traditional kitchen equipment plan
The furniture must be pre-selecting in advance and remove its exact dimensions on the site from the seller or take from the catalog. In order not to draw and turn over the Watman or not to be launched in 3D graphics or sappers, we recommend the following method:
- From the cardboard, on the scale, glue the box without a lid, cut through the walls window and the door.
- From the foam we cut cubes and polyhedra, also on the scale corresponding to furniture and equipment; We celebrate wherever, inscriptions or roughly draw the front panels on the foam marker.
- We play cubes until an acceptable option is obtained. To the walls of the box of the model we stick with pieces of plasticine or chewed chewing.
- Natural lighting imitating a LED flashlight. By moving it, you can display the course of the Sun at different times of the year. To simulate cloudy weather, the lantern aperture is covered with a piece of thin paper.
- To obtain a satisfactory layout for the known dimensions of the models, we build a plan on paper or computer. In the latter case, it is enough to sit 2-3 hours in CorelDRAW, and the development of the placement layout in 3D requires at least a day of the experienced designer.
The main principle of the kitchen planning is a triangle of functionality: a stove, washing, refrigerator. Its parties should be approximately equal length, and no more than 6 feet (1.85 m) each.
Planning sequence is:
- Communications;
- Equipment;
- Furniture.
Video: An example of a small kitchen project
Communications
Here the main problem is to remove the ugly gas duck from the stand on the wall. Fortunately, it is now allowed to connect gas appliances with flexible hoses, and gas, it is worth showing them at least a picture, most often go to meet and draw up permission without wires - such fruits of the constructivism of the era of unforgettable Nikita Sergeevich themselves to the belly and headache.
A warning: It is impossible to produce work on gas independently! You need permission and specialized brigade: you have to cut and weld gas pipes!
When planning, you need to clearly remember: the permissible length of flexible gas hoses is 4 m; water supply and sewer - 1.5 m. Bending of rigid sewer pipes in the horizontal plane are not allowed; Corrugated taps - let's say a one-time than 120 degrees.
If you have a kitchen with a gas column, then "under the shum" is extremely preferably immediately and make a permit for its transfer and replacement. The place can be specified any, according to the prior plan; Light to the millimeter will not be.

Gas hoses and pipes should be available for inspection, but this does not mean that they should be turned into in sight. It is quite acceptable to lay them out for furniture without the rear walls (the doors opened, and can be seen) or behind the laundry on wheels, easily rolled out. Hoses behind the washer firmly standing on the floor can cause a claims of a gas service.
In Khrushchevsky cuisines, as a rule, initially there is only one socket on the far from the plane wall. Of course, you need a socket group over a cutting table, so when planning you need to provide a separate wiring branch to it. It is also desirable instead of a regular dose (distribution electrocarditus; there is always such a kitchen) for the kitchen as a whole, washing and electric boiler, if it is. It will require twice to disconnect electricity in the apartment for a short time; Wiring for additional sockets is paved in the process of work on the walls and ceiling.
Equipment
Plate, extractor, ventilation
A hood plate is a stumbling block when repairing a kitchen: it can break the ventilation and you and the neighbors. Extraction with air recycling and coal filter is not output: odors still seep through it, and one-time and not very cheap filter should be changed periodically.

Exit - exhaust with a reusable (washing) fat aluminum filter and exhaust in the house ventilation. For it, it will be necessary to break through the additional ventilation outlet. Actually, this is already redevelopment, and permission is needed, but it is just the case when you can, if carefully. The main thing is not to create a fit of ventilation and prevent the vents of the ventilation trash.
If in the kitchen is a separate vent, then the extension for drawing should be done below the main (right in the figure). In such strokes, a good thrust, and blowing out of an exhaust with a fan up to 65 W only will improve the full-time ventilation. At the same time we get rid of the exhaust pipe (the lower the outlet under the extract, the better) and the place is released on the wall.
A warning: but remember - to start in one ventilation movement of exhaust hood and gas boiler in no case! Here you risk no longer a fine and sanctions, but life!
If the kitchen ventilation with the bathroom is headed into the overall ventilation highway (this is the same 464 project, so that its creators are neither the bottom, no tires, then the extension must be done further on the current air, and as far as possible, in the picture - right.
The next task is to punch a new outflow purely, "without noise and dust." This is done as follows:

- In the center of the reserved area, the hole is drilled through and drowned in it a self-sufficiency in a dowel; Fastener size - any. Self-tapping not to the end.
- To the protruding head of self-pressing, we bring the twine, and the other end is attached to the ceiling or furniture.
- According to the contour of the future inventory, a 4-6 mm stone drill is chosen by the holes "before the pricho" after 5-10 mm. It is advisable to immediately surpage the contour of the hood pipe on the template.
- A narrow chisel or a special chisel for cutting the grooves - Crantsmesele - we engage the jumpers between the holes by 1-1.5 cm in the depth.
- Vacuum cleaner, necessarily with a dust collector, we ask the groove.
- We repeat the procedure until the cutting piece does not hang on the twine; Then we take it out - the pure sweat is ready.
- On how to further install the hood -.
Notes:
- A dust collector can not buy - out of 2-3 l cans with a hermetic lid, it turns out a great homemade, see the drawing above. Hoses - Garden PVC diameter inside at least 20 mm.
- To cut down the Crazzames easier and cleaner than the chisel or ordinary chisel. The tool is specific, it is not offered for rent, but it is inexpensive, and on the farm it will come in handy.
Note not on the topic: partly, but the described tricks are known no longer from the construction, but their criminal practice. Purely took out a piece of the walls of the famous film "Va-Bank", and with the help of a dustwater, a large Amsterdam jewelry firm was robbed for several decades ago. The accomplice inside was looted through ventilation hose. The facade worked perfectly legal, called the owners of the windwakers, and in their vant, meanwhile, the powerful industrial vacuum cleaner was also diligently worked.
Plate, Boiler and Refrigerator
According to the rules of operation of gas devices, they must be located no closer than 80 cm from each other, and in the case of a plate with a boiler, the requirement is not formal. The refrigerator is also undesirable to move to the stove closer 60 cm - from heating it from the side noticeably for the budget increases the consumption of electricity and the probability of breakage increases.

An example of the incorrect kitchen layout is given in the figure on the left, and correct, with the observance of the triangle of functionality - to the right. The location of the refrigerator next to the gas boiler is permissible, that the sides are not very warm, but in general about the refrigerator in the kitchen should be spent especially.
Refrigerator
The refrigerator in the kitchen, as mentioned above, is hard. It is better for him what is cooler outside. Therefore, the optimal version of the placement of the refrigerator in the apartment is on the glazed balcony or, if there is a place, in the hallway. It is generally remarkable on the balcony: electricity consumption with a refrigerator in the summer decreases 1.5-2 times, and in winter - every 6-10. Exception is the southern balcony in warm edges. There, by heating with direct sunlight in the summer, the effect may turn out the opposite.

Washing Machine in Khrushchev Kitchen
But all the time all the time go here for the products is hardly like any hostess. Exit is a small single-chamber (without freezer) refrigerator for consumables. This consumption is 3-5 thousand rubles. Additionally, but for the winter or two it pays off.
In the Khrushchev cuisine, the place for the washing is completely naturally exempt (see Fig.), And a small refrigerator can be watered on the table above it. Instead of one unit of kitchen equipment - two on the same area, which in the kitchen is not excess.
Expenditure refrigerator requires absorption or semiconductor, on the Peltier effect. These are not completely noisy, and the latter also do not require refueling with a refreshment. It is frozen, however, worse, but for the consumable portion of the products it is insignificant.
Of the domestic models, as purposefully created for such a goal "Morozko" (on the left in the picture below). "Morozko" used almost as new can be bought for 1500-1700 rubles. Biryusa, Sansung and Shivaki (in fig. In the center) are equipped with small freezers, but cost more. Ukrainian Nord take it is undesirable: it is only a little cheaper "firms", but breaks much more often.

As for the Sino-Swiss (it happens ...) Liberton LMR-128, in Fig. On the right, then it is better to bypass the tenth road:
- After a month or two, it starts to be buried and bother to stuck.
- The freezer works on self-relocation, and not to freeze products.
- Remove from the freezer boiled sausage or a piece of meat is impossible: the upper protrusion of its cover works like a stopper.
- With the slightest frost, when trying to open the freezer lid from fine fragile plastic, it breaks.
- Animals carrying eggs that are not falling out of the corresponding Liberton trays, science are unknown.
- Six months later, the inner lining from low-quality PVC begins to crack.
In general, Europe with China has turned out to be China to all China.
Microwave
Microwave in a small kitchen is better to hang on the wall under the closet. The design of most microwaves involves their suspension on the wall.
Electrical safety at work
Before starting construction work, the kitchen is completely de-energized by turning off its branch in a dose near the meter or in the apartment shield. Light and pave the tool when working from the extension cord stretched out of another room.
If the kitchen is powered by one branch with a toilet and bathroom (again 464 project, whether it is nonladen!), In the bathroom, the segment is turned off in the bathroom: the wiring is probably aluminum in dry insulation, and it still needs to be changed. After that, the dining of the bathroom is restored. This work, of course, is performed with a fully de-energous apartment.
Stages of repair and finishing works
Purification of the room
In the old kitchen, the ceiling, walls and sexes are saturated with fat evaporation to the capital wall, and a lot has absorbed too. Therefore, the cleaning of the room includes three stages: sprinkling, washing and impregnation, otherwise there is no confidence that the finish will hold. But first of all remove the old floor flooring to the screed.
The sprinkler is made with preliminary discharge of the coating: the paint and plaster are additionally sacked by chant, and just do not take them. Water-leveling coatings and plaster are swollen water from the spray:
- Sprinkled abundantly.
- Hold with tightly closed doors and windows hour or two.
- Quickly, until he dried, remove the coating with a spatula or "stocking" - an abrasive grid.
- If dried to the end of work - the procedure is repeated.
Oil and other paints are removed in the same way, but wetted with a sponge composition to remove it, and withstand the surface according to the instructions for it. We wipe off parts: the composition, naturally, more than water and spend it in vain anything. Imported and domestic compositions are equally effective, but for our excerpt is longer and they are cheaper. Work on the removal of oil or alkyd paint is produced in the respirator and protective gloves, in the indestructible, except for the kitchen, apartment.
On the walls impregnated with cuisine evaporation, paint with plaster or will be lying bad, or then start peeling. Therefore, after riding the wall, the floor and the ceiling need to be washed out by any means for washing dishes, divorced in water in the proportion of 1:20 by volume. Also in the washing solution add 5% of table vinegar. Previously need to be checked on a small portion, whether vinegar does not react with detergent. Bubbles, drilling, sharp smell - components are incompatible, you need to take another wash. Washed with a metal sponge with pressure, often dipping it into the solution. Then two times the foam sponge washed with clean water.

The final phase of cleaning the room is impregnated by primer deep penetration on concrete. Soak twice a day. Primer must necessarily be with biocidal supplements. When buying, check the recipe on the label: Tiuras and its derivatives (Fernazon, Aroson, Tiram) are not allowed. If the recipe is not specified, do not take.
Head revision
The purpose of the operation is to identify the following:
- gaping, more than 2 mm width, cracks;
- cracks crossed, especially in the center of the floor;
- cracks or grid cracks around the perimeter;
- depressions and protrusions are more than 3 mm high (depth);
- the deviation from the horizontality is more than 3 mm / m, or more than 10 mm diagonally diagonally.
If any of the first three factors are needed with the replacement of the screed. This is a complex and time-consuming job. Small cracks close in any of the known methods.
The floor on evenness and horizontal is tested by a bubble level of at least 1 m long. If there is only small irregularities, a great solution -, see below. If there are extensive wells or bumps, or half a sealer, it needs to be aligned, not only for the convenience of work on the catering, but then so that the spilled is not shown in the corners.
Optimal in this case, the solution is a filling floor on a cement basis with a layer of 10 mm from the highest angle or a boogue. Such an alignment is not very expensive, the flow rate for a small kitchen is small, and right on it can be flattened. By the way, when pouring a cement equalizer and small cracks can not be chopped.
Ceiling revision
The kitchen ceiling is the most sore place: it is where all the chad is coming. On the last floor of the house with a flat bituminous roof from the ceiling often dripping, and the kitchen is saturated with electrical appliances. Therefore, besides the floor, you need to worry and ceiling, and very carefully.
When revising the ceiling primarily exempt the rusts - the seams between the plates; The kitchen is so most often alone. Then from the channel between the plates pull the old electrical wiring. Equality and horizontality check in the same level, but there is a deviation of 20 mm diagonally. When the plates are shifted vertically by 30 and more MM relative to each other (in the same 464 project there is a ceiling alignment, we do not engage the ceiling: excess hard work, money, materials. The problem will solve the suspension ceiling, see below.
What needs to be done during revision, especially on the last floor in the panel house, so this is a gun with a nice nap to a better (layer) canal between the stoves. From the winding from above it will not save, but the droplets will be held in the adjacent bathroom and the toilet, where electricians are less, and the floor screed is designed for abundant pouring. 
Laying Communications
About gas, water, sewage and ventilation said above. We will add only the main electricity.
If you are planned to replace the dose of the shield, it is necessary to extend a niche at a height of about 1.8 m, so that children cannot reach the machine guns. Put the shield to the dose of dose uncomfortable: too high to reach adults.
Wiring Put any flat three-wire cable in double insulation. Wires are hard, single-core. Such a cable during laying does not sane or saves weakly. The cross section of the vein is at least 1.4 square meters. MM (2 mm diameter).
In a dry room, the wiring is desirable to lay in the strokes and in the metal corrugated, but if there is a risk of winding, it is better to pave directly on a bare ceiling. Descents on plastered walls (if there is no passage card) in any case will have to be stated. 10-15 cm cable fix with painted (paper) tape for start; Then in the strokes - smears of plaster or alabastra, and on bare surfaces drops of construction silicone.
Branches on lighting and sockets We lead to the center of the ceiling. There the lighting branch ends, and the sockets go further, then turn to the walls at 90 degrees and go down to their place each. The branches on the washer and the boiler are allowed on the wall for 15-25 cm below the ceiling, wrapped down also at right angles and bring to the place.
Make the wiring "Sico-hob as God put on the soul" - a common building halura; The saved cable is allowed to "left". This then greatly complicates the search and troubleshooting and creates risk for living in subsequent construction work. To deceive yourself - the last thing, and the savings of the cable in the small kitchen is meager.
If the apartment is not yet grounded, protective (yellow with a green stripe) Cable conductors leave in a shield or dose, necessarily isolated. When replacing the dose, the shield is better to immediately start them in the appropriate terminals of the shutdown and the RCD.
Window and door
The window and door change or restore, if required, at the end of work on communications. It is possible before, it is not fundamentally, but you need to make sure that the volatile remains of previous operations weathered. To do this, the room is tightly closed for a day, then sniff. If "Duhan" is still felt, we still do.

From patchfish with further work, the window and the door are protected as usual: plastic film on painting tape.
Ceiling
The ceiling in the kitchen must meet the following requirements:
- Be resistant to sharp fluctuations in temperature and humidity.
- As far as possible, evenly fading, burn out and change the tone under the influence of kitchen evaporation.
- Do not pass through yourself, so that in the interpochor space, the organic sediments have occurred - the gathering nutrient medium for microbes.
- Be a washing brush.
- Make full or partial bulkhead and repair without repairing the entire room.
- Have a settlement service life of at least 10 years.
Based on this, foam and stretch ceilings, despite the common recommendations, are definitely branded: In the kitchen, they serve no more than 5 years, when stretching with an ionic or ultraviolet ionizer, and the relief on foam plates in half a year begins to black and yellow.
Materials
Materials for the ceiling should be selected, in order of preferred:
- Plastic lining or rail.
- Laminate, impregnated with an inside of a water emulsion PVA.
- Impregnated with it lining MDF.
- Waterproof (green) drywall, with an insane with a needle roller and twice on both sides of the impregnated PVA emulsion.
The length of the clashes and MDF boards - 2.95 m. This is in most cases enough to sew the ceiling with solid boards, but it is first necessary to make a calculation, as it is better to sneak, along or across, so that the material it takes less and less it is left in the waste.
Obsek and light
The trim under the trim can be made linear, without cross, from metal profiles or wooden plates. Step of lags - 400-600 mm; Pagting of lags to the ceiling - 300-400 mm. In the failures under the rails or profiles of the crate when the uneven basic ceiling can be put on plywood pieces. Ideally flat such a ceiling will not be, but it will not be on it and small irregularities, so spoiling a look at the oblique daylight.
In the course of the installation of the crates in it, the slots are made under the already laid electrocabylor if it is not in the strokes. Wiring of wires for spotlights is done along the sheath of a freely lying flexible cable cross section of 0.7 square meters. mm.
Under the point light, the inter-storage space should be at least 80 mm. Under the ceiling or chandelier in the center, there are enough regches of clamps of 20x40 mm, laid plastics. A variant of one main light is generally preferable, since it is almost eliminated by the paths of penetration into organic evaporations and their malicious consumers.
Sheaving
The ceiling cover is made in the usual way: panels put on the mounting glue and fasten with small cloves into the corner of the groove of the tongue with the achievement of Dobochnik (for) or champions on self-stairs, for. In this case, when buying needs to be checked so that the club of the tongue entered into the response groove with a glimer freely or without a significant effort.

Many owners of city apartments and private houses would like to know how to make repairs in the kitchen, spending at least time. This will be discussed in the article.
If earlier the question itself on how to make repairs in the kitchen, caused the most real panic, then with the development of repair and construction technologies everything changed for the better. Now perform all the necessary work the installation of apron, laying outdoor tiles and so on) you can independently without resorting to any help. The main thing is to clearly plan and calculate how much about how much you can repair the kitchen. Prices for ceramic tiles vary in very large limits - from 95 to 3,000 rubles per square meter. m (depending on the producer country). Purchase of a bucket (2.5 liters) of water-free paint for walls and ceiling will cost 250-300 rubles. The average cost of decorative PVC panels is 150-200 rubles per piece. Experts do not advise save on quality. But overpays for building materials only because they are released under a well-known brand, not worth it.
How to make repairs in the kitchen: the main stages
First stage: Decide that you are waiting for the repair
If you do not want to waste money and your time, you should initially decide on expectations regarding the upcoming repair. For example, you need to keep the functionality of the room, but at the same time improve its aesthetics. What exactly do your kitchen need change? Repairs? Design? Photo interior kitchens will allow you to decide that it is suitable for you.
Second Stage: Color Gamma Selection
Any professional will confirm that correctly selected color will help achieve the desired effect - for example, visually increase or decrease the space. You must take into account the fact that dark shades negatively affect the mental state of people in this room. The same can be said about bright screaming paints. In order to avoid problems, it is best to choose finishing materials and neutral gamut textiles.
Third Stage: Wall Decoration in Kitchen
Before starting the wall decoration, you need to prepare the following tools and devices:
- construction spatula;
- wide (for applying primer);
- the rollers with which the ceiling will be held;
- paint tray;
- schucker (necessary for grouting putty);
- bucket.
First, we get rid of the old finish (we remove the wallpaper, and we carefully delete the tile). Next, we carry out the primer and putty.
Fourth Stage: Replacement of Kitchen Apron
Old ceramic apron lost its original appearance? Then it's time to replace it with a new, more pretty and modern. "Apron" is called part of the wall between mounted cabinets and a working surface. Removing the old tile, you need to clean and align the wall. Only after that you can proceed to the creation of a new apron. For this purpose, it is recommended to use smooth ceramic tiles, without a structured pattern.
Fifth stage: ceiling decoration
Carefully inspect if it is in good condition, it will be enough to paint with its water-making paint. If the ceiling can not be called smooth and beautiful, then there is no way without primer, putty and finishing finish. Today, a variety of finishing materials for the ceiling are on sale. These are panels from PVC, and drywall sheets, and suspended systems.

If you just want to offer you to take advantage of some practical advice:
- Do not save on the purchase of paint. It must be high quality.
- If you need to hide small surface defects, matte paint will perfectly cope with this task.
- There is no particular difference between cheap and expensive putty. And in that, and in another case, you can get a perfectly smooth coating.
- But the choice of primer has its own characteristics. Here specialists advise paying attention to universal brands. The best option is a primer with a deep penetration effect.
Finish stage: floor finish

As most often used ceramic tiles. To independently perform its laying, you need to remove the old coating and make a screed for all the rules. After that, you can lay out the tile. There is a simpler and less time-spent option - lay linoleum. In your kitchen is not a very smooth floor? It is easily eliminated by means of fiberboard stoves. They will serve as a solid and sustainable basis. And such plates will provide good sound and thermal insulation. The final stroke in the floor decoration will be replaced by old plinths to new ones.
Now you know how to make repairs in the kitchen with your own hands. For this you do not need to have special skills, as well as spend a bunch of time and money.
Repair of the kitchen - optionally costly event. You can do everything quickly and inexpensively with ordinary materials. If you use exactly what is suitable for not easy room conditions, the finish will not lose an attractive view of a dozen years and more. Along the way, questions are solved with windows, doors, communications. Outdated designs change new ones.
The whole process is performed in stages to miss anything and not spoil already done. Difficulties cause the placement of furniture and equipment in Khrushchev, where there are very few places. Proper selection of modern products will solve this problem.
Project work
Most of the kitchens, especially small, requires redevelopment to post furniture and equipment conveniently. Start with careful measurement of the room - accuracy is not less than 5 mm. In a small area, non-accuracy leads to the accumulation of errors, and as a result it turns out that somewhere there is not enough space, it interferes. All data is recorded to then form a plan based on them. Not only the dimensions are determined, but also the position of each object relative to the walls, gender, the ceiling. Remove the indicators from the following elements:
- total rooms - length, width, height;
- door and window openings;
- mezzanine;
- sockets, switches, lamps;
- pipes - gas riser, sewage, water supply;
- ventilation grille;
- finishes - cornices, stucco, various protrusions.
All data is transferred to a sheet of paper, as a result, the plan goes. Now it should be decisled with the location of furniture and household appliances. If they are not updated, remain the same, then the dimensions are removed. But probably wants to update everything. There is no sense to buy ones - you have to place somewhere, in a small apartment, the technique will only interfere. It remains to choose in the store you liked products, learn dimensions from the catalog, which will provide the seller.
To draw their placement manually or use computer programs, a non-specialist is difficult and considerable. They come easier - take a cardboard sheet and prepare a large-scale copy of the kitchen with walls, only without ceiling, windows, doors cut out. Reduce 5-10 times depending on the size of the room. From dense foam plastic makes models of cabinets, plates, washing and all of the other, sign a marker. Then begin to play in the cubes, moving them around the space until there is an optimal location. On the walls glued with pieces of plasticine.

If there is no desire to work with a project on a computer or the proposed method seems difficult, use another. It will take quite a lot of cardboard, on which the length is applied to the length and width of each setting element, which will stand on the floor. They are moving around the kitchen space in search of an acceptable solution. It is notable to make the models of the rear walls to assess the location in height. The lack of a method is that it is impossible to pre-plan, possibly when all furniture and household appliances are made.
General and Private Repair Features
The kitchen is a room with operating conditions that are radically different from residential rooms and even utility. There are many time people spend a lot of time, and cooking food that strongly affects furniture and finishing materials. It must meet increased sanitary and hygienic and operational requirements. Starting repair, take into account the following factors:
- the temperature differences are constantly occur - from normal to elevated and back;
- the presence of evaporation leading to excessive humidity;
- the installed gas and electrical equipment requires special security measures;
- aggressive fat particles, soot, settlement on the surface - should easily wash;
- enhanced operation of furniture, equipment withstand only wear-resistant coatings.
These features are necessarily taken into account when repairing, otherwise the money will be wasted. In addition to concern for beauty, measures should be taken to preserve in adverse conditions. This promotes good ventilation. Before repair, it is checked: remove the grille and look where the canal leads. If a vertical mine is good, you may only have to enhance the effectiveness to put a small exhaust fan. When the direction is horizontal - worse, but you can fix it.
How to cover the floor, walls, ceiling?
A significant role in the durability of the kitchen plays the choice of materials for finishing. The main thing is high functionality in special conditions of the kitchen. Regarding the design, even the most traditional views are able to decorate the room if you choose them with taste and usefully use.

Ceramic tile is often used for flooring - immune to moisture, physical stress, contamination. The color is so diverse that they imitate wood, parquet, marble and much more. A significant drawback is bad thermal insulation. Common budget material - linoleum. It is easy to fit with your own hands, the moisture is not afraid of moisture, due to which is popular. You can buy with different degrees of thermal conductivity, with or without lining. It serves a long time, but should be preserved from punctures and cuts.
Some beautiful and fashionable materials on the kitchen floors should not be applied. This is primarily refer to the laminate. It is easy to lay, durable, but moisture is afraid, which in the kitchen with an excess. Getting between the joints, it gradually destroys the coating that swells. The second undesirable material is parquet. Permanent temperature fluctuations, high humidity act destructively.
In the kitchen, the walls are contaminated to a greater extent than in other rooms. It is advisable to use coatings that are easy to clean. Washing wallpapers or painted phlizelinic are suitable for such a case. With their help, the room acquires a desirable shade, all defects disappear under them. Of the disadvantages - weak resistance to damage.
The coating of the half-wood paint is cheap, but impractical. The surface is clean, quickly contaminated, isolated flaws, but if necessary, without problems is updated. Everything will hide the decorative plaster, which is easy to clean. It looks great in any interior, but in case of subsequent repair, it is not easy to remove it. Ceramic tiles usually finish only apron.

Water resistant plasterboard is performed quickly, it is inexpensive, the walls are perfect perfect. It is optional to correct the surface flaws - they will hide under the sheets. In the kitchen with a small area, the method is not very desirable - so the limited space will be reduced even more.

Well hides flashes of a suspended ceiling of plastic panels, which is not afraid of steam, fat, requires minimal care. Further, the degree of functionality is laminate, the indoor side of which is impregnated with PVA and MDF with such treatment. The use of moisture-proof drywall for these purposes is also a good option, but in the extreme case. It creates multi-level structures from it, but it is required to periodically update the blots, because even the highest quality paints do not hold long. In small-sized kitchen reduces space.
Cheaper ceiling finish using polystyrene foam plates. Under them are all defects, they are easy to install and also replace. Only laminated material should be chosen, which is rigorously contaminated, it is easy to wash it. Nevertheless, despite the attractiveness of this option, the application is fraught with problems: slab relief after half a year begins to yellow and black.
Options for setting up small room
Khrushchev and panel house are extremely limited kitchen sizes. It is uncomfortable, closely, the plaster crepts, the pipes rusted. With competent planning, even such "crumb" can be transformed.

To begin with all the household appliances and furniture, otherwise it will simply have nowhere to turn around to perform repair. Old communications and finishing materials are mercilessly removed, removed the semi-shine window. You can proceed to work. After completion, an important point comes - to place the equipment in a new way, so that it becomes the most convenient as possible even on such a limited area. Possible layout for one of the options:
- single row;
- angular;
- M-shaped;
- letter P.
To properly organize space, placed exclusively the furniture that is really necessary. Do not clutch things, without which you can do. With all sorts of boxes, boxes, standing part. Resolutely get rid of all unnecessary, inconvenient, even if it is expensive as a memory. The walls for mounted cabinets, the shelves are used - the floor area is released. Buy built-in household appliances that takes little space. From the furniture, preference is given to the folding table and the same chairs. On the cooking panel, the sink and the working surface set one solid worktop.
If not physically, the space is visually expanding, creating a modern design, glossy surfaces of pastel tones. Many lamps - on the ceiling, shelves, above the table and work surface. On the windows of any heavy curtains, the material is translucent or rolling. Several mirrors will increase the space even more. Furniture are chosen with glossy light tones with a surface.
Kitchen equipment - what to improve, with what to part?
Full repair of the apartment is not only a finish of a new wall, ceiling and floor, but also replacing pipes. Start with communications that are outdated, prevent, look ugly. With a metal pipe, applying gas to the stove, part. Now flexible hoses that are compact, and the space on the wall can be used. It is forbidden to do it yourself, you will have to call specialists. If there is a gas column, simultaneously remove it, having received permission, and transfer a new water heating device to another place.

Water pipes change to repair. The budget solution is polypropylene, which is not afraid of corrosion. The connection requires a special welding machine - you can buy inexpensive or rent. In order not to think about it, we use metalplastic. Installation is simple, performed by a special fastening. At the same time, the old mixer changes.

In Khrushchev, one outlet was initially installed, placed on the far wall, which in modern conditions does not meet the needs. A socket group is needed, the place of which over the desktop. It consumes a lot of electricity, therefore it is provided for separate power wiring. Instead of a regular junction box, a shield with automata, a RCD for kitchen equipment, a washing machine, a boiler are installed.

Ventilation is a weak place, and it needs to be improved to smell, couples and fat do not apply throughout the apartment. It is impractical to use a coal filter hood - it requires a frequent replacement and costs a lot. Install the usual with an aluminum mesh filter. In the staff channel punch a separate outstand. If the system is not related to the toilet and the bathroom, it is made below the existing hole. Built-in fan will improve traction. At the same time get rid of the exhaust pipe, freeing the place on the wall.
The refrigerator is not installed next to the stove - the consumption of electricity increases from heating. If there is an opportunity, put into the cool room - on the glazed balcony (except for the sunny side in the south), in the hallway. But not every hostess will like constantly running for the products. Exit is a small single-chamber unit without freezer. The space for the washing machine is released on the site of large equipment. Compact refrigerator are installed on top.

Under the window - a niche for the refrigerator
Replacing the old window on the plastic is the best inexpensive solution. The material resistant to temperature fluctuations has good heat and noise insulation, easy to clean. The use of wooden structures with double-glazed windows is preferable, but the cost of the natural product is above an artificial counterpart.

Do not disregard the door. The old frame of chipboard is changed to a new one - there are many attractive inexpensive options in stores. In a small apartment, the fabric often just take off. But the renovated kitchen with the remaining box is unattractive. In her place arrange the arch. It will take quite a bit of drywall and water-emulsion paint. The main thing is that such an opening organically fits into the interior, the space is released.
Repair and finishing works - a sequence of actions
When the clarity came, what to do, the materials were purchased, the most responsible moment begins - repair the kitchen with their own hands. It is important to do everything in stages, not allowing mistakes that many who do it for the first time sin. If you ignore the design, it happens much more often. Then it is difficult to accurately calculate the number of necessary materials, install few sockets, forget about the extract and the like.
The violation of the sequence leads to extensive spending of time and means, already finished surfaces are polluted. Work begins with communications: water supply, sewage, electricity, ventilation. Then the windows and door turns. After them, proceed to the place itself. First preparation of the base for the floor, the rough finish of the ceiling and walls. Then at the same time the finish finish is made. Completes all installation of equipment and furniture.
Preparation of the room
After the room was released, proceed to the surfaces. Start follow from the ceiling. In homes with a bituminous roof, the tenants on the top floor are often suffering from the course. Partially saved, the bounce rusts are intercutric seams, so that water flows into the adjacent bathroom, where the material is not afraid of moisture, less electrical equipment. Before you definitely free the channels from the old wiring. The level is checked by horizontal. If the difference exceeds 30 mm, alignment is inappropriate - expensive and difficult. The problem of the suspension ceiling device is solved.

Conduct the inspection of the floor in order to determine its condition. Looking a new coating on the old flooring makes no sense. There are so many defects that it is better to remove completely before the screed. Its replacement is necessary if cracks have been detected with a width of more than two millimeters, especially intersecting. Wpads and protrusions with good general condition can be aligned. Check horizontal - it should not exceed 3 mm, and diagonally ten, which is available for correction.
Use the construction level of at least a meter long. If small irregularities are detected, so as not to engage in the screed device, the marmoleum is used for flooring. This is actually linoleum from natural raw materials, brought to perfection. For the manufacture of tropical cultures are used, which is cheaper than laminate. The layer of pressed plug makes it very warm. The material is not afraid of moisture, pollution, even spilled paint does not stick. This is an absolutely eco-friendly product that serves 20 years. To put it, do not require special tools and skills.
A screed with extensive wells or protrusions, peashed, should be repaired. The most acceptable solution for such a case is the filling floor based on cement. It is raised by 10 mm from the highest bulb. The alignment in the price is not too expensive, it will be necessary for a small area. The finishing floor is placed right on it. Cracks in the old basis are not required to close, and a perfectly smooth surface will create good conditions for further work, water will not fall into the depressions.
At the old kitchen, the walls absorbed a lot of evaporations, which sometimes penetrate to the base. Simple cleaning is useless - finishing materials do not stick. Pre-smear the coating - paint and plaster impregnated with fat. They spray with water from the spray, closed windows, doors, withstand 2 hours. Then quickly remove the coating using a spatula or abrasive grid. If the first time failed, repeat.
Oil, alkyd paints are removed using the composition designed to remove them. They work with a sponge, apply to small areas so that in vain does not spoil the dear tool. Our drugs are cheaper imported, but for their action requires time. To protect the skin, respiratory organs from aggressive fluid use a respirator, rubber gloves. For ventilation, everyone opens the lash.

On the grounds impregnated with fat, paint and stucco, they will not hold on, start peeling. Therefore, everything is washed - the ceiling, walls, gender. Any means for dishes are used, which is diluted with water 1:20, add a table vinegar. Pre-check their compatibility. If bubbles appear, sharp smell, take another means. Apply a metal sponge, which is often dipped into the solution, a clutch with pressure. Washed twice.
In conclusion, when the surfaces are dried, priming is carried out. Use deep penetration tools on concrete. Before purchase, carefully read into the recipe. Be sure to preserve biocidal additives. If Tiuras are present, derived from it (Tiram, Aroson, Fernan) - the composition for these purposes is not suitable, choose another. The impregnation is made twice with an interval per day.
Ceiling cutting, casing and wiring under it
It has already been said that in the kitchen in order of preferences for the ceiling use:
- plastic lining;
- laminate, impregnated with the inside of PVA-emulsion;
- MDF with the same processing;
- green plasterboard - last place.

The crate is made without cross, using wooden slats or metal profiles. The distance between the lags is 0.5 m, the fastening step is 0.4 m. Exhibit on stretched ropes, lining for alignment pieces of plywood.
In the hanging ceiling it is convenient to mount wiring. In order not to make shoes, cut the channels in the rails, where it is placed freely hanging. A flexible three-core cable with double insulation is used, a cross section of at least 1.5 mm2, for a socket - 2.5 mm2. Using a parallel connection: From the shield, one wire goes to the socket group, the second is on the main lamp, the third is onto the point (the cross section is 0.7 mm2). Such a scheme ensures enhanced security, the convenience of repair.

The branch on the sockets is also allowed under the ceiling. From the center where the lighting network ends, at an angle of 90 ° rotate to the wall, the laying is performed in the stroke. In the same way make eyed to the switches. The cable is fixed at the beginning of the painted scotch, then the alabaster. For point lighting, space 8 cm is required. On the central chandelier or the ceiling arrange an additional clamp of 20 × 40 mm. The main lighting on the ceiling is better limited, because extra holes are the path for the penetration of evaporation.

After laying electrical communications, it is processed. There is nothing special in technology. The laminate and MDF panels on a wooden crate are installed using mounting glue, extra minor carnations in the corner of the groove. Plastic fastening is performed on self-drawing. When buying checks the occasion of the ridge of the tongue into the return groove - ideally freely or without significant effort.
Plasterboard mounted on ordinary technology. Sheaving panels, before installing in the groove of the previous one, squeeze silicone sealant - it will become an obstacle to the penetration of evaporation. The drips immediately remove the cloth, wet in vinegar.
Wall decoration and finishing flooring
The tile in the kitchen does not fully comply with the rules of hygiene - the dirt accumulates in the seams. For their cutting, the composition used in the baths, adding 10% of the aqueous emulsion. Clean a piece of cable with an insulation with a diameter of 5 mm. If the finger, even in the glove, remains imperceptible to the eye of irregularities - the perfect place for the accumulation of dirt and reproduction of microbes. It is recommended to use ceramic tiles only for apron. As a budget option - plastic and MDF panels, thanks to the reliable connection of which the work area is protected from dirt and steam.
The best decoration of walls in the kitchen is washable. They do not accumulate odor, can serve for a long time. If you correctly pick up the color, then the guaranteed unnecessary few years do not have to think about repairs. The least suitable white and bright, and light beige pastel shades with a small pattern do not lose the form for more than 10 years. Help requires, then it will go faster - one man glue, another combines.

Installing tiles on the floor - occupation time consuming, the cost is quite high. The plug is warm, but accumulates moisture. Linoleum is an opportunity with insignificant costs to quickly make an outdoor coating. Another best option is marmoleum, a little-known natural material, which, besides inexpensive.

Kitchen with laid on the floor marmoleum
Complete the finishing of the installation of plinths. They are needed not only as a decorative element, but also serve to isolation of joints from evaporation around the perimeter. Fastening is carried out on liquid nails or silicone glue, smearing over the entire surface. The drips are immediately removed. If desired, the tightly use self-tapping screws, whose heads are blend and missed.
On the ceiling, the plinth will have to be additionally fixed with screws or small nails. Take phosphatated black, which are less noticeable. Set about 0.5 m, extreme in ten centimeters from corners. If it is afraid that the elements will be noticeable, they wash with liquid nails, pose a suitable shade.
In the kitchen, every woman tries to show fantasy and ingenuity in cooking for his family. The kitchen performs the responsible role of the heart at home. Homemade comfort, which creates a kitchen, stimulates each household to look there more often. Kitchen Repair Options - 70 Design Ideas:


It is on the kitchen on a tea party with a cookie, I accidentally looked friends. Therefore, every hostess wants a pleasant atmosphere of warmth and comfort to be felt in the kitchen. Repair of this part of the house becomes an important and serious step. Especially, this concerns those cases where the owners themselves take responsibility for inexpensive repair of a small kitchen.


In order not to delay repairs in the kitchen for many months and get pleasure and emotional unloading from this process, you need to stick to a certain tactics in actions.


Design design kitchen
Create a design project of a future kitchen. Repair without a previously calculated plan can lead to excessive concerns and costs. If you make a estimate, it is possible to accommodate repairs in the established financial boundaries and understand what you can come, ultimately.

To create a design project, you can turn to a professional designer. Taking into account your wishes, the designer will provide you with several types of projects, and you can choose what I would like to see you. Your task is to think through the color range, furniture accommodation, style and lighting of your kitchen. Repair Kitchen Real Photo Examples:


You can do with small repair to maintain the cleanliness of the room, or make a overhaul, and you can fully redevelop the room and change your favorite corner in the house to an amazing state.

How to make kitchen repair quickly and cheap
Clear the area and disassemble the last finish. When the design is selected, you need to remove household appliances from the kitchen and furniture. You can easily part with superfluous objects and old cabinets. After that, proceed to disassembly decoration on the ceiling, walls and sex.

One of the significant stages of repair of any kitchen are plumbing work. In particular, if plumbing equipment needs absolute shift to the new one. Pipes need to be put close to the walls, or to build inside the walls. Replacing the cast-iron battery to the newest system of aluminum or the convectors will be the perfect option.

Polypropylene, metalplastic, copper are used for the pipeline. These materials have a number of advantages:
- - in a polypropylene pipeline low heat transfer and corrosion protection. There is no need for installing cuffs and linings. Differs on a democratic price. You can install using a welding machine.

- - Metal-plastic pipes are not separated by corrosion, characterized by low heat transfer and rigid design. The installation of metal-plastic pipes is quite complicated and a large number of components are required.

- - The highest rapidness indicators, tolerability of very high and low temperature, immunity to deformation and other external reasons from the copper pipeline. Copper has antibacterial qualities. The disadvantage of copper pipes is their high price. Kitchen repair options Photo:


Electrical work
When the electrical wiring is carried out, it is important to take into account the workload of the kitchen by various electrical appliances - a refrigerator, an electric kettle, a microwave, washing machine and others.

It is better to pave a separate electrical line in which there will be a sufficient number of outlets.

In addition to the main lighting, it is also necessary and additional. These can be point lamps that will highlight all the required areas of the kitchen. If you want to produce a master replacement of wiring or install gas equipment, then the best option will be used by professionals.
Window for kitchen
Modern kitchen repair implies the windows replacement, and it is important to decide which window you want is wooden or plastic. The quality of the wooden window in the environmental purity, the naturalness and ability to "breathe", but the price of such a window is high.

Plastic is more solid, it is distinguished by resistance to temperature drops and other hostile circumstances, does not need additional care. Also, the PVC profile in combination with double-glazed windows creates excellent sound and thermal insulation.

Take into account all types of ventilating room when replacing the window in the kitchen. Install such a sash so that it is most practical in operation. Kitchen repair ideas Photo:


Installation of doors in the kitchen
Kitchen doors can be ordinary, but you can make the arch. There are plastic and wooden doors. Plastic doors do not crack, are not predisposed to deformation, hermetic, moisture-resistant, have high sound and thermal insulation.

Repair of the kitchen in a one-room apartment, the prices of plastic doors are quite acceptable. But the wooden doors plastic are still inferior by naturalness and ecological harmlessness.

With the help of the latest technologies, it is possible to process a tree so that the highest operational properties are as high as possible.

The arch can be made of drywall, or can be performed from a tree. The main thing is that this element has a good harmony with a common interior.

Inexpensive repair of a small kitchen, starting to equalize the walls. You need to pay attention to two methods. Align the walls can be used by drywall or shockting.

Methods have both pros and cons:
- - Install plasterboard is easy and this process does not take a large amount of time. You can form uniform smooth walls and hide the surfaces of the surfaces using drywall. The disadvantage of drywall is a significant decrease in the size of the room, as well as the plasterboard wall comes out empty and sonor.

- - If you will apply plaster for alignment of the walls, you can eliminate unnecessary skips between the trim and the wall. And ultimately get a flat, holistic surface. But in the premises, with large drops of surface levels, the wall decoration is impractical, this is due to the processability of the process and sufficiently high consumption of material.

Designer kitchen repair - choose apron
No kitchen costs without clearance "Apron." "Apron" is intended to be the protection and decorative element of the gaps between the surfaces and mounted cabinets. Ordinary ways to finish "Apron" is:


- - Plastic panels. Affordable and appropriate option for self-repairing kitchen. If you make a good choice of color solutions of panels, you can get a pretty practical coating, which will be quite simple to care;

- - hygienic and long-term option for the finish "Apron" is a tile;
- True, the tile is painstaking in laying and will require significant financial costs;

- - Mosaic or artificial stone - a specific option in the design of the kitchen. Exclusivity and high price provided. Working with these materials is better to entrust professionals.
- - A non-standard solution will be the choice of a mirror or glass "apron".

Having an idea of \u200b\u200bhow to start repairing the kitchen, you can approach your dream step by step. Kitchen Repair Options - 70 Design Ideas:


The kitchen is the most popular place in the apartment where the whole family is going to have breakfast, lunch and dinner. In this room, each mistress holds a quarter of his life, so the space should be the most functional, comfortable, cozy, comfortable and beautiful. The article will tell in detail all about the repair of the kitchen: design, photo of real and beautiful rooms, tips on the choice of coating for walls, ceiling and floor, nuances of decorated apron.
Thanks to modern and environmentally friendly materials, it is possible to create not only a beautiful, but also a comfortable atmosphere indoors.
The kitchen is the most functional place in the apartment that usually has a small area. It is important here conveniently and rationally arrange furniture and household appliances. Since during cooking in the kitchen is usually humid, hot and fat, the finishing materials and furniture should be moisture-resistant, which are well clean.

The upper level is determined at an altitude of 2.3-2.4 m above the floor level. This is the height of mounted cabinets. Outlets are needed to connect the hood, microwave, TV. The average level reaches 1 m from the floor level. This is a space above the tabletop or table. Here you will need to connect a food processor, a mixer, a meat grinder, a coffee grinder. The lowest level is located at an altitude of 10 cm from the plinth. Such sockets are necessary for connecting the refrigerator, an electric brass cabinet, a washing and dishwasher.
Article on the topic:
How to choose and punish washable wallpaper, the features of their cleaning and washing. Tips for designers for choosing color solutions.

At a distance of 60-70 cm above the cooking surface, a forced powerful hood should be installed, which will pull the steam and smoke formed during the cooking in the ventilation shaft. The cooking surface is located near the gas pipe. If it is not combined with the oven, then it is convenient to position under it. Over the oven, electrical or gas stove should not have other communications, in order to avoid accidental fire or damage.

Helpful advice! Do not mount the sockets near the cooking surface and washing.
Another of the modern and fashionable materials for wall decorative is a decorative stone. It is often used to create an interior in the Loft style. A decorative stone can be awarded one accent wall. This material is well combined with other finishing elements. It can be safely combined with decorative plaster and wallpaper, as clearly shown in the photo of the repair of a small kitchen in Khrushchev.
All finishing materials described above can be used individually and create unique complex interiors and implement the most unexpected design solutions.

Finish Kitchen Apron
Before choosing the material for the design of the working surface of the kitchen, it is necessary to clearly know that it should be moisture-resistant, heat-resistant, durable and easy to clean with detergent. With this task, a smooth tile, which should be laid on the working area with a small margin, slightly standing up for hinged cabinets.

The most popular materials for cladding the working area of \u200b\u200bthe kitchen are ceramic tiles and
The new-fashioned design intent is the use of kalen glass, which looks very beautiful and unusually, thanks to the unique method of applying paint and special photo printing. Such modern technology is able to provide a wide variety of various options. Repair of the kitchen in Khrushchev using this material will look exquisite and visually will increase the small space.
Helpful advice! It is possible to use colorless rotable glass, which is superimposed on the main pattern of another finishing material, without disturbing its integrity and appearance.
Outdoor coating for kitchen
Choosing material for the floor of the kitchen, you should consider certain properties with which it must have to not only create an attractive appearance, but also to be durable and practical in care.
Linoleum occupies a leading position among other floor coverings. This material has a high indicator of wear resistance, sound and thermal insulation. When falling on the floor of a heavy item on the surface of the linoleum, there will be no damage. Material is easy to install and subsequent care. The variety of various options allows you to choose a linoleum to create any interior. With it, you can make a budget version of the repair of a small kitchen with your own hands. However, this material has one obvious disadvantage: in places where heavy furniture is, dents are formed.

The next position in the rating of popular flooring is a ceramic tile. This is the most eco-friendly material that is resistant to moisture, abrasion, chemicals and easy to care. However, this almost perfect option for the kitchen has its drawbacks. Despite its solid structure, when a heavy item falls from a height on the tile, a chip or crack is formed. It has a cold surface all year round, which is not comfortable in the winter. Various options for performing ceramic floor tiles are visible in photo repair of Kitchen Khrushchev 6 square meters. m.

Helpful advice! Ceramic tile is the perfect floor surface, under which you can mount a warm floor system.
Many prefer to put parquet in the kitchens, which is an eco-friendly material and thanks to the appearance enlarges and creates an additional comfort of the room. On this positive aspects of this material for finishing the kitchen ends. A tree has a low moisture resistance, reacts to temperature differences, it is afraid of stains and requires regular special care. However, to improve its operational indicators, manufacturers are covered by protective materials.

Helpful advice! The thermododevo is ideally suitable as a wooden coating for the kitchen, which is resistant to moisture and fluctuations in the indoor temperature. The main drawback is a high price.
Original flooring is natural environmentally friendly cork material. When it is used, you can get soft, durable, warm floors that provide high soundproof space, resistant to moisture and stains, easy to install and easy to care.

Laminate is a good inexpensive wooden floor alternative, which wins according to specifications, however, is less environmentally friendly. It is pretty durable, moisture-resistant, wear-resistant material, the surface of which is very warm, which is important for the comfort of the legs. The affordable price and a wide range of textures, patterns and colors will help embody the desired interior design.
The proposed flooring options, which are depicted on real photo of the kitchen after repair, can be combined, which allows you to zone space and create an exclusive unique interior.

Lighting and repair of the kitchen: design, photo of real interiors of updated rooms

Glossy surfaces are able to visually expand the space
A good method of saving space is the compound of the cooking surface, washing and working area with one tabletop. To this end, you can use the place on the windowsill, where you can also create a working surface. An excellent idea of \u200b\u200ba visual increase in space is considered to be the placement of the refrigerator in the corner far from entering the corner.
When designing a small kitchen design, you should abandon clearly smooth lines. Give preference to rounded furniture elements that make the room spacious.

The practical idea of \u200b\u200brepairing a small kitchen is the use of sliding or folding tables, mini-tables that can be an additional workplace, built-in baskets, grids, carousels, lifting and sliding structures for storing kitchen utensils, spices, croup and other items. The impeccable ordering of all items in the kitchen creates a parallel placement of niches and hinged cabinets.
Today, many manufacturers produce modern household appliances, the sizes of which are different from standards. It can perfectly fit into small dimensions of your kitchen. There are options that are mounted in the walls and are embedded in furniture, as shown visually on the photo of a small kitchen repairs of 5 square meters. m.
You can add an extra depth and uniqueness of a small kitchen using decorative elements: mirrors, transparent and brilliant vase with fruits, original paintings located vertically, unusual design clock. All this will give the room an additional note of warmth and comfort, and will certainly emphasize the taste of the hostess.

Kitchen repair is a very responsible and time-consuming event, as a result of which, I want to get a functional, beautiful, cozy and stylish room, where you can not only make food cooking, but also be able to comfortably accommodate all family members at one table at breakfast, lunch or dinner , Or invite friends to a cup of tea. Do not be afraid to embody the most unexpected and original ideas. The stream of your fantasy and the practical recommendations of the designers will help create a unique and unique image and decoration of the kitchen.
 Why you can not give icons
 Is it possible to give icons as a gift: Signs, the opinion of the Church
 A year ago left her husband, and now I do not know what to do