How to build an attic from the board. Do-it-yourself mansard roof: drawings and stages of how to build a mansard roof at home. Attic floor design - standard elements and key requirements for them
A house with an attic is not only an additional living space, but also a respectable view of the entire building. Even if the room under the roof is made unheated and is used only in the summer, it still creates a powerful "air cushion" that helps to retain heat inside the entire capital building.
And about, then - read on our portal.
Attic project
When drawing up a scheme for building an attic, it is best to do this in different projections in order to see and understand the placement of all elements of the truss system. It is very important to correctly calculate the height of the roof ridge, since the size of the area under it will directly depend on it.

When drawing up a scheme-project for the construction of a mansard roof, you need to calculate the height of the ridge, the ceiling and the total area of \u200b\u200bthe room.
The minimum height from the floor to the ridge should be 2.5-2.7 m, if this distance is less, then the room is not an attic, it can only be called an attic. This parameter is set by the norms of SNIP.

In order for all elements to be drawn accurately and have the desired location in the overall system, it is necessary to start from a figure with right angles, that is, a rectangle or square - a section of the attic space being created. Based on the sides (height and width of the future room), it will be almost impossible to make a mistake with the angles at which roof slopes are located, with the location of the ridge, rafters and all retaining elements. Determining these parameters, they must immediately be entered into the drawing.
First you need to find the middle of the width of the front wall. Starting from this point, the parameters of the height of the ridge, the future ceiling of the attic, the location of the rack-walls and the size of the cornice overhang are determined.
Due to the fact that each of the structures has a certain number of connecting nodes that have different configurations, it would be nice to draw each of these ligaments separately in order to understand their features of conjugation among themselves of all elements connecting at this point.

Any truss system consists of basic elements and additional ones, which may not be in every design. The main components of the mansard roof are.
- Floor beams, which are the basis for the rest of the elements of the truss system. They are laid on the main walls of the building.
- Rafter leg, straight in a gable roof system or consisting of two sections - in a broken pattern. In this case, the upper rafter is called the ridge rafter, as it forms the highest point of the roof - and the rafters that form the walls of the attic are called side rafters.
- A ridge board or beam is an indispensable element for a gable roof, but is not always used when constructing a broken roof model.
- Mauerlat - a powerful bar, fixed to the main side walls of the building. Rafter legs are installed on this element.
- Racks are supporting elements necessary to strengthen a gable and broken structure. In the latter case, a ridge and side rafters are attached to it, and in the first case, the stand is a reliable support for a long rafter. In addition, the racks serve as a frame for insulation and sheathing of the attic walls.
- Diagonal braces or bevels additionally hold the posts or stringers and rafters together, making the structure more durable.
- Attic floor beams are used in all attic options - they connect the racks, and they are also the frame for the ceiling device.
- Interrafter runs are installed in a broken form of the roof for structural rigidity.
To be sure that the prepared project is developed correctly, you need to show it to a specialist. Only he can determine whether the attic parameters are correctly selected for the width and length of the walls of the building.
Video: professional mansard roof calculation using special software
Parameters of materials for the construction of a mansard roof
If the graphic project is ready, then, starting from the dimensions marked on it, you can calculate the amount of materials needed to build a mansard roof. Materials must be selected according to their characteristics, which must meet the requirements of fire and environmental safety. For wood, it is necessary to provide special treatment with fire retardants, which will reduce the combustibility of the material. So, for the construction you will need:
- Boards for rafter legs. Their cross section is selected according to the results of special calculations - this will be discussed in more detail below.
- A beam having a cross section of 100 × 150 or 150 × 200 mm - for floor beams, depending on the chosen truss system and the width between the bearing walls, as well as for purlins, diagonal legs or valleys - if they are provided for by the design.
- Beam with a section of 100 × 150 mm or 150 × 150 mm for laying Mauerlat.
- For racks, a beam of 100 × 100 or 150 × 150 mm is usually used.
- Unedged board for subflooring and some fasteners.
- Annealed steel wire with a diameter of 3-4 mm - for fastening together some parts.
- Nails, bolts, staples of various sizes, corners of various configurations and other fasteners.
- Metal sheet with a thickness of at least 1 mm - for cutting overlays.
- Lumber for battens and counter battens for roofing material - depending on the type of roofing chosen.
- - for thermal insulation of the roof.
- Waterproofing and vapor barrier membranes.
- Roofing material and fasteners for it.
What section are required rafters
Rafters are roofing elements that will perceive the main external loads, therefore, the requirements for their cross section are very special.
The size of the required lumber will depend on many parameters - on the step between the rafter legs, on the length of these legs between the support points, on the snow and wind load that falls on them.
The geometric parameters of the design of the truss system are easy to determine in the drawing. But with the rest of the parameters - you will have to refer to the reference material and carry out some calculations.
Snow load is not the same for different regions of our country. The figure below shows a map on which the entire territory of Russia is divided into zones according to the intensity of the snow load.

There are eight such zones in total (the last, eighth, is more likely to be extreme, and it can not be considered for the construction of a mansard roof).
Now you can accurately determine the snow load, which will depend on the angle of the roof slope. For this, there is the following formula:
S = Sg × μ
Sg- tabular value - see the map and the table attached to it
μ — correction factor depending on the steepness of the roof slope.
- If the slope angle is less 25° then μ=1.0
- With a steepness from 25 to 60 ° - μ=0.7
- If the roof is steeper than 60 °, then it is considered that the snow does not linger on it, and the snow load is not taken into account at all.
It is characteristic that if the mansard roof has a broken structure, then for its different sections the load can have different values.

The angle of the roof slope can always be determined either by a protractor - according to the drawing, or by a simple ratio of the height and base of the triangle (usually - half the width of the span):
The wind load also mainly depends on the region of construction of the building and on the characteristics of its environment and roof height.

And again, for the calculation, the initial data on the map and the table attached to it are first determined:
The calculation for a particular building will be carried out according to the formula:
Wp = W × k × c
W- tabular value, depending on the region
k- coefficient taking into account the height of the building and its location (see table)
The following zones are indicated in the table with letters:
- zone A - open areas, steppes, forest-steppes, deserts, tundra or forest-tundra, open to the winds of the coast of the seas, large lakes and reservoirs.
- zone B - urban areas, wooded areas, areas with frequent obstacles to the wind, relief or artificial, at least 10 meters high.
- zone IN- dense urban development with an average height of buildings above 25 meters.
from- coefficient depending on the predominant wind direction (wind rose of the region) and on the angle of inclination of the roof slopes.
With this coefficient, the situation is somewhat more complicated, since the wind can have a double effect on the roof slopes. So, it has a direct, overturning effect directly on the roof slopes. But at small angles, the aerodynamic effect of the wind takes on special significance - it tries to raise the slope plane due to the emerging lifting forces.

In the drawings, diagrams and tables attached to them, the sections of the roof that are subject to maximum wind loads are indicated, and the corresponding coefficients for calculation are indicated.
It is characteristic that at slope angles up to 30 degrees (and this is quite possible in the section of ridge rafters), the coefficients are indicated both with a plus sign and negative, that is, directed upwards. They somewhat extinguish the frontal wind load (this is taken into account in the calculations), and in order to level the effect of lifting forces, it will be necessary to carefully fix the truss system and roofing material in this area using additional connections, for example, using annealed steel wire.
After the wind and snow loads are calculated, they can be summed up, and, taking into account the design features of the system being created, determine the cross section of the boards for the rafters.
Please note that the data are given for the most commonly used coniferous material (pine, spruce, cedar or larch). The table shows the maximum length of the rafters between the support points, the cross section of the board depending on the grade of the material, and the step between the rafters.
The value of the total load is indicated in kPa (Kilopascals). It is not difficult to bring this value into more familiar kilograms per square meter. With quite acceptable rounding, you can accept: 1 kPa ≈ 100 kg/m².
The dimensions of the board along its section are rounded up to the standard sizes of sawn timber.
| rafter section (mm) | Distance between adjacent rafters (mm) | ||||||
|---|---|---|---|---|---|---|---|
| 300 | 600 | 900 | 300 | 600 | 900 | ||
| 1.0 kPa | 1.5 kPa | ||||||
| higher | 40×89 | 3.22 | 2.92 | 2.55 | 2.81 | 2.55 | 2.23 |
| 40×140 | 5.06 | 4.60 | 4.02 | 4.42 | 4.02 | 3.54 | |
| 50×184 | 6.65 | 6.05 | 5.28 | 5.81 | 5.28 | 4.61 | |
| 50×235 | 8.50 | 7.72 | 6.74 | 7.42 | 6.74 | 5.89 | |
| 50×286 | 10.34 | 9.40 | 8.21 | 9.03 | 8.21 | 7.17 | |
| 1 or 2 | 40×89 | 3.11 | 2.83 | 2.47 | 2.72 | 2.47 | 2.16 |
| 40×140 | 4.90 | 4.45 | 3.89 | 4.28 | 3.89 | 3.40 | |
| 50×184 | 6.44 | 5.85 | 5.11 | 5.62 | 5.11 | 4.41 | |
| 50×235 | 8.22 | 7.47 | 6.50 | 7.18 | 6.52 | 5.39 | |
| 50×286 | 10.00 | 9.06 | 7.40 | 8.74 | 7.66 | 6.25 | |
| 3 | 40×89 | 3.06 | 2.78 | 2.31 | 2.67 | 2.39 | 1.95 |
| 40×140 | 4.67 | 4.04 | 3.30 | 3.95 | 3.42 | 2.79 | |
| 50×184 | 5.68 | 4.92 | 4.02 | 4.80 | 4.16 | 3.40 | |
| 50×235 | 6.95 | 6.02 | 4.91 | 5.87 | 5.08 | 4.15 | |
| 50×286 | 8.06 | 6.98 | 6.70 | 6.81 | 5.90 | 4.82 | |
| total snow and wind load | 2.0 kPa | 2.5 kPa | |||||
| higher | 40×89 | 4.02 | 3.65 | 3.19 | 3.73 | 3.39 | 2.96 |
| 40×140 | 5.28 | 4.80 | 4.19 | 4.90 | 4.45 | 3.89 | |
| 50×184 | 6.74 | 6.13 | 5.35 | 6.26 | 5.69 | 4.97 | |
| 50×235 | 8.21 | 7.46 | 6.52 | 7.62 | 6.92 | 5.90 | |
| 50×286 | 2.47 | 2.24 | 1.96 | 2.29 | 2.08 | 1.82 | |
| 1 or 2 | 40×89 | 3.89 | 3.53 | 3.08 | 3.61 | 3.28 | 2.86 |
| 40×140 | 5.11 | 4.64 | 3.89 | 4.74 | 4.31 | 3.52 | |
| 50×184 | 6.52 | 5.82 | 4.75 | 6.06 | 5.27 | 4.30 | |
| 50×235 | 7.80 | 6.76 | 5.52 | 7.06 | 6.11 | 4.99 | |
| 50×286 | 2.43 | 2.11 | 1.72 | 2.21 | 1.91 | 1.56 | |
| 3 | 40×89 | 3.48 | 3.01 | 2.46 | 3.15 | 2.73 | 2.23 |
| 40×140 | 4.23 | 3.67 | 2.99 | 3.83 | 3.32 | 2.71 | |
| 50×184 | 5.18 | 4.48 | 3.66 | 4.68 | 4.06 | 3.31 | |
| 50×235 | 6.01 | 5.20 | 4.25 | 5.43 | 4.71 | 3.84 | |
| 50×286 | 6.52 | 5.82 | 4.75 | 6.06 | 5.27 | 4.30 | |
Instruments
Naturally, during work, one cannot do without tools, the list of which includes:
- Electric drill, screwdriver.
- Building level and plumb line, tape measure, square.
- Axe, chisel, chisel, hammer
- Circular saw, jigsaw, hacksaw.
- Carpentry knife.
Installation will be accelerated if the tools for work are of high quality, and the work is carried out with competent mentors, with assistants, carefully and in stages.
Installation steps
It is necessary to strictly observe the sequence of work - only under this condition the design will turn out to be reliable and durable.
Mauerlat mount
The installation of any truss system begins with fixing a powerful supporting structure at the end of the side walls of the structure. timber - Mauerlat on which it will be convenient to install rafter legs. Mauerlat is made from a high-quality bar with a cross section of at least 100 × 150 mm. It must be laid on the roofing material waterproofing laid along the upper end of the wall (regardless of the material).
Due to the Mauerlat, the load will be evenly distributed along the walls and transferred to the foundation of the building.

The Mauerlat is fixed to the wall with metal studs, which are pre-embedded in a concrete belt or a crown running along the upper edge of the wall, or with anchor bolts with a diameter of 12 mm. They must go deep into the wall by at least 150 — 170 mm. If the Mauerlat is installed on a wooden wall, then the bars are attached to it with the help of wooden dowels.
Installation of the truss structure
- Installation of the truss system begins with the installation of floor beams. They can be mounted on the Mauerlat from above if the beams are planned to be taken out of the perimeter of the building and thereby increase the attic area. In this design, the rafter legs are fixed to the floor beams.
 Floor beams fixed on top of the Mauerlat (Fig. A)
 - Otherwise, they may fit into waterproofed walls and fastened with corners or staples to the inner edge of the Mauerlat. This option is used when the rafter legs are planned to be fixed directly to the Mauerlat.
 Another option - only rafter legs are attached to the Mauerlat
 - Next, you need to find the middle of the floor beam, since this mark will become a guideline for determining the location of the support posts and the ridge.
- Racks should be located at the same distance from the marked middle of the floor beam. In the future, they will begin to determine the location of the walls of the attic room, that is, its width.
- Bars for racks should have a cross section equal to the size of the floor beams. Construction sites are attached to the beams with the help of special corners and wooden linings. However, to begin with, they are first baited with nails, then carefully leveled with the help of a building level and a plumb line, and only then they are fixed thoroughly, with the expectation of future loads.

- When the first pair of racks is installed, they are fastened together from above with a bar, which is called a puff. This puff is also connected to the racks using special metal corners.

- After fixing the puff, you get a U-shaped design. Layered rafters are installed on it on the sides, which are attached to the floor beam with their second end or are laid on the Mauerlat.
- A special notch (groove) is cut out on the installed supports for the timber or in the rafters. With its use the rafters are tightly installed on the mauerlat beam, and fastened with metal brackets.

- For structural rigidity, struts can be additionally installed from the base of the rack to the middle of the installed side rafter. If this seems not enough, and saving material is not in the foreground, then you can strengthen the overall design with additional racks and contractions (they are indicated in the drawing in Fig. A by translucent lines).
- Further, the middle is calculated on the puff - a headstock will be attached to this place, supporting the ridge connection of the upper hanging subsystem of the rafters.
- The next step is to install ridge rafters, which can be fastened together with different connections - this can be a metal lining or powerful bolts with metal plates or washers.

- After their installation, a headstock is attached to the ridge and the middle of the puff.
- Having completed work on one part of the truss system, you need to make all the rest according to the same principle. The distance between adjacent rafters in such a system should be no more than 900 — 950 mm, but the interval of 600 mm will probably still be optimal - this will give both the necessary rigidity and stability of the structure, and will be convenient for insulation using standard mineral wool mats. True, this makes the structure heavier and requires more materials.

- First, the side parts of the complete system are installed, and then the intermediate ones. Between themselves, they are connected by runs, which are installed between the upper ends of the racks and act as spacers. Thus, a rigid structure of the attic rafters will be obtained, in which the frame for wall cladding will already be ready.
Prices for various types of fasteners for rafters
Fasteners for rafters
Mansard roof waterproofing
When the truss system is built, you can proceed to finishing it and their accompanying materials.
- The first coating to be fixed immediately on top of the rafters will be waterproofing and windproof film. it is attached to the rafters with staples and a stapler, starting from the eaves. Cloths are overlapped by 150 — 200 mm, and then the joints are glued with waterproof tape.
- On top of the waterproofing, a counter-lattice is stuffed onto the rafters, which will more reliably fix the film on the surface and create the necessary ventilation distance between the windproof and roofing material. The counter-lattice is usually made of boards with a width of 100 — 150 mm and 50 thick — 70 mm.

- A crate is fixed perpendicular to the counter-lattice, on which the roofing material will then be laid. The step between the rails must be calculated depending on the type and size of the sheet roofing material, taking into account the overlap required for it.
- If a soft roof is chosen, then plywood sheets are most often fixed to the counter-lattice.
Roofing installation
Roofing material is fixed on the prepared crate or plywood. Its installation usually starts from the roof eaves and runs in order, from one of the edges - depending on the type of roof. Roofing sheets are mounted with an overlap. If a metal profile or metal tile is used for coating, then such material is fixed with special self-tapping screws with elastic gaskets. Fasteners are usually matched in color to the roofing material.

The most difficult thing in covering a mansard sloping roof is the transition from layered side rafters to hanging ridge rafters. There may be certain difficulties in the event that ledges are provided on the roof for roofing over balconies or windows.
In addition, if a chimney pipe enters the roof, it requires a separate opening inside the rafter system and the insulation layer, and on the roof, a reliable waterproofing device around the pipe.
How and what is better to cover the roof, you can find out in detail on our portal, there is a whole section in which you can find answers to many questions, including recommendations for reliable insulation of the attic room.
Prices for popular types of corrugated board
Decking
Video: a detailed video tutorial on building a mansard roof
It should be noted that the work on the construction of any roof, and even more so complex as an attic, is not only responsible, but also quite dangerous, it requires special, increased security measures. If there is no experience in carrying out such construction processes, then it is better to entrust their implementation to professionals or to perform all actions under the supervision of an experienced craftsman, and with the utmost care and accuracy.
Use the entire possible area, give the house originality and significantly reduce heat loss through the roof - these are the tasks that the attic solves. If there is a certain margin of safety at the foundation, in this way it is possible to turn a one-story house into a two-level one. It is also attractive that a do-it-yourself mansard roof can be built even without special building skills. It is important not to make a mistake with the choice of materials and do everything according to the rules.
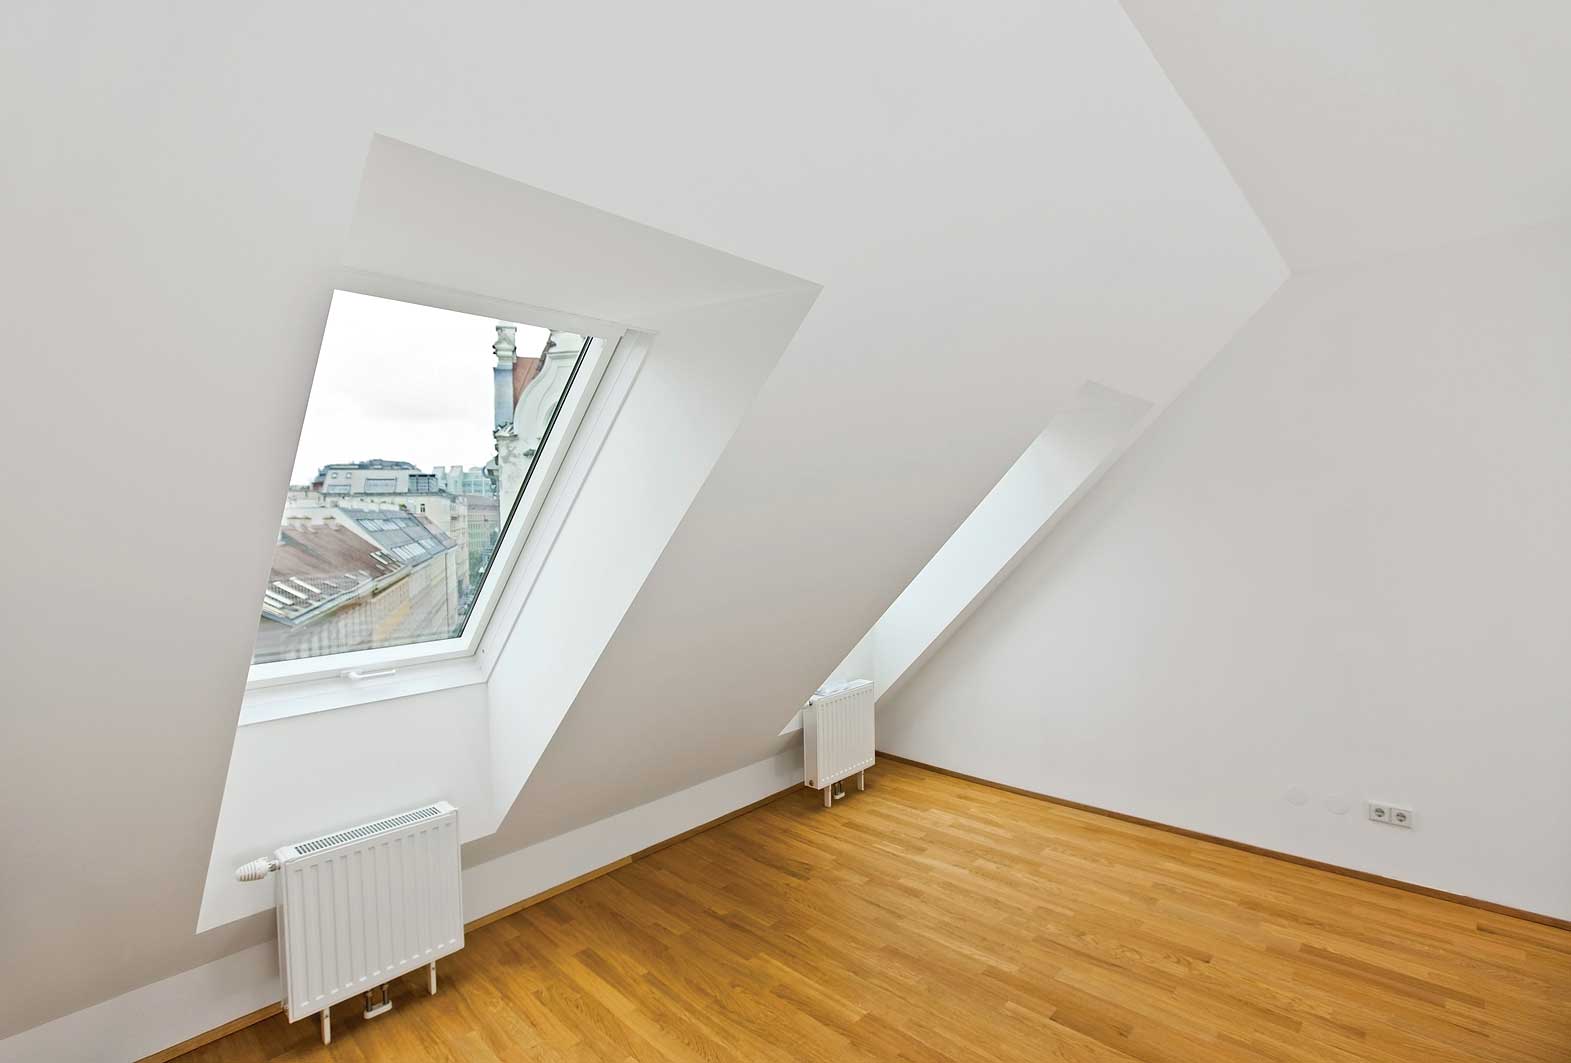
Windows in the usual floor are located in the walls. There are no or almost no walls in the attics. Roofing replaces them. That is why windows are made special: they not only have to let in enough light, but also withstand wind and snow loads, which are much more on the roof than on the walls.
Skylights
When planning an attic, it is worth considering the recommendations of SNiP. They recommend that the window area be at least 10% of the floor area. So if the attic is divided into several rooms, each should have a window.
Of all the methods shown in the photo for arranging skylights with an attic, the inclined installation is the easiest to implement. At the same time, it is necessary to ensure the proper degree of waterproofing of the junction, as well as to use special models with a reinforced frame and reinforced glass - the load on the surface can be significant.
Benefits of a sloped roof window:
- more light, not so sharp borders of light and shadow;
- the roof surface remains flat, its relief is not complicated;
- relatively easy installation.
When planning such a window, it must be remembered that its area increases with an increase in the angle of inclination. At what height is it more convenient to install such a window and how its height in centimeters increases depending on the slope, see the photo.

The steeper the slope relative to the floor, the lower the height of the window should be.
The width of the window frame should be 4-6 cm less than the pitch between the rafters. Then it can be easily installed without disturbing the structure of the frame. If the window is wider, it is necessary to make a reinforced beam above it, calculate the load.
If you need to have a larger window, it is easier to put two narrow ones side by side. They look no worse than one big one, and there will be fewer problems.

When installing a dormer window, the geometry of the roof becomes more complicated: a valley appears on top and on the sides. Because of this, the truss system becomes more complex in both planning and assembly. The complexity of laying roofing also increases. All valleys are the places where leaks are most likely to occur. That is why it is necessary to do everything very carefully. In regions with a lot of snow, it is advisable to install snow retainers above such windows: so that they are not blown away during a sharp descent.

The device of a vertical window-dormer in the mansard roof
The advantage of such a window: near it you can stand in full growth. But they let in less light, the terrain becomes more difficult and the roof becomes more problematic.
A recessed window is usually used if an exit to a balcony is made through it. In other cases, this method of arrangement is not the best option: there is little light, the shadows are very deep, which is tiring for the eye, the geometry also becomes more complicated, although not to the same extent as in the previous version.
The easiest way is to make a window in the end part of the attic. In this case, a reinforced frame or reinforced glass is not needed. Quite simply high-quality glasses are enough. It is this option that can most often be seen in country attics: this is the most inexpensive option, which is easily implemented with your own hands.
truss system
With the independent construction of private houses with an attic, usually a sloping roof is chosen. It allows you to get a room of a significant area, larger than under the gable.

With an equal width of the base (house), the attic room under a sloping roof is larger than under a conventional gable. The truss system is getting more complicated, but a gable roof with an attic under a sloping roof is still more popular.
The design of the sloping mansard roof is such that the overhangs can be lowered quite low, giving the house an interesting look. But the long overhang of the roof is not only a decorative role. They also cover the upper part of the wall from precipitation and divert the bulk of the water away from the foundation. Although when planning, you need to keep in mind that in strong winds they increase the windage. Because of this, it is necessary to use more powerful boards and beams. Therefore, the size of the roof overhang is chosen based on several considerations, the main of which is weather conditions.
Tilt angle
It depends on the roofing material, but most of all - on the region and weather conditions. The classic version is shown in the figure: the lower slopes in relation to the plane of the attic floor are inclined by 60 °, the upper ones by 30 °. Based on these data and the parameters of your building, all lengths can be calculated. Just keep in mind that according to SNiP, the ceiling height in the attic cannot be less than 2 m. Then, by definition, this is an attic. A person will feel comfortable if the ceiling is raised to a height of at least 2.2-2.3 m. Based on this, according to the rules of geometry, calculate the required lengths.

In the classic version, the load from precipitation on the side surfaces may not be taken into account. Precipitation can only be held on the upper part, the angle of inclination of which is less than 45 °.
In general, the slope of the side surfaces usually ranges between 45° and up to 80°. The steeper the slope, the greater the windage it has, this must be taken into account: in regions with strong winds, it is better to make flatter roofs. Then the wind loads will be perceived much better.
Types of rafter systems of broken roofs

The design of a broken mansard roof is one of the options for the truss system (the most common)
For the manufacture of a sloping roof frame with their own hands, pine lumber is most often used, the grade is not lower than 2. The choice of the section of timber and boards depends on the size of the roof, the selected roofing (its weight), wind and snow load in the region, the installation step of the rafters. All these parameters are taken into account in the calculation. The technique is prescribed in SNiP 2.08.01-89 and TCP 45-5.05-146-2009.

One of the options for building a frame with hanging rafters
Above in the figure is a drawing of a frame with hanging rafters. It can only be implemented if the base of the upper triangle is no more than 4.5 meters (in this case, this is the width of the attic room). If more, you will have to make layered rafters, which should rest on the load-bearing wall in the middle (the attic will turn out to be divided into two parts by a row of beams).
Another version of the upper part is shown in the photo below (the picture is clickable). In this case, the side rafters are reinforced with struts. They significantly increase the rigidity of the system.
There is a second way to achieve a similar effect - to set contractions - in the figure they are only outlined with barely visible lines. The length of the side rafter leg is divided into three, contractions are set in these places. They will be needed if the roofing will have a solid weight.

A variant of the rafter system of a sloping roof - with struts that increase the rigidity of the system
For a building that is small in size, the roof frame can be generally simple: at the top there are two hanging rafter legs, a puff, floor beams, racks and side rafters (pictured below).

The device of the truss system of a broken mansard roof for a small house
How to calculate a sloping roof
The mansard sloping roof of a small house (width no more than 6-7 meters) has been built so many times that, based on experience, we can say what materials should be used. Many parameters are dependent on other materials. For example, the installation step of the rafters is tied to the parameters of the insulation. To ensure that there is as little waste as possible during insulation, installation is easier, it is necessary that the distance from one rack to another is slightly less than the width of the insulation (by 20-30 mm). So, if you are going to use mineral wool, its width is 60 cm. Then the racks must be installed so that the clearance between two adjacent ones is 57-58 cm and no more.
The width of the board for the rafter leg is again determined based on the insulation. For the central zone of Russia, the required thickness of basalt wool is 200-250 mm. That's not all. In order for the thermal insulation to dry out, a ventilation gap of 20-30 mm is required (without it, the condensate will gradually rot the wood and render the mineral wool unusable). In total, it turns out that at a minimum the width of the rafter leg should be 230 mm. The thickness of the board is at least 50 mm. This is in regions with mild winds and not very heavy snowfalls. Summing up, for all rafters - ridge and side - a board of 230 * 50 mm is required.
If lumber with such characteristics turns out to be too expensive, it will be possible to make insulation in two directions: part along the rafters, part, stuffing the crate, across. You can lay a minimum of 100 mm of basalt wool, therefore, you can take a standard board 50 * 150 mm and leave it on the ventilation gap of 50 mm, or order a non-standard 130 * 50 mm. See what is more profitable in terms of money.
For racks and beams, it is better to take a beam of at least 80 * 80 mm, better - 100 * 100 mm. Especially in areas with difficult weather conditions - with heavy snowfalls or strong winds.
For a more accurate estimate, ask the experts. This is a long process, consisting of the collection of loads from the roofing material, the structural elements themselves, wind and snow loads. After that, according to a certain formula, the elements are selected. For more information on how the calculation is carried out, see the following video.
Do-it-yourself mansard roof: installation procedure
The Mauerlat device on mansard roofs is no different from the standard version. If or logs, you can use the upper crown as a Mauerlat. It is only pre-treated with impregnation with high protective properties.
If the wall is made of foam blocks, a reinforced monolithic belt is arranged on top of it. On a brick wall or made of shell rock, other similar materials, the device of such a belt is optional. Waterproofing is laid on the wall in two layers, and on top - a timber treated with an antiseptic - 150 * 150 mm or a log. It is fixed with embedded studs.

When assembling all elements, long nails are used - at least 150 mm long. In the most critical places, it is better to connect three or more elements with bolts or studs with double-sided threads. It is desirable to strengthen all joints with steel plates or corners.
First way
The installation of mansard roof rafters is done in two ways. First: parts are assembled on the ground, then they are lifted up in finished form. There, the first to expose the extreme structures that will become the gables. They are placed vertically, fixed. It is often more convenient to fix them with long bars nailed to the wall (temporary). The following assembled structures are inserted into the prepared recesses in the Mauerlat (they are made with the required step). They are set strictly vertically, carefully fixed. If necessary, install additional temporary spacers that fix them in the desired position. Side rails are installed.
How to build a sloping roof in this way, collect nodes, see the video below.
Second way
The second method - the construction of a sloping roof is carried out by sequentially collecting elements right on the spot. This method is more convenient if the structure is large and when assembled it can only be lifted using special equipment (crane).
First, floor beams are laid. Racks and puffs are attached to them, temporary struts are placed to hold them in the vertical direction. Next, the rafters of the upper and side legs are assembled, puffs and jibs are installed.
During installation, the following sequence of actions is observed: first, the extreme elements are installed and set in the desired position, securely fixed. If necessary, use temporary spacers. Between them, a fishing line, rope, lace is stretched, which will serve as a guide for the installation of all subsequent elements. This simple move allows you to get the perfect geometry (do not forget to check the slope angle, verticality or horizontality).
Puffs are attached over the racks - bars, to which the side rafters are then fixed and on which the puff of the upper triangle is installed. Puffs are attached with metal corners. Since the beams are long, they sag. This is further eliminated - after the installation of the upper rafter legs - using vertical beams of a fixed or adjustable height. And temporarily they can be propped up with racks (so as not to pull the entire system).

To make it easier to maintain the desired angle when installing the side rafter legs, templates are made according to which the cuts are made. But since the geometry of DIY buildings is rarely perfect, adjustments may be needed. To check the resulting angle of inclination from several boards, another template is knocked down, which checks the correct installation.
If the standard length of lumber - 6 meters - is not enough, either order the required length (expensive) or increase it. When building up, two boards with a size of at least 0.6 meters (30 cm on each side of the junction) are nailed to the junction. They are nailed on both sides or bolts are used.

A reliable way to build rafters. The length of the "patch" - at least 60 cm
After installing the side rafters, it remains to install the top ones. A template is also made for them, it is first sawn on the ground, and installed at the top.

The top part can be done in different ways. Its structure depends on the width of the base. See the photo below for how to make it.

Since the device of the mansard sloping roof does not provide for the presence of a ridge, a beam is stuffed into the puff in the middle, to which the slopes are attached, fixing the triangle in the required position.

Nodes and their drawings
When installing the truss system, questions may arise regarding the assembly of nodes - the intersection and connection of several structural elements. In the photo you see drawings of key connections.

The second option is to connect the side rafters and the upper triangle. Bolts are used for more secure fastening.

How to make a do-it-yourself fastening of the upper triangle and rafter leg on a mansard roof
The methods for attaching the rafter legs to the Mauerlat or, as in this case, to the side beam are shown in the figure below. To make it easier to mount a heavy element, a stop board (bar) is nailed to the rafter from below, which limits its movement: the board rests against the edge and prevents it from falling lower.

Nowadays, the desire to effectively use the entire area of \u200b\u200bthe house is quite understandable, so many immediately plan to build an attic at the design stage of the house, or in a certain way, as well as remove the roof and attach the attic floor with their own hands to the old house.
In fact, the attic is an attic, the design of which is regulated by the norms of SNiP, which entails alterations not only of the roof, but also changes in the thermal and waterproofing of the upper extension.
In order for the attic to be reliable with your own hands, not to harm the load-bearing walls and foundation of the house, and to serve for a long time, it is necessary to understand the specifics and knowledge of the design features of this type of superstructure. In the article, we will talk about what materials an extension can be made of, as well as about the specifics and nuances of the phased construction of an attic with your own hands.
Do-it-yourself attic floor above the garage
The main types of attics
Do-it-yourself attic construction begins with the choice of the type of extension, the most suitable design for the main building, and the manufacture of the project. For the superstructure, they use: four-pitched, domed, etc. determine the materials, design features of the building and the specifics that are assigned to the completion.
Depending on the particular main building, standard solutions are usually used in the construction of the attic.

1. Gable; 2. Broken gable; 3.Single-level; 4.Multilevel
- Single-level with a gable roof - this is an ordinary attic under a gable roof, converted into an attic. and the construction of such a room is not difficult, but the main drawback is a small internal usable space with a low ceiling.
- Single-level under a broken gable roof has four pitched planes, which are located at different angles. this type is somewhat more expensive and more difficult to design, but the result is a large interior space.
- A single-level attic with the removal of consoles presents some difficulties in design and construction. But the spacious interior and the opportunity to compensate for the complexity of the construction. A feature of the construction of such an attic frame is the displacement and extension of the extension beyond the sides of the house, and in its appearance it is identical to a shed.
- Multi-level completion with mixed roof support. This is a complex attic design, which requires professional calculations and design not only of the room itself, but also. As a rule, such attic floors, with multi-level rooms, are planned together with the construction of the main house, as a one-piece structure.
materials
The house is built on a foundation, which is specially designed for the weight of the building. If the attic floor is planned initially, the load is calculated and laid down at the attic design stage, so the attic floor can be built from any materials: a monolithic attic made of concrete, brick, foam concrete, metal structures, or galvanized logs. But if the superstructure of the attic floor is carried out after the construction of the house, then the weight of the superstructure must be calculated in accordance with the load on the foundation and load-bearing walls. Accordingly, in order for the superstructure not to damage the house, the material should be light, for example, wooden beams, frame-panel structures, in some cases the building is made of aerated concrete, which has good heat and vapor barrier properties, and vulture panels.
Attic device
Attic floor projects involve the use of various materials for the walls, but, in fact, the design of the attic is pitched roofs resting on the walls. Of course, different versions of the extensions of the attic floor have their own characteristics, but in general they consist of the following elements:
- Roof.
- A crate of wooden boards on which the roofing and insulating materials are attached.
- The ridge run is the top of the truss structure.
- - stiffeners, layered or hanging. In the attic, layered rafters are usually made.
- Mauerlat - beams that are laid along the perimeter of the external walls and are connected to the walls with special fasteners. A truss structure is attached to the Mauerlat.
- Diagonal ties (bevels) for the reliability and strength of the attic, with the help of which rafters, longitudinal beams and vertical racks are connected.
- Internal supports give the attic stability, if the attic area is large, they support the ridge run and rafters.
- An insulating layer consisting of waterproofing, sound and vapor barriers. Provides temperature conditions and moisture exchange between the main walls and the roof.
The minimum distance from the floor to the highest point of the ceiling in accordance with SNiP should be 2.5 m. If the height is less, then the room is an attic.

We build an attic with our own hands, the main connecting nodes:
A - ridge knot. B - rafter + screed + rack. B - rafter + ceiling beam G - ceiling beam + rack + strut. D - stand + strut
Construction technology
Attic walls are maximally attracted to the walls of the main building, so it is extremely difficult to achieve comfortable heat transfer. It is very important to choose the right materials for insulation, make ventilation, the entire structure must be erected in accordance with the drawing and calculations, and the wooden parts must be treated with a fire-fighting compound.

Do-it-yourself attic installation, how to properly fix the knots
Rules for the construction of the attic floor
In order for the attic to serve with your own hands for many years, it is necessary to fulfill the conditions that are prescribed in the SNiP standards:
- should be 250 mm or more, it is better to use glued beams. This thickness is due to the ability to lay insulation between the rafters with a thickness of at least 200 mm.
- Heaters should not lose their properties at high humidity, it is best to use foamed polystyrene, which has a small weight and a low heat transfer coefficient. Mineral wool absorbs moisture and breaks down.
- there must be full ventilation, with hoods and vents, so that air circulates freely under the entire roof surface of the attic floor.
- Inside, be sure to arrange a vapor barrier layer.
- A waterproofing layer is laid on the outer side of the rafters, it is recommended to additionally lay a soundproofing layer.
Step-by-step instructions on how to make an attic with your own hands
Do-it-yourself attic construction is fraught with some difficulties, since the superstructure elements are at an angle, the installation of broken slopes and requires compliance with SNiP standards in terms of “Load and impact”.
When making a drawing of the installation floor, it is necessary to accurately calculate the loads, angles of inclination, the permissible weight of the structure, and, in accordance with preliminary calculations, select the appropriate type of attic and materials for construction.
Do-it-yourself attic construction begins with the installation of maurlin along the perimeter of the house, usually a bar with a section of 100 * 100 mm is used for this.
Next, we build a frame for the room. Racks can be from a bar with a cross section equal to the longitudinal beams, possibly from foam concrete or metal. We fix the vertical racks at the corners of the rack structure, and then install the beams between them, with a step of no more than 2 meters, equal to the location of the attic rafters. All parts are attached to metal corners, nail plates or self-tapping screws.

We build the frame of the internal attic room, instead of vertical wooden racks there can be a wall of foam concrete blocks or a metal frame
On top of the rack we tighten with a jumper and fix the structure. With the help of a building cord, follow the geometry of the building.
We attach the lower rafters to the resulting frame. The beam is cut to the estimated length, a groove is made at the base for secure fastening to the Mauerlat, the top of the beam is cut off according to the calculated angle of inclination. Installation of the lower rafters is carried out in place and securely fixed.

Do-it-yourself attic installation, photo of fixing the lower rafters of the room, instead of vertical wooden racks there can be a wall of foam concrete blocks or a metal frame
The next step is the installation of the upper rafters. The difficulty lies in maintaining the angle and centering of the structure as a whole.
Advice: So that the angle of attachment of the rafters does not go astray, first a template is made from two boards that exactly matches the connection of the rafters. The beams are cut to a template on the ground, and then installed on the frame.
Do-it-yourself frame attic, installation of the upper rafter structure

Attic device, construction of lathing for roofing material
The next step is to create an insulating layer. It is recommended to use non-toxic and non-combustible materials, this is especially true if. On the inside of the rafter frame, we lay the vapor barrier, fasten it with brackets. Then, it is important that it fits snugly against the rafters, without gaps. On the heat-insulating layer we mount the crate with a step of 500 mm, which will fix the insulation.

We build an attic with our own hands, installation of roofing material
We lay a waterproofing layer on the crate, which will protect the wooden elements from moisture. The roof is laid on waterproofing.
Do-it-yourself attic construction, video materials clearly demonstrate how to properly install rafters in practice.
This video shows typical mistakes made during the installation of the attic floor.
Features of an attic extension with your own hands to an old house
If it is planned to complete the attic in an old private house or in the country, to equip additional living space, then in this case the issue of dismantling the roof is relevant. Dismantling can be done with your own hands, be sure to follow the safety precautions so that the beams do not fall on your head.
The construction of the attic provides for certain loads on the foundation and walls of the building. It is especially important to correctly distribute the loads on the walls, therefore, before building an attic, the load-bearing wall structures are carefully strengthened.
Important: When designing, the strength of the walls should be taken into account, taking into account the wear and dilapidation of the structure.The overlap of the old house is both the ceiling of the adjacent floor and the floor of the attic, so it is necessary to take into account the movement of warm and wet flows so that condensation does not form in the ceiling, and as a result, rotting and fungi. To avoid problems, it is also necessary to waterproof the floor.
After completing the preparatory procedures, you can begin to join and build the attic floor. During completion, it is important to strictly adhere to the design scheme for erecting walls and. Violation of the project entails not only deviations from, but also improper distribution of the load on the supporting structures can lead to the destruction of the walls and foundation of the house.
The easiest and most reliable way to increase the usable living space in an old house is a do-it-yourself attic. A video on how to build an attic floor in a frame house will help to avoid global mistakes, and will tell you the nuances of how best to make an attic with your own hands. The work performed in accordance with the attic floor construction technology guarantees the reliability and safe operation of the extension.
The attic allows you to significantly expand the useful area of \u200b\u200bthe house. At the same time, the arrangement of the roofing floor can be performed even in an already finished building. At the same time, financial costs will be relatively small, because the main necessary structures will already be present, and you can handle all the necessary measures on your own.
First of all, you must make sure that the base of the house can withstand the additional load from the attic floor. If necessary, the foundation must be strengthened or try to transfer new loads to a separate foundation. At this stage, you may need the help of professionals.

Decide on the design of the attic. The sub-roof floor can have a variety of shapes. At the same time, the interior space of the room is given by the features of the roof structure.

The attic roof must be designed in a special way. You will have to get rid of the old rafters and related materials, replacing them with a new system designed to take into account the upcoming loads, angle of inclination and other important design features.
Thus, the truss structure must be calculated and designed in a separate order, specifically for your attic floor.

The most optimal option for the roof structure for the attic floor is a broken gable roof. A gable roof will exert a much more significant load on the walls compared to a shed system. However, you will not find a more convenient roof option for the attic floor.

At the same time, the broken roof will “eat up” the least amount of free space in the attic compared to all other types of roofs.
It is important that the gable roof has a sufficient number of bearing supports. Usually, for the arrangement of such a roof, layered rafters are used. At the same time, the elements of the truss system must be supported by load-bearing walls that can normally withstand the incoming vertical and horizontal loads.

Before starting construction, decide what area the under-roof floor should have, whether you will insulate it and whether it is necessary to equip heating in the attic.
In accordance with your own preferences, draw up (order, find in open sources) an attic project with sketches, drawings, calculations and explanations.

The design documentation should reflect the following important features of the attic:
- the presence of additional partitions and load-bearing walls;
- number of window openings;
- features of the internal structure of the roof;
- type of roofing material, etc.
After that, calculate the required amount of materials for arranging the attic. It is best to make an attic using the same materials from which the building itself is built (brick, blocks, etc.).

If the attic is planned to be used exclusively for seasonal living, you can make it from more budget materials. Usually in such situations, wood is used. This material goes well with most existing building materials and is perfect for arranging an attic.

Proceed to the arrangement of a wooden frame - the foundation of the roof. Choose suitable places to place the blocks needed for arranging partitions.
First you will need to lay out the exterior and gable walls. Proceed with the arrangement of the roof of the attic only after the construction of the house itself is completed.
To assemble the frame, use a high-quality wooden beam measuring 15x5 cm. In the process of performing each stage of work, be guided by the sketches and drawings you have. It is impossible to explain everything in words alone.

First step
Reinforce the existing structure with slings. To strengthen the runs, use special support blocks in the form of the letter U. Blocks are installed and filled with cement mortar. Such hardening will prevent further cracking of the walls.


Second step
Build the capital gable walls and proceed to the construction of the attic. After installing all the necessary walls, proceed with the installation of the elements of the truss system.

Third step
Install the rafters in accordance with the project documentation and make sure that the installed system is reliable.

First you need to install the runs, and after that fix the rafters. First you need to lay out the stepped wall bevels, and then equip the partitions of the attic floor. Be sure to check the evenness of the arrangement of the elements of the truss system.

Fourth step
Align the bevels of the gable walls with a band saw.

Fifth step
Nail the battens to the rafters for the installation of thermal insulation material. Fix the waterproofing, insulation and vapor barrier, and then stuff another layer of boards on top of the waterproofed thermal insulation.


sixth step
Lay the selected finish on the crate. It is better that the finishing roofing material is as reliable and of high quality as possible, so that the attic is cozy, warm and safe.

After completing the work on the arrangement of the walls and roof of the attic, proceed to the insulation and internal arrangement of the under-roof space.
To insulate the attic, you can use a variety of materials. For example, mineral wool insulation, polystyrene foam, all kinds of blocks, etc. are very well suited to perform such work. One of the most preferred thermal insulation materials is fiberboard. It is on the example of this material that the procedure for warming the attic room will be considered.

In the case of using slabs with a thickness of 1.2 cm, the thermal insulation characteristics of such insulation will be similar to the properties of a wall laid out in brick, or a finish made of boards with a thickness of about 5 cm.
In addition, the plates have good sound insulation performance. Factory treatment with antiseptic preparations makes the material resistant to adverse external factors, and the relatively low price allows almost everyone to buy such plates.

The most suitable material for attic insulation is fiberboard
On the one hand, the plates have a slightly corrugated texture, and on the other they are smooth. To cut the plates, you can use an ordinary sharp knife. The material is not particularly afraid of temperature and humidity changes. At the same time, work on thermal insulation of surfaces using fiberboard will not take much effort and time.
In conclusion, on the smooth side of the fiberboard (smooth is the front one), you can glue the wallpaper or perform another finish at your discretion.
Walls

Traditionally, thermal insulation work begins with wall insulation. It is enough to fix the plates with nails. Previously, duralumin plates should be placed under the caps of the fasteners. Place the nails themselves in a checkerboard pattern.
If the walls are not made of wood, you may need to use other fasteners. Focus on the situation.
For fixing plates to plastered surfaces, you can also use PVA glue or various types of adhesive mastics.

Ceiling
At the stage of ceiling sheathing, try to enlist the support of at least one assistant - the plates are quite large and it is not very convenient to mount them alone.
Sheathing is carried out according to an extremely simple scheme: the plate is carefully applied to the attachment point and fixed using T-supports made of boards, nails and duralumin plates. Wear safety goggles at this stage.

The floor can be insulated using two methods.
In accordance with the first method, first the surface is covered with a double layer of roofing material, after which the fiberboard is fixed on top, and then the finishing floor is installed.
In accordance with the second option, fiberboard boards are nailed to the floor, and carpet is glued on top of them. This cover is very comfortable. For added convenience, it is recommended to impregnate it with a special composition that makes further care of the carpet easier.
Before gluing the carpet, it must be unfolded and kept in the room for 7-10 days. Fiberboard boards are pre-coated with glue. After gluing the fiberboard, you need to additionally press it to the surface with the help of boards and leave to dry for a day.
In conclusion, you will only have to complete a number of works on the internal improvement of the attic. Start from the ceiling.

Ceiling
The best option is the arrangement of a light suspended ceiling. For the construction of such a design, lining is well suited. You can also use hardboard, plywood or other materials suitable for this.
It is more convenient to first make the ceiling in size, and then attach it to the crossbar of the truss truss.
Walls

Nail the crossbars from a quality wooden beam to the rafters. Nail the selected finishing material to the frame. The best option is a wooden lining.
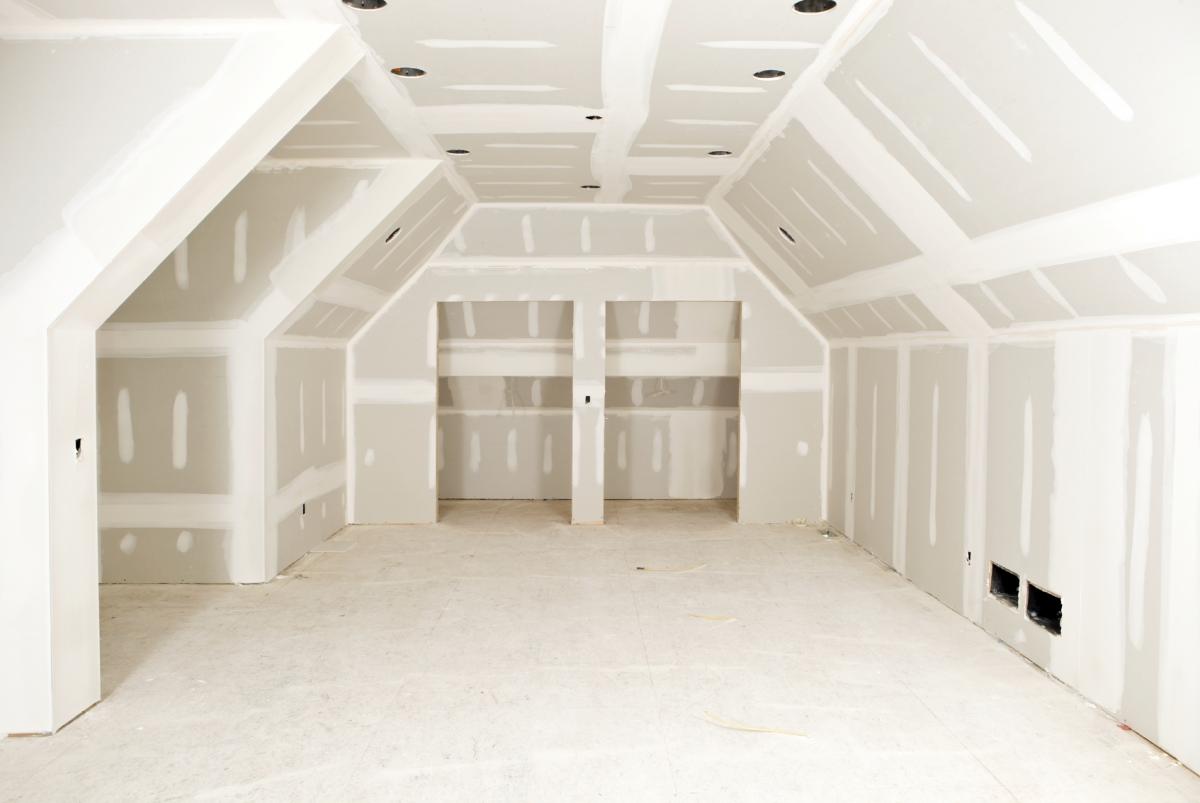
niches
In places where niches are formed (and they will definitely be present due to the peculiarities of the roof structure), you can nail drywall or other suitable material, creating compact cabinets for storing various kinds of accessories.

Depending on the available space on the attic floor, you can equip a bedroom, an office, a children's room. Focus on the specifics of your situation.


Lighting
Consider the arrangement of attic lighting. The best option is to organize local lighting in each corner of the room. So the interior of the attic will be the most expressive.

In matters of furnishing and further arrangement of the under-roof floor, be guided by your needs and possibilities.
Successful work!
Video - Do-it-yourself attic construction
High-quality interior decoration of the attic will turn it into an additional room, not devoid of warmth and comfort.
In our previous articles, we described the possibility of converting an attic into an attic and promised to tell you about the next stage - finishing work. Finishing the attic with your own hands is a completely doable task, especially after you have dealt with the installation of the truss frame and the production of roofing work. The high cost of finishing material in the current realities is no secret to anyone. But, by applying small construction tricks, and doing everything with our own hands, we, of course, can save a lot. Therefore, armed with a set of necessary electric and hand tools, we can get to work. But for starters, it would be nice to think over the whole process, draw up a work plan for yourself and calculate the required amount of consumables.
Floor, walls, ceiling
Let's start with the floor. Having previously taken care of the thermal insulation of the interfloor space with mineral wool, we proceed to installation. We have ready-made logs on which the slabs are laid. You can use DSP board (cement strand board) or OSB (oriented strand board). Such a coating option will allow us to further improvise with the main (final) floor covering: from standard, boring linoleum to everyone, to decorative and rich in choice of colors and textures of the laminate. You can, of course, follow in the grandfather's footsteps and close the floor with a 25-40 mm edged board. It will also be nice, especially if it is pre-treated and then opened with stain and varnish.

 Finishing OSB with plates is considered a universal option.
 To finish the walls, as well as the under-roof space (attic ceiling), all of the above materials are used, but drywall can also be added to them - a material that has proven itself from the best side for ease of processing and installation. All this motley slab and sheet row is fastened without problems with ordinary self-tapping screws. The slabs are cut to size with an electric jigsaw, and the GK sheets with a construction knife. Therefore, there will be no issues with the installation, despite the square of the sewing, which can initially be frightening. It is recommended to pay special attention to the slopes of the roof windows, if any. This is not a flat plane, so you need to be extremely accurate when marking. It does not matter which of the listed materials you use when sewing the attic interior. The main thing is that everything fits correctly, without large gaps and protruding irregularities. All this can subsequently lead to overspending of building mixtures.
Advice!
If, suddenly, as a result of an uneven cut when cutting DSP or OSB boards, you have a gap at the joints (which happens when you do not use a jigsaw for professional use), and it is not possible to use a new sheet, this technical flaw can be filled in the puttying process with a mixture of putty and sawdust.
 The best way to finish attic slopes is plasterboard cladding
 We install windows
The next step, of course, will be the installation of translucent structures. In each attic, their number and configuration, of course, vary. Some generally completely glaze gables, some are limited only to windows, and in some places they put glass door blocks to exit to the balcony. We will not raise the topic of skylights now. You can learn about this from other articles on our website. We will try to describe, in as much detail as possible, the sequence of installation of vertical translucent structures using the example of installing a banal PVC window. First you need to know what the window actually consists of. Its components (standard for all window, door and stained glass translucent structures):
- extruded PVC frame with galvanized metal reinforcement inside;
- double-glazed window (two or three glasses connected in a monolithic, sealed block. Glasses can be of different thicknesses and carry different functional loads);
- plastic glazing beads with rubber seals;
- inserts for double-glazed windows;
- accessories, where provided.
 Skylights are a great source of daylight
 For self-assembly of a translucent structure, in our case, a window, we need the following tools:
- hammer;
- Phillips screwdriver (or screwdriver);
- level.
Putting the window against the wall, remove the glazing beads, prying them with the sharp end of the knife blade and using it as a lever. Carefully remove the glass and plastic inserts. We insert the frame that has become light into the opening, and with the help of the level we set it horizontally and vertically, making the appropriate marks with a pencil. Make sure that the gaps between the frame and the perimeter wall are approximately the same. With a drill for metal (8 mm), we drill the PVC profile (and with it the reinforcement profile) to half. If we have a wooden base, and self-tapping screws are used as fasteners, then the second half with a 6 mm drill. Using a screwdriver or screwdriver, screw the self-tapping screw into the hole until it stops. Make sure that when tightening the self-tapping screw, the frame does not deform. To do this, use wood trimmings as substrates.

 Installation of skylights should be carried out only according to the instructions and with a constant check of the quality of installation
 Advice!
For fasteners in a brick, foam concrete or concrete wall, it is best to use anchor bolts. In this case, the holes are drilled through, taking into account the length and diameter of the anchor.
You can also use mounting plates inserted into the grooves at the ends of the PVC profile. In this case, the profile is not drilled. The plates are attached to the slopes and subsequently closed with decorative inserts with mandatory insulation. We check by level the absence of distortions in the frame and you can install a double-glazed window. We put the plastic inserts back, put the glass on them and fix it with glazing beads. If you do not have a special rubber mallet for such manipulations, you can use a soft wood block and a regular hammer. If the bead is too tight, bend it and insert the ends first and, moving towards the middle, gently put it in place. After the double-glazed window has taken its place, we can start foaming the perimeter. There is no rush in this matter. The foam should fill the gap evenly. After standing (a day, at least), the excess is cut off without problems with a construction knife. It remains only to adjust the fittings (where it is provided). Our translucent structure is installed, and you can do the slopes.

 Proper installation of the roof window will ensure its reliability and durability.
 A few words about wiring
We should probably go back a little and say a few words about electrical wiring separately. Wiring is done immediately before stitching.
Important!
The wires are laid in a corrugation to provide additional security, and only the terminations are brought out.
Holes are cut using a special nozzle on a drill. The wires brought out are twisted into a knot. It is worth noting that any electrical work begins with drawing up a wiring diagram. Only careful planning of the locations of lighting fixtures and power points will save your walls from unnecessary, unnecessary holes.

 Electrical wiring in the attic is a factor of increased danger, because the roof structure mainly consists of wooden, and, therefore, fire hazardous elements
 Well, let's assume that you did an excellent job with the attic sheathing, and wires are already peeking out of the neat holes, waiting in the wings. And the translucent structures are pleasantly pleasing to the eye, along the way protecting from drafts. Time to move on to finishing work. For this we need quite a bit:
- electric drill with a nozzle for kneading mixtures;
- roller;
- spatulas (from small to wide, usually use 3-4 different sizes);
- aluminum corners (for external corners);
- primer;
- putty.
 Seal joints and seams of drywall on walls and ceilings
 On even walls, you can immediately use the finishing putty, after carefully priming the entire surface. Particular attention should be paid to mixing building mixtures. Putty should be brought to the consistency of thick sour cream. To do this, having kneaded it with a mixer once, we leave the mixture for five minutes and only when it is normally soaked, knead it completely. Add water in small doses so that the putty does not turn out to be too liquid and does not “float”. When the mixture is ready, taking a wide spatula (40-50 cm) in one hand, and a narrower spatula in the other, apply the mixture across the entire width of the wide spatula, as if with strokes. Now we take a wide spatula in our working hand and carefully apply a layer of putty to the wall. You should get an even layer 1-2 mm thick. After repeating this manipulation several times, and eventually getting about a square meter of a “closed” area, we moisten the spatula with water and smooth out the resulting irregularities. We strengthen the joints of any material with a tape putty mesh. Don't worry if it doesn't work the first time. It is necessary, as they say, "to fill your hand."
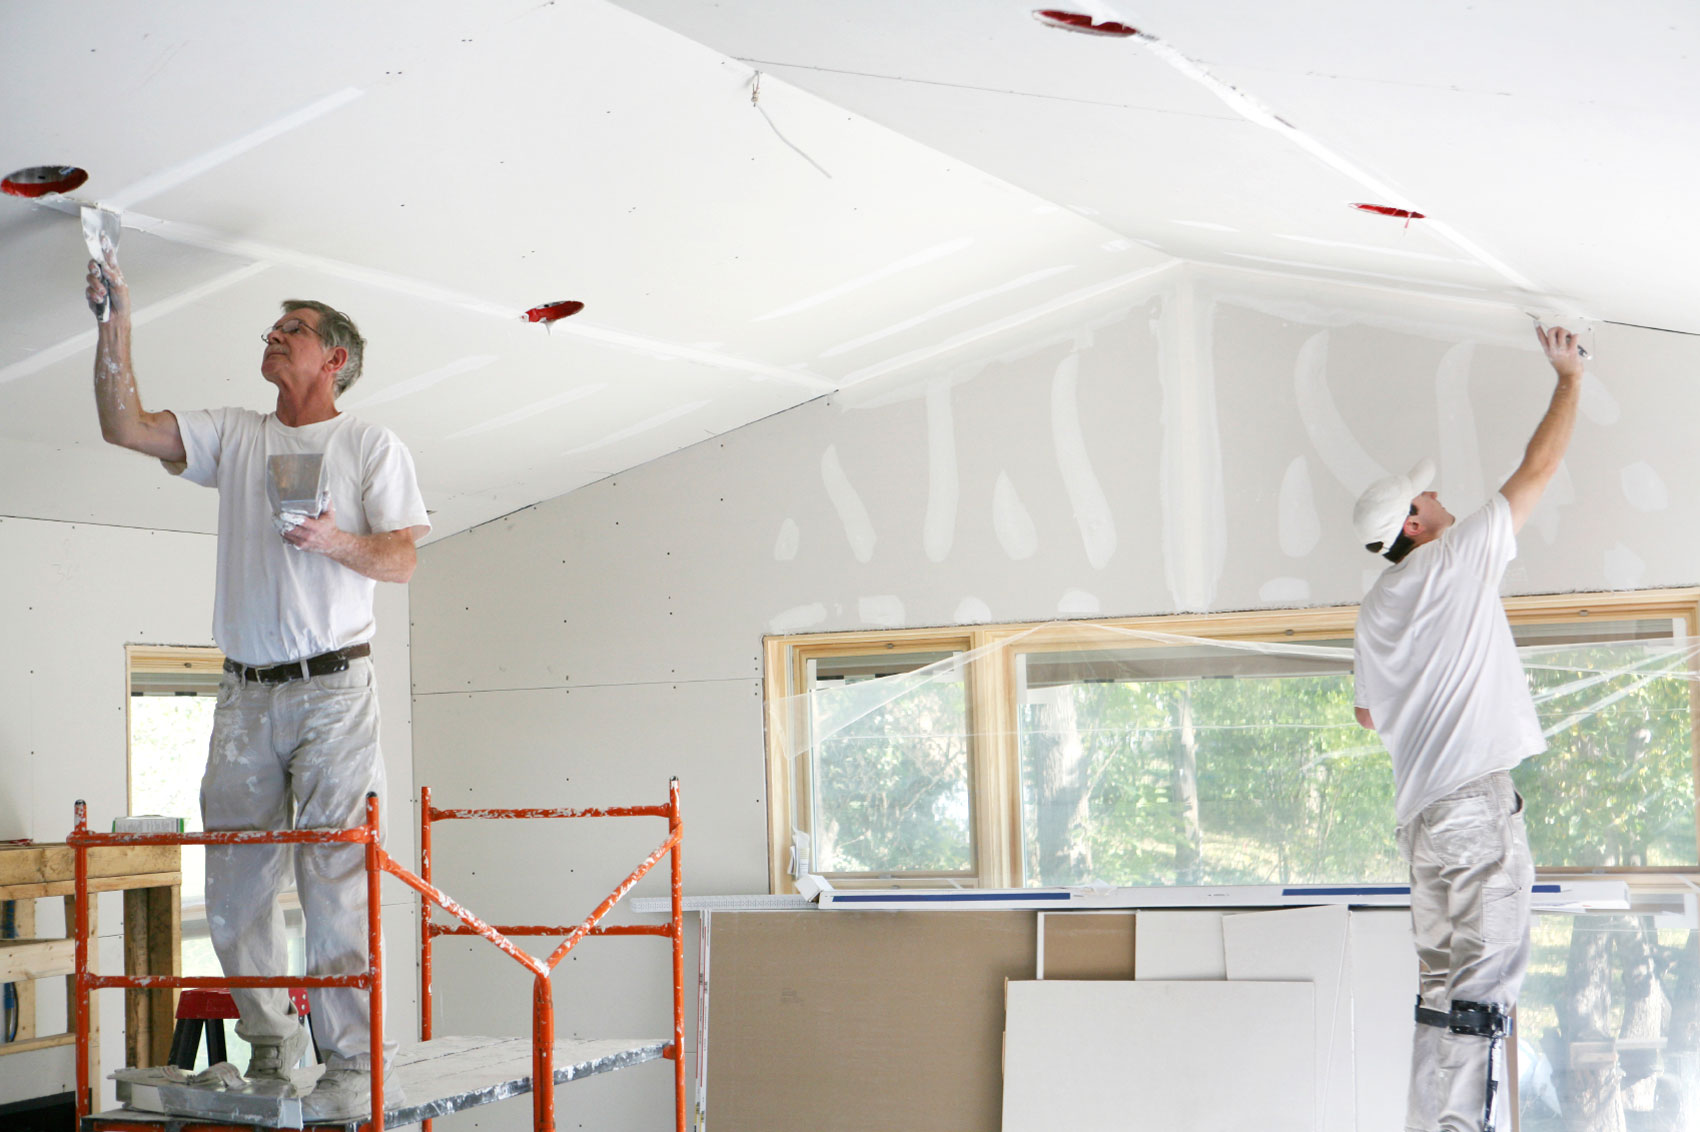 The service life of the attic room depends on the quality of the putty
 Important!
An important nuance is that the spatulas are always clean and in the bucket (or any other vessel) where you prepare the mixture, there is no putty dried from the last batch.
This will lead to the formation of stripes, scratches and other unpleasant "surprises". Therefore, do not be lazy after making each batch, thoroughly wash the container and spatulas. If you still have such defects, do not rush to correct them “raw”. Let the putty dry. After processing the desired place with a sanding grid, and then carefully apply putty with a small spatula. After it dries, you will see that there is no trace of the grooves left. It remains only to walk over this place with a grinding grid again. A flat and smooth surface is guaranteed. On such a surface, you can apply paint, glue wallpaper, ceramic tiles, and, in principle, anything. Finishing a room in the attic or in any other room includes a lot of work, each of which is very important to achieve the final, desired result, and one of them should not be neglected.

 For finishing surfaces, it is recommended to use light colors that scatter light well in all directions.
 Another option is wood trim. By and large, here you can do without sewing with sheets of DSP, OSB and GK. It is enough just to fix the transverse beam between the elements of the truss frame. The size of 50x50 mm is enough. It can be fixed using metal corners with holes for self-tapping screws. Having prepared a similar frame, you can safely proceed to the sheathing. Clapboarding is usually practiced, but other, more interesting options can be found, for example, imitation of a log house. The tree is selected in a completely different way than for load-bearing structures. Here, the more knots, the better.
Important!
With self-preparation of wood, the mandatory stages are grinding and treatment with an antiseptic.

 If you want to organize the design in an eco-style, then the attic wood trim is suitable for you.
 Coating with stains and varnishes, as they say, is a matter of taste. Natural wood has been and remains one of the most sought-after materials for finishing work, especially in country houses. Its natural structure will not leave anyone indifferent, the main thing is to present it correctly.
Has your attic already acquired a residential look? Well, almost residential. Now it's time to tackle the lighting. We install sockets, switches and lamps in the holes prepared in advance. When the backlight is on, the interior decoration of the attic walls will take on a residential and finished look. And, in general, trust your imagination and do everything according to technology. The results will pleasantly surprise you.
 Actions of the lender if the debt is not returned
 Why did Lera Kudryavtseva and Sergey Lazarev break up?
 IQ test result: what do the scores mean?