What you need to know before making a closet in the hallway with your own hands. Sliding wardrobe in the hallway: ideas for design and filling Sliding wardrobe in the hallway with your own hands
The main, and sometimes the only piece of furniture in the hallway is a wardrobe, which often has a closet design. Someone buys a similar product ready for installation, while someone, showing enviable ingenuity, patience and diligence, makes it himself. Home craftsmen who decide how to make a closet in the hallway with their own hands will have to decide on a number of points before starting the assembly: its size, what material it will be made of, how much money they are willing to spend on it, etc.
What should a designer rely on?
When developing a built-in closet for your apartment, its design is worked out in three directions, focusing on:
- on functionality;
- design;
- engineering solution.
It turns out that in order to assemble a do-it-yourself wardrobe in the hallway, you will need knowledge from the field of usability, interior design and furniture designs, as well as the practical skills of a home craftsman.
Functionality
Sliding wardrobes are a common name for furniture with sliding (sliding) doors, they can be installed separately (case version), as well as built into niches or corners (case and frameless options). At the same time, they allow:
- It is optimal to organize living space, often occupying little-used areas or playing the role of zoning partitions.
- It is convenient to place things, guided by the principles of ergonomics, in all spatial directions: from floor to ceiling, completely along the width and depth of the niche. In addition, built-in furniture may have unusual departments for placing communication elements: electrical panels, ventilation ducts, etc.
- Exclude hard-to-reach areas (behind the side and rear walls, top and bottom), in which dirt has accumulated over the years.

Design
Designing an installed furniture assembly, you can adapt it to any, even non-standard interior solutions, for any repair. A variety of modern facade materials allows you to fit a cabinet, for example, in high-tech style or the baroque opposite to it, and decorating the facade with author's drawings, you will get a truly unique design solution. However, often the built-in wardrobe in the hallway has outer surface almost completely covered with mirrors, which visually expand the limited space of a typical hallway, and are also convenient functional elements.
Engineering Solutions
When assembling home-made wardrobes, or purchasing ready-made factory models of furniture, they pay attention to a number of important points:
- design sliding doors- this is the first thing that largely determines the design, functionality, as well as ease of use of the entire product. Today, the system with the lower support roller(single) and upper auxiliary (paired). This arrangement allows most of the mass of the door (reaches 150-180 kg) to be transferred to the lower support, which rolls almost on the floor, while the upper roller remains only the function of vertical support for the sliding canvas.
- Efficient use of interior space. Not only the quantity, purpose, dimensions, placement of compartments are essential, but also the use of target accessories: baskets, pantographs, clothes rails, neckties and others. Sufficient space should be allocated for each product, taking into account the necessary working area for sliding mechanisms.
- Internal lighting, which is not just done in the chosen place, it must comply with increased electrical and fire safety standards. It is recommended to install low-current low-voltage LED lamps or, in extreme cases, 12 V halogen lamps.

How to correctly measure and calculate?
When preparing the design detailing of furniture elements, it is especially necessary to take the measurement stage very responsibly. A suitable niche is often adapted for a built-in closet in the hallway, so an error in its measurements, calculations of the external dimensions of furniture may then require significant alterations, and as a result, unforeseen financial costs.
Features of measuring a niche
Niche being natural architectural element buildings are rarely geometrically perfect. This moment should be carefully examined by displaying the errors of the walls in the drawing, in order to then obtain the dimensions of the “clean” opening. Necessary:
- make sure that there is no general curvature and local sags on the walls, floor and ceiling, applying a rule or an even rail in the longitudinal-transverse directions, as well as crosswise along the planes;
- determine, by measuring the diagonals of the opening, the parallelism of opposite surfaces, and their vertical and horizontal orientation with the usual bubble building level;
- examine the corners of the niche. They often have roundings that will either have to be cut down or taken into account during calculations.
Calculation of overall and nodal dimensions
The development of a built-in furniture project requires the designer to have a certain amount of professional knowledge. It will be quite difficult to make correctly performed calculations yourself, however, if you nevertheless decide to take such a step, you will have to take into account many engineering and practical issues, as well as the features of the source materials, mechanisms, accessories from different manufacturers.

Furniture structures built in the corridor can have a practical depth standard of 60 cm, however, when the hallway is not wide enough, a narrow size of 40-45 cm is chosen. The depth of the product is essential if you plan to use hangers hung on a longitudinal clothes bar. If the project includes a pantograph or other mechanisms for transverse hanging of hangers, then it is convenient to use them at any depth of compartments.
When calculating a closet in the corridor for do-it-yourself assembly, its height is determined based on the planned filling, given that a person of average height can reach things at a height of 2.1 m. However, structures are often designed that occupy all the space up to the ceiling. For example, you can supplement a home-made wardrobe by assembling mezzanines on top with your own hands. Thus, the functionality and capacity of the entire installation is increased, and dust pockets are eliminated.
The width of furniture in a niche is usually chosen according to the maximum possible size. If the product is case-based, standing apart, then it all depends on personal desires or capabilities. At the same time, they take into account that the closet implies sliding doors, so their width should be such that there is free access to the interior space. The minimum leaf width is 50 cm (if it is less, then the door warps when moving), the maximum is 90 cm (with a larger width, the door turns heavy, the load on the guides increases, and when opened, there are impacts on the side walls).

Assembly materials
The material for a cabinet in a niche can be chipboard, MDF, wood, glass, laminated panels. If we choose chipboard, then we need to pay attention to the following point. Only material of medium or high density, type E 1 or E 0.5 (low formaldehyde content) should be used. MDF can also serve as an analogue of medium-density chipboard, moreover, this material is more environmentally friendly. The coating of laminated chipboard and MDF is represented by a wide range of colors and textures, so it can be matched to the most sophisticated requests.
After completing the detailed study of the project, you can order the cutting of the material at the selected specialized enterprise. You will need to provide a full-fledged sketch with the dimensions of the parts to the sawing shop (it will be difficult to redo the parts due to an error in the calculations), also indicating the type of plates, edges, glass and other parts, in accordance with the factory catalog marking.
Assembly activities
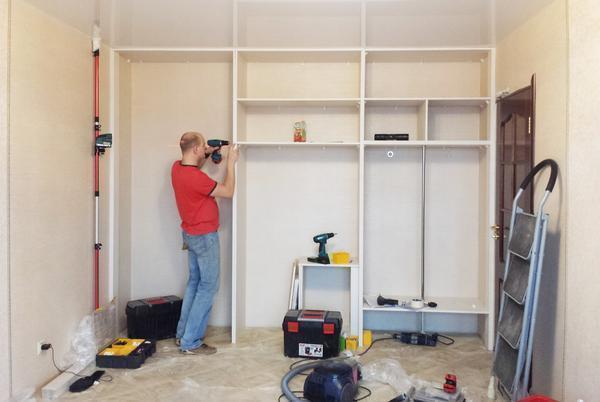
Self-assembly activities should be considered if there is a willingness to devote several days to them. How to make a closet in the hallway with your own hands, consider the example of a cabinet product with three doors. The width of the doors is 60 cm, the width of the shelves in the amount of 4 pieces is 57 cm, the mezzanine with 5 compartments is 57 cm wide, the shoe shelves are 2 pieces, of the same width. Assembly height - 240 cm.

- Assembly tools:
- 4 mm hex key for confirmations (Euro screws);
- hammer;
- Phillips screwdrivers No. 1 and No. 2;
- tape measure 3-5 m;
- building level;
- screwdriver or drill;
- drills 2.5, 5, 7 mm.
- Foundation preparation.
First, prepare the base by securing the front and back supports with confirmations. To do this, through holes (under the thickening of the confirmation) are drilled 7 mm each with a countersink for the head, and 5 mm each for the screw part of the euro screw.
- Installation of partitions and shelves.
After the base is ready, put it vertically on the long side. We also fix the inner and side vertical partitions to it with confirmations. We fasten the shelves with the top cover, but do not tighten them until they stop. Since the section for outerwear is large, it is necessary to fix additional stiffeners inside it on the back of the cabinet between the side wall and the partition.
We turn the structure over, resting completely on the base, we check with the building level that it is installed without slopes. At this stage, you may need an assistant.

- Back wall
We check the diagonals: lower left corner and upper right, upper left corner and lower right. If the distances are the same, we wrap all the non-twisted confirmations all the way and fasten back wall. For it, fiberboard sheets are usually used, perfect option for a three-section cabinet - these are three sheets of fiberboard. We nail them with small carnations, you should not rush, because if you miss, you can damage the edges of the shelves or partitions. Joints are additionally nailed with special spider brackets.
- Installation of door guides.
We fasten the lower rail onto the self-tapping screws in a checkerboard pattern, deepening them so that the door rollers subsequently do not “stumble” on the fastener caps. Holes for self-tapping screws must be prepared with a 2.5 mm drill. The distance from the rail to the edge of the base must be 15 mm. Next, we fix the upper rail to the cover in the same way. 
- Rods for clothes and accessories.
We prepare blind holes of 2.5 mm on the walls. The distance from the top cover to the center of the rod must match on both sides. We fix the base of the bar under the outer clothing with self-tapping screws on the left side, insert the bar with the base put on on the right, wrap the fasteners on the right side (for a solid bar) or fasten it to the rack.
We mark and fasten accessories with self-tapping screws.
- Hanging doors.
First, the side doors are hung, then the central door. For hanging, we wind the upper part of the sash into the far groove of the upper guide, then, pressing it up, wind it lower part into the far groove of the lower rail. Similarly, we hang the front sash in the near grooves of the guides.
The final stage is the installation of plugs in the color of the cabinet into the heads of euro screws and gluing self-adhesive seals to the edges of the doors. The seal will protect the contents of the cabinet from dust, as well as from impacts that destroy the structure of the doors against the side walls or against each other.
- How to make a mezzanine in the hallway with your own hands for a closet?
There are two options. The first is to make a built-in wardrobe combined with a mezzanine. It is assembled according to the same scheme as without it, only in this case the mezzanine cover will be the place of attachment of the upper guide of the sliding door. The second, when the mezzanine is a separate unit, installed already assembled on a mounted wardrobe.

Conclusion
The article describes the main points that those who want to build their own unique wardrobe model with sliding doors will have to face. Manufacture and assembly of furniture, even experienced craftsmen does not always go smoothly, so home master you will have to show maximum attention and responsibility at all stages from design to assembly of the wardrobe.
The hallway will be inferior if it does not have a good spacious closet. It is not necessary to buy it at all, since the manufacturing process is quite simple.
Spacious closet in the hallway niche
The advantages of this option:
- you can choose any project, most suitable hallway by style, parameters;
- designers for development individual project don't have to pay;
- material costs are minimal.
The main thing is that the furniture in the hallway should be roomy, compact, neat, not pretentious.
Details to consider when designing.
- must be exact dimensions;
- the presence of a crossbar to accommodate the hangers;
- hooks for clothes for every day;
- one or more shelves for hats;
- cabinet for storing shoes.
- mirror;
- small drawers for small things (gloves, scarves, etc.).

Furniture fittings for the wardrobe in the hallway
To assemble a wardrobe in the hallway with your own hands, the following tools and accessories are prepared in advance:
- guides for installing boxes;
- tires, if "coupe" is conceived with sliding system;
- hinges and handles for doors;
- clothes hooks;
- the number of nails, screws, self-tapping screws calculated in accordance with the project;
- necessary and wooden fastener: confirmations, dowels for furniture assembly;
- furniture corners (metal, plastic) and plugs;
- you can not do without a standard set of tools (screwdriver, drill, electric jigsaw, saws for wood, a key for furniture confirmations, a mallet, clamps, a square and a building level).

DIY cabinet assembly tool
It is better to take inexpensive materials that are easy to process. For example, even experienced manufacturers will not undertake to make furniture from solid wood.
- Chipboard is the most acceptable option for a future DIY product. This material is easy to cut, process. The building material weighs a little, so it does not need reinforced fasteners or fittings. An important fact is the low cost.

Chipboard cabinet with mirrored door
- Plywood is a light, durable and denser material that can be used to make curly details, as well as welt patterns.

Spacious eco-friendly plywood wardrobe
- MDF can be subjected to various types of processing (painting, tinting, staining, etc.). It is less durable than plywood.

Sliding wardrobe and cabinet made of MDF in the hallway
- Fiberboard must be purchased for the back walls of the elements.

Fiberboard for the back wall of the cabinet in the hallway
- Wooden beam for frame construction.

Wooden beam for the frame of a homemade cabinet
- Edged boards (usually from pine).

Edged board (pine)
- Drywall for interior space equipment with built-in niches.

Homemade drywall wardrobe in the hallway
The most responsible approach is to take measurements. If a miscalculation is allowed, all subsequent work will be difficult or nothing will work out at all. There are various ready-made options with suitable sizes. If the finished drawings are not suitable, and the drawing skills are weak, you need to attract a specialist for this stage who will think over the project with the right size. Cutting materials and edging the end parts is better in a store that sells building material. Store services are inexpensive, but it saves a lot of time.
Assembling the wardrobe
This model belongs to the built-in ones, it is easier to manufacture, since the parts do not need to be calculated and cut out. The complexity of this option is that it is necessary to take into account the features of walls and floors.
The ideal solution for such furniture would be a niche with a sliding system, equipped with several shelves, a crossbar for hangers. The installation of the sashes in this case is the same as for interior doors(involved wall and floor).
Very often, a closet is made in the corner of the room. This model does not have one side and back wall (and in some cases there is no floor and ceiling).
The base consists of wooden frame, which consists of a pair of frames (front and side), assembled on self-tapping screws or nails. If the project provides for the arrangement of shelves and partitions, cross rails must be fixed to the frames in the designated places.
Instruction
Mark the walls, floor, ceiling in places where the frame will be installed, drill holes for the fasteners. It is recommended to mark the places of the paper clip as well.

We make markings for shelves, install corners
Fasten the front frame to the wall and ceiling with dowels. Check its verticality using a level.

We lay and fasten the shelves on the corners, install the vertical panel to the shelves inside the cabinet
Install the side frame.
In the resulting niche, wooden slats are attached to the walls, designed for shelves (cut shelves from plywood or chipboard). You can not fix the shelves by laying them on the slats or fix them with nails.

On top of our construction, we lay a horizontal shelf according to the level
The side is sheathed with drywall or laminated chipboard. Drywall is pasted over or painted. The side part, in which the crossbar with hangers will be located, must be strong (chipboard, plywood, but not drywall).

We prepare panels for the front side of the cabinet

Attaching the bottom and top panels
The final stage is the installation of sliding doors. Top and bottom rails are mounted respectively on the ceiling and on the floor.

Installing door rails
Here it is very important to observe the exact dimensions. First, they try to install the layout of the future door. Take any part whose height is the same as that of the door and install it inside the top rail. Check the verticality value and mark the area where the lower guide will be attached. The door must first be inserted by slightly pressing on the upper rollers, and then into the lower tire. To correct the position door leaf adjusting screws are used. Right installed door moves smoothly and unhindered.

We insert the doors into the guides, snap the latches and adjust the mechanisms in the roller systems
The above example is suitable for a simple design small size consisting of two halves. With a good hallway area, it is possible to manufacture a more spacious model. Then the frame of the bars will not work. It is better to make a base from chipboard, and “fasten” its elements with the help of a common floor and ceiling. This method will allow you to place in a niche, in addition to shelves and a bar for hangers, also boxes for small items and other details.
Such a product will be assembled as a designer for dowels and confirmations. For this fitting, you must first drill holes. All this must be done very carefully and patiently. All fasteners for corners are kept in a clamp for a day.

Built-in two-door wardrobe in the hallway
Corner cabinet assembly
It will be easy to do it yourself corner module. For stability, modules are often made of durable solid materials (chipboard, plywood). These products come in several forms:
- triangle;
- L-shaped;
- trapeze;
- five-walled.

Basic configurations of corner cabinets
The most suitable for the hallway is five-walled.

Built-in five-wall corner cabinet

Detailed assembly diagram of the corner cabinet


Instructions for self-assembly of a corner cabinet
Shoe cabinet assembly

Convenient do-it-yourself shoe cabinet
This is the easiest process, because everything that is needed in the work is sold by the building materials store.

The design includes: an outer frame, several shelves with partitions. The width of the structure depends on maximum size shoes, and height - from the number of shelves.

Addition of facades and clearances of cabinets for shoes
A good solution would be to combine a shoe cabinet with dresser elements. Or place it in a closet or corner wardrobe, which have open facades.
There is a lot of information on the Internet about how to make a closet in the hallway with your own hands. Therefore, by examining all the available data, the most suitable model can be successfully constructed.
Video: Wardrobe in the hallway, do it yourself
Sliding wardrobe is very popular because of its versatility and ability to save space. In such furniture, you can store things both in a folded and free position on a coat hanger. This thing can be made not only useful, but also beautiful. Of course, it can be bought for a lot of money. We offer a profitable option - to make a wardrobe in the hallway with your own hands. So you kill two birds with one stone - free up space and make exactly the dressing room that you have been dreaming of for so long. Before you make a built-in wardrobe in the hallway with your own hands, you need to decide on some nuances: determine the location, select the configuration and material, and then make the wardrobe according to our instructions. Let's get started.
Installation method
Depending on the principle of installation of such furniture, there are such varieties of it.
Installation in a niche of a room
Considered the most economical option requiring some free time and effort from you. In this case, the niche serves as a ready-made base for the wardrobe, in which shelves, doors and fittings must be built in. The most important thing here is that the lid, bottom, back and side walls will already be available to you.
Important! Such a cabinet will perfectly fit into the interior of a bedroom or hallway, which have a technological niche in their space.
Installation along a blank wall
This option has similarities, but differs in that the niche is replaced by a wide blank wall. A cabinet installed along the wall has the right to exist in small apartments, where part of the living room needs to be made a miniature dressing room, thereby saving space for other interior items.

Corner installation
This arrangement implies the manufacture of a structure according to a specific sketch, which is fully consistent with the installation site of the product. Here are collected elements of cabinet furniture: top cover, walls and bottom.
Important! Most often, a corner cabinet is installed in the hallway or in the living room with a blank wall adjacent to the doorway.
Installation in the pantry
Often this building can be found in apartment building. This is a very profitable option for one reason: all the contents of the cabinet are hidden from prying eyes and does not take usable area the entire room. To make a similar design, you will need to build shelves and a retractable door.
Location
One of the advantages of a sliding wardrobe is that it can be installed in any part of the apartment. Here are the most popular options.
Hallway
Most often, it is advisable to store outerwear in corridor cabinets. That is why in the manufacture of the structure it is necessary to take into account the location of at least one section with a horizontal pipe.
- It is better to make a closet with two main sections - for seasonal clothes and clothes for other seasons.
- The next compartment should be designed for small items - gloves, bags and umbrellas.
- But shoes should be stored in the lower compartment of the closet.
Important! It is advisable to make all compartments closed to hide the contents from prying eyes. At least one part of the structure must be equipped with a large external mirror, allowing you to see yourself in full growth.
Living room
The purpose of the wardrobe in the living room is to store light clothes, dishes, household appliances, documents. That is why it is necessary to build a structure with a variety of configurations of niches and shelves. Accessories for such a cabinet should be made with the function of easy access to everything you need.
Important! Sometimes the central part of such a structure is left open, and the side shelves serve as a stand for a TV and other multimedia equipment. In this case, the installation of a full-length mirror on the front panel of the wardrobe remains relevant.
Children's room
A wardrobe for a children's room should be multifunctional - it should store not only clothes, but also books, toys, and other necessary things for a child. For such a design, it would be advisable to make a large number of open sections, which will be at an accessible level for taking one or another item.
Base materials
To make a wardrobe in the hallway or another room with your own hands, use different materials. It all depends on the goals and financial capabilities, the design of the room.

Laminated chipboard, fiberboard, MDF
These materials are suitable for the manufacture of any cabinet furniture:
- They are considered universal, practical, durable, resistant to external factors (sun, heat, moisture), easy to process.
- They are issued in the form of shields. different sizes, which allows significant material savings.
- The modern market presents various color scheme and a variety of imitations, with which you can build a wardrobe with your own hands for the interior of any room.
Important! The most suitable laminated chipboard are 16 mm thick boards of different densities.
Wood
Such raw materials are not very suitable for the manufacture of a wardrobe due to the fact that this material is more difficult to process, it easily absorbs moisture. The situation can be corrected by applying a special protective solution and stain. So you can increase the moisture resistance and visual appeal of your new product several times.
Drywall
Of course, it can be used as a raw material for built-in wardrobes, but it should be noted that this material is fragile. That is why it is customary to combine drywall with wide metal profiles.
Plastic
It is quite easy to work with it: it is easy to process, you can assemble the structure using self-tapping screws. The only negative is the low resistance to external damage and the short life of the product.
Internal organization
The placement process is a rather responsible, but solvable task. The internal contents of the closet determines its content. The main thing here is to follow three rules:
- Fold dry clothes along the central and side shelves.
- Necessary and small things - to place before your eyes.
- Valuable documents - hide in the top drawers.
- Raw outerwear - put aside the structure.
Important! As you already understood, the period of durability of the cabinet depends on the competent installation of the internal sections. So, for example, a compartment for the upper casual wear it is not advisable to place it in the center of the wardrobe, as dampness and moisture from it will spread to all shelves. It is advisable to hang walking clothes on the side of the structure, where moisture will gradually come out.
Door device
Doors can be put on different fasteners. Here are the most popular options for making a wardrobe in the hallway or bedroom with your own hands:
- Top rail. Not too common for the production of wardrobes, despite the fact that the main weight of the canvas is borne by the ceiling. This is due to the fact that the door can easily fall into the cabinet, so the bottom of the structure must be supplemented with one guide.
- Monorail. In this case, all guides with rollers are installed on each door. Such a mechanism is attached to the ceiling with several rails, and the bottom of the structure cannot do without one long rail in the center of the cabinet.
- Bottom rail. This option is currently very popular due to its ease of use and affordable pricing. The cabinet doors will not fall out of the installed rails and collide when in contact with each other.
Important! Pay attention to the choice of rollers for guides, since it is on them that the load of the entire structure will fall.
How to make your own closet in the bedroom?
The whole procedure for making a wardrobe with your own hands looks like this:
- Determination of the place, nature and degree of filling.
- Designing doors with a specific suspension method.
- Preparation of the room (niche) for the installation of the structure.
- Measuring work.
- Drawing up a drawing.
- Purchase of material and accessories.
- Cutting blanks.
- Product assembly.
- Installation of interior lighting (if available).
- External design.
Tools and materials
In order to make a built-in wardrobe with your own hands, you need to prepare in advance the following list of tools and materials:
- Building level.
- Building corner.
- Hammer of two types (normal and rubber).
- Screwdriver with a set of different screwdrivers.
- Hex key.
- Hammer drill or electric drill
- Roulette.
- Sandpaper of different grits.
- Simple pencil.
- Hacksaw for metal.
- Electric jigsaw.
- Construction stapler.
- Finishing material for the manufacture of walls and cabinet compartments.
- Dowels.
- Confirmants.
- Undershelf.
- Melamine edge.
- Self-tapping screws.
- Bar for clothes on hangers.
- Rod holders.
- Hardboard (for a free-standing structure).
- Nails.
- Construction staples.
- Furniture corners.
- Guide profiles (upper and lower).
- Internal filling for sliding doors.
- Horizontal and vertical profiles for sliding door corners.
- High quality rollers.
- buffer tape.
- Stoppers.
Important! Before buying necessary materials and tools, look at the sketch finished wardrobe again so as not to forget anything.

Preparatory work:
- We collect all the pieces. We cut the metal that we took for the body of the wardrobe. Certainly, this work you can do it yourself with a jigsaw, but only experienced builders should choose this option. Better contact furniture shop, provide your blanks and a diagram of the future cabinet so that specialists can make samples according to an individual sketch.
- We cut profiles, doors and rails with a miter saw or a hacksaw.
- We grind the ends sandpaper coarse and then fine grit to make the surface of the material as smooth as possible.
- We apply a melamine edge on the ends of the shelves and walls of our design. This work will not take you much time using a regular iron and a construction knife.
- We apply the edge to the butt and iron it. Under the influence of high temperature, the glue quickly melts and then hardens. It is this interaction that ensures good adhesion of the elements.
- We cut off the protruding edges with a construction knife. We grind the cut points with sandpaper.
- Since we are building a built-in wardrobe, we put the walls of this room in order to install it. We clean them from the old coating (wallpaper, paint, and so on), and then cover the surface with a PVA water-polymer solution in 3 layers. Do not forget the fact that each layer needs at least a day to dry. After all the procedures done, we cover the walls with paint or glue wallpaper to choose from.
Assembly:
- We assemble the outer walls of our future structure in a horizontal position. We fasten them to the lid and bottom with the help of corners or confirmations.
Important! To perform such work, we use clamps and a square so that the walls become perpendicular to each other. But the dowels, deepened in PVA glue, will add reliability of fastening.
- We attach the legs to the bottom of the product with self-tapping screws. We install the back wall (if one is available) with a stapler, screws or nails.
- Now we check the compliance with the size of the wardrobe at the location of the niche. We carry out this procedure with a building level, which will show the correct installation of the product relative to the vertical and horizontal axes.
- We assemble partitions, compartments and shelves with already installed corners. If the cabinet does not have side walls, we attach the shelves to the walls of the existing niche using metal corners. We perform similar manipulations with vertical partitions, only now we fasten the parts to the ceiling and floor.
- We install accessories with self-tapping screws.
- We install rails (upper and lower) for fastening sliding doors, which we hang after installation.
So you learned how to make a wardrobe with your own hands. Yes, it is not very easy to do this, but it is quite possible. The most important thing is that you have received new multifunctional furniture, the design of which includes all the wishes of its happy owner!
The built-in wardrobe is very convenient to use, and therefore is very popular. The built-in closet in the hallway or other room can be seen in the photo on our website. They save space, as they fit even in small spaces. This is explained by modern doors for the built-in wardrobe are shifted to the side, and therefore do not take up free space. On sale there are models with a built-in TV, which are convenient and functional. You can see incredible products with TV, photos can easily be found here.
Drawing of a direct wardrobe
A cabinet built into a niche can be profitably purchased or assembled by yourself. If after viewing the photo, you realized that the built-in closet is more suitable for you, carefully study the description below to understand how to proceed in order to obtain the desired result.
To date, there are several types of products of this type. This:
- direct sliding wardrobe in the living room - classic products, whose facades are concise and versatile in their design. They are the easiest to make with your own hands to equip any room. Coupe in classical style goes in a straight line. The problem is that it is difficult to give such products an original look, you can try to work only with doors, equipping them with a mirror or adding colors to their design. It is better to look at the built-in wardrobes in the hallways in the photo to understand whether such a thing fits into your interior;
- built-in corner cabinet. The main advantage is that the corner wardrobe fits well into a relatively small space. A compartment in a small hallway is complex shape, because of which it is more expensive to manufacture corner cabinets. We calculate the costs and understand whether we can afford triangular built-in wardrobes or cabinet models;
- radius models are becoming more and more popular, as their design is distinguished by style and originality. A complex system of doors functioning is provided, which significantly complicates the process of self-manufacturing.
Straight cabinet Corner cabinet Radius cabinet
Which cabinet to choose in the end depends only on your preferences, capabilities and the availability of free space. If you are a novice craftsman or craftswoman, it is better to give preference to built-in or cabinet furniture in the corridor, whose facades run in a straight line. Even small hallway suitable for installation of a built-in wardrobe.
Features of the choice of material
The process of creating a built-in wardrobe according to individual sizes and its design depends on the right choice. Most often, to make facades, options such as wood and lining are used. The first type is considered traditional and prestigious.
However, wood is not suitable for a built-in wardrobe, as it can warp due to high humidity.
If this does not frighten the master, then he should choose a straight-layer material without any flaws, well-aged and impregnated with a special substance, for example, heated drying oil or a special emulsion. Lining and MDF can be used without additional processing, however, there is another restriction regarding the frames of the door leaves. They should be assembled on the basis of wood parts, while observing the conditions and rules that were described above.
Do not forget that PVA can be used to connect the lining panels, since the grooves and tongues provide a fairly reliable fastening.
Also, drywall can be used to create a closet in the hallway. It is quite easy to work with it, in addition, it provides the master with a lot of new opportunities. Even amateurs, not professionals, can make very good compartment lockers based on it. However, the material is characterized by a large mass and fragility, therefore it is more suitable for decoration. Laminate, MDF, fiberboard are the most suitable varieties. To create a built-in or conventional wardrobe based on them is the simplest task, the implementation of which is accompanied by minimal time and effort.
These options have all the same advantages as wood, however, they remain resistant to gradient and moisture changes.
Cabinet with photo printing
Modern stores offer doors with photo printing. They will make the facades more stylish and presentable, and allow many ideas to be realized. It is enough to choose the perfect sample. By making such a model, you will transform the entrance hall in Khrushchev.
How to quickly make a built-in wardrobe?
A classic-style coupe is quite simple to make. Requires a minimum of costs that can be quickly calculated. Such wardrobes include three walls, a bottom, a tire. Step by step manufacturing compartment in the hall includes several stages. This:
- Acquisition of material at the preliminary stage. The options presented above are suitable for making a built-in wardrobe in the hallway with your own hands. Consider the design and operating conditions to make right choice. Calculating the parameters will allow you to determine how much material is needed for work. It will be easier to create a built-in wardrobe if you use a calculator.
- Internal filling. Here you need to follow a valuable rule: necessary and small things should be located right in front of your eyes, and valuable things should be in boxes. It is undesirable to install a section for outerwear in the center of the structure, since the moisture from it will disperse to the sides. It is better to embed it from the side so that the moisture naturally seeps out.
- Do-it-yourself door project, which are considered the most important elements designs. First you need to decide how many wings will be, what width the doors should have, what suspension design to choose. The width of the door should be such that the overlap does not exceed 50-70 cm. Do not experiment with dimensions, otherwise it may be difficult to use the door.
- Choice of suspension method. To date, there are several options: two-rail with a bottom support, two-rail with a support located on top, and a monorail.
- The choice of the layout of the shelves, the calculation of their length and depth. For the built-in wardrobe, the same suspension options are not suitable as for cabinet types of furniture. It would be more rational to build a solid frame into a niche, however, this is a rather complicated and costly procedure. It is easier to use a special adjustable suspension system. Its use greatly facilitates the task of the master, who plans to make a built-in wardrobe with his own hands. If the calculation is too difficult, then he should choose a ready-made system.
- Preparatory work carried out on the niche.
- Measuring dimensions and creating a diagram. Here, the basic parameters are calculated, on the basis of which the drawings of a wardrobe equipped with small cabinets are made. If you are planning to make a coupe, the dimensions should be listed under each item. It is very important to correctly calculate, since the repair of built-in wardrobes is a very difficult task.
- Acquisition of fittings and materials suitable for the product to be installed. This will give the integrated products the desired design.
- Calculation and production of blanks.
- Assembling a built-in wardrobe in the hallway in Khrushchev. If you have any problems doing this job, you can always watch a tutorial video or a suitable picture, which clearly shows how the individual parts are installed and performed complete installation built-in wardrobe. Probably, after that there will be no questions left about how to assemble a built-in wardrobe with your own hands.
- Installation of structural elements provided for by the plan.
Making a closet in a full-wall room or repairing an old interior element at home is simple work, the main thing is that the calculation was done correctly. Following step by step instructions, you can easily cope with the task. The finished design can be supplemented with mirrors, patterns or drawings. The mirror double-leaf version in the hallway will look very presentable. In the living room it is wiser to put a wardrobe with a built-in computer desk whose photos can be found on our website.

Wardrobe with computer desk
Examples and ideas various kinds jewelry is easy to find here. The site is filled with interesting ideas that can be implemented. You can upgrade the device and independently make a wardrobe with a built-in TV. designer models can not be compared with a built-in wardrobe, created according to individual sizes.
Today, more and more owners are paying attention modern design premises. It is extremely important that all rooms are decorated in a stylish, original way and at the same time harmonize with each other. The entrance hall is the place that first introduces guests to the apartment. It has many features. It is in the corridor that they store shoes and clothes, meet guests, preen themselves immediately before going out. It should be practical and comfortable. Installation of the hallway can be done independently.
Today, many are trying to Beautiful design not only in living rooms but also in the hallway. Thanks to this, the corridor can look stylish, neat and beautiful. But for this you need to know the techniques and methods that will help you correctly arrange the furniture.

It is important to decide in advance on the pieces of furniture that will be located in the corridor. They must be practical first and foremost.
Our climate is very changeable. Therefore, the hallway is often a concentration of dust, moisture and dirt. It is important to think over the floor finish, as well as ways to store outerwear and the room. It is important to remember the main rule that the material should be of high quality and durable.
What to put in the hallway:
- Swing wardrobe;
- Shelf for shoes;
- Large mirror.
When choosing this or sometimes type of furniture, it is important to pay attention to its capacity. Very often, overall-looking furniture cannot accommodate a sufficient number of things. Furniture should be ergonomic. Today, modular designs are very popular.
Hallway Assembly: Basic Elements
The cost of arranging a hallway can vary. After purchasing the necessary furniture, the owners will have to resolve the issue of its assembly. This can be done by specially hired workers.
Assembly of the hallway can be done independently. However, this requires certain knowledge and skills.
Furniture can not only be assembled, but also made independently. To do this, you need to determine the number of necessary elements. Work should begin with the development of an assembly scheme.
Hallway assembly elements:
- Single cabinet;
- Double cabinet;
- Hanger;
- Pencil case;
- Closet.
In order to assemble a complete set of furniture, it is necessary to prepare materials, make drawings, determine the number of parts. After the parts are ready, you need to make sure that there are enough fastening materials. It is important to assemble following safety precautions.
How to assemble a hallway with your own hands: assembling a pencil case
Pencil size can vary. It is worth deciding on the dimensions of the furniture in advance so that unforeseen situations do not occur. Materials for the pencil case can be bought at building supermarkets or ordered online.

Preparing for the assembly of the pencil case takes little time. The main thing is to cut the planks of the appropriate size.
During the assembly process, the strips must be placed parallel to each other and fastened to the lid with self-tapping screws. It is necessary not to forget to fix the frame with corners made of plywood. After that, it is fashionable to start cutting out doors and shelves.
Features of the assembly of the pencil case:
- May have different sizes.
- The cover should be cut "overlap".
- To fix the doors use 2 or 3 hinges.
The assembly of the pencil case is not difficult. However, you should not take on a job without experience working with building materials. It is important that the hallway looks beautiful.
In our following material you will find useful advice choice of functional wardrobes: .
Hallway Assembly Scheme: Corner Option
When assembling a corner hallway with your own hands, it is important to be extremely careful. Incorrect calculations can lead to damage to the material from which the furniture is made. Before assembling furniture, you need to check the condition of the wall near which the furniture will be located.

The curved wall suggests the presence of a common frame, to which the shelves are screwed during the assembly process.
The correctness of the assembly scheme is influenced by the size of the room, the length of the walls and the proximity of the doorways. After the dimensions are taken into account, it is necessary to consider the internal equipment of the furniture structure. It consists of six main body elements.
Corner cabinet assembly process:
- Frame assembly;
- Work on the slats (lower and upper);
- Production of back walls;
- Creation of side walls;
- Installation internal shelves, boxes and baskets;
- Fastening rods and hooks.
You can assemble a corner cabinet yourself. For this, it is important to prepare in advance. Watch video tutorials that will help you understand the assembly process in more detail. It is important to note that the quality of the cabinet will depend on the material chosen. It is best to use natural tree species. However, such a cabinet, even with self-manufacturing, will be quite expensive.
How to assemble a hallway with your own hands (video)
You can assemble the furniture in the hallway yourself. The main thing is to take the assembly and installation of the hallway responsibly and carefully. Many designers advise to install a modular design in the living room. It is ergonomic, has a beautiful appearance. Building modules may take some time. Furniture can also be made independently. However, this cannot be done without professionalism and appropriate skills.
 Hoya: how reproduction occurs Rooting hoya cuttings in water
 Plectranthus - room mint
 Stonecrop or sedum: growing features