Greenhouse with your own hands from PVC. Greenhouse from plastic pipes with their own hands on an individual project. What is the coating for the greenhouse from PVC pipes
Its greenhouse is always convenient and profitable. When it is still cold outside the window, and vegetables in the supermarket are too expensive, products can be served onto your table, growing them yourself.
Greenhouses are rearranged now from different materials, but with the advent of innovative technologies, you can quickly and easily make a greenhouse from PVC pipes.
Earlier to create a greenhouse used old window frames and other similar household items. Currently, each wishing has the ability to make a cheap, but reliable design.
Selection of places
The convenience of work, lighting conditions and heat resistant depends on the right location of this design.
It is necessary to install a structure on a plot that is well lit by the Sun, as well as in the zone protected from the wind. For example, you can build this construction between other buildings - it will help to save heat inside the design.
The distance between the buildings and the greenhouse should be at least 3 meters, otherwise these they can shade the construction.
It is necessary to take into account the level of groundwater. If the household plot is located in the nizenne, then it will be necessary to build a foundation and a waterproofing base. Therefore, when choosing a place to build such a simple design as a greenhouse from PVC pipes, you should choose a small elevation or plain.
Choosing materials
To create a greenhouse, an arched construction with doors and several opening machines from the face of the structure are usually used. This design is not intended for. Polyethylene film is used for coating, this material is inexpensive, but it must be replaced every two years. You can install, giving a bunch of reliability. For assembly, the framework will require such materials:

- pVC pipes;
- mounting with different diameters (the more greenhouse will be, the greater the diameter of the fasteners must be used);
- ends;
- special clamping elements for polyethylene film;
- for fastening - PVC tees;
- self-tapping screws for fastening pipes and other elements;
- different PVC elements for angular transition parts.
We will also need metal rod pegs that are driven into the ground so that the design is stable and reliable. The distance between such supporting elements is not more than one meter, and drive the rods are necessary to a depth of 25 centimeters.

The table calculated the number of building materials required to build greenhouses from PVC pipes
The choice of PVC pipes is based on the calculation of the desired method of this material. For the construction of a small greenhouse will need pipes of such length:
- 190 cm (4 pieces);
- 68 cm (10 pieces);
- to create 10 cm hinges (10 pcs);
- 350 cm (2 pcs);
- 558 cm (4 pcs);
- 170 cm (2 pcs);
- 360 cm (2 pcs)
- 90 cm (4 pcs).
The selection of material for the skin can be made in favor of polyethylene, reinforced film, spanbond, or others. Polycarbonate is a durable material, but it is distinguished by a high cost.
The cheapest materials are considered polyethylene or reinforced film. If it is planned to change the material once every two years, which is covered with a frame, then can be used polyethylene. It is cheap and can withstand small wind loads.
If strong winds prevail in the region, then it is better to use a reinforced film, it is more reliable, although its cost is slightly higher than that of polyethylene.
Loutrasil and Spanbond have a non-notanist structure and many gardeners also use these materials to create greenhouses. They will perfectly protect plants from cold and wind, they need to be replaced once every two years.
Calculation of approximate costs
According to the above calculations, it will take a little more than 70 meters of PVC pipe. Water pipes are from 30 rubles. In construction stores you can find similar products worth from 97 to 155 rubles, depending on the manufacturer (domestic - cheaper, imported - more expensive). For the construction of a greenhouse, you do not need to choose the most expensive products from PVC, inexpensive products will be suitable.

If you make a calculation, then it turns out that the pipes will need 70 meters x 30 rubles \u003d 2100 rubles. To this amount should be added 400 - 500 rubles per tees, fastenings, angular transitions and self-tapping screws.
Polyethylene is an inexpensive material for covering the greenhouse frame. Suppose the size of the greenhouse turned out to be 6x2.4 m, then the polyethylene film will need to be about 30 m2 (standard width 3 m) - it is 10 route meters. The cost of one routine meter of this material is 182 - 185 rubles per meter.
The reinforced film is just more expensive - 240 rubles per meter. The remaining materials are about the same cost. Accordingly, it will take 1800 to 2500 rubles on the material for covering the greenhouse. As a result, the cost of materials for the entire structure is just over 5,000 rubles.
Technology of construction of greenhouses from PVC pipes
Also you need to additionally fasten arcs on a wooden basis. With the help of clamps in the form of a symbol Ω. It can be done by conventional scams of 3 - 4 cm long.
Installation of doors and windows
On a wooden basis in width, on the segment that will be input, set two piles of metal fittings. The door will be attached in this place. Now you need to do the following:
- from the reinforcement to hold a flat line up and make notice on the extreme arc (it will take a wooden long line, the marker of any color and level);
- in the marked place to embed tees. To do this, cut off a piece of pipe, attach a tee to get a segment with a tee at the top. It is necessary to produce manipulations with the arc with extreme caution, as it is under load.
It will be good for a master who builds a design if someone helps in this work and will be able to hold arcuate segments.
It turned out the door. To make the windows you need to do everything the same thing in the right place. The hinges are screwed with one of the sides to which the rectangle from the fastened PVC pipes will be strengthened - this is the door or window itself. You can use pipes, but smaller diameter as canopies, and you can use real canopies from the store.
With the arrival of spring begins the summer season and gardeners. At this great time, not to rest, because you have to have time to plant and grow seedlings to please yourself and close homemade vegetables with their own beds. In order not to disappoint in the fruits of your work, many prefer to do it in the greenhouses.
These simple devices make it possible to significantly improve the harvest, and avoid the consequences of weather popsicles, such as freezers. They are easy to control the temperature, the degree of illumination and humidity. It remains to find an economical and durable greenhouse version to have not enough for one year. And it is just such a greenhouse today and consider.
Materials for greenhouse
Our greenhouse will be 3x5 meters the size, but the dimensions can be arbitrary. Material for the frame - PVC cold water pipes (KH).The specification is as follows:

We will cover the greenhouse with a segment of a polyethylene film 7x9 meters. Short trimming from pipes should not be thrown out. They can be adapted for auxiliary elements - door handle and clamps.
From the fittings we will need: Several window loops, self-tapping screws with washers or wide hats (desirable anodized).
Tool: Hammer, Hamsaw for metal or Bulgarian for cutting pipes, a screwdriver with a nozzle under a self-tapping screw, a knife, a tape measure and a pencil or a marker. Well, and the shovel with a chopper for each gardener will always be found. So, start!
We collect a greenhouse from PVC pipes
Prepare the base for the greenhouse
For stability, the greenhouse requires a reliable basis. Instead of capital concreting, we use segments from a pipe with a diameter of 40 mm. Cut from it segments of the length of the half meter (which has a loose soil, can be longer), and drive into the ground with an interval of 1 meter.


Installing Dougi.
The shape of the greenhouse gives the framework, which in our case will be semicircular. We take the cutting pipe by 32 mm, and bend them, inserting in the rack. There should be exactly six semicircular arches. Secure arcs in the racks in the following ways:1. Spike Plumbing Iron - the way reliable, however, making the arches of the greenhouse in unimprovant;
2. On the self-tapping screw - the inner hole of the racks is expanding with a cutter or a knife so that the pipe smaller diameter is inserted into it freely. The connection after that can be easily fixed on the screws of a drill or a screwdriver.


Breppy compound
The next stage of the assembly of the carcass greenhouse will be mounting connecting cross. They make it from segments with a length of 5 m. There will be only three of such elements. To avoid accumulation of extra moisture inside the pipes, the plastic plugs of the corresponding diameter attack the ends.To connect with arcs, the author applied a special fastening clamp (photo).
It can be replaced with anodized self-pressing, nylon tie or unnecessary segment of an aluminum cable.


Mount the doors
In conclusion, you must equip the door in our greenhouse. To do this, take a pair of segments by 2 and 1.15 meters for each door, and fix them in the form of a rectangular box under the canvas on both sides of the greenhouse.The frame for the door is made from the pipe of the same diameter, intensifying in the middle of the cross. Calculate the gaps of about 1 cm. On the entire perimeter of the rectangle. Any non-sequiguous window loops of a simple opening, which can be installed on the screws can fit as loops. Door handle make out of a short cut pipe, and mount it on plastic clips, fixing with self-draws. For rigidity from the handle side, one can accommodate another cross.

We stretch the film
Sliced \u200b\u200bpolyethylene film stretch over the greenhouse. To fasten it on the pipes, you can cut the semicircular plates from the waste from the same pipe with a length of 10-20 cm, and squeeze them with self-draws. A rubber tube of suitable diameter is also suitable. If the cut from it is cut along, it turns out a flexible tight clamp, which is easy to install and remove, if necessary manually.At the base of the greenhouse, the author advises to make a channel 20x20 cm, and press the film with earth ground.


Such greenhouses have many advantages. PVC pipes can be bought anywhere. This material does not rot and is not destroyed in the open air decades. The diameter of pipes can be chosen depending on the size of the greenhouse, and the fastening clamps to make themselves. Otherwise, such a project provides complete freedom of creativity for a real gardener and a lovers of home farming. Good harvest!
Those who are interested in the cost of greenhouses know that any high-quality and durable design is truly expensive pleasure. The process of the construction of the latter is associated with the question - is it worth equipping greenhouses, the price of the construction is large, if it is known that they will be "in work" only from spring to autumn, while remaining winter without supervision?
In such a situation, the most acceptable option ─ the construction of greenhouses. Greenhouses are temporary facilities in which seedlings are grown, or the earlier harvest matures. For the construction of greenhouses do not need a foundation.

They are constructed to the selected place for the season, and with the onset of winter colds are dismantled and disassembled in the "Square". In our time, structures made of galvanized profile, as well as plastic and metal-plastic pipes, especially popular.
From above, thick spanbond (nonwoven raw materials from the molten polymer) or cellular polycarbonate (carbonic polyesters).

Deciding to build greenhouses from plastic pipes with their own hands, it remains only to make configuration issues and decide on the size.
So arched. The material is in great demand among dacnis, for it is durable, easy.
In addition, it will not rot, like a tree or rust like a metal. And at the cost of PVC pipes are available.
Such greenhouses possess many advantages:
- acceptable price;
- simplicity of construction;
- the possibility of free movement;
- the possibility of creating projects of any size and forms.
Similar materials are not terrible high or low temperatures. They cope with high humidity. In addition, polypropylene is environmentally friendly.

Construction of the PVC pipe design with pegs
To carry out construction, you need to stock such materials:
- pVC pipes;
- rods that have a small diameter and length equal to 60 cm;
- 4 boards, of which the base along the perimeter of the coming greenhouse is constructed;
- braces that fasten the frame elements to the base;
- plank holding a film on the frame.
Stages assembly
The order of work is:
- a rectangular frame from the boards is installed on the prepared land plot. It should be perfectly smooth, without any distortion. A set of small rods is installed for fixing the design in the corners;

- the long side of the frame is placed under the pins. So that the structure was strong and durable, the intermediate distance between adjacent elements should be no more than 50 cm of length;
- patterns, with the outside of the frame, the soil will jump. From above there are 20 centimeter ends;
- at the next stage, the ends of plastic pipes are put on top of the rods. Then with special brackets segments of plastic are attached to the frame;

- following this, on the opposite side, the door and the fanta for ventilation is installed;
- in order for the frame to acquire good stability, another plastic tube is tied in the upper part;
- after that, the oilcloth is tensioning on the frame and is attached to the basis of self-draws;
- next, the inlet is done, the door frame is installed. Mounted the doors themselves, the planks are covered with a film;
- thus, greenhouses are mounted from plastic pipes.

Metalplastic
When financial capabilities allow, it makes sense to build a greenhouse from metal-plastic pipes with your own hands. As a result, almost an eternal design is obtained, which neither strong winds nor heavy loads are terrible. In fact, it is metal pipes tightened in plastic.
Basically, the assembly is similar to the previous cycle:
- with the help of screws, a box with a width of no more than 4 m is collected (steps between arcs - within a meter);
- fragments of fittings are clogged into the soil, for which semicircular frame segments are put on. They are fixed using selflessness and brackets, in some cases fine metal plates apply. The frame is enhanced by three longitudinal pipes (one - on the axis at the top and two - on the sides);

- the northern end part can be made deaf. A pair of wooden racks under the door is installed. The remaining areas are closed by plywood (or fiberboard), the extreme arc "dresses" into thermal insulation, which is based on foamed polyethylene. For fasteners, small nails are used;
- , a hundred micron thick. At the bottom of the film, the film is fixed with small planks that screw to the greenboat. The second side must be pulled.
Design from PVC.
Sometimes the dackets are wondering - how to make a greenhouse from plastic pipes more solid? In this case, they should take advantage of a special apparatus, which is able to weld such pipes among themselves.
In such greenhouses, elements are connected using tees.
- as the instruction says, the work begins with the fact that the tees are welded to a pair of long pipes. They will fall into the base of the structure, the distance between them should not exceed 50 cm. The edges are equipped with crosses;
- for the future door, a pair of tees is installed to which pipes are attached. Doors will dress on them;

- when the frame is formed, it comes a turn of the creation of the arches, the installation of the transverse elements, the arrangement of doors and the window. Film stretches in the final on the construction.
Tip! If the greenhouse is not removed for the winter, it is required to strengthen it with such a calculation so that it can withstand the weight of the snow. In this situation, the arched construction is strengthened by the backups.

Output
To build a second option, you will have to spend more money than when assembling the usual "plastic" greenhouse. However, as practice shows, it is worth it.
Durable and inexpensive polyvinyl chloride pipes began to be used in agriculture as a material for a greenhouse frame. However, due to the mistrust of the plastic, even those who have left the old stocks of PVC pipes, they neglect, giving preference to the metal or wood. And as practice shows, it is quite good - when complying with certain conditions for the reliability of such a design, it is enough to make a greenhouse from polycarbonate and plastic pipes with its own hands withstanding 5-8 years of operation.
Project greenhouses from pipes and polycarbonate
PVC pipes have a lot of advantages: first of all, they are much cheaper than the same metal rolling or wood. At the same time, the material exceeds them in many technical properties - for example, in durability, density, weight. There are no problems such as corrosion and rotting, and the thermal conductivity coefficient, lower than that of the metal, does not worry about the safety of the underfloor material in the heat.

Installation, thanks to the large selection of standard sizes, is a simple case for which a special tool or many years of experience is required. It is also easy to repair a greenhouse from PVC pipes with their own hands - without an invitation of a specialist, you can quickly replace any damaged area.
As for minuses, they are also sufficient, and to the first lack there should be a lightweight design, which is the cause of high sailiness. To prevent the breaking of polycarbonate by the wind or the heat skew due to wind load, the frame must be installed on the foundation, and the pipes themselves are hard to fix with each other.

Cross connection is enhanced by self-drawing
Opponents of using such a material for greenhouses also argue that it is quickly embrittleing in the sun, and therefore the framework of the framework comes into disrepair.
Partly this is true - PVC pipes of the old sample have low light resistance, which means they can really crumble on small pieces in 2-3 years. Modern material due to special additives is more stable in relation to ultraviolet.

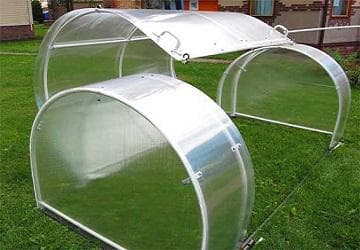
Model with shifting roof
It is often found and the opinion that such a frame will not stand any other coverage, except for the film or spunbond. In fact, if it was not possible to achieve its optimal stiffness, the polycarbonate is better not to use, since any reflection of the frame, especially on the fastener section, will lead to cracking or complete destruction of the sheet, which, as is known, it is impossible to restore anything.

To increase the UV-resistance of the pipes, wrap them with a wide tape
Workshop on the construction of arched greenhouse
If you make a greenhouse exactly according to the instructions, then get a structure with a width of 3.5 m, a length of 3.6 m and a height of about 2 m. However, you can vary the length according to your own requirements, adjusting the length of the foundation and adding the required number of arcs.
By time, construction takes no more than one full working day, and the cost of the greenhouse of PVC pipes mounted with its own hands will be lower than at least twice than the purchase of analogue.
Mini greenhouse from pipes and polycarbonate
Getting Started - Creating a Foundation
Properly manufactured foundation - one of the key factors for the durability of the greenhouse. Since polycarbonate as a streaming material implies its multi-mezing use, small-breeding point supports for the task is not suitable, and it is required to prepare a tape base. The blockage in the form of a wooden bar is placed on a sandy pillow.

The foundation from the bar will significantly strengthen the design
Before proceeding with the construction, prepare such materials:
- pine timber or ate cross section 100x100 and 3.6 m long - 2 pcs.;
- the same ram with a length of 3.5 m - 2 pcs.;
- metal brackets or threaded studs for fixing frame - 8 pcs.;
- the sandy-ground mixture for the pillow - the amount depends on the type of soil on the site;
- antiseptic impregnation - its number and species depend on the quality of you have.
Bookmark the strapping for greencarbonate greenhouse consists of several consecutive stages:
- Selecting a place and its markup under the foundation - to facilitate the process, use a pre-prepared lumber to facilitate the direct corners and extending the rectangle geometry with a roulette, twine and wooden weft.
- Ground removal - dig a trench with a depth of 10-15 cm, plug into it and sink a sandy mixture, forming a pillow, 5-10 cm exceeding the soil level.
- Laying the strapping - on the perfectly level plot, collect the basis of the future foundation, whileking Bruse in the paw or in Polterev.
- Check the accuracy of installation level - Make sure that all the foundation points lie in the same horizontal, as it is important for trouble-free laying of polycarbonate.
- Fixation of brusons - self-pressing, studs and brackets fasten the joints of lumber among themselves.

Ready wooden base
If weakly drained soils prevail on your site, and the level of groundwater level is high, the strapping must be put in the form of a painter on a support from bricks, screw piles or concrete blocks.
In this case, the foundation must be consolidated by anchors on the grooves, and in all subsequent calculations of materials, take into account changes in the size of the wrapping height.
Consumption of plastic and fastening materials
The undoubted advantage of plastic pipes is their flexibility, due to which manually bend the arch of the desired size is not suitable for something archus. If necessary, the process can be simplified even more - due to the installation of greenhouses in hot weather or by unscrewly heated with a construction hairdryer.
So, what materials, and in what quantity will need to create the greenhouses from PVC pipes according to the drawing:

Greenhouse scheme for calculating and editing
- A - PVC pipe with an inner diameter of 25 mm, the thickness of the wall is 2.4 mm (PN 16), a length of 3.5 m - 2 pcs.;
- B - PVC pipe with a length of 3.6 m - 2 pcs.;
- C - PVC pipe with a length of 5.8 m - 5 pcs.;
- D - PVC pipe 0.9 m - 4 pcs.;
- E - PVC pipe with a length of 1.9 m - 4 pcs.;
- F - PVC pipe 0.68 m long - 10 pcs.;
- G - PVC pipe 1.7 m long - 2 pcs.;
- H - PVC pipe 32 mm (1-1 / 4 ") 0.1 m long - 10 pcs. (will be used as hinges);
- I - clamps under the passing material (if the greenhouse first will be covered with a polycarbonate, but a film);
- J - plastic tee under pipe 1 "- 30 pcs;
- K - corner tee - 4 pcs.;
- L - angular transition (90 ") - 8 pcs.;
- M - metal reinforcing rods class A1 500 mm long - 10 pcs.;
- W - Self-tapping screws 20 mm - 120 pcs.;
- Z - glue for plastic surfaces.

Door frame circuit and doors
If there are doubts about the stiffness of the structure, add it two side screeds. In this case, the number of pipes B will increase to four, as well as six crosspies and four tees for their connection with transverse arcs.
How to build a frame of plastic pipes
A greenhouse of PVC pipes is assembled like a children's design - by a sequential set of individual elements to nodes that are then connected to each other. For the convenience of assembly, tees can be modified, it wrecked them in such a way that the pipes pass through them through. You can fix them with the help of ordinary galvanized screws.
The assembly algorithm looks like this:
- Close to the foundation at a distance of 90 mm from each other to take the reinforcement to a depth of 300 mm, thereby fixing the base on the site.
- Setting the pipes B next to the foundation, take the place of attachment of tees.
- Install tees in marked places on pipes B and centered on future arches C.
- Place the pipes as they will lie in the finished frame, and symmetrically relative to the center. Mark the position of tees for fastening the door and window frame (the distance between them is 68 cm).
- Firmly attach to the conjugates of tees, the segments of the skunk pipe.
- Bend the pipe C and wear both of its end to reinforcement rods. Repeat the process to mount all the arches, connecting the skate pipes using the tee elements and, if available, the pipes of side strapping.
- With the help of the beans stretched between the extreme arcs, check whether the arches are not distinguished in height. If so, adjust them to one level.
- Take the reinforcement with the arches on it to the wooden base with metal clamps.
- Make sure the rigidity of the resulting design and, if necessary, reinforce it with additional ribbins from wooden or plastic slats.
- Rigidly fix the fasteners with screws.

Making latch for doors
An important condition for mounting the carcass greenhouse is strictly maintaining the horizontality of all the upper points of the greenhouse and the vertical of the arched supports. Only in this case you can quickly and smoothly put polycarbonate sheets.
Manufacture of the door and windows of the greenhouse
At this stage, you need to build the door and a window that will be part of the ventilation system. Make them for arched greenhouse with your own hands from PVC pipes - photos with assembly schemes placed above will help you with this. Make an assembly on a flat surface and at each stage control the rectangles of the corners of the structure.

Fortochka is important for venting
To begin with, collect the door frame:
- At a distance of 68 cm, lay parallel to each other 2 tube segments E.
- On one of them, we put two hinge (the side of their placement determines which one will be left or right), and to another - latch.
- At a distance of 200 mm from the upper edges of the pipe E install two tees J - one on each pipe.
- Insert the pipe F. into tees

Window frame and window frame
The door frame is ready, now the door itself remains:
- For each of the pipes G, the tee J.
- Insert one of the pipes into the hinges of the door frame.
- Connect the elements G with the transverse parts of the pipe F through tees j and the angular transitions L.
It is possible that you will be convenient to assemble the door frame and the door after they are sewn with polycarbonate.
To make the window frame and window, use the same technology:
- On the pipe e, the tees j, and one pair should be located at a distance of 880 mm from the top edge, and the second is at a distance of 200 mm.
- On one of the remaining pipes f, pull two hinge, to another - latch.
- Insert pipes F horizontally into J. Tees
- Separately out of 4 pipes F using angular transitions L collect the square - it will serve as opening the window.

Ready carcass
Window and door frames assemble with the help of hinges (for this you need to remove one of the fittings for a while, insert the pipe into the hinge and put the fitting again). Test their work in a horizontal and vertical position. With the presence of gaps, distortions and overlapping parts to each other, eliminate defects, aligning the position of the connecting elements. After that, secure all the connections with self-draws.
Laying polycarbonate - installation subtleties
Cellular polycarbonate has deserved a lot of laudatory reviews, but also there was enough complaints, and all because many builders neglect the main rules of installation. Lightweight and durable sheets require strict execution of the rules, otherwise the material will not serve the 5-15 years promised by manufacturers.
On the video from PVC pipes offered to view the video, with their own hands, the master covers polycarbonate. At the same time, he focuses on the main features of the process:
- the thickness of the material should be at least 4, and better - 6 or 8 mm;
- for the reliability of the consolidation, it is necessary to use special thermoshabs;
- it is important to immediately navigate, which side of the List UV-stabilized - usually, the manufacturer shall be labeled;
- polycarbonate must be located vertically, thoroughly closing all the ends of the web with a sealant or P-shaped profiles (but not tape!);
- when installing, it is impossible to allow the screws to be poor or, on the contrary, cut the material due to the tongue;
- it is necessary to lay it on a flat surface, aligning it where it is necessary, with the help of wooden plates of the corresponding thickness.
First, lick the polycarbonate and install door and window frames, as well as doors and windows. After that, lay the sheet behind the sheet and attach the polycarbonate web directly to the arches. Between panels connected by profiles, leave a gap to 5 mm to compensate for their temperature expansion.

Construction of pipe racks
Due to the high cost of polycarbonate sheets is quite rational, if for a plastic structure to arrange a test period, temporarily covering it not by polycarbonate, but a greenhouse film.
For a short period of operation, you can identify the weak places of the greenhouse and evaluate the profitability of the replacement of the coating on the polycarbonate. So, with the minimum risk you will get reliable, and most importantly, an inexpensive greenhouse from polycarbonate and plastic pipes.
If you want to speed up the process of organizing a closed soil, buy a ready-made greenhouse or consult for help from specialists.
- The protective layer on which the inscriptions are applied must be from the outside of the greenhouse.
- To obtain the most durable design, you must (!) Pay attention to the location of the "honeycomb" of polycarbonate - they should only go vertically, in inclined structures - parallel to the skate.
- When creating an arch, take into account that polycarbonate sheets are bent only in one direction - in length, that is, along the line ribs.
- Sheet joints should have to the center of the frame of the frame, connect sheets only in this way.
- Repeat this type of plastic with a construction knife, an electric lobby, a grinder. You can also use with a metal or circular saw.
- For durable interconnection of sheets, special plastic profiles are used among themselves. Playing polycarbonate brass manufacturers do not recommend. In practice, in the manufacture of greenhouses from polycarbonate, it does not always work perfectly with your own hands and fit the sheets. Some folk craftsmen are generally managed to do without connecting profiles, placing the polycarbonate of Vansel. The most important thing is that the place of the junction must have accounted for the center of the rack, and did not resist in the air. Moreover, with even the perfect mounting under the pressure of the snow, the sheet can squeeze out of the profile. In the case of the allen, this does not happen.
- A powerful drill to screw the screws to use undesirable - it will drag fasteners and often slip during operation. It is better to work with a conventional shurtholder. Polycarbonate drills on small turns with a little effort. Next, turn off the tool, insert the screws and continue to work.
- The distance between the screwed screws is 25-70 cm. It all depends on the type of frame and the alleged snow and wind load.
- When collecting structures from polycarbonate instead of self-tapping screws, rivets are sometimes used. However, dismantle a greenhouse or replace the damaged sheet in this case will be more difficult.
- When changing the temperature, plastic is able to change the dimensions. When joining the jack between sheets, a small space of a couple of millimeters is still left - a technological gap. Otherwise, cracks are formed at the scene. For the same reason, the size of the holes under the fasteners is made a little more. So that the plastic cracked, turn them down until the stop should not.
- To compensate for the expansion and protection of cold bridges, it is recommended to use special thermoshabs for polycarbonate (self-samples are purchased separately). It is allowed to use roofing screws of EPDM equipped with a gasket or standard metal with a rubber thermoshaba, in which the carving has a small step.
 Why you can not give icons
 Is it possible to give icons as a gift: Signs, the opinion of the Church
 A year ago left her husband, and now I do not know what to do