Screed the walls of a brick and wooden house from cracks with a metal frame from a corner, reinforcement and metal plates. How to do the screed of the walls of a brick house with your own hands Screed a house with corners and fittings
If it so happens that a crack has gone along the load-bearing wall or foundation, this is not yet a sentence, it’s just time to take radical measures to strengthen the entire structure. We will talk about the most simple and popular methods of preserving the integrity of a building in this article.
Note. The article uses conditional terminology.
By purchasing finished house, the new owner in all cases deals with a pig in a poke. And it doesn't matter if it is a new building or a renovated old one. Builders build and renovate cottages and private houses in a fantastic short time, which always affects their stability and durability. Regardless of the reasons for its appearance, a crack is a frequent and faithful companion of stone buildings and structures. We will talk about the most difficult cases these unpleasant and dangerous defects - structural cracks, which serve as signals of the appearance of the mobility of the bearing elements. To stop the crack propagation, the movement should be stopped and the elements fixed, and then repaired and "masked".
Note. A crack in the finish does not always mean the presence of defects in the wall material. Make sure that it is the carrier material that is damaged by removing some of the trim and exposing the defective area for observation.
Let's leave the theory and consider the three most common cases of the appearance of element mobility: collapse, blockage and separation of the extension.
Collapse
In the event of a collapse, the walls and corners have a visual outward deviation from the vertical, sometimes wavy. Walls can also be deformed in waves or deflected by the entire plane. In most cases, this is accompanied by the appearance of cracks in the upper corners of the door and window openings.

By the degree of coverage, the collapse can be:
- Complete. All load-bearing external walls are deformed to varying degrees.
- Incomplete (partial). Some walls are deformed.
In both cases, even if only one wall is collapsing, we recommend applying a preventive screed on all sides to prevent the development of movement on other walls.
Depending on the degree of collapse of the walls, measures of different depth of influence are used. We will conventionally divide the degree of camber into three categories - light, medium and strong, and tell you what to apply in each case.
Light camber
Signs
The tops of the walls are noticeably deformed in the area up to 1/3 of the height of the wall (without the height of the foundation). Cracks in the corners of openings in 50% of cases. The rest of the walls and foundations are normal (no cracks, deformations).
Cause
Occurs due to the unreliability or lack of an armored belt, roof overload, during construction attic floor on the old walls.
Note. The most common mistake leading to roof overload is unaccounted snow load.
Elimination method
In this case, it is reasonable to use a steel mono-yoke (hereinafter referred to as the cage) on the corner stops for screed walls. At the same time, as in all cases of using various clips, the rods will pass from the outside along the facade load-bearing walls standing in the shape of a rectangle. Sometimes it is necessary to make technological openings for rods in the walls of the outbuildings.
What you need:
- Steel corner 100x100 mm (minimum 75x75) - 4 m.
- Pipe 1 inch - 1 m.
- Stud with thread 20 mm - 4 m.
- Stud nuts and washers.
- A circle (steel bar) with a diameter of 20 mm or a strip of 40x4 mm - as long as the perimeter of the house.
- Welding, painting.
Note. It is undesirable to use reinforcement for rods, since it is not designed for outdoor work and is subject to corrosion.
How to make a corner stop: on a steel corner 100x100 mm long equal to the distance from the top of the wall to the top of the window openings plus 20%, pipe sections 150 mm long are welded on.

The number of stops is equal to the number of corners (4).
Work order:
- The rods (strips) are welded into two continuous lashes along the walls of the house minus 200 mm (per tightening stroke).
- Then hairpins with a free end of 200 mm are welded at the ends of the lashes.
- The pins are threaded into the tubes and the lashes are welded together in the middle.
- The entire structure is assembled on the ground and fixed at the required height.
- The nuts are tightened to a state of tension.
Attention! When using steel clips and ties, remember that they are for anchoring walls. An attempt to return the walls to their original state can result in breaks and sagging areas.
The design of the steel race may vary. For example, in the case of undulating deformations, a channel can be used as one, several or all four rods. Installation will be more difficult, but the entire load from the wall will be evenly distributed over the rigid channel.
Average camber
Signs
All signs of slight collapse spread to the level of 50% of the wall height (excluding the foundation). The probability of cracks in the corners and boundaries of openings is 80%.
Cause
Weak armopoyas. Lack of a bunch of corners and masonry in the wall material, high material wear, overload.
Elimination method
In these cases, a solid corner cage is used. It is arranged similarly to the mono-holder, but along the entire height of the wall and has more tie belts. With an average camber, it is recommended to arrange three belts.

In all cases, the circle can be replaced with a 10x40 mm steel strip.
Attention! The welds must be of good quality (they hold the load). The overlap is 250 mm.
Strong camber
Signs
All signs of medium and light, but at a level of more than 50%. In the overwhelming majority of cases, it is accompanied by the appearance of deep, sometimes open, cracks along the walls and foundation.
Cause
Most often, deformations of the base or foundation are combined with the causes of slight to medium collapse. May be accompanied by partial destruction of the foundation.
Elimination method
For repairs, a solid corner frame and a retaining wall (support) or a retaining belt of the foundation are used.
The retaining wall or support is part of the reinforcement belt applied in the deformed area.

Retaining belt is a repair structural element designed to strengthen the existing foundation walls along their entire length. It is used when it is necessary to strengthen the foundation. Material - reinforced concrete.
Back-up device. Let's consider an example of a corner section. A solid belt is arranged in a similar way.
First you need to determine the size of the backwater. If we had to resort to such radical measures, it means that it is too late to calculate the load, especially since the existing foundation remains in place. Therefore, we simplify the calculations towards increasing the safety factor. The backing thickness should be 50% of the foundation wall thickness, but not less than 400 mm. If possible, the bottom of the backwater and the foundation should be at the same level. The optimum ratio of the aboveground to the underground is 1 third above the ground, 2 thirds below the ground.
Attention! Reinforcement rods at the corners must be solid (bent at 90 °). The minimum side of the corner support is equal to three support thicknesses.
Work order:
- We excavate the damaged area and clean the trench. We clean the wall of the foundation from oils and organics, residues of waterproofing.
- We drill holes with a diameter of 18 mm into the wall of the foundation to a depth of 200 mm in a checkerboard pattern with a step of 200 mm.
- We drive in reinforcing pins with a diameter of 16 mm and a length equal to the thickness of the support plus 200 mm (hammered into the wall) minus 40 mm (protective layer).
- We tie a working reinforcement with a diameter of 16 mm with a pitch of 200 mm to the pins with a knitting wire.
- We make U-shaped clamps from 10 mm reinforcement according to the dimensions of the frame of the beam (support) 600x360x600 mm (workpiece length 1600 mm) and install them with a step of 200 mm.
- We install the formwork by size.
- We lay concrete (factory or prepared on site) with vibration.
- After the concrete has set (3 days), remove the formwork and apply waterproofing.
- We perform backfilling of soil with ramming and pouring.
 Backwater reinforcement: 1 - foundation; 2 - working L-shaped rods Ø 16 mm; 3 - formwork; 4 - U-shaped clamps Ø 10 mm; 5 - rods driven into the foundation, Ø 16 mm
Costs for the device 1 lin. m backing with a thickness of 400 mm, a height of 600 mm in the manufacture of concrete on site:
| Name | Unit rev. | Qty | Unit price, rub. | Total cost, rub. | Note |
| Rebar 16 | pog. m | 20 | 30 | 600 | Wall pins and work rods |
| Rebar 10 | pog. m | 10 | 20 | 200 | U-shaped clamps |
| Knitting wire | kg | 0,5 | 200 | 100 | Anchoring all wireframe elements |
| Concrete | cub. m | 0,25 | 1000 | 250 | |
| Waterproofing | sq. m | 1 | 20 | 20 | |
| Formwork costs | sq. m | 1 | 100 | 100 | Self-tapping screws, nails, boards |
| Additional expenses | - | - | 300 | 300 | Disks, drill, etc. |
| Total material | 1570 | Depends on local conditions and contract | |||
| Work | 1000 | ||||
| Total material and work | 2570 |
Blockage
The walls are piled up inside the building. Can be complete or partial (incomplete). In different degrees of deformation (light, medium, strong), one stop method is used.
Note. To repair the blockage, it will be necessary to carry out welding work indoors, which is most often associated with carrying out overhaul the whole building. Take care of fire safety.
Full blockage
Sign
Three or more walls are piled up inside the building (to varying degrees).
Cause
Weak armored belt, material wear, violation of technology during construction ( weak solution, lack of corner reinforcement, etc.).
Elimination method
Rigid self-supporting steel frame (frame) on through fastening.
What you need:
- Rotary hammer with a drill 18-20 mm.
- Channel 50x100-150 - length equal to the perimeter of the walls that need to be reinforced.
- Steel plate 200x200x3-4 mm (up to 300x300).
- Reinforcement 16 - 3 wall thicknesses for each running meter of the frame.
- Good welding (tension), painting.
Operating procedure:
- Determine the perimeter of the walls to be reinforced. If necessary, we punch technological holes (for the channel) in the partitions.
- We break each wall into steps close to 600-700 mm (but no more). We retreat ½ step from each corner.
- We drill through holes 18-20 mm.
- On steel plates, perpendicularly weld reinforcement pins with a length equal to the wall thickness plus 100 mm.
- We install the resulting anchors into the holes with the plate outward.
- Trying on each channel from the inside, mark it under the holes.
- We burn with welding the holes in the channel for the reinforcement.
- We paint the outer shelf of the channel with a primer (it will adhere to the wall).
- We install the channel on the pins in the holes.
- We weld the pins in the holes.
- In the same way, we install the continuation of the channel.
- When the entire perimeter is installed, we weld the channel to each other along the joint and make welded linings from reinforcement 16 - 2 per joint with an overlap of 300 mm.
- We reinforce the corners in any way possible (for welding).
Ideal for such a holder - if it will then be covered with a false ceiling. Then you can arrange diagonal rods. If false ceiling not expected, we close the tire with a box.
Attention! The plates on the outside and the reinforcement welded to them passing through the inside of the wall are a strong cold bridge and it will destroy the wall with condensation. Be sure to insulate the plates, and preferably the entire wall.
Partial blockage
Sign
One or two walls are overwhelmed.
Cause
The walls are located close to a busy roadway (with tram). Washing with atmospheric waters.
Elimination method
Partial cage arrangement according to the solid principle. The side of the interrupted corner is equal to one third of the length of the heaped wall, but not less than 1.5 meters.
 Arrangement of a partial inner cage: 1 - wall with a blockage; 2 - reinforcement with a plate; 3 - channel 100x50x4 mm
With combined collapses / rubble (when the walls diverge into different sides), use the inner frame (first of all) and the outer screed (secondly) together. In severe cases, use all the enhancement options at once or a combination of them.
Calculation of the cost of 1 running meter of the inner cage:
Outbuilding department
Let's consider the most difficult and at the same time popular case - the combined one.
Sign
Through crack along inner corner or at the junction of the extension with the main building with a medium to strong collapse of the outer wall.
Cause
Lack of attachment to the wall of the main building during the construction of the extension (in 90% of cases). Weak foundation under the walls of the extension. Overloading of the extension (superstructure, balcony).
Elimination method
Combination of through, semi-through or anchor cage and back-up:
- Through cage - the rods pass through the load-bearing wall and are fixed (nuts, welding) on a thrust bar or plate located on the inner side of the wall.
- Semi-through cage - one side is of the through type, the other is fixed from the outside to the embedded part.
- Anchor clip - rods are attached to embedded parts, arranged on anchors in the walls of the building.
 Extension screed options: 1 - semi-through; 2 - through; 3 - anchor; 4 - corners 100x100 mm; 5 - rods (rod, plate); 6 - main walls; 7 - plate with anchor; 8 - plate 4 mm
You can arrange any of these types of clips using the instructions above.
Rules for the construction of anchor rods:
- A thrust bar or plate located inside the building must not hit the top of the doorway.
- Arrange embeddable parts in the walls at a distance of 1/3 of the extension wall length, set aside from the junction of the walls, but not less than 1.5 meters. Drill 3 points with a diameter from 12 mm, depth 2/3 of the wall thickness.
- If the number of anchor rods is more than 2, place them with a breakdown along the length of 1 meter.
- The walls of the main building must be free from deformations and cracks.
The support can be as separate (under outside wall), and along the entire length of the foundation of the extension. In this case, the reinforcement is driven into the foundation of the main building at an angle.
Most often, the types of deformations described above occur in houses made of marl or bricks laid on clay. Even in the case of the initial stage of deformations (the appearance of small cracks), we recommend using a preventive screed at home on corner frames. Remember that any metal passing through the wall into the room is a cold bridge and will negatively affect the condition of the wall if it is not insulated.
Vitaly Dolbinov, rmnt.ru
If it so happens that a crack has gone along the load-bearing wall or foundation, this is not yet a sentence, it’s just time to take radical measures to strengthen the entire structure. We will talk about the most simple and popular methods of preserving the integrity of a building in this article.
Note. The article uses conditional terminology.
When purchasing a ready-made house, the new owner in all cases deals with a pig in a poke. And it doesn't matter if it is a new building or a renovated old one. Builders build and renovate cottages and private houses in a fantastically short time, which always affects their stability and durability. Regardless of the reasons for its appearance, a crack is a frequent and faithful companion of stone buildings and structures. We will talk about the most difficult cases of these unpleasant and dangerous defects - structural cracks, which serve as signals of the appearance of the mobility of the bearing elements. To stop the crack propagation, the movement should be stopped and the elements fixed, and then repaired and "masked".
Note. A crack in the finish does not always mean the presence of defects in the wall material. Make sure that it is the carrier material that is damaged by removing some of the trim and exposing the defective area for observation.
Let's leave the theory and consider the three most common cases of the appearance of element mobility: collapse, blockage and separation of the extension.
Collapse
In the event of a collapse, the walls and corners have a visual outward deviation from the vertical, sometimes wavy. Walls can also be deformed in waves or deflected by the entire plane. In most cases, this is accompanied by the appearance of cracks in the upper corners of door and window openings.
By the degree of coverage, the collapse can be:
- Complete. All load-bearing external walls are deformed to varying degrees.
- Incomplete (partial). Some walls are deformed.
In both cases, even if only one wall is collapsing, we recommend applying a preventive screed on all sides to prevent the development of movement on other walls.
Depending on the degree of collapse of the walls, measures of different depth of influence are used. We will conventionally divide the degree of camber into three categories - light, medium and strong, and tell you what to apply in each case.
Light camber
Signs
The tops of the walls are noticeably deformed in the area up to 1/3 of the height of the wall (without the height of the foundation). Cracks in the corners of openings in 50% of cases. The rest of the walls and foundations are normal (no cracks, deformations).
Cause
It occurs due to the unreliability or lack of an armored belt, roof overload, when erecting an attic floor on old walls.
Note. The most common mistake leading to roof overload is unaccounted snow load.
Elimination method
In this case, it is reasonable to use a steel mono-yoke (hereinafter referred to as the cage) on the corner stops for screed walls. In this case, as in all cases of using various clips, the rods will pass from the outside along the facade of the load-bearing walls, standing in the shape of a rectangle. Sometimes it is necessary to make technological openings for rods in the walls of the outbuildings.
What you need:
- Steel corner 100x100 mm (minimum 75x75) - 4 m.
- Pipe 1 inch - 1 m.
- Stud with thread 20 mm - 4 m.
- Stud nuts and washers.
- A circle (steel bar) with a diameter of 20 mm or a strip of 40x4 mm - as long as the perimeter of the house.
- Welding, painting.
Note. It is undesirable to use reinforcement for rods, since it is not designed for outdoor work and is subject to corrosion.
How to make a corner stop: on a steel corner 100x100 mm long equal to the distance from the top of the wall to the top of the window openings plus 20%, pipe sections 150 mm long are welded on.
The number of stops is equal to the number of corners (4).
Work order:
- The rods (strips) are welded into two continuous lashes along the walls of the house minus 200 mm (per tightening stroke).
- Then hairpins with a free end of 200 mm are welded at the ends of the lashes.
- The pins are threaded into the tubes and the lashes are welded together in the middle.
- The entire structure is assembled on the ground and fixed at the required height.
- The nuts are tightened to a state of tension.
Attention! When using steel clips and ties, remember that they are for anchoring walls. An attempt to return the walls to their original state can result in breaks and sagging areas.
The design of the steel race may vary. For example, in the case of undulating deformations, a channel can be used as one, several or all four rods. Installation will be more difficult, but the entire load from the wall will be evenly distributed over the rigid channel.
Average camber
Signs
All signs of slight collapse spread to the level of 50% of the wall height (excluding the foundation). The probability of cracks in the corners and boundaries of openings is 80%.
Cause
Weak armopoyas. Lack of a bunch of corners and masonry in the wall material, high material wear, overload.
Elimination method
In these cases, a solid corner cage is used. It is arranged similarly to the mono-holder, but along the entire height of the wall and has more tie belts. With an average camber, it is recommended to arrange three belts.
In all cases, the circle can be replaced with a 10x40 mm steel strip.
Attention! The welds must be of good quality (they hold the load). The overlap is 250 mm.
Strong camber
Signs
All signs of medium and light, but at a level of more than 50%. In the overwhelming majority of cases, it is accompanied by the appearance of deep, sometimes open, cracks along the walls and foundation.
Cause
Most often, deformations of the base or foundation are combined with the causes of slight to medium collapse. May be accompanied by partial destruction of the foundation.
Elimination method
For repairs, a solid corner frame and a retaining wall (support) or a retaining belt of the foundation are used.
The retaining wall or support is part of the reinforcement belt applied in the deformed area.
Retaining belt is a repair structural element designed to strengthen the existing foundation walls along their entire length. It is used when it is necessary to strengthen the foundation. Material - reinforced concrete.
Back-up device. Let's consider an example of a corner section. A solid belt is arranged in a similar way.
First you need to determine the size of the backwater. If we had to resort to such radical measures, it means that it is too late to calculate the load, especially since the existing foundation remains in place. Therefore, we simplify the calculations towards increasing the safety factor. The backing thickness should be 50% of the foundation wall thickness, but not less than 400 mm. If possible, the bottom of the backwater and the foundation should be at the same level. The optimum ratio of the aboveground to the underground is 1 third above the ground, 2 thirds below the ground.
Attention! Reinforcement rods at the corners must be solid (bent at 90 °). The minimum side of the corner support is equal to three support thicknesses.
Work order:
- We excavate the damaged area and clean the trench. We clean the wall of the foundation from oils and organics, residues of waterproofing.
- We drill holes with a diameter of 18 mm into the wall of the foundation to a depth of 200 mm in a checkerboard pattern with a step of 200 mm.
- We drive in reinforcing pins with a diameter of 16 mm and a length equal to the thickness of the support plus 200 mm (hammered into the wall) minus 40 mm (protective layer).
- We tie a working reinforcement with a diameter of 16 mm with a pitch of 200 mm to the pins with a knitting wire.
- We make U-shaped clamps from 10 mm reinforcement according to the dimensions of the frame of the beam (support) 600x360x600 mm (workpiece length 1600 mm) and install them with a step of 200 mm.
- We install the formwork by size.
- We lay concrete (factory or prepared on site) with vibration.
- After the concrete has set (3 days), remove the formwork and apply waterproofing.
- We perform backfilling of soil with ramming and pouring.
Backwater reinforcement: 1 - foundation; 2 - working L-shaped rods Ø 16 mm; 3 - formwork; 4 - U-shaped clamps Ø 10 mm; 5 - rods driven into the foundation, Ø 16 mm
Costs for the device 1 lin. m backing with a thickness of 400 mm, a height of 600 mm in the manufacture of concrete on site:
| Name | Unit rev. | Qty | Unit price, rub. | Total cost, rub. | Note |
| Rebar 16 | pog. m | 20 | 30 | 600 | Wall pins and work rods |
| Rebar 10 | pog. m | 10 | 20 | 200 | U-shaped clamps |
| Knitting wire | kg | 0,5 | 200 | 100 | Anchoring all wireframe elements |
| Concrete | cub. m | 0,25 | 1000 | 250 | |
| Waterproofing | sq. m | 1 | 20 | 20 | |
| Formwork costs | sq. m | 1 | 100 | 100 | Self-tapping screws, nails, boards |
| Additional expenses | - | - | 300 | 300 | Disks, drill, etc. |
| Total material | 1570 | Depends on local conditions and contract | |||
| Work | 1000 | ||||
| Total material and work | 2570 |
Blockage
The walls are piled up inside the building. Can be complete or partial (incomplete). In different degrees of deformation (light, medium, strong), one stop method is used.
Note. To repair the blockage, it will be necessary to carry out welding work inside the premises, which is most often associated with a major overhaul of the entire building. Take care of fire safety.
Full blockage
Sign
Three or more walls are piled up inside the building (to varying degrees).
Cause
Weak armored belt, material wear, violation of technology during construction (weak solution, lack of corner reinforcement, etc.).
Elimination method
Rigid self-supporting steel frame (frame) on through fastening.
What you need:
- Rotary hammer with a drill 18-20 mm.
- Channel 50x100-150 - length equal to the perimeter of the walls that need to be reinforced.
- Steel plate 200x200x3-4 mm (up to 300x300).
- Reinforcement 16 - 3 wall thicknesses for each running meter of the frame.
- Good welding (tension), painting.
Operating procedure:
- Determine the perimeter of the walls to be reinforced. If necessary, we punch technological holes (for the channel) in the partitions.
- We break each wall into steps close to 600-700 mm (but no more). We retreat ½ step from each corner.
- We drill through holes 18-20 mm.
- On steel plates, perpendicularly weld reinforcement pins with a length equal to the wall thickness plus 100 mm.
- We install the resulting anchors into the holes with the plate outward.
- Trying on each channel from the inside, mark it under the holes.
- We burn with welding the holes in the channel for the reinforcement.
- We paint the outer shelf of the channel with a primer (it will adhere to the wall).
- We install the channel on the pins in the holes.
- We weld the pins in the holes.
- In the same way, we install the continuation of the channel.
- When the entire perimeter is installed, we weld the channel to each other along the joint and make welded linings from reinforcement 16 - 2 per joint with an overlap of 300 mm.
- We reinforce the corners in any way possible (for welding).
Ideal for such a holder - if it will then be covered with a false ceiling. Then you can arrange diagonal rods. If a false ceiling is not expected, cover the tire with a box.
Attention! The plates on the outside and the reinforcement welded to them passing through the inside of the wall are a strong cold bridge and it will destroy the wall with condensation. Be sure to insulate the plates, and preferably the entire wall.
Partial blockage
Sign
One or two walls are overwhelmed.
Cause
The walls are located close to a busy roadway (with tram). Washing with atmospheric waters.
Elimination method
Partial cage arrangement according to the solid principle. The side of the interrupted corner is equal to one third of the length of the heaped wall, but not less than 1.5 meters.
Arrangement of a partial inner cage: 1 - wall with a blockage; 2 - reinforcement with a plate; 3 - channel 100x50x4 mm
In case of combined collapses / rubble (when the walls diverge in different directions), use the inner frame (first of all) and the outer screed (secondly) together. In severe cases, use all the enhancement options at once or a combination of them.
Calculation of the cost of 1 running meter of the inner cage:
Outbuilding department
Let's consider the most difficult and at the same time popular case - the combined one.
Sign
A through crack along the inner corner or at the junction of the extension with the main building with a medium to strong collapse of the outer wall.
Cause
Lack of attachment to the wall of the main building during the construction of the extension (in 90% of cases). Weak foundation under the walls of the extension. Overloading of the extension (superstructure, balcony).
Elimination method
Combination of through, semi-through or anchor cage and back-up:
- Through cage - the rods pass through the load-bearing wall and are fixed (nuts, welding) on a thrust bar or plate located on the inner side of the wall.
- Semi-through cage - one side is of the through type, the other is fixed from the outside to the embedded part.
- Anchor clip - rods are attached to embedded parts, arranged on anchors in the walls of the building.
Extension screed options: 1 - semi-through; 2 - through; 3 - anchor; 4 - corners 100x100 mm; 5 - rods (rod, plate); 6 - main walls; 7 - plate with anchor; 8 - plate 4 mm
You can arrange any of these types of clips using the instructions above.
Rules for the construction of anchor rods:
- A thrust bar or plate located inside the building must not hit the top of the doorway.
- Arrange embeddable parts in the walls at a distance of 1/3 of the extension wall length, set aside from the junction of the walls, but not less than 1.5 meters. Drill 3 points with a diameter from 12 mm, depth 2/3 of the wall thickness.
- If the number of anchor rods is more than 2, place them with a breakdown along the length of 1 meter.
- The walls of the main building must be free from deformations and cracks.
The support can be either separate (under the outer wall) or along the entire length of the extension foundation. In this case, the reinforcement is driven into the foundation of the main building at an angle.
Most often, the types of deformations described above occur in houses made of marl or bricks laid on clay. Even in the case of the initial stage of deformations (the appearance of small cracks), we recommend using a preventive screed at home on corner frames. Remember that any metal passing through the wall into the room is a cold bridge and will negatively affect the condition of the wall if it is not insulated.
Vitaly Dolbinov, rmnt.ru
Vasily Mironovich, Voronezh asks the question:
Good day! My parents bought recently suburban area which has brick house... About 2 months after purchase, a large crack was discovered on the back of the house. Friends suggested that it is possible to pull off the crack on the walls. Please tell me how to pull down the walls brick house?
The expert answers:

Very often, the owners of private houses, especially brick ones, are faced with the problem of cracks on the walls. This happens due to the shrinkage of the foundation, deformation of the soil structure, with a strong current groundwater or in case of improper use of the building.
How the wall is repaired will depend on the cause of the cracks. The most difficult and difficult to repair a defect that arose as a result of poor-quality installation of the foundation. In this case, in addition to repairing the wall, it is necessary to carry out work to eliminate defects in the foundation and only after that proceed with the removal of cracks. Otherwise, if you neglect the repair of the foundation, all other work will be meaningless.
Most often, cracks near the walls of a brick house appear above the openings of doors or windows. If they are small, then they can be filled with a special liquid fraction. This is done in such a way that it fills all the empty space. If this method does not help, then you need to strengthen the window and door lintels.
In the event that such measures did not help, you need to think about how to pull off the wall of a brick house. Such measures are used to eliminate large cracks. To eliminate the vertical gap in the brick, holes are drilled through and through, into which metal fasteners are then inserted. These fasteners are steel beams that are pulled together with special studs. When the damage to the masonry is very significant, the wall opening should be completely disassembled and laid out again.
If the damage to the building is located in a horizontal position, in order to correct the malfunction, it is necessary to use metal plates. Such plates must be installed in the gap in such a way that a seam connection is obtained. This will allow you to reliably strengthen the structure of the house. This must be done, since such horizontal damage can lead to the fact that the wall is completely displaced.
When the damaged sections of the structure have both horizontal and vertical directions, steel brackets should be used. For their fastening holes are punched in the wall. And the final fastening is done with steel strips.
When repairing masonry, it should be remembered that the sooner a crack is found, the more efficiently it can be repaired. This is due to the fact that the longer she is unattended, the bigger size she becomes. In the future, this will lead to the fact that the house cannot be repaired and it will completely collapse.
 How to make a boiler with your own hands from improvised means?
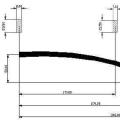 How to make a crossbow: throwing an office battle!
 What to do if neighbors steal electricity What to do if electricity is stolen from a house