Laying plywood on a wooden floor under laminate. Laying plywood on a wooden floor under laminate - how to install? Install plywood yourself on the floor under the laminate
Laminate has recently become a popular material used for finishing flooring. But this coating has one serious requirement for the floor itself - the base must be strong and level. A small difference within 2 mm per 1 m of length is allowed, because a substrate will be placed under the laminate, it will hide the defect. Several materials can create evenness of the plane: plywood, OSB boards and self-leveling floors. More often, plywood is laid under laminate on a wooden floor, as a cheaper and simpler method.
Laminate on plywood
Regardless of what floor is present in the room: concrete or wooden load-bearing beams, plywood is laid on joists. These are wooden blocks laid along or across the room. There are two main requirements for installing logs:
- The distance between them should be equal to half the width of the plywood sheet, because this material rests on three logs, one of which should lie in the middle of the slab, two at the edges. In this case, the plywood sheets must be joined on one joist.
- The entire joist structure must be located in the same horizontal plane.
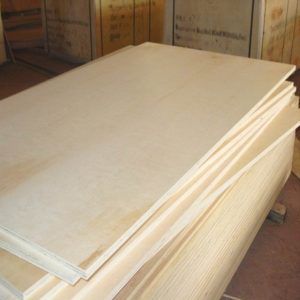
What plywood to use
First of all, the question concerns the strength of the material, because it will be subjected to serious loads. Therefore, plywood sheets with a thickness of at least 10 mm are selected.
The second selection criterion is the moisture resistance of the material, because various liquids are often spilled on the floors, which means the base must resist the destructive effects of moisture. Therefore, it is recommended to use FK grade plywood, which can be used in interior spaces.
The third selection criterion is the type of material. There are four of them in the plywood panel category. It is better to use the second or third grade for laminate.
Rules for laying plywood
Despite the apparent simplicity of laying plywood, there are some nuances that must be observed.
- The sheets are stacked with an offset of half their width. On the floor there should be a structure in the form brickwork.
- A compensation gap of 1 cm is left between the sheets in case of thermal expansion of the wooden floor. The same distance is left between the base and the walls of the room.
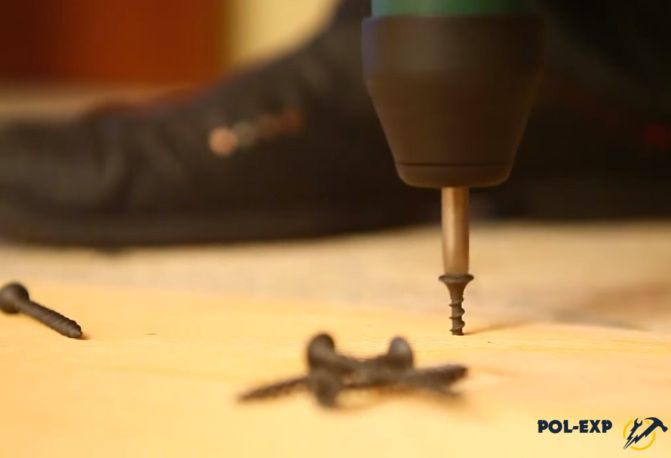
- The plywood is fastened with wood screws every 10-15 cm. The heads of the fasteners are recessed into the sheet to a depth of 0.5-1 mm.
- Laying plywood under the laminate begins from the far corner of the room and moves to the side front door.
- After installation is completed, the wooden floor is covered with drying oil, preferably hot.

Plywood on joists
Alternative to lag construction
Today, there are alternative designs to joists that are used for laying plywood under laminate. This mainly applies to concrete foundations.
- Installation on adhesive composition with additional fastening with dowels. The latter are self-tapping screws for concrete. An important component of the process is a smooth concrete floor, which must be carefully prepared.
- On leveling studs that cut into the concrete floor. A nut with a wide washer is screwed onto them, sheets of plywood are put on top, a wide washer is placed on top and the nut is screwed on. By raising or lowering the bottom nut, you can adjust the level of the plywood relative to the floor. It is secured to the studs with two nuts. For the top nut and washer, a round groove must be made in the plywood sheet so that the fasteners do not extend beyond the plane of the wooden floor.
Today, as an alternative to stiletto heels, different designs made of metal or plastic. But the essence of their application is the same - to obtain an adjustable plywood base. The only requirement for plywood is a thickness of at least 20 mm.
Rules for laying laminate flooring on plywood
Laying the laminate on plywood begins after the drying oil has dried. First of all, spacer wedges made of plastic or wood are installed along the walls at the level of the covering being laid. They will create a compensation gap between the floor and the wall in case of thermal expansion of the former. The wedges are attached to self-tapping screws and plastic dowels. You will have to drill holes in the wall for each self-tapping screw. After dismantling the wedges, they will not be visible, because this section of the wall will be covered with a plinth.
The second stage is laying the substrate. This is a porous structure synthetic film of small thickness. It is spread on a wooden floor without fixing it with anything. If the width of the substrate is not enough to cover the entire floor area, then laying is done in end-to-end strips using self-adhesive tape.
The third main stage is laying the laminate. There are four requirements for it:
- You need to start the process from the far corner of (any) room from the front door.
- Laying is done in the form of brickwork with a half-panel offset. This ensures uniform distribution of loads over the entire surface.
- The boards are laid perpendicular to the wall in which the window is located.
- The first row is laid with a spike towards the wall.

Installation of laminate flooring on a plywood base
To carry out the work you will need: a hacksaw for cutting laminate flooring, a clamp - a special tool similar to a crowbar (nail puller), a mallet, a pencil and a ruler, wooden block 10 cm long and 40x40 mm cross-section or a special plastic puncher.
Here step-by-step instruction How to properly lay laminate on plywood.
- Entire panels are laid along the wall from the corner towards the front door. If the last floor element does not fit in one piece, it is cut with a hacksaw to the required size. It is important to lay the panels close to the spacer wedges. To connect them, use a mallet and a wooden block. Two boards are pressed against each other with their ends and a block is installed at one end, which is hit with a mallet.
- For installation last board a clamp is used. Its two ends are directed towards different sides. Therefore, one end is inserted between the wall and the laminate, it is directed downwards; the second, which looks up, must be hit with a mallet. In this way, one board is connected to another.
- The next row of laminate should begin with half of the panel, which is obtained by cutting the whole panel in half.
- Now you need to connect the half with the laid ones. It is brought to the laid row at an angle of 30-45°, the tenon is inserted into the groove and lowered onto the wooden floor. A click should be heard indicating that the connection has occurred successfully.
- Next, entire panels are laid in the second row up to the wall. The last element may also not fit in one piece, so it is cut and installed using a clamp.
- The third row of laminate flooring begins with a solid board. The fourth from half and so on alternately.
- The width of the last row usually does not fit on the floor. The boards will have to be cut lengthwise to the required size, taking into account the compensation gap. For example, if the distance from the wall to the penultimate boards is 14 cm, then the width of the latter should be 13 cm. Cut off the edges with the groove.
- The last panels are being installed.
AND finishing touches: spacer wedges are dismantled, baseboards are installed, which are attached to the wall, and not to the laminate, the floor is cleaned of debris and dust.
To better understand the nuances of the technological process, we recommend watching this video:
One of the features of laminate floors is that they should only be laid on flat surfaces. As a base, you can use moisture-resistant OSB or fiberboard boards and moisture-resistant plywood. We will consider the last option; it is considered optimal for many reasons.
Not all plywood can be used as bases. The thickness of the sheets cannot be less than one centimeter, and even then such sheets can be used when laying a laminate floor on a concrete screed.
If logs are used to level the floor, then the thickness should increase to 1.6 cm. In such cases, it is more advisable to lay plywood in two layers of one centimeter thick.
This is not only much easier physically (thick sheets have a lot of weight), but also improves the final quality of the work. Specific base thickness values depend on the total maximum load on the floor and the distance between the joists.
As for moisture resistance, the higher this indicator, the better. Manufacturers produce several types moisture resistant plywood, each of them differs in its physical characteristics.
Plywood grades for moisture resistance and impregnation
- FSF brand. Has the highest moisture resistance, can long time be in direct contact with water. But it is rarely used for residential construction due to unsatisfactory environmental performance. Reason – technological process manufacturing involves the use of very toxic formaldehyde-based adhesives. Such plywood is often used for reusable formwork during the production of spilled concrete structures, including foundations. It is often used during the construction of roofs, cladding walls of garages, outbuildings and other non-residential premises.
- FBA brand. Universal purpose, sanitary government organizations do not put forward any restrictions on use. Used as a base for many types of floor coverings. In terms of moisture resistance, it occupies an average position. Albumin-casein glue was used for gluing the veneer.
- Brand BS. A high-quality product takes first place in all physical indicators. Impregnated with bakelite glue. It has ultra-high strength indicators, is flexible and elastic, does not bend, does not get wet, and does not change its size. Unfortunately, the too high cost does not allow the use of such plywood for construction purposes; it is used only in the shipbuilding and aircraft industries.
- FC brand. The most natural product, but moisture resistance indicators limit the scope of use. It is mainly used in the furniture industry, in construction for construction various designs, excluding prolonged contact with water. Another area of use is the design of various architectural structures in premises with very high safety requirements. During manufacturing, urea glue was used.
You can also use FK plywood for floors in bedrooms and children's rooms; in all other rooms it is recommended to make the base for the laminate from FBA plywood. It is strictly forbidden to use BV grade plywood under the base of a laminate floor. For gluing, it is impregnated with water-soluble bakelite glue. If its strength indicators do not differ from the brands described above, then it has no water resistance. At elevated humidity levels, bakelite glue loses its gluing capabilities, and the plywood sheet spreads into separate veneers.
As for quality and grade, there are no restrictions on these parameters; you can buy the cheapest materials. If there are minor chips along the edges, and there are knots on the veneer, including rotten ones, this does not mean at all that the base will not withstand the load on the laminate floor. Due to such defects, physical strength indicators are reduced slightly.
Let's consider two options for laying plywood under the laminate: on a concrete screed and a subfloor or joists.
Laying plywood on the floor under the laminate on a screed
A precondition is that the screed must be made with high quality, the height difference over the entire surface should not exceed ±2 mm. The concrete must be completely dry.
You can check the humidity using a simple method. Place a piece of plastic film on the concrete overnight and press it tightly around the perimeter with any objects. If the concrete is wet, then the evaporation of water from the surface will continue all night; it itself retains heat for a long time. Polyethylene film will cool quickly, high humidity underneath and low temperature will create conditions for condensation, the so-called dew point will appear. In the morning, look at the film, there is condensation - take active measures to dry the concrete, if there is no condensation - you can start laying plywood.
Step 1. Inspect the condition of the surface of the concrete screed. Small cracks there is no need to close it up. Additionally and more carefully, it is worth checking the uniformity of the dry screed. To do this, tap it, places with a dull sound indicate the presence of voids, here the builders made a defect.
You will have to make the decision yourself: if the sound is very muffled and the air pocket has big sizes, then you have to do renovation work. At this point the thin upper layer screeds, the recess is sealed again. Time will, of course, be lost, but it’s better and cheaper than having to redo the entire floor later. If heavy furniture is placed in this place, the finishing laminate coating will be deformed.
Step 2. Using an even spatula, slightly scrape off the protruding sharp parts of the cement-sand mortar; the dust should be carefully swept up or, better yet, vacuumed.
Step 3. Apply primer. If it is expensive and of high quality, then it is enough to saturate the surface once. There are doubts about the quality - it is much safer to do a double primer. Conclusion - do not buy cheap materials. As a result, you will lose more time and will not achieve monetary savings. You will have to do all the work twice.
Step 4. Prepare construction adhesive. When all the preliminary work is done correctly, any glue will do its job perfectly. Moreover, the loads on the plywood sheets are only vertical, and even then insignificant. There is no effort or displacement. Before using glue, read the manufacturer's instructions and follow its recommendations.
Practical advice. You can not use glue at all, but fix the sheets of plywood with dowels, the distance between them is 30–40 cm. But experienced professionals recommend using glue, with its help the slightest irregularities are corrected, the plywood does not sag at all, the base becomes monolithic. Laminate flooring can withstand significant loads without problems.
Step 5. Apply glue to the floor area and remove excess with a comb. The glue should be thick, with a consistency similar to a putty solution. Let the prepared area be slightly larger than the size of the plywood sheet. Carefully place the plywood on the prepared area and secure with dowels. You will have to work with an assistant; you won’t be able to put it down alone.
Fix the corners first, and then the rest of the surface. To set the gap between the plates, use cardboard spacers; their thickness is 2–3 mm. The holes will have to be drilled immediately in plywood and concrete; you need to use drills with pobedit tips. To make plywood easier to drill, don’t be lazy to periodically sharpen the solder joints.
Before fixing the next sheet, do not forget to use an even ruler to align the bottom edge with the previous one. This technique will help you avoid additional cutting of plywood, reduce the amount of waste and speed up the installation process. If the screed is strong, then you can use the simplest and cheapest hardware. They should penetrate approximately 3–4 centimeters into the concrete. If the concrete is of low quality, then you need to use special dowels with spacers.
Important. The heads of the dowel nails should not protrude; carefully press them into the sheet. You need to finish it off with a special metal hammer or sharpened reinforcement.
Place the next row of sheets slightly staggered, do not allow the four corners to be located at one point. There is no need to seal the holes from the dowel heads under the laminate, putty the gaps and sand small unevenness of the base; such work is done only under linoleum.
Step 6. Sew up the cracks near the wall, do not forget to leave an expansion gap.
At this point, the work on preparing the plywood base is completed, you can begin laying the laminate floor.
Laying plywood under laminate on joists
This method has its advantages: it is possible to insulate the floor with foam plastic or mineral wool, in the spaces between the logs it is allowed to hide all engineering communications.
Step 1. Check the horizontal position of the joists; the variation in height should not exceed 2–3 mm. Such fluctuations in height after laying the laminate are completely invisible.
If the logs do not lie in the same plane, then the problem can be solved by two methods.
First method
- Use a level and a rope to find problematic joists. All others should be leveled at the lowest level.
- Note the amount of horizontal discrepancy. Draw straight lines along the entire length of the logs.
- Using a portable electric planer, carefully adjust the height of each log to one horizontal plane. There is no need to achieve great accuracy; a few millimeters do not matter. This method of leveling lags is quite labor-intensive, but the most effective and reliable.
Second method
- In the same way, find problematic structures, align the outermost ones and stretch a rope between them.
- Taking into account the clearance between the rope and the joist, select wooden slats or wedges. You can fix them to the joists with small nails; it is advisable to additionally use wood glue.
- Using a straight rod or long level, check the position of the joists.
Step 2. Taking into account the distance between the joists, cut the plywood sheets. The work must be done precisely, the joints of two adjacent sheets must be fixed on one joist, and its width rarely exceeds 10 centimeters, leaving only five per sheet. The width of the indentation from the edge of the sheet should be subtracted from this value, otherwise it will crack. Simple mathematical calculations show that an error of more than one centimeter is considered a defect; the sheet will have to be redrawn or used for other purposes.
There are cases when unscrupulous or unprofessional builders left too large a gap between the outer joists and the walls. This significantly complicates the process of laying plywood sheets. Before starting work, you need to securely fix the slats to the walls; plywood sheets will be nailed to them. The position of the slats is set according to the logs.
Laying plywood under laminate on an old wooden floor
The simplest process. Before laying, you need to check the position of the old floorboards. If the variation in height is small, it is permissible to immediately lay and nail down sheets of plywood. If it is large, then the floor can be trimmed a little with an ax, removed with an electric planer, or called in a specialist for sanding.
Important. When leveling old floors, keep an eye on the nails. The caps should be sunk or the nails should be pulled out. If it doesn’t work, no problem, finish them off with everyone possible ways, minor damage to the floorboards and indentations do not play any role. All of them are perfectly covered with plywood and do not worsen performance characteristics laminate flooring.
Video - Laying plywood under laminate on a screed
There are quite a lot of options for leveling the floor, for example, to lay laminate flooring. All of them are available for independent implementation and allow you to complete the work quickly. Sheets of plywood are purchased quite often by both professionals and amateurs as a level base. There should be no difficulties in the work, but it would be useful to find out the properties of the materials that you plan to use, as well as the nuances of their installation. This article will discuss how to lay laminate flooring on plywood.
Everything you need to know about plywood
Since the main task is to obtain a smooth and durable surface so that the laminate lasts longer, the lamellas do not diverge, and there is no creaking when walking, then the choice of plywood must be approached with skill.
How is the material produced?
- Plywood is a product of the wood processing industry. The basis is veneer sheets various breeds trees (deciduous or coniferous). The manufacturing process is reminiscent of assembling a layer cake. There may be several “floors”, but minimal amount- three.
- Wood fibers have a longitudinal or transverse direction; when gluing sheets into a single product, veneer alternates with in different directions. The outer layers always have the same fiber orientation. Therefore, the division of plywood into longitudinal and transverse depends on the direction of the “pattern” of the outer layers of the building material.

Tip: during installation, you need to lay the sheets taking into account the main trajectory of movement around the room. The plywood fibers should be perpendicular to it. If the sheets are laid on logs, then their direction is chosen taking into account this requirement.
Classification of plywood by purpose
- A material with the same name is not always suitable for leveling the floor.
- Construction plywood- this is what you need to ask sellers in stores.
- Industrial variety it's not like that good quality, like the previous option, but it can be used.
- Furniture, structural and packaging types of plywood are worth ignore. They are not useful for the floor.
Dividing the material according to moisture resistance

In some houses, such a characteristic of plywood as resistance to moisture absorption is especially useful. Labeling will help determine this indicator.
- FBA- an environmentally friendly version of the material, but it cannot be used without creating a waterproofing layer: the moisture resistance of such plywood as an indicator is practically absent.
- FSF- has increased protection against moisture. The glue used for its production includes phenol-formaldehyde resin. This building material can be used not only for internal, but also for external finishing work.
- FC- This is plywood, in the production of which an adhesive composition with a base of urea-formaldehyde resin was used. It resists moisture well and meets all the requirements of materials intended for indoor use.
- They also produce plywood with markings FB, which is perfect even for a humid tropical climate, but in the conditions of our apartments and houses it is not necessary to use it, especially if you plan to install a heated floor. Bakelite glue, which is used for its manufacture, is also used in the material with the letter designation BS And BV. If you need to level the floors on a personal yacht, you can purchase them, but for apartments it is better to limit yourself to one of the above options.
Division according to the principle of surface treatment
- After the floor is covered with plywood sheets, the coating will need to be sanded over the entire area.

- You can avoid additional labor costs if you immediately purchase plywood marked Sh2. This means that it has undergone a polishing process on both sides. Ш1 - designation for sheets of material with a smooth surface on one side. NS - letter designation unsanded plywood.
Material quality
Like any other product, plywood can be first-class or far from acceptable quality. This is what it can be depending on the presence of knots or other defects.
- "E" category. This material is elite. There are no knots on the veneer, no other defects (cracks, poorly processed edges). It can be used as a leveling layer, but it will be unreasonably expensive. Usually it is not used for such operations.
- I category. Minor defects in the form of uneven swelling or shrinkage of veneer and knots are allowed. But their length should not exceed 20 mm. There may be wormholes, but their diameter should not exceed 6 mm, and there should be no more than three such defects per 1 m².

- II category. The presence of falling out, fused or unfused knots is assumed. Number of wormholes per 1 square. meter should not exceed six pieces. If the choice is made in favor of this material for other work, then, if necessary, defects can be hidden with veneer inserts. In the case of leveling floors, such additional actions are not necessary.
- III category allows fused or unfused knots, holes and wormholes (no more than 10 per square meter). It can be used for installation of structures hidden from prying eyes. Our case is just one of those.
- IV category assumes any manufacturing defects.
Advice: to level the floor under the laminate, it is better to choose any category of plywood from the first to the third. In principle, all sheets will be covered with laminate panels, and no one will appreciate their “beauty”. Therefore, you can save a little on appearance here.
Size range
One of the principles of a thrifty owner is reasonable savings. Correct calculation of materials greatly contributes to this. Therefore, it makes sense to familiarize yourself with standard sizes plywood.
- The material is produced in the form of square (1525 × 1525 mm, 1220 × 1220 mm, 1475 × 1475 mm, 1270 × 1270 mm) or rectangular (1525 × 1350 mm, 1525 × 1220 mm, 1525 × 1475 mm, 1525 × 1270 mm) sheets .

Advice: take as much as possible large sheets not always profitable. Measuring the area of a room and calculating consumables must be done carefully to reduce the amount of scraps.
- The thickness of the plywood is selected depending on the method of its installation. To create a base on the joists you will need material with a thickness of 16 to 21 mm. This is provided that one layer is laid out. And if you plan to lay the base under the laminate in two rows, then the thickness of the sheets can be reduced to 8 or 10 mm. To lay plywood directly on the subfloor, a material of at least 6 mm is suitable. The thickness of finished plywood for an adjustable floor starts from 10 mm. Accordingly, if House master decides to independently produce an analogue of such material, then when purchasing the base he needs to focus on this indicator.
When everything is clear with the quality and quantity of plywood, it’s time to start leveling the floor. You can do this in one of four ways.
How to level plywood under laminate
- It all depends on how smooth the subfloors in the house are. On a high-quality cement screed and a wooden floor with a deviation of different sections in height of no more than 2 mm, plywood can be attached without the use of joists and without additional leveling.

- The wooden base will need to be treated with acrylic sealant or prepare a putty mixture (sawdust and PVA glue lightly moistened with water) and use it. If differences between floor areas of 1 m² are more significant, then it would be correct to make a sheathing from timber. It is better to disassemble wooden floors that have significant deviations in height and install them from new lumber.
Fastening plywood with glue and screws
The method is quick, simple and applicable to any flat floor, both wooden and concrete.
- Sheets of plywood are marked, cut into pieces of the required size, and the necessary recesses are cut out for door jambs or to bypass heating risers. Most often, plywood with standard dimensions is sawn into four parts.
- Each fragment of the future foundation is laid on the floor, taking into account technological gaps. Along the walls they have a size of 10 or 20 mm, and between the sheets they are left with a tire of 0.5 to 1 cm. This is not just the prevention of a squeaky floor, but the provision natural circulation air. Such foresight will have a good effect on both the plywood itself and its service life. finishing coating for the floor.
Advice: when laying sheets, keep in mind that each subsequent row will begin not with a whole sheet, but with a sheet of plywood shifted in half. That is, installation is carried out in an order reminiscent of brickwork. And when sawing and pre-laying fragments, they should be marked, since afterwards they will have to be removed for preparatory work.

- So, it was decided not to level the base of the subfloor, but it still needs to be prepared. This stage is slightly different for wooden and concrete surfaces.
- Now the sheets of plywood are placed on the glue in the prescribed order, not forgetting to leave gaps. Additionally, each fragment is secured with self-tapping screws or any other hardware at intervals of no more than 20 cm from each other. The screw heads must be properly embedded in the plywood. Unsanded material will need to be processed mechanically or by hand using sandpaper. After cleaning, the plywood base can be covered with a backing and laminate can be laid.
Adjustable plywood floor
- A specially produced type of material is used for it, in which holes are drilled using a drill according to the applied pattern. The height is adjustable using anchors equipped with washers and nuts to secure the desired position.

- First, the anchor pins are driven into concrete base. A nut and washer are screwed onto them. The height of the nut is set according to laser level. Now sheets of plywood are laid on the anchors. The excess length of the rods is cut off. Now you can lay the second layer of plywood so that the upper slabs overlap the joints of the lower slabs.
Such a floor cannot be called cheap, but if there are significant differences, this system allows you to do without leveling and installing timber sheathing.
Leveling the floor with sheets of plywood along the joists
- The subfloor is cleared of debris and covered with film for vapor barrier. Using a level, the zero mark is determined and beacons are set (at intervals of approximately 20 cm). Logs made of timber with a cross-section of 80 × 40 mm are laid on top. When laying them, you need to be guided by the beacons: if there are large depressions, using available materials, they construct linings to level the joists. The interval between the guides should be from 40 to 60 cm.

- After the rough installation of the longitudinal joists, their even position is checked again using a level and final fastening is carried out with hardware. In order for the sheathing to acquire a finished look, it is necessary to secure the transverse elements of the structure. The distance between the crossbars should not exceed 50 cm, and the minimum step of their location is 30 cm. The thicker the sheet of plywood that is laid, the more often it should be attached to the beams, which means that the distance between the transverse sections of the sheathing must be reduced.
- The empty space between the joists is filled with any insulation; if the base allows, it can be filled with expanded clay. After the thermal insulation layer has been created, the logs are covered with a layer of vapor barrier material and they begin marking and sawing plywood sheets the right size. At the same time, we should not forget that the laying will be done in the same order of brickwork, and the joint of adjacent sheets of plywood should be in the middle of the log.
- The need to make the base in two rows plywood sheets It is assessed differently by experts. Some believe that this will produce a more durable surface. Others remind us of how the material is produced (when layers of veneer with different grain orientations are alternated). And this feature in itself provides plywood with the correct thickness with sufficient strength. In any case, the master himself will have to decide.

Installation of plywood base on boards
- The described method is suitable for a bulk subfloor. This method of insulation and simultaneous raising of the base is used both in apartments and in private houses. The dry screed is poured and compacted in accordance with the technology, and wide boards are laid on top. Most often, material with a width of 200 or 150 mm is used.
- The interval between the guides should be approximately equal to their width. On top of them, starting from the far end of the room, a layer of vapor barrier is laid.
Light: you can only move on the boards without stepping on the screed.
- A sheet of plywood is immediately attached to the self-tapping screws on top of the vapor barrier. Next after the starting sheet, a solid layer of material is fixed, placing it on the opposite wall with the necessary shift.
Advice: installation should be carried out in exactly this sequence, immediately fastening large pieces of plywood in order to cover as large an area as possible. This is due to the mobility of the dry screed. And by using this method of fastening, it will be possible to move around the floor more freely, and without fear, fix smaller elements of the plywood base in their places.

Now you can begin installing the finishing coating.
How to lay laminate flooring on plywood
The first step will be laying the substrate. Which of its types presented on the building materials market today to purchase is decided by the home craftsman himself, depending on personal preferences and the size of the budget. But the need for such a layer between the rough plywood base and the laminate board is justified.
The underlay is not attached to the floor; it will be pressed tightly against the laminate. You just need to tape the canvases together with tape, because the width of the material in the roll is not enough to cover the entire floor area in the room.

Some general rules will allow you to avoid the main mistakes made when laying laminate flooring on plywood.
- The general appearance of the laid laminate slats, when viewed from above, should resemble brickwork. That is, the rows will alternate, starting either with a whole plank or with a trimmed one. This staggered laying method helps to properly distribute the load on the lamellas.
- Laminate flooring is not mounted flush against the wall. A gap of approximately 1 cm is left so that during further use of the floor, the lamellas have room to expand. Loose adhesion of the material to the walls along the entire perimeter of the room is a guarantee that after a while the laminate will not stand on end. You can purchase spacers at a hardware store or use identical pieces of scraps from laminate boards.
- You need to carefully study the manufacturer's recommendations indicated on the packaging. It contains information about required thickness substrates, the basic principles of installation and the locking system are described. Most often, lamellas are attached in two ways:
- Click connection assumes that the elements are first joined at the desired angle, then carefully moved along the groove until a characteristic click occurs. It means that the alignment was correct and the panels are firmly attached to each other.
- The lock connection requires connecting the top of the die to the groove of the preceding lamella. You can also find out if an action was performed correctly by clicking on it.

- Laminate requires special care when tapping the plank (to ensure a tighter fit). It is convenient to use a mallet or a regular hammer, but do not allow the tool to come into direct contact with the board (you can damage the locks). When tapping, you need to attach a piece of laminate to the board and apply pressure to the lamella through it.
- In order to snap the lock into the panel that completes the row, use a clamp. This tool has bends at the ends that are located at right angles, but each oriented in its own direction.
- Before you begin laying the first row, the interlocking joints facing the walls must be cut off.
- For sawing material, it is better to stock up electric jigsaw. It is more convenient for them not only to cut boards to length, but also to cut out recesses in order to go around the radiator or door frame.
- The first row is mounted from solid lamellas. The choice of direction is dictated by the location of the window in the room. It is recommended to make row joints parallel to the light flow. This will make them less noticeable. You should start work from the corner farthest from the entrance, located on the left side. When calculating, it is important to take into account the fact that the length of the cut element must be at least 30 cm. This should be taken into account so that the coating remains durable throughout the service life of the laminate.
- You can lay the boards one by one, joining each one to the previous one. Carrying out the entire sequence of actions until the lock snaps into place. Or assemble the planks in rows and combine them with the slats already laid along the wall. The first method is preferable for those who are going to work alone or have little experience in laying laminate flooring. The second option allows you to speed up the installation process, but you will need a couple of assistants so that the long row is docked and connected to the previous one properly.
- The second row begins with a board shortened from the first lamella of the initial row by 1/3, and the third - offset by 2/3 of the length. After the panels of the second row are joined to the first, you need to lay spacers along the wall to provide a gap.
- So, a laminate coating on plywood is gradually formed. The last row adjacent to the wall can be easily connected to the previous one using a clamp. Now all that remains is to remove the wedges that prevent the slats from touching the walls, mount the baseboards and install general cleaning. You can arrange furniture and invite guests so that they can appreciate the skills of a home craftsman.
When laying laminate flooring, one of the main requirements is the maximum Smooth surface subfloor, and the easiest way to provide it is with plywood. Dense, smooth sheets can be easily mounted on any base, covering various defects, and also serve as additional thermal insulation. And the absence of “wet” processes significantly reduces the time for repairs, which is also important. Let's consider which plywood is best to lay on the floor under laminate, what to look for when choosing, and how to lay the material yourself.
The strength and durability of the plywood substrate directly depends on the thickness of the sheets, strength indicators, number of layers and type of processing. Therefore, when choosing plywood, you should pay special attention not to appearance, but technical specifications material.
Plywood thickness
The choice of plywood thickness depends on the type of rough base and the method of laying the sheets. If you plan to lay plywood on a concrete screed, a thickness of 15 mm is sufficient; for a plank floor it is better to take a little more - 18 mm. In both cases, the sheets are laid in one layer. When installing on joists, it is recommended to attach plywood in two layers to avoid sagging of the material and to give the base maximum rigidity. Here you can take sheets 15 mm thick or make the bottom layer thicker, for example, 21 mm, and the top layer thinner (12-15 mm). The wider the distance between the joists, the thicker the flooring should be.

The thickness of plywood is determined by the number of layers of veneer it consists of. The thickness of each layer varies within 1-1.5 mm, so different manufacturers of plywood of the same thickness may differ in the number of layers and vice versa. It should be noted that sheets with the maximum number of layers have the greatest rigidity, and not thicker ones.
Sheet sizes
Based on size, plywood is divided into format and large format. The first type includes sheets with maximum dimensions 1525x1525 mm, for the second - from 1830x1525 to 3000x1500 mm. It is more convenient to work with smaller plywood, but at the same time, a large number of joints reduces the rigidity of the coating. When choosing the size of sheets, you must take into account the size and configuration of the room so that you have to trim the material as little as possible.

Material of manufacture
Based on the material used, plywood can be birch or coniferous. This means that in the first type the upper layers are made of birch veneer, in the second - from pine, spruce or larch veneer, as well as other conifers. The inner layers are usually made from cheap wood, both hardwood and softwood. Visually distinguishing the material is quite simple: birch plywood is lighter and has a weakly expressed texture, while coniferous plywood has a richer color and a beautiful pattern on the surface.

The bending strength of birch plywood is 10-12% higher, so it is used where the floor is subject to increased loads. It is denser and heavier than coniferous, which is not always convenient during installation, and is also more expensive. Coniferous plywood is more practical: it is cheaper, lighter in weight and resistant to rot, fungi, and mold. This type is more suitable for installing a subfloor in a residential building, because there are no intense loads on the base, and moisture is often high.

Combined plywood is also produced, the structure of which includes both birch and coniferous veneer. This material combines good quality, strength, attractive texture and affordable cost, and it is most often used in furniture production and interior decoration.

Prices for plywood for flooring
plywood for floor
Grade and marking
Depending on the quality of the material, there are four main grades and grade E - elite, the properties of which are regulated by GOST 3916.1-96. The types of veneer on the front and back sides may differ, which helps reduce the cost of products.
| Material grades | Characteristics |
|---|---|
| The highest quality. The presence of visible processing defects or wood defects is not allowed. The surface of the sheet should have an even color and pattern |
| Veneer High Quality, no more than three defects per sheet are allowed: small knots up to 1.5 cm in diameter, closed cracks, brown veins, edge processing defects up to 2 mm wide. Inserts that differ in color or texture are also allowed, provided that their area does not exceed 2% of the sheet area |
| No more than 6 defects per sheet are allowed: fused or unfused knots, small cracks, wormholes with a diameter of up to 6 mm, dark veins. Also on the surface there may be minor dents, leaked glue, inserts of a different shade with an area of up to 5% of total area plywood |
| The number of defects is no more than 9 per sheet. These can be knots, wormholes up to 6 mm in diameter, inserts that differ in texture and color, cracks up to 2 mm wide, stains of leaked glue. Defects in edge processing and disruption of the fiber structure in certain areas are also acceptable. |
| Lowest quality material. Veneer may have a wavy surface, torn fibers, dents and cracks of varying lengths. There may be a large number of wormholes and small knots on the sheet, leaked glue |


The lower the grade of the material, the cheaper it is and the lower its performance properties, since the presence of cracks or wormholes reduces the bending strength of the sheet and its resistance to mechanical stress. The grade is indicated by two numbers that indicate the grades of the outer layers of veneer. For example, the numbers 1/2 in the marking of plywood mean that on one side of the sheet there is veneer of the first grade, on the other - of the second. The numbers 1/1 indicate that both sides of the sheet have first-grade veneer.


Grade 3 plywood is quite suitable for laminate flooring: it is inexpensive, but at the same time quite strong and durable. If the screed serves as a rough base, and the traffic of the room is low, in order to save money, you can use fourth grade plywood. It is not practical to use grade 1 and 2 plywood as a subfloor due to its high cost.

In addition to the type of plywood, you need to know other markings. According to GOST, sheets are marked special paint from the reverse side. The marking must include the following designations:
- Name;
- brand;
- grade;
- emission class;
- type of material processing;
- sheet dimensions.
Of primary importance is the grade of material, which is based on the type of binder for the veneer sheets and determines the degree of water resistance of the plywood.
| Brand | Characteristics |
|---|---|
| Urea glue, which is relatively resistant to moisture, is used as a binder. The material has good strength, low content of toxic resins, and low cost. This type plywood is widely used in construction for interior work |
| The binder is phenol-formaldehyde resins, thanks to which the material has excellent resistance to moisture and mechanical stress. Due to the presence of toxic components, plywood of this brand is not suitable for residential premises |
| Bakelite varnish is used for gluing veneer. The finished sheets have maximum resistance to water and other negative impacts. It is characterized by high cost, which limits the use of plywood in construction |
| Albumocasein natural glues act as binders. Of all types of plywood, this is considered the most environmentally friendly, but it is not resistant to moisture. |
| Melamine resin is used for gluing veneer. This binder provides high resistance to moisture and does not emit toxic compounds, so plywood of this grade can be used in residential premises |


Equally important is the emission class, which is designated by the letter “E” and the numbers 1, 2, 3 and indicates the content of formaldehyde resins in 100 g of material:
- E1 – less than 10 mg;
- E2 – from 10 to 30 mg;
- E3 – from 30 to 60 mg.
To avoid negative consequences For health reasons, E3 plywood should not be used in residential premises.

According to the type of surface treatment, the material is divided into polished and unpolished, and this is designated as follows:
- NSh – unsanded sheets;
- Ш1 – plywood sanded on one side;
- Ш2 – grinding on both sides.
The roughness that is present on the surface of unsanded sheets does not in any way affect the quality of laying the laminate, so there is no point in overpaying and buying sanded plywood. Moreover, it is inappropriate to use painted or laminated sheets, the cost of which is much higher than usual, but the performance properties are the same.


As for plywood manufacturers, the most preferable are the products of domestic companies, which combine good quality with quite reasonable price. For European manufacturers, the cost is higher, but for Chinese companies, the quality of plywood often causes a lot of complaints, and the characteristics of the material in most cases do not correspond to the declared ones.
Which plywood to choose?
So, by comparing the characteristics of plywood, you can confidently choose the best option. The main criteria here are the reliability and safety of the material, while external characteristics do not play any role. For bedroom, nursery, living room the best option There will be plywood of 3 or 4 grades FK grade with a thickness of 12-15 mm. Emission class is only E1, others are not suitable. As for the material of manufacture, there are no special recommendations; you can use both birch and coniferous plywood.
In the kitchen or hallway you need to select more durable plywood 15-18 mm thick, all the same 3 or 4 grades. Recommended brand - FK or FKM, emission class E1. For convenience, you can use Sh1 plywood, mounting the sheets with the sanded side up. It is easier to lay a thermal insulating substrate on a smooth surface; the material does not cling to rough surfaces, and there is less need to correct it.

How to lay plywood under laminate
Installation of plywood is quite simple and does not require special skills. Let's look at how to properly lay plywood under laminate on a subfloor made of boards. Before starting work, you should prepare necessary tools and materials:
- screwdriver;
- jigsaw;
- self-tapping screws;
- foamed polyethylene backing;
- plywood sheets;
- roulette;
- scotch;
- level.


It should be noted that the subfloor must be in good condition, and this applies not only to the boardwalk, but also to the joists. If the floor is severely worn out, or certain areas are rotten, you cannot lay plywood. Firstly, it is impossible to securely fasten the flooring to rotten boards, and secondly, the wood under the plywood will continue to deteriorate until one day the floor sag under your feet.
Step 1. Prepare the base. Remove the baseboards, check the integrity of the boards, strengthen loose areas with screws, and seal large cracks. If there are noticeable irregularities in certain places, you need to remove them using a grinding machine. Finally, the floor is vacuumed or swept to remove all excess.

Step 2. Measurements are taken carefully and the sheets are cut to minimize the number of joints. In this case, you need to take into account the mandatory gap around the perimeter of the room with a width of 8-10 mm and gaps of 2-3 mm between the flooring sheets.


Advice. After cutting the plywood, it is recommended to sand the ends of the sheets to remove burrs and loose fibers.
Step 3. The underlay is laid on the floor in strips end to end. The edges of the material should extend onto the walls by approximately 5-10 cm. At the joints, the substrate should be taped to seal the heat-insulating layer. In addition, this will prevent the strips from moving when laying the plywood.

Step 4. The prepared sheets are laid one by one on the floor, leaving a gap from the wall. The joints between the sheets are shifted in each subsequent row by about a third of the sheet width. Be sure to check the horizontality of the flooring with a level to avoid differences in height (when installing laminate, maximum differences of up to 3 mm per meter are allowed).

Step 5. Fix the plywood to the floor with self-tapping screws, screwing them in increments of 15-20 cm and always at the corners of each sheet. The fastener caps should be recessed by 1-2 mm.


After this, the floor is ready for installation of the laminate, and lay flooring on such a basis it will not be difficult. The edges of the thermal insulation substrate protruding from the walls are cut off upon completion of all work, before attaching the baseboards.
Prices for Tarkett laminate
Tarquette laminate
Video - Which plywood is better to lay on the floor under laminate
Video - Laying plywood on a wooden floor
As a material for finishing floors, many apartment owners and country houses use laminate. This material has a pleasant appearance, variety color solutions, long term services. The service life largely depends on the correct installation. Its flooring requires a very flat base, which can be done using sheets of plywood, which are placed on joists or on a concrete screed.
Advantages
This building material has some advantages over other materials:
- has low weight;
- has a high density;
- withstands significant loads;
- may have a certain moisture resistance;
- does not emit unpleasant odors;
- easy to install;
- costs less than cement;
- comes in different thicknesses;
- has special rigidity;
- can bend, but does not break;
- unpretentious in operation;
- Excellent for use as a base for laminate and parquet flooring.
Return to contents
Features of choice
Plywood is a material consisting of several compressed layers of wood veneer. Number of them in finished material always odd. Which plywood to choose? It is divided into several categories:

Image No. 1. Types of plywood.
- FC is a category of material with an average level of resistance to moisture. The glue used to glue the individual layers is non-toxic. This material is suitable for use in residential premises.
- FOF - this material has the most low level moisture resistance. It can also be used in residential areas.
- FSF - this category is characterized by increased moisture resistance. Toxic glue is used to glue layers of plywood. For this reason, this material is not recommended for use in residential premises.
Any plywood is made from wood coniferous species. Of the deciduous trees, only birch is used. Coniferous material is highly resistant to mold and fungi. Recommended for use on roofs. In residential areas it may release harmful substances in small quantities. Thus, for indoor use in residential premises, it is better to lay FC birch plywood.
This material is divided into 4 grades:
- without any flaws on the outer surface;
- with a small number of knots;
- with defects in the form large quantity knots and cracks;
- many defects, cracks, knots.
These defects do not affect the quality of gluing layers. Appearance The front surface of all types of plywood is shown in image No. 1. For constructing a base for laminate flooring, birch plywood FC 3 grades can be considered an ideal option. This material has fairly high strength and low cost.
Under laminate can be different. For leveling floors using plywood under laminate, a thickness of 12-16 mm is ideal.
Return to contents
Tools

To carry out work on laying a plywood base under a laminate, you need to prepare:
- logs;
- building level;
- plumber's hammer;
- self-tapping screws;
- screwdriver;
- roulette;
- pencil;
- electric jigsaw;
- drill or hammer drill.
Return to contents
Installation under laminate
First you need to clean the surface of the subfloor. Uneven surfaces, traces of plaster, dirt and dust should be removed from it. Can be used regular vacuum cleaner. After removing dust, you need to prime the surface. You can prepare the primer composition yourself. To prepare it, you need to take mastic or glue for it, dilute it with gasoline or solvent. Liquid primer is applied to the desired areas using a roller or brush. After this, you can begin laying the prepared sheets of material.
It is recommended to cut standard square sheets with a side of 125 or 150 cm into 4 parts. This way they are easier to install. In addition, small squares are less susceptible to moisture deformation. Temperature gaps of 8-10 mm wide should be left between the sheets. Individual squares are secured with self-tapping screws, the length of which should be three times the thickness of the plywood. You need to retreat 15-20 mm from the walls. The sheets of the subsequent row are laid offset with respect to the previous row according to the principle of brickwork. A properly laid base looks like image 3.

Image No. 3. Layout diagram of plywood sheets.
The screws should be screwed in, retreating from the edge of the sheet by 2-3 cm. The distance between them should not exceed 20 cm. The finished plywood base can be additionally leveled using a grinding machine.
The basis for the plywood covering under the laminate can be logs laid on a concrete screed or on another type of subfloor. They are treated with an antiseptic composition. Logs are installed with horizontal adjustment, this process is controlled using a level. Between long logs, jumpers are installed at such a distance from each other that the joints of the sheets fall in their middle. The average distance between the logs is 40-50 cm. The thinner the plywood, the smaller this gap.
A laminate floor will be of high quality if it is laid on a plywood base.
The choice of plywood needs to be approached carefully in order to buy a fairly cheap, but high-quality and environmentally friendly material.
You can lay plywood directly on a concrete screed, but it is better to lay it on joists. This method makes it possible to additionally insulate the floor.
 Mountain lavender made of beads in two weaving options
 Aeschynanthus - stunning foliage and blooms
 New Year's decoration of the garden and home Do-it-yourself kindergarten decoration for the New Year with photos