How to hang a ceiling chandelier on a suspended ceiling. How to hang a chandelier on a suspended ceiling: step-by-step instructions. Requirements for a chandelier
Stretch ceilings have gained widespread popularity, so more attention is paid to their arrangement. The question of how to attach a chandelier to a suspended ceiling becomes very acute, since in most cases “points” and LED strips are used for lighting.
Which chandelier is suitable?
It is believed that the usual chandelier and stretched fabrics are not the best combination. But, nevertheless, you can choose an option that can be used. This must be done before attaching the canvas. Most often, PVC sheets are used, for which heating after fastening is destructive. With regular heating to +45–+50 ⁰C, the canvas hardens, becomes brittle and eventually becomes covered with cracks. That is why the installation of incandescent lamps in such chandeliers is unacceptable.
Expert opinion
Alexey Bartosh
Specialist in repair and maintenance of electrical equipment and industrial electronics.
Ask a question to an expertImportant! To achieve high-quality illumination, you do not always need a large chandelier with high-power lamps. It can be a central element; it should be supplemented with spotlights or lighting around the perimeter of the room in the form of a strip with LEDs.
 Original chandelier for a stretch glossy ceiling
 When choosing one or another chandelier option, you should pay attention to:
- For a standard-sized room, which is decorated in a classic style, choose a matte or satin stretch ceiling. As for the chandelier, the optimal solution is a compact model with 2-3 small shades.
- If the ceiling is planned to be glossy, then chandeliers with many small lamps that reflect from the surface look great. This technique helps to visually raise the ceiling and make the room larger.
- For mirrored black and dark ceilings, chandeliers with small elements are also ideal. But here you should also take into account the color and shape of the lamps. Small, simple shapes are best - effectiveness is achieved through the play of light on the canvas.
- A chandelier with matte globe shades of different sizes in white can be called original.
- Chandeliers with colored lampshades should be selected based on the color scheme of the ceiling and the entire room.
Choosing a chandelier based on technical parameters
There are a number of other criteria by which you should select a chandelier specifically for stretch fabrics, among them:
- The distance from the lampshades/light sources/lamps to the canvas is at least 10 cm. This is necessary to prevent overheating of the canvas during operation of the lighting device.
- It is optimal when each lamp is placed in a separate lampshade - it will become an additional barrier to thermal energy.
- The more lamps, the better. Each individual element will have a low power rating, and the quality of lighting will not suffer.
 Chandelier with many LED bulbs
 - The cap that covers the mounting elements should be large enough - this will make the installation process easier. This element should not have sharp edges that pose a danger to the integrity of the canvas.
The choice of a chandelier is important, but even more important is the correct and reliable fastening of it to the ceiling.
Preparing the electrical wiring
The specified work should be carried out before installing the tension fabric; cutting an already tensioned one will be impossible. Most often, the chandelier is hung in the center of the room, where the cables from the old device have already been routed. The procedure in this case:
- Turn off the machine on the panel and measure the length of the cables. In this case, the space that the fastening of the canvas will occupy is taken into account. The length of the wires is such that the chandelier can be mounted freely, without tension on the cables.
- If the length is not enough, increase the wires, it is better to have a reserve. In this case, clamp terminals are used. It is better not to use twisting, since the contact in this case becomes worse over time, and getting to the twisting will not be very easy.
- Turn on the machine on the panel and check the phase and zero on the wires. You need to use an indicator for this. After this, turn off the machine again.
- The ends of the wires are insulated so that during installation of the canvas they do not break through it and suffer from an electric shock.
If installation is carried out in a different location, new wiring is required. The cable cross-section is sufficient for a 1.5 mm² chandelier; the number of cores is selected based on the characteristics of the lighting fixture.
 Wiring under a suspended ceiling
 Important! The wiring is attached so that it does not sag or lie on the canvas - this will ruin its appearance.
Installation methods
There are two main mounting options: on a hook or a mounting platform, through a bracket. The choice of one method or another depends on the design of the selected chandelier. All preparatory work is carried out while the canvas is not yet stretched, after which it will be more difficult to do.
Fastening with a hook is suitable for models that have a long rod and a small base in diameter.
A simple mounting strip is the best option if the lamp is small in size and weight. As for the cross-shaped strip, it is necessary for massive chandeliers that have a wide base. To hang on these types of slats, you will need a support platform.
Attaching a chandelier using a hook
Hanging a chandelier on a hook is considered one of the most reliable and versatile options. In addition, in the average apartment the ceilings are equipped with these fasteners. If it is not there, then fixing it to the ceiling is easy. Installing it yourself is even better, because the owners will know exactly how much weight it will withstand. If the ceiling is concrete, then an anchor hook with a dowel will be required. The fastening process is simple - drill a hole of the required diameter and hammer in a plastic dowel, then screw in the hook. For wooden ceilings, you don’t even need dowels; the hook is simply screwed into the ceiling or beam.
 Chandelier fixed with a hook
 When the fastening element is ready, you need to actually hang the chandelier using the following algorithm:
- Check the strength of the hook fastening.
- If the space between the finished ceiling and the rough ceiling is larger than the hook can cover, additional hanging elements are needed. They can be: chains with the required number of links, another hook. Another option is to use a wooden block that is screwed to the rough ceiling, with a hook already screwed into it.
- The necessary stages of installation of the ceiling sheet are carried out.
- After the surface has cooled and been tensioned, you should carefully find the location of the hook by touch.
- Glue a plastic mounting ring of the required diameter onto the film; without it, the film will be easy to tear. This is best done using special glue. Moreover, its circumference should be a couple of centimeters smaller than that of a decorative glass.
- The film is cut out inside the ring - access to the mounting element is open.
- The wiring cables are now coming out. The chandelier is hung in its place and connected to the wiring cables. These actions are carried out with the machine switched off on the dashboard.
- The last step is to secure the decorative cap.
All that remains is to check the functionality of the chandelier. As you can see, installation is not difficult to do with your own hands.
Mounting on mounting platform
A similar option is used for chandeliers that have a longitudinal or cross bracket for installation. The size of the platform is determined based on the dimensions of the bracket, and the thickness is determined based on the distance between the rough and finished ceiling and the weight of the chandelier. The actual installation of the platform is carried out at the stage of fixing the baguettes for the stretch ceiling; it should go 2–3 mm above the level of the mounted canvas.
 Installation procedure on the platform
 The basis of this method is the mounting platform; care should be taken to fix it to the ceiling in advance. Its main task is to compensate for the distance between the rough ceiling and the tension fabric. Options for embedded platforms:
- Made from wooden beams. These are needed for massive heavy chandeliers. A hole is drilled in the block for cable exit. He himself is screwed to the ceiling base. When choosing a thermal ring for this design, it is important that it be slightly smaller than the platform. In some cases, 5 small rings are used instead of one large one. In this case, it will be easy to screw the chandelier through the tension fabric.
- Prefabricated structure. It is assembled from moisture-resistant plywood and metal elements. Plywood is attached to the ceiling using hangers (those used for suspended ceilings). They should be screwed to the concrete base using metal screws.
Fastener for longitudinal strip
The installation steps after tensioning the web with a longitudinal strip are as follows:
- Find the location of the platform, glue the plastic thermal ring.
- After the glue has dried, cut out the film inside the ring.
- Tighten the screw on the bar, then secure it to the block.
- Remove the wiring cables and connect them to the chandelier.
- Hang the lamp on the removed studs and secure with decorative fastening nuts.
 Longitudinal strip on a suspended ceiling
 Cross bar fastener
The algorithm of actions with a cross-shaped bar is similar to the previous option. The difference is that it is difficult to find a thermal ring of the required diameter, so 5 small ones are used. The central one is for removing cables, 4 more around the circumference are for removing mounting studs and fixing the chandelier.
 Cross bar
 What tools are needed?
Regardless of the installation method, you will need:
- Thermal rings and glue for them.
- A sharp knife, preferably a stationery knife.
- Screwdriver indicator.
- Connection terminals.
- Crosshead screwdriver.
- Insulating tape.
For mounting on a hook, additionally: the hook itself, if there is none. For installation on a platform - platform elements based on the weight of the lighting fixture, plates for on the platform.
Conclusion
In general, hanging a chandelier from a suspended ceiling is not difficult, but strict adherence to the operating technology is required. If everything is done correctly, the result will only please you.
Installing a chandelier on a suspended ceiling is a task that can only be performed very carefully and with great attention to detail. The key difference is that the stretch ceiling fabric is not very strong, and installation errors can lead to its damage, as a result of which the entire structure will have to be redone. To avoid possible mistakes, you need to choose the right chandelier and install it correctly. This article will discuss how to attach a chandelier to a suspended ceiling.
Choosing a chandelier for a stretch ceiling
It is advisable to select lighting fixtures for any type of ceiling at the design stage, and with tension structures this rule is especially relevant. The thing is that the chandelier is attached to a suspended ceiling in a unique way - it is usually suspended using a hook or a special platform from the base ceiling. In addition, the choice of chandelier type directly affects the distance between the tension fabric and the base.

When choosing a chandelier for a stretch ceiling, you need to be guided by the following points:
- The ceiling material most often is a special PVC film, which is not very durable and can be very easily damaged by the sharp edges of the chandelier. In addition, it is also worth considering the features of the base to which the lamp will be attached - the surface of the structure should not be protruding or sharp. If such defects exist, it is necessary to address them.
- Another problem associated with the use of PVC film is its poor resistance to high temperatures. If this material is constantly heated to 45-50 degrees, then over time it will be compressed and become too brittle, to the point of cracking and crumbling. To avoid such an impact, you should choose a chandelier that is equipped with LED lamps - they practically do not heat up during operation. Another good option involves using a lamp with several shades, each of which has a low-power lamp built into it - with this design, the lighting will be quite effective at a relatively low temperature.
- When attaching a chandelier to a suspended ceiling with a glossy fabric, you must pay attention to the reverse side of the device. On the glossy surface of the ceiling, the back of the chandelier will be reflected almost in the same way as in a regular mirror. If wires or other internal elements of the device are visible there, then it is better to bypass such a chandelier and look for a more suitable one.
- The next point is the method of attaching the chandelier. In the case of standard apartments, the situation is often very simple - the ceiling initially has a hook that is installed at the central point of the ceiling. In order not to equip a new structure, you can use this particular hook to mount the chandelier. In the absence of a built-in hook, the choice of fastening does not play a special role, so you can decide how to hang the chandelier from the suspended ceiling at your discretion.
- The dimensions of the chandelier must be suitable for the room and correspond to the height of the base ceiling. For example, a large chandelier mounted on a long rod will look very awkward in a small room with a low ceiling. The same rule also works in the opposite direction - a small lampshade adjacent to a suspended ceiling will not visually correspond to a large room with a high ceiling.
- Luminaire wattage has little effect on lighting efficiency. In order for the room to be fully illuminated, it is better to supplement the chandelier with spotlights - anyway, the wiring will be laid in a hidden manner, so there will be no problems with the visual side of the issue. To highlight individual areas of the room, you can use decorative LED lighting.

Before attaching a chandelier to a suspended ceiling, you need to choose the most suitable option. If you lack confidence in your own abilities, it would be best to consult with a specialist who will select the optimal chandelier for specific operating conditions.
Choosing a chandelier design
Along with questions about how to properly hang a chandelier on a suspended ceiling, you also need to understand its decorative properties. In order for a chandelier not only to effectively illuminate a room, but also to emphasize its style, when choosing a lighting fixture, you need to take into account the interior features of the room. For example, typical apartments usually use a classic style with subdued tones. In this case, the ceiling is most often made of matte or satin light fabric, and as the main lamp it is best to choose a small chandelier with several shades - the lighting will ultimately be soft and unobtrusive, as a result of which the room will visually appear larger.

When arranging glossy multi-level ceilings, the best solution would be an LED chandelier with a large number of lamps - thanks to the reflection of light, a feeling of depth will be created. This combination will make it possible to visually increase the height of the ceiling and delimit the room into zones. The lighting efficiency of an LED chandelier may not be very high, so it should be supplemented with spotlights.
An LED chandelier is also suitable for a dark mirrored ceiling, but you will need to choose the right color scheme and shape of the lamps. In the case of mirror structures, a good visual effect is achieved through reflection, so large and elaborate lampshades will be out of date. On dark satin ceilings, spherical lampshades perform best, the reflected light of which allows you to create a cozy atmosphere in the room. The color of the lampshades must match the ceiling, otherwise the harmony will be disrupted.

Chandeliers with glass pendants fit perfectly into the design of a bedroom or children's room, made in pastel colors. Unusual lampshades and LEDs of complex configuration make it possible to create an interesting play of light and shadows, which is great for living rooms. This effect is best recreated on colored or dark ceilings.
Methods of mounting a chandelier
Regardless of which chandelier was chosen for the stretch ceiling, it must be installed and fixed correctly. For these purposes, during the installation of the ceiling, a special platform is built, to which the chandelier will be attached. Before you hang a ceiling chandelier on a suspended ceiling, you need to understand how to attach it.
Fastening a chandelier to a suspended ceiling can be done in the following ways:
- On a hook - this method is optimal for mounting chandeliers with a long rod and a small base diameter;
- On the bar - in this case, a mounting platform is attached to the bar, and this is the method that is used most often;
- On a cross-shaped bar - this mounting method is relevant for large and heavy chandeliers with a large base diameter.

The hook and support platform must be installed very carefully and securely. For installation, it is worth purchasing specialized elements that are initially designed for such tasks. When attaching lamps to a suspended ceiling, you need to take into account that it will be possible to remake this structure in the future only if the suspended ceiling fabric is completely dismantled.
Electrical wiring installation
All lamps can only work if they are connected to the mains. In order for this condition to be met, before attaching the chandelier to the suspended ceiling, it is necessary to carry out a series of preparatory work that will allow you to connect the lighting fixtures to the network.
The wiring preparation technology includes the following steps:
- First you need to turn off the circuit breaker on the panel and check whether the wires are long enough to connect the chandelier normally (it is advisable that the wires be with a small margin);
- If this is necessary, the wiring is extended using a mounting wire connected with clamp terminals (conventional twisting is not reliable enough);
- Next, with the power turned on, you need to check and mark the phases on different wires, after which the switch with the machine turns off again;
- The edges of the wires are insulated so that there is no risk of electric shock during the installation process.

If it is necessary to install lamps or a chandelier in another place, you need to lay a new wiring circuit. For normal operation of lighting fixtures, a cross-section of 1.5 mm 2 is sufficient, and the number of cores is selected individually depending on the characteristics of the lamp.

Laying a new cable under a suspended ceiling can be done in the following ways:
- Corrugated installation. In this case, the wire is inserted into a corrugated sleeve so that about 30 cm of protruding wire remains on both sides. The sleeve is fixed with plastic hangers using dowels and nails.
- Packing in a plastic box. The arrangement of such a structure begins with attaching plastic channels to the ceiling. Wiring is laid inside this box, after which the structure is closed with a lid.
- Fixation with plastic ties. To implement this method, you need to attach the screeds to the ceiling using dowels. Wires are subsequently attached to the ties.
During installation, you must make sure that the wires do not sag or lie on the canvas - this always leads to a deterioration in the appearance of the ceiling.
Mounting a chandelier on a hook
Most often, standard lamps are installed using a hook, which are devices on a long rod, equipped with several shades. To disguise the mounting point of the chandelier, a decorative bowl is used, pulled up to the ceiling itself. Attaching a chandelier in this way is simple, but installing a hook for a chandelier in a suspended ceiling in the right place is difficult, since it largely depends on the planned design of the ceiling.
If there is an initially installed hook in the center of the room, the task is greatly simplified (of course, only if the chandelier will be installed in this exact place). To mount the structure on such a hook, you just need to extend it using a chain with a hook at the end and install all the necessary wiring. The hanging chain and wires can be temporarily removed into the hole in the ceiling.
If there is no hook, then before you screw the chandelier to the suspended ceiling, you will have to install the fasteners yourself. To do this, you first need to measure the distance between the ceiling and the suspended ceiling in the area where the chandelier will be installed. In the same place you need to fix a beam, due to which the level of the structure will be lowered to the required distance.

Two holes are drilled along the edges of the beam at a distance of about 5 cm. You also need to drill a large hole in the block through which the electrical wiring will pass. In accordance with the block, you need to mark the base for the chandelier and make mounting holes in it. Wires are inserted into the block, after which it is fixed using dowels and screws. The threaded hook should be screwed into the beam after installing the blade.
If we hang a chandelier weighing more than 5 kg on a suspended ceiling, it would be much better to use anchors. To install these elements, you need to drill a hole in the concrete floor, the diameter of which will correspond to the diameter of the anchor sleeve. The sleeve is inserted into the ceiling, after which the hook is twisted until it stops, resulting in the anchor being fixed. If the distance between the ceiling and the tension fabric is less than 5-7 cm, the chandelier can be hung directly on the hook, otherwise you will have to extend the structure with a chain.
When the canvas is tensioned, you need to determine where the hook or support beam is located. In the place where the chandelier will be located, you need to glue a plastic mounting ring for the chandelier onto the suspended ceiling. The diameter of this ring should be slightly smaller than the inner diameter of the chandelier bowl. The part of the tension fabric located inside the perimeter of the ring is carefully cut out.
The chandelier fastener for the suspended ceiling is mounted to the beam. If the hook is originally built into the ceiling, then it must be leveled using a chain. In any case, the next step is to remove the wiring. The wires need to be straightened and a terminal block installed on them, which will allow you to connect the lamp.
Immediately before hanging a chandelier on a suspended ceiling, you need to remove all sharp and protruding elements from it that could damage the canvas and lamps. The chandelier is hung from a hook and connected to the power supply. The wires must be placed around the rod in such a way that elements that do not have insulation are located at a distance from the parts of the chandelier itself. The structure is covered with a decorative bowl and fixed at the required level, and the canvas should not be stretched after installation.
Light bulbs are screwed into the installed chandelier, after which the lamp must be checked for functionality. If everything works normally, then the light turns off, and the lamps and those elements that were previously removed are installed on the device. The fully assembled chandelier is turned on and held in this state for 15-20 minutes. During work, you need to check whether the ceiling near the chandelier is heating up - if the temperature is too high and can damage the canvas, it is worth replacing the lamps with less powerful ones.
How to attach a chandelier to a mounting platform
The luminaire can be attached to a suspended ceiling on a platform using a longitudinal or cross-shaped strip. The dimensions of the platform are determined depending on the size of the strip and the weight of the chandelier. The plank is mounted at the stage of installing the baguettes so that its level coincides with the level of the guides.
A block, board or plywood can be used to make the platform. To mount the lamp, you will need to prepare plastic mounting rings in advance. The diameter of the rings for the longitudinal strips must be large enough to allow wiring to be inserted into them. In the case of cross-shaped strips, you have to buy five rings at once, each with different diameters.
The suitable point for mounting the chandelier is determined individually. If the chandelier will be mounted at the central point of the room, then the standard hook must be cut off or hidden in the slab. The wires going to the lamp are pulled out and checked for functionality, after which the resulting hole in the ceiling must be covered with gypsum putty.

If the tension fabric is located at a short distance from the base, the lamp is installed on the mounting plate using an embedded bar. You need to drill two holes in the block with a diameter of about 2-3 m. To lay the wires, a small groove is cut right in the center of the block. Next, you need to mark the ceiling and prepare holes in it, to which the block with the wires located in it is attached. In the case of a cross-shaped mounting strip, a platform of the same shape is required.
If the ceiling level changes significantly, the mounting platform has to be assembled. The base of the platform will be a rectangular piece of plywood with a thickness of 6 to 12 mm. The length of the plywood platform should slightly exceed the length of the lamp strip, and the width should be slightly larger than the diameter of the mounting ring. For cross-shaped planks, you need not rectangular, but square platforms.
To lay wiring in the platform, you need to prepare suitable holes in it. The outer part of the prepared part must be processed with high quality - the presence of unevenness and roughness can lead to damage to the canvas. Brackets are installed at the corners of the platform.
Before hanging a chandelier on suspended ceilings, you need to check the structure for alignment. The assembled platform is tried on in its place to check the level - a correctly made part will be at the same level where the stretch ceiling should be located. If necessary, you can adjust the height of the platform using brackets. When the part is exactly where it is needed, all that remains is to fix it with screws and dowels.

Next you need to install a suspended ceiling. After the ceiling has hardened, you can continue installing the chandelier. The hole for the wires is found by touch, and a mounting ring is glued around it. A part of the canvas inside the ring is carefully cut out, and the wiring is pulled out of it.
Mounting studs are attached to the mounting plate using a locknut. They need to be installed very well, otherwise the mounting of the chandelier will ultimately not be reliable enough. The plank is attached to the platform with self-tapping screws. When the entire supporting structure is ready, you can attach the chandelier to the strip to the suspended ceiling. The installation technology looks the same as in the case of hook mounting.
Conclusion
Installing a chandelier on a suspended ceiling is quite a feasible task even for an inexperienced craftsman. In order for the work to proceed without complications, it is necessary to take into account all the nuances of the future structure during the design, and during the installation process, strictly adhere to its technology. If you don’t have confidence in your own abilities, it’s better to entrust all the work to professionals - in the end, only a quality result matters.
At the final stage of renovation work, lighting fixtures should always be installed. If this is an ordinary ceiling, then there will be no difficulties with their installation. Problems arise when you have to hang a chandelier on a suspended ceiling. The fact is that attaching it directly to the ceiling plane will not work.
Beautiful lighting fixtures are not only one of the elements of the interior of a room; it is impossible to live without them in the dark. When a suspended ceiling is used to finish the rough floor, the process of attaching them becomes more complicated.
Since the ceiling structure consists of a tightly stretched fabric, it is impossible to use long-used installation technologies. But there are methods on how to hang a chandelier on a suspended ceiling without spoiling it or damaging the panel.
Features of the chandelier installation process
Before proceeding with the installation of lighting fixtures, it is necessary to ensure that this work is carried out by people who thoroughly know its nuances so that all existing risks are minimized.
The fastening process must meet a number of requirements:
- Reliability. The chandelier must be installed so well that the possibility of it falling, and therefore causing injury, is excluded.
- Aesthetic component. Installation work should be carried out as carefully as possible so as not to damage the ceiling surface.
- Simplicity. When thinking about how best to attach a chandelier, you should not invent your own methods. It is advisable to use the recommendations of specialists who are constantly engaged in this type of installation work.

Mounting a chandelier on an already installed tension structure has some features:
- The lighting device must be installed after the canvas has been tensioned and cooled. It is advisable to carry out this process two to three days after the completion of the ceiling.
- The simpler the ceiling structure, the easier and faster the lamp can be installed.
You also need to remember about other important nuances that affect the reliability of fastening and good appearance. It is necessary to ensure that after the installation of the tension fabric is completed, there is space for installing the chandelier. It is isolated with a thermal ring, which is intended to prevent rupture of the panel.
Requirements for the lighting device
Not all homeowners who have installed a suspended ceiling know that not every chandelier can be attached to it.
This type of lighting device is subject to a whole list of requirements regarding:
- Lamp locations. Chandeliers in which they are directed to the sides and downwards are suitable. It is impossible to install devices if their lampshades “look” upward, since as a result of the effect of heat on the canvas, stains appear on it. The reason for this phenomenon is the property of polyvinyl chloride to change when heated.
- Base material. Preference should be given to products that are not made of metal. The reason is that with prolonged use of the chandelier, the metal elements begin to heat up and as a result of contact, deformation of the ceiling surface occurs, which manifests itself in the form of spots and stains.
- Availability of a universal lamp. Today the choice of chandeliers is huge, but the most practical choice is still a universal lampshade. Energy-saving lamps are suitable for it, since they do not heat up and do not have a negative effect on the stretch fabric.
- Lamp depths. It is better to purchase chandeliers whose lamps are completely covered, as this will protect the ceiling surface from the influence of artificial lighting. In the absence of a lampshade, when it is made in the form of a decorative base, you can only use energy-saving lamps with low power.
- Distances from the lampshade to the canvas. It must be at least 20 centimeters, otherwise the panel will not last long and defects will soon appear on its surface as a result of heating the material.
- Polyvinyl chloride films. The fabric made from it is elastic, but too thin. Therefore, it can be easily damaged by sharp objects, which means the chandelier should have a streamlined shape.
- Incandescent lamps. In a chandelier it is permissible to use lamps with a power of no more than 40 W, otherwise too high a temperature will cause rapid deterioration of the panel.
Requirements for the fastening process
When choosing a chandelier, you need to pay attention not only to its decorative part, but also to the fastening elements. There are two methods for installing this lighting fixture. The first of them is the use of a hook for a suspended ceiling chandelier.
The use of a hook-shaped element is considered the most reliable and time-tested option. Using an anchor, the hook is inserted into the ceiling slab and ultimately secures even the heaviest of chandeliers.

By using a strip, which is a metal piece. It is intended for mounting to the ceiling and comes in:
- cross-shaped, consisting of two slats that are arranged crosswise;
- I-beam – it is used for mounting massive lamps if they additionally require a safety mount;
- an ordinary strip shaped like a metal product in the form of a rectangle.
When it is necessary to install a chandelier in a suspended ceiling structure, the best solution is to use a hook mounting method, which is simple and reliable, and also allows you to maintain the integrity of the ceiling finish.
The hook looks neat, it helps reduce the diameter of the thermal ring used to cut a hole for the electrical wires. This allows you to install a chandelier with a small glass and a decorative cover. It is important that the lighting device is not attached to the tension fabric, but to the floor slab located under the structure.
Tools and Supplies
For installation you will need the following tools and materials:
- screws and dowels;
- drill with drill bits for working on wood and concrete;
- pliers;
- screwdrivers - indicator, Phillips and slotted;
- wooden block;
- insulation;
- mounting gun plus staples.
Important: work related to the installation of the chandelier should be carried out when the power supply is turned off. These precautions reduce the risk of injury.
Mounting the lamp using a hook on a suspended ceiling
There are several ways to attach a chandelier to a suspended ceiling, which differ from each other. As a rule, when selling such a lighting device, a set of fastening elements is attached to it. The first method assumes that the chandelier will be installed using a hook.
To carry out installation work you will need the following tools:
- drill or hammer drill;
- concrete drills;
- hammer;
- anchor hook.

Fastening is carried out in a certain sequence:
- A hole is created in the ceiling slab using a puncher, the diameter of which should be equal to the diameter of the anchor.
- Using a hammer, the anchor is driven into the hole. Next, the hook is rotated until the sleeve straightens out and assumes a working position. A similar result can be achieved differently, namely by tightening the nut included with the hook. The diameter of the anchor is selected in accordance with the type of chandelier. The most popular diameters are from 6 to 14 millimeters.
- A plastic ring is glued onto the tension fabric through which the hook is to be pulled. Then a hole is cut inside the resulting circle and hanging is performed. Glue the O-ring and then cut the film in the place where the hook is located. If you make even a slight mistake when determining the location of the hole, this will lead to the fact that you will have to move the lighting fixture. For this reason, you need to find it very accurately.
Even for inexperienced home craftsmen, installation will not take more than 30 minutes. There is no better way to install lamps on a suspended ceiling than this. But the chandelier cannot always be hung on a hook. In some cases, manufacturers of such devices provide for the use of fasteners of a different type.
Installing chandeliers on a mounting plate
This method is used when it is necessary to hang a chandelier on a suspended ceiling without a hook. In such a case, the fastening is carried out on a longitudinal or cross-shaped mounting plate. In this case, the size of the platform depends on the parameters of the bar, and its thickness depends on the weight of the lamp.
The mounting strip is installed when attaching the baguettes, and at the same level as the guide elements. To make a platform, take a block, piece of plywood or board. In addition, plastic mounting rings are used to secure the chandelier.

For the longitudinal strip, a ring is used, the diameter of which allows you to pass wires through it and fix it with self-tapping screws. For cross-shaped strips you will need 5 rings, of different diameters.
Installation of chandeliers on a longitudinal strip is carried out as follows:
- When the level of the ceiling structure must drop by an insignificant amount, in order to install the chandelier on a small longitudinal strip, it will be enough to fix the embedded block in a certain place on the ceiling. For this purpose, 2 holes with a diameter of 2 - 3 millimeters are drilled in it. To lay the wire, a shallow groove is cut through the center of the block. The ceiling is marked and holes are created using a puncher, then the wooden element is secured and wires are placed in it.
- In the case of a significant difference in ceiling level, for example when installing two-level structures, a prefabricated version of the mounting platform is used. To make it, take a piece of plywood 6 - 12 millimeters thick and cut out a rectangular element of the required size from it. The length of the platform should exceed this parameter of the lamp strip by a couple of centimeters, and the width should be slightly larger than the diameter of the mounting ring. For cross-shaped planks, a square platform is made.
- A hole for wires with a diameter of 10-15 millimeters is drilled in the center of the platform and its outer side is carefully polished to prevent damage to the canvas, and brackets are attached to the corners with wood screws.
- The platform is applied to the ceiling and its level is checked. This is to ensure that it matches the location of the finished ceiling surface. The height of the platform is adjusted using brackets, for which they are bent. It is fixed to the ceiling with self-tapping screws and dowels.
- Guides are placed along the perimeter of the room, controlling the correspondence between the levels of the baguettes and the mounting platform. The fabric is stretched according to standard technology.
- After it has cooled, when it acquires the required elasticity, they begin to install the chandelier. Find the hole for the wires by touch and glue a mounting ring around this place. Then the material is cut out inside it and the wires are brought out through the hole.
- Mounting studs are placed on the bar and pulled onto the locknut. They are tightened well, since then it will not be possible to secure the device. The plank is mounted to the platform with self-tapping screws.
- Next, you need to remove the light bulbs and sharp parts from the chandelier and prepare the terminal block for connection. It is advisable to hang the lamp with a partner - he will hold the device, and at this time the second person will begin to connect the wires and tighten the decorative union nuts on the body.
- Finally, the lamps are screwed in, shades and various decorative elements are attached, and then the performance of the chandelier is checked.
Installation of lighting fixtures on a cross-shaped strip
This method is used when there is a need to attach a heavy chandelier to a suspended ceiling, which requires the creation of additional support. It has much in common with the previous version of mounting lamps.
A cross-shaped strip is used as a fastener for massive lighting devices with a wide base. It is impossible to mount it in a suspended ceiling structure within the mounting holes, since they are located at a great distance from each other.
For this reason, a supporting platform or wooden base is attached to the ceiling. Such an element can be made from a plywood sheet with a thickness of 10 -12 millimeters; it must correspond to the parameters of the cross.

The suspended ceiling is equipped with 5 holes, reinforced with thermal rings. One of them, intended for electrical wiring, is made large. The remaining four are created small and used to connect the power supply - they must match the mounting holes on the cross-shaped strip.
If there are no thermal rings of small diameter, you can use pieces of plastic that are glued to the tension fabric to strengthen the places where the screws are screwed in. Otherwise, the film at the puncture site may tear. When the wires are connected, all that remains is to place the chandelier on the crosspiece and secure it with decorative nuts.
By the way, it is prohibited to connect wires made of different metals. For example, copper wires can only be twisted with copper wires, otherwise a short circuit cannot be avoided.
Fastening the chandelier with a dowel - butterfly
The installation method using butterfly dowels is very convenient, but it is used provided that the lamp weighs no more than 3 kilograms. This fastener has a plastic collar and a screw hook.
Openings are created in the ceiling taking into account the openings of the cage. Then the hook is screwed into the cage several turns. It is inserted all the way into the desired hole and the hook is tightened. From the inside, the plastic clip opens into petals, which secure the hook.
Advantages and disadvantages of various fastening methods
To decide on the option of how to install a chandelier on a suspended ceiling in a specific situation, you need to have an idea of the pros and cons of each of them:
- Installation using an anchor hook is simple, quick and reliable, but not every chandelier is suitable for this type of mounting.
- The cross allows you to install massive lighting fixtures, but since this is not easy to do, an assistant is required.
- Most chandeliers are mounted using a strip - this is a simple method. In this case, you will need to use a wooden block.
- Using a butterfly dowel, attaching a lamp is quick and easy, but the reliability of this method is less than that of other options.

There are other methods of attaching chandeliers, but they are not used for suspended ceiling structures, since they provide free access to the base base during installation, which is impossible with stretched film or fabric.
Connecting the lamp to the electrical network
When the fasteners are prepared, the chandelier needs to be connected to the network. Using a pre-made hole, the wires are pulled out through the thermal ring. The lamp is hung on a bar or hook to free your hands, and the wiring is connected.
The wires are connected according to the chandelier manufacturer's instructions, the lamps are screwed into the shades and the functionality of the device is checked. If it functions properly, proceed to insulating the wiring and securing the lamp. This work is performed with the power supply turned off.

Having twisted the wires, they are placed in a corrugation and the glass of the device is secured. Using decorative bolts, begin to adjust the clamp of the chandelier and the density of its contact with the ceiling surface.
Completing the installation of the chandelier
After all the work on installing and checking the functionality of the devices has been completed, you need to make sure that the canvas is intact and that there are no various damages, such as scratches, tears, and others.

In order to eliminate traces of unprofessional installation, you can use several tricks:
- The remains of the fabric in the thermal ring are carefully cut off, leaving at least 2-3 centimeters from the edge to prevent the material from slipping or deforming.
- If the ceiling surface is damaged by tools or sparks, thermal stickers will help make the damage invisible, which will also decorate the interior.
- The corrugation will help prevent direct contact of the wiring with the inside of the tension fabric - all electrical wires are placed in it.
Elimination of non-standard situations arising during installation
When hanging a chandelier on a suspended ceiling, situations often arise from which it is not easy to find a way out.
The most common problems among them are:
- The length of the hook installed in the ceiling was insufficient. This happens when there is a large distance between the ceiling and the suspended ceiling. This situation can be corrected by adding a strong chain to the hook - something like an extension cord.
- There was a need to extend the wiring. In this case, all wires are placed in a plastic corrugation. This way they will not sag, which means they will not touch the inside of the tension panel. The corrugation is attached with staples to the concrete ceiling.
- The idea arose to change the location of the chandelier. This should be done in advance, since transfer is impossible without damaging the canvas.
- There is a difference between the wires of a home's electrical wiring and those of a lighting fixture. In such a situation, you need to use special terminal blocks that prevent short-circuiting of non-contact metals from which the wires are made.

In order to correctly perform the rather difficult job of connecting a chandelier to the electrical wiring, you must strictly follow the instructions included with the lighting fixtures. It always describes the entire process in detail and includes a connection diagram. If you do not have special knowledge and skills for such work, then it is better to entrust the installation to professionals.
Many apartments and country houses have suspended ceilings. The design requires certain knowledge of care and operation. When installing a profile, the question often arises: how to hang a chandelier on a suspended ceiling.
The work of fixing the lamp can be entrusted to professional craftsmen. But, if you want to save money, you can do it yourself.
It is important to understand what sequence to install the lamp and what fasteners to use.
Rules and precautions
Attaching the lamp to the ceiling surface is not difficult. But, it is necessary to take into account that you need to be very careful when hanging a chandelier on a suspended ceiling. This coating does not tolerate heavy loads, and if handled carelessly, the canvas may become deformed.
When installing the lamp, wear rubber gloves - you are working with electricity. Do not work with a drill towards the switch - damage the wiring.
It is advisable to select a lamp before installing the ceiling covering. This way it will be clear in advance which mounting method to choose. You will also understand what is the best place to mount a chandelier?.
Buy energy-saving light bulbs for lamps.
When installing, make sure that between the lighting fixture and the canvas there was free space left.
Tools and materials
To properly hang a chandelier from a suspended ceiling, you need to stock up on the necessary tools and materials. The following devices will be needed:
- drills and drill bits working on concrete and wood;
- if there is a hook, good. If not, then you need an anchor bolt with a hook;
- wooden block;
- screws for wood and metal;
- screwdrivers;
- pliers;
- tools for connecting wires;
- if the wiring is open, you will need wires;
- gun for installation work.

Typically, luminaires intended for installation on a suspended surface have a mounting device. It can be made in the form of a cross or a bar.
Selecting a lighting device
To avoid deformation of the canvas, you need to choose the right lamp:
- The chandelier should not heat the tension fabric, otherwise stains will form on it. Try to choose a lamp with downward-facing shades. With this option, the light bulbs can be either energy-saving or incandescent;
- a lighting fixture with energy-saving elements is an ideal option for stretch fabric because it releases heat without heating the surface. Just take medium wattage bulbs;
- choose a lamp so that its decorative elements are not pointed.
The main thing when choosing a chandelier is not to damage the ceiling covering or allow it to deform.
Types of hooks
If a strip is selected for the fastening element, you need to know that it comes in three types:
- ordinary. Conventional lamps are mounted to this;
- cruciform. Reliable option that can withstand heavy weight;
- I-beam This one will withstand large lamps.
Of all types of fasteners, the hook is considered the most reliable option.

Hook Installation
Even if you know how to hang a chandelier on a suspended ceiling, do not neglect the preparatory work.
For safety, be sure to wear rubber gloves.
Preparing to install the lamp involves securing the hook on which the chandelier will be held. The hook can be installed in different ways.
First option:
- you will need bolts and screws;
- die for mounting the device;
- a hole is cut in the canvas.
Once the hole is cut, be sure to tape the edges. A special tape is sold for this. The hook is installed in a hole drilled in the die.
The second method is intended for a lamp with a ready-made mounting strip:
- screws are needed;
- butterfly fastener;
- part of the hook is attached to the bar, the other to the embedded part;
- connect the wires.
The second installation option makes it possible, if necessary, to replace the lighting device. In this case, the ceiling canvas does not experience stress and is not damaged. You can see in detail how to hang a chandelier on a suspended ceiling in the video.
Removing traces of fastening
How to decorate the place where the mount is installed? You can use a beautiful polyurethane socket.
Another method is suitable if there is a little tension fabric left after installation - you can decorate with it.
Alternatively, try decorating the mounting location with a sticker. Just choose it so that it fits into the style of the room. There are photos on the Internet on how to arrange everything correctly and hang a chandelier on a suspended ceiling.
Installation on mounting strips
You can hang the lamp on a suspended ceiling using mounting strips. Such fasteners cannot be mounted to a concrete base.
You can attach it to wooden beams or pre-install a wooden or plywood insert on concrete. The plates will already be attached to them. In the case of a concrete ceiling, the structure is usually fixed with anchor dowels. For the wooden version, self-tapping screws are needed. Don't forget to make a hole for the wiring in the wooden insert.
Important information: this method of mounting a lighting fixture is unacceptable if the ceiling covering is plasterboard.
For private houses
This method is only suitable for home owners. It will not work in apartments, because it is necessary to make a hole in the ceilings between floors. Unless it will be an apartment on two levels.
After cutting the hole, you need to install metal plates. One is mounted in the floor on the ground floor, the other in the ceiling space (possibly in the attic).

The metal plates will hold due to the hook with a nut screwed onto it.
The hook is installed in the hole. The plates are tightened with nuts in the floor slabs.
Safe work with electricity
After installing the lighting device, it must be connected. All work should be performed according to the instructions attached to the device passport. Follow safety rules when connecting the chandelier step by step. Do everything carefully and competently, otherwise power outages may occur, which is unsafe.
Important: when choosing a lighting device, read its characteristics. Pay attention to power consumption. The load on the electrical wiring depends on the parameters of the device.
Before connecting the lamp, study the purpose of each wiring. Make sure there is a grounding cable in the room.
It is not difficult to determine which cable is which - they are different colors. But not all houses have multi-colored wiring. Older buildings may still have outdated standards.
If there are several keys in the lighting device, then there will be several phase wires.
The easiest option is to hang a chandelier on a suspended ceiling, with a single-key device. If the chandelier has more than two groups of arms, then the job is more difficult.
After connecting the wires, screw in the bulbs and try to turn on the lamp. Make sure all light bulbs are in working order. Then secure the glass of the chandelier by lifting it to the ceiling surface.
Hanging a chandelier on a false ceiling is not so difficult. Follow the rules, stay safe and everything will work out.
A stretch ceiling is a beautiful and practical solution, thanks to which you can easily hide all the flaws in the ceiling. And well-arranged lighting in the apartment makes it even more attractive. The main source of light in the room is the chandelier. We will tell you which products are best to install when decorating a room with a suspended ceiling, how to attach chandeliers, and also provide step-by-step instructions for installing a lighting fixture.
Choosing a chandelier for a stretch ceiling
A chandelier in combination with a glossy stretch ceiling gives the room a special chic
Before purchasing a lamp, you should make sure that it will not damage the ceiling covering. The fact is that the tension structure can be damaged due to strong heating from nearby lamps. Therefore, when purchasing a chandelier, you need to take into account not only your personal preferences regarding the design and power of the lamp, but also pay attention to the design of the product, as well as the type of lamps used. Let us highlight the main selection criteria:
- Give preference to chandeliers with energy-saving lamps (LED or fluorescent), which, even during prolonged operation, do not emit a large amount of thermal energy.
- You can also use devices with halogen or traditional incandescent lamps. But in this case, the light-emitting elements must be enclosed in lampshades.
- If you decide to purchase an overhead chandelier, remember that its base is often made of metal, as a result of which it will constantly heat up. As a result, the tension film soon becomes deformed and the ceiling loses its appearance.
Mounting options
The hook can support even the largest lamps
The most common way to install a lighting fixture is to mount the chandelier using a hook. In this case, a very simple and reliable fastening is obtained. This method is convenient in the sense that apart from the hook fixed in the ceiling, nothing else is needed. Moreover, if there is no metal fastening in the ceiling, then its installation can be done without any problems by yourself. The main thing is that the hook is tightly fixed in the concrete floor. This mount can support lamps of almost any size and weight.
To attach a chandelier to a suspended ceiling, a standard mounting strip is often used. It is a metal profile with special mounting pins or side holes and clamps for screws to which the base of the chandelier is attached. As a rule, a mounting strip is included with the lighting fixture. To properly install a chandelier with this type of fastening, you need to prepare in advance and install a special base on the ceiling - a wooden block.
If you have chosen a massive chandelier, then it is advisable to use a cross-mounting strip to install it. Here the mount consists of four mounting metal legs, which are firmly attached to the ceiling, and a wooden supporting strip attached to them. And the chandelier itself is fixed to the cross-shaped structure using self-tapping screws.
Tools and materials
To install a chandelier to a suspended ceiling, you may need the following tools and materials:
- powerful screwdriver;
- drill or hammer drill with concrete drill;
- self-tapping screws;
- screwdriver;
- assembly adhesive;
- wooden block, plywood strip 10-12 mm thick;
- wood hacksaw, grinder or circular saw;
- anchor and dowels;
- voltage indicator (up to 1000 V) or indicator screwdriver;
- pliers;
- stationery knife;
- electrical insulating tape.
Preparatory work
Before installing the suspended ceiling and chandelier, it is necessary to thoroughly clean the surface of the ceiling
Despite the fact that a suspended ceiling perfectly hides all the unevenness, stains and other imperfections of the concrete floor, many people still prefer to prepare the mounting surface. And they are absolutely right, because if you clean the ceiling from old crumbling putty or paint, and also apply a new layer of primer, you can significantly reduce the likelihood of further damage to the tension fabric.
After preparing the surface, it is worth determining the optimal location for installing the chandelier. After all, after installing a stretch ceiling, changing the location of the lighting fixture will be extremely problematic. In addition, you need to think in advance about laying electrical wiring for lighting and ventilation, as well as other elements that are planned to be located behind the surface of the stretch ceiling. It will be impossible to get to all these communications without dismantling the canvas.
Before installing the chandelier, turn off the power supply to the apartment and check the absence of voltage with a special indicator
Before you begin work on fixing the chandelier, you should turn off the electricity in the apartment. First you need to turn off the lights and all electrical appliances. And then on the electricity meter panel, turn the toggle switch of the input circuit breaker to the “off” position or unscrew the plugs.
If the panel is installed on a staircase or in any other place accessible to strangers, then an observing person must be placed near it to avoid accidental voltage supply.
Then check that there is no electricity in any of the outlets and on the wires to which the chandelier will be connected. To do this, use an indicator screwdriver or a voltage indicator.
Installation instructions
Regardless of what kind of lighting fixture you purchased, its installation begins with the installation of a profile to fix the suspended ceiling covering. Then two fishing lines are stretched between the profiles, at the intersection of which the chandelier will be located. After this, the fastening element is installed in the concrete base. As noted earlier, the product can be suspended using a hook, mounting strip or cross-shaped plate. Here are step-by-step instructions for installing a chandelier with each mounting option.
Hook mount
A hook is the simplest and most reliable mount for a lamp
- We install a mounting hook on the ceiling. To fix it, we use powerful dowels or anchor bolts. In this case, the lower edge of the hook should be higher than the level of the future suspended ceiling, that is, higher than the stretched fishing line.
- At the second stage, we install the stretch ceiling.
- At the location of the hook we glue a heat-resistant plastic ring. To do this we use assembly adhesive. The ring must be selected in such a way that it can subsequently be completely covered with a decorative cap.
- We cut a hole inside the ring and take out the electrical wires to connect the device.
- We hang the chandelier on a hook and connect the power wires.
- Finally, we lift the structurally provided decorative cap, which allows us to hide the electrical connection points.
To make it easier to lift and hang the chandelier, remove the shades from it and unscrew the light bulbs.
Installation using a strip
Installing an O-ring allows you to avoid stretching of the stretch ceiling covering
- We attach a wooden block to the main ceiling. We use dowels as fasteners, and make holes for them with a hammer drill. You need to pre-drill a hole in the block through which the electrical wires will be passed to connect the lamp.
- As in the previous case, the suspended ceiling is then installed, a thermal ring is installed and a hole is cut out in the latter, followed by the output of the supply wires.
- The next step is to install the mounting plate. Within the ring, we screw it to a wooden block with self-tapping screws.
- We attach the base of the chandelier to the bar so that the pins of the bar coincide with the mounting holes of the device. We fix the lamp using decorative nuts.
Video instructions for preparing fasteners for a chandelier
The height of the bar should be such that after installation its lower surface is in the plane of the future stretch ceiling.
The cross-shaped mounting strip is used for mounting chandeliers with a wide base of a round or rectangular shape.
- In accordance with the dimensions of the cross, we cut out a platform from a sheet of plywood, in the center of which we make a hole for the output of electrical wires.
- We screw metal strips into each corner of the platform. The latter are needed to attach the structure to the main ceiling. The structure is fixed to the ceiling using dowels.
- After installing the tension covering, we install the ring, lead the wires into the hole made in advance and attach the cross-shaped plate to the wooden platform using self-tapping screws.
- Attaching the chandelier to the bar is done in a similar way to the method described above. In this case, the base of the chandelier must be located strictly parallel to the plane of the suspended ceiling.
The height of the supporting platform is determined by the length of the metal strips. Compare it with the plane of the stretch ceiling.
If you plan to make several holes in the ceiling for exiting wires and attaching the strip, then each of them must be equipped with a heat-resistant sealing ring.
If the chandelier does not include a decorative cap, then you can decorate the mounting location of the lighting fixture using a polyurethane socket. This product is light in weight, beautiful in appearance, replicating a genuine gypsum ceiling rosette, and also goes well with the stretch ceiling covering. You can decorate the place where the lamp is mounted in another way. For example, if you have a small piece of ceiling fabric left, cut a ring of the appropriate diameter from it and carefully glue it to the desired location.
Installing a chandelier on a suspended ceiling is not an impossible task. Installation of the product using any of the above methods can be done by an owner who has an understanding of repair and construction. But do not forget that installing a lamp involves working with electricity. Therefore, follow safety precautions and perform all actions carefully.
 DIY brick foundation: strip and columnar
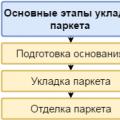 How to lay parquet: methods, necessary tools and step-by-step process for proper installation
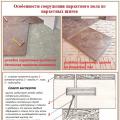 How to lay parquet: methods, necessary tools and step-by-step process for proper installation