Gloxinia room care at home. Features of wintering gloxinia: when to put the plant to rest. When he goes to rest
Attention: Winter for adult indoor gloxinia is a rest period. A plant that has bloomed at least once and managed to grow tubers enters a dormant state. The larger the tuber, the better it is stored. A young copy of the first year of life may not fall asleep for the winter.
When to retire? This should not be forced. Such gloxinia has a small tuber less than two centimeters in diameter, which, under wintering conditions without watering, can dry out and die. The young plant in winter season need special care
- Provide correct temperature regime . Indicators should not rise above + 20 ° C. If the room is too hot, the stem will stretch to the detriment of tuber growth.
- Watered less often than in the summer season(read how to properly water and feed gloxinia for long-term flowering). Otherwise, waterlogging will lead to root rot.
- Organize the backlight. Light day should last at least 12 hours a day. In the absence of additional lighting, the flower is strongly drawn out. To prevent this, the room temperature is reduced to +18°C. Or at the end of February, a long stem is cut, leaving only the lower leaves.
rest period
When to remove gloxinia for the winter, for rest? Usually in September-October, the plant goes into a midnight state, when the dry season begins in their homeland - in South America.
In the case when the plant has faded and does not want to fall asleep, it needs help. If gloxinia does not go to rest on time, the flowering time will shift, which should fall in the spring and summer months.
To prevent this from happening, at the beginning of autumn, the faded gloxinia begins to be prepared for wintering. With late flowering, wait for its end. After complete self-death of the aerial part, the tuber is ready for storage. If everything is done correctly, gloxinia will begin to wake up no earlier than January - February.
Detailed description
- In September-October, after flowering, place the gloxinia in a less lit place, for example, on the northern windowsill. Provide a temperature of +15°C. Feed once with potash fertilizer. Gradually reduce watering. Moisten the soil with small portions of water no more than once a week.
- When the leaves begin to dry, stop moistening the substrate. You can not immediately cut off the aerial part of the plant. It is necessary to allow nutrients to gradually pass into the tuber from the stem and leaves. If you cut off the green foliage, the vegetation processes can resume.
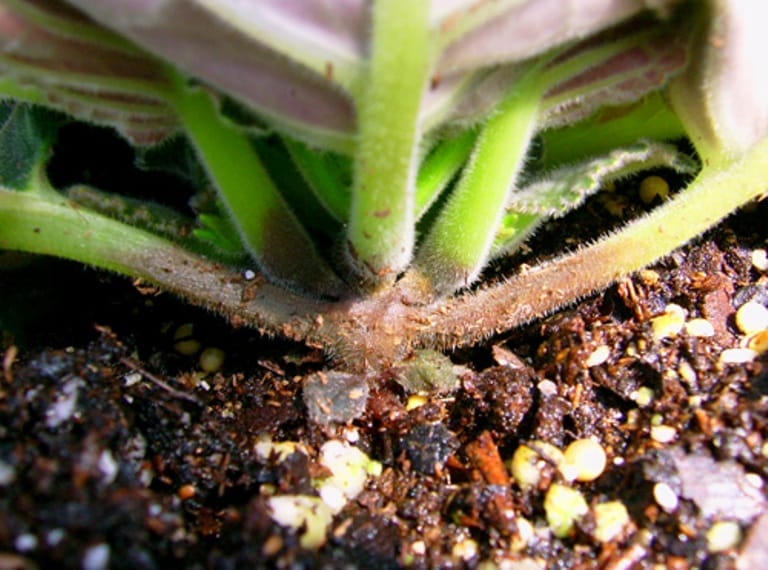
- After the complete independent death of the upper part, cut it off, leaving a small stump one and a half centimeters high.
Methods and conditions of storage
When the preparation is completed, you need to send the tuber for the winter. Storage methods:
- Leave the tuber in the pot. Can be sprinkled river sand. Cover the flowerpot with a saucer, place in polyethylene and place in a cool place with a temperature of +10 to +15°C. Make sure that the tuber does not dry out completely. Lightly moisten the soil by spraying several times during the winter.
- Two weeks after the complete death of the aerial part, dig out the tuber. Remove root debris. You can wash it in water, dry it and treat it with Fitosporin. Take a plastic bag with a zipper, pour slightly damp sawdust or river sand or crushed peat into it. Or take a mixture of substrate with vermiculite. Rinse the sand beforehand and hold it in a hot oven.
- Put the tuber in the bag. Store in a box in a cool place at a temperature of +10 to +15°C. The middle or bottom shelf of the refrigerator door will do. Take out and inspect the tuber monthly. If the substrate is dry, spray it with warm water and return the tuber to its place. Avoid excess moisture.
In the case when the grower has several gloxinia, make labels indicating the variety and date of dispatch for wintering.
The dormant period of gloxinia.
In autumn, after flowering, gloxinia begins a dormant period. The plant slows down growth, does not pick up buds, the leaves begin to turn yellow and dry out. In such a plant, the leaves are cut off and removed for winter storage. The optimal time for pruning gloxinia and sending the tuber for winter storage is October-November.
Sometimes it happens that gloxinia do not want to go to hibernation themselves. If the tuber is more than a year old, then gloxinia still needs to be put to bed.
Such gloxinia must first be prepared for a dormant period, i.e. reduce watering, move to a darker and cooler place, stop feeding. After the plant stops growing, the leaves begin to turn yellow, the stems and leaves are cut off.
Gloxinia tubers are stored in a dark, cool place at a temperature of 12-16 degrees Celsius. My gloxinia are stored in a closed closet on an insulated loggia. Some flower growers store tubers in the refrigerator, having previously measured the air temperature on the refrigerator shelf.
Methods for storing tubers:
1. The plant can be left in the same pot in which gloxinia grew. The soil in which gloxinia is stored should be slightly damp, but not wet. Gloxinia with this method of storage must be watered, slightly moistening the soil, about a spoonful of water. Watering is done 1-2 times a month, making sure that the soil does not dry out and the tuber does not dry out. You can make it easier: place the pot with the tuber in a plastic bag and tie it tightly. With this method, there is no need to water gloxinia and the possibility of drying out of the soil is excluded. Once a month, it is necessary to check the soil moisture and the condition of the tuber.
2. In a plastic container.
Currently, pavilions with disposable tableware sell various plastic containers with lid. It is convenient to store small gloxinia tubers in such containers. We pour a small amount of moist soil on the bottom of the container, place the tuber, sprinkle it with earth. Close the container tightly with a lid to prevent overdrying of the soil. Such containers allow you to save space during storage, the possibility of drying out of the soil is excluded. 
Awakening gloxinia.
The dormant period of gloxinia lasts from one to five months. After that, the tubers wake up and release new shoots. The optimal time for awakening is February, March, April. If the gloxinia tuber has not woken up before May, it can be forced to wake it up. To do this, the gloxinia tuber must be placed in a transparent bag, add a little moist soil, and put in a well-lit place, but not straight Sun rays. Usually after this, the tuber releases sprouts within one to two weeks.
After waking up, it is necessary to remove the tuber from the old soil, shake it off, rinse in water or a weak solution of potassium permanganate, cut off the old thin roots, while leaving thick roots.
Awakened gloxinia should be transplanted into fresh nutritious light soil, lightly watered. When planting, it is impossible to deepen the gloxinia tuber, you need to plant the tuber with a recess upwards, sprinkling the tuber itself with soil no more than 1 cm. At the same time, you need to make sure that the young sprout is not covered up.
The first time after waking up, the plant should be watered moderately, without waterlogging the soil, in order to avoid rotting of the tuber.
It often happens that gloxinia produces several sprouts. I always leave one, the strongest. The remaining sprouts can be carefully removed by cutting with a blade. Leaving one sprout on the tuber, a more accurate bush is obtained, and the flowers are larger.
If you want to get a more lush plant, then you can leave two sprouts.
Cut off "extra" sprouts can be easily rooted by placing them in water until the roots appear 1-2 cm, and then plant them in the soil. Thus, you can get another plant that will bloom in the same year. In this case, it should be borne in mind that slightly grown sprouts are suitable for rooting, on which there will be 4 leaves.
Pot size for gloxinia tuber.
A pot for gloxinia must be selected in such a way that the diameter of the pot is 3-4 centimeters larger than the diameter of the tuber.
For example, a very small nodule, about one or two centimeters in size, I plant in a hundred gram a plastic cup, medium tuber - in a pot with a diameter of 7 cm, adult tubers feel good in 9 cm pots.
As small nodules grow and the root system develops, gloxinia will need to be transplanted into a larger pot.
If you plant a small tuber immediately in a large diameter pot, then there is a possibility of acidification of the soil and rotting of the tuber.
One of the most important points in the development of gloxinia there is a dormant period, because thanks to this the plant can delight with its colorful flowering every year. A flower that has rested and gained strength has more flower stalks, and the flowering itself lasts longer.
When does gloxinia go on vacation?
A dormant period is not required for all gloxinia. Young and small nodules still do not need it, but the bushes that have already produced flower stalks and have reached adult size go to rest for the winter.
Tubers that have reached a diameter of more than 2 cm, and which are more than a year, hibernate in late October or November.
How to understand that gloxinia is preparing for a dormant period?
The fact that the flower wants to take a break can be understood by its appearance:
- in a healthy plant, the lower leaves gradually dry out;
- over time, the entire aerial part of the flower dries up.
Drying out as a transitional stage of preparation for winter can take place even if there are flower stalks on the bush. They may never have time to bloom, but this is not scary - the flower simply did not calculate its strength and threw out the flower stalks too late.
You can not cut off the remaining green top of the bush - it should dry out on its own. So everything nutrients from green leaves pass into a tuber, and the flower is gaining strength before wintering.
How to prepare a flower for a dormant period?
As soon as the gloxinia are present external signs falling asleep, it is necessary to reduce the frequency of watering and completely eliminate top dressing.
Since the bright light will only interfere with the plant now, the pot must be removed from the windowsill and placed in a darker place.
How to store tubers in winter?
When the gloxinia is completely dry (its green part), it's time to start sending the tuber for storage.
There are two ways to store nodules in winter:
- Directly in the pot without taking them out of the soil. Cut dry leaves and stems with scissors, leaving a small stump. Lightly moisten the ground and cover the flowerpot with a bag, tying it tightly. Remove the bag once a month to check the soil and re-moisten the soil if necessary, watering only around the edge of the pot.
- In a bag of peat. Carefully remove the tuber, wash it, getting rid of the remnants of the earth. Be sure to let it dry. Pour a little peat into the bag and put the tuber on top. Spray a little with water and close the bag tightly.
Where to store tubers?
Prepared gloxinia tubers should be stored in a dark and cool room. The maximum temperature in the room should be 15 degrees Celsius, and the minimum - not lower than 5 degrees.
Gloxinia flower - beautiful flowering plant from the Gesneriaceae family. These tender plants very popular among flower growers, since caring for gloxinia at home does not cause problems.
Numerous hybrid varieties this flower. The most popular of them are gloxinia hybrid- a flower with a pubescent shortened stem. The flowers of this variety reach a diameter of up to 12 cm and resemble bells.

Gloxinia is beautiful. It is considered the source for most hybrids. Leaflets in the form of an ellipse are narrowed towards the base. Flowers up to 5 cm in diameter, often pink or purple.

Caring for gloxinia will not cause trouble if you correctly observe the active vegetation regime and dormant time.
How to care for gloxinia at home
- The plant prefers cold southern rooms.
- The gloxinia flower is photophilous, but requires maximum lighting during the forcing period. Then you need to provide your pet with 14 hours of daylight. It will not do without artificial lighting.
- Gloxinia loves heat, but does not tolerate heat. Especially, in addition to dry air.
- For soil is suitable any loose earth with a neutral reaction. It is best to purchase a specialized mixture in the store. Be sure to use drainage.
- You need to water the flower often, but choose small portions. When gloxinia fades, try to gradually reduce watering to zero. Sometimes you can water the tubers in winter to avoid drying out. Make sure that the water for irrigation is warm, otherwise you risk ruining the flower. Pour water only on the ground, avoiding contact with flowers or leaves.
- Gloxinia is demanding on air humidity, so spraying is required. Only you need to spray not the flower itself, but the space around it.
- Gloxinia is fed only during the active growing season, especially at the stage of bud formation. Use only organic fertilizers.
- The plant has a pronounced dormant period. After flowering, the aerial part dies off. It must be removed, and the pot with tubers rearranged in a cool dark place.
- Reproduction of gloxinia occurs by leaf or stem cuttings or division of roots.
Video: Care and cultivation of gloxinia flower
We grow gloxinia from seeds at home
- Planting seed passage in early or mid-February.
- We purchase planting material, it is better if it is Dutch or English, we specify the planting dates on the label.
- We disinfect the prepared soil with a weak solution of potassium permanganate.
- We observe the temperature up to 23 degrees, avoiding sudden jumps.
- You also need to take care of additional source Sveta.
- We make holes at the bottom of the prepared container, pour drainage, and then prepared soil.
- Since the seeds are very small, we carefully scatter them on the surface of the prepared earth and cover with a film. Get a mini greenhouse.
- We put the container in a well-lit place.
- Periodically air the seedlings by removing the film. This will help prevent mold and rot.
- We don't water. For the appearance of sprouts, the condensate formed on the film will be enough.
Video: Gloxinia, growing from seeds
Gloxinia flower, growing from a tuber
Gloxinia flower tuber planting is carried out in late December - early January.
- We prepare the tuber for planting. To do this, remove the old scales from it and wash it in warm water.
- Pour drainage into the prepared pot, and then the soil.
- We root the tuber only by 2/3, green sprouts should remain on the surface.
- Around the tuber, you need to slightly moisten the soil.
- Leave it like this until the leaves begin to grow. Only after that we add more earth, leveling the surface.
Video: Planting a gloxinia tuber after winter dormancy
It is important to remember that the successful growth of your gloxinia directly depends on whether you stored the tuber correctly during the dormant period.
Gloxinia (lat. Gloxinia) is a tuberous perennial that is grown mainly in pots. However, there are varieties suitable for planting in open ground. The homeland of gloxinia (you can still find the name "sinningia") are the tropics and subtropics of Asia and America. However, these plants bright flowers fit perfectly on our windowsills. Read below to learn how to care for gloxinia, when to transplant and prepare for wintering.
Gloxinia blooms in summer, and sometimes twice a year, after which the aerial part dies off. The flower needs a dormant period, which occurs in the winter.
Temperature and lighting
Gloxinia needs sufficient diffused lighting for 12-14 hours a day. Placement of the flower sunny windows requires shading, as direct ultraviolet rays leave burns on the leaves. On the northern windows of the gloxinia, stems and peduncles are stretched due to lack of light, and you can not wait for the second flowering of the year. To form a neat bush, gloxinia must be turned once a week with the other side to the light source.
The optimum air temperature for gloxinia is 18-22 ° C during the growing season. When the flower germinates tubers, it is necessary to increase it to 25 degrees, and during the dormant period - to lower it to 10-14 ° C. Drafts should be excluded. Elevated temperatures lead to overheating of the root system - gloxinia stops developing, the leaves wither, the flowers do not open or fall off quickly. At low temperatures, the plant also suffers - the leaves turn black and turn yellow, the buds wither.
Soil and watering
Gloxinia loves humidity. In a dry room, the leaves begin to curl, and the buds may not open. It is impossible to spray the fluffy leaves of the plant, but you can put pallets of water next to it. During the growing season, gloxinia should be watered abundantly, excluding water from entering the leaves and outlet. Allow to dry out between waterings. upper layer earth.
When the flowering period ends at the end of August, watering should be slightly reduced. After that, gloxinia will begin to prepare for a dormant period and wither - then you need to water even less often. Gloxinia roots are thin and superficial, so wide pots are chosen for them, but very deep. The best soil for a flower, you can cook it yourself: mix leaf and peat soil with river sand in a ratio of 2: 1: 1. Purchased soil for violets is suitable.
Gloxinia fertilizer

Growing gloxinia in open ground
From April to early August, gloxinia should be fed weekly. Fertilizers for flowering plants are suitable, containing more potassium and phosphorus than nitrogen. A good effect is the use of humic acids. Fertilizers can be combined with the application of growth stimulants, but not with fungicides.
It is important not to overfeed the plant, because such a gloxinia will have bud rot, and cuttings will take root poorly. Better to cook more weak solution than prescribed on the fertilizer package. Do not fertilize sick, weakened, recently transplanted flowers, as well as those in a dormant period. If you do not fertilize healthy gloxinia at all, the plant will develop worse, the flowers will turn pale and become smaller.
Transfer
Every spring, with a new germination of tubers, they are transplanted into a new soil. In the spring, the tubers are taken out, even if they were stored in the ground, they are cleaned of old roots, in addition to the largest ones, and planted in fresh soil. The distance between the tuber and the walls of the pot should be 3-4 cm. It is better to plant immediately after the sprout appears. Before this, you can treat with a fungicide solution to prevent the development of fungal diseases.
Before planting, the tuber should be inspected for damage. If there are rotten areas, they are removed with a sharp clean blade, and the cuts are sprinkled with crushed charcoal. It happens that after wintering the tuber becomes lethargic and wrinkled. In this case, you can try to restore it.
- Soak in a solution of epin or zircon. To prepare it, 10 drops are dissolved in 200 ml of boiled water. room temperature. A day later, the tuber is planted in the ground.
- Soft and shriveled tuber wrap for 2-3 days in a damp cloth. If after a while it has become hard - plant it in the ground.
- You can moisten the vermiculite with the solution described above and place the tuber in it for 1-2 days. If it has not sprouted, then it is buried entirely, and if there is a sprout, then it is left on the surface.
Before planting on the bottom of the pot, you need to put a layer of drainage of 1-2 cm - it can be foam, expanded clay. Then fill the container with soil, and place the tuber in the center, deepening 2/3 into the ground. Now cover the pot with cellophane or a transparent container and put in a warm place for germination.
Once a day, the greenhouse needs to be aired for 10-15 minutes. With the advent of the first pair of leaves, the greenhouse can only be covered at night, and after 4 days it can be completely removed. After the stem grows, the tuber must be covered with earth by 1 cm.
When did the gloxinia bloom?
After the end of the flowering period, the stem dies off. It is important to let the plant complete this process on its own. Gloxinia care after flowering is simple: when the leaves wither, watering is reduced, and when the upper part dries, stop it altogether.
Now the tuber can be dug up or left to be stored in a pot, providing an air temperature of 10-14 degrees. If gloxinia is still young and has not grown a tuber of sufficient size, it does not need winter period rest.
If gloxinia has faded in early summer, you can bloom it again. To do this, after flowering, the stem and leaves are cut off, leaving only a couple of lower ones. Stepchildren are formed in their sinuses. It is necessary to leave the strongest, and remove the rest. During this period, top dressing is introduced with nitrogen for growth, and with the advent of buds - with a phosphorus-potassium complex. The second bloom will be less lush.
Outdoor cultivation
During the summer period, gloxinia can be planted in the garden. For this, large tubers with a diameter of 8-10 cm are selected. Planting is carried out when the air temperature is stable at 18-20 degrees. Choose a damp shaded place, protected from the wind. In the open field, plants grow larger than in pots, so they need to be planted at a sufficient distance from each other. Before frost, you need to dig up the tubers for storage, without waiting for the natural drying of the stem.
Difficulties in growing
Due to errors in the conditions of detention, gloxinia are attacked by pests. If gloxinia leaves become thicker, deformed, twist around the edges - most likely, the plant is affected by a cyclamen mite.
When defeated spider mite white dots appear on the leaves, subsequently turning into yellow-brown spots. When thrips settles on gloxinia, the leaves acquire a silvery hue, white strokes and dots appear on them. Gradually they turn brown and dry, and their edges are wrapped up.
Often from over watering tubers rot and root system. At the same time, the leaves lose turgor, which is not restored after watering. In this case, the only way to save the plant is by re-rooting the top. The tuber must be removed and inspected, the rot cut out, soaked in a fungicide solution and tried to germinate again. Buds may not open due to drafts and watering with cold water.
Root and stem rot
Gloxinia are susceptible to fungal diseases. Their development is facilitated by excessive watering, keeping in a cold and damp room, the use of contaminated soil or planting material. Leaves appear watery dark spots, the stem becomes soft. You can save the plant by removing all infected parts and further processing with drugs like Maxim, Fitosporin.
Bloom
The flowering period of gloxinia falls at the end of spring-beginning of summer. The flowers are oblong, large, sometimes may have irregular shape, be drooping. Depending on the variety, gloxinia flowers are blue, pink, white, purple, red, brindle, two-tone. If the plant fades in late summer or early autumn, it will prepare for wintering. And if gloxinia has faded earlier, it is quite possible to achieve repeated flowering.
reproduction
Gloxinia are easy to propagate. This can be done with the help of a leaf (both its part and a cutting), seeds, peduncle, process, and also by dividing the tuber.
Reproduction with a leaf
Reproduction of gloxinia by cuttings is the most popular method. A young leaf with a small petiole up to 3 cm is best rooted in boiled water and dark glass containers. To avoid decay, put an activated charcoal tablet in the water.
The cuttings are rooted and immediately in the soil. To do this, fill the container nutrient soil, and in the center they make a hole with river sand. A cutting is fixed in it and covered with a transparent container or polyethylene on top to create a mini-greenhouse. It can be removed with the formation of tubers - this usually happens after a month.

Propagation of gloxinia by parts of a leaf plate
It can also be propagated by part of the leaf. For this they take big leaf and make incisions along the veins. The sheet is placed on the ground, pressed a little and covered with a greenhouse. So you can get several young gloxinia babies, but the tubers will be smaller than when rooting the cuttings.
Reproduction by seeds
For propagation, take seeds that are collected less than 3 years ago. They are sown in the cold season - from November to February. To do this, they take a wide shallow container, cover it with leafy soil and sow the seeds without sprinkling them with anything on top. The container is covered with a transparent material and kept in a bright room with a temperature of 22 degrees.
When the first 2 leaves grow in the sprouts, gloxinia are seated at a distance of 2 cm from each other. And when the seedlings grow up to 3 leaves, they are planted 5 cm. After these leaves develop well, the plants are planted 10 cm, but again in a common bowl. You can finally plant gloxinia in pots only when the bushes began to touch each other.
Reproduction by peduncle
When gloxinia fades, you need to cut off the peduncle and put it on root in the water. After the roots grow back, they treat it in the same way as with a cutting.
Reproduction by stepchildren
In the spring, several sprouts form on the tuber. You can root all or only the strongest. Such processes are easily rooted in water, and then planted in the ground.
Tuber division
The overgrown tuber in the spring is cut into pieces with 1-2 sprouts on each. The sections are sprinkled with crushed coal, after which the delenki are planted in separate pots and germinated in the same way as an ordinary tuber after wintering. Two days after planting, the soil is not moistened. The method is risky for valuable varieties, since in places of fresh cuts there is a high risk of developing fungal infections and, as a result, loss of sprouts.
Why is it not blooming
The lack of flowering in gloxinia can be caused by several reasons:

By following all the rules of care, you can achieve lush flowering. And in order for the period to last longer, faded flower stalks must be removed immediately.
Purchase
In a flower shop, you can buy both gloxinia seeds and tubers, or a mature flowering plant. The price usually depends on the variety. Among lovers of these flowers, the Alyonushkina Gloxinia website is popular - there you can buy both adult plants and cuttings, tubers of your favorite varieties. On average, you can buy gloxinia in the range of 100-200 rubles per piece.
If you choose a tuber in a store, inspect it carefully. It should be whole and firm, not have dark decayed areas, reach 3-4 cm in diameter. In its upper part there is a small depression with dormant buds. If they are awakened, then you can see small hairy sprouts.
When you buy mature plant carefully inspect the leaves for pests. The flower should look healthy, not have suspicious spots, with elastic monochromatic leaves. By choosing the right plant and providing it with proper care, you will get a bright bouquet on the windowsill.
 Should a woman get married after 40?
 Getting married after 40 is real
 Dangerous diseases during pregnancy Pregnant woman get a cold what to do