DIY coffee table: master class on making, ideas and tips for choosing the optimal design. DIY coffee table: drawings with dimensions and photos How to make a wooden coffee table with your own hands
Reading time ≈ 4 minutes
A coffee table made from wood with your own hands can become exactly that interior detail that will add completeness and atmosphere to the entire room. After all, this will not be a trivial purchase from a furniture store, but a thing created with one’s own hands. Don't be discouraged if you don't have specialized carpentry knowledge. About how to do coffee table We will tell you in our master class without expensive tools and extensive experience.
Selection of drawing, materials and tools
To make a table, you can use many materials: glass, metal, plywood, chipboard. We will consider a simple option with wooden beams and boards, which a person without experience can easily implement.
First you need to think over the table drawings, based on which you will select necessary materials and tool. The simplest, most convenient and versatile option is the classic model. rectangular table on four legs. Tabletop parameters and leg heights may vary depending on preference.
Drawing of a classic coffee table.
Therefore, to make a table you will need the following materials:
- Wooden beam 40*40 mm (total length 1.6 m).
- Planed board for drawer 50*20 (total length 3 m).
- Planed board for table top 10*20 mm (total length 3.2 m).
- Self-tapping screws.
- Wood putty.
- Varnish or paint for decorative finishing.
Instead of tabletop boards, you can take a sheet of waterproof plywood and cut a tabletop from it. In this case, making the table will be even simpler.
Expert advice: the frame (the frame between the table legs on which the tabletop rests) must be made, otherwise the structure will be unstable and will deform over time.
It is also worth preparing the following simple tools:
- Wood file or jigsaw.
- Electric screwdriver.
- Sandpaper (sanding attachment for drill/grinder).
- Level.
- Pencil for marking.
Step-by-step production of a table
Step-by-step progress:


Coffee table before painting.
Expert advice: after each layer of varnish, the product must be carefully sanded with fine-grained sandpaper (grain size 20-40 microns).
Thus, making a wooden coffee table with your own hands will take you no more than a few hours in total, as a result of which you will receive a beautiful, easy-to-use product.
Video: making a coffee table from beams.
A coffee table is an optional piece of furniture. Moreover, its presence makes any living room more comfortable. You can put a newspaper on the table, put a cup of tea or coffee. We will make this piece of furniture ourselves, making it truly original and comfortable.
Low table - practical interior decoration
The very first coffee table was created back in the mid-19th century in England. Within a couple of decades, this furniture adorned the living rooms of all European houses. In the 20th century, fashion came to our country. True, in Russia the tables we are interested in are called coffee tables, not coffee tables. But this does not change the essence of the matter. This piece of furniture is understood as a small table with a height of no more than 40–50 cm, which can have any ergonomics, appearance and design. It all depends on consumer preferences.
In furniture stores, low tables are sold in a wide range. You can find both an inexpensive design and a designer item that can make any interior chic and unusual. But many home craftsmen want to make an original table themselves, using a variety of available materials. We put a piece of our soul into homemade furniture. This means that it will turn out to be really comfortable and will be able to fill your home with comfort and warmth.
Coffee tables are made of wood and glass. Also unusual and beautiful designs can actually be assembled from:
- old window and ordinary books;
- unused heating radiator;
- wooden pallets or boxes;
- dismantled interior or entrance door;
- car tire;
- wicker basket;
- reels from electrical cables.
There are a lot of options for making a table for tea drinking. You just need to show your imagination and listen to advice experienced craftsmen who are engaged in independent decoration of their homes. Next, we will describe the most popular ways to construct coffee tables. And you stop your choice on the very suitable option.
Making furniture from chipboard is as easy as shelling pears!
Chipboards are the most available material for creating homemade tables. Chipboards can be processed without problems, are easily cut to the required sizes, and have affordable price. To assemble low tables, it is recommended to use laminated boards, as they are characterized by an attractive appearance, and the products made from them are durable. There are many sites on the Internet where it is not difficult to find various drawings with dimensions for making furniture from chipboard. We suggest making a table based on the sketches below.
.jpg)
Our planned design consists of the following elements:
- shelf dimensions 500x700 mm;
- table top 736x736;
- 4 strips 100x464;
- 4 plastic corners and the same number of legs (or wheels);
- 2 bottoms (dimensions of each of them are 500x700);
- 4 strips 100x464.
We will fasten the indicated elements with cofirmats, you will need 8 of them, and 16 self-tapping screws measuring 3.5x16 mm.
We make the table step by step. First (position 1 in the diagram) we make a shelf from chipboard (preferably, as mentioned, laminated) board. We do cutting electric jigsaw, using a file with small steps. Such a tool will eliminate the possibility of chipping. Then (position 2) we attach the planks to the tabletop (we place them on plastic corners). We mount a shelf in the center of the vertically installed slats (item 3). We make holes in it with a cross section of 4.5 mm (you will need a drill with an appropriate drill bit). We fix the shelf with confirmations. Without them, our tea table may not be very stable and reliable in use. Using confirmations, we screw the bottom of the structure (item 4).
After this, screw on the legs (item 5). They are attached not from the very edges of the table, but at a distance of about 15 mm from them. Instead of legs, it is allowed to install small wheels (fixed with self-tapping screws). Then we will have a mobile coffee table that can be moved throughout the home. All that remains is to bring homemade furniture to mind. We glue all the visible joints of our table with melamine edge. Visual design from laminated chipboard will look perfect! By the way, instead of wood chips, you can use MDF (wood fiber products). The result will be approximately the same.

Glass table - stylish and elegant
Interiors designed in a modern theme are perfectly complemented by compact glass tables. They are installed on wooden or chrome-plated legs. It is advisable to use frosted glass. It usually has a special film that protects the tabletop from mechanical damage. In addition, on frosted glass stains from carelessly spilled tea, coffee, other drinks and fingerprints will not be so noticeable.
The recommended tabletop width is up to 120 cm. There is no need to build a table with large parameters. It will be difficult to fit into the interior of a standard apartment or small private house. Choose any design shape. But if you are making a glass coffee table with your own hands for the first time, it is better to choose a rectangular configuration. We will purchase chrome legs from furniture store. And it’s easy to make components from wood yourself. Table drawing with standard sizes presented below.
.jpg)
Let's get to work. First, we cut out the glass according to the specified geometric parameters. This operation must be performed slowly. Place the glass on flat surface. We are planning with a simple pencil cutting lines. Wet the glass cutter sunflower oil(or other lubricant). Apply a metal ruler to the marked line. Carefully (without strong pressure) we go through the markings with a glass cutter. Then we move the glass from the surface, ensuring that the excess pieces of material are suspended. We tap our fingers along the marking line and press lightly. After these steps, unnecessary parts of the glass are broken strictly along the lines made.
The cut material must be processed. First, we clean the edges of the glass with a file, then with a grinder equipped with a diamond tool. Additionally, it is recommended to sand potentially unsafe parts of the glass with sandpaper (fine grain). Then we take thin felt, mount it on the edges of the tabletop and press it against it. This way we will protect our furniture from scratches. Turn the table face down. We make marks for mounting the legs. It is advisable to install them at a distance of at least 50 mm from the edges of the tabletop.

We drill holes at the top of the bases of all legs. They will be needed to attach the suction cup. Everything is simple here. We treat the suction cups with adhesive, install them in the prepared holes, and press the elements as tightly as possible. After the glue has set, turn it over homemade design to normal position and wait about two days. After 48 hours, the coffee table will be ready for use.
We will build a structure from wood - a win-win option
Wooden tea tables are suitable for any living space, no matter what type of decor is implemented in them. Wood products look great in classic interiors, and in the most modern ones. Do wooden furniture DIY is really simple. Moreover, we can build a table of any design - the simplest one, with many additional drawers, stands, shelves. With the right approach to business, we will end up with a piece of furniture no different from expensive store-bought tables.
We will not offer a drawing of a wooden structure. Any craftsman is able to draw up a simple sketch of such a structure with the right sizes. But let’s say a few words about the materials and tools that will be needed to complete the work. Stocking up:
- blocks or scraps of wooden boards (from which we will make table legs and crossbars);
- two thick boards;
- varnish and stain;
- grinder, sandpaper;
- wood saw;
- glue;
- electric drill.
Let's start creating. We cut thick boards to the required sizes to make a tabletop. We connect them together with glue. We are waiting for the structure to stick together firmly. At this time, we make crossbars and legs from scraps of boards or bars. Give the tabletop the selected shape. It can be rectangular or square (it’s easier), but tables with various roundnesses and curves look better. Wood is easy to process. Using a hacksaw, we can easily create a tabletop of the configuration we need. After this, using a grinding machine, carefully process ready-made elements. Additionally, we rub their surface with sandpaper.
We apply stain to the tabletop, legs, and crossbars. This composition gives the tree noble look, providing an antique effect. These elements are completely treated with stain. We need to apply it not only to the surfaces, but also to the end parts of the coffee table parts. Nuance. The ends of wood products can be covered decorative materials, for example, butterflies often used for these purposes.

Next, we attach the crossbars to the tabletop, assembled from two boards. The operation is performed using glue and round spikes inserted into pre-made holes. The latter are drilled in the right places with an electric drill. We fasten the legs in the same way: we make holes, lubricate the tenons with glue, and insert them into the grooves. The tea table is ready. Let's coat it with varnish to make the structure look perfect, and we'll enjoy the new piece of furniture in the house.
Books, waste paper and an old window - you can even make a table out of them!
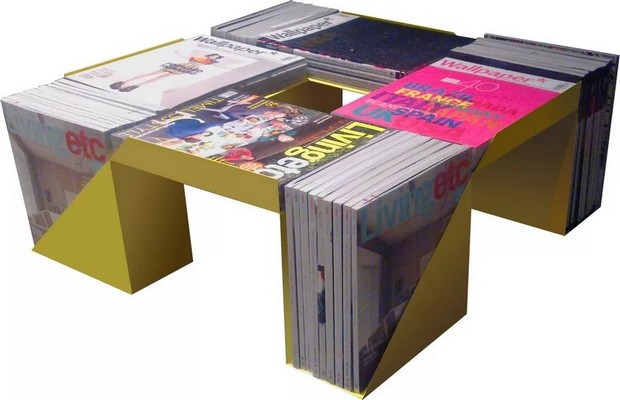
As we have already noted, it is possible to make an original coffee table from various available materials. If you have a lot of old magazines and newspapers, you don’t have to throw them away. Let's make them not regular table IR according to the following scheme:
- 1. Roll waste paper into tight tubes.
- 2. Secure the resulting blanks with rubber bands.
- 3. Immerse the prepared tubes in a bucket filled with a water-polymer based emulsion.
- 4. Wait for 5-7 minutes.
- 5. We take out the soaked paper blanks and hang them on a rope on wire hooks. Drying should be done in a dust-free room. Let's not forget to put it under the rope plastic film. Streams of water from waste paper will flow onto it.
- 6. From the dried tubes we form a cabinet for a coffee table - we simply glue them together (as tightly as possible) with PVA glue.
The created cabinet is usually secured with strong threads and left to dry. Then we cut our homemade table up and down. We get a neat bedside table. Glue regular or mirror glass using silicone, which is used for repairing aquariums. Advice. The glass should have a thickness of 1.2–1.5 cm. Thin countertops will be unreliable in use. One careless movement and they will crack.
In cases where the old window structure in a home is replaced with a new one (for example, a plastic one), the dismantled product can also be used as a coffee table. A minimum of difficulties awaits us. We remove the hinges, handles, and other fittings from the window and wash the canvas well. If necessary, remove the old layer of paint, polish the surface and paint with a fresh composition. We have a finished tabletop in front of us. It can be installed on any legs. A great option is to make them from volumes that have been gathering dust on bookshelves in your home for decades.
We fasten the books to each other, forming them into legs of the required height.
We carry out the procedure using superglue. Another option is to drill neat holes in the books and thread a steel rod through them. Installing the updated window frame on homemade legs and rejoice in our ingenuity. These coffee tables are good for interiors in retro, vintage, and Provence styles. Instead of a window, by the way, it is allowed to use old doors, a mirror, or simply a large board that did not have a place in the household.
Furniture for tea parties made from pallets and boxes - simple and original
Wooden pallets are products used for transporting and storing a variety of goods and cargo. Pallets perform the same function. But they are considered more modern designs. Both the first and second are ready-made countertops. They make great low tables. Moreover, the entire manufacturing process homemade furniture of such products requires a minimum of time and labor from the home craftsman.
We just need to thoroughly clean and wash the tray, treat it with a grinder and sandpaper, and paint it in the chosen color. It is not necessary to apply a single color paint. Color the table to your taste. Apply any ornaments and symbols to the pallet. And if you wish, you can not paint the workpiece at all, leaving the wood in its natural form. Small chips, scratches, cracks will highlight the natural texture of the structure.

We install the prepared tabletop on low wooden blocks or on wheels. Here you need to understand that the weight of the pallets is quite serious - up to 15–25 kg. Therefore, wheels and legs for a pallet table should be selected wisely. They must withstand a given load. However, a pallet of sufficient height may not be equipped with legs. The design will be comfortable and reliable without them.
If there are no pallets at hand, you can actually make a table from any empty wooden boxes. Containers for wine, vegetables, and fruits are suitable. From two drawers you can build a small coffee table, and from four drawers you can make a spacious structure for gatherings with friends. We assemble the boxes into a square or rectangular furniture. We fasten them together with nails, and putty the places where the hardware is installed with a mixture of glue and sawdust. We decorate the structure and cover it with varnish. We get a chic table.
.jpg)
Place a vase or flower pot in the free space between the drawers. You can also cover it with a suitable sheet product. Nuance. Design experts advise covering the tabletop with plastic if the interior of the home is made in the style of minimalism and modernism. For high-tech and art deco decors, it is better to use a sheet of polished steel. Country style interiors are perfectly complemented wooden coverings. And glass placed on a table made of drawers will harmoniously fit into any room decor.
Other ideas for assembling structures - a little more creativity
You can actually build a massive coffee table from an old one. cast iron battery heating. It is enough to tint it a little, install it on strong wheels, and cover it with glass on top (if possible, with rounded edges). The functionality of such a design is, of course, in question. She, however, weighs 60–80 kilograms. But she is not lacking in originality. Not a single guest of your home can ignore this unusual item interior
And car lovers have the opportunity to make a comfortable table from old tire from his iron horse. Very often, tires are used for garden decoration. But even in the house they are proper preparation will look appropriate. To create a table from a tire in the now popular eco-style, you need to stock up on:

Table made from an old tire
- two circles cut from plywood sheet(we take their cross-section slightly smaller than the diameter of the tire used);
- superglue;
- cord, braid or decorative rope;
- varnish;
- self-tapping screws, electric drill;
- wheels.
We attach plywood circles to the tire on both sides. Products can be attached to superglue or (which is more reliable) to self-tapping screws. If you want the homemade plywood lid to open, one of the circles should be installed on small hinges. Then you can store a variety of household items in the tire niche.
After that, we proceed to decorating the coffee table. We make a small circle out of a rope (bundle). Coat the middle of the plywood table top with glue. Carefully secure the rope element to it. In the same way, going from the center to the edges, we decorate the rest of the surface. Then we turn the tire over and continue braiding it on the sides. The bottom of the structure does not need to be decorated. We will attach the legs to the bottom sheet (as an option - wheels). The table is ready. All that remains is to cover it with varnish or a special wax composition.
Fantasize boldly! Original tables for tea parties can be made from other available materials. The more creative the craft looks, the more positive emotions you will experience looking at it. Decorate your home with unusual homemade furniture, creating unique interiors. Good luck.
Furniture making with my own hands- not only a way to save money, but also a fun activity. You can bring your wildest ideas to life, for example, creating a coffee table. After all, this is not only a stylish accent in the interior, but also a functional element of the room.
The procedure for making a table at home is as follows:
- We take a beam with a cross-section of 5x10 cm, cut it into three parts, several pieces each. For example: the length of the first part is 130 cm, it is necessary to cut 9 pieces of beams with this length. The length of the second part is 21 cm - 12 pieces. The length of the third part is 34 cm - 2 pieces. You can start by making a drawing of the table.
- The timber is placed in three rows. At this stage, you need to leave a small gap so that you can place the table legs there later.
- Remove two rows from the top. We begin to move the rest of the timber. This way the table will turn out to be original appearance. Then we make markings for the transverse parts.
- We lay the outer bars of the second row and put marks for the cuts. The cuts can be made with a hacksaw or saw. After which we secure the bars with screws.
- Let's move on to the third row. We shift the parts a little and secure them.
- Empty spaces appeared under the tabletop. They are for feet.
- The table must be treated with a protective compound.

Original coffee tables
Every person wants to have an unusual table in their apartment so that it fits into the interior of the room and pleases the eye. This piece of furniture can be made from any material: wood, chipboard, drawers, etc. Let's look at several of these options.

Table made from waste paper
 If there are old magazines and newspapers in the house, there is no need to rush to throw them away - perhaps they will serve you as material for the table. True, the interior design must be appropriate. By making furniture in this way, you can choose the table height you need and is comfortable for you. Process making a table from old newspapers and magazines height:
- We take waste paper and roll it into a tube, securing it with money rubber bands.
- We dilute the water-polymer emulsion. And put the rolled paper in it for 2-7 minutes.
- Then we dry the paper.
- We glue the bunch of cabinets with glue, you can use PVA. Dry it in a vertical position, securing it with thread in advance.
- We mark the strips and cut them.
- We glue the glass tabletop. The glass should be 12 mm thick.

Gallery: coffee table (25 photos)


Stylish table made of logs
This method is more complex in terms of execution than the previous one. The main elements for creating a table will be logs. The basis is a wooden box, preferably on wheels. After which it must be furnished with logs. A homemade surface planer is also used for marking. After sawing off all unnecessary elements, there is no need to throw away the sawdust. It is better to collect them in any pallet. After this, the round pieces are glued to the surface. Sawdust must be mixed on liquid nails. The mixture should resemble plasticine. Using a spatula, it is necessary to rub all the cracks between the rounds. Then, the product must be removed from all sawings and dirt, sanded and varnished.

DIY coffee table (video)
Creative curved table
Make a table like this It will be difficult on your own, but still possible. The main thing is to follow the manufacturing rules. For the design you need to take any type of wood. You choose the height yourself. The basis is taken from the property of wood, such as softening during dry heating. After which the form is saved. More details about production:


 This table option is for those who love functionality and beauty in one item. With the help of simple manipulations he able to change height and appearance.
When assembled, it is a regular table for various waste paper. One has only to lift the two sides with legs, and it changes its usual size and turns into a dining room one.

Another transforming system is based on metal frames-pedestals. They are attached to the tabletop. In their usual position, that is, when assembled, they lie horizontally; if you change the size, the lid rises and rotates on hinges and becomes vertical.

When unfolded, the size of the structure is 73 cm. This height is acceptable for computer desk. Before making a transformer, you need to make a drawing.

DIY coffee table
To make a coffee table you need to take a sheet of chipboard. Its thickness is 16 mm. Make markings: find the center at the intersection of two diagonals. A nail is driven into the center, to which a thread and a pencil are tied. With its help you can draw a circle. If you want to make a table of a different shape, then draw the bends. After this, the shape is cut out using a jigsaw. The edges must be sanded.

The legs of the table are attached with screws. Paint the countertop itself in the color you want.

Table on wheels
 If you have never made tables with your own hands, then you can try the simplest option. Let's consider making a model from chipboard. To make it you do not need a lot of knowledge and skills and expensive materials.
You can order cutting of laminated chipboard.
To make the structure you will need: a table top, planks, a shelf, a bottom, wheels, plastic corners, self-tapping screws, confirmations. When you have all the necessary materials, you can start assembling:
- First you need to make a shelf.
- Connect the tabletop and planks to plastic corners. The result is vertical slats to which you need to attach the shelf using a confirmant. To make her hold on tighter. the same must be done with the bottom.
- We attach the wheels using screws.
- At the very end, you need to seal the attachment points using self-adhesives.

As we have already found out, making a coffee table at home is not difficult. The article presents options that everyone can handle. Over time, you will be able to create the most original designs.

The height of a coffee table according to GOST should not exceed 50 cm, but no one forbids adjusting it to suit yourself. For example, the height of the transformer can be 73 cm. It is also worth noting that the table should fit your interior. Self-production Making such a piece of furniture is a fascinating process that will also save you money. A little imagination - and you are ready original product.

Building a coffee table with your own hands is an ideal way to add originality to your interior and surprise your guests. This piece of furniture is an integral part of any recreation area and always attracts attention.
Building a coffee table with your own hands is an ideal way to add originality to your interior and surprise your guests.
Comprehending the science of turning ordinary things into the highlight of the situation is within everyone’s control. And to understand how to make a coffee table with your own hands, you just need to be inspired creative ideas, show your own imagination and put in a little effort.

What kind of raw materials do interior designers use in their work? But wood always remains the undoubted favorite. They love it for its naturalness, environmental friendliness, natural texture and color palette.

Original coffee tables made from stumps or trunk cuts natural wood, despite their apparent simplicity, will become a completely unique piece of furniture and will fit perfectly into the design of a bedroom or living room, decorated in eco style.
 What kind of raw materials do interior designers use in their work? But wood is always the undoubted favorite.
 - harvesting (a stump with part of the root system or a cut of a whole tree trunk);
- chisel;
- hammer;
- saw;
- building level;
- manual or electric plane;
- grinding machine or sandpaper;
- brush.

How to make:
- a wooden piece of the required size must be thoroughly dried in a warm, dry room;
- Using a hammer and chisel, remove the bark from the tree (if desired, you don’t have to remove the bark);
- using a saw, form the base of a table or legs from root branches;
- Use a building level to check the evenness of the countertop and, if necessary, level it using a plane;
- Use a brush to clean the workpiece from debris and chips;
- sand the cuts and lateral surface stump grinder or fine-grit sandpaper.

A stump processed in this way is itself a kind of small table. If desired, it can be primed with a bioprotective primer, painted, applied in various patterns and varnished.
Gallery: coffee table made from scrap materials (25 photos)


Coffee table made of firewood (video)
Wood-layered fantasy
A plywood coffee table is a more affordable alternative to natural wood. Multi-layered, featureless and unsightly at first glance, the material has almost the same qualities as wood, but at the same time it is an ideal basis for simple furniture construction. Plywood elements can be given any shape: rectangular, rounded, broken, which stimulates the craftsman to bold design experiments.

Having conceived a coffee table made of plywood, you should start with a drawing, using existing sketches or creating your own. In the latter case, the output will be a 100% original product.
 A coffee table made of plywood is a more affordable alternative to natural wood.
 How to make a small one round table made of plywood on rectangular bases:
- prepare a drawing that includes 4 parts - 2 identical round shapes for the base and tabletop, 2 identical rectangular shapes for the table supports;
- transfer the patterns of the parts onto a sheet of plywood with a nominal thickness of 9 to 30 mm (the thicker the sheet, the stronger the final product will be);
- use a jigsaw or hacksaw to cut out the required elements;
- process the ends of each template with a grinding machine;
- V rectangular shapes Using a router, make cuts 1.5-2 cm wide in the center so that you can insert the parts crosswise into each other;
- connect the rectangular parts, having previously coated the joints with wood glue;
- secure the tabletop and table base to a wooden cross using liquid nails(to increase the strength of the product, additionally secure round parts with screws or tongues);
- Treat the finished product with stain, paint (optional) and varnish.
The simplicity of the design makes it easy to screw wheels to the table. Interior design in which plywood furniture will look great is grunge, minimalism, constructivism.

The idea of a quadrangular shape
A coffee table made of drawers is another unexpected idea from designers, captivating with its simplicity. Various sizes rectangular containers for storage are a universal basis for creating furniture with your own hands. Unusual tables, chests of drawers, cabinets and chairs can be assembled from simple plastic drawers, but a more elegant and vintage look for homemade furniture is easier to achieve using antique wooden drawers.

What you will need to make a table from boxes on wheels:
- 4 wooden boxes, equal in size;
- a sheet of plywood with a thickness of at least 10 mm;
- 4 swivel casters for containers, trolleys and scaffolding;
- hammer drill or screwdriver;
- wood glue;
- self-tapping screws;
- fasteners (dowels);
- impregnation for wood;
- varnish on water based;
- brush.
 A coffee table made of drawers is another unexpected idea from designers, captivating with its simplicity
 How to make a table:
- clean the drawers with sandpaper, apply impregnation and open with varnish;
- let the product dry;
- place the boxes on their sides and put them together in such a way that a table is formed (in this case, peculiar shelves are formed on the side of the structure);
- mark the places of fastenings and drill holes for fasteners;
- connect the boxes;
- use self-tapping screws to secure the wheels at the corners of the plywood sheet;
- fix the fastened boxes on a plywood base.
In the resulting recess in the center of the product you can pour a variety of decor, put a vase with flowers, a lamp, put magazines or books in the side shelves, turning the coffee table into an original one. bookshelf. This type of furniture will fit well into the design of a home furnished in eclectic, country or French Provence style.

Automotive element in the house
You can make a completely unusual piece of furniture using an old car tire. This technique is used by the most fashion designers, and perhaps this idea will form the basis for creating an exclusive coffee table with your own hands.

For the coffee table you will need:
- old tire;
- plywood;
- rounded wooden beam for making legs;
- studs and nuts;
- liquid Nails;
- glue gun;
- drill and screws;
- natural strand for decoration;
- finishing coating.

How to make:
- select the most intact wheel, wash and dry;
- cut a wooden beam into three equal parts and make table legs (if you have your own lathe, it is advisable to make cone-shaped supports);
- give the tire stability using studs, nuts and rigid plywood inserts in three places;
- plant wooden table top on liquid nails and secure to the tire with self-tapping screws;
- Attach the legs to the base and screw them to the tire (it is advisable that the screws go through the rubber into the plywood stiffeners);
- with help glue gun secure natural twine in the middle of the tabletop;
- braid the tabletop in a circle from the center to the edges, constantly gluing the rope;
- continue decorating until the twine covers the entire rubber surface of the tire;
- secure the end of the braid with glue and a metal clamp;
- cover the table finishing coat(wax or varnish).
A table made of tires does not need to be decorated. By installing special wooden stops at the bottom of the tabletop, it can be made removable like a lid, which will allow you to store various useful little things inside the tire.
A table made from a car tire and decorated with cord rope can become the highlight of an interior in a fusion or loft style, while a brutal rubber table will fit perfectly into high-tech and techno style.

Travel Club exhibit
Lovers of retro style and avid travelers who want to express their passion in the interior setting can easily make a table with their own hands from grandpa's old suitcase.
What you will need:
- hard-sided suitcase;
- wooden furniture legs or wheels;
- sheet of thick plywood;
- screws and a screwdriver.

It is better to further strengthen even a strong suitcase with sheets of plywood. This will allow you to get a flat “tabletop” without dips, on which you can place both food plates and glasses. Stages of product manufacturing:
- cut 2 templates from plywood and attach them from the inside to the walls of the future suitcase table;
- make markings for the legs and screw them to the bottom plywood template inside the suitcase using screws;
- Cover the inner surface of the resulting table with flannel cloth, linen cloth or felt.
Original tables made from suitcases can be decorated to your taste with the most in a variety of ways. They are decorated with travel stickers, envelopes, and stamps. Decor made using decoupage technique with an aging effect looks very advantageous and elegant. Interior design in which a suitcase table will look organically is avant-garde, eclecticism, loft and fusion.

DIY coffee table with LED lighting (video)
Product made from Euro pallets
Few people know that you can create an exceptional home interior using ordinary industrial pallets (European pallets) made of wood. The process of making a coffee table from one or several pallets will not require much effort, since the product itself has an extremely good shape.

Required materials and tools:
- wooden pallet;
- wheels on a rotating base;
- brush;
- Grinder;
- wood glue;
- drill and screws.

Assembly procedure:
- Clean the tray from dirt using a stiff brush;
- sand the boards;
- coat the structure with a primer for wooden products;
- use a drill and screws to secure the swivel wheels at the corners of the base of the product.
Having remade the pallet, you should give it a designer look using finishing. White or bright will help with this acrylic paint, water-based varnish. A table made from a pallet can be painted entirely or an original design can be applied to its working surface.
If desired, the pallet can be refined by placing impact-resistant glass of the same size as the pallet or treated plywood on top. A table made of pallets can be static and just stand on the floor, or it can be able to move to a place in the room convenient for the owners if rotating wheels are attached to its base. In addition, the rubberized wheels do not scratch the floor covering.

New life for old things
When replacing windows in an apartment with fashionable metal-plastic ones, many people throw away old frames, not even suspecting that they can be used to make an amazing homemade coffee table.
All you need to do is:
- remove metal fittings from the frame;
- clean off any remaining paint;
- strengthen the corners of the structure with additional fasteners;
- place the frame with glass on unusual legs (the supports of such an improvised table can be stacks of books or stacks of old magazines).

In the case of using a double frame, it is permissible to have a wide variety of decor between the glasses:
- beads;
- colored sand;
- seashells;
- dried flowers.
 When replacing apartment windows with fashionable metal-plastic ones, many throw away old frames, not even suspecting that they can be used to make an amazing homemade coffee table
 No guest will remain indifferent after seeing such a master’s creation. Interior design that involves the presence of hand-made furniture from old things is eclecticism, kitsch or pop art.
As a base for the table you can use:
- cast iron battery;
- car engine frame;
- a barrel, grandmother's chest, large stones;
- rolls of old wallpaper.
From water pipes you will get unusual legs, and from plastic, a door leaf or an old mirror - an original tabletop.
Using as work surface fragile glass, structures with one leg should be avoided; those who have small children and large pets in the family should be careful with glass.
From scrap materials, using your imagination, you can make an original and multifunctional transforming table, an exclusive bedside table and a comfortable table-shelf.
Anyone who has ever tried to transform banal things into unique “living” interior items will hardly be able to stop. Independent design and making furniture is a fascinating, addictive process, which for many becomes a real hobby. A DIY coffee table is an ideal item for a first try. Out-of-the-box thinking, an original design approach and a little craftsmanship are all you need for success.
Attention, TODAY only!
The selection of ready-made tables in a furniture store is huge, and it won’t be difficult to choose the model that fits perfectly into the interior. But it’s even easier and cheaper to make a coffee table with your own hands. This does not require either expensive materials or special tools. And all the work, even for a beginner in carpentry, will take a maximum of two to three hours.
DIY coffee table
Since there is a wide variety of wooden coffee tables, drawings of several models will be given below. They differ not only in appearance, but also in complexity of execution.
Rustic style
To make such a piece of furniture, it is not advisable to use laminated wood. The table will look truly chic if you make it from solid oak, hornbeam, or boxwood. But since these types of wood are very expensive, they can be replaced with birch, spruce or ash. A big advantage will be the use of old boards that bear the imprint of time, or artificially aged ones. This material does not need to be painted or varnished; it looks harmonious in itself.
Blueprints
This model does not require strict adherence to diagrams and instructions. It is easy to make, changing all sizes at will. The initial parameters are shown below.
All values are in inches. If it is not possible to get a ruler or square with markings in this metric system, you need to convert them to centimeters. To do this, just multiply the quantity by 2.54.
Materials
For production you will need:
- Boards at least 3 cm thick.
- Self-tapping screws.
- Wood for cutting tenons.
- Wood glue.
- Paint, stain and varnish (optional).
Tools
In the process of work you cannot do without:
- Fraser.
- Knife saw.
- Screwdriver.
- Electric drills.
- Chisels.
- Grinding machine or sandpaper.
Step-by-step instruction
During the work process, you will have to perform the following operations sequentially:
- Preparation. It consists of three stages:
- Lay out the boards, indicating the location of all the parts.
- Cut out the parts according to the drawn outline.
- Sand each cut with sandpaper or sand it with a sander. If the surface of the wood is rough, it should also be brought to complete smoothness.
- Creation of technological holes. The task is to drill them in places where the parts will be fastened with wooden tenons. These are the connection points of the legs with horizontally laid transverse side strips in the lower and upper parts, as well as the connection points of the planks that make up the tabletop. To make work easier, the tabletop can be assembled not with tenons, but with the help of several slats attached from the inside with self-tapping screws and glue.
- Cutting out the thorns. Based on the diameter and length of the resulting holes, wooden tenons are prepared.
- Product assembly. It is performed in several stages:
- First, the tabletop planks are mounted to each other. Regardless of the type of connection used, on wooden tenons or on slats nailed across, it does not hurt to use glue at the joints. The main thing is to make sure that drops of glue do not leak onto the front side.
- After this, the legs and side strips are assembled, the bottom shelf and decorative cross bars on the sides are mounted.
- The tabletop is screwed to the upper side planks with self-tapping screws.
Unusual
This table will really appeal to those who purchased a sofa without armrests. You can put a laptop or a cup of coffee on it, and put things that you want to keep at hand. Because the Bottom part fits under the sofa, it does not take up extra space, and if necessary, you can turn it upside down and it will turn into a regular coffee table or children's table.
Blueprints
Dimensions are in inches. To convert them to centimeters, you need to multiply by 2.54. You can change the width and length of the elements according to individual needs.
Parameters of main parts:
Internal vertical crossbar, which serves as additional support:
Materials
To create such a convenient and useful item furniture you only need:
- Boards.
- Self-tapping screws.
- Wood glue.
- Paint, varnish, stain are used as desired. If the interior is made in boring colors (gray or beige), it is recommended to make the table bright and add a few more accent items of the same color to the room. These could be curtains, pillows, a flower pot.
Tools
Tools can be found at home for any person who likes to make something out of wood with their own hands:
- Hacksaw saw.
- A grinding machine that can successfully replace sandpaper.
- Screwdriver.
- Glue brush.
Description of work
There is nothing difficult in making such an unusual coffee table. The work will take little time and require almost no special skills:
- Cut out the material. Details are drawn on the boards, guided by the drawings. You need two identical elements for the top and bottom, a longer vertical element, a vertical internal crossbar and four small strips to create the “leg”.
- Sawing. Cut out all the parts with a hacksaw.
- Grinding. Remove all splinters and roughness on the cuts and other parts of the parts using a grinding machine.
- Decorative processing. The parts are covered with stain, paint and/or varnish.
- Assembly. All elements are connected to each other according to the diagram. Since large loads on this table are not provided for by its design, you can only get by using wood glue. For reliability, it is worth screwing in self-tapping screws in several places.
If you need a colored table, but there is no way to use varnish and paint and then wait for them to dry, it is better to use self-adhesive film.
Making a transforming table
The transforming coffee table easily turns into dinner table or work surface. Making one with your own hands is no more difficult than a regular one, but it is much more convenient to use.
When folded, the table looks like a rectangular cabinet, and when unfolded, its tabletop becomes taller and doubles in size.
Blueprints
Drawings are for reference only wooden elements table. It makes no sense to make a transformation mechanism with your own hands, since buying a ready-made one will cost less and significantly reduce time costs.
Tools and materials
To make a transforming coffee table you will need the following tools:
- Screwdriver.
- Knife saw.
- Electric drill.
- Sander.
- Jigsaw.
- Square or ruler.
- A simple pencil.
From Supplies should be prepared:
- Boards from natural wood or MDF, chipboard, OSB panels.
- Self-tapping screws.
- Metal furniture corners.
- Loops.
- Optional - varnish, paint and stain.
- Tassels.
- Wood glue.
- Sandpaper (if you don't have a sander).
- If laminated wood panels are used, you will also need a special thermal tape for decorating the edges.
Completing of the work
Before you get to work, you should find a suitable transformation mechanism on sale. In order for the finished table to be convenient to use, you need to check the smoothness of movement in the store and make sure there are no creaks or stalls.
When all the materials and tools are prepared, you can begin making the table. This process consists of several stages:
- Marking wood. Using a pencil and a square, lines are drawn on the boards to indicate the edges of the parts. You can immediately number each element so that you don’t get confused later when assembling.
- Sawing out parts. Using a hacksaw and a jigsaw, cut out the parts along the marked lines. This work should be done carefully, as one awkward movement can ruin the material.
- Grinding. Grinding machine Each part is processed until it becomes absolutely smooth. There should not be a single splinter left on the boards, which could then be caught on clothing or cause injury.
- Impregnation with stain. This is done in one or several layers depending on the desired color of the wood. Before applying each subsequent layer, you need to wait until the previous one has dried.
- Painting or varnishing. After treatment with stain, the parts are varnished. If it has not been used, you can paint them in any desired color.
- Product assembly. Guided by the above diagram, the table is assembled using self-tapping screws, gluing all wood joints with wood glue for reliability. The load-bearing sidewalls are also reinforced from the inside with furniture corners. The two parts of the tabletop are fastened together with hinges so that the protruding part of the hinges is on the wrong side and does not spoil the appearance of the unfolded table.
Decorating the tabletop
To give your table more personality and make it unique, you can decorate the tabletop. The most popular options are aquarium, decoupage, mosaic and craquelure.
Aquarium
A tabletop base is made with small sides on the sides, various shells, sea stones and other decor are laid out on it, and then poured epoxy resin. By the way, it is not at all necessary to design the tabletop in nautical style, you can create any compositions that suit the interior.
Decoupage
Decoupage allows you to decorate the tabletop with any design you like. You can buy ready-made pictures in the store; all you have to do is glue them to the surface and varnish them. They also use paper napkins with images and even print the pictures on a printer.
The decoupage technique is performed as follows:
- The napkin is peeled off and the part that will be used for decoration is cut out with nail scissors.
- The cut piece is placed face down on a plastic bag or cling film.
- Pass over the napkin with a damp brush (not dry and not so wet that water drips from it).
- The part of the tabletop where the design will be located is smeared with glue, then a napkin is placed on top of the adhesive layer, wet side down, and the paper is slowly peeled off from the polyethylene, using a brush with glue for this.
- When the drawing is completely transferred to the table, it is covered with another layer of glue.
- If wrinkles appear, they are removed by ironing them through tracing paper.
- You can use paints to draw contours and add shadows.
- After finishing the work, the tabletop is varnished.
Mosaic
Decorating with mosaic tiles looks very original and expensive. You can buy everything you need to work with mosaics at a craft store, but you should come up with a pattern yourself.
Craquelure
A beautiful web of randomly located cracks forms on the surface of the tabletop if you cover it with a special craquelure varnish, which is sold in construction hypermarkets and large craft stores. This method can be used either on its own or in combination with mosaic or decoupage.
A coffee table made by yourself will not only be a wonderful addition to the interior, but also a reason for pride. After all, not every home has such unique and inimitable furniture.
 Breaks for workers during the working day
 The main directions of the foreign policy of Alexander II
 The principles of a truly healthy breakfast