How to drill chipboard big diameter. How to cut a hole under the sink in the tabletop? Drilling under the sewage
Holes of small diameter (up to 10-12 mm) in the tree and chipboard are drilled most often conventional drills For metal. They completely successfully cope with their task. But if each millimeter is important for the position of the opening, then you need to use special drills.
The metal drill at the entrance to the wood can be a little distance to the side, even if at the place of the future hole is made of deepening seer.
In general, the drilling of wood can be carried out even by the usual nail or a piece of wire, which has an end to the end. Special drills for wood have to be resorted only when it is required to drill a hole of a large diameter, or increased requirements for cleaning the surface and accuracy. There are several types of such drills:
- spiral (a);
- twisted or single-alpiral (it is sometimes called spiral) (b);
- feather (B);
- ring (crown) (g);
- cylindrical forstner (D) drill.
The drill for wood is made from instrumental alloyed and instrumental carbon steels, the metal cannot be processed with them.
Spiral drill Drill holes of small and medium diameter. Its quite can be replaced by a metal drill, although the cleanliness of the holes will be higher when using a spiral drill for a tree.
Single drill It has an acute cutting edge and a screw shape that removes the chips well. It is used when you need to get accurate deep hole With a clean surface of the walls.
Feather drill Usually used when drilling holes with a diameter of 10 to 25 mm, although there are drills with a diameter of less than 10 and large 25 mm. This drill is the easiest of construction and cheapest, so it is reasonable to use it in all cases when high demands are not presented to the quality of the hole. The disadvantages of the featured drill include a bad direction, low accuracy of diameter, the coarse surface of the hole walls, the need to periodically remove the chips, stopping drilling and removing the drill from the hole. To the merits - simplicity and low cost.

Crowns Used when driving a large diameter holes - up to 100 mm and more. In the sets there are one mandrel with a shank and centering drill And several crowns that are inserted into the mandrel.

Drill Forstener It has a centering edge and sharp cutter. Thanks to the latter, it is characterized by accurate cut geometry. Usually used to drill blind holes with precision sizes in soft wood, chipboard or laminate for installation of furniture canopies.


Forcener drill can be with a short or long edge.

Forcener drill with long edge is harder to make deaf hole For loops in a thin door, since the edge can make a through hole. But the drill with a short edge is more inclined to inside. In addition to the differences in the length of the island, the forster drills depicted in the photo above are distinguished by the maximum rotation frequency. So the short-casting drillings have welded knives from high-speed steel and is suitable for working with large revs, and a long-edge drill has a maximum rotational speed when working with soft wood equal to 1000 rpm.
There is another device for cutting big holes - it is ballerinka, designed to clipping large (up to 300 mm) holes in thin wood blanks, chipboard, fiberboard and other materials.

The ballerina consists of a centering drill and two incisors, which are carried out with a circle cut. The displacement of the cutters on the guide sets the diameter of the cut circle. To rotate, the balletics uses a coland or a drill with a low revolutions. You can rotate it and manually.
How to drill a tree and chipboard
So that the drill does not go to the side at the very beginning of drilling, in the center of the future opening you need to make a small deepening selection. The drilling of the tree is carried out on the small and medium turnover of the drill. The main problem when drilling through holes, are chips at the output of the drill. You can cope with them in two ways. To drift first a thin hole and carry out the drilling on it from two sides of the part to the middle of the final diameter drill. Thus, it will be possible to avoid chips that are at the output. The second way is that the side with which the drill comes to tightly press the lining from the tree, which is removed after drilling.Conductors are used to give the drill perpendicularity. Especially convenient for the latch to perform holes in cylindrical details.

Special attention requires drilling of chipboard - Because of its fragile structure. The presence of laminated or veneer coating complicates the task. To avoid their detachment, use drills with a sharp edge (in particular, the cylindrical forstner drill) and the exit lining. For the holes, it is necessary to use the seed.
When using the content of this site, you need to put active links to this site visible by users and search robots.
Often, when repairing or mounting various wooden products It is required to drill perfectly round hole. In this article we will try to illuminate all the ways that you can cut such a hole. Options with the use of special tools will be considered, as well as without it.
Than cut out Faneru
Hacksaw with a very narrow canvas, jigsaw, drilling saw and round file - these are those hand toolswhich can be cut by curve.
It is a narrow canvas that provides hacksaw maneuverability, but for the same reason it is extremely difficult to lead. It is necessary to have a solid hand and attentive eye to prevent deviations from markup. At the same time do not try to work quickly. On the contrary, to move better with small jerks. It will help confidently keep the saw handle and lead it exactly at a given line.
Cut down small round or oval holes And "narrow" curves are better with the help of special tools - a drill saw and a round file, which can also be cleaned by rounding.
However, the most suitable tool for drinking rounded parts and holes is to recognize electronics. Its advantage is not only that the strength and time will save. The included set of replacement canvases with different teeth allows you to choose a web for sawing the workpiece of almost any type, be it wood, plywood or chipboard. In other words, the electronics can be called with full right to be called a universal tool.
Round the corners of furniture
You can even hurt the sharp corner of the table. Therefore, we recommend cutting the corners where possible. W. homemade furniture They must be rounded from the very beginning.
Cut circles and curves lines are not more difficult than making an absolutely straight cut on the workpiece, but under one condition: in your hands required tool And you speak well.
Make drop-down parts
It may happen that the holes that you drilled to insert a narrow canvas of manual or electronics will be on useful sites to avoid similar errors, all the drop-down parts of the billet shading should be labeled.
What is suitable for the template
Make a circle on the workpiece not only with a circulation. For this purpose, any subject of a similar form will suit. It can be a saucepan, plate, cup or bowl. However, being taken for the work associated with the repair of furniture or some object of the situation, calculate the need for the details of rounded circuits or with round holes. Perhaps only minor changes in the design will be enough.
Instead of a circula
The school cyculous can come in handy in the home workshop, just the radius of his action is small. And if you need to draw a circumference of a large diameter?
A simple way to do it with a rope, nail and pencil. The nail is gently driven into the workpiece, the rope is fixed on it with one end, and the pin is fixed on the other end. The length of the rope determines the radius of the inline circle. The only condition - on the entire path of the pencil, the rope should be tightly stretched. Then the distance from the center (nail) to the circumference on all parts of the markup will be the same.
Cardboard or Rake Strip
No less simple but more reliable way - Use instead of rope striped cardboard or, even better, wooden bar. In this bar (strip), drill two holes - one, smaller, for nail, more, more, - for a pencil. The distance between their tips should correspond to the radius of the desired circle. It remains only to install a nail in the right place and turn the bar around the axis.

Two sharpened nails and wooden Planck Or the strip of dense cardboard can replace the circus.
How to draw ellipses
Ellipse - a figure is quite complicated, but to draw it on paper, you will need only two buttons, a cut of a rope and a sharpened pencil.
Secure two buttons on the surface of the workpiece at some distance from each other. Take the segment of the rope, tie both its end with a knot and hook the rope behind the buttons head. Now you can enter a line with a pencil that allows you to describe a stretched rope. The form of an ellipse can be changed at your discretion.

The distance between the two focal points of the ellipse is indicated by the buttons. If you conduct a pencil within the borders, the rope allocated to him, the ellipse contour will appear on the paper.

The form of the ellipse may be greater or less, thicker or already, depending on the distance between the buttons and the length of the rope.
Templates
Wine glasses, cups, plates, pans or baking molds - there are quite a few objects in any farm round shapewhich can be used to mark the circle. If you set anything and decided to give your product a rounded shape, then look at the beginning, whether there is no suitable template among the home utensils. For loyalty, select multiple items and take into the workshop. There you can immediately try on them on the workpiece and determine what is most suitable. After some training, you can make rounded lines from several round items with different radius. Circle arcs can be drawn sequentially or carry out bridges transitions between separate arcs.
Preliminary drawing
Before trying to draw the curve on the workpiece, desk it on big sheet Paper or piece of corrugated cardboard. Only after the result is satisfactory over all positions, you can cut the pattern from paper and make marking on it on the workpiece.

Circles and fragments of a circle you can draw with a cup or plates, just circles them with a pencil.
Cutting Sinks by Template
Washing - one of the most important elements kitchen equipment. If you decide to cut the sink in the table top of the kitchen desk, the first thing to do is prepare an accurate pattern.
First on a dense sheet of paper transfer the outer contour of the shell. Next measure the width of its sides, which it will rely on the worktop. It is usually 2-3 cm. Now back from the contour, applied to paper, inside the width of the side and spend parallel line. This will be the cut line.
When applying markup, make sure that the position on the slab itself was correct. Of course, if all the corners of the shell are symmetrical, then nothing terrible will occur, it will be according to the markup as it were in the mirror image. But if the sink has the shape of a trapezoid and rounding at the front angles differ from the rear rounds, then in no case can you confuse the front and rear parts.
By a similar scheme, make templates and cut the holes for instruments. wall lighting Or for the loudspeaker installed on wooden panels.

The line conducted around the sink is auxiliary. The second, carried out in parallel closer to the center, is the sawing line.
Electronics
If you need to cut the part of the rounded shape and cutting a round hole in the blank, then the electronics is the most suitable tool. With it, you will save strength and time, because such a saw has great advantages over manual. So, the electronics canvas is narrower, which provides increased maneuverability. Further, she has interchangeable canvas with various teeth, which allows you to process the workpiece of any type, that is, wood, phaneer, chipboard (it is not by chance that the tool is also called an electric bison).
To cut the area inside the workpiece, for manual hacking, first drill the hole. But if you have an electronics, then this is not necessary. The tool is made to the workpiece with a slight tilt forward and in such a position include. Saw sama will send a hole. Just do not need to put pressure on the body - this can lead to a breakdown of a saw blade.

Lead in a circle
This is a simple device, the device markedly makes it easier to drink round holes or arcs. It is enough to note on the workpiece center of the circle, fasten the device and connect the rod-coming from it with electronics. The divisions on the rod help install the saw blade at a distance from the center of the circle, what is needed. As a result, without preliminary marking, you can cut a circle or cutting an arc with a radius from 5 to 20 cm.
The device (more precisely, its "sole") is attached to the surface of the harvesting screws. They must be well tightened. If the mount is not tough, it will begin to hang out, then the smooth circle will not work.
Suitable for left-handed
To use the device can be left-handed, since the guide rod is attached to the moving node both on the left and right. So peel at your own discretion - by or counterclockwise.

Using such a device, you can cut the round hole with a diameter with a diameter from 10 to 40 cm without prior markup in the billet.
Lobzik
When drinking holes or curves in small billets, sometimes you can not do without a jigsaw. Interchangeable canvases with different teases in shape and location allow you to work with wood different density. However, it should be borne in mind that the depth of the cut is limited to the jigsaw arc, that is, the saw blade will not be able to advance farther than 30 cm from the edge of the workpiece.
Very subtle narrow blades of saws easily damage, if you use the jigsaw wrong. Whether the saw is needed by neat techniques. The main thing is to prevent the polls. Otherwise, small and light billets will begin to move along with the saw, as a result, it can lead to the fact that the canvas burst.

The thinnest linen of the jigsaw "master" the most narrow curve, but only in small blanks, since the web promotion is limited to the jigsaw arc.
Drilling Pila
Neither manual, nor electronics will help if in the workpiece it is necessary to cut a small - with a diameter of less than 10 cm - a hole. Lobzik may also be useless if the billet is large. In this case, the most suitable tool - drill saw. Its tip it is brazed into a tree as a bang and thus makes "starting" holes for further cutting. Externally, the saw looks like a round file with the difference that its rod goes on the helix cutting edge.
Drilling saws are produced with replaceable nozzles various diametersdesigned for wood processing both soft and solid rocks as well diverse Materials from her.

The working drill saw organ is a metal rod with cutting edge, like a bouwn, and a cutting edge that envelopes the rod on the helix.

So the narrowest looks like hand-made knife. Thanks to the mounting unit, the canvas in the hacksaw can be changed depending on the nature of the material being processed.
Nozzle on drill
One of the most popular and convenient options Cutting holes is a special nozzle on a drill. It is performed in the form of a crest crown and has a rounded shape. With this nozzle, the cutting of the holes happens quickly, and they are obtained fairly smooth.

drill nozzle for holes
Nozzles are different diameters, allowing you to cut the hole of the required diameter. If you have already prepared a hole, we can advise you to try yourself in optional trading.
Sverlo
Cut big hole You can also with drill. For this, it is necessary to place the outline of the extended hole in advance. Next, a small drill drill along the contour prepared in advance, through holes. Next, the jigsaw or very sharp knife, Cut the wells, thereby connecting the holes. After that, it is possible to smooth the circle with the help of the skin of various grainies.
Chisel
Cut required hole You can also with the help of the chisel. It is enough for a layer to remove wood along the contour. This option is the least suitable for interior design. The hole must be even, which cannot be achieved by the use of primary and unsuitable for the case of materials. Optimal option There will be a crown on a drill. The hole is flat and smooth edges.
Thus, summing up, it becomes clear that you choose the tool for cutting the hole, it is necessary on the basis of your goals. If high-quality cutting is required, it is not necessary to do without a special tool.
The main fastening element in the furniture assembly is the confirmation. It is screwed with a preliminary drilling of the hole. It is the drilling of assembly holes in the chipboard under the confirmates we will consider in this article.
For the assembly of DRP details we need:
- Screwdriver
- Bit under confirm
- Rule or roulette
- Pencil and Shily
Depth and opening width
With usually use confirmation of 6.4 * 50. Because The diameter of the thread is 6.4 mm, and the diameter of the body of the confinal is 4.4 mm, then for high-quality mounting parts, the diameter of the hole must be within 4.5-5 mm and a depth of at least 50 mm.

If the thickness of the hole is greater than the specified - the confirmation will be bad for the details, if less - it can break the chipboard with its thickness.
For drilling, a confirmable drill is used, a diameter of 4.5 mm, which is equipped with an additional head to drill an enlarged hole for the confirm neck, which also makes the cenchka under his hat.

Of course, you can use normal drill With a diameter of 5 mm, but for high-quality mounting in the hole, you will additionally need to make a place under the cervix and its hat.
To perfectly cut two details, you need to accurately place the places of their fixtures.
On the details that will be imposed on the end (the one on which the through hole), two measurements should be made - in length (usually 5-10 cm) and from the edge - exactly 8 mm (this is if the thickness of the plate is 16 mm).

On the details that lies perpendicularly, the drilling point is celebrated on the end. Here you need to withstand the same distance in length (5-10 cm from the beginning), and in width - strictly centered (8 mm from the edge).
Marking should be made as accurately as possible, especially in length, because With incorrect marking, your parts can have extra gaps or protrusions.
It is better to make a pass-through hole in the first part, attach it to the second - and immediately the drill to schedule a drilling site in the end of the second part. And then, separately, calmly reserved the hole.
We make a hole at a distance of 8 mm from the edge.
Drill always need to keep strictly perpendicular to the surface
Before making a pass-through hole, put a piece of unnecessary chipboard under the detail. So you will prevent the appearance of chips on the reverse side.

When the through hole is done, for drilling holes for the neck and confirm hat, the part can be drilled by weight.


The main rule - when drilling in the end, the drill must be strictly perpendicular to the end of the part. If you do not hold the drill smoothly, the drill can go away and outward, thereby spoiling the item.
When drilling, you need to pull the drill several times so that the chips are not clogged in the opening.
This option is considered the most accurate and, moreover, the fastest. But in order to make a hole in two details at the same time, you will need to fix them before driving. To do this, you may need special clamps, clamps and other devices.


Devices for drilling holes
In order to not post 8 mm from the edge of both the reservoir and the end, you can use a special device that, by the way, it is easy to make it yourself.
It is a kind of wooden pattern with a metal sleeve for drill inside.
It looks like this, see photo:


And this is a more professional thing:

See short videos by accurate drilling of holes in the chipboard under the confirm and the assembly of furniture parts:
Drilling under the sewage
The hole for the sewage is made by a 8 mm drill. Also, not to drill a detail through, it is desirable to equip the depth limiter.

In the end, drill the same drill to a depth of 20 mm. Do not forget that for any work, the drill must be strictly perpendicular to the parts plane.
Of course, if you first in my life took a drill in your hands, you will succeed. But this lesson can be learned quite quickly.
Everywhere where the walls of plasterboard plates are installed, there is a need to make one or more holes in them.
The most common case is the installation of a cylindrical box for a socket or switch, ceiling (and not only) lamps or fuse boxes.
That is why it is important to learn how to make such holes, and not just know.
In order for the finished hole to be smooth and beautiful, and the process itself did not take a lot of time, you need to prepare required tools And know how to use them.
If you plan to make holes in the old, and do not know anything about the layout of cables and pipelines, use the metal detector to not cut the wiring or anything important.
Cutting round holes
To create round holes, you can use special handwall for drywall in the event that the hole diameter is large (for example, about 15 cm) or it can be special nozzles on the drill (see Foto).
Required tools and materials:
- Roulette or ruler;
- Pencil;
- Circul (for large holes);
- Corolnic;
- Pillet for plasterboard or drill with a nozzle.
Using a drill nozzle
With this tool, you can make a hole in seconds. You only need to select the desired saw diameter (the rest you need to remove from the mount) and accurately determine the location of the center of the future hole.
Note: In construction stores, you can purchase nozzles for a drill with saws from 2.5 to 15 cm.

Before cutting a hole in the drywall, determine its intended location. Accurate measurements in this case are not less important than the accuracy of the drilling itself. If this is a new plaster of drywall, it will be easier for you to make a hole without damaging the communication (as stated above).
With the help of the kitchen and ruler or roulette, measure the desired distance from the bottom edge of the plate to the center of the future hole. Put the point in this place. This will be the height on which the center of the future hole will be placed.

The line attach at the level of the point you caused in the previous step. Now measure the desired distance from the side edge of the plate.

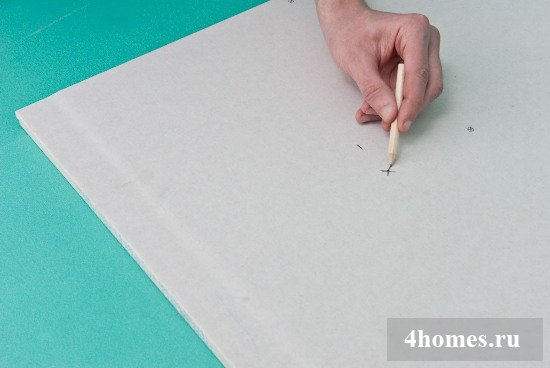
The center of the hole mark the cross in order not to be mistaken in the notation. Before driving, make sure that everything came out correctly.
If you plan to make a hole more than 15 cm in diameter with handpit for drywall, you should draw a circle the desired diameter Circle.
If you plan to use a drill hole to drill, select a model with adjustable rotation speed and special nozzle (see photo).

Install the average rotation speed on the drill. Start drilling the nozzle drill in the place indicated by the cross. Keep drill strictly perpendicular to the surface of the plate and try not to move it to the sides. To do this, use an overhead handle.

As the drill of the nozzle drowshes in the stove, and the saw approaches it, increase the speed of rotation of the nozzle. The saw very quickly acts a hole in the plasterboard plate.

Note: Saw on high speed creates a lot of dust, so use the protective glasses and respirator in the process. Paul can be covered, for example, old newspapers.
Note that the circle carved or fall down, or will remain on the drill nozzle.

All plaster dust and cardboard crumbs carefully remove with a broom or vacuum cleaner.

Round hole ready!

Rectangular holes
If you plan to make a rectangular hole on old wallUse a narrow hacksaw for drywall. Do not forget about the possible wires behind the wall. On the new plates the most convenient to use the electrolovka.
Required tools:
- Construction knife;
- Corolnic;
- Pencil;
- Roulette;
- Narrow hacksaw or electrolybiz;
- Drill with a drill.
A successful end result depends on the correct measurements and neat dug. With the help of the kitchen and line (roulette), mark the location of the right and left side of the rectangle - the distance from the beginning and the end of the future hole to one edge of the plate.

Inscribe the length of each side of the future hole at the desired distance from the other edge of the plate.

Note: Measure and check at least twice the correctness of measurements and drawing.
Connect the ends of the drawn lines, creating a rectangle or square.

Now take a drill with a large drill and drill 4 holes in the center of each line drawn, in the inner area of \u200b\u200bthe rectangle. This will give the ability to insert the hacksaw or the electrol-free cloth (see photo).

Note: Make holes in the drywall as close as possible to the rectangle lines. So it will be easier to cut through the drawn line.

Remove the crumbs after drilling holes by a broom or vacuum cleaner.
Turn the plasterboard sheet face up. Lock it so that he does not move together with cutting tool. Insert the jigsaw or a narrow hack in one of the holes.
Start sawing, firmly holding a tool perpendicular to plane plane. Move strictly along the line.

It is almost impossible to make a neat rectangular hole, continuously moving around the perimeter of the rectangle. Therefore, you made four holes with a drill. Having reached the corner of the rectangle, stop sawing and rearrange the cloth into the next hole.

Note: In the process of work there will be a lot of dust - use protective devices.
Do not rush, cut off slowly, but neat. You should get about the same hole as in the photo.
 Why you can not give icons
 Is it possible to give icons as a gift: Signs, the opinion of the Church
 A year ago left her husband, and now I do not know what to do