Garden shapes do it yourself: master class with photos and videos. Garden figures from plaster: mushroom figurines made of gypsum for giving
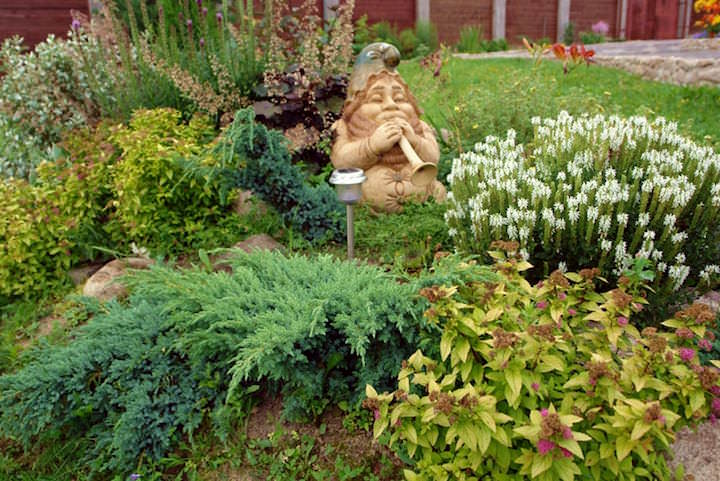
The garden is the place where you want to relax. At the same time, no one bothers you to realize your creative potential. Often the landscape for the garden comes up with a specialist. And you can decorate the territory of the Garden figures you yourself!
We have decorations correct
In order to decorate the garden correctly, you need to be guided simple rules. First of all, garden figures must be combined with the nature and design of the plot.

How to do it?
- If you are not sure own power, Cut out cardboard figures and arrange the garden. Look, what does the result look like? If necessary, remove the extra details or change them in places.
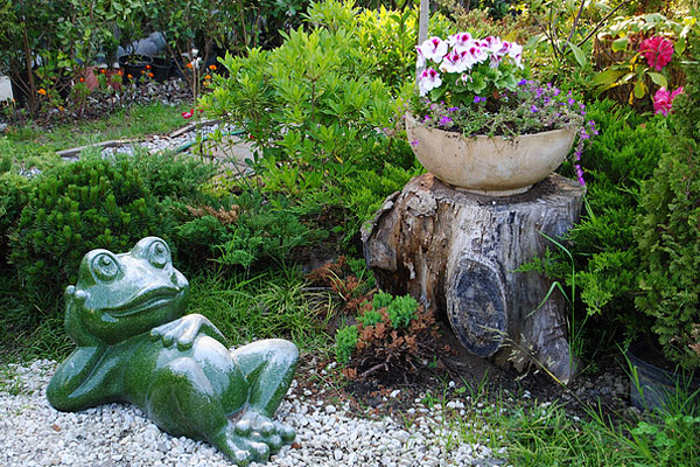
- It is important not to overload the territory. Garden figurine does not have to become the center of the garden. Perhaps, in your case will be better if it is one, but necessarily combined with vegetation.

Selection of decorations depending on style
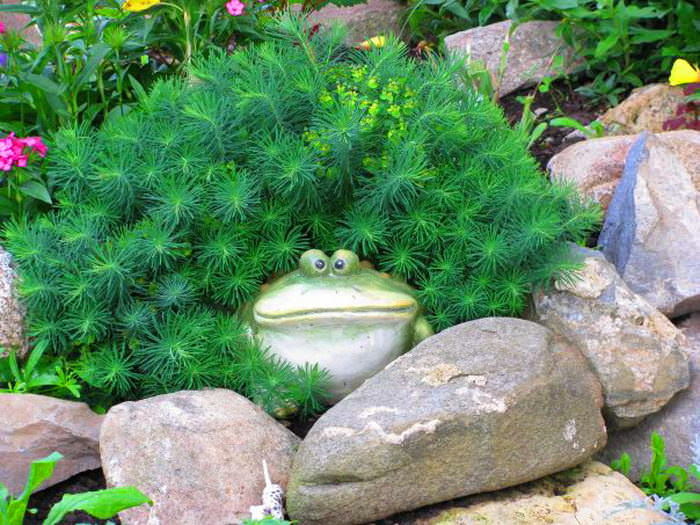
Garden figures Form the magic of the plot. This means that they should look harmonious and combine with other elements of design.
Garden figures do it yourself (video)
How to make garden figurines do it yourself
Often, shopping options are not suitable in order to embody their own ideas. But you should not despair, because you can make garden figures with your own hands. Best for this will suit such materials such as plaster or mounting foam.
They can easily cut, the product can be painted at their discretion, and to facilitate the task, the use of stencils is not yet rebeling.
The most common option, to perform that, for everyone, is a figure of a kolobkin. Everything is simple. Make a hole in the rubber ball and fill it with the mounting foam. Then carefully cut the ball and take the ball. It remains only to paint the product.

So, decorate the garden will help the figures made of perfectly different materials. At the same time to do decent ornament The site can be independently. But do not forget that decorative elements Must match the style of the garden.
Figures from the hay do it yourself (video)
Figures in the garden (20 photos)


Reviews and comments
(9
estimates, average: 4,39
out of 5)
Inna 11/21/2014
I live in a private house, I have a small kindergarten, and a recreation area with a gazebo, hammock and mangal. Very love to decorate your site with various squirrels, mushrooms and gnomes. To make you done with your own hands yet Flowers for flowers from automotive tires, but I think and think Up to the rest of the creativity, I will soon reach your hands!
Sasha 11/21/2014
Garden figures This is a very cool idea to decorate your cottage. And I have my own plot perfectly decorated with all sorts of dwarfs and protein. And I will tell you what it looks all this case is just wonderful)
Oleg 28.11.2014
For me - so very much on an amateur. Dwarves do not definitely like me, and the rest of this type. They are like such a direction in art, called "naive", that is, primitive on technology. Some samples in the photo are pretty, but not for the garden in my opinion. There are already established classical ideas if not natural, then about geometry and sculpture.
love 12/04/2014
And I like that there is something else on the plot other than beds with greenhouses, flowers with cabbage kochem, etc. Figures somehow enliven the whole dacha * flora *,
I agree with the author you need to create harmony, and not to poke into different places Or all a bunch.
Olga 16.02.2015
I love all sorts of decorations for the garden, garden and flower garden. It is clear that they should be a supplement, and not to drag on the focus on plants., So I have a little on the plot. Video to create a sheet to take a note, already in my head the idea arose where it can be adjusted :)
Nikolay 02.04.2015
When I studied at the school, we were taught to do various statues and figures from the gypsum. It is quite easy, just need a fantasy. I almost every month make figures for decoration. In the children's corner, Masha and the Bear, around the well swans. Near entrance door Put two lions. Inside the figures, I insert metal rods and I do a small frame from a metal construction grid. Then we stick to the gypsum and make a figure.
Margarita P. 03.10.2015
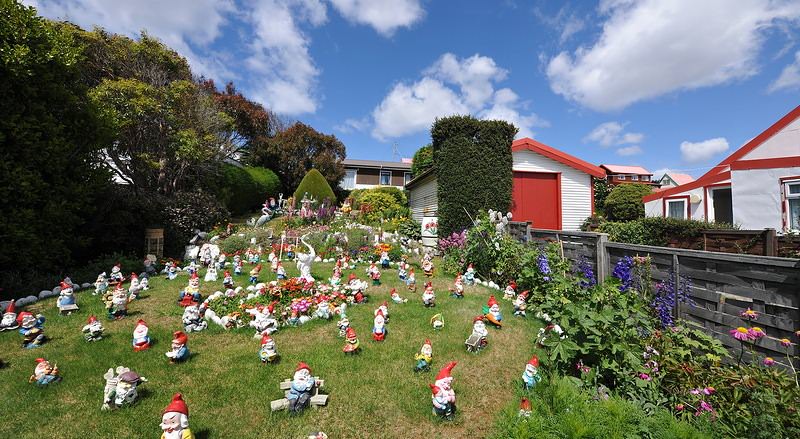
All photos liked, in addition, which depicts many dwarves behind the fence. I would call such an image: "Hour of reckoning. The invasion of dwarfs. " Well, it does not look like an abundance of figures on a narrow plot!
As for the material for statuette, I would recommend the mounting foam - it is inexpensive and wear-resistant.
slavyta5032 12/24/2015
And I often have a strong wind on the plot, especially in winter and spring, so options from mounting foam not for me. I am more suitable for large plaster figures and concrete sculptures ( cement mortar) Painted after complete readiness. Just how to do them?
Lisa 08/18/2017
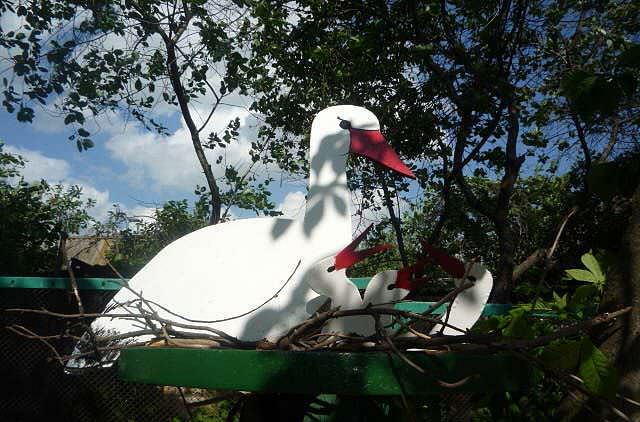
Clasto! And I have on cottage plot Red dwarfs stand in chaotic order ... Also very beautifully look and decorate the garden and a plot as a whole. 🙂 I also think a caravalie nest with straws with imitate. 🙂
You can see), and now Lesson 2 and I will tell and show in the master class, how to cast a silicone form for the future figurines from plaster. Looking again a little ahead, I will say that the most perhaps difficult in all this process is all cooking for the casting of silicone form: the frame assembly (box), lubrication, etc., and the casting itself is not much labor.
So, for the casting form from the silicone it took me:
- 1 liter of silicone
- Plywood pieces (for assembling boxes)
- any means for washing dishes
- Little self-tapping screws
- Hoven
At first, I measured and cut off the bottom of the future box, it should be 1 cm from all sides more than the width of the figure. Next, I poured four side walls with a hacksaw, attached them with self-drawing to the bottom, and it turned out a box without top. By the way, when disconnecting, once again place the plasticine blank in the box so that it does not work so that between the figure and the wall will be very small distance. Ideally - 1-1.5 cm.
When the box was ready, all his walls and the owl itself smeared the dishwashing agent. This is done so that after drying silicone, it easily moved away from the plywood walls and from the figure itself. There is a special separation grease for silicone, but it was not there, and I replaced it with a dishwashing agent (in this case, AOS). You can also use liquid soap or any soapy composition. In general, everything inside, where silicone will touch, should be lubricated.
Further, the bottom of the bottom with the front side was overwhelmed with self-tapping screw, the owl put on the self-sufficiency so that she did not pop up when filling silicone. Next, the silicone spread, and carefully, trying not to form bubbles, poured it into a prepared box with a figure. Bubbles somehow will appear on Silicone, because when you stir, oxygen falls silicone. But you need to try to be less.
Silicone frost time is different, depends on the brand and its shore density. I froze for about 40 minutes. Then carefully cleaned all the screws, removed the plywood and removed the finished silicone shape. Owl was still in the form, so I pulled it out. So at home, you can make a silicone form for the statuette.
Well, now the most interesting is the casting of plaster figurines using silicone shape. On 1 liter of water took 700-800 g of molding gypsum, stirred to a homogeneous consistency and poured into a silicone form. The time of frozen is about 20-30 minutes (depends on the freshness of the gypsum). The frozen plaster owl removed from silicone form. This is the principle of gypsum figures with their own hands. In the last lesson I will tell you as under the old bronze. 


Instruction
Prepare the form in which you will pour material. You can buy a ready-made set for crafts in which there will be plastic molds. Also for these purposes, silicone baking molds and even sand tanks are suitable. You can also cut down the bottom of any hollow plastic or rubber toy. To make a figurine from the gypsum easier to get, lubricate the shape of any vegetable oil.
Powder gypsum pour into a glass glass or jar. Add required amount Water - in accordance with the instructions on the package. The consistency should resemble sour cream. Place the mass so that there are no lumps left.
Pour the gypsum into the prepared shape. Run the surface with a spatula or knife. Leave the mass to dry for 30-50 minutes. If you make a magnet, after 15-20 minutes, press the magnetic plate into the surface of the plaster. In the cradle, which plan to hang, paste a loop from the fishing line.
Before pulling out the figure, make sure the gypsum is really dry. Let's knock on a pencil - the sound must be ringing.
The shape of the finished craft can be changed. With the help of sculptural different size You can make a thread on gypsum craft. First apply the pattern lines on the figurine sketch. Then, focusing on this sketch, mark the craft simple pencil. Cut the gypsum with small pieces, layer behind the layer, achieving the desired effect. Use only sharply sharpened tools so that the material is cut into exactly, without chips.
If you want to make a multicolored figurine, shed the gypsum acrylic paints. On the packaging acrylic, look for the mark "for porous surfaces." You can apply paint with a foam sponge (for painting large areas) or synthetic brushes (for detailed study).
Video on the topic
Sources:
- how to make a statuette with your own hands
Approaching creatively to carry out your leisure and home decoration, pay attention to such a simple and affordable Material as plaster. From it you can make crafts with children and quite serious work for the decor of the room.
Frame for photos from plaster
For the manufacture of the frame you need a transparent plastic cover from the cake or from another disposable container in which the middle is smooth, and the edges are embossed. It must be of the size you want to get a frame. Carefully inspect the shape. If there are some dents on it, straighten them. Otherwise, all this is imprinted on the finished product.
Pour water into a deep bowl and gradually pour dry gypsum into it. Carefully stirrate the tablespoon or fork. It can also break the resulting lumps. The mass should be homogeneous, similar to a liquid sour cream.
If we breed the plaster with warm water, in which the pinch of the salt is dissolved, it will be grateed faster.
Pour into the form dissolved plaster layer a little more than 1 cm. Slightly shake the container or knock it on the table. Then the liquid mass fill the entire relief, and air bubbles will come out. Route along the entire surface of the layer of gauze or bandage. This reinforcement will do ready product more durable. Immediately pour into the form another portion of the gypsum for a couple of centimeters.
If you want to make a big frame, it is necessary to make a "sample" to facilitate weight. Return from the edges slightly hardened crafts by 3-4 cm and screaming the entire sample of the frame to the layer of gauze.
Make a loop from the segment of stainless wire so that the finished frame can be hanging on the wall. If the wire is not, bend the fastening of a large clip. When the craft is slightly freezing, insert the loop to the place perpendicular to the plane. Final form fit already after the complete frozen of the workpiece.
Leave the frame to stick room temperature. Touch it periodically. While the plaster freezes, the billet will be very warm to the touch. When it cools, around a couple of hours, get it out of the form and put on smooth surface For final solidification.
Gypsum - malleable material for processing material. Cut the sharp knife from the finished craft unnecessary influx if they are. Severate fine-grained emery paper All irregularities. Just be sure to cover the nose and mouth so as not to imagine gypsum dust.
Cut the plastering frame impregnation for porous surfaces. After its drying, you can decorate your product with acrylic paints. They do not require lacquer. Reverse side Camelts check. In the middle of the frame, place a photo or picture that are suitable. You can make a printout on the computer for the specified parameters.
Sculpture from children's toys
Volumetric figures that are obtained when casting, children will be happy to paint. Immediately pour patience. A large billet for a toy will dry out a few days. Therefore, it is better to immediately make a few pieces.
Cut sharp knife bottom of rubber children's toys. Divide the plaster and fill it into the resulting form. Shake her so that the mass penetrates in all corners and curls of the figure. Leave your craft to dry for several hours. Then, flexing rubber from plaster, get a cast sculpture. Fill a fresh portion of the gypsum into the form, and leave toy to dry another day three. Then it can be painted.
Gypsum products are able to revive any interior, give it an individuality. Especially if they are not done at the factory, but on their own - on their own sketch. The technology of their creation is not so complex.

There are two principles of action when independent manufacture Gypsum products. The first is the fill. Option time-consuming, requiring the creation of a prototype model (from wood, plasticine, clay) and form for filling, but allowing you to create beautiful bulk figures. The second method is a carbon on the gypsum. It is more suitable for creating decorative flat ornaments. From the tools you will need only a drawing sketch, awl and good knife or scalpel.
As a "model" to create a form under the fill with plaster, you can use the ready-made product (for example, a statuette). It is carefully lubricated with vaseline or silicone lubrication and laid on a flat surface (shining or otherwise protected), they make a wooden or steel frame, which is also lubricated so that the future form does not stick. Then poured into the frame a gypsum solution of consistency thick sour cream, taking into account the model can be removed from the form after drying.
If the model for creating a form was made independently, it should be durable, dried, smoked.
When the solution solids, the model gets. Future form Pretty dry, neutralize defects (for example, pits from air bubbles) with the help of the same gypsum solution, lacquered from the inside. After the lacquer drying, the form is ready for the fill in it plaster to create the final product, but you need to not forget to clean and lubricate it before each new fill. Figures complex form Most often collected from several parts, cast separately.
It is most convenient to pour the shape in two stages: first - a thin layer filling all small cavities, then the main mass. If the product is large, it will be useful to strengthen its reinforcement. The finished figure is perfectly coloring. For final processing It is desirable to cover the wax or varnish layer.
Relief plates, ornaments, decorative inserts are more convenient to perform by carve on the gypsum.
To create a sketch of the future ornament, dense drawing paper will need (if the elements are repeated, it will be convenient to fold it several times). It paints the contours of the future pattern and on the line at some distance they make punctures with a seboard or needle. On a flat protected surface, a frame is installed desired size (about 3 cm high).
Gypsum poured into two stages. The first layer filling the shape of two-thirds is prepared in the ratio of 2 parts of the gypsum to 3 parts of water. Poured it (without stirring) when it acquires the consistency of sour cream. The second layer is prepared in the same proportion, but smeared very carefully. Poured the upper part 10 minutes after the first, the rubbed surface is a frozen surface with a damp cloth.
After 10-15 minutes, removing the disturbing rails, you can transfer the drawing to the surface of the gypsum. For this, the leaf with punctures is exactly laid on the gypsum blank and sprinkle with dry pigment (waking up through the holes, it forms a dotted pattern). The scalpel or knife on the plaster is carefully made a slot, a parallel pattern (with an indent of 2-3mm in the direction of the "background"), then the same knife takes off the background layers so that the ornament spoke.
Beauty people create themselves. They planted flowers on the summer site, decorate the house with different decor, etc. Surely you are familiar to crafts from plastic bottles and tires, but today we want to tell about such a material as plaster. It turns out luxurious products that will take a worthy place in your home and will be real pride pricework. In this article we offer original crafts From the gypsum with your own hands, the master class will help you in creating them.
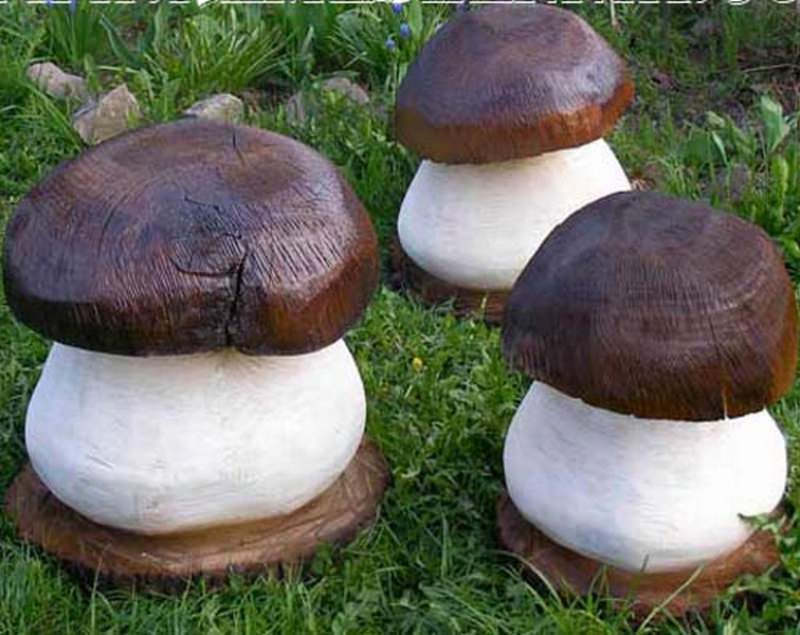
Fabulous mushroom
It will look original on the balcony, in the room or in the garden here is such a wonderful house fungus.

To the creative process, bring the child. He will be happy to help at every stage of making a mushroom. In addition, such a lesson develops motility, spatial thinking and is an excellent way of time.
For work, prepare such materials:
- sculptural plaster;
- glue;
- pencil;
- compass;
- food film;
- plastic bottle;
- stationery knife;
- cups (2 pcs.);
- acrylic paint;
- sunflower oil;
- water;
- details for registration;
- soap.

At the first stage you need to make a feet for the mushroom.
Step 1. Cut the neck at the bottle, it will serve as a base for the leg.

Cover the walls of the bottle with a solution consisting of vegetable oil, water and soap, then the gypsum is easier to extract from the form.
Step 2. Sut the soap on the grater and pour into the jar.

Step 3. Pour vegetable oil with water into the container and mix everything. Apply a brush solution on the walls of the jar.

Step 4. Divide the sculpture gypsum.


Step 5. Fill the gypsum solution into the form and leave for some time to stick. In order to save material, it is possible to insert a plastic container of the corresponding diameter in the form, then the leg is obtained by the floor.


Step 6. Secure the position of the bottle using the press, then it will not pop up in solution.

Step 7. Remove the gypsum blank and clean it from extra residues, cut a part of the tank that was inserted into the bottle.


The leg is ready. Now let's go to the hat.
Step 1. Take a cup of the appropriate shape and cover its surface with a food film. Try not to leave folds.

Step 2. Imit a portion of a gypsum solution for a hat and pour it into a cup.
Step 3. Insert the leg into the frozen solution and leave half an hour.

In the third stage, you need to make the basis for crafts.
Step 1. Take a wide container and pour a solution there, pre-laying the food film.
Step 2. Watch the foot of the mushroom with a film and immerse the base into the finished solution. It is desirable that the leg is removable, then it is easier to accompany the product.

After the figure freezes, you can get it.
Decoration. You can decorate the cracker with leaves and flowers made from the same gypsum. To do this, fill the building material in the form, and after complete drying, get them.


Put the craft for two days to a warm place so that it is good. So it will be easier to apply paints along its surface.

You can paint the mushroom as you like. Let the child come up to how the handicap will look like, and you will sketch on the mushroom surface or draw outline on paper.


Step 1. Using the needle or tool, give the score.


Step 2. Trunct the mushroom, then you spend less paint. To do this, distribute the construction glue with water (1: 2).

Step 3. Apply the brush to the primer on the workpiece and let it dry.

Step 4. Collect the figure according to the picture you made or via the drawn template.

Step 5. After the paint is driving, cover the mushroom with varnish in several layers.
It remains to find a place where the cauldron will stand.


We offer to see crafts from plaster for giving with your own hands. The master class submitted to the video will help you in the creative process.
Crafts for the nursery section "Kolobok"
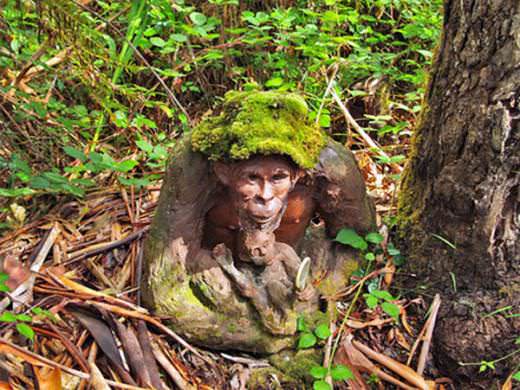
Decorate the garden or garden can be a figurine of a fabulous character. Such a cobobok will like your neighbors, relatives and guests.

Step 1. Work should be started with hemp. Of course, you can simplify work and make the basis from the residue of the fired wood. But it is possible to use secondary raw materials for the manufacture of a product - for example, to bore scotch plastic bottles and smear the depression by the starting plaster.

Step 2. Deliver the bottles completely and give the workpiece to dry.

Step 3. To make the imitation of the bark, interlace finish plaster In small portions and apply a layer over the entire surface of the hemp.

Step 4. Make the hand of the groove and make the features of the face of the hemp.

Step 5. Is starting spike Take the spout.

Step 6. Hold the nose of the ball with one hand, and the second is seeded with a wet tassel. Give the workpiece to dry one day.

Step 7. Twist the desired size bruk from the newspapers.

Step 8. From a vegetable mesh, cover the case for the preparation of the appropriate size.

Step 9. From the wire twist your hands and insert them into the product.

Step 10. Apply the first layer of plaster and fix the handles, then allow the solution to be grabbed.

Step 11. Apply the second layer with starting plaster.

Step 12. Send a blank with a wet brush.

Step 13. To make the legs of a ball, straighten the stucco with a wet brush.

Step 14. Bend the wire, as shown in the picture and insert into the cast.

Step 15. Apply plaster on a wire.

Step 16. Fix with a wet bandage and give building material Craspiate.

Step 17. Remove the wet brush.

Step 18. Draw the features of the corob.

Step 19. Twist the rod from the wire ends, as shown in the picture and insert into the shaped ball.

Step 20. At this stage you will have such a billet.

Step 21. According to the contour of the face, the roller is blind from the plaster - it will be a handkerchief.

Step 22. Take the details of the face Kolobka - nose, cheeks, mouth.

Step 23. Send the finished billet for drying.

There is a kolobok coloring.
Crafts from Gypsum will decorate your home, cottage and garden. Decide for yourself what character you want to create and proceed to work.
We offer to see the video formation of products made of construction material.
 Why you can not give icons
 Is it possible to give icons as a gift: Signs, the opinion of the Church
 A year ago left her husband, and now I do not know what to do