How to arrange shoe boxes. Decoupage a cardboard box (or from under shoes) with napkins and a cloth with your own hands
Each of us loves a beautifully designed interior. This commitment becomes especially demanded in cases where interior solutions affect a good mood and joy for our loved ones.
With proper ingenuity, you can create any design options with your own hands.
This joy can be caused, among other things, by the gifts that we so love to present to each other. But how to make the gift not just an ordinary thing, but something unique and memorable for a long time?
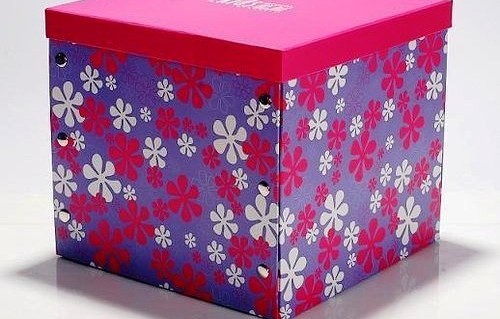
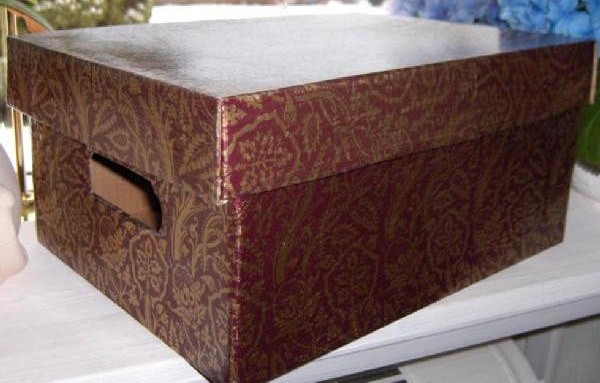
There are several different solutions, and today we will talk about one of them: this is the design of the box using wallpaper, paper, fabric and other similar materials. Wallpapering the box or covering it with fabric is not as difficult as it might seem at first. let's consider short master the class that contains step-by-step instruction of how to do everything with your own hands, decorating a cardboard shoe box both inside and outside.
If you do not have experience in such work, you should not despair and worry. The scheme of work is quite simple, since it allows you to decorate yourself by completing the design according to the pattern. As for the choice of a gift box, it can be either with a lid or without: the decoration does not depend on what shape it has. It can be square, rectangular or even round.
Working with paper and wallpaper
Before learning about the process of decorating a box with wallpaper, it is necessary to say a few words about what materials and tools will be needed and may be needed when doing the work.
Box selection
It would seem that any box for storing toys, shoe boxes, and so on can be suitable for decoration or decoupage. However, this is not entirely true, since an important criterion is not only the appropriate size, but also the sufficient strength of the material. It is also important to pay attention to how durable the cover is.
Remember! Packaging from small household appliances and various devices. Typically, the packaging is made of corrugated cardboard.
Corrugated cardboard (corrugated packaging) is a durable packaging that is, in fact, free. The fact is that after purchasing the product, you will no longer need it, except for those cases when it can be used for long-term storage or transportation of things, dishes, and so on. An example of such material is packaging from:
- Electric kettle.
- Thermos.
- Shoes - sneakers, shoes, boots.
By the way, it will be desirable to pay attention to the fact that, despite the rather strong material, the edges of the box itself may diverge somewhat. It is for this reason that it is advisable to glue them additionally. This will help avoid possible problems associated with deformation in the future.
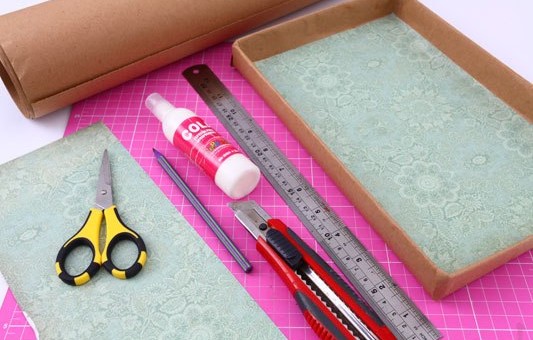
What tools should be used
All in all, you don't need a lot of tools. All of them are the most common ones, widely used in everyday life. As a rule, we are talking about ordinary scissors, as well as a stationery knife. At the same time, for more convenience, you can use some additional devices, such as, for example, a ruler, a special clamp that will be used for fixing, and a set of brushes.
How to choose materials
To wrap the box, you can use small scraps of leftover wallpaper. In addition, the decor can be made with the following materials:
- Newspapers (this will look very stylish, including in some modern interior styles).
- Foil (including self-adhesive) made from a variety of materials.
- Napkins, preferably thick.
- Paper, especially colored or specially designed for gift decoration.
By its composition, the wallpaper that will be used for decoration can be very different: vinyl, paper, non-woven and even fabric (textile). How to decorate a shoebox using fabric will be described below.

The various finishes offer a wealth of possibilities to customize any design you like. You can decorate in one style or another using different variants patterns, colors and shades: red, brown, blue, yellow, gray, green, turquoise, beige and many other "representatives" colors... When combined with original patterns and ornaments, they can give a really great result. No one will believe that you did it all with your own hands.
Advice! For final finishing your decorative "box" can be used with a protective transparent varnish. Its role is to create a special layer that will clean the surface to be decorated with the possible ingress of water and other liquids.
In addition to materials, you need to take care of the right choice glue. It is not so difficult to pick it up: you can use the same adhesives that are used when gluing ordinary wallpaper of one kind or another, be it paper, vinyl or non-woven canvases. When working with paper covers The time-tested PVA glue, which can be bought at almost any hardware store, will also work quite well. In his favor speaks profitable price and excellent performance because it adheres well to paper, cardboard and many other materials.
The main stages of work
![]()
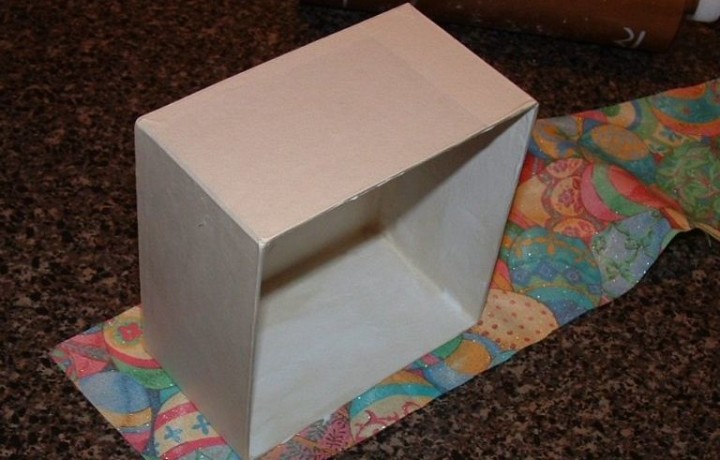
In the practice of home design and decor, there are several ways at once how you can paste over a box with wallpaper. Some of them are quite complex. Therefore, as an instruction for beginners, it is advisable to dwell on the simplest method. So, here is the sequence of necessary actions:
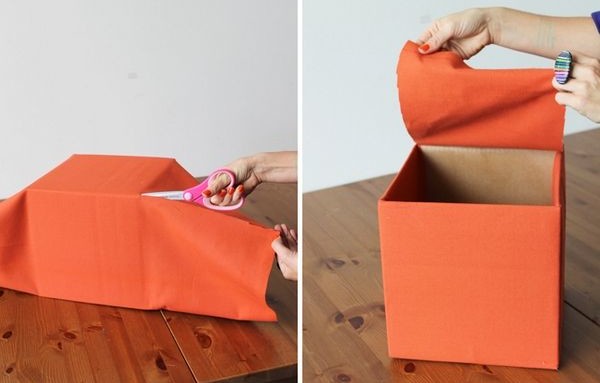
- First of all, we need to take the proper amount of material. Please note that a few extra centimeters will not hurt, so you need to take a certain margin (overflow). We straighten the wallpaper by leveling it on a table or other similar surface.
- Then, using a pencil, we mark out a pattern for decorating a shoe box or other product, depending on what exactly you are using.
- The next step: you need to carefully wrap the box (both its bottom and side parts) with paper, wrap it inward and press it tightly. Thus, we prepare the wallpaper for gluing. We take them off and put them aside for now.
- Using cutting tool, we get rid of unnecessary pieces.
- Now you can proceed to pasting. We put glue on the bottom of the box (of course, from the outside), and put it on the place outlined with a pencil. Press firmly. In the same way, we glue the paper to the sides, and then to the inner ones (those areas that were bent.
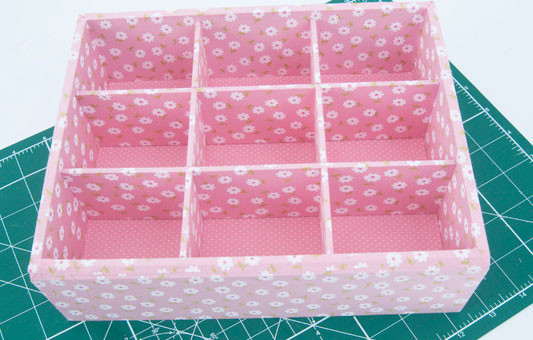
- But that is not all. Inside, you also need to glue everything so that general form was attractive not only from the outside. For internal pasting, contrasting paper colors are perfect. You can use plaid or velvet paper. By the way, some types of fabric are also suitable.
So after adhesive composition completely dry, we can assume that our decorative gift box-casket is ready. On the other hand, you can go even further and continue decorating it. We will talk about this below.
How to make decoupage
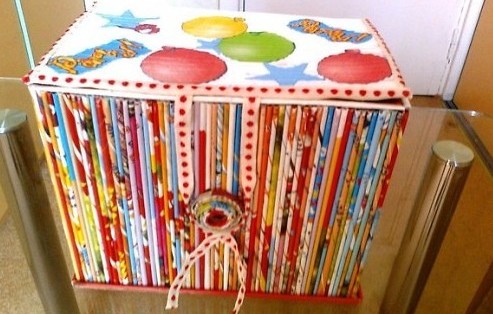
In addition to simple pasting, you can talk about such processing technology as decoupage. In order to complete it, it is necessary, first of all, to choose a drawing that would act as a plot. As for the material, a fairly popular solution is the use of two-layer paper wallpaper, which is also known as "duplex".
Nevertheless, the best solution in such cases is to watch a video tutorial on decorating using this method of decorating boxes. Therefore, we recommend that you familiarize yourself with a more detailed master class:
How to sheathe a box with fabric
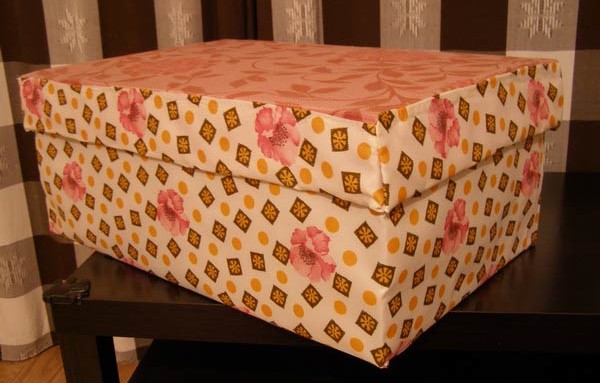
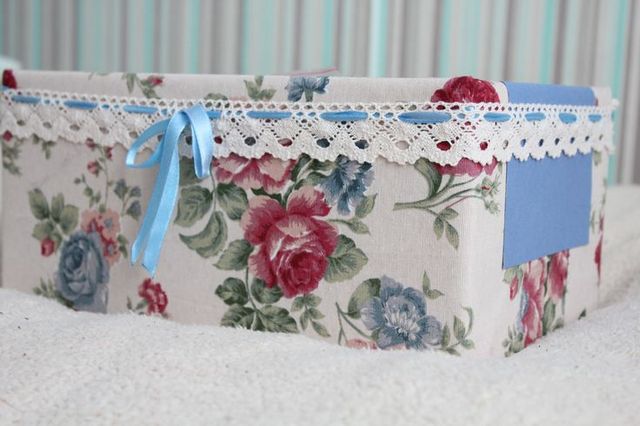
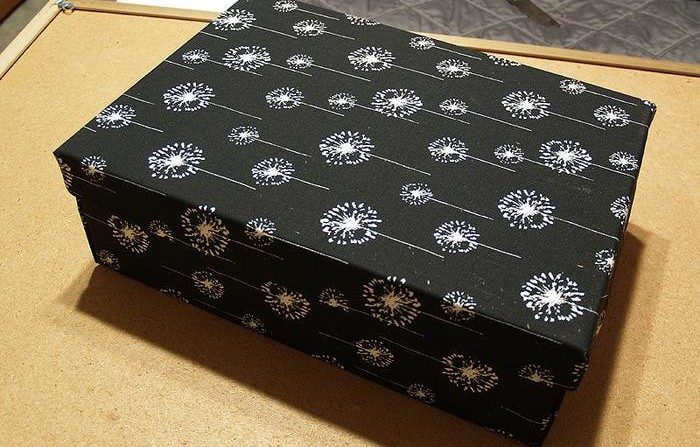
In addition to decorating newspapers or even tissue paper with wallpaper, there is another option for decoration. It is about the use of fabric. You can glue the box with a cloth using a wrap. This is enough uncomplicated way, which allows you to create a unique design and, of its kind, exclusive thing.
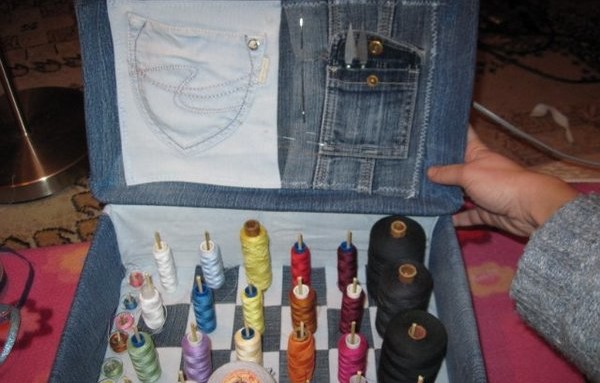
Note! Using this technique, you can not only sheathe the packaging itself, but also make an attractive textile cover for the gift box. Especially considering that when you work, you may have extra scraps of fabric.
Such an item can act as a separate independent gift, and also be great place in order to store all kinds of small household items. These can be children's toys, objects home decor, sewing supplies and much more. Especially much such gift wrapping can please a mother or daughter. Many women are very fond of these decorative elements... So, here's what you need to cover the gift box with fabric:
- The box itself. When choosing it, you can use the same principles that were described above for working with wallpaper, film or newspapers.
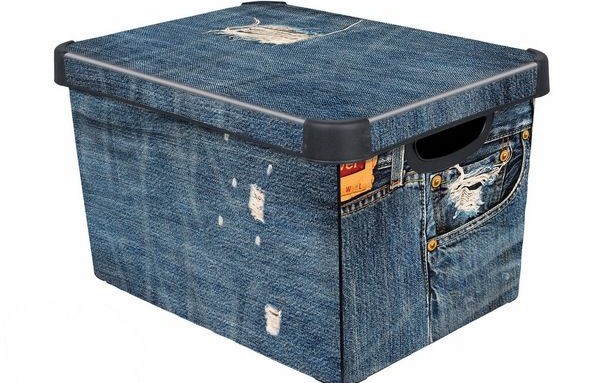
- The fabric you are going to cover. It is desirable that it be dense. Denim, which is known to be made from cotton, will do. But some other varieties are also acceptable. It is best to take at least two colors, but more is possible
- Special glue and tape (it is better to use double-sided).
- Sharp scissors.
- Additionally, you need to say about a strong cord, the shade of which should either match or contrast with the fabric base, as well as an awl, which may also be needed.
Click the picture below for a larger view:
Well, now let's move on to a short listing of the main stages of the work. To do everything right and count on a good result, it is advisable to strictly follow these instructions:
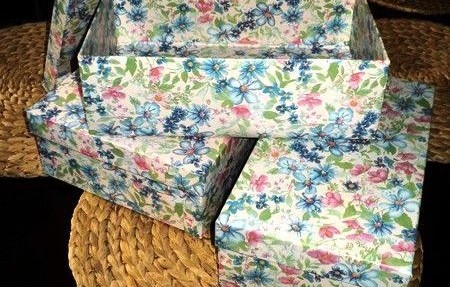
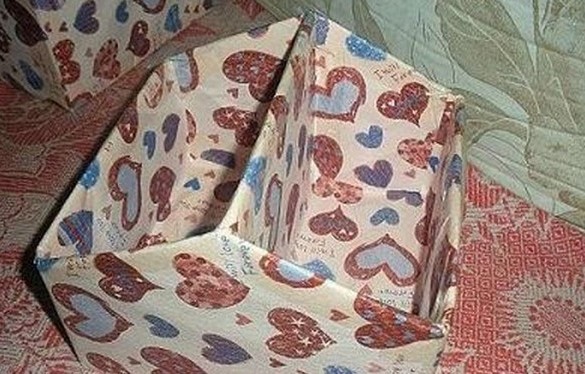
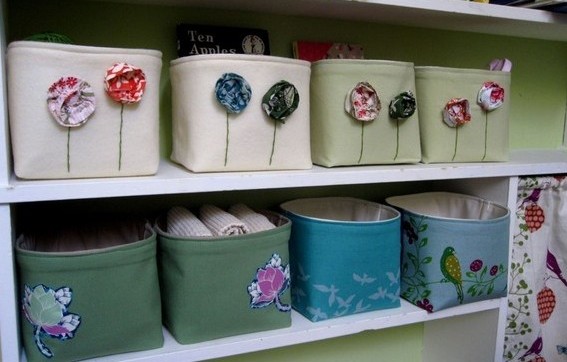
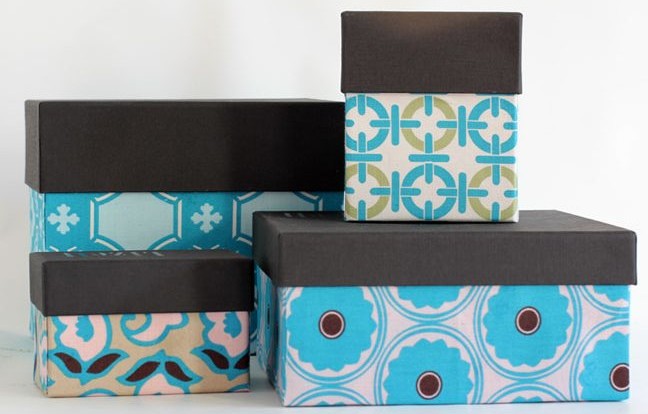
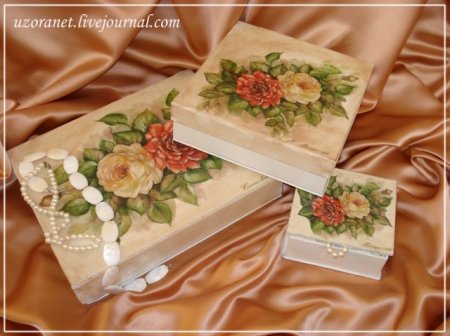
- Make a pattern for a square or rectangular box which has relatively right angles – the easiest way. You just need to measure the size of the sides, and also leave some margin for the part that will be folded to the other side. At the same time, it will not be easy to sew round or oval sheathing. By the way, you can see examples of what is obtained as a result in the photo below.
- We glue the main part. At the same time, it is advisable to choose a suitable glue that will not saturate the fabric through and through, leaving ugly streaks and stains. It is allowed to use high-quality double-sided tape, provided that it firmly glues the fabric and cardboard.
- When working, it is advisable to make sure that the fabric is tightly pressed against the cardboard, without leaving folds and "waves". If necessary, you will need to get rid of excess material.
- After the clearance is completed outside parties, go to gluing inside.
Interesting! You can make a decorative handle if needed. They are done with a cord. It is either threaded into pre-made small holes, fixing with knots, or glued, which, on the other hand, is slightly less reliable.

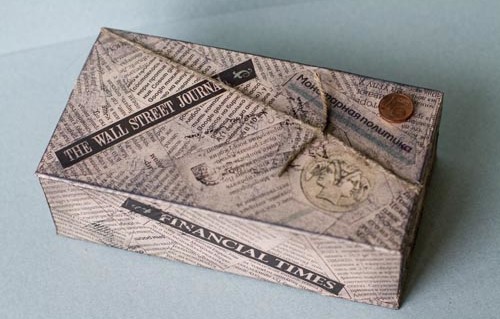
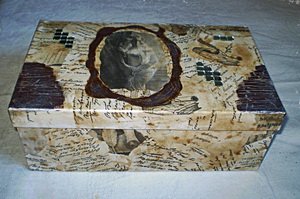
There are no unnecessary things. Every old thing can be adapted for something new, original and extremely useful in everyday life. To begin with, for example, you can transform and then use various. And even unnecessary boxes have the right to a second life. If you can decorate them, then a new and new one will appear in your house. useful thing for use or just decoration. In addition, we will tell you how to make a do-it-yourself shoebox decoupage. Read more in our master class for beginners.
Modern decoupage is a hobby that attracts needlewomen with its simple and beautiful end result. You will be surprised how much this technique transforms things!
Step-by-step MK for beginners
For the master class to be successful, you need, first of all, to prepare the materials. You can decorate an ordinary box yourself at home as shown in the photo. To do this, you will need:
- Drawings printed in advance on a printer, or photographs and other ornaments on paper;
- Water;
- Instant coffee (if you need to age our decor);
- PVA glue;
- Acrylic lacquer.
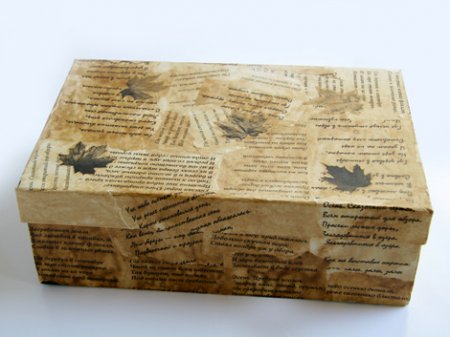
Progress
- First, sprinkle the sheets of paper with water, and then gently spread instant coffee over them.
- After that, lay the sheets on the table and let them dry.
- After the sheets are dry, tear them into pieces, but they shouldn't be very small.
- Cut out the pre-printed figures (pictures).
- To make decoupage cardboard box, clean the surface of the box from unnecessary elements.
- Glue the torn piece of paper to the surface of the box and coat with the solution made on top. Pay special attention to the edges.
- Glue the whole box like this, and glue the cut-out figures on top.
- Let the box dry, and then, if desired, you can coat it with acrylic varnish to give it a shine.
See an example in the video (a wooden box is decorated there, but the situation is the same with thick cardboard).
Decorating the shoebox with fabric
If these actions are clear and easy for you, you can easily do it for your valuables or jewelry.
Don't limit your imagination, let your imagination run wild! Create masterpieces with your own hands! The decor of the shoebox can be completely different, and it is not difficult to make it at home.
Required materials and tools
- Actually, the cardboard box itself;
- One tone paper;
- Glue (of your choice);
- Paints.
Detailed master class
You can cover the box with a cloth. Fortunately, there is now a lot of it for different tastes. Can be glued with PVA. The only drawback is that the cardboard can get wet from it, so you need to use it very carefully.
In addition, it can be covered with self-adhesive foil. It is very convenient because you don't need to use any glue. In addition, such boxes can be wiped after decoupage and even washed with soap.
Leftover wallpaper can also be used. If the wallpaper is washable, it also turns out beautifully and quite practical. Instead of PVA, you can use a stationery glue stick.
Finally, you can simply paint the box. When painting a box, you can create various effects. For example, aging or craquelure effect.
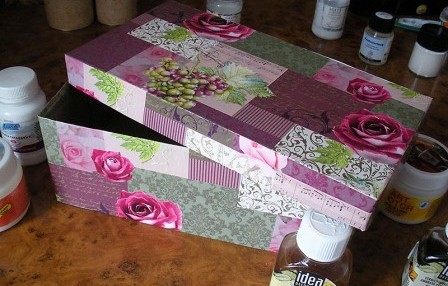
You can make the same box as in the photo, or you can connect your own imagination.
More on video:
- First, cover the box with plain paper. The paper also needs to be absorbent. Leave excess paper for folds when pasting.
- Catch your baby running around the apartment and dip his palms into the prepared containers with paint. Then place your palms on the surface of the box. The number of prints can be completely different, as can the variety of colors.
- After that, you can ask the child to write the names of loved ones on the box, or you yourself can perform this ritual.
- After the paint has dried, the surface can be coated with acrylic varnish.
Didn't it turn out beautifully?
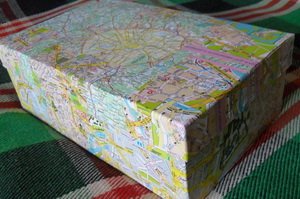
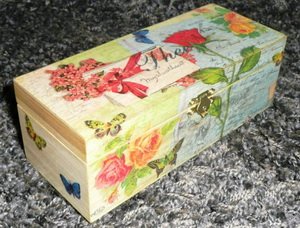
We use napkins
The cardboard box can be adapted to fit just about anything. And do not rush to throw away even small boxes. Decoupage boxes with napkins consists of several stages, and it is not difficult to do it yourself. In the photo you can see what you can get. First you need to prepare the materials.
To get started, you need
- A small box of any shape prepared in advance;
- Paint (acrylic and oil can be used);
- Glue (PVA is suitable);
- Patterned napkin;
- Manicure scissors;
- Brushes;
- Sponge.
Master class step by step
- To begin with, if the surface of the box is not completely flat, it needs to be lightly sanded. Sand until smooth.
- After that, apply paint to the surface of the box.
- Carefully cut out the drawing from the selected napkin.
- Attach a napkin to the surface of the box (lid or walls) and mark with a pencil the place where you plan to stick it.
- Now take your paints. You can mix several shades so that they do not strongly contrast with the selected pattern. Then, gently sponge the paint onto the lid of the box with a sponge, without touching the area you have reserved for the design.
- After that, we put glue on the clean place of the lid, and glue our pre-prepared drawing there.
- You can also paste over the outer walls of the box with a colored napkin - as you wish.
Instructional video
Learn more about the nuances of decoupage from our article
Well, there are only a few days left until the summer! It's time to get out summer dresses and sandals, and put your boots and boots in the closet. For many, the question arises: how to store shoes? All boxes different sizes, they are inconvenient to put in a closet.
For myself, I found a way out. These are boxes for storing shoes. Making them with your own hands is not at all difficult.
We need:
Corrugated cardboard;
Spunbond (the thicker the better);
Adhesive for cardboard;
Hot pistol;
- scissors, breadboard knife.
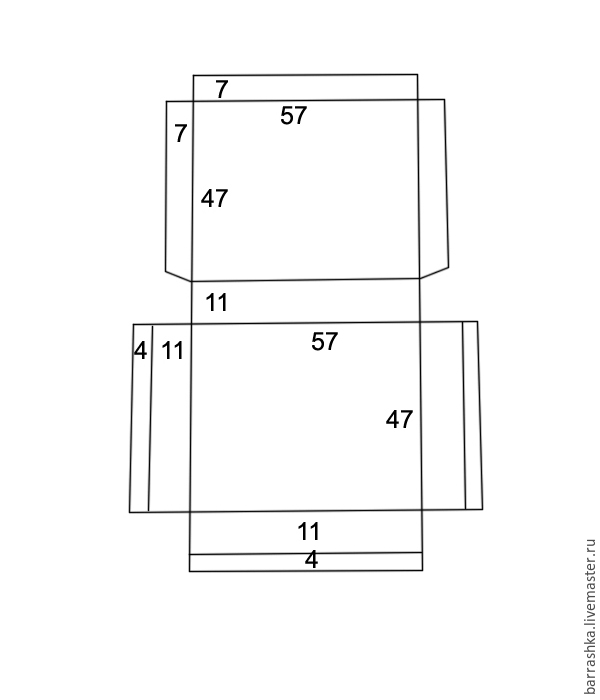
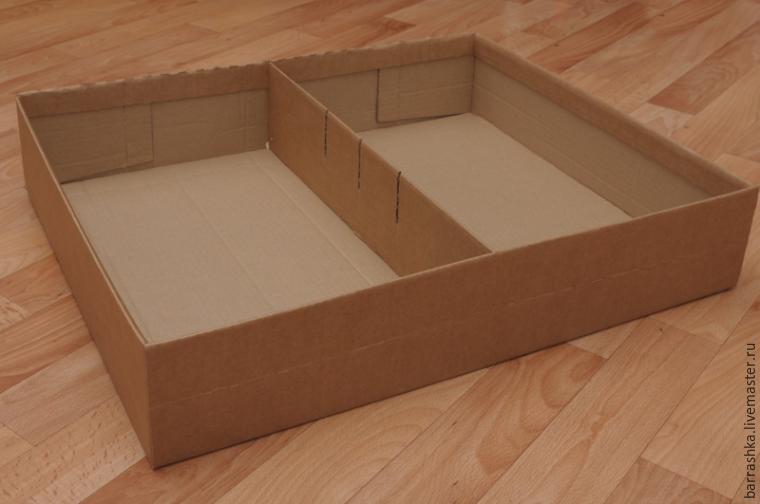
I made a box measuring 47 cm x 57 cm and 11 cm high.This box fits perfectly into a cabinet 60 cm deep.
Drawing of parts made of cardboard:
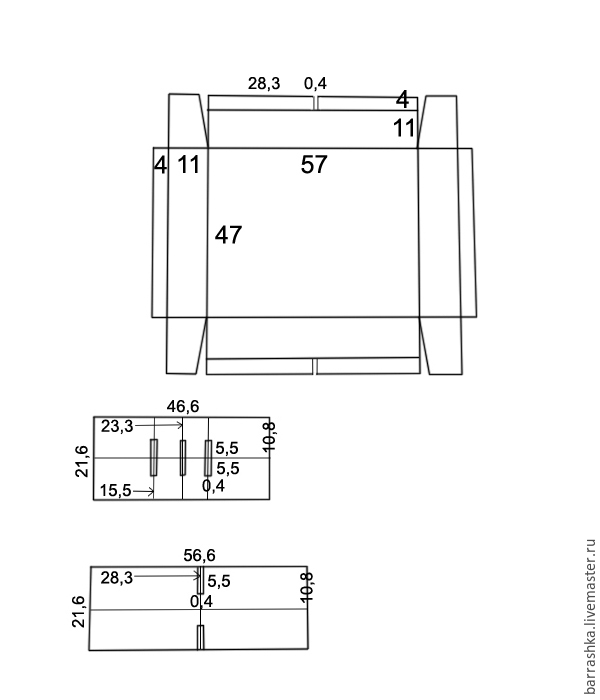
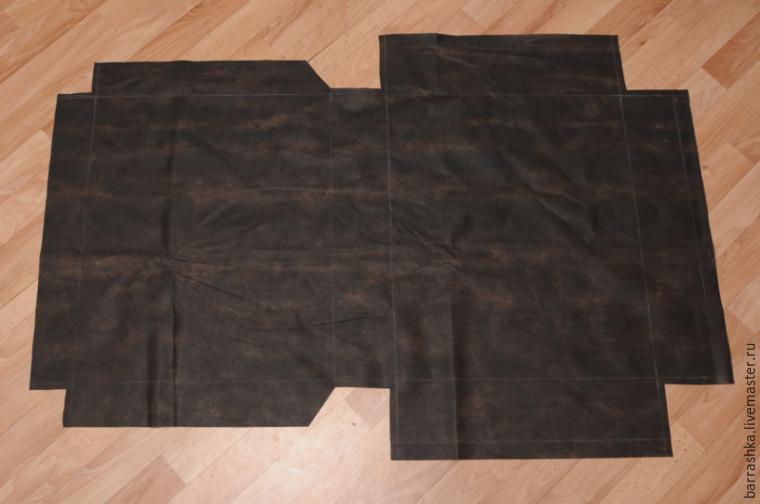
Spunbond parts drawing:
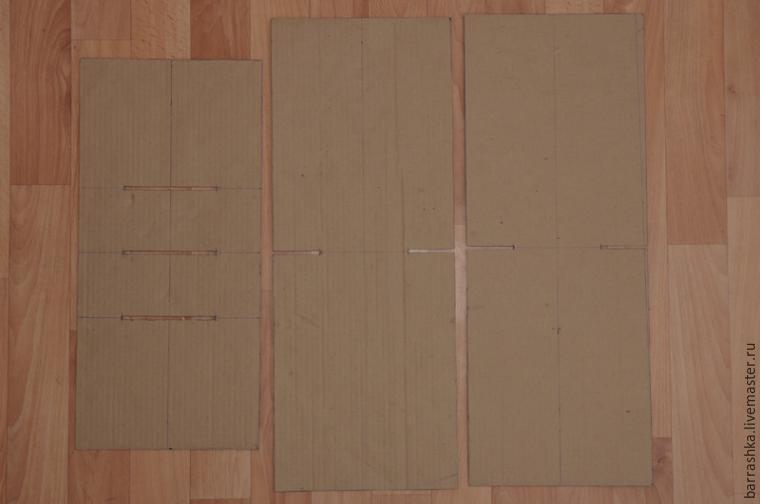
From large sheet cut out the main part of the box. Using a ruler, draw along the lines with the blunt side of the scissors and bend.

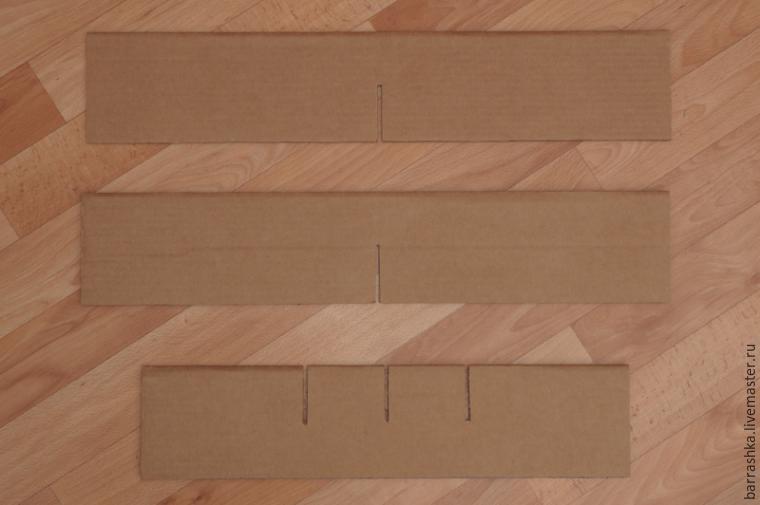
Cut out a piece of 21.6 x 41.6 cm from cardboard, and two pieces of 21.6 x 56.6 cm. Pay attention to the cutouts that need to be made in the cardboard.
Fold the parts in half, glue them together and put them to dry under the load.
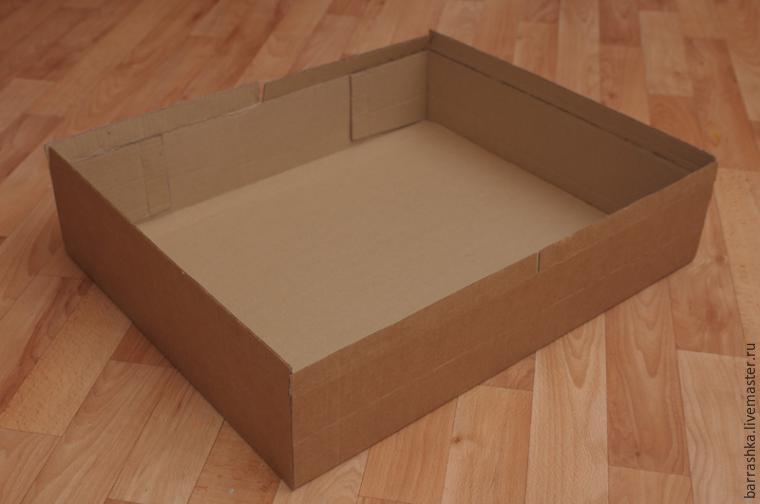
We glue the box. First, we glue one side, leave it for a couple of hours under the load, then the other side.
Bend the top 4 cm inward and glue it. In the middle of the box, insert a short piece into the cuts. We glue it to the walls.
We take spunbond. We draw a detail on it according to the drawing. Be sure to add 1 cm for allowances in all corners!
Fold in the corners and stitch. Be sure to bartack at the beginning and at the end of the line.
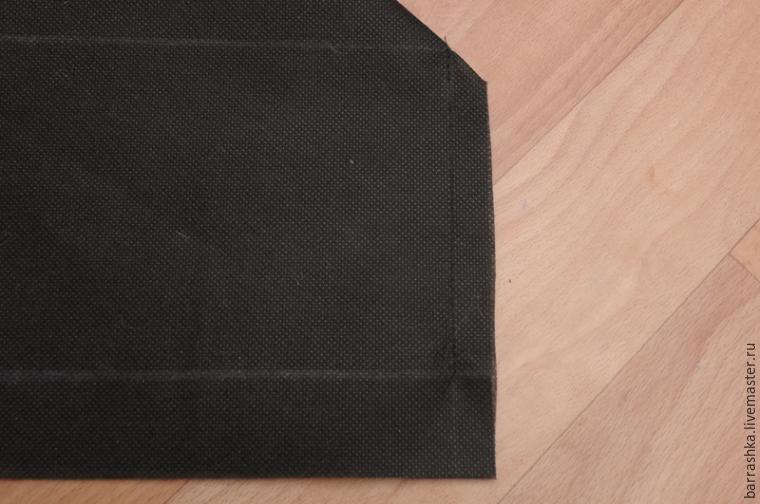
Tuck the spunbond on the lid and sew.

Put the finished cover on the box. Make an incision in the middle of the box in the area of the lintel.

Fold the spunbond inward and glue with a hot gun.
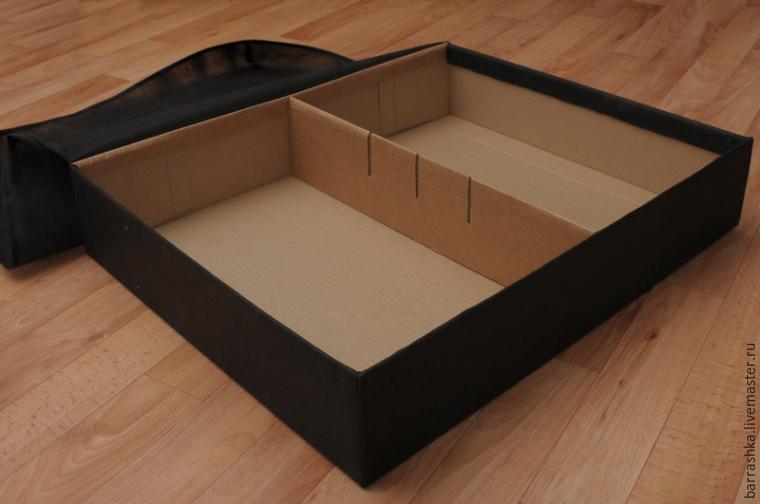
The box is ready!

With the help of long pieces, you can organize the space in the box. Without additional jumpers, two pairs of high boots will fit perfectly into the box. If you add one jumper in the middle, then winter boots and ankle boots will perfectly fit in the box.
 Ox and Monkey - compatibility in love and marriage
 Tarot horoscope for Taurus for December
 Snake Woman: a jealous aristocrat