How to wrap a shoe box with fabric. Do-it-yourself box decor with a cloth: original and simple ways to create a masterpiece with the application of photo and video materials
Easy!
When arranging the interior, we often face the question: where to put the mountain of necessary little things so that it is easy to get it, but at the same time they were not visible? The answer comes by itself: boxes-boxes-baskets-and-so-on. And in order to fit the box into the interior, you need to give it an aesthetic appearance: paint, sheathe, tie or glue. Today we will answer the question: how to wrap a box
So, how to cover the box with fabric?
You will need:
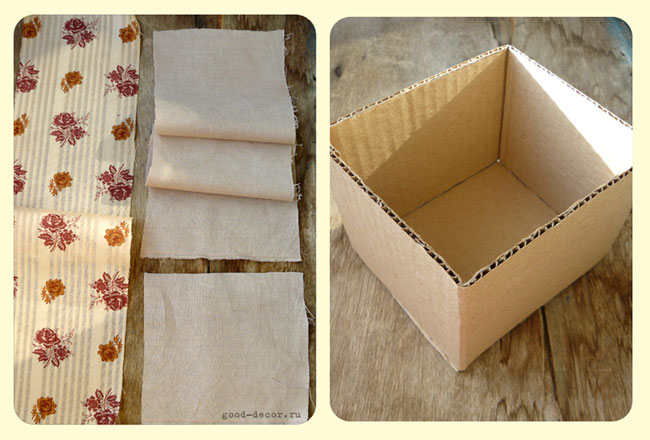
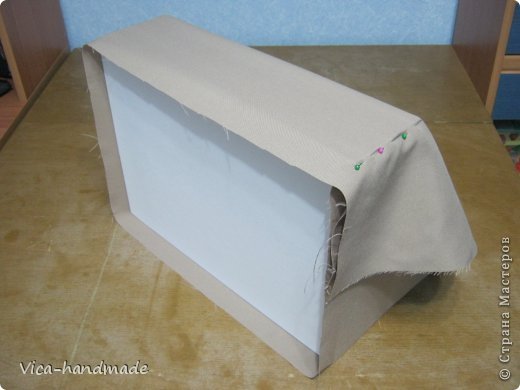
Let's deal with the outside of the box first. Let's wrap it with cloth like this: 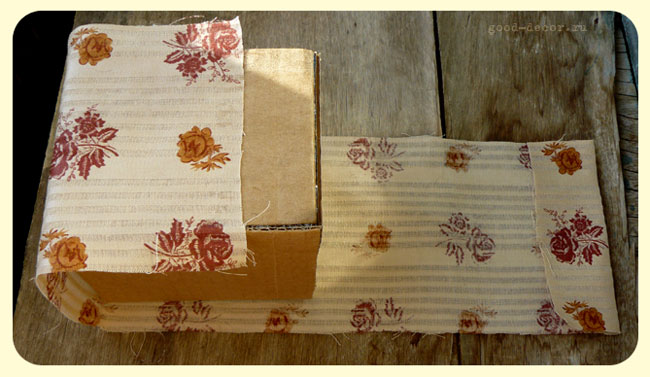


As you can see, I glue the fabric on the “Moment” to the box in one place - at the back (this can be seen in the first photo of three), and sew the joint with small stitches (third photo). The glue still impregnates the fabric, so the choice was made in favor of a needle and thread, despite the fact that gluing everything would be faster.
Then we will bend the allowances and decorate the bottom: 
It's not finished yet, but for now let's leave it and move on to the top of the box. We bend the upper allowances inward, fix it with the help of the “Moment” like this: 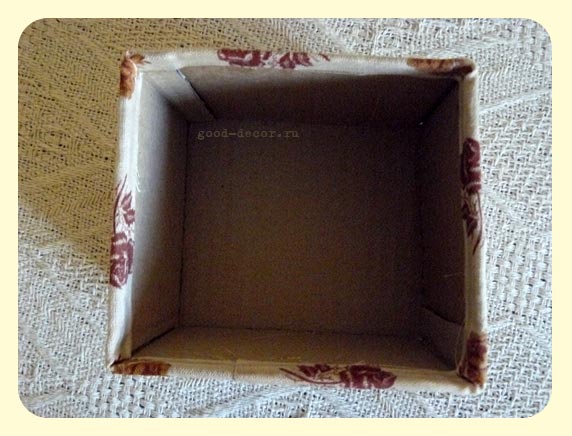
Let's get to the inside.
We will bend one of the long sides by about 1 cm. 
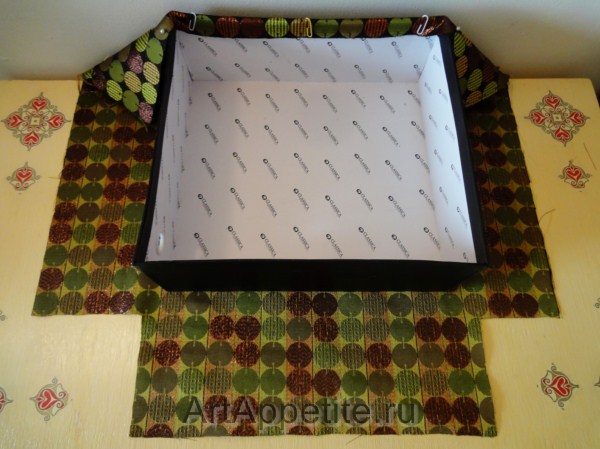
The folded side will be on top. We begin to sew around the perimeter of our “lining” to the box as follows: 
The inner joint is also sewn up with small stitches or glued. We see that inside the bottom of the box turned out to be not at all beautiful, but now we will fix it!
We take a piece of cardboard of the same size as the bottom of the box, it should fit tightly into the box and not fall out. Cover it with fabric. 
And put it inside the box. 
AND finishing touch- on the bottom with outside glue a piece of paper to cover the fabric sections and protect them from shedding. This time we glue on PVA glue. It is important to grease the edges of the paper well. 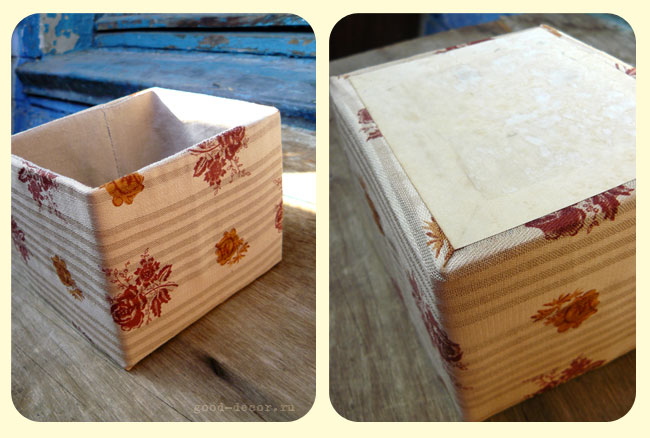
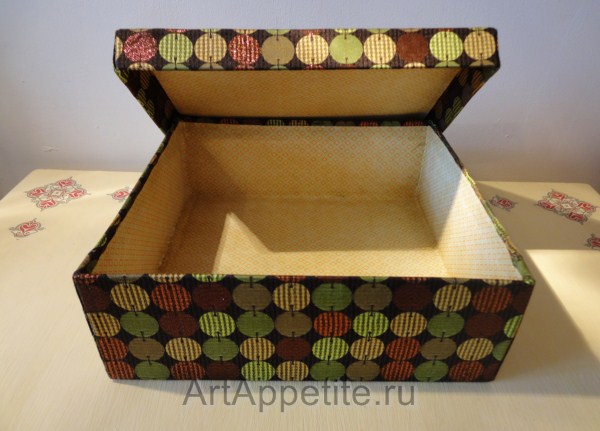
So, our box is ready, you can put something in it. Or keep decorating. For example, attach a decorative handle, like on the boxes from my workplace, or decorate with lace and beads. We figured out how to sheathe the box, and how to decorate it, everyone decides for himself. Wrap the box not difficult at all, but it will take a little patience to do it neatly. So good luck with your creative endeavors!
Today's master class is dedicated to rework - from a boring shoebox we will make a cute storage box. Glue the outside of the box with fabric, and decorate the inside with scrapbooking paper. Both practical and pleasing to the eye :) By the same principle, you can decorate any box, the main thing is that it be durable. It is advisable to use a fabric that is not thick so that the box opens and closes freely after the transformation.
In my work, I used Moment Papyrus glue, it perfectly glues cardboard and fabric, and a little superglue. Theoretically, PVA should work, but it dries longer and does not give the effect of instant gluing (well suited for the inside of the box).
How to do:
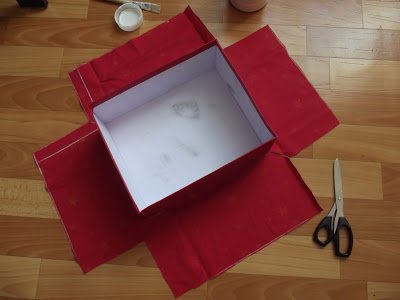
1. Cut out a rectangle from the fabric of such a size that you can wrap the box along with the sides and leave hem allowances of 1.5-2 cm. Place the box in the center.
With the help of improvised means, I marked out a place for the bottom on the fabric. Lubricate the bottom of the box with glue around the perimeter with a brush and press it against the fabric along the markings, align all the folds.
2. The bottom is glued exactly in the center. Now from each corner you need to cut a rectangle of excess fabric, leaving 1 cm for the hem.
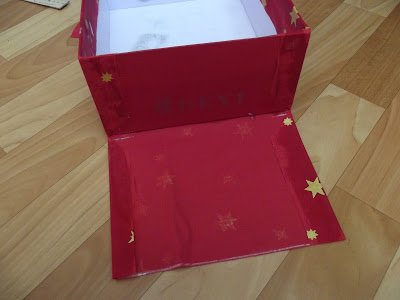
3. Glue the fabric, starting from opposite sides (see photo). In the corners for reliability, you can use superglue.

4. Similarly, glue the cover of the box.

5. For the inside of the box, I chose scrapbooking paper of the right color. I can offer the following options: adhesive film, gift wrapping paper, you can make your own tinted coffee paper, etc. We first glue the sides, leaving a small allowance along the bottom, then the bottom of the box.

6. It's easier with the lid - just glue the rectangle. Let the box dry for a while.

Agree, it is much more pleasant to store things in such a box. You can make a very interesting shabby chic box from pastel-colored fabric, decorate it with buttons and lace.
PO did you like the article? Tell your friends about it using the social buttons. networks! To stay up to date with new articles, subscribe to
A little fabric and glue - and old, but still good boxes will turn into stylish little things.Choose the right fabric color scheme your interior, and you will have a smart box for all sorts of things. Can make multiple boxes different sizes using matching fabrics. Arrange them on the shelves to bring fresh notes to the design of the room.
Square or rectangular boxes with lids will do, as long as they are strong. Choose thin or medium-weight fabrics - too thick fabric will not drape well at the corners or puff up at the folds. If the fabric is thin, make sure that the images or labels on the boxes do not show through.
You will need: square or rectangular box; Textile; Cardboard; Glue (preferably in an aerosol); fabric glue.
cutting
Outside sidewall:
Measure the height of the box and add 5 cm to it. Measure the perimeter of the box from the outside and add 5 cm. According to the measurements obtained, cut out one piece from the fabric.
Outside bottom:
Measure the length and width of the bottom of the box from the outside. Cut out a rectangle from the fabric, reducing it on each side but 0.6 cm.
Outside cover:
Measure the length and width of the lid, including the height of the sides inside and out, add 4 cm to both measurements. Cut out a rectangle from the fabric.
Inner side of the side:
Measure the depth of the box and its perimeter from the inside. Add 2 cm to each measurement. Cut out a rectangle of the appropriate size.
Inner bottom side:
Measure the length and width of the bottom inside the box. Using these measurements, cut out a piece of cardboard, stepping back 0.6 cm inward on each side. Round corners. Cut out a rectangle from the fabric 5 cm longer and wider than the cardboard piece.
Cover inside:
Measure the length and width of the lid inside without the sides. Cut out a part from the fabric, reducing its size by 0.6 cm on each side.
Manufacturing
Apply glue to the short side of the box. Attach it, centered in height, to the fabric part for the outer side of the sidewall, bending along the edge 2 cm on the long side. Glue this side, and then one by one the other sides. On the last side, tuck a piece of fabric so that it does not reach the corner of the box a little, and glue it too.
Fold the fabric that protrudes along the top edge of the box inward and glue it with fabric glue. On the bottom edge, fold the excess fabric to the bottom, making neat diagonal folds in the corners, and glue it. Apply spray adhesive from the inside to the fabric piece for the outside of the bottom. Glue it to the center of the outer side of the bottom of the box.
Apply glue to the inside of the box. Glue the inside of the sidewall, slightly stepping back from top edge and overlapping the edges at the corners. Make neat diagonal folds at the bottom corners where the fabric meets the bottom.
Carry glue on one of the sides of the cardboard part bottom, place it in the center (glue down) from the inside on the fabric part for the inner side of the bottom. Fold over and glue the protruding edges to reverse side cardboard, notching the fabric but the corners. Insert the cardboard into the box with the fabric side up.
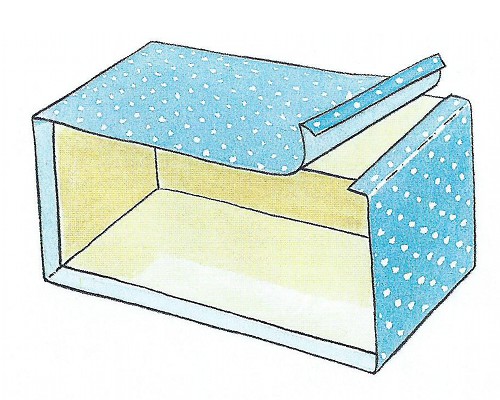
Apply glue to the entire surface of the lid and center the fabric piece for the outside of the lid. Glue the fabric to the edge, smoothing it and making neat folds at the corners. Fold the edges of the fabric over the inside edges of the lid and trim off any excess. Glue the appropriate piece of fabric to the inside of the current lid so that there are no wrinkles.
How to wrap a box with fabric and create a new original storage box.
Glue the outer side of the box first.

Then glue the outside of the bottom of the box

Then the inner surface of the walls of the box

Take the cardboard cut out for the bottom and glue it with a cloth on one side.

And finally wrap the lid of the box
Everyone, especially women and children, love to receive gifts. And even the most trifling souvenir can cause a storm of emotions if it is presented in its original packaging. This does not require large investments or the search for special gift wrapping salons. You are quite capable of creating a small masterpiece on your own, and having mastered the basic techniques, you will be happy to give gifts, putting them in gift wrapping own production. Decorating is a fascinating creative process, so both adults and children will be happy to participate in it. Let's be inspired by examples of do-it-yourself box decor with fabric and start learning the basics of this simple skill!
We collect everything you need for creativity
To decorate the box in which the gift will be presented with a cloth, you will need the following materials:
- Sturdy box of the right size;
- Textile;
- Glue;
- Sewing accessories;
- Ribbons and other decor;
- Double sided tape;
- Iron;
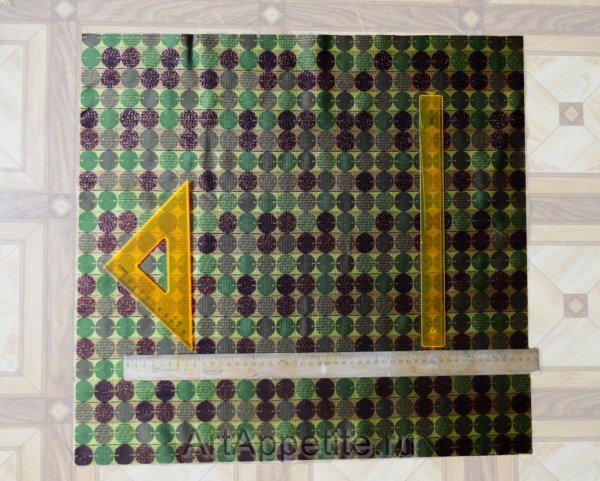
- Pencil, ruler;
- Sewing machine.

How to wrap a box with fabric
When decorating a box with material, the first thing to learn is how to fit it and create beautiful foundation, on which it will already be possible to sew, glue and sew on various stylish elements. Armed with the materials listed above, let's start learning the basics. First, let's master the first part of the master class: decorate lower part boxes.
- We measure the height of the box, multiply the resulting figure by 2 and add another 2 cm. For example, if you decide to cover a 15 cm high shoe box with fabric, then the width of the fabric should be 32 cm.
- Now we determine the required length. We put the fabric on the box with the front side and wrap it around. No need to pull. When we got to the beginning of the fabric, we fasten this place with sewing pins.
- We pull the fabric off the box, leaving the pins, and draw a line along them with a pencil or chalk;
- We sew the material, but we lay the line 0.5 cm to the left so that the length of the fabric is slightly less. So it will fit the box more tightly. We cut off the excess.
- We generously grease the sides of the box with glue.
- After turning the fabric right side out, pull it over the box and iron it so that there are no wrinkles. In this case, the seam should be located on one of the corners of the box so that it is not visible.
- Inside the box, on the bottom along the side walls, we glue strips of double-sided tape, to which we attach the material.
- The bottom can be glued with ordinary white or colored cardboard, to match the fabric. On the contrary, you can choose a different color, but always combined with your material.
- Now we make out the bottom. Along the two long sides of the box, along the very edge, we glue strips of double-sided tape and attach the fabric to them.
- Now you need to lay the corners and glue them along the very edge with double-sided tape, as shown in the photo below. We also attach double-sided tape along the remaining two sides and glue the fabric to it. As a result, the fabric lay flat, and the corners look neat.
- At the bottom of the box outside, as well as inside, glue the cardboard. The bottom of the box is ready.
In the photo, the process looks like this.
And in this way you can glue the corners at the bottom of the box.
Decorate the lid of the box
The lid of the box can be covered in a similar way, but this is not very convenient, since the lid has very narrow sides.
For convenience, we offer the following option.
- Putting the lid on flat side on a piece of fabric and circle it around the perimeter. The result is a rectangle or square, depending on the selected box. We remove the cover.
- We measure the height of the lid. For example, if it is equal to 3 cm, then at a distance of 3 cm from each drawn line we draw another one - parallel. It turns out the second rectangle, but already larger, located around the first.
- Now we make cuts diagonally from the edge of the fabric to the corners of the inner rectangle. It turns out 4 cuts.
- We work with the lid of the box. We glue double-sided tape around the perimeter on it and apply it to the fabric along the markings. The inner rectangle should line up with our lid.
- Coat the side of the lid with glue and pull the fabric over it. We also glue the corners resulting from the diagonal cuts.
- We bend the fabric inward, fasten it with double-sided tape, cut off the excess pieces to avoid thickening.
- We repeat the same thing on the opposite side.
- Now there are two pieces of fabric left that need to be glued inside. To do this, cut off the excess fabric on the sides, or glue it so that the cut does not give a fringe. We attach double-sided tape along the very edge from the inside. Lubricate the side of the lid with glue and fasten the fabric. Outside and inside, neat edges are obtained.
- Repeat for the remaining side, glue the fabric from the inside with glue.
- Glue cardboard on top. The lid is ready.
Photo hint for mastering the material.
Now the resulting box can be decorated with pictures, buttons, stones, beads, sequins, ribbons, twine, flowers. There are a lot of decoration options, choose according to your taste.
Video selection of materials on the topic
On the videos below you can see how the masters of their craft decorate the boxes with fabric. By repeating after them, you will achieve excellent results.
 Presentation "September 1"
 Examples of funny, funny and funny New Year's scenes for holidays and corporate parties
 Last Call Scenario Ideas