How beautifully decorate the box of shoes. How to Plug Box with wallpaper: Process of pasting and decoration of the product
Shopping is a favorite pastime of almost all young ladies. Delight, joy, pleasant emotions, new clothes. And how many shoes in women! But there is nowhere to delete the boxes. Today we will talk on the topic "Decorating boxes from under shoes." It turns out that from unnecessary and non-fully cardboard structures, you can make a lot of interesting things.
All hands from boredom
Did you spend the audit at home and found a heap of unnecessary boxes from under shoes? Some of them just need to be sent to the landfill. But we will need some for creativity. What can be made of boxes from under shoes with your own hands? You know how much interesting!
With the right approach and the availability of fantasies, you can make an interesting box for storing your jewels or jewelry. Needlewomen never throw such boxes. They keep their tools for creativity in them.
Here are some more ideas in your piggy bank, which can be made of shoe boxes:
- desktop organizer;
- stand for handles;
- box for storing charger and gadgets;
- original chest of clothing storage and personal items;
- box to storing toys.
If you want, the box from under the shoes can be full, and most importantly, exclusive designer decoration Your interior. Most often masters make decoupage boxes from under shoes. But before we proceed from words to business, I would like to give novice masters a few tips:
- to decorate boxes, you can use colored paper, foil, fabric, ribbons, lace, painted with paints;
- before work, you need to think about the design in detail and prepare the necessary tools;
- for decoupage, you will have to acquire special primer and varnish;
- the workplace should be well covered;
- no extraneous items should distract you;
- with paints I. decorative varnish We work carefully, protecting the hands with gloves;
- to create the illusion of the smooth transition of paints in Ombre technique, use the usual sponge.
Decoupage is done using conventional paper napkins. You can choose any drawing and arrange it on the box. It is necessary to separate the box, and the lid so that the product is full and completed.
Before use, do not forget to dry carefully, so as not to blur with varnish or paints. Fabric and paper can be fixed not only glue. Very convenient to use bilateral adhesive tape. Special attention is paid to the corners - they must be perfectly smooth.
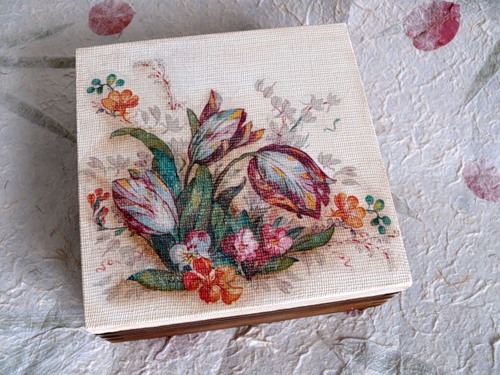
Designer box - excellent gift
You do not know what to give a friend's birthday? Perfect option - Box with your own hands from the shoe box. Master class on decoupage you will be so hobble that this box will not be the only creation.
To start strive to the nearest store with goods for creativity and buy acrylic paints. They are ideal for decoupage. You also need to purchase finishing and finishing varnish.

Necessary materials:
- shoe cardboard box;
- paper napkins;
- iron;
- multicolored acrylic paints;
- latex gloves;
- decorative lacquer;
- primer mix for decoupage;
- a piece of foam rubber;
- pencil;
- scissors;
- sandpaper;
- brushes.
Step by step description of the creative process:
In this article, we will tell how to attach a box with wallpaper. Of course, for packing gifts and storage of different trifles, you can also purchase ready-made containers, but if "there is time and inspiration", then why not do the needlework? Especially since this technology is quite simple, and forces even a schoolboy.
Technique description
What we need
Any instructions for performing a particular work should begin with the listing of all necessary. Our case will not be an exception, so for starters, we will deal with what we need.
So:
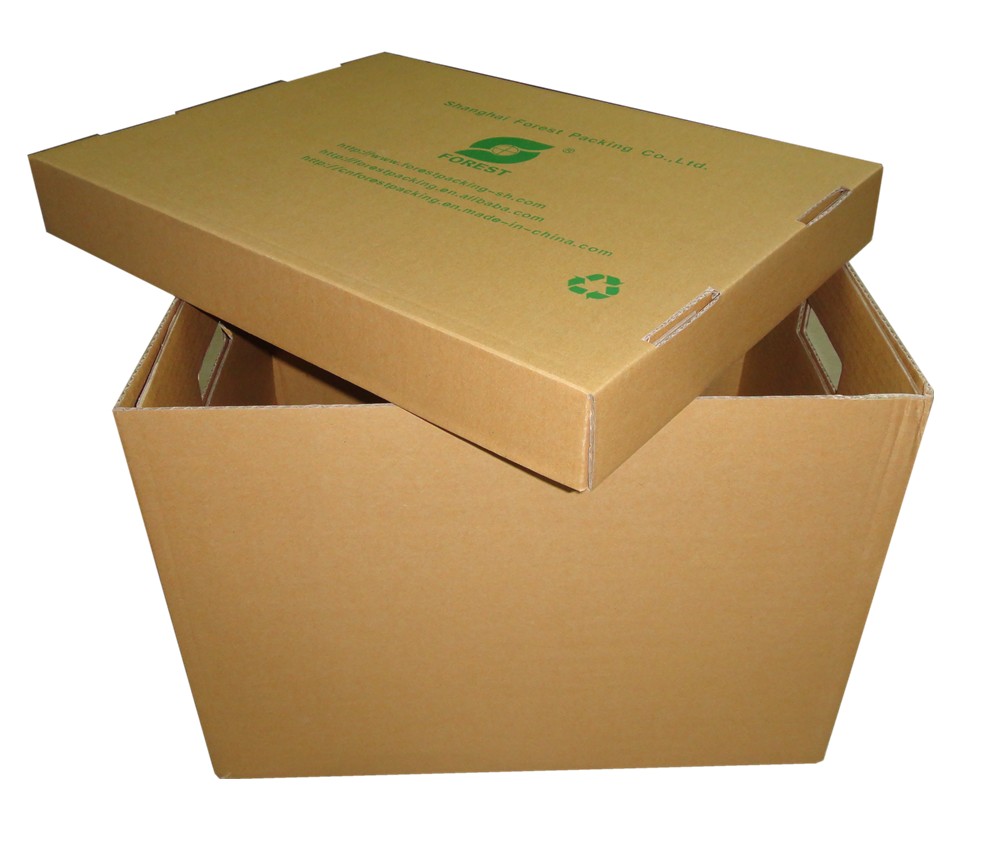
- First of all we are looking for the box itself. Since the chopers are quite dense and durable material, they will not fit for small products. So that the walls of the box are not deformed when pasting, it must be made of thick cardboard and fastened reliably either with glue or metal brackets.
Tip!
It is best to use shoe boxes, packaging from household appliances etc.
The tanks from the so-called corrugated cardboard will also be suitable, then they need to thoroughly stick the edges.
- Next - wallpapers. Since we do not need excessive resistance, it is quite suitable for paper choplars (better one-layer). Also for work, you can use Flizelin or Textiles. In general, what remains after decoration of the room - then we take!
- The third mandatory component is glue. In principle, the composition is for work, but it is better to buy high-quality PVA. Despite the fact that the price of this material is low, it is practically the perfect choice To decorate small objects.
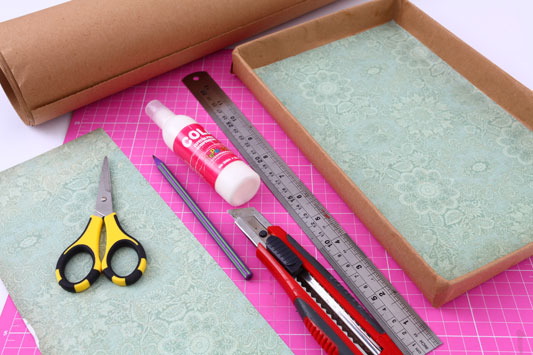
In addition to the box itself, a steller and glue, we may need varnish to protect the product from moisture and damage, paint (if used), materials for decorating, etc. It all depends on how you see the result of your work.

Separately it is worth taking care of the equipment.
In principle, one-time work can be performed almost any cutting toolBut if you want to decorate a few boxes, you should stock all necessary for this list:
- Scissors with straight blades.
- A knife with a replaceable cutting element (a model scalpel is suitable).
Tip!
In order not to damage the table in the process of work, you can put a special rug from dense rubber.
Such a coating after a while after the cores is self-assessing, so it does not have to worry about the power of pressure to the tool.
- Metal line.
- Transportation and circulat (needed if the box has an indirectacular shape).
- Stopler for temporary fixation.
- Brushes for glue and decor.

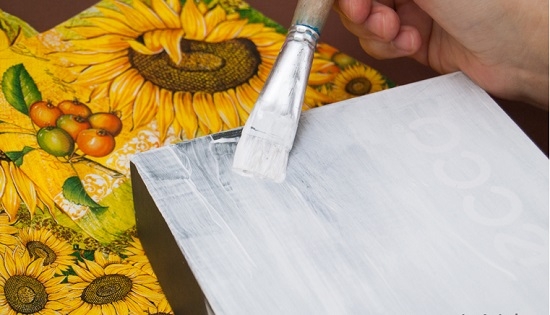
The process of pasting
The methods of finishing boxes with colored paper and choplaresses there are several. Below we give the most simple in the implementation: you are guaranteed to master it with your own hands.
So, we perform work according to the following scheme:
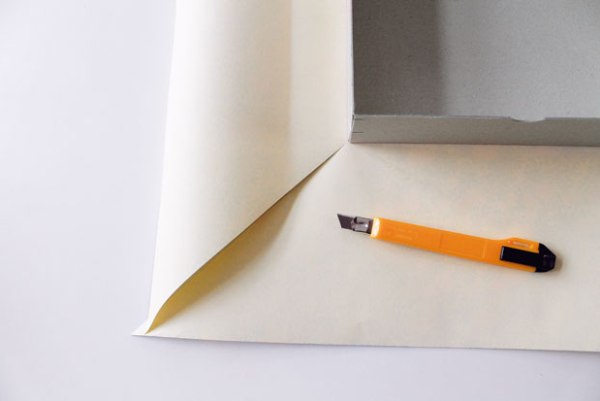
- From the remaining roll cut off the fragment of the material. The size of the fragment is chosen with a good stock so that there were no joints on the walls.
- Unchedule Trelliers on smooth surface and install the box on them.
- Around the perimeter of the bottom we carry out a stupid side of the knife: It will help us make bends on these lines more even and clear.
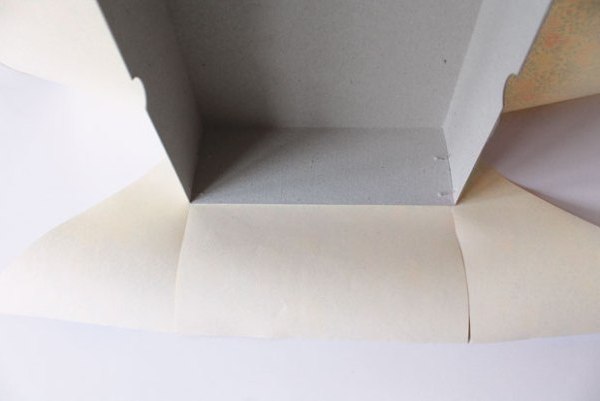
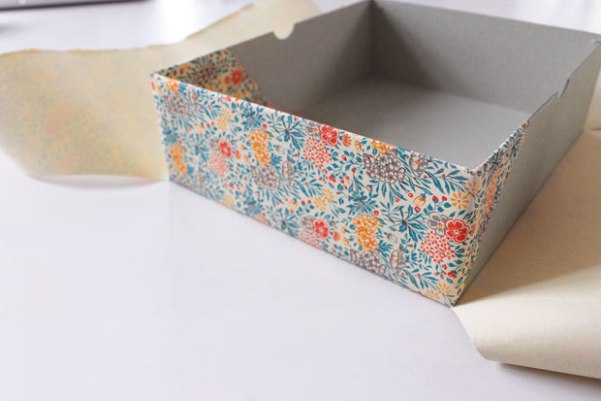
- Wrapping the walls of the wall, bending the edges inside the tank. At the same time, we try to schedule bends with smooth lines, not allowing the removal of the material.
![]()
- Deploy wallpaper and remove the box. Using a ruler and model knife, cut off the excess material.
- With the help of a knife or scissors cut the line for which we will fold the wallpaper. Seats of folds noting with a blunt tool.
Note!
If you have drawing skills, you can not suffer with wrapping the product itself, but simply build a pattern on the dimensions.
In principle, with due accuracy, both techniques give an identical result.
- First we apply glue PVA on the bottom of the box and install it on decorative material to the marked place. It should not be laid too much glue, as this can lead to wetting and deformation of wallpaper.
- Next, we wrap the walls and glue the side parts.
- Last but we stick to those sites that should be located inside the container.
So that our box looks as careful as possible, we need to "reflect" it from the inside. For this, the bottom, and sometimes the walls are sticking with one-color material. Most often, with this purpose, dense white paper is used, but you can take a beautiful fabric (atlas, velvet, etc.).
Decorating the product
When we glue the box with wallpaper, we try to get the most beautiful product.
That is why the most appropriate miscellaneous techniques Decoring:
- First, to save the color and texture of the wallpaper, they can be laid out. For this purpose, a colorless composition is best. acrylic basis: It is non-toxic, does not damage the paper and fliseline, and at the same time, after polymerization, it forms a fairly durable coating.

- If the pasting was used, the box can be painted. For this purpose, acrylic paints on aquatic or alcohol basis are used.
- The upper part of the sides can be made using a wobbing edge or tissue braid. Also in some cases on the walls of the box, lace looks well.
- As an express decor, it is also worth using vinyl stickers. They, of course, are not very firmly held, but you can find almost any suitable pattern.
However, more interesting technology is a decoupage:
- To decorate the sealed box, we will need interesting images for this technique. Traditionally, pictures are used, carved from napkins (their main advantage is a subtle base), but you can also take other materials, or print the ornament yourself on a loose paper.
Note!
In some cases, the decor is cut out of thin wallpaper.
Duplex at the same time it is necessary to divide on the layers.
- The selected image cut over the contour. If there is a white background around it, it can be left: it will still be almost transparent after processing.
- Then on the wall of the box we apply a special glue, and we also put the decor. Using a brush, we blend a picture in the glue layer and recall so that the folds are not left.
- When the glue starts to polymerize, we proceed with a decorative varnish section. In this case, the image becomes one whole with the base, and is perceived as part of it.
Note!
To achieve a more expressive effect, a varnish can be used, which forms the surface of microcracks - the so-called crackers.
At the same time it seems the impression of the surface.
Output
Tips on how to get a box with wallpaper, can be useful to anyone who seeks to decorate their apartment with pleasant little things. This technique is simple and economical, so at least one use of the trimming of the sleeper you will find. And to master the technology of execution of all operations you will help you video in this article.
From old cardboard boxes, for example, shoe, you can make beautiful gift packaging. Also in such boxes can be stored different little things. They are practical, they can put the material for needlework and place on the open shelves or in the closet. For business!
In order to make a gift box with your own hands, you will need:
Old cardboard (for example, shoe box)
Beautiful wrapping paper
Glue Spray
Stationery knife and ruler
1. Depending on the size of the box, cut the desired amount of wrapping paper. Calculate like this: base of the box (or cover) + 2 × height of the box (or lid).
2. In the middle of the wrapping paper, spray a little glue and place the box on it. All four corners of wrapping paper cut diagonally towards the corners of the box.
3. Apply glue on paper and box, glue the wrapping paper to the cardboard. Then make 2 outbreaks in the outgoing paper and glue it to the inner side of the box.
4. Repeat the steps with 3 remaining parties until you glue all the paper. Glue spray dries in a couple of minutes.
 Why you can not give icons
 Is it possible to give icons as a gift: Signs, the opinion of the Church
 A year ago left her husband, and now I do not know what to do