How to destroy boxes from under the juice. Interior Master Class Birthday Crochet New Material Packaging Material Material Taste Polyethylene
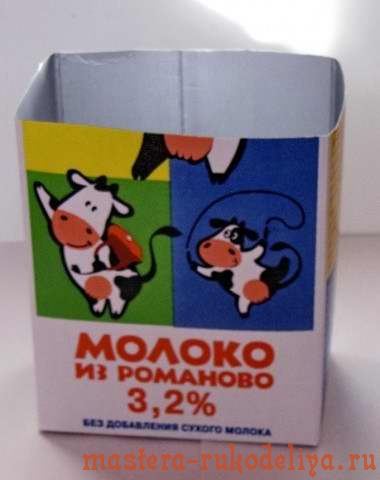
Looking at an empty package of milk came the thought to make a house for tea bags. Inside the package, food foil means you can put bags without fear and risk (for health).
That's how it was: here it is the most ill-fated box.

You need to cut it.
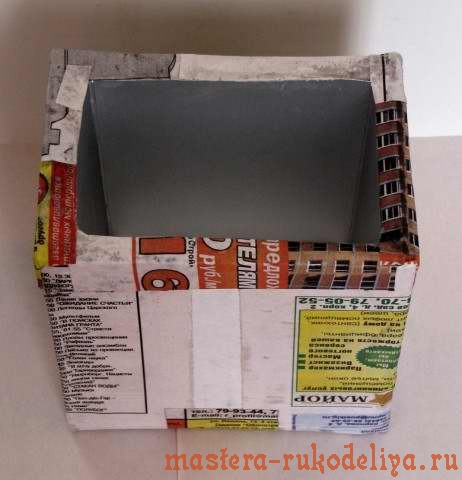
Then put the box on the cardboard sheet and draw contours of the bottom and sides. There should be five details (bottom, two side, front and rear walls).

PVA glue (the whole house is punctured only by pva glue, construction) we glue the cardboard blanks. Fix for reliability with newspaper stripes. Newspapers also hide the joints between cardboard details.

When you dry by repeating all movements with cutting parts from cardboard and gluing them to the right places. It turns out that two layers of cardboard were glued.

From above, gently sample with newspaper stripes. Dried.
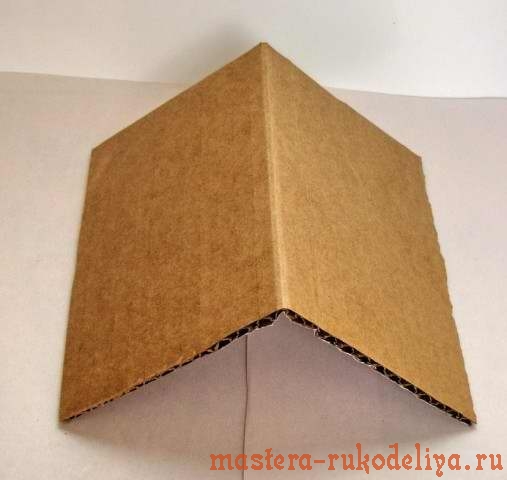
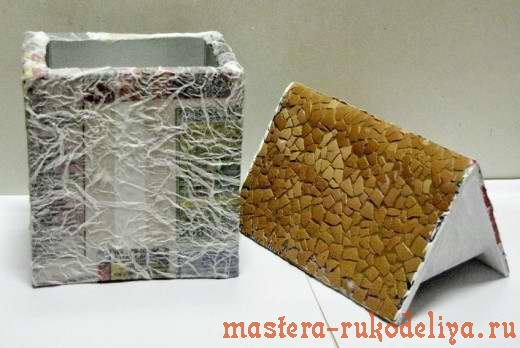
I took the box of cardboard in size to a smaller side wall and painted a triangle. The roof is due to be attached. You need to cut two such triangles.
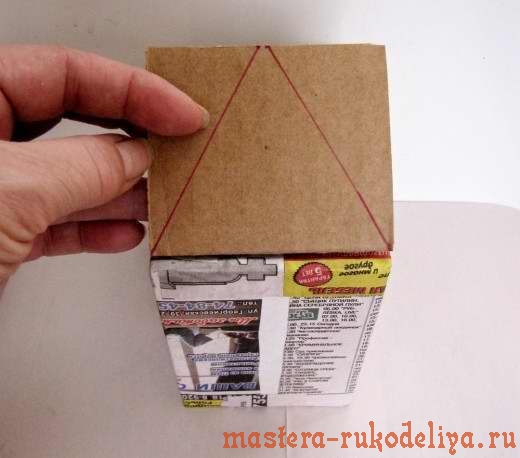
The side ends of the triangle are missing glue. And a little stretched in the hands so that the glue grabbing. The distance between the triangles is equal to the width of the larger side wall of our house. Visit, I have a stomer strip.
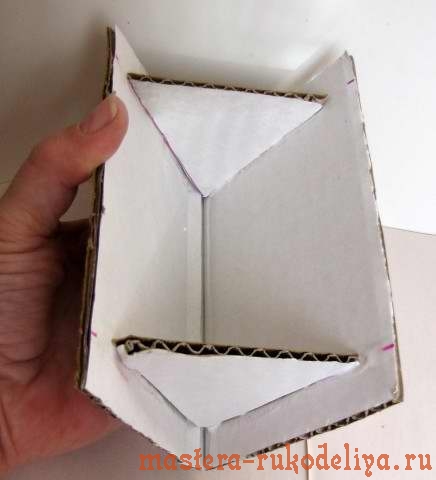
Then, again, we all fix the newspaper stripes and they hide all the cut places. It should turn out like this. Drain again.
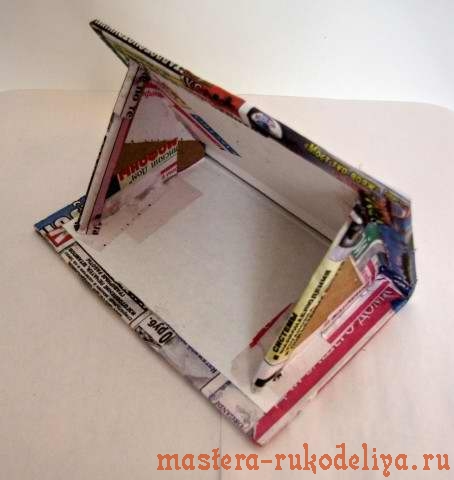
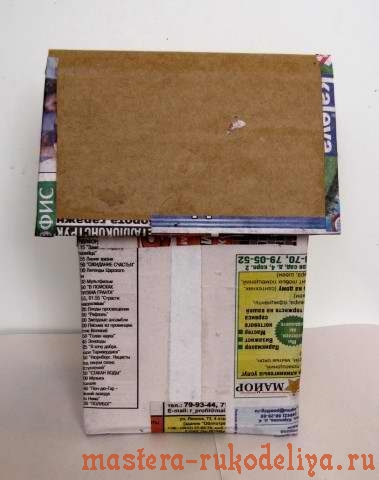
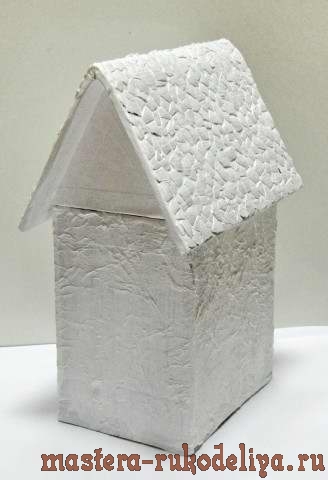
Here is our newspaper cardboard house.

And he has already turned to you sideways.
Then take the eggshell. For those who did not work with egg shell I give advice. Shell i put in cold water For a long time (maybe in a short time, I do not know), three or more hours. We'll see how it goes. Then we take the edges, we cling to your fingers and remove the inner film. Removed very well. If anyone does differently, it would be very interesting to know.

We glue pieces of shell. I do this: one piece is not glue. I put a large piece of shell on a lubricated glue. Then pressed my finger on it, the shell crackles and push it to the desired distance, etc. Now let's think about how to make the walls of the house. But how: the bottom layer of the tricolor napkin, the meters and the mint glider on the walls diluted with water with glue. Straight over the napkin. Drain again. Oh! And the roof is already beautiful. Truth?
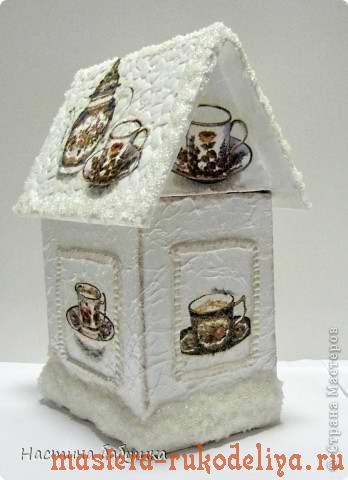
Now we will decorate the house so that it is tea for us. Fill all white paint. And then we will invent.
But it turned out that we are laughing on November 5 we are going to a wedge at the plant of the Christmas tree toys. She confused me all his head with this trip, a new year, snow, christmas toys. How much will we buy them and how the master class will be held on painting the workpiece christmas toysthat I had an unnoticed myself to pay a New Year's winter house.
How to make a wallet for money with your own hands from the box (package) from under juice or milk.
Useful crafts from the cast material (packages from juice or milk)
From such a cast material, like packages (boxes) from juice, milk or other dairy products, you can make many different crafts.
And not only crafts, but also things that have practical benefits. For example, from the packages of tetra-pack from juice or dairy products, you can make pretty elegant children's wallets for money (coins and paper bills).


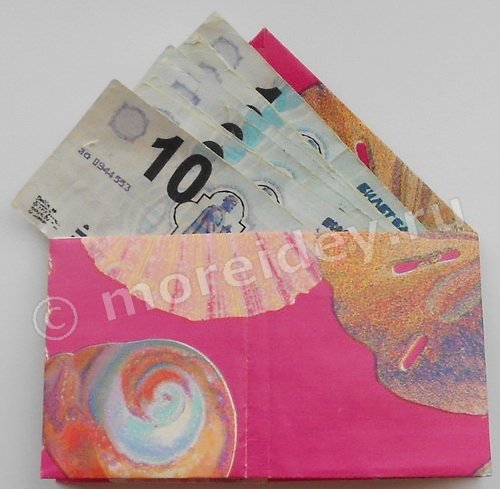
Packages inside Silver, and between the layers of cardboard are punctured by foil and cellophane, so the wallets of them do not rush along the flex lines with intensive and long useUnlike conventional cardboard and paper.
Make such a wallet as a small gift for your child or other children is completely simple. Children rejoice in new toys, even if they are quickly forgotten about them. And such a wallet is not sorry to throw away if he gets bored.
How to make a wallet with your own hands out of the box (package) from juice or milk
Wallet from the box from under the juice
Materials and tools
In order to make a wallet from a package from under the juice, you will need:
- pure cardboard packaging 1 l or 1.5 l from juice or milk with a screw round lid
- scissors
- pencil
- rule
- paper template
The template is a wide strip, the length of which is about three widths of the future wallet, and from above on both sides of the strip - two halves of a circle with a diameter of two wallets.
Stages of manufacture
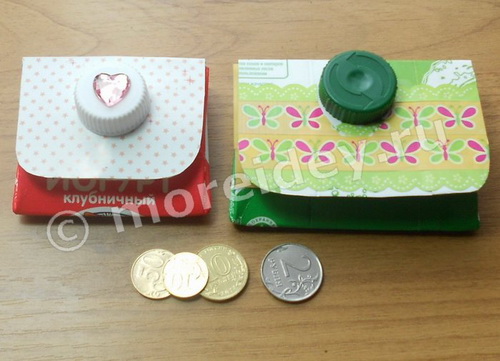
Wallet from the box from dairy products
Similarly, you can make a wallet from a small floor of a liter box from yogurt or other dairy products. But it is more convenient to do from liter packaging, we just didn't have such.
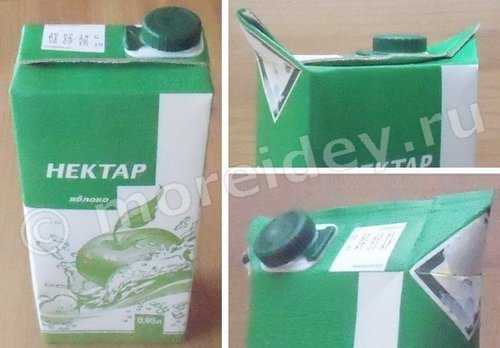
It will be necessary to cut the box as in the photo, and the pattern is cut in the middle and glue in such a way that the width of its central strip coincides with the width of the box.
![]()
On the bottom, because it is white, and gets just on the front part of the wallet, you need to glue beautiful paperSo that the wallet turns out more elegant and bright.
On our wallet paper with asterisks is also roll Material: Background from under reusable stickers.
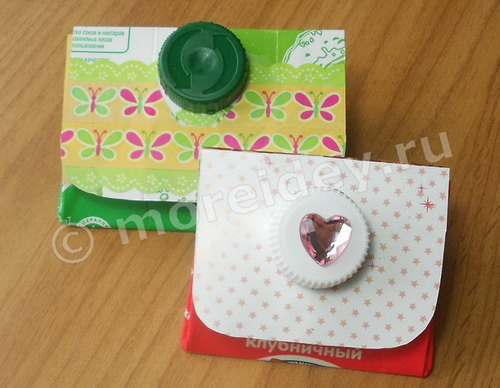
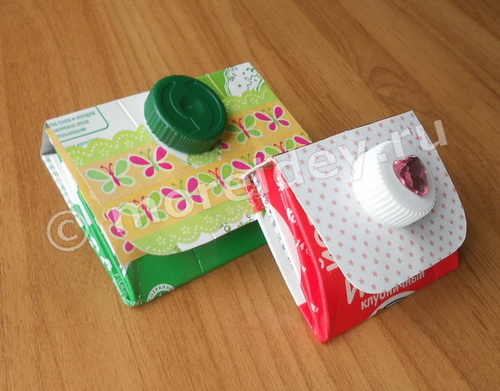
The lid can be decorated with glue-based rhinestones or a small sticker (from the same covers you can still do or and much more).
I suggest see other crafts from boxes from juice or milk:
Pleasant creativity!
Yulia Sherstyuk, https: // Site
Copying site materials is prohibited and persecuted by law.
All the best! If the article was useful to you, please help me in the development of the site, share a link to this article in social networks.
The placement of the materials of the site (images and text) on other resources without written permission of the author is prohibited and persecuted by law.
Crafts from milk boxes. Second life of unnecessary things
Milk cardboard boxes (juice, kefir) - wonderful material for children's creativity. They can be used not only as a pot of seedlings. If you manifold a bit of fantasy, you can make milk bags a large number of useful craftswho a child can use in their games. Similar toys can be, of course, and buy. But it's no secret that many kids are glad to play homemade toys. And often they are for them where nurses are purchased. Is it not because these toys do the heat of your hands, the love of your hearts, the part of you yourself? This is not consumer goods, it is an exclusive. And besides other things, similar homemade toys are very useful for the kid. They develop its fantasy and creativity, because all the time you need to do something ponamoshka, use substituent items. This will not give any wonderful and realistic purchased toy.
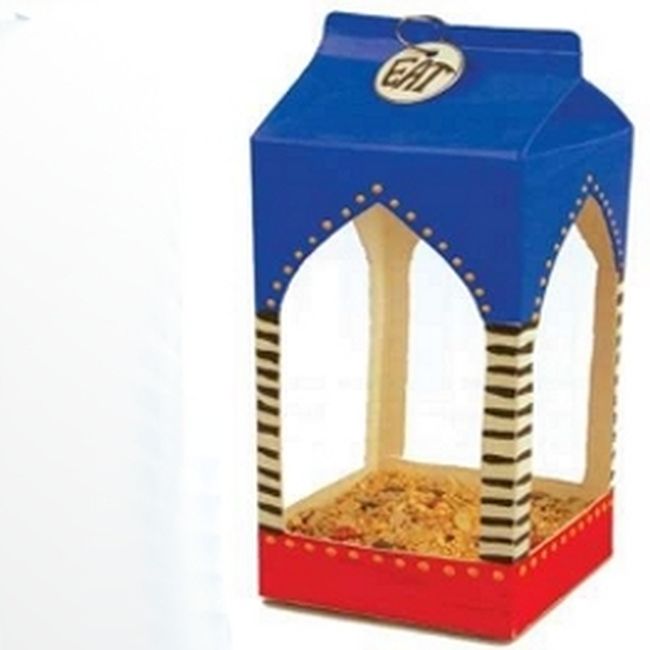
Bird feeders
The most simple in the manufacture of a cannon of dairy bags is a bird feeder. Rent a hole in the package from one, two or four sides, leaving the side of the side from below, and on top of the thread rope or wire to hang the feeder. Now it remains only to decorate the feeder to your taste.
Cubes
One more simple drinking Milk boxes - building cubes. There are several ways to make them:

And from them you can make this toy-house, which your baby will collect floor outside the floor:
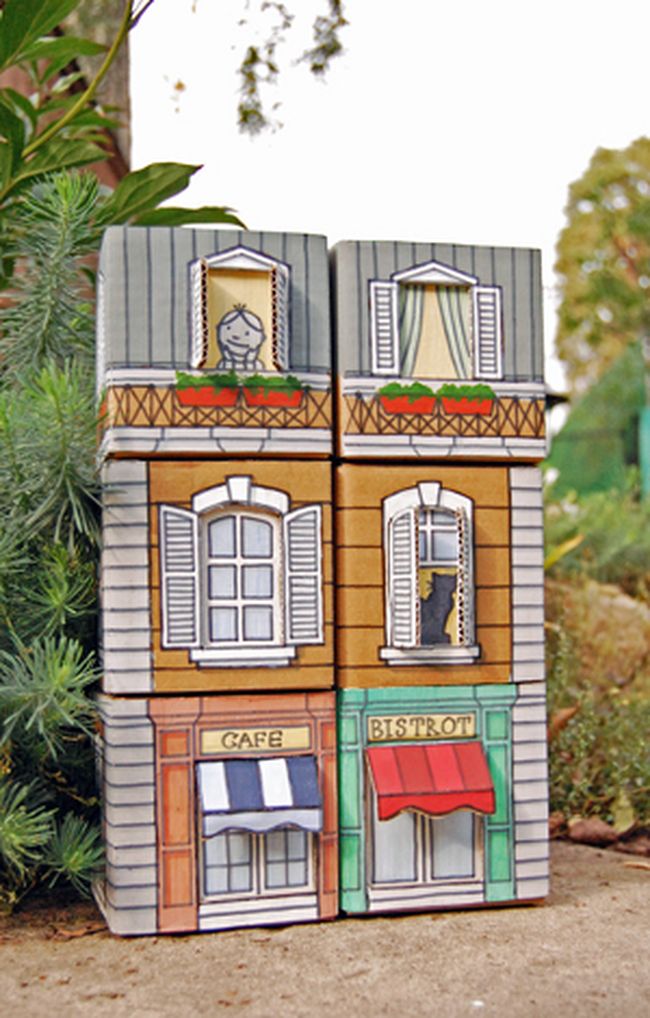
![]()

Garage for machines. See more details

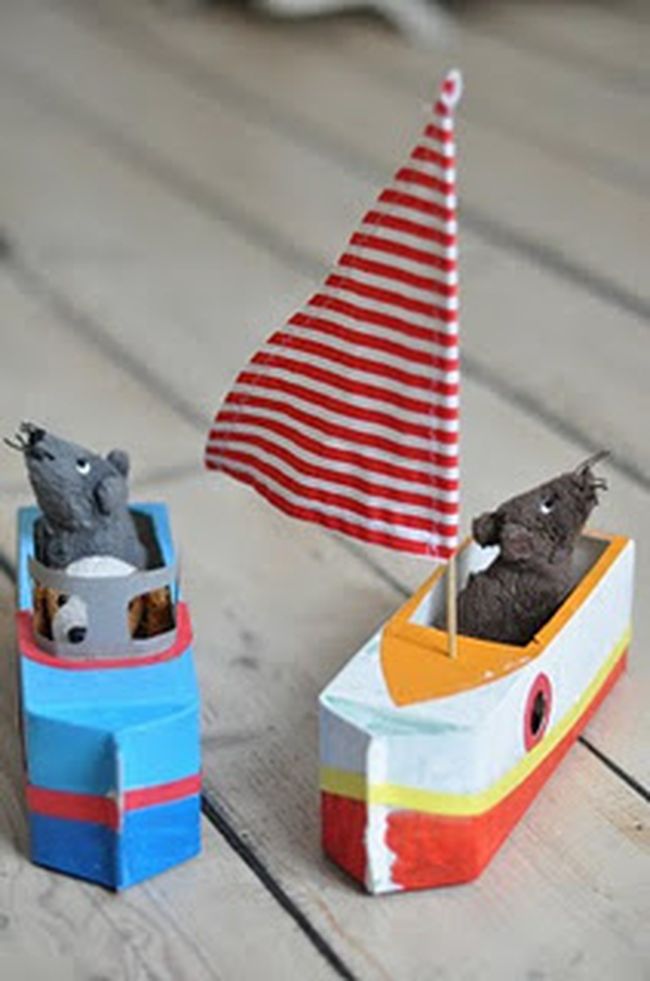
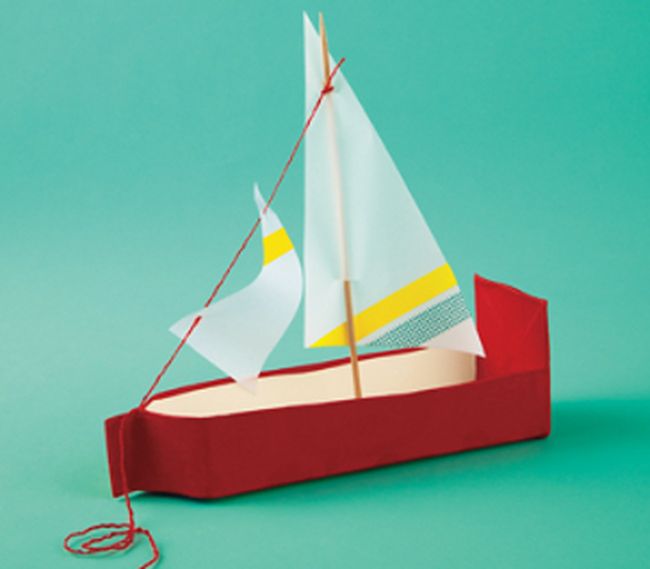
Boats and car.
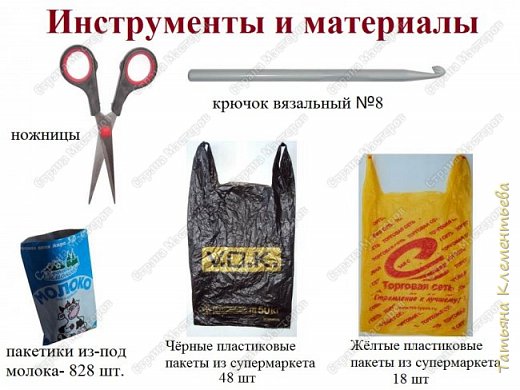
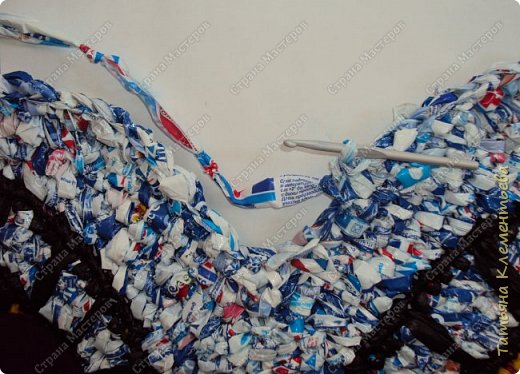
Tools are very simple. These are scissors and knitted hook-aluminum number 8. Materials are polyethylene bags from under milk and plastic bags from the supermarket. Milk bags copied the whole year. Soaps them, dried and folded into the box. All relatives and acquaintances brought me these thrust packages. Accumulated dairy bags 850 pieces (needed 828) and 70 bags from the store.
First made yarn from bags, having previously cut from 3 cm widths (photo below). Then combined the rings by the knot, receiving long double threads.

The threads walked into the balls in color.

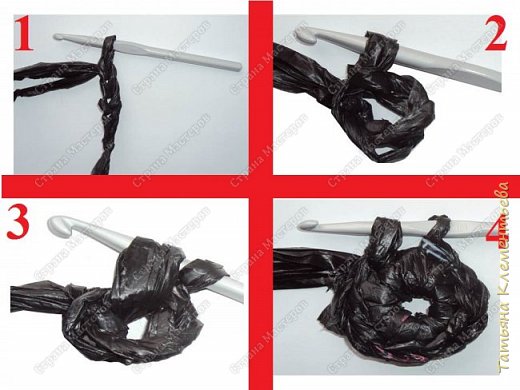
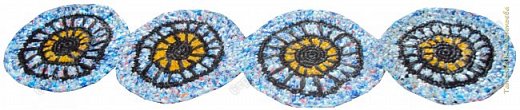
Talking 3 rows in black, changing threads on yellow. Black thread do not tear off. Yellow-in-time 2-3 rows are also by columns without Nakid.
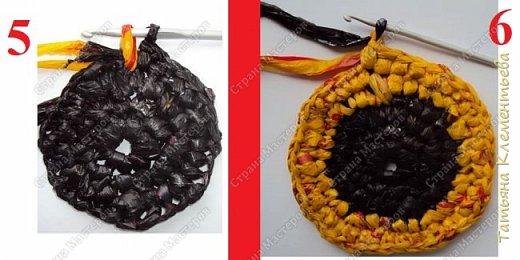
Then I check the 1 loop in black and start the hook under the base of the first yellow row. Pull the thread freely. We are in line with 3 loops without Nakid in a circle. We repeat the same in the whole row. By sticking the entire row in such a pattern, the next row is also tied by black simple columns without Nakid. (photo 7-8)
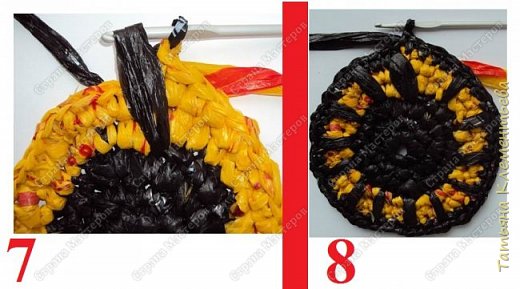
Then knit in a circle (3-4 rows) with simple columns without a light thread. After that, we make a black thread pattern again (polyethylene yarn).

And we complete the motive with a light thread -3 -3 row by columns without Nakid. Such motifs are 4 pieces. In diameter, each circle is 45-47 cm. We connect circles with columns without an inventive.
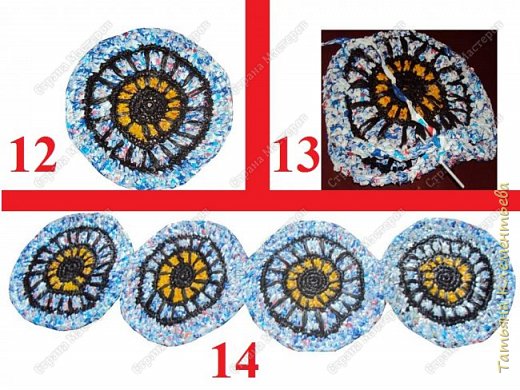
Here is such a design (photo below) we are taking the columns without an in a circle.
In places connecting circles (depressions), knit columns with Nakud in order to align the edge.
 Why you can not give icons
 Is it possible to give icons as a gift: Signs, the opinion of the Church
 A year ago left her husband, and now I do not know what to do