Filling for cheese baskets: the most tempting recipes. Salad in cheese baskets recipe with photo Cheese baskets how to make
A cheese plate for a salad, or, as it is popularly called, a cheese basket, is a wonderful invention of chefs, which allows you to turn a banal serving of salads in a salad bowl into an original and very tasty one.
The cheese salad basket looks very beautiful and unusual.
This creative idea will truly decorate the festive table.
This option is designed for serving in portions, therefore, making a cheese basket is more convenient than a small format, so that later you do not break it together at all, but just eat your own whole.
Making cheese baskets is easy.
Do not forget that they will need to freeze before spreading the salad.

You can make openwork (thinner) or regular (denser) cheese salad bowls from hard cheese varieties.
The more cheese, the denser and thicker your cheese basket will be.
Thick baskets are used to decorate salads that are already seasoned with mayonnaise and can flow, and openwork ones are used for portioned fruit salads, which are dressed with whipped cream already on the plate.

Cheese baskets can be prepared with different spices and additives.
For example, if you mix cheese with finely chopped dill, then cheese plates will turn out to be interspersed with green.
You can add toasted sesame seeds for even crisper baskets.
Lovers of spicy notes will love garlic. Or simply pepper the cheese with freshly ground black pepper.
If you want to cook denser baskets, then you need to add a little starch to the cheese. For 200 g of cheese shavings, use a heaped tablespoon of potato or cornstarch.
You can make cheese baskets on the eve of the holiday and put them in the refrigerator.
You need to fill cheese salad bowls with filling just before serving.

You cannot put hot dishes in such "containers", otherwise the cheese will melt and your edible salad bowl will lose its shape.
Read our step-by-step cheese basket recipes.
How to make a cheese basket in the microwave
For 4 servings you will need 400 g of hard cheese, a parmesan cheese basket and a flat plate are good. Spread the bottom of it with butter.
1. Grate a small part of the cheese on a fine grater on a plate. Lay out a circle about 12 cm in diameter.
2. Place the plate in the microwave until the cheese is melted.
3. Remove the melted cheese plate and leave to cool slightly. Prepare glasses of the shape you want for the basket.
4. Carefully remove the cheese circle from the plate. Place it on a glass or cup and shape.

5. Place the glass of cheese in the refrigerator to solidify the cheese.
Cooking a cheese basket in a pan
1. Grate hard cheese on a coarse grater. Pour into a dry, non-stick skillet.
2. Heat slowly over low heat. As soon as the cheese melts and begins to bubble, remove from heat and place on a cold surface (a towel dampened with ice water).
Avoid toasting the cheese, otherwise a brown crust will form on the cheese plate, which should not be.
3. As soon as the cheese cake has cooled slightly and stops bubbling, gently remove it with a wide spatula on an inverted glass, greased with butter, pressing with a paper towel and shaping the edges.
This method will also help to remove excess fat, which is melted out of the cheese.
4. Place the entire structure in the refrigerator for 20 minutes.

Silicone muffin cups or small salad bowls can help make cheese plates easier to prepare.
Place the hot cheesecake into a greased container and press down with the bottom of the glass.
Put the molds with blanks in the refrigerator for 20 minutes and chill well.
Carefully remove the finished cheese baskets from the molds and lay out the salads.

Enjoy the taste of your cold snacks, complemented by the aroma and piquancy of cheese.
First of all, you need to make a salad basket. Pre-heat the oven at 180 degrees. Take a flavored cheese like Parmesan or use a similar variety. Rub it with a fine mesh grater.
Line a baking sheet with parchment or foil and spread the grated cheese in a circle with a diameter of 10-15 cm in a thin layer. Make a trial base for the basket to test how the cheese cooks. The cheese should melt quickly and not spread, the piece should not be too thin and transparent, just as do not make the pieces too thick.

Place the basket blanks in the oven. Wait until the edges begin to brown a little. The cheese should melt, but not burn, after which the pieces can be removed from the oven.

Leave the cakes to cool for a couple of minutes, wait until the cheese stops burning your hands and you can carefully remove the cheese cake from the parchment.

Start shaping the baskets using narrow glasses or tall glasses. Turn the container upside down and cover with a flat cake, pinch its edges, giving it a wavy shape. Put in the refrigerator for 10-15 minutes to cool, after cooling, their shape should be fixed, the baskets should become hard.

A salad in cheese baskets with crab sticks will require the preparation of the rest of the ingredients.

Cut the boiled chicken eggs into small cubes or grind them on a grater. Quail eggs cut into quarters will look beautiful in this recipe.

It is enough to defrost boiled frozen octopuses. When cooked for a long time, they will become very hard and "rubbery". But to add flavor, it is better to blanch them in boiling water with the addition of a sprig of dill and lemon zest.

Cut the crab sticks and octopuses into thin strips.

Move the shredded seafood and boiled cut eggs into a deep bowl. For a brighter taste, rub some cheese into the salad.

Season the mass with mayonnaise. Store-bought will do, but if you have time, make mayonnaise sauce at home.

Remove the chilled baskets from the molds.

Gently place a couple of tablespoons of salad in each cheese basket. Decorate the dish with herbs and serve.

- To prepare this salad, choose high-quality cheese, it should not break, bubble and spread during the melting process.
- Shrimp with cucumber, boiled beef tongue with cherry tomatoes, salmon with soft cheese are perfect as a filling.
- Do not overheat the oven, the base for the baskets should be soft, but not burnt.
- Use aromatic seasonal herbs or vegetable cuts to garnish. Parsley leaves, diagonally cut green onion feathers will look great.

Preparing to receive guests, each hostess is concerned not only with making menus and preparing dishes, but also with how to decorate them most effectively. After all, beautiful table setting and festive table decoration is one of the ways to express your respect for guests.
Traditionally, salads are served. Of course, this appetizer can be put in one large salad bowl, but one of the effective ways of serving is portioned. The salad can be placed in small glass, porcelain or ceramic bowls or served in tartlets, which are sold in many stores today, or there is another rather effective and unbroken option - to serve the salad in a cheese basket. In addition to the fact that such a serving of an appetizer will greatly decorate the table, there is another advantage - the taste of the salad is complemented by the taste of toasted cheese.
The question may arise, which salad can be served in cheese baskets? Yes, almost any! In addition, other snacks such as mixed seafood or julienne can be served in this way. The main thing is that what you are going to put in the cheese basket is not too runny.
It should be noted that making beautiful cheese baskets is not so easy. Therefore, you need to practice a little before tackling the preparation of a festive salad frame. But on the other hand, you can prepare such baskets for cheese salad the day before. Then carefully fold them into a container with a lid and refrigerate. And you need to fill cheese baskets with salad just before serving.
So let's try to prepare this delicious decoration. For example, we need parmesan. But you can use regular cheese, but it needs to be allowed to wind up a little and dry in the refrigerator. The cheese should be grated, and it is desirable that it does not crumble in the process, but forms thin translucent slices. In this case, our cheese baskets will be more beautiful.
It is most convenient to use a frying pan with a non-stick coating for making baskets. It must be greased with a thin layer of vegetable oil and heated over a fire. Pour into a preheated frying pan (about two tablespoons are needed for one basket). It is desirable that there is more cheese in the middle of the resulting cake than along the edges, then our basket will have a thick bottom and openwork edges.
Fry the cheese "pancake" for five to seven seconds, until it begins to brown on the edges. Then remove the pan from the heat and put it on a towel slightly dipped in cold water (this will cool the cake slightly). Now we very carefully pry the pancake with a spatula and put it on an inverted glass or cup. Press the edges of the cake to the walls of the vessel with a paper towel. This will give the basket a shape and at the same time remove excess fat. Let the cheese cool without removing it from the mold. That's it - the cheese basket is ready.
As you can see, cooking it is a little difficult, and it can take a lot of time, especially if a lot of guests are expected.
I must say that cheese baskets can be prepared with different additives. For example, if you mix cheese with finely chopped dill, then the baskets will turn out to be motley, with green splashes. You can add toasted sesame seeds to it, then the baskets will turn out to be crispy. And lovers of spicy taste can use chopped garlic as an additional ingredient.
If you want to make denser baskets, you can add a little starch to the cheese. For two hundred grams of it, you need to take a full tablespoon with a slide of potato or corn starch.
In short, a little practice - and you can pleasantly surprise your guests by serving salad in cheese baskets. Surely, such a dish will make a splash, and the hostess will listen to many compliments about her culinary skills.

Any housewife wants her dishes to be not only tasty, but also serve as a decoration, especially on the festive table.
I would like to offer you an original way of serving any salad (the main thing is not very "wet") in cheese baskets.
You can cook ordinary(they are denser) baskets or openwork... For making cheese baskets, you can take almost any type of cheese or a mixture of different varieties.
They are prepared very quickly and easily.
It is important that you can prepare them in advance, the day before the holiday, and fill them with salads before serving.
Based on personal experience, I can say that Parmesan cheese is ideal for making baskets. The baskets hold their shape perfectly and look very beautiful.
Ingredients: Cheese "Parmesan", "Russian" - the amount depends on how many baskets you cook.
Now that the cheese has cooled down a little, you need to gently remove it from the pan with a spatula or by hand and transfer it to a muffin tin or use a small bowl. Next, you need to press down with your hand or a glass, give the shape of a basket.  Let it cool. Fruit salads look great in these baskets.
  Now let's prepare the usual baskets. We take cheese and rub it on a coarse grater.
I used a mixture with Parmesan.  Further, as in the first case, pour the cheese into the pan, heat it up, let it cool slightly.
  Only now we carefully remove and put it on a glass turned upside down, press the edges. We wait until they cool down, and then put in the refrigerator for 15 minutes.
  In the same order, we make the required number of cheese baskets.
  The baskets, by the way, are quite edible. I love to serve seafood salad in them.
  Enjoy cooking!
Salad in a cheese basket with chicken
- For cheese baskets, hard or semi-hard cheese is predominantly suitable, so that in the future a stable beautiful shape is obtained. Rubs a piece of cheese on a grater with coarse divisions.
Rub the cheese coarsely
- Put a small amount of cheese shavings in the center of the non-stick frying pan - slowly heat up over medium heat.
Melt the cheese in a non-stick pan
- When the cheese is completely melted, leave it in the pan for a while so that it grabs and does not spread too much.
Cool the melted cheese slightly
- You can use a muffin or muffin baking dish to make cheese baskets. Flip it over, you can get grooved edges. Very carefully, using a silicone scraper, turn the cheese layer over onto the prepared form - leave it to cool.
Turn the cheese blank onto the mold
- When it turns out to calmly touch the cheese, remove the carefully resulting cheese "blank" from the mold and place it inside. Remove the melted fat with a paper towel.
Remove oil, fat
- Let's do a similar procedure with the remaining cheese mass. After simple manipulations, the question of how to prepare cheese baskets for salad will be irrelevant for you. Let's form neat airy "coasters" and leave them aside for a while.
Ready cheese baskets
- For the filling, you will need boiled chicken fillet, pineapple rings (canned food), curry spice and shallots. If there is no onion indicated in the recipe, it is better not to put any other in the dish, otherwise the pungent smell will be unpleasantly contrasted.
Filling - products for salad with chicken and pineapple
- Grind pineapple, chicken and onion.
- Season the prepared slices with a little mayonnaise and add curry generously. Salt to taste.
Dressing with mayonnaise, curry
- Each basket will be stuffed with salad; the cheese base must be completely cooled before combining with the salad filling.
Ready cheese basket
- Put the filling of chicken and pineapple, seasoned with spice in the center.
Filling with salad
- Cheese baskets for salad recipe with a photo of the finished dish. It remains to decorate a little, complementing it with bright accents. For example, put lettuce leaves on a plate, sprinkle with curry.
Decoration, finishing touches
- The dish turned out to be tender, juicy and at the same time effective.
Ready! Bon Appetit!
Fans of fish or seafood can be offered an alternative option - salad in cheese baskets with shrimps. Using the recipe above, replace the chicken with spiced king prawns, which will go great with pineapple. Which salad to put in cheese baskets is up to you.
Cheese baskets with filling recipe with photo
But before filling the tartlets, they still need to be baked. The following option is considered the most successful test for them. Take a glass of flour and one hundred grams of margarine; products are chopped with a knife into small crumbs. A one-hundred-gram piece of hard cheese is rubbed and added to the mass. The yolk of one egg and half a spoonful of salt are also added here. The kneaded dough rolls into a ball, wrapped in cling film and hides in the refrigerator for forty minutes. After the dough is rolled into a thin cake, circles are cut from it with a cup, laid out in shapes and put into the oven for a quarter of an hour. While the tartlets are baking and cooling, you can start filling the cheese baskets.

There's nowhere without wine
Now that you have picked up a cheese set, add one or two bottles of wine to it - but not more, otherwise you will already have a wine basket.
The choice of wine depends on what exactly you put in your basket. The main thing is to choose a combination in which the cheese will not "clog" the taste of the wine, but only emphasize it.
- Hard, salty varieties are best combined with red dry wines. Those that can be grilled are suitable - for example, the Adyghe or Suluguni.
- Putting red wine or not is a matter of taste, but you must put a bottle of white wine. White wines go well with almost all cheeses except blue moldy ones - they taste too intense.
- If you put a blue variety in the basket, then supplement it with sweet wine or even port. Oddly enough, but they will perfectly complement each other.
CHEESE BASKET salad recipe with photo
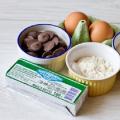
The photo shows the ingredients we need. Everything is very simple and from a minimum of products.
The amount of ingredients I quote is per serving.

So let's get started. First, we need to make a cheese basket. I use hard Russian.
You can take any hard cheese, soviet, parmesan. Three half of the cheese on a coarse grater. Put in a small frying pan, spread over the bottom and put on fire. fry until melted and slightly browned.
The main thing is that the cheese grabs like a pancake and can be easily pryed off and transferred to the mold. Fry for 3-5 minutes.

Then, gently prying with a spatula, transfer to a glass form. You can take any that you like, for example a deep, but not large in diameter, round salad bowl or a muffin pan.
Press the edges tightly and leave to cool completely.

Bechamel sauce with aromatic herbs, but if you do not like this sauce, you can use ordinary sour cream as a dressing or mayonnaise. So bechamel sauce: pour the cream into a convenient bowl.
Finely chop the marjoram (I used fresh leaves), finely chop 1 clove of garlic or pass through a press. Mix herbs and garlic with cream. put the cream on the fire.
Meanwhile, mix flour with olive oil until smooth. As soon as the cream begins to boil, add flour and butter and cook, stirring constantly, until it thickens.
I need to stir constantly so that there are no lumps.

Dice the remaining cheese and dice the apple in the same way. Pass the second clove of garlic through a press or finely chop.
Season with salt, dress with sauce and stir.

Put the salad in our cooled basket, garnish with grated cheese and parsley. Bon Appetit!

How to cook
Cheese baskets are very easy and quick to prepare, they can be made both in a frying pan and in the oven on parchment or in the microwave. 1
IN THE PAN: Once one side has grabbed, use a spatula to carefully remove the cheese pancake and immediately place it on an inverted glass, cup, glass, or whatever vessel you wish to shape. So that at the initial moment the form does not straighten, you can grab the basket on a glass with a thin rubber band
Remove the finished basket from the glass (glass) and fill with any appetizer, salad, fruit. 2. MICROWAVE: wait until the cheese melts, usually 20-30 seconds is enough for this, the cheese has completely melted, quickly transfer it to a glass, a glass, straighten the cheese as needed, slightly press the edges. 3. In the OVEN on parchment: cut the parchment into squares, preheat the oven to 200 degrees, put the baking sheet on the middle level of the oven for 1-2 minutes so that the cheese begins to melt. We take out the baking sheet, carefully take each square and place it in the muffin mold until it solidifies, or in the same way (glass / glass). 4. If you want a crunchy and tender basket, don't sprinkle too much cheese on it. Pre-fry the sesame seeds. Maybe someone will come in handy, the New Year is coming soon. Bon Appetit!
So different
To diversify the flavor palette of the gift basket, it is recommended to buy different types of cheese in small pieces or portions. The optimal amount is 100-200 grams. So where do you start?
- First of all, you should take a closer look at pickled cheeses. Their main feature is the absence of a crust, which is present in almost all other species. These include feta, suluguni and feta cheese. Their salty taste makes them very versatile in terms of use, so you need to put more of such cheese.
- Next, pick up the hard cheese. Parmesan is an ideal option - almost everyone likes its piquancy. However, no one bothers to replace it with Russian, Dutch or Swiss cheese, especially if you know exactly the preferences of the recipient of the gift.
- Make sure you have blue cheeses in your basket. They are divided into white and blue. It is very easy to distinguish them - white varieties are covered with a white crust, and inside they have a homogeneous structure. But the blue varieties are completely riddled with blue or green mold veins. They may not give the most pleasant impression, but it disappears instantly, it is worth appreciating their taste and aroma. The most famous are Gorgonzola, Danablu, Roquefort, Stilton and Dorblu.
- Finally, buy some whey cheese. They have a sweet-salty taste and are often used not only as an independent dish, but also as a component for various dishes - sweetish notes allow you to add it even to desserts. The ideal option would be ricotta - the most famous and easiest to buy.
How to make a cheese salad basket
Svetlana Bendina Sage (17327) 6 years ago
To do this, rub a plate with butter and sprinkle with grated cheese (so that there are no holes, otherwise mayonnaise will flow out of the salad). Place the plate in the microwave or oven until the cheese is melted.
After the cheese has melted, turn the cheese pancake into a glass and let cool. Stuff the cheese platter with salad. or like this- For cups: grate 200 g of cheese on a coarse grater, put on a preheated and oiled frying pan in an even layer. When the cheese is melted, remove the "pancake" and put it on an inverted glass (to prevent the glass from bursting, put it on a damp towel).
Mistress of the dark Oracle (69380) 6 years ago
grate the cheese, put it in a tight bag or in two and put it in hot water for a short time and after taking it out with your hands, check the consistency as it looks like plasticine, take it out and quickly shape it, put it on the dishes, for example, on a bowl and put it in the cold. cheese shot well
Elena Uzlova Sage (11292) 6 years ago
100 g of hard cheese, any salad (vegetable or meat) Grate the cheese on a coarse grater, put in an even layer on a frying pan (without vegetable oil). When the cheese melts and spreads over the pan with a “pancake”, let it cool slightly and carefully remove with a thin spatula.
Place the glass upside down on a damp towel, put the cheese pancake on top of the glass and refrigerate. Prepare a salad and fill a basket with it.
Cheese salad basket
For this dish, the ingredients are taken, as they say, by eye. First, we make a cheese basket. Grind the cheese on a grater (preferably on a coarse one).
We spread a layer of it in a dry frying pan, put it on low heat and wait for it to melt so that the surface is homogeneous (it will take a few minutes). As soon as the cheese begins to turn into a cake, remove the pan from the heat and wait for it to cool. Next is the hardest part.
We take the glass, turn it upside down. With a spatula, very carefully remove the cheese cake from the pan and put it on a prepared glass (dexterity is required here, the cheese tends to creep away). We give it the shape of a basket (pinch the corners) and send the entire "structure" to the refrigerator for solidification.
Now we take the basket out of the fridge, put our favorite salad in it and treat the guests!
Cheese baskets with salad
Preparation
Let's make a salad. Cut the chilled crab sticks into strips, chop the olives and herbs finely, chop the boiled eggs finely.
Mix all ingredients thoroughly in a separate bowl, salt and season with mayonnaise. 
Let's prepare cheese baskets. To do this, mix the grated cheese and flour in a separate bowl. Then, in a preheated pan covered with parchment, spread 1/5 of the cheese and flour mass.
Smooth with a spoon and bake until you have cheese pancakes. Once the cheese is melted, carefully remove the pancake from the pan and transfer it to an upside-down mold or glass. 
Press the pancake over the surface of the mold or glass with a towel and leave to cool. After 20 minutes, remove the cheese pancakes, you should have 5-6 cheese baskets. 
1. First we need to make cheese baskets. Before spreading the salad, they will need to harden. You will need a flat plate. Spread the bottom of it with butter. Grate a small part of the cheese on a fine grater on a plate. Place a circle about 12 cm in diameter. Place a plate in the microwave or preheated oven until the cheese is melted.

2. Take out a plate of melted cheese and leave it to cool slightly. Prepare glasses of the shape you need for the basket. Carefully remove the cheese circle from the plate. We put the circle on the glass and give it the desired shape.

3. We put the glass of cheese in the refrigerator so that the cheese finally solidifies and takes the desired shape. Thus, we prepare all the baskets and send them to the refrigerator. Cheese baskets will look like in the photo.

4. Now we are preparing a salad for our basket. I already said that you can put any salad in the basket. It can be vegetable or meat. Chicken or seafood salads go well with cheese. I give you an example of a simple salad. Peel the squid carcass, rinse and place in a bowl. Pour boiling water over for 3-5 minutes. Pour out the water and pour boiling water over again. Then cut the carcass into strips. Cut the cucumbers into strips too. Boil the eggs, peel and chop finely. Mix everything, salt to taste, season with mayonnaise and put in the refrigerator for 15 minutes. Before serving, arrange the salad in baskets and decorate to your liking. They eat salad along with "tara".
 Liquid Center Chocolate Fondant - Yummy Chocolate Milk Chocolate Fondant Recipe
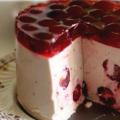 Delicious and healthy cherry jelly
 How to cook lightly salted cucumbers on mineral water - instant recipes with gas