Rough floor of a brick house. Sub-floor device: what is hidden under the floor covering. On the ground: we provide a basement, insulation
The load from the structure falls on its foundation. The construction, which precedes the finish coating and serves as the basis for the insulation, is the "subfloor". The temperature regime of your room depends on how it was installed. If there are cracks in it, then cold air will begin to flow from below, dampness and the smell of rot in the house will appear.
Description
When choosing the material for the supporting beams of the floor structure as a whole, take into account the area of the room for which it will be designed. The larger it is, the thicker they are. This factor is explained by the fact that the finishing coating and all materials that are involved in the process of installation work must be evenly distributed on them.

How to make a rough floor in a wooden house
There are several options for its formation, but more often the "dry" method is used.
The sub floor is formed according to the following principles:
- By lags.
- "Prefabricated", using a dry screed.
- "Adjustable" (on plywood and chipboard).

Prefabricated sub-floor

"Adjustable" subfloor

If the boards are laid on logs, then they are laid on the following base:
- Beams.
- Reinforced concrete slab.
An adjustable floor is formed on the following bases:
- Lags.
- Plywood.
What do you need to know?
It is laid on the main floor slab using less hard types of wood. These include coniferous varieties. These are the following types of them:
- Edged board.
- Croaker

In order to achieve the expected results from the installation done, you need to know the following:
- The basis of the entire floor structure is a timber, which is laid on a layer of waterproofing (two layers of roofing material).
- A roll of protective material or 2 layers of high density polyethylene is spread on it.
- Lags are attached to the timber, which serve as a frame for installation. They are not brought to the walls, leaving a gap of up to 30 mm. This distance will be an insurance against possible soil shrinkage (changes in the temperature regime and groundwater level in the soil) and natural fluctuations in the moisture content of the log during its operation.
- The artificially created free area between the wall must be filled with mineral wool.
- The entire tree must be treated with antiseptics and fire retardants. If ready-to-use materials are purchased, then the cuts made must be protected from moisture and bark beetles.
DIY rough floor in a wooden house
For work, a board with a thickness of 15 to 20 mm is used. A correctly prepared starting material on milling machines will create grooves and shoulders on its side. This option will eliminate hammer and nail work, which will speed up the assembly process and the tightness of the connection. The rigidity of the structure will not create a squeak.
The thickness of the subfloor board affects the distance (pitch) between the joists. The larger it is, the wider this gap is. For example:
- With a board thickness of 40 mm, the step between the lags can reach one meter.
- With a thickness of 35 cm, the step between the lags should not exceed 850 cm.
- With a thickness of less than 35 cm, the step between the lags should not exceed 60 cm.
The correct location of the foundation pillars is of great importance. They are located around the entire perimeter and in the central part of the building.
The thickness of the log is directly related to the pitch of the foundation pillars, since the main beam is attached to them.
The following relationships should be observed between the dimensions of the lag and the pitch of the foundation pillars, expressed in centimeters:
- Logs with a thickness of 40 with a step of no more than 900.
- Logs with a thickness of 50 at a step of 1100.
- Logs 60 thick at a step of 1300.

Installation of a sub-floor using plywood
The sequence of works is as follows.
- The beams are placed on a waterproofing layer.
- Roll material is laid on them, providing protection from moisture.
- Attach the lags.
- They are lined with plywood sheet 10 mm thick or moisture resistant boards (MDS, VAT).
- The seams of the connection are closed with construction tape or a sealant is poured.
- Cover the sub-floor with a layer of vapor barrier.

For insulation from condensation from the side of the room, the following materials are used:
- Cement mortar.
- Dense cellophane in 2 layers.
- Rolled foamed polyethylene based on foil (laid with foil to the room) and other materials.
There must be an air barrier between the vapor barrier and the floorboard. The subfloor must be ventilated through the holes in the foundation (vent).
Insulate pipes and meters with construction tape before application. Apply it in layers using a brush, roller or rubber trowel. Pay special attention to hard-to-reach areas. After the first layer, self-adhesive tape must be applied to all joints and joints. It will close with the second layer. The composition must be partially applied to the wall (its lower part).
There are other materials for such work. Roll foil insulation can be used, which at the same time will help to isolate from noise and retain heat in the room. They are laid with an overlap with the metal part towards the room.
Video: Correct installation of the subfloor
Conclusion
This type of "dry sub-floor" can serve as the basis for the formation of the base coat. In some cases, for laying a parquet board or laminate, the finished structure is covered with a layer of waterproof plasterboard.
Video: How to make a subfloor from plywood?
Longevity and excellent aesthetic characteristics of the final flooring are provided by the subfloor in a wooden house, which is made according to different methods.
A rough base is understood as a special structure necessary to form the most even area for the finishing floor covering. Its second task is to ensure an even distribution of the load on the floor. The rough base can be equipped in two ways:
- Dry - lags are used.
- Wet - the leveling structure is created by means of a concrete screed.
Rough sub-floor
Among other things, the subfloor in a wooden house is installed in order to increase the thermal insulation performance of the dwelling. In timber buildings, the wet technique of arranging a leveling base is very rarely used. It is usually created using lag. In this case, the rough floor platform is mounted on the base or on the floors (thick beams or reinforced concrete slabs perform their function). Next, let's talk about how to properly make a preliminary floor using wooden elements.
Before starting the arrangement of the rough base, it is necessary to choose the method by which it will be mounted and to determine the amount of materials required. After that, a row of round holes should be made in the corners of a residential building made of wood. They will provide effective ventilation of the subfloor and increase the life of both subfloor and finishing floor. The holes will not spoil the look of your home. At the end of all the planned work, you simply disguise them with decorative ventilation grilles.
Then it is necessary to treat the entire underground space and directly the lags with an antiseptic composition. Laying the rough base on an unprocessed site is not allowed. You need to understand that various microorganisms can appear on the elements of the subfloor during the operation of the building. If the wooden logs are not treated, they will very quickly be destroyed by mold and mildew. And it is almost impossible to repair the preliminary foundation - access to it is either completely impossible or very difficult.
- hot resin - it protects both from the negative effects of moisture and from a variety of pests;
- solutions of VVK-3, KhKhP or MHKhTs;
- fluorosilicate ammonium;
- chlorophos - it is most often used as protection against insects;
- sodium fluoride.

Wood processing products
All of these compounds are safe for humans. They do not emit harmful substances and at the same time have the required indicators of wood water protection. Processing with their help should be done strictly according to the manufacturer's instructions.
Note! Subfloor boards only need to be processed from the back. But on the logs themselves, crowns and beams, protective compounds are applied from all sides.
Additionally, it is recommended to treat the sub-base with fire retardants. In specialized stores, universal compounds are now sold that simultaneously protect wood from fire, moisture and from the effects of microorganisms.
To install a platform for a floor finish, stock up on the following materials:
- Wooden bars of the third or second grade - logs. In most cases, such products are characterized by a not very flat surface. Therefore, they need to be slightly tweaked. Your task is to make their front side (the one on which the laminate, parquet board or other covering will then be laid) more or less even. Such an operation is performed with an ax. Naturally, nothing needs to be done with logs made of first grade wood. Such products are in themselves very even.
- Bricks for the construction of support posts. The height of the finished supports should be at the level of 20-25 cm, and their dimensions are usually taken as 40x40 cm. The number of brick pillars is determined by the geometric parameters of a wooden house and its floor base. Supports are mounted on cement mortar.
- Plywood or boards. With their help, the first and second rough layers are laid.
- Polyethylene film or other waterproofing material. It is needed to protect the logs from decay.
- Heat and vapor insulating material.

Installation of the platform under the floor finish
Also, the installation of the structure described by us is impossible without the use of fasteners. With brick supports, wooden logs are most often connected with 4x5, 5x5 cm bolts and steel corners.
How to make the floor correctly - instructions for beginner craftsmen
The design considered in the article can have two or one layers. If the beams are attached to the walls of a wooden residential building, the installation of a lag is mandatory. In such a situation, the distance between the individual beam products is quite large. If the distance between the beams is minimal, the leveling base is allowed to be made directly on them.
The scheme of self-assembly work is as follows:
- Install brick pillars (they serve as a support for the black base) or make a strapping of boards around the perimeter of the room. If supporting elements made of bricks are used, roofing material must be laid on top of them.
- Attach the logs to the base of the house. Fix them with bolts and corners made of metal (to brick supports) or (to a harness made of wood).
- When installing the lag, leave 20 mm gaps near all wall surfaces. Thermal insulating material can be placed in these slots. With a small distance of the support of the logs on the base of the house (less than 10 cm), they are installed in the same way. And then they are pressed with a fairly massive bar. It is fixed tightly in the walls of the building. The walls of the house and the sections of the joints of the timber are measured, after which the corresponding incision is made. It is advisable to take its dimensions a couple of centimeters larger than those that you get as a result of measurements. Do not forget that the logs will expand slightly under the influence of moisture.
- Install cranial bars at the bottom of the supports for the rough base. Then connect them with the lags on the sides. The geometric parameters of such bars are always taken smaller than the dimensions of the main elements.
- Mount the boards on the beams. You do not need to attach them. The wood will expand during operation. Free placement of the boards will not interfere with this natural process.
- Lay a layer of waterproofing on the floor base. The selected moisture-proof material (for example, plastic sheeting) should be fixed to the wall surfaces. On them, the waterproofer goes to a height that is equal to the height of all available levels of the feasible floor base (this figure also includes the finishing of the floor). Fasten the areas of connection of the pieces of film with each other with a construction stapler.
- Lay a layer of thermal insulation. The height of the lag should be slightly greater than the thickness of the heat-shielding material. For wooden buildings, it is allowed to use any materials for
Subfloor thermal insulation layer
Next, cover the cake made with a vapor barrier material. He is also fixed on the walls of the building with a stapler. The joints of vapor barrier products are glued together with construction tape. If the heat-insulating material was laid precisely along the height of the lag, thin slats should be mounted on their sides. They will hold the insulation in place. As a result, you get a ventilation gap under the floor.
Final work - laying plywood, boards, OSB-boards on a rough base. The installation of the second layer of the base is carried out in the same way as you installed the first part of the structure (leave gaps at the walls, place heat-insulating material in them, and so on). Fastening of boards, plates and sheets is carried out with a pitch of 10-14 cm using stainless self-tapping screws.
As you can see, it is not difficult to equip a rough base with your own hands. Good luck with this business!

Laying a sub-floor is a laborious operation, but absolutely necessary. The device of the lower floor of the house serves as its basis and is connected with the foundation. The sub-floor serves as an intermediate link between the foundation and the finishing, while performing a number of specific functions.
1. Subfloor as a structural element of the house
After strapping the foundation, first of all, the lower floor of the house is installed. It can be used for further wall installation work. This is especially true for the construction of a frame house using frame-frame technology, and laying bricks and wall blocks from the inside requires a solid foundation underfoot. In addition, the lower ceiling performs a number of other functions, being a necessary element of the building.
Sub floor:
- Distributes all loads on the lower floor, such as the weight of load-bearing walls and partitions, all people, furniture, household appliances and appliances
- Serves as the basis for work on the assembly of the frame and the construction of walls
- It is the basis for the finishing floor
- Is a component of the overall shell of the house, protecting it primarily from low temperatures
Obviously, all of the above functions of the subfloor impose special requirements for its installation, such as strength, surface evenness, resistance to atmospheric influences.
2. Types of floors
The main reason for installing different sub-floor structures is the difference in the type of construction of the houses themselves. The house can be stone, block, built of logs or thick timber, frame. Different types of foundations can be laid under different types of houses:
- Slab
- Tape
- Columnar
- Pile screw
The deepening of the foundation and its strapping may also differ slightly. Nevertheless, there are some common features and features of the sub-floor arrangement for all types of structures. In many cases, the subfloor is based on strapping beams that receive and transmit all loads from the floor directly to the foundation.

In accordance with their function, subfloors are composed of several layers responsible for each of them:
- The base of the floor is either soil or floor elements
- The underlying layer is a layer of gravel, sand, slag, expanded clay, etc.
- The base for the coating (screed) is a monolithic leveling layer
- Hydro and thermal insulation layer
- Floor covering itself
Sub-floors are classified into three main types:
- By lags
- On beams
- On the ground
The difference in the types of subfloors lies in the way they are laid, which is evident from the name.
3. Preparation for the installation of the subfloor
If the foundation of the house does not provide for a basement, then the soil serves as the basis for laying the sub-floor. It must be prepared accordingly for the sub-floor.
Grass, various construction waste and plant soil are removed. An important point: you need to dry clay and loamy soils as best as possible, so they can contain a lot of moisture in the base. It is also impossible to use soils with an admixture of snow and ice.
The site is then carefully leveled. If necessary, soil can be poured into the holes. After adding soil, it is distributed in an even layer and tamped with manual or mechanical rammers.

4. Laying the subfloor on the joists
The device of the floor along the logs is a fairly popular method.
In this case, a wooden frame is made, which is laid on a strapping beam or other specially made supports. The logs themselves are a bar or a thick board, sometimes placed on the edge.

In this case, the floor height should be insignificant - so that there is no danger of sinking to a great depth. The distance from the floor to the log should not be more than 25-30 cm.
With a significant width of the room, the logs will have a large length, and it is not enough to lay them only on the beam of the external strapping. In this case, additional supports are placed under the lags. There are several ways to arrange supports for logs.
The base is concreted and a thick board is laid on it, which serves as a crate for installing the lag. This method is especially well suited for low basements above the ground. If the distance under the floor is large 15-20 cm and the floor is not concreted, columns are installed under the boards of the lower sheathing, with a step of about 80 cm. The installation of the columns can be done as follows:
- Pits come off, slightly wider than the cross-section of the columns (35-40 cm)
- Concreted so that the upper base protrudes slightly above the ground.
- Brick posts are laid out.
Usually it is enough to lay out the posts in two bricks in two layers, perpendicular to one another. You can completely make the posts of concrete, but then you need to build a high formwork.

The height of all columns should be displayed in one plane. This is already controlled when the foundations are laid for them. If necessary, the height of the columns is adjusted with various substrates: wooden spacers are installed between the surface of the boards and the logs, the dimensions of which are about 20-25 cm in length, 10-15 cm in width, and the thickness is about 3 cm. They correct the horizontal plane of the log. Thin sheets of plywood are usually used for fine adjustments.
On top of the posts, you need to lay a layer of waterproofing, for example, from roofing material.

The distance between the joists should not exceed 0.5 m. A small gap should be left at the walls, taking into account the deformation of the wood.
On top of the log for the device of the finishing floor, you can fix plates of durable material - OSB or thick plywood. It is recommended to do this "sprawling", that is, the next layer of plywood or OSB is slightly displaced relative to the previous one.
If necessary, the cavities between the lags can be covered with insulation. It can be expanded clay or mineral wool - depending on the degree of required insulation of the house.
5. Floor on adjustable joists
Recently, it has acquired a method of installing the lag on adjustable stands. These are plastic screw mounts, strong and light enough. They are equipped with a square base, which is placed on a rigid base and a screw, adjustable in height. With their use, you can quickly equip a rough floor, moreover, it will not come into contact with the base, it will be well ventilated, and therefore the need for waterproofing disappears.
The procedure for installing such lags is as follows:
- Holes are drilled in the log boards - with a step of 50-80cm
- The lag is installed in the right place
- The support is attached to the base
- Racks are twisted to the required level

6. Sub-flooring on beams
The next way to install a sub-floor is to install it on beams. Here, the main structural element is a wooden beam. It is made of rectangular bar. To determine the cross-section of the timber, all load characteristics on the base of the premises of the first floor are taken into account. In order not to use a heavy, thick timber with which it is physically difficult to work, you can use double boards or boards installed on the edge. A good option would be to use hewn logs.
The load on the beams is calculated from a number of parameters that we mentioned above. It is believed that the total load from the weight of people on furniture, fittings, etc. can be about 400 kg per 1 m2 of floor area.
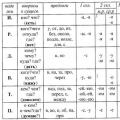
| Span length, m | Installation step, m | |
| 0.6 m | 1.0 m | |
| 3 | 75x200mm | 100x175mm |
| 4 | 100x200mm | 125x200mm |
| 5 | 125x200mm | 150x225mm |
| 6 | 150x225mm | 175x200mm |
| 7 | 150x300mm | 200x275mm |
The beams are installed parallel to each other. If the room is more than 6 meters wide, additional supports must be installed under the beams. These can be posts, the installation of which was described above.
The beams are fastened directly to the walls. A hole is cut in the wall, corresponding to the cross-section of the beam, and the beam is laid in it with its end. For isolation from external influences, this hole is laid with tow. The installation depth of the beams into the walls depends on the cross-section of the beams. The thinner the beams, the deeper they should go into the holes (up to 100-150mm).
Often, the sub-floor crossbeams are elements of the lower foundation piping.

7. Laying the floor on the ground
In many cases, especially if the height of the floor is low, it is laid in the "on the ground" method. In this case, you do not have to spend a lot of expensive lumber.
Let's consider this method in detail. It consists of several stages:
- Base leveling
- Backfilling with a layer of sand 10-15 cm at a moisture content of 7-10%
- Compaction of sand
- Backfilling of crushed stone and gravel with a thickness of 8-20 cm at a moisture content of 5-7%
- Laying an adobe-crushed stone or adobe-gravel layer with a thickness of about 10 cm
- Compaction of this layer and the appearance of moisture on the surface
- Pouring with concrete mixture
As a result, after hardening, we get a flat, hard surface on which you can immediately lay the finishing floor. For better fastening and solidity of the screed, the layers of the subfloor are reinforced, as a rule, with a reinforcing mesh. It is convenient to insulate such a floor with expanded polystyrene plates.

8. The device of screeds
The top layer of the subfloor on the ground is called a screed. Screeds are made from cement-sand mortars. The main purpose of the screed is to create a perfectly flat surface for laying the finished floor. To bring the plane out, so-called beacons are installed. These are, as a rule, slats with a thickness selected for the creation of a plane. The mixture is applied to the floor and accelerated to the height of the slats.
The joints of the screed to walls and partitions must be waterproofed. The surface is continuously leveled during the laying process, as the concrete tends to settle.
Work on the creation of screeds must be carried out in the warm season, with an optimal air temperature of at least 15 degrees. It is recommended to apply a self-leveling layer on top of the main screed (its thickness is about 5-10 mm) by the pouring method. For this, there are a lot of different mixtures on sale.
The final stage of the screed is its priming and waterproofing. Before applying primers, the surface is cleaned and primed without gaps.
9. Conclusion
The arrangement of subfloors is a rather laborious process that requires adherence to all technologies, accuracy and well-known craftsmanship. In the simplest cases, it can be done with your own hands, but it is better to turn to professionals - the structural strength of the building, the evenness of the surface and its suitability for finishing, as well as sufficient insulation and waterproofing of the whole house, largely depend on the construction of the floor.
The specialists of the "K-DOM" company are ready to perform work on laying floors, both rough and final, in compliance with all requirements. The work can be performed both separately and as part of the construction of turnkey cottages.


Arrangement of a wooden floor is recognized as the most time consuming, expensive and difficult, since any structure made of wood should be protected from direct contact with concrete. Otherwise, the floors will become unusable in a short time and will need to be replaced. Using some impregnations, you can protect the wood from decay. Chemical methods of protection are very effective and prevent the process of deterioration of the material. However, a timber structure impregnated with chemicals cannot be considered environmentally friendly. Considering that it is because of this indicator that a tree is chosen, few people use chemistry. When laying on concrete, waterproofing is required over the entire area between the layers. Fasten the wooden floor using metal squares to create a gap between the bases and joists.

Subfloors are defined as subfloors that form an ideal surface for a subfloor. It is created to ensure the distribution of loads directed to the floor covering.
In timber structures, sub-floors are made using three methods:
- wooden on logs;
- pouring with concrete;
- use of plywood flooring.

Wooden floors on logs
In a wooden house, the sub-floor device does not differ from the installation of similar structures in a monolithic or brick structure. The only feature is how the logs are attached:
- There is no need to attach the joists to various wooden planks. The best option is to strengthen them to the plinth or foundation grillage, retreating a couple of centimeters from all walls. The distance from the support should be at least 11cm on all sides of the log.
- Before laying the base, lay the harness from the bottom, which is made from a long and thin board. Lags are attached to it using metal anchors. They do not need to be rigidly reinforced with a harness. It should only be fixed so that they do not stagger while working on another layer of the floor. This design will have an indent from the walls by a few centimeters.
If the distance is less than 11 cm, then it is better to bump into the walls. But before that, it is necessary to make the initial laying on the base, then you should attach a beam or logs to choose from. It is necessary to first measure the contour of the cutting site, then cut out the dimensions necessary for the groove in the tree, which will be required for the support function.
Important: it is recommended to add about 2 cm for further expansion of the lag. It must be remembered that the laying of the log and beams is done on a grillage or basement when the laying of the waterproofing layer is finished.

Standard steps between two logs are 40-60 cm. However, when choosing, great emphasis is placed on the width of the insulation and the required load. Based on this, the choice of the section of the lag and the acting load is made. With small dimensions, the cross-sections should be approximately 15x10, with heavy loads - 15x20, with medium - 15x15 centimeters. In case of excessive loading, if the beams have a small cross-section, then it is desirable to provide the parameters of the cross-section of 30x40 cm.
Installation of subfloors on logs
When the installation is done, you will need to do the standard installation. It is performed in several stages:
- It is necessary to secure the cranial bars. They have small sections (approximately 4 by 4), they are fixed in the lower parts of the lags from the side. Professionals recommend replacing the cranial block with boards that will be wider than the lags in width. They will need to be nailed either along or from the bottom of the lags.
- Planks should be laid. They need to be laid on the cranial block, but not fixed. Considering that their main task is to fix the insulation, they are left to lie free.
- Waterproofing. Lay it on the rough floor. This is done to avoid additional stress. Lay the waterproofing so that it goes onto the wall at the level where the floor will be in the future. It is recommended to use foil insulation, and use a stapler for fastening.
- Thermal insulation - placed on waterproofing.
- Vapor barrier. They are laid in the same way as waterproofing.
- Ventilation. To create a ventilation gap, you only need to break through the counter-battens along the log on top of the vapor barrier.
- Coating. At the final stage, it is proposed to use chipboard sheets, as well as boards. The logs must be separated from the wall with a gap of 2 cm. Heaters will then be placed in them.

On our website you can find contacts of construction companies that offer a house design service. You can communicate directly with representatives by visiting the Low-Rise Country exhibition of houses.
Video description
Read more about floor insulation in a wooden house - in this video:
Plywood sub-floors
The floor in a wooden house is one of the most reliable options, as it has a high hardness. Plywood is also used for flooring. When sanded and varnished well, it looks expensive. But in most cases, it is then covered with linoleum or parquet flooring.
Plywood can be installed in one of two ways:
- On a cement base. You will need to provide a level and level base or use adjusting stands.
- Mount on logs. The main thing is to correctly set the lags to ensure that the sheet joint hits them. The lags should be positioned so that the top surface provides a straight line. Insulation and sound insulation are then removed from them.
Need to know! When laying plywood in 1 layer, it must be at least 15mm thick, if there are 2 layers, the minimum thickness must be at least 9mm.

Remove all debris and dust from the substrate prior to final installation. If possible, you should also do priming - treatment with a primer. The plywood must be fixed with glue, and the head of the self-tapping screw must be drowned.
Concrete floor
As a rough and final floor in a wooden house, the concrete option is less common than others. The concrete floor has one significant drawback - it is very cold. This problem can be solved with the help of heat-insulating material.
The advantages include durability and reliability. Compared to analogs, it is smoother and more durable. A concrete floor in a wooden house is also chosen because it is better preserved from destruction.

In a wooden house, a concrete floor is made in 11 stages:
- Lay on the lags.
- Lay on the ground.
- A concrete screed is made on top of the wooden floor.
- The floor horizon is set with marks (it is recommended to pull the cord for accuracy).
- Colas less than 11 cm should be driven into the ground, so that gravel can then be poured over them. After that, it should be tamped down and the pegs removed.
- Next, sand is poured.
- Then a large polyethylene film is laid, creating an overlap on the walls. She will be in the role of waterproofing.
- Using slats, it is necessary to divide the room into equal strips. Each should be about 1 meter wide. The height of the installed rail must be equal to the height of the cord. Next, concrete is poured onto the prepared surface.
- Concrete is spread along the slats.
- Next, the concrete should be covered with a film and left to harden for several weeks. To avoid cracking, it is sometimes necessary to spray the mass with water.
- After the expiration date, it is covered with a cement and sand screed.
Materials for processing lags
Some environmental factors, such as dampness, should not affect lags. Therefore, when providing flooring in a wooden house, you should protect them from certain factors.
Bio-protective compounds
The drug with a bioprotective composition protects the tree from mold, rotting, blue discoloration, beetles and fungi. One application of these products will provide protection for 27-32 years. You can buy them in the form of a concentrate. Sometimes a pigment is added to the composition, which makes it possible to control the quality of the application.

Bio-protective compounds are praised for:
- environmental friendliness;
- slight odor;
- lack of allergens.
It is necessary to apply the preparations before the installation of the floor in a wooden house begins.
Indelible antiseptic
An excellent option if the city has high humidity. Also indicated for use in places with high rainfall, temperature extremes, baths and saunas. Working with antiseptics is simple and not too time-consuming. Approximate consumption per meter is about 400 grams. Topcoat can be achieved after 4 coats. After finishing the work, the color of the tree will become pistachio.
Traditional methods
Folk remedies for processing lags:
- Transformer oil. Due to its deep penetration into the structure of the tree and embalming, this agent perfectly protects the material.
- Resin. Birch resin is a great help against beetles, fungi and rotting. Its only drawback is its lack of fire protection.
- Motor oil. Pros - low price, good protection. Cons - too strong smell, sometimes interfering for several months.

Before starting work, you should understand the layout of wooden floors, which consist of 4 "layers":
- Rough coverage.
- Heat and waterproofing layers.
- Finishing floor.
- Finishing.
Therefore, asking the question of what to make a finishing floor in a wooden house, you must first complete the first 2 stages, which were mentioned above, and start working on the finishing floor.

To make a finishing floor yourself, you need to buy milled boards.
Need to know! The finishing floor in a wooden house is laid 5 centimeters above the subfloor.
The construction of the floor of the first floor in a wooden house is erected in 3 stages:
- Logs are laid - so that the boards can be laid perpendicular to them. The smallest thickness is 25mm.
- The board needs to be fixed closer to the wall.
- Next, you should use a hammer and a block so that the boards are as close to each other as possible. With the help of a self-tapping screw, fasteners of each log are carried out through the ridge.
Important! If there are plans to change the floor in the future, it is necessary to use a simple mounting option - all floorboards should be fixed from above to the logs using self-tapping screws.

Conclusion
A high-quality and beautiful floor is the basis of comfort in the house. Floor is an interior decoration, but not only. During operation, it withstands the weight of people and furniture in the house, helps to preserve heat. For it to be that way, he needs a solid foundation.
In the case of a wooden house, this base will be a sub-floor on wooden logs. It is easy to do it yourself, it is strong and durable.
Appointment of the subfloor
In a general sense, a sub-floor is a floor covering over a slab or beams at the base of a building that is laid under the floor covering. Various materials are used for its manufacture, most often wood. This can be OSB board, plywood or board trimmings. In the case of non-residential buildings, you can use sawn timber without pretreatment of the ends, as well as used timber.
Sub-flooring helps you to accomplish three main tasks:
- Additional thermal insulation.
One of the most popular subfloor structures is the log structure. It is easy to place rolled insulating material in the space between the beams, which will significantly reduce heat loss.
- Leveling the base for the floor covering.
It is difficult to create a beautiful floor on uneven surfaces. This is solved with wood-based boards or plywood.
- Increase in the bearing capacity of the floor.
A high-quality and reliable base will allow you to use any floor coverings without regard to their strength.
There are several sub-floor options. The main difference between them is the material. The floor can be a time-tested concrete screed. It is a good choice for high humidity environments. The concrete base is suitable for a bathroom in the house, a shower cabin or a bath.
If you need to prepare a flat base for linoleum, laminate or other material that is not very durable, it is enough to make a simple subfloor from plywood or OSB boards. It cannot boast of good thermal protection, therefore it is more suitable for non-residential premises.
Advice... The best choice for the living area of the house is a subfloor over timber beams. This is a great option that is equally suitable for any room in a wooden house and not only.
Design features
Beams () are at the base of the floor on wooden joists. These are beams made of wood or polymer materials, laid parallel to each other, which serve as a support for the sheet material. This is one of the most common options for creating a sub-floor.
It is distinguished by:
- sufficient ease of installation;
- low material cost;
- a significant increase in the strength of the floor;
- even load distribution;
- easy installation of thermal insulation and noise protection.
It should be noted the versatility of this type of subfloor. Logs can be laid on the ground, wooden or concrete surfaces, of course, in all cases it is important to ensure maximum protection of the tree from moisture. The result of a properly performed work will be a dry, ventilated subfloor, which will have a positive effect on the characteristics of the floor and the structure as a whole.
Material selection
The reliability and durability of the floor directly depends on the quality of the material used. This primarily applies to beams. For their manufacture, you will need a bar with a cross section of 50 x 50 mm or a board with a thickness of at least 50 mm and a width of 150 mm. The exact parameters are selected individually for each specific project.
An important part of the floor on the joists is the cranial bars - slats of a small section (approximately 20 x 30 mm), which are attached to the beam along its length and serve to lay the material that supports the thermal insulation. As such, OSB boards or plywood are most often used.
The beams and boards for subfloors must have sufficient strength and be resistant to decay. The structures are made of coniferous wood. Beams can be any available wood, pine is the most common option.
In addition to the timber, you will need sheet material to create a substrate for the floor covering, roll waterproofing, an antiseptic for impregnating wood and a heat insulator (mineral wool).
Floor on logs
Any home craftsman can make a reliable and durable subfloor in a wooden house with his own hands. This is not a very difficult business, but in order to achieve the desired result, you will have to work hard. The work itself can be roughly divided into two major stages. The first is the preparation and fastening of the logs, the second is the cutting and laying of sheet material.
Fastening
The first thing to do before starting work is to sketch out a floor plan and calculate the amount of material. It is necessary to count the number of beams and multiply by the length. In this case, it is important to choose the right laying step. It is calculated individually and depends on the area of the room, the material that will be used in the second stage, its thickness and mechanical strength.
Advice... The device of a sub-floor with insulation has its own specifics. When choosing a lag step, it is worth stopping at its standard value, namely 55–58 cm. This is due to the fact that the width of a standard sheet of mineral wool is 60 cm.
Before starting the installation, it is necessary to soak the beams with an antiseptic. Professionals recommend processing wood in two stages, which will provide maximum protection to the wood, and therefore the durability of the structure as a whole. If the ends of the lag will lie on the foundation, it is imperative to lay two layers of roofing material or a modern analogue between the tree and concrete.
You will need metal holders to attach the beams to the wall. Several of their modifications are on sale, it will not be difficult to choose the best option for each specific case. The fasteners are easy to install and guarantee high floor reliability and durability.
When mounting logs, it is important to ensure that their top faces lie in the same plane. For control, you can use a long, even rail to make sure the surface is horizontal, you will need a building level. It is not difficult to correct a slight misalignment; an adjusting pad must be placed under the sagging beam. It should be made of metal or plastic (the wood will soon sag, which will cause the floors to creak).
Mounting
Using a screwdriver or an electric drill with a nozzle, cranial bars are screwed on the lower edge of the lag. Their task is to support plywood or wood board, which will serve as a support for the mineral wool. The sheet material is cut, focusing on the step of the beams. Plank trims can be used instead of slabs.
Advice... When cutting sheets for laying in the space between the logs, you do not need to strive for perfect accuracy, on the contrary, it is better to cut the blanks 1–2 cm narrower. This compensates for the possible curvature of the beams themselves, and the cracks are easy to seal with polyurethane foam.
The assembled frame is covered with a vapor barrier. You can buy an expensive membrane-type roll material or limit yourself to cheap plastic wrap. In any case, the insulation must be reliable. The film is fixed with a construction stapler, the joints are glued with tape.
Lay the first layer of cotton wool. If the standard step is chosen during the installation of the lag, there will be no problems. If necessary, cotton wool is lightly tamped around the edges so that it fills the entire interior space. Then the second layer is laid. It is important to offset by half or a third of the sheet.
The thickness of the insulation is chosen based on the local climatic conditions. For the middle strip, 10 cm is enough, for the north of the country - at least 15 cm. Waterproofing is laid on top of the top layer. On the beams, it is additionally fixed with a stapler, the joints must be sealed with tape.
A rail 20-30 mm thick is stuffed on top of the lag, it will provide good ventilation of the finished floor, protect it from mold. The warm subfloor is almost complete. It remains only to lay the boards of the final floor or sheet material, which will serve as the basis for carpet, linoleum, laminate.
In order for the new floor to fully meet expectations, it is necessary to initially determine the purpose of the room and the type of floor covering, the width and thickness of the beams and their step depend on its parameters. For the most part, a sub-floor using OSB board or plywood seems to be optimal. The technology of working with the material is not particularly complicated, and the result is an even and reliable coating.
It is really easy to work with sheet material, but to avoid mistakes, it is worth adhering to a few simple recommendations:
- regardless of the purpose of the room, use only waterproof plates;
- the joints should go along the lags;
- sheets must be laid not end-to-end, but with gaps of 2-3 mm between them and at least 5 mm from the wall, subsequently the joints are filled with foam;
- for fixing the plates, it is necessary to use self-tapping screws for wood, the length of which is at least one and a half times the thickness of the plate.
You shouldn't try to save on material. It is important not to forget that the reliability of a product is made up of the quality of parts and components plus good work. To make subfloors well in a wooden house, you need to soberly assess your strengths.
Yes, this is not the most difficult thing, but you definitely cannot do without the initial skills of a builder and the ability to work with material. Perhaps it is worth hiring a specialist, at least not to be afraid to ask for advice.
 Spelling the suffixes of different parts of speech
 Higher professional education
 Rebus in Russian