How to make a multilevel stretch ceiling. Multilevel stretch ceilings: types of profiles, advantages. Tools and materials
You can find many stories on the Internet about how people assembled multi-tiered ceilings with tension structures with their own hands. Installation of such a ceiling is not an easy undertaking, the process requires preparation and experience, but this is also possible.
The options will differ in the complexity of the design, the number of tiers and design. You can, for example, make level ceilings, very simple with the usual geometry in two tiers, where the stretch canvas will be the basis of the ceiling. But they also make designs in three levels with complex curvilinear elements, interweaving of colors, etc.

Modern multi-level stretch ceilings:
- Assumes a rich color palette;
- Differ in texture;
- Provide an opportunity to use high-quality photo printing;
- They involve the use of dense and translucent textures in one design, etc.
The number of levels in theory can be infinite - and these levels can be mounted at any angle, and these are cones, and arches, and dunes.
What are the advantages of multi-level stretch ceilings
The first and foremost advantage is the perfect design. This is not from the category of "simple and modest", such a ceiling is a self-sufficient interior element.
And there are enough other advantages:
- Such a structure can be erected in rooms with any functional load - living room, bedroom, kitchen, bathroom, swimming pool, sauna, loggia, etc.
- perfectly masks all defects of the base ceiling.
- In the inter-ceiling space, it is really possible to hide the communication system, they attract the eye too much, which makes the interior seem somehow unfinished, careless.
- Several levels of the ceiling are always additional thermal insulation and sound insulation.
- According to fire safety standards, such a ceiling also has no complaints, the ceiling is hardly flammable.
- The canvas is strong enough, like the plasterboard sheathing, the service life of the structure is quite long, from 15 years.
- The design requires minimal cleaning - just wipe the surface with a slightly damp cloth.

Multilevel ceilings are so good that by correctly distributing the location of the levels, playing with the color of the tiers and, of course, lighting, you can successfully zone the room. Ready-made standard sketches can be found on the Internet, or you can create it yourself.
Profile for multi-level stretch ceilings: why you need it
It is worth understanding here - you need two profiles, more precisely, two types of profile. One is for attaching a tension cloth, the second is for creating a metal frame, which will be sheathed with plasterboard.
For a stretch ceiling, they usually use:
- Or an aluminum profile (baguette). It is a highly rigid construction that guarantees a reliable and durable fastening, perfectly holds the corner when notching.
- Or a plastic baguette. It is a versatile profile that can be combined with any type of ceiling harpoon. And its lower locking part geometrically practically repeats the aluminum version.

Types of profiles for stretching fabric:
- Universal. It is designed to work with curved and volumetric structures.
- Ceiling. Fastens the canvas along the edges directly to the surface of the base ceiling, used if there is no access to the walls.
- Wall. It is necessary for fastening the tension cloth along the perimeter of the room to the wall.
Sometimes they use separate profiles - if, for example, the area of the room is very large, more than 60 squares. But the corner profile is closer to this topic, since it participates in the creation of multi-level ceiling structures, the corner connection of canvases.
Installation of multi-level stretch ceilings: what it consists of
Almost any process of installing a ceiling structure begins with marking. Around the perimeter of the room, mark the level of the lower tier. The lower tier is drywall. Mark with a water level / laser level.

- A UD profile is attached along the perimeter of the entire room, the fixing step will be no more than 300 mm.
- After that, the border of the box is marked from the side of the center of the room. The UD profile is attached along the marked line, with the same step - 300 mm.
- Next, you cut and fasten vertical posts and horizontal strips along the inside of the box. The spacing between the posts will be no more than 20 cm. The material used is a CD-profile. All interplane connections are made with special self-tapping screws for metal.
The frame is complete. This is a plan for installing a multi-level ceiling, where the stretch ceiling is taken out to the upper tiers, which is more common.
Installation of a multi-level ceiling: what's next
The process of creating a layered structure continues the wiring process. If you put lamps in a stretch canvas, you need to mount platforms under them.
After that, the frame is sewn up with plasterboard, the edges from adjacent slabs will fall on one profile. One drywall sheet will require about 100 self-tapping screws.

- The surface is primed, irregularities are putty, the seams are bandaged with a special tape;
- After re-priming, the entire surface is putty with a finishing putty, you need to putty twice with a very thin layer, after that - again the primer;
- Next, holes are cut for the lamps, drywall is painted (better - with acrylic or silicone water emulsion);
- The installation of the tensioning fabric is carried out last, first, a baguette is attached to the inner vertical surface of the box;
- The air warms up to at least 40 degrees, the film is attached from the corner, during installation, the temperature should warm up to 60 degrees;
- Insert the harpoon with a spatula into the baguette until it snaps into place;
- After the ceiling has cooled down, it will become as even as possible, then holes for the lamps will be cut through it and the lamps will be installed directly.
In fact, this is how the work ends. Plasterboard tiers can be made with your own hands, and to install a tension cloth, special devices are required, the same heat gun, therefore it is more often installed by specialists.
The material on how to install the stretch ceiling curtain yourself may also be useful:
Design of a three-level stretch ceiling
Multilevel ceilings decorate the interior by themselves. And today, not only illumination can favorably emphasize the three-level structure - this is also done by the play of color, the use of fashionable shades, and the use of interesting shapes of the ceiling figures. Flower, sun, cloud, pyramids, drops, etc.

Very often there are decorative cornices on such a ceiling, as well as stucco elements.
If this is a combined room, for example, a kitchen + a living room, three ceiling levels help a lot to zone the room. Highlighting the cooking area + dining room, sofa area, etc.
If the ceilings in the apartment are high, you can combine the ceiling zoning with a podium device, for example.
Installation of multi-level stretch ceilings (video)
It is not for nothing that multilevel ceilings have so many fans: they are modern, not pretentious, if they have not overdone the design, are durable and work well as a connecting link in the interior.
Good luck with the repair!
Design of a multi-level stretch ceiling (interior photo)


Modern technologies make it possible to create unique finishing materials for walls, floors and ceilings. Multilevel structures are becoming an increasingly popular option for decorating ceiling spaces around the world.
You will learn about the pros and cons of multi-level ceilings in this article.


Peculiarities
Plasterboard suspended structures are used for arranging the ceiling space and its zoning. You can designate the border of a particular zone in different ways - with color, level difference, lighting contrast.
As a rule, multi-level structures are used to create a spectacular and original interior. They look good in spacious rooms in which the usual ceiling is simply lost. Multi-level structures mean two- and three-level plasterboard ceilings.
To create such a ceiling, one or two levels are additionally built along its perimeter, which may have niches, ledges, curly edges. Based on the design style, the ceiling cornice comes with beveled edges, round or rectangular.


Drywall, like any other material, has its drawbacks:
- the installation of a multi-level ceiling reduces the height of the room by at least 40 mm, therefore, such structures are usually installed in spacious rooms;
- drywall is not intended to come into contact with water. Even the so-called moisture-resistant (green) drywall only tolerates high humidity in the air, but direct contact with water is contraindicated for it;
- the duration of the installation of a plasterboard ceiling depends on the complexity of the structure and can take from several hours to several days;
- drywall is a "dusty" material, when working with which be prepared for a lot of dirt and waste.


Views
Plasterboard ceiling structures are of several types. The simplest - basic ones - include single-level ceilings. Two- and three-level structures are considered varieties of complex ceilings.
Each type has its own advantages. For example, a single-level design is suitable for decorating a ceiling space in a small room. Often, it is single-level ceilings that are used in the form of a frame for installing the second tier.
Regardless of the type of suspended structure, a profile made of durable material is always used as a base. Most often, the frame is made of aluminum, wood or metal-plastic. The resulting frame is sheathed with plasterboard, and lighting fixtures are installed.


When installing a multi-level ceiling, you should know that the area of the new level will always be less than the previous one.
Unlike single-level ceilings, the installation of multi-level ceilings is more difficult. This is due to the figurality of the base, the manufacture and installation of which is much more difficult than installing a single-level ceiling.

Simple multi-level structures, in turn, are divided into the following subspecies:
- framework... Their appearance is a two- or three-level figured box located along the entire perimeter of the ceiling. As a rule, built-in lighting equipment and even utilities can easily fit in such a suspended box. Often, the design of three-level ceilings is complemented by an LED strip located along the inner walls of the box;
- diagonal... In this case, the new "floor" is placed diagonally from opposite corners. It is worth noting that the division visually can be different in area, depending on the design idea. The shape of the levels can also be curly or wavy;


- three-level structures differ from two-level only in the number of suspended layers. Moreover, the more there are, the stronger the foundation should be. Different levels are painted in different colors or decorate the border between them. Of course, equipping a multi-level ceiling is much more difficult than a simple one. The biggest difficulty for the installer lies in drawing lines, along which curly and wavy levels will subsequently be built. That is why it is better to entrust the installation of a multi-level ceiling to experienced specialists who know exactly how to bring the designer's idea to life;
- zonal... Such ceilings mean dividing a room into several parts. For example, to the work area and the recreation area.


Design
The stylistic design of the ceiling space must fully comply with the design of the room. The ceiling will always be in sight and therefore is the most important part of the interior of the room.
This or that ceiling design allows you to achieve a certain effect: to increase the space, divide the room into parts, create a pleasant atmosphere in the room.


The use of spotlights is widely popular when decorating multi-level ceilings. With this type of lighting, you can visually increase the parameters of the room, hide flaws. Using a pendant chandelier, you can combine the space, but spotlights, on the contrary, will help to "divide" the room into several zones.
A multi-level ceiling is often complemented with an LED strip. The illuminated ceiling will look especially impressive in the living room or corridor.


Designers offer unique solutions for multi-level structures - this is backlit hanging figures... If the size of the room allows, then you can combine different types of lamps, different in brightness and light. This approach to the design of the ceiling allows you to delimit the space and is often used for zoning a room.
When creating a multi-level ceiling, different colors are almost always used to paint the levels. The main task is to choose such shades that will be in harmony with each other, without getting out of the general style of the room. In addition, the ceiling should not irritate or draw attention to itself. It is best to use neutral shades - beige, white, pink, light brown.
The combination of stretch and false ceilings is quite common., due to which the methods of original design of the ceiling space are significantly increased.


Recently, in the design of a multi-level ceiling such original solutions as "starry sky" or photo printing are used.
"Starry sky" is obtained by installing the structure of the main luminaire made of optical fiber above the canvas. Such a ceiling will look great in the bedroom or in the children's room..
Photo printing on canvas implies the application of an image using special technologies. Often, a stretch canvas with photo printing is used to decorate certain areas of the ceiling structure. The choice of drawing largely depends on the main theme of the room, the degree of illumination, and the interior.


The most popular are floral motives, geometric shapes, abstract drawings.
Today manufacturers offer an ultramodern novelty - 3D ceilings... Perfectly rendered three-dimensional effect allows you to embody any, even the most creative idea into reality.
It is worth noting that light shades in photo printing make the room spacious, while the dark areas seem to conceal the height of the room. However, a well-designed dark pattern can be a highlight of a room.
Using photo printing allows you to carry out the most complex design projects and make the ceiling truly unique.


Another popular type of multi-level ceiling design is fiber optic cable application, the placement of which in a certain order allows you to create delightful ornaments and patterns. This design is called light painting and opens up endless possibilities for interior decoration.

To extend the life of a multi-level ceiling, it is important to know the rules for caring for it. It is enough to wipe the ceiling from time to time with a dry, clean cloth with soft bristles. If too much dust has accumulated, the surface can be vacuumed.
Because drywall does not tolerate moisture well, it is not recommended to wash it, otherwise, the material may swell and deteriorate. If the dirt is too ingrained in the coating, you can rub the stain with a slightly damp cloth dipped in water or a special tool.
Old stains are the hardest to remove. In some cases, you can get rid of dirt only with a new coat of paint.
Remember that streaks and stains are easy on light ceilings, so keep the cloth or cleaning brush clean.

Beautiful examples in the interior
In addition to all the advantages described above, plus multi-level ceilings is that they look equally good in the bedroom, living room, kitchen and even the hallway.
- Kitchen a multi-level plasterboard ceiling requires additional protection from moisture. It is best to paint it with waterproof enamel or cover the surface with PVC film. If the size of the kitchen allows, you can use gypsum cardboard partially, for example, only above the dining table.


- Living room- the most popular place for installing drywall suspended structures. Two- and three-level ceilings will be a real highlight of any interior. It can be a classic version, a luxurious Empire style, a delicate Provence - you choose! Modern designers often decorate the ceiling in a loft-style hall, diluting the ceiling space with plasterboard beams. For an Art Nouveau room, it is better to choose the option of a multi-level structure with straight, clear lines.


- For false ceilings in the bedroom soft, flowing shapes and gentle tones are preferred. It is appropriate to use unobtrusive images - stars, sky, floating clouds, abstract drawings. Glowing fiber optics or fluorescent patterns can help create a romantic atmosphere in the bedroom. It is better to refuse variegated colors, bulky structures, bright or too dark patterns - such ceilings will interfere with rest.
/ What are multilevel ceilings made of and what do they look like?
What are multilevel ceilings made of and what do they look like?
A lot of attention is always paid to the ceilings in the apartment. It is only at first glance that it seems that no one is looking at them. In fact, the ceiling attracts attention as soon as a person enters the room. To make this surface spectacular, you can build multi-level ceilings that will not only attract the attention of your guests, but also serve as a decoration for the room.
What is it and how it looks
This design can have several different incarnations and, accordingly, different design features. There are simple structures, and the network is very complex, the construction of which will take more than one day. The most popular are:
- Three-tier solutions. In them, the planes are located at three different levels. It is very difficult to assemble such a structure, and more often than not, the installation of such ceilings is trusted by professional finishers, without trying to make them yourself.
- A curb or one small plane around the entire perimeter of the room is the most common version of such designs. It is easy to make and installation does not require a complex tool or special technical skills. You can do everything yourself.
- Complex geometric shapes in one or two planes, occupying only part of the ceiling surface. Such figures can be made both independently, and you can contact the masters if the conceived composition is quite complex.
They look very impressive and much more interesting than standard flat solutions on one level. Several examples of what multilevel ceilings look like are shown in the photo below.


What are they made of?
Most often, such compositions are collected from plasterboard sheets. This is a very convenient material for creating any volumetric structures. The ceilings assembled from gypsum plasterboard have already become a kind of classic renovation.
It is this material that is best suited for the independent construction of several planes at different levels. It is easy to work with it, and the price of simple structures will be very low. A few examples of what simple ones might look like are shown in a few photos below.


However, more complex designs can be made, which can cost significantly more. True, and they look much more spectacular. In addition, they are often supplemented with built-in lighting, which will further decorate the ceiling and, at the same time, can be a functional element - it can be used as an option for night lighting.

When the price of plasterboard finishing becomes quite high, you can think about using other materials that are no worse than plasterboard suitable for such work, but are somewhat more expensive. Drywall is not the only option for such a finish; you can easily order stretch ceilings at different levels. At the same time, the most interesting thing in such solutions is that a composition of several planes will not cost much more than an ordinary one-tier one.

They are assembled in a similar way to plasterboard solutions - for each individual element, a frame is installed, on which the outer covering of textile or PVC film is stretched. How such will blow up in the interior can be seen in the photos below.


The last option for the execution of such solutions will be combined ceilings. They can use several types of surfaces at the same time, which are combined with each other. More often than others, there are combinations of gypsum boards and stretch coatings. This symbiosis turned out to be very successful - on the one hand, there is a solid matte surface finished with plasterboard, and on the other, a perfectly even stretch coating.


Advantages and positive aspects
Several levels will give the rooms a visual dimension. They, contrary to popular belief, can be installed even in not the highest rooms. The main thing is to correctly plan the entire structure and not overdo it with the amount of volumetric parts.
The appearance has become the most important advantage of such ceilings. They are much more attractive than standard planes without any frills. In addition, the presence of several tiers will allow you to hide all engineering communications that were previously in sight. If necessary, you can cover the air duct system from the air conditioner or heater.
Any shape can be created on the ceiling. There are no limitations, and the only thing that can get in the way is a lack of imagination. In such a situation, the Internet will save - there are tens of thousands of design options for floor planes that can be implemented at home.
Backlighting will not only decorate your home, but also become a completely functional design element, if you apply a little imagination and desire. You can highlight with light individual parts of the structure or tiers of the ceiling.
Zoning of large or not too large rooms can be carried out not only by various designs of walls or floors, but also by delimiting pieces of furniture. Ceiling volumes can also be used for this. At the same time, the floor area remains free and no additional furnishings are needed.

The multi-level plasterboard ceiling is a suspended finish structure, the metal frame, which holds the weight of all this, is also mounted on several levels.
The surest option is to install the first level of drywall, and on top of it the second level of CD-profiles is attached. The main thing is to observe one single rule - not to combine seams of several levels in one plane. That is why it is more convenient to make ceilings with curved lines and shapes - the new level will not repeat them anyway.
The first layer of drywall is fixed in the usual way - along the guide profiles and the crate. The metal profiles themselves can be fixed rigidly to the rough ceiling or held on to metal belts, and also around the perimeter (just on self-tapping screws).
Both the one and the other option are quite good, but installation on the main ceiling is not always reasonable (for example, if it is not even).
In total, multi-tiered plasterboard ceilings are mounted as follows:
- first, the main layer of drywall is made in the usual way;
- then you need to make a new frame for the second level, initially setting the shape of the boxes;
- further - new levels are gradually attached to the desired height. All lighting and electrical (wiring) will be hidden in the box itself.
Diy three-level plasterboard ceiling: installation
You can use an example to consider the process of installing a three-level plasterboard ceiling with your own hands. Moreover, the last layer will be "floating", that is, without attachment to the walls. Multi-tiered are made in the same way as a three-tiered one, only taking into account the static weight of the structure. Accordingly, for the first level, you need to make an extremely strong frame that can withstand not only static, but also dynamic load (so that the ceiling does not collapse during flooding from the neighbors above, for example).
So, the structure is created as follows:
- First, the main lathing is made of aluminum profiles.
- The first layer of drywall is attached to the crate and is rigidly connected at the seams with self-tapping fleas.
- Next, a new profile is laid on the first level drywall. The rigidity of the structure will ensure perimeter mounting.
- Then the device is closed with the same plasterboard box, leveled at the desired height.
- The last stage is a soaring plasterboard level, which is attached in the same way, except that closed CD profiles are used. The form is free.

In a similar way, tiered stretch ceilings are mounted, but instead of sheets of drywall, a film is used. Backlighting is done last, that is, when the base of the ceiling is ready.
What is a floating plasterboard ceiling?
Diy multilevel plasterboard ceilings with lighting
A multi-level ceiling, in contrast to a single continuous layer, has a so-called deflection index. And it should be taken into account. Accordingly, the installation of one level on the second is made only rigid, without any ties or suspensions that cannot withstand a mass of over 10 kilograms.
To create tiered ceilings, use the appropriate classification profile CD, D, CW, UW and the like. Only in this way the structure can easily withstand even high humidity in the apartment (drywall, like a sponge, absorbs even moisture floating in the air).

As for the backlight, it is generally recommended to hide the controller and the power supply under the LED strips and lamps in a separate niche made in the wall. The wiring is laid in any convenient way, but preferably not through the profile. Otherwise, if the wire burns out, you will have to disassemble almost the entire ceiling and remove the layer of plaster.
The material on the use of multi-level ceilings in the interior will also be useful:
On average, the maximum possible load level of the ceiling is:
- 100 kilograms to the first level (room 3 by 3 meters on average);
- 60 kilograms - for the second;
- 30 kilograms - for the third.
These are limiting values. But the less, the better.
Multilevel plasterboard streams (video)
In total, it is not difficult to make a multi-level ceiling with your own hands. The only difficulty is creating a sketch along which the drywall sheets will be placed, as well as cutting them. To create curly bends, it is better to use a jigsaw, and handle all the cuts with fine grain sandpaper.
Multilevel plasterboard ceiling backlit (photo)


Multilevel stretch ceilings
Contact the company "MDV-Group" to order multilevel stretch ceilings with the required design. Unlike the installation of complex structures made of plasterboard and painting, stretch canvases located in several levels give the desired effect without excessive spending. You can create a designer ceiling in your cottage or apartment by inviting measurers for this and ordering the installation of a multi-level ceiling.
Installation of multi-level stretch ceilings
In the company "MDV-Group" you can order the installation of multi-level canvases made of fabric, satin, PVC film. By choosing the right materials and combining various design solutions with each other, you can get multi-level stretch ceilings of impeccable quality. In different cases, it is appropriate to use different solutions: simple and complex shapes, solid and translucent layers, with backlighting or with the effect of a starry sky, plain or with a texture (including the effect of photo printing).
Installing such a ceiling is a rather difficult process and should not be trusted by non-professionals. Employees of "MDV-Group" have at their disposal the tools and materials that are necessary for installation.
Depending on what technology is used and how many levels are involved, editing can take up to several hours. The price of multilevel stretch ceilings also depends on additional services that you can order from our employees. For you, we will install the backlight, create the effect of the firmament, apply a photo print, paint the initially white canvas in the desired shade.
Pros of multilevel ceilings
Unlike standard single-level structures, such a ceiling has several advantages, it opens up more freedom of action when decorating the interior. Usually multilevel stretch ceilings are ordered to:
- completely transform the room, update its appearance;
- to zone the space and place accents on objects;
- create a complex and impressive aesthetic composition.
You can contact the company "MDV-Group" to place an order for such a ceiling. We will preliminarily take measurements, draw up and agree on a project with you. We will offer several solutions to choose from, so that you settle on the one that suits you in terms of price and in terms of the final result. Our team works professionally, uses different materials, offers additional services. The order is completed on a turnkey basis, that is, you do not need to contact other contractors.
Installed multi-level stretch ceilings are subject to a safety certificate and a production quality guarantee. Contact "MDV-Group" and place your order - we will create for you not just a ceiling, but a real work of art.
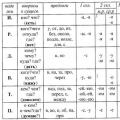 Spelling the suffixes of different parts of speech
 Higher professional education
 Rebus in Russian