How to make a homemade jigsaw. Homemade jigsaw - design and manufacture at home. The lightest product
Many people know from childhood the fun of sawing with a jigsaw. The technology is simple. But despite the seeming ease and simplicity of work, you can get very beautiful lace made of wood or plastic. This is a very slow process that requires perseverance and patience. To facilitate labor, jigsaw machines were developed. They are functionally divided into two groups: with manual and electric drive.
Muscle-driven jigsaw device
Homemade machine is easy to make. You can find many drawings of this plywood product. With a jigsaw, with your own hands and with an improvised tool, a simple but functional device is assembled in a short time.
The scope of jigsaws is extensive. They are used for cutting figured products from a variety of materials. And also machines are needed when cutting lumber. In this case, the outer contour of the workpiece remains intact. If you use various nail files, then a homemade jigsaw will perfectly process natural wood, plywood, chipboard, plastic, metal, in particular aluminum.
Examples of drawings of a do-it-yourself jigsaw machine, which works on muscle strength, have been repeatedly cited in various magazines of the Soviet era.
Nail files for such a jigsaw machine are produced in the form of a flat blade.
The main parts of the machine:
- Stanina (A).
- A working table with a slot for a saw (B).
- Large drive pulley acting as a flywheel (D).
- Small drive pulley. The drive is combined with a crank mechanism (D).
- Levers (B).
- A pedal that spins the flywheel through the crank assembly (E).
- Saw Tension Unit (G).
The master, constantly pressing the pedal with his foot, spins the flywheel. Through the belt, the movement of the flywheel is transmitted to the second pulley. Which, in turn, makes the crank mechanism with the saw blade move.
If the flywheel is correctly balanced, without distortions and with a uniform, correctly selected mass, then the nail file achieves good smoothness. Such a plywood sawing machine allows you to quickly produce many simple similar products. Cutting time and effort is significantly reduced.
With this design of the machine, the size of the initial workpiece is limited. It depends on the length of the levers (B). When the pattern becomes more complex, it is necessary to rotate the product around the saw.
Since the foot drive does not provide a completely uniform stroke and limits the freedom and imagination of the master, most often such machines are replaced with electric ones.
The design of the electric jigsaw
An electric tape jigsaw is a household universal device for making souvenirs, furniture, and various interior items. There are many options for the manufacture of such machines. But the main elements on which product quality and ease of use depend are the electric motor and the blade of the blade.
Main structural elements:
- Saw blade.
- Crank mechanism.
- Drive part.
- Tape tensioner.
- Bed or desktop.
- Various accessories.
Device and principle of operation
Alteration from a manual jigsaw
 The first step is to make a desktop for the mechanism. For these purposes, a metal sheet or thick plywood is suitable. Holes are drilled and cut out in the worksheet for the cutting tape and fasteners.
Then the jigsaw table is placed on a regular table. After fixing, you can assemble the guide rails. To reduce vibration, it is enough to cut the rubber gasket of the desired size and place it between the jigsaw table and the main surface.
The above design is convenient in that it can be easily disassembled, and it can be used again as a manual jigsaw.
Since the standard apparatus has springs that tension the saw, a rocker is needed. One end of the rocker arm is attached to the cutting element of the machine, and the other is under spring tension. These simple actions will easily turn an ordinary jigsaw into a machine.
When using the device, it is important not to forget to turn off the pendulum stroke before starting cutting.
Sewing machine assembly
 From a sewing machine, you can also quickly and easily assemble a homemade jigsaw machine. Moreover, this device has an interesting feature - a nail file stroke regulator, since there is a speed switch on sewing machines.
First, at the bottom of the machine, you need to find the thread weaving knot. To do this, unscrew a few screws. Inside, the cotter pin is knocked out and the drive shaft is removed, which is connected to the weaving complex. After completing this procedure, the top panel is unscrewed. The groove along which the needle traveled expands slightly to fit the saw blade. The nail files themselves are slightly shortened to the size of the length of the needle. To fix the saw itself, you can make an adapter. But the easiest way is to grind off the upper part of the cutting blade and sharpen the lower one. After that, you can insert the nail file in place of the needle and get to work.
When working with jigsaws of any type, you should not forget about the safety rules. Do not leave the device turned on for a long time unattended.
If the master has long hair, then it is better to pick it up or use a special cap. It is better to roll up sleeves on clothes. The room must be well ventilated. In the room where carpentry work takes place, a first aid kit with first aid for cuts must be kept.
A jigsaw machine is a high-precision equipment designed for processing workpieces of varying complexity, made from different materials. To choose the right device, you need to study its design and familiarize yourself with some useful recommendations.

Basically, the einhell jigsaw, like its competitors, is used for the following purposes:
- Processing of complex contours from blanks;
- Cuts on the inner surfaces of the material, without affecting the outer contours;
- Furniture manufacturing;
- Manufacture of musical instruments;
- Creation of all kinds of blanks based on wood.
In addition to wood, even an assembled do-it-yourself jigsaw machine is able to work on plastic, ceramics, plexiglass, polycarbonate and a number of other materials. But still, the main material that jigsaws have to deal with is wood. Makita machines do an excellent job with this task.
Design

Studying the wmss 11 01 jigsaw kraton machine or its competitors represented by Makita, Bosch, Excalibur in order to assemble such a device with your own hands, we can say that structurally they all look about the same.
If you decide to make a homemade jigsaw machine, equip it with a CNC module in the future, then it is better to start manufacturing by studying the design of factory models.
The main structural elements of the machine are:
- Desktop;
- Electric drive;
- KShM (crank mechanism);
- Sawing tool;
- Tension mechanism;
- Auxiliary elements;
- CNC module.
If we take for example such machines as Makita, Proxxon, Dewalt, Hegner, Holzstar, Excalibur, DKS 502 Vario, Dremel or WMSS 11 03, they will be structurally close to each other. But the estimated price is from 6-10 thousand rubles. Therefore, the choice must be based on technical parameters and your personal needs.
- The working table is used to place the workpieces to be processed. A number of machines are offered with rotary mechanisms for the table, which allows the operator to change the angle of inclination as needed, to perform inclined processing of parts. When performing a homemade jigsaw, you should think about grading to simplify marking. The size of the workpiece with which you can work depends on the size of the table. Therefore, base the choice on what materials you have to deal with. A standard table has a length limit of up to 30-40 cm.
- The drive differs in power. Manufacturers such as Makita, Hegner, Dremel, Dewalt, WMSS 11 03, Proxxon, Holzstar, Excalibur, DKS 502 Vario offer a wide range of machines, each of which has different drive powers, nuances of the CNC module, etc.
- KShM. This mechanism transfers the torque from the electric drive to the saw of the machine. The vertical movement of the file can be 3-5 mm at a speed of up to 1000 oscillations per 1 minute. Some machines, including Makita, Excalibur, WMSS 11 03, Dremel, Dewalt, Hegner, Holzstar, DKS 502 Vario, are equipped with a sawing frequency adjustment function. This allows you to adapt the machine to the specific type of material being cut.
- File. With a length of 20-35 cm, it is able to cut a workpiece with a thickness of 10 cm. Saws differ in size and materials of manufacture. The choice is based on the density and characteristics of the materials to be cut.
- Tension device. Due to it, the file receives the necessary tension at working points. Depending on the model, the device is based on springs or springs.
- Auxiliary elements are primarily a dust extractor. If you decide to make a homemade jigsaw machine, we recommend that you provide this functionality. It can be organized using a conventional vacuum cleaner.
An ordinary electric jigsaw is sometimes quite capable of replacing a jigsaw-type machine. The jigsaw is not a stationary unit, but a hand tool. At the same time, the jigsaw has a wide range of applications. For domestic needs, it can be enough with the head. If, however, for work in a workshop, garage or in production, maximum cutting accuracy is required, then instead of a jigsaw it is better to purchase a full-fledged machine. Better yet, CNC. The CNC module will provide process automation. Through the CNC, the necessary programs are set, the machine independently processes the workpieces according to the specified algorithm.
A jigsaw cannot have a CNC, since it belongs to the category of a hand-held power tool. A stationary unit is in many ways better, because often the choice falls in its direction. This is evidenced by numerous customer reviews of Makita, Proxxon, Dremel, Hegner, Dewalt, Excalibur, Holzstar, WMSS 11 03, DKS 502 Vario, etc.
Criterias of choice
When such machines as Makita, Dremel, Holzstar, Dewalt, Proxxon, Hegner, DKS 502 Vario, WMSS 11 03 are on the market, the choice is complicated by the wide range. To make your choice a bit easier, think carefully about your machine requirements.
Based on them, you can understand whether the scheppach deco flex jigsaw is right for you, or maybe even prefer a homemade jigsaw.
- Power. Dewalt, Hegner, Makita, Proxxon, Dremel, WMSS 11 03 equipment is offered in various designs - from household to professional. The choice in favor of professional devices with modern CNC should be done by specialists who regularly operate the equipment. The power of such devices is from 1 kW. The power parameters of household models from Dewalt, Proxxon, Makita, Hegner, Dremel are in the range of 500-950 watts. Power affects the depth of cut and the duration of non-stop operation. You should choose a more powerful model, even for domestic use, because they have a margin of durability.
- Weight. The more powerful the selected Dremel, Dewalt, Makita, Proxxon, Hegner or WMSS 11 03 unit is, the more weight it will have. Since this is not a hand tool, it is important to take weighty devices. They form less vibrations, providing the necessary quality of processing.
- Speed. Here the speed is measured in strokes per minute. Most machine tools from Makita, Proxxon, Hegner, Dremel firms, the frequency is in the range of 0-3500 units. Industrial models provide increased travel speeds for high precision machining.
- Personal feelings. When choosing a machine, be sure to try it out. So you will understand how comfortable it will be to deal with him.
- Stroke frequency adjustment. Modern machines Dremel, Proxxon, Makita, Hegner, Dewalt necessarily include the possibility of adjustment in the list of available functions. Only the range of adjustments for each model is different. Rely on the materials to be cut. The more diverse the blanks are planned, the wider the range of settings. In this regard, CNC models are convenient. They are adjusted to a specific material, which allows you to practically not take part in operations during the cut. This is the main advantage of CNC, for which many are willing to pay a lot of money.
Before you make a jigsaw machine with your own hands, based on drawings and videos, or purchase Makita, Proxxon products or a WMSS 11 03 machine, carefully consider your actions.
Homemade units are good in places, but they are far from the level of Makita machines. Makita has a very good reputation. Many units from Makita receive numerous positive reviews, laudatory criticism from experts. Yes, in addition to Makit, there are a number of other companies on the market that we talked about.
You choose whether it will be a machine from Makita, or decide to cut blanks on Proxxon, Bosch machines. For some, it’s even easier to make a device with your own hands than to pay for, of course, a high-quality Makita product.
Recently, I have been very interested in cutting out with a jigsaw, I don’t even know why it would be. It all started with the fact that I needed to cut a few gears out of plywood...
And off we go. At first I sawed the gears by hand, then I thought, pumping a muscle with a manual jigsaw is certainly good, but if you automate the process, it will be much faster!
So, for starters, get acquainted, this is a manual jigsaw for artistic sawing.
(all photos in this article were found on the Internet)
To cut, you need files, they are thin like wire, with sharp teeth. Previously, such files were sold in a pack of 50 pieces. Recently I went to the store, so these "bimesmen" began to sell them individually. During the evening, you can break a couple of pieces of such files.
For sawing, we also need a special table, it can be a board with a conical slot, screwed to the table with screws or a clamp.
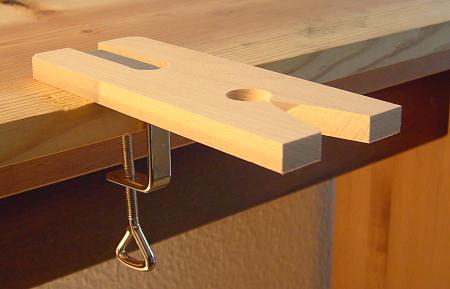
For the convenience of attaching files to the machine, it is better to use a special device that will compress the contour of the jigsaw, so you can easily change the file without effort. With the help of a wooden eccentric, compression occurs.

And now about automation. In the next photo you see a factory-type desktop jigsaw; on the Internet you can find a sea of various modifications. This thing is not very expensive, but even if I really want it in my city, I can’t find it, and in principle, there’s nothing to it. 
Industrial machines are certainly good, but I will probably use them for a couple of months and abandon this occupation, and in general, such a machine, as I found out, can be easily assembled by myself from plywood and wooden blocks.

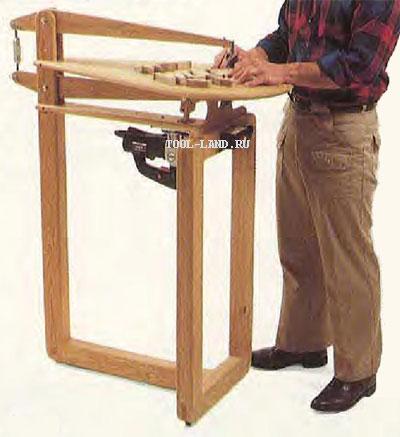

The next photo uses an industrial manual jigsaw and a spring to return the file.

So, we can easily assemble a desktop jigsaw with our own hands at home. I personally did this, but I have a special design, there are no photos of me in this article, but I will definitely post it, as well as a video in work.
After several unsuccessful attempts to cut out complex shapes with an electric jigsaw, I decided to make a homemade desktop jigsaw from the drawings from the network. It will be very easy to cut complex shapes of small sizes from light materials on it.
To assemble a jigsaw machine with your own hands from a jigsaw, you will need:
- electric jigsaw
- plywood sheet and boards for support
- screws for wood
- bolts with nuts
Tools: drill, sandpaper, clamp, tape measure.
Step 1: Cut out the lid and base


Draw two rectangles 250x300 mm on a sheet of plywood and cut them out with a jigsaw. These rectangles will be the base and top of your machine. Carefully sand the surfaces of the rectangles with sandpaper, especially the one that will be the lid.
Step 2: Making the Front Racks


Show 4 more images


Measure the height of the jigsaw from the sole to the handle so that the jigsaw fits in the box of the machine, the racks must be greater than this distance. My jigsaw is 18 cm high, so I made 20 cm long posts from the board. Then I squeezed two pieces together with a clamp and sawed off 5 mm from them on both sides so that both posts were the same height.
Now the racks can be screwed to the base. To prevent the wood from cracking, you must first drill holes for the screws and countersink them.
Step 3: Attach the jigsaw to the lid


Show 7 more images


- Remove the sole from the jigsaw using the supplied hex. There is already one hole in the lid, you have three more holes to drill so that there is a mounting hole in each corner.
- In the central part of the plywood cover, mark the place where you will fix the sole of the jigsaw, and the hole for the jigsaw blade.
- Now you can drill four holes in the plywood, countersinking them with a spade bit so that the screw heads are flush with the surface. It remains to make a hole for the saw.
- Now put the sole back on the skis of the jigsaw, and attach the plywood cover to the sole so that the file goes into the hole intended for it.
- Insert a washer into the expansion of each mounting hole, insert bolts into the holes and tighten them on the other side with nuts. Turning the bolts was a little tricky, so I fixed the head of each bolt with a flathead screwdriver, and twisted the other side with a wrench.
Step 4: Install the jigsaw on the base


Lower the lid with a jigsaw onto the base with uprights and fix it on top with screws, having previously drilled holes for them. Be sure to countersink these holes so that the wood does not crack when screwing. The jigsaw should not touch the base and should have a good grip on the lid. Therefore, the screw heads must be flush with the surface of the cover, otherwise they will unwind during the operation of the jigsaw.
From the remnants of the board, I made an additional two rear racks, so the machine became much more stable.
Step 5: Finishing the Machine

At this stage, the machine is quite functional, it is enough just to fix it with a clamp on the tabletop and you can work.
I identified two features of my jigsaw machine:
- the canvas walked a little to the sides, especially when working at high speeds.
- the width of the blade was greater than that of standard electric jigsaw files, which left much to be desired in cutting particularly thin holes.
Step 6: Decrease the Canvas Width


A smaller blade will allow you to cut through thin curves and make it easier to cut rounded corners.
- Extend the file to the maximum, do not forget to turn off the jigsaw from the network.
- Mark the point where the blade comes out of the housing. Below this point, nothing needs to be removed.
- Remove the file from the jigsaw and grind the blade to the desired width on the grinder. While grinding, dip the file in cool water so that it does not overheat, otherwise the metal will lose its hardness, and the file will no longer be able to cut through anything. A change in color is a sign of overheating of the metal.
- When you get the desired blade width, put the file back into the jigsaw.
Step 7: Making a File Guide


The guide will not allow the blade to walk to the sides during cutting, especially at high speeds.
I made the guide out of a small strip of PVC plastic. At one end of the strip, use a jigsaw to make a small cut at an angle to the middle of the strip. We fix the strip behind the file by screwing it to a wooden L-shaped part mounted on the cover of your machine. The guide can be lubricated with oil for better movement.
Remember:
- The guide should never be higher than the blade at the lowest point of the blade path.
- The guide limits the size of the material you are about to cut due to its height and the attachment point on the surface. Therefore, it is better to fix the guide as high as possible (considering the previous remark), and as far as possible from the canvas, with a bias to the side, as soon as possible.
Step 8: Conclusion


With a little effort, you get an almost real desktop jigsaw. Of course, it will not replace a real machine, but given its zero cost, it is an excellent option.
I didn’t want to put my expensive Makitovsky jigsaw on the table all the time, so I decided to buy another one to create a table. I very successfully turned up a jigsaw in the store "Our House" Caliber LEM-610E for only 862r. Included: wood file, side stop, vacuum cleaner adapter, spare brushes for the motor.
There was an outlet next to the display case and I looked at it in operation. Quite decently made, convenient, there is an adjustment of speed with a wheel, the inclusion is fixed with a button. The saw holder moves clearly without backlash.
It’s very fortunate that I was able to twist it in my hands before buying it, I wouldn’t risk ordering it from the Vseinstrumenty.ru website without knowing what it is. (Although the reviews about it are good) By the way, it costs more there and also pays for delivery ... so I successfully bought it in Our House. :)
Despite the advantages, he has a number of shortcomings that he saw on closer examination:
1) The file does not fit into the file holder. Apparently this is a copy of the marriage, but I did not waste my time on the exchange. Each saw has to be sharpened. (Although on the second jigsaw I won’t be able to use them after turning - it doesn’t matter, they are relatively inexpensive)
2) And this drawback can be seen even in the picture. The canvas is tilted strongly forward. (This was also corrected by placing tin strips under the back of the sole, achieving 90 o.
3) The speed control wheel turns hard, not very clearly and with jamming. At the minimum speed value, the tool cannot start at all (However, the same garbage with the start-up of my other "caliber" drills. This is unpleasant, but does not spoil life much)
As always, everything is in the spirit of minimalism. I did not make a separate switch. It is quite conveniently turned on with a standard button and fixed.
To do this, I bought a bracket in KrepMarket (this is a fastener from some kind of iron structure system)
By the way, I love CrepeMarket. Any screws, nuts, screws, fasteners. Every time I design something, I wander there in thought and collect the necessary details for myself.
The excess was cut and trimmed.
Back view. Now the distance between the bearings has a fixed file clearance of 1.2mm. I have a plan for the future: make a gap adjustment.
For thin materials can be omitted below.
As an experiment, I drew an asterisk and tried to cut it out evenly
For a 130mm file, the maximum possible thickness is 5cm. It turns out that there are very long files, I recently saw a 300mm file on the market
Sawed off a 1.5mm slice from a 40x40mm bar
Which is what I did. Now it can cut long workpieces with a width of 11.5 cm. The old L-shaped design also remained, and if more strength of the holder is needed, it can be installed again, although the new design has remained quite strong and reliable.
I also came up with the idea of making a knife out of an old blunt file, grinding off its teeth and sharpening it.
 |
They can figuratively cut material like a sealant. The cut is even. Much better than a utility knife. Pictured is a mouse pad.
Well, perhaps that's all. The table turned out to be reliable and comfortable. Now I have a tool on which I can do finer work than on a circular.
 Respiratory gymnastics in music classes in a dow methodological development on the topic Health-saving technologies in a dow in music classes
 VKontakte: history, success, well-known and little-known facts Unusual facts vk
 Master class "Application of non-traditional forms of health-saving technologies in the musical activities of the dow, in the context of the federal state educational institution"