Installing a shower tray in the country with your own hands. Installation of an acrylic shower tray. The set of materials includes
Installing a shower tray is the first step to installing a shower enclosure. Read how to install a semi-circular acrylic shower base. It's easier than you think!
Installing a shower tray with your own hands is not difficult if you skillfully choose a model that matches the place in which the installation will be performed. When buying a pallet, you should choose the one that is easiest to install. First of all, we are talking about the height of the pallet and the location of the hole for the water drain. See where the sewer entrance is in the bathroom, and at what height. You can connect a low pallet if the entrance to the sewer is very low, directly above the floor or even in the floor. If the entrance is slightly higher, choose a higher one, because only then it will be possible to ensure the reduction of the pipe from the siphon into the sewer.
The second question is the location of the drain on the bathroom floor. Contrary to popular belief, the small distance between the drain of the pallet and the entrance to the sewer does not facilitate the connection, because it is difficult to fit the siphon and bend the pipe. It is better that the drain is a little further, so that there is a place for making a connection to the sewer.
The third question is the choice of the siphon itself, which, as a rule, must be purchased separately. Choose the lowest siphon, especially if you plan on installing a low siphon.
Preparing a place in the bathroom
Walls and floors must be tiled before installing the pallet. Be sure to make sure that waterproofing is done under the tiles. This will prevent flooding of neighbors or adjacent premises. The entrance to the sewer with a diameter of 50 mm must be located.
Assembly and installation

1. Attach the legs to the bottom of the pallet as shown in the photo. Measure the panel height in advance and set the required leg length so that the panel fits under the pallet. Do not remove the protective layer from the pallet to avoid scratching it.
2. After installing the legs, check the horizontal plane with a building level. Apply the bubble level from different sides - along the sides of the pallet, and diagonally.


3. Screw on the side panel brackets.
4. Place the drip tray in the corner of the bathroom, and check it level again. Adjust the feet again if necessary. Try on if the side panel fits, do a trial panel installation, and then remove it.


5. Use a pencil to mark the drain on the floor. At this point, you will install a siphon.
6. Connect the lower part of the siphon with a flexible pipe to the sewer drain. Usually, the drain in the sewer pipe has a diameter of 50 mm, the same diameter is the pipe. Remember to observe the slope towards the drain.


7. If the tube is too long, cut off the end with a metal saw. Smooth the edges after cutting with a knife or sandpaper. To facilitate connection, grease the ends of the sewer pipes and gaskets with dishwashing liquid.
8. Carefully place the gasket on the bottom of the siphon.


9. Install the pallet in the desired location as shown in the photo. You can apply silicone or assembly glue and thus glue the pallet to the wall. Some models may have mounting brackets, which must be screwed to the wall with wall plugs.
10. Insert the upper part of the siphon into the drain hole and connect it to the lower part previously connected to the sewer. Remember to install the gaskets correctly (this depends on the type of siphon). Be careful not to damage the gaskets. Insert the rest of the siphon and the top cover. Now you can remove the protective film from the pallet.


11. Fill the siphon with water and check if water is sucked well into the drain. If the floor remains dry, installation can be continued.
12. Glue the feet to the floor to keep the pallet from moving during use. Apply silicone with a pistol around the legs and rub with your finger.


13. Press down on the side panel latches.
14. Wipe dry and tape securely to the edges against the walls and the edges of the side panel against the walls and floor.


15. Fill the gap with silicone. Squeeze the silicone out of the gun along the entire length of the crack, then smooth out the seam with a rubber trowel or finger.
16. Peel off the molar tape immediately while the silicone is still wet.

17. Do not use the shower tray within 24 hours until the silicone is dry. Then you can mount the cab.
How to choose a pallet
It does not take up much space, which will allow you to make a functional interior even from the smallest room. In the shower stall, one of the important elements is the pallet. Below we will advise what to look for when choosing.
The form
Available in square, rectangular or semicircular (quadrant based). For a small bathroom, angular - semicircular or square models are better suited. For a spacious bathroom, a rectangular tray is suitable, in which we gain freedom of movement. It is better for the appearance of the selected model to refer to the nature of the rest of the elements in the bathroom, this will create a coherent whole with them.
The size
The common sizes of square and quarter shower trays are 80x80 cm, 90x90 cm, 100x100 cm. It should be noted that in the case of identical quarter shower trays, their radius is essential. Most often they are with a radius of 45 cm, 50 cm and 55 cm.When choosing a rectangular model, models with a size of 100 × 80 or 120 × 80 are available.
The selection of the size depends on the space that we can allocate in the bathroom.
Depth
Another aspect in this regard is the choice between shallow (low) and deep pallets. Low, look more modern and elegant. Moreover, their use visually enlarges the bathroom space. They are suitable for use by the elderly who have difficulty crossing high thresholds.
Deciding on the choice of a deep model, we acquire, in particular, the possibility of bathing a small child or soaking a wash.
With or without seat
On the one hand, his presence takes up space, which can be unpleasant with daily shower use, on the other hand, on the seat, you can sit or put soap and shampoo on it.
Siphon
The last element is the selection of a siphon. Depending on the diameter of the outlet, we have a large siphon - diameter 90 mm or a small one - diameter 50 mm.
From which material to choose a pallet
The selection is not limited to the well-known cheap acrylics. There are many materials available on the market, each with its own strengths and weaknesses.
Acrylic - popular and affordable
Pros: Lightweight, smooth, warm to the touch, and durable. Their installation is not difficult. Small scratches or chips can be easily hidden on acrylic using ready-made care kits (paste and sandpaper) or repairs (liquid acrylic and hardener). Acrylic pallets also have decorative qualities - they are available in various shapes and colors.
Cons: Poor quality acrylic can quickly turn dull and yellow. In order for it to retain its original appearance for a long time, it cannot be cleaned with detergents containing abrasive substances - use only polishing agents to care for them.
Enamelled steel - strong but prone to chipping
Pros: Fairly durable, scratch-resistant, and relatively inexpensive. Easy to keep clean - the enamel surface can be washed safely with any type of chemical agent.
Cons: Enamelled steel is prone to chipping. Tin trays are cool in contact with your feet and are quite loud when a jet of water hits their surface. Luckily, you can install a special rubber mat that will iron out both.
Ceramic - durable, heavy, expensive
Pros: More stable and durable than acrylic pallets. They do not need a frame for their installation - they are attached directly to the base. They are resistant to damage, have a stylish, elegant look and are easy to keep clean.
Cons: much heavier (a 90 × 90 cm pallet weighs 33-46 kg) than acrylic or steel, several times more expensive than acrylic counterparts.
From a conglomerate (artificial stone) - style has a price
Pros: They are made from 80% marble, 20% plastics, resins and dyes. At first glance, this type of connection is indistinguishable from natural marble. The pallet is durable, resistant to chips, scratches, temperature changes and chemicals. They are warm and smooth, bacteria and fungi do not develop on the surface.
Cons: price - shower trays made of conglomerate are significantly more expensive than acrylic, steel or ceramic.
Stone - luxurious granite and marble
Pros: luxurious stone shower trays, elegant and pleasant to the touch, resistant to mechanical stress and dirt. Suppresses water shocks and builds up heat.
Cons: high price. In addition, when cleaning stone shower trays (especially marble), you should pay attention to the alkali content of the cleaning agent, as this can lead to discoloration. Shower trays of this type are slippery, so a rubber mat is needed to minimize the risk of falling. Absorbent stones require frequent polishing and constant soaking.
How to make a shower tray with your own hands
If none of the listed types of material suits you, you can make a shower tray with your own hands from ceramic tiles. There are even ready-made kits on the market that contain the necessary elements.
Now you know in what sequence the installation of a shower tray with your own hands is done, as well as what forms and materials there are from which they are made.
For long-term operation of the shower enclosure, the shower tray must be correctly installed. The technology for performing work must be accompanied by competent installation of all structural details. In this article, we will describe the features of installing a shower tray in accordance with the rules and recommendations of specialists.
Types of pallets
The shower room is a great addition to the bathroom, which saves space in the room. The method of installing the shower tray must be installed in a safe manner. Installation options depend on the type of pallets and the technology of fastening to a specific material. However, it is important to remember that not all pallets can be installed independently, and in some cases, you need to seek help from specialists.

Shower trays differ according to the type of material from which they are made. So, the following types of structures are distinguished:
- cast iron products;
- pallets made of marble and ceramics;
- steel products;
- acrylic pallets.
The most durable and reliable marble products are considered, however, their cost is quite high, so not everyone can afford such an acquisition. Ceramic pallets are also expensive and have excellent decorative properties, but are too susceptible to damage.
An affordable option is the installation of a shower tray made of acrylic materials. For the installation of the structure, it is necessary to build a special frame that would support the pallet, because such products tend to bend under the weight. The kit includes special fixing legs, as well as reinforcement parts, which ensure the strength and reliability of future installation. For example, cast iron pallets are the cheapest among other types of products. The peculiarity of such pallets is their durability and reliability, which is indicated by the material used.

Pallet installation aspects
The cost of a shower stall depends on the variety of functionality of the product. For example, a shower room with hydromassage, telephone, lighting and other effects will have a high cost. In this case, it is important to take into account the payment to workers for the installation of the entire structure. It is easiest to install acrylic or steel products with your own hands.
During the do-it-yourself installation process, it is important to remember about leveling the shower surface for the vertical position of the legs. The assembly technology of the structure can be seen in the instructions for the product. They indicate the features of installing a product made of plastic or metal, and also describe tips for connecting the sewer system to a shower stall. Pallets can be installed on plastic support elements that can be replaced with bricks.
It's important to know! To insulate the shower tray, as well as to seal all the voids, it is necessary to use polyurethane foam in the work. However, this method can complicate dismantling or repair work. To check the correct installation of shower trays, you need to get into it with extreme caution, after which you will determine the stability and reliability of the structure.

Do-it-yourself installation of an acrylic pallet: features of the work
The main disadvantage of acrylic products is the lack of support under the central part of the pallet. Thus, the surface can be damaged by careless movement. This will cause the unit to malfunction and damage the human body as a result of the splinter.
Therefore, it is important to follow the sequence when installing the acrylic pallet.
Preparatory work
During renovation work in the bathroom, special attention is paid to connecting the sewer system and water supply. The shower cabin needs to be connected to several systems, which are water supply and drainage, as well as electricity wiring. At the same time, the last part must have high resistance to moisture and water.
To install a shower tray for showers, you need to purchase high-quality pipes and other products in order to avoid leakage in the future. After installing all communication systems for the bathroom, it is important to check everything carefully, especially the water supply and the work of the sewer. All pipe openings are closed with temporary plugs at the time of installation work.
Installation process
It is important to align all pallets during installation strictly vertically. This is due to the need for proper drainage into the sewer system, only under the condition of ideally even installation of the product in a horizontal position. This will prevent the formation of puddles in the shower stall. To install the pallet, it is important to make a flat base of tiles or ceramics.
In order to properly mount the pallet, you need to fix the central part of the product, while the horizontal structure should not be disturbed. To simplify the work, a contour is drawn around the entire perimeter of the pallet in order to establish the exact position of the product. After that, you can start connecting sewer pipes and other elements.
Strengthening the shower tray
For the strength of the installation of shower trays, it is necessary to measure the distance between the product and the floor. In the beginning, it is important to leave space for the drain so that the drain pipes can be cleaned or replaced later. Bricks or steel pipes can become additional parts of the support, depending on the design parameters.
Rubber is placed on top of pipes or bricks, after which the supports must be firmly pushed under the base of the acrylic pallet. After that, you can connect the communication systems.

Detailed instructions for installing shower trays
Before proceeding with the installation work, you need to prepare the necessary tool. For installation, you will need the following materials:
- FUM tape;
- sealant or special glue;
- double on the sewer network;
- if the kit does not include a siphon, then you need to buy it at any plumbing store.
1. The pallet with legs must be leveled horizontally. For this, the legs are separately unscrewed and fixed in special locking screws. If you purchased a booth without supports, then you need to fill the floor with cement mortar. The level of the base must correspond to the position of the bathroom floor. After that, they begin the installation work and do the finishing, using ceramic tiles or other products.
2. It is important to fix the pallet from the side of the wall with the use of adhesives. Joints and attachment points must be additionally sealed with sealant. All work must be carried out carefully to avoid further infiltration of water between the wall and the structure. A double is attached to the sewer system; in the presence of other types of connection, a tee is installed.
3. All parts and joints of the pallet must be carefully sealed to avoid water leakage and destruction of the pallet.

4. It is important to install the pallet above the level of the sewer pipes. This is necessary for further access to communication items for their repair or dismantling in case of breakdown or damage.
5. Finally, it is necessary to check all attachment points. Also check the water supply and drainage. If there is a leak in some areas, it is important to tighten all connections more thoroughly. If necessary, additional insulation is carried out.
Features of installing other types of pallets
The pallet for a cheap cab can be installed in a variety of ways, for example, on a brick base, on plastic supports or a metal frame. The technology for carrying out work depends on the characteristics of the product and the materials from which it is made.
For a ceramic pallet, there is no need to install supports or other racks, because the structure is mounted directly on a flat floor. There will be no mounting clearance in this case, therefore it is important to lay all communication systems with high quality and professionalism. To carry out repair work or to replace sewer parts, it will be necessary to dismantle the pallet. Answering the question: how to install a shower tray without ceramic legs, you need to attach the product with glue or cement mixture for tiles. Last but not least, a drain hole is installed.

For the installation of steel or cast iron products, you need to use more reliable support elements, which are bricks. Initially, the boundaries of the pallet are set on the floor. After that, a cement mortar is prepared and brickwork is made. The height of the masonry must correspond to the parameters of the pallet and have the same shape. The pallet must not be in contact with the floor in order to be able to install a communication system.
After three days, after the cement mortar has dried, a pallet must be installed. On top of the masonry, you need to apply a layer of cement, then attach the product and level it horizontally. A hose must be attached to the drain system. Tiles, decorative panels, mosaics and other finishes are used as facing materials. This is necessary to complete the established structure.
Unlike installing a low shower tray, other products need to use a metal or plastic frame, which makes the DIY installation process simple. The process of performing the work consists in leveling the legs, installing the pallet and fixing the drain hole.
At the end of the installation, it is necessary to check the stability of the structure. If the pallet wobbles or binds, then additional support elements need to be made as brickwork or attaching steel pipes.

DIY pallet making process
It is quite possible to install a pallet with your own hands without buying similar products in plumbing stores. The main thing is to adhere to the rules and detailed instructions for performing the work. The shape of the base for the shower stall can be different, you can also use different materials for finishing, creating your own design of the structure. The work process has the following sequence:
1. First, we mark the place of the drain and the installation of the drain system. We cover the surface of the base under the shower tray with a waterproofing layer, and the height of the wall covering should be 30 cm.
2. A brick barrier is installed along the perimeter of the structure, the height of which should be more than 5 cm above the position of the drain hole. Next, the screed is poured, which should be 6 cm below the drain point.
3. After the screed and brickwork have hardened, the barrier is covered with a layer of insulation. Pouring adhesives or cement mortar is carried out with a slight slope towards the drain system. The technology for applying the mixture starts from the edge and shifts to the center. It is important that there are no steep angles of inclination, as this forms significant and sloppy transitions.
4. At the end of the work, the surface is finished with different materials, for example, ceramic tiles, mosaics and other products at the discretion of the owners.

Features of installing the sides for the shower tray
After determining the features of installing the shower tray, the video of which is presented at the end of the article, you can proceed to the construction of the sides. If the pallet has a large height, then it is necessary to build one or more steps for the shower stall. Masonry can be made of bricks with the installation of formwork, however, the type of material used does not matter, because the surface will be covered with tiles.
After laying the steps and removing the formwork, it is important to cover the surface of the sides with a primer and a layer of waterproofing. After that, the processed and properly erected structure can be covered with finishing materials. It is important that the shade and type of finish match the look of the shower enclosure and the style of the bathroom. It is important to tile the walls behind the pallet, unless they are finished with waterproof materials. As a tile adhesive, you need to choose waterproof products without the addition of silicone, as it darkens over time and spoils the appearance of the shower stall.

To equip a shower cabin in an apartment, it is better to seek help from specialists. This will allow you to correctly distribute the load on the base, as well as lay all communication systems. It is easier to install such a structure in a private house or in a country house, where there is no danger of flooding the lower floors of the house. In the process of performing work, it is important to fasten all parts and elements firmly and reliably in order to extend the life of the shower tray.
Renovation in the house is always perceived positively only at the first stage, when everything conceived is brought to life on paper. When the stage of the direct editing process comes, there are many disputes, disagreements and pitfalls that simply no one knew about.
In this article, we will describe in detail the process of repairing a bathroom, or rather, installing a shower stall on a "brick pillow".
Shower cabin made of scrap materials
As you know, the price of a ready-made shower cabin sold in a store can vary greatly, this is due to various factors. For example, some devices are more modern, they have more electronics, others use cheap materials, and some are completely non-standard.
The choice is large enough, it is extremely difficult to find something worthy at an affordable price, so we suggest not to get hung up on finished products. Let's better make a shower cabin ourselves, save money, and at the same time work with our hands.
The very first thing you should pay attention to is the shape of the pallet:
- Rectangular.
- Semicircular.
- Pentahedral.
As for the materials from which pallets are made, the choice is quite diverse:
- Cast iron- the most expensive, but at the same time, the most durable and durable. They are considered the heaviest by weight, so a reliable base is required for them. On the other hand, the supports can be placed around the perimeter, leaving the central part hanging.
- Steel pallets are slightly inferior in strength and durability, but they are also more affordable in terms of cost. There is one drawback, steel makes noise when exposed to water, therefore it is necessary to use a special noise muffler under the pallet.
- Acrylic- the most diverse in shape, but the least durable. Under the weight of an adult, such a pallet will easily bend, and with increased load, it will crack altogether. Therefore, the pallets are installed with an additional support made of metal parts.

Note! You can make a brick shower tray with your own hands, but it must be tiled with ceramic tiles. Firstly, it is better from the aesthetic point of view, and secondly, the tactile contact with the brick cannot be called pleasant.
Now let's select one of the above pallets to describe the installation process using it as an example. Let's give preference to the most durable and reliable - cast iron option.
Additional materials
To install a shower cabin with our own hands, we need:
- Plumbing elements: siphon, hoses, valve, rubber rings, fum tape, shower head.
- A silicone sealant is also useful.
- The preparation of the solution requires cement, sand and a plasticizer.
- Building bricks (for example).

- It is better to use tiles for decoration.
As for the tools, you need to purchase:
- Building level (laser device).
- Roulette.
- Putty knife.
- Master OK.
- Mallet.
- Sealant gun.
Room preparation
Important! If the bathroom is being repaired in a country house, then be sure to make sure that the pipeline is initially located correctly. For this, the drain is installed in the floor, in any part of the room. It is better to install pipes with cold and hot water supply in the wall so as not to spend money on additional finishing during repairs.
- The first step is to vacate the room, dismantle the old flooring and cut off all the old plumbing fixtures.
- Measure the working area and calculate the amount of building materials.
- Prepare a cement-sand mortar using water and a plasticizer.
- Level the walls and floor using mortar or filler. You can skip this stage, but, you must admit, in a smoother room and repairs are easier to do, at least finishing materials are easier to fix.
Installing the base
Below will be described instructions, from which you will learn in detail how the pallet is attached to the bricks:
- After the floor is leveled, it is necessary to mark the boundaries of the cast-iron pallet on it.
- The masonry grout can now be kneaded.
- The next step is to apply a few strokes of cement to the floor using a trowel.
- Put a brick on them, lightly drag it around the mortar. The final position of the material must coincide strictly with the line of the pallet.
- Then hit the brick several times with a mallet in order to press it as best as possible to the floor.
Note! The thickness of the seam for masonry can vary, it all depends on where it is carried out. In this case, 5-7 mm is enough to maintain strength.
- Put the second brick, perpendicular to the first, to make a letter "G".
- Lay out as many bricks as necessary so that the pallet does not touch the floor surface and there is room for a drain hose.

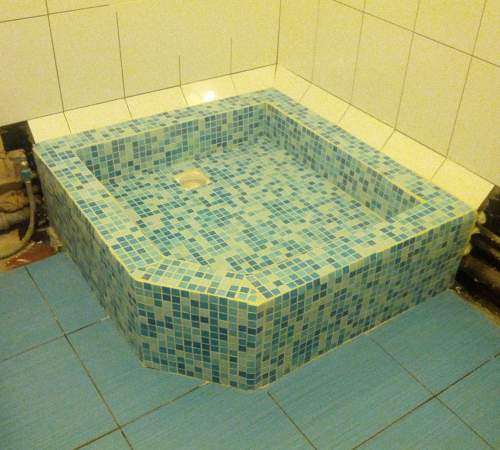
In the photo - under the pallet there is not only a drain, but also a water supply
- Do the same in all other corners, observing the drawn line of the pallet.

- While the solution is drying, you can mount the plumbing elements.
- After waiting a certain amount of time (at least 2-3 days), you can proceed to the direct installation of the pallet.
- Before you put the cast iron product on the bricks, you need to apply a cement mortar to them.
- After putting the pallet down, you should press it well and check with a building level whether the horizontal plane is observed.

- If all is well, you can connect the drain hose to the drain hole of the pan.
The next stage is finishing. Since we took tiles as a basis, we only need two things: plastic crosses to install them between the tiles, and grout for the joints. And in the desired color. Here, in fact, the shower cabin is ready, it remains only to hang the curtain from the ceiling so that the spray does not fly in all directions.
Acrylic pallet
A cast iron product is still expensive, not everyone can afford it, so let's briefly consider the process of installing a more flexible and elastic material - acrylic.
- It is best to use a metal frame to support the central part of the pallet. It can be welded from 20x20 mm corners.
- As for the brickwork, you can save a little money and purchase a double silicate brick M 150.

- They should also be installed in the corners.
- The welded metal frame is attached between the brickwork to the floor using dowel nails.
- To prevent the metal from rubbing the acrylic surface, an insulating material must be used. The most affordable thing that can be found in the materials at hand is ordinary rubber, which is glued directly to the metal.
Important! Pallet joints (even cast iron, even acrylic) should be treated with silicone sealant. If you think this option is not very aesthetic, then you can use plastic decorative corners, which are fixed with glue or sealant.

As you can see, a do-it-yourself brick shower stall is quite accessible, even for people not associated with construction and repair. The main thing is to do everything as the professionals advise, then the result will delight you longer.
Output
Brickwork is not afraid of high humidity, it is important to isolate other elements from direct contact with water. For example, the drain hose can be the main source of excess moisture.
If it is installed without the appropriate materials (fum tape and rubber rings), then there is a high probability of leakage, as a result of which water will accumulate under the sump. And this is an excellent breeding ground for harmful microorganisms.
The shower cubicle is a great alternative to the traditional cast iron bathtub. It is great for a small combined bathroom, allowing you to save a lot of space, as well as for taking water procedures in the country. The main element of the cab is the pallet. The service life and comfort depend on it. It is important to install the base correctly, in compliance with special requirements. You can cope with such a task with your own hands by following a few simple steps. The installation procedure depends on the material of manufacture and the coating of the bathroom.
Types of shower trays
Before purchasing a shower tray, it is important to choose a specific sample that will meet all the necessary requirements. Such products differ from each other in the material of manufacture, installation method and cost.
The most popular today are pallets made of the following materials:
- sheet metal;
- cast iron;
- acrylic;
- ceramics.
Metal products are distinguished by their availability and excellent durability. The inner surface is coated with abrasion-resistant enamel, which increases the service life. The main disadvantage is the significant noise that water droplets will make when falling. This problem is especially relevant for large families, since getting up early with a shower will interfere with the rest of the neighbors.
The most popular among consumers are acrylic bases due to their low cost and a wide variety of products. Modern technologies allow you to give plastic to any shape. It is difficult to call a pallet absolutely silent, but in comparison with sheet metal, the discomfort rates are much lower. Among the shortcomings, the low strength is noted, since under heavy load the product can lose its shape or crack.

The most expensive model is cast iron. It is distinguished by good indicators of strength, noiselessness and reliability. The heavy weight requires a solid base and support during installation. The main disadvantage of cast iron is its low thermal conductivity. It heats up for a long time without additional heating. That is why in the first few minutes of taking a shower, your feet will have to experience slight discomfort.

A less popular material is ceramics. In all respects, such pallets occupy an average position. Sufficient strength, lack of noise and affordable cost make them a good option when choosing a product in terms of price and quality.

The list of distinguishing characteristics includes the size of the walls, the geometry and the location of the drain hole. Large sides, more than 20 centimeters high, minimize the possibility of overflow and leakage in the pallet. However, they can become an obstacle for the elderly or children. For installation, the shape and place for the drain are of great importance. Therefore, you will have to devote some time to the correct placement of the pallet in the bathroom, so as not to carry out unnecessary pipes and not to hammer the walls.
Step-by-step instructions for installing a pallet
Professional builders most often use three main methods of installing a shower tray. They differ in the type of base on which the product is installed. The choice will depend on the floor in the bathroom, on the materials from which the product is created. Concrete or tile floors are ideal. The wooden structure will require additional reinforcement.
Installation on a foundation made of foam concrete blocks
Foamed concrete blocks are used as the basis for the future pallet, which are placed at all corners of the frame. If necessary, they can be replaced with bricks. The list of necessary tools will include a building level, tile adhesive, a sealant bottle with a gun, a trowel, a hacksaw, a tape measure, a pencil, a corrugated hose and a siphon for organizing a sewer system.

It is necessary to put the pallet so that the sewer hole is covered by the plane of the product, and the drain is located as close as possible. Having chosen the right place for placement, you should trace the contours of the product with a pencil or marker. 4 rectangles with a height of no more than 10 centimeters are cut out of foam concrete. The floor in the room must be clean and level. Pre-prepared tile adhesive is applied to one of the edges of the support, and then attached along the perimeter of the contour.
It is important to secure all blocks perfectly evenly using a building level and a trowel.
Pieces of foam concrete placed in the corners will serve as beacons for the foundation. Using a hacksaw, cut out rectangular strips, apply glue and fill in all the gaps, forming an even square along the contour of the pallet. Remember to use the level and constantly check the ideal horizon.
The foundation will take several hours to fully harden. At this time, it is worth taking up the sewer system and installing the siphon. The hole for the drain is located next to the sewer, adjusting it with a corrugated hose. The siphon is assembled in accordance with the instructions, special attention is paid to the tightness of all joints and the correct installation of the O-rings. The resulting base is coated with a thin layer of tile glue, no more than 1 centimeter thick.
Before fixing the pallet to the foundation, mount the assembled drainage system. After the glue has completely hardened, it will be very problematic to remove the product without damage. Therefore, it is especially important to immediately set the ideal level.
The processing of the joints between the pallet and the wall requires close attention. Poor sealing will result in nasty black streaks around the shower stall and harmful mold. Experts recommend a special plumbing compound that is elastic and quick-hardening.

The final stage will be the process of facing the foundation. For this, tiles and decorative aluminum corners are used to hide the cut points.
Product on factory metal legs
Most modern products are equipped with metal legs made at the factory. This installation method is much faster and less expensive. If you act in accordance with the detailed instructions that are included in each box, the shower cabin will be absolutely stable and will last for more than one year.

The fixation points of the legs are specially marked and are distinguished by the influx of more material to give strength. The bases are fastened to the pallet on the floor, with the obligatory use of the building level. After installation, proceed with the installation of the drain system. A siphon must be supplied with the shower stall. If not, there is a wide variety of similar devices in the plumbing store. A sales assistant will help you make the right choice.

Assembling the siphon will require precision and meticulousness. All connections must be airtight and prevent water leaks. It will be impossible to correct the flaws after the end of the installation. You will need to completely disassemble the structure and do all the operations again. Supplied with side braces for maximum stability. They are fixed with self-tapping screws, so you will have to use a drill. Professionals advise not to drill holes at the joints of the tiles, as this will cause cracks.
Do not use the drill in punching mode, as shock loading will break the ceramic.
After the pallet is installed and connected to the drain system, the attachment points to the wall are treated with plumbing sealant. To make the layer perfectly even and uniform over the entire surface, use a construction gun. It will take 12 to 30 hours to completely dry the composition.
Styrofoam base
Some manufacturers in the delivery set include blanks for stands made of durable polystyrene foam. Such structures are very low, easy to install and will serve as an excellent basis for a future shower cabin.

Due to the presence of transverse cuts, the polystyrene strips break easily, allowing you to form a foundation to the desired size. Having turned over the structure, it is necessary to outline the places for fastening the stiffeners and the drain hole. Plastic legs are screwed into the pre-prepared nests, which will ensure maximum stability of the entire system. By adjusting the height, a minimum clearance between the stand and the floor is achieved. The building level will help to cope with this task.
The structure is installed on the floor in such a way that the siphon is located directly under the opening. The contour is outlined with a pencil or marker, both from the outside and from the inside. Fastening will be carried out using polyurethane foam, which is applied over the entire surface of the marking.

The stand is carefully installed on the circuit, the siphon and the drain hole are checked for compliance. Having degreased the surface and cleaned the pallet from dust and moisture, it is fixed to the plastic base with polyurethane foam and pressed tightly. For greater reliability, use heavy objects. It will take up to 24 hours for the tiles to fully cure.

At the final stage of work, all joints are coated with plumbing sealant, guided by the general rules. Like the base of foam concrete, the plastic contour is lined with tiles or decorative mosaics. By planning the height of the shower stall pedestal in advance, you can choose the right size of the cladding and avoid unpleasant trim marks.
The choice of how to install the shower tray depends on the area of the bathroom, the material of the product itself and the strength of the base. By following all the steps in the instructions, it is easy to create a solid and reliable foundation for the cabin with your own hands.
A shower tray today is not something unusual, as it was at the end of the last century. Until the beginning of the 1980s, mass construction offered new settlers 1 m 50 cm long cast iron bathtubs, a breakthrough was the appearance of 1 m 70 cm bathtubs. The appearance of shower enclosures with glass doors of a matte surface texture installed on them became a perfect squeak of fashion. Today, many users are interested in how to install a shower tray with their own hands.


Peculiarities
Modern plumbing stores offer a great variety of showers, corners, separate pallets and curtain doors.
They differ in:
- depth;
- form;
- material of manufacture;
- frame.


- additional attachments;
- devices;
- built-in ventilation;
- lighting;
- radio systems.


The operation of any shower cabin is impossible without a shower tray. The installation of any cabin begins with this part. The service life and quality of the entire structure directly depend on the correct installation, drain connection, rigidity. The design is not always arranged in such a way that curtain doors can be mounted on the sides.


Depending on the height and shape, these plumbing products can be overhead (built into a base-foundation made for them) or frame (installed on a prefabricated metal frame). For frame models, you can almost always find suitable curtains. They are usually straight or semicircular. For a flat shower tray, you must also select the appropriate shower.


Materials (edit)
Pallets are made from different materials. Let's get acquainted with their features.


Metallic
Pallets made of carbon steel of different grades are called steel. The susceptibility to corrosion directly depends on the steel grade. If there are chips of enamel on such a pallet, rust spots are observed in the place of defects and around them. With prolonged use of a damaged product, corrosion can lead to a through hole through which water will seep into the foundation and gradually destroy it.


Steel pallets are made by stamping, therefore, the material is in a stressed state, which causes deformations and destruction of the integrity of the enamel coating. Cast iron is more preferable when choosing a metal tray, it is an alloy of iron with carbon. A feature of the manufacture of cast iron products is the fact that they are produced only by casting with subsequent heat treatment. Such a product turns out to be heavier, stronger and more durable.


Acrylic
These are some of the most affordable types of shower trays. A beautiful appearance of a glossy surface, lightness, a wide variety of shapes and colors - all this attracts when choosing a shower tray or cabin. The disadvantage of this material can be considered its possible yellowing and dullness due to improper care or the use of low quality acrylic by the manufacturer.


Ceramic
With no less aesthetic appearance than their acrylic counterparts, ceramic products last much longer. It is easier to look after them. A high price and a lot of weight can be taken as a disadvantage. But this pays off in their long service life.


Artificial stone
These products are made by casting from polymer materials. Visually, these products resemble natural marble or granite. Easy maintenance, lack of habitat for fungi and bacteria, beautiful appearance, immunity to temperature changes, lack of deformation - this is what brings buyers to them. The only drawback of such products is their rather high price.


A natural stone
This option is suitable only for those who do not feel sorry for anything they love. They are the most expensive and luxurious. Polished marble or granite is usually used for their manufacture. The downside is the careful selection of cleaning agents that should not contain alkali. When exposed to alkali on natural stone, it can change color. In addition, such products must be polished at least once every six months. In order not to accidentally slip, it is worth putting a transparent silicone mat on the bottom of such products.


Views
Shower trays vary in height. The shallowest ones usually have a depth of up to 15 cm. These can be steel and acrylic products of a square, rectangular or quarter round shape. Steel products have a square shape with overhead bumpers.
In fact, this is an imitation of a shallow steel bath. There is no support frame for such pallets, therefore, for its installation, it is necessary to provide for a special foundation structure made of foam blocks or bricks. The supporting structure eliminates sagging. The entire pedestal can be tiled with ceramic tiles for an aesthetic appearance.


Low acrylic shower trays are rarely equipped with a metal frame. They are installed directly on the bathroom floor. All structures with a height of more than 20 cm are installed on a metal frame with the number of supports from four to eight pieces. The supports are adjustable in height so that a clear horizontal line can be set during installation.


Recently, a variety of shower cabins with pallets has been gaining popularity., made in the form of a sufficiently deep bath. The dimensions of such a product range from 130 cm in width and increase in steps of 10 cm. Therefore, it is easy to calculate and select a cabin of the required size for bathrooms of various sizes. When choosing a shower tray, special attention should be paid to the thickness of its walls. The service life of the product directly depends on this parameter.


If the steel product has thin walls, it can deform if it is not firmly installed on the foundation, which will lead to cracking and chipping of the enamel. Thin-walled acrylic products will sag under the weight of even a lightweight person and may crack, which will lead to the need to replace them. Cracks in these pallets can form due to temperature changes. Pallets and bathtubs made of artificial polymer stone are more durable and strong. They can have a variety of colors, sizes, are convenient for non-standard sizes of bathrooms. Cast iron varieties are leaders in rigidity and durability. They have only one drawback - their appearance.


Installation instructions
There are two principles for installing shower trays: embedding on a foundation and installation on a frame frame.


On the foundation
For the most correct arrangement of shower rooms of this type, the horizon of the floor surface is of great importance, as well as its waterproofing. Therefore, the first step will be to perform a screed on the floor along the beacons if the level is not met. Careful waterproofing of the joints between the floor and walls will help to avoid possible troubles in the event of a leak through the drain system. The most correct solution would be to use a two-component waterproofing applied to the walls and floor of the bathroom in two layers, going beyond the dimensions of the final product by about 15 cm.


Before installing the pallet, you need to study its characteristics.(strength, wall thickness, design of the used drain). If the product can deform under the weight of a person, then the foundation must be laid out over the entire space of its bottom so that the pallet stands on it with its entire bottom. To eliminate noise when choosing steel pallets, it is recommended to isolate it from the foundation with a small layer of polyurethane foam or fill the frame made of bricks or blocks with fine sand. You need to connect a siphon to drain water before installing the pallet in the seat. In this case, it is necessary to mount the sewer pipes with such a slope so that the water flows freely through the drain.

When making the foundation, it is important that the sides of the pallet rest on a rigid structure around the entire perimeter. Therefore, gas silicate blocks have more advantages over bricks, they are easier to adjust in place using an ordinary small hacksaw. To eliminate possible leaks and better fix the pallet around the entire perimeter, you need to plant it on silicone with antifungal additives. After that, you can start decorating the shower enclosure with mosaics or ceramic tiles.
In addition to steel pallets, this type of installation includes ceramic pallets. The accuracy required for its installation is dictated by its fragility, like any morocco product. The difference in the installation of ceramics on the foundation lies in the fact that it is imperative to provide an inspection hole for access to the drainage communication. At the landing site, around the entire perimeter and under the bottom, the pallet should be fixed with a solution of tile glue or sand concrete.


In this case, the drain pipe and the place for the siphon must remain free. Before fixing the pallet to the solution, the siphon must be connected to the drain and sealed. You need to connect after the solution has completely dried. After installing the pallet on the solution in the seat, the level must be checked, if necessary, correct.

On a frame-frame
These pallets stand on legs fixed in a frame that can be adjusted in height. Sometimes manufacturers supply their products already assembled for installation, but more often the frame comes in a separate kit. In the latter case, before installing the pallet, you need to assemble it according to the diagram attached in the instructions, then fix it on the pallet. Before installing the product in the marked place, you need to mount the drain.
The siphon is connected to the sewer pipe, the hole is sealed with a collar and insulated with silicone sealant. The drain funnel is mounted after the pallet is installed in its original place. Despite the presence of a frame, acrylic pallets can sag under the weight of a person, which can subsequently lead to cracks and product replacement. In this case, it is necessary to measure the distance from the floor to the bottom of the bottom, as well as to make reinforcement from metal pipes or bricks, gas silicate blocks, then cover with a rubber mat of a suitable size.


Acrylic pallets on a frame frame are equipped with "aprons" - decorative plastic panels that repeat the shape of the front. The aprons are mounted after installing the pallet using self-tapping screws. The screw heads are closed with decorative buttons included in the kit. After installing the decorative apron, the frame and possible reinforcement become invisible to the eye. If the pallet does not provide for the installation of curtains or a cabin on it, then the last operation will be to seal the joints between the wall and the edge of the product with sanitary silicone sealant. If you decide to fix the structure to a wooden floor, you need to choose a suitable sealant for it. Dismantling with your own hands, you need to disassemble all the fences, screen, metal frame and remove the seal.


How to strengthen the structure?
You can think of many options for strengthening the design of the shower tray. First, it depends on the distance between the bathroom floor and the bottom of the bottom of the tray. Secondly, on the presence or absence of a pallet frame. A big mistake would be to use only polyurethane foam.
 What is the dream of an office based on a dream book Office based on a dream book of the sorceress Medea
 Characteristics of the Capricorn man by zodiac sign - an avid pragmatist
 Strong biofield in humans, signs