How to make a wooden double-glazed window yourself. How to make double-glazed wooden windows. There is only a little left - we insert glass
Today PVC windows can be found in almost every apartment, private house. By installing them, the owners are trying to protect themselves from noise, to give the housing an aesthetic look. However, many of them do not think that, along with the advantages, these windows have a disadvantage. They do not breathe, which leads to a greenhouse effect in the room. Wooden windows are devoid of this drawback.
Wooden windows allow the room to breathe and do not lead to a greenhouse effect.
Wood does not just breathe, it is able to create a special microclimate in the room and, thanks to its structure, maintain it. Modern manufactures produce wooden windows from various types of wood, different shapes and colors. However, it is quite possible to make wooden double-glazed windows with your own hands. This requires skill and patience.
Materials and tools

For faster and better quality windows, you will need power tools for woodwork.
In order to make wooden double-glazed windows, oak, pine, ash, birch wood is used. An oak frame will be the most durable, however this wood is difficult to work with due to its hardness. In this case, later it can be given any shade. Any wood chosen for the production of windows must be thoroughly dried to avoid distortions of the already installed window. When dry, the frame may crack, bend. These deformations can lead to the need to replace the window; it is unlikely that it can be repaired. And these are additional costs.
In addition to solid wood for windows, glued laminated timber can be used as a starting material. It is produced by gluing individual thin lamellas with a special glue. Such timber is not subject to deformation and does not require additional drying time.
Power tools will greatly speed up the work and make it easier:
- plane;
- a circular saw;
- jigsaw.
Of course, in their absence, you can get by with hand tools: a chisel, a hacksaw. It is preferable, when making wooden windows with your own hands, to use good electrical tools that allow you to perform a high-quality adjustment of the grooves.

Therefore, for the manufacture of windows, it is necessary to take high-quality material and excellent tools.
Also, don't forget about:
- roulette;
- chisel;
- level.
Frame making: features
Before starting work, it is necessary to measure the window openings. This can be done with a tape measure. It should be noted that if wooden windows are made for a private building, then the sizes of the windows can be completely different. But even the windows in a standard apartment may differ slightly in size. Therefore, regardless of the structure, measurements must be taken at each window opening.

Triple glazed windows keep more warmth in the house.
The bars of the window frame are connected by a thorn-groove method. This is the tightest compound and will last a long time. For its implementation, a groove is drilled on the vertical side of the frame, and a spike is cut out on the horizontal side. The depth of the groove corresponds to the width of the bar.
You can make a shallow cut with a hacksaw to mark the size you want. A slot is made from the end with a jigsaw and the wood is removed. Using a vernier caliper, the centerline of the groove is determined - the center of the bar. On this line, a hole is drilled with a drill and drill for working with wood. After marking the shape of the groove, it is cut out with a jigsaw. 4 grooves are made according to the same principle.
Further, on the bars, which will be the horizontal part of the frame, it is necessary to make a spike. The thickness of the tenon should be slightly larger than the width of the groove, for a tighter connection and precise fit of the parts during assembly. All markings must be performed using a caliper. For a thorn, measure the width of the thorn from the center line of the bar and cut the thorn with a jigsaw or use a saw and chisel. The surface of the tenon, which will border on the bottom of the groove, must be rounded off with a chisel.
In addition, it is necessary to saw through the grooves for the glass.
The most acceptable dimensions are grooves 10 mm high and 14 mm wide.
After the preparatory work has been completed, you can start assembling the frame of the future window. The application of glue at the joints will give additional strength to the connection. Excess glue must be removed before it hardens completely.

Scheme of profiles with one and two glasses.
Glass, before cutting, should be carefully marked. The size must match the size of the frame exactly. The error is not permissible even in 1 mm.
To cut glass, several rules must be followed:
- wear gloves and goggles for safety;
- clean, wipe dry the glass;
- apply a thin layer of oil to the glass surface before cutting;
- the cut itself should be done in one firm motion.
The notch will be deep enough if you hear a distinctive creaking sound when you press the glass with the glass cutter. After making the cut, the glass is pushed to the edge of the surface on which the cutting is performed, and after pressing, the cut part of the glass will break off.
The edges of the finished glasses must be sanded with sandpaper.
Wooden double-glazed windows: assembly of the structure

Cutting glass should be done on dry, clean glass, the cut is done in one motion.
First you need to fit and fit. To do this, insert the glass into the frame, look through it and make minor adjustments if necessary. The glass is removed from the frame and a sealant is applied. Then the glass is again placed in the frame and fixed with a glazing bead. After that, according to the same principle, the second and, if any, third glass is inserted.
In industrial production, a material with a large number of small pores is used as a desiccant. The task of the molecular sieve is to absorb moisture from the air or gas that is inside the window between the glass panes. To do this, use silica gel in granules. However, granular silica gel can also be purchased in stores. This material is placed between glass panes.
The window inside itself is filled with air, since in the manufacture of a wooden glass unit it is impossible to fill it with gas on its own, as in industrial production. However, if a compressor is installed, the space between the panes can be filled with dry air.
After that, the window can be painted or given the desired tone with a stain. After drying, you can cover it with varnish, which will protect the wooden glass unit from moisture penetration. Most often, the varnish is opened several times.
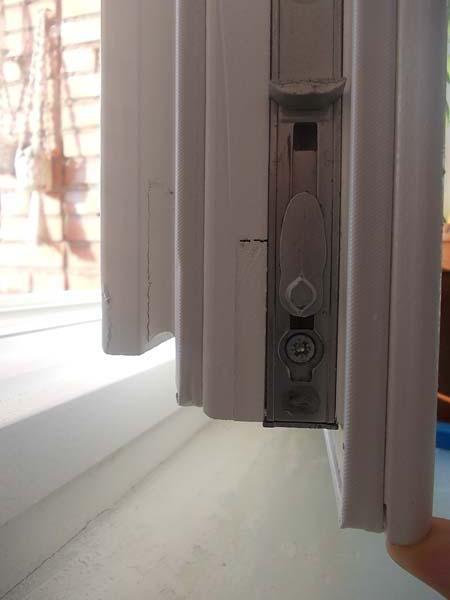
Twist the handles that fit the style of the room. Special recesses for fastening the closing mechanism in the sash are cut out in advance.
If this has not been done or its size does not correspond to the fastening, then a recess is neatly made with a chisel. In this case, the frame itself must not be damaged in any case. A wooden double-glazed window, made by hand, can be placed in a window box.
When using a jigsaw, it is better to take a small file for it, then the edge will be even, without chips.
If necessary, a rubber seal can be attached to the outside of the window to allow the window to close more tightly.
Excess sealant, putty, which are used in the process of installing a double-glazed window, must be removed carefully immediately after they are found. Otherwise, after they solidify, it will be very problematic to do this.
When making wooden windows with your own hands, you must observe accuracy in work. A mismatch of a few millimeters can lead to skewing of the entire structure during installation. As a result, there is a risk of violation of thermal insulation.
However, if plastic double-glazed windows are produced only at the factory, then wood products, if you have the necessary tools and work experience, can really be made independently. This design is especially in demand in country houses and dachas.
Profile selection
Khrushchevs and long-built private houses are especially in need of replacement of window frames. Replacing old shutters with wooden windows is the best option. It is important to make the right choice of the product profile. Single glass is sometimes used. Double-glazed windows are considered another method.
If in the first case the low cost belongs to the advantage, then double glass provides better heat retention due to low thermal conductivity. This is especially important in areas where frosty weather sets in in winter. Inert gas is pumped into the gap. Over time, it comes out, but from this the glass unit does not lose its characteristics.
There is another type of window - Finnish 3-chamber double-glazed window. On the one hand, a system of 2 glasses is installed, and on the other, a single version.
Selection of the type of wood
Before starting work on the manufacture of a wooden structure with your own hands, you need to make the right choice of the type of wood:
- 1. Oak. Good material for these types of work, but very expensive.
- 2. Birch. Is the best option. Wood lends itself well to processing and has a low price. The disadvantage is the complexity of the acquisition.
- 3. Pine. If used correctly, it will last for a long time. The material is inexpensive. Given its availability, a beginner can work with it.
Making a wooden product
Before starting work with your own hands, a drawing of the future window structure is created. Then materials and tools are procured:
- wooden beam;
- boards;
- glass;
- glazing beads;
- self-tapping screws;
- PVA glue;
- hammer;
- drill;
- glass cutter;
- milling machine with a set of cutters;
- saw.
Step-by-step instructions for making wooden windows consists of the following steps:
- 1. Formation of the box.
- 2. Manufacturing of the frame.
- 3. Glazing.
It should be remembered that wood material is selected with precise geometry and no cracks.
Box formation
The box is made when it is absent in the structure of the house. Its need is to take on the main load and unload the frame.
Stages of its manufacture:
- 1. An L-shaped groove is made in a board with a section of 15x5 cm. Its depth is 1.5 cm.
- 2. Four boards are connected in the form of a box.
- 3. In the corners, holes are drilled to a depth of 3 cm.
- 4. Wooden pins are driven into them. This gives the structure its rigidity.
Frame making
A drawing assists in the manufacture of the frame.

On the side and intermediate strips, a quarter is selected. This is a sample of wood where the glass will be inserted.

At the end of the beams, grooves are made of the thorn-groove type. An end mill is used for this. If it is absent, then a regular chisel is used.

Places are filled with PVA glue, fastened and pressed.

A sash is placed in one part of the frame. For this, samples are made in the uneven bars. The sash is manufactured according to the same principle as the frame. It should fit snugly into its intended place. After that, the marking is carried out for fastening the hinges.

Holes are drilled in the marked places, the loops are fixed. Then comes the installation of the handles. To do this, a groove is milled in the sash rail and a mechanism is inserted. In the counterpart, a place is formed for the entry of the tongue.

Glazing
When installing glass, its exact cut with a tolerance of no more than 0.5 mm is required. For this, a diamond self-tapping screw is used. The final polish is done with sandpaper.

If the deviation in dimensions reaches 1 mm, then a cold bridge is formed. The window will not perform its function.
Glazing work requires compliance with safety precautions:
- 1. Wear gloves to avoid injury to your hands.
- 2. Glasses are required. The eyes are protected from the ingress of glass microparticles.
- 3. It is not recommended to breathe through the mouth and talk. Together with the air, glass crumbs settle on the mucous membrane of the throat.
The order of work is as follows:
- 1. The glass to be cut is measured beforehand. For this, a meter ruler is used, which exceeds the dimensions of the material.
- 2. A line is drawn with a diamond glass cutter.
- 3. A plate is applied to the glass so that its cut coincides with the line, and is well pressed.
- 4. By pressing the hand, the glass breaks off with a characteristic crack along the fracture line.
- 5. Fitting in progress. If the cut is made exactly, then the glass is installed and pressed with glazing beads, into which thin nails are driven in.
- 6. When installing double glazing, a bar with the selected grooves is attached between them.
Four years ago, I published the article "Drawings of the profile of a window block (wooden glass unit)", where I attached photos and drawings of the profiles of a wooden window. Over the years I have received several emails asking me to show drawings of corner joints or send me more detailed drawings. A week ago I received another such letter and today I will try to clarify the situation with this review article.
Letter from the reader of ModelMen.ru
Writes: Daniel
Hello Dmitry. I am from Sevastopol (Crimea, Ukraine). I was very interested in the drawings of a wooden window with a double-glazed window. (). Now I am doing repairs in the house and did not want to put plastic windows, and the wooden ones were very expensive, I came to make them myself, I started looking for drawings on the internet and many search engines indicate yours. You write that you developed the drawings yourself, so I wanted to ask you a question as a developer. How much the window should be smaller than the frame, that is, if the frame is assembled, then how the frame should be calculated (height width), so that they exactly fit each other and do not create cracks when closing (or do not cling to each other). Is it possible to make such a window without a milling machine? How to join corners (butt or 45 degrees)? What fittings was the window designed for? I promise that if I succeed in making such a window, I will post photos of the phased creation of such a window. Thanks in advance. With admiration, Daniel.
= = = = = = = = = = = = = = = = = = = = = = = = = = = = = = = = = = = = = = = = = = =
So let's go!
Is it possible to make such a window without a milling machine?
Yes, it is possible! Moreover, such a window can be made with only a circular saw at hand. In my arsenal there is a modern saw blade for aluminum, although at the time of sale it was written that it also saws wood, of course. My disk looks like this one:
Specifications:
Disc diameter 255 mm.
Number of teeth 80 pcs.
Bore diameter 30 mm.
My true bore hole is 32 mm and a larger diameter, but the point is not in this, but in the number of teeth! Thanks to the large number of teeth on the disc, it cuts wood exceptionally clean. I often asked my friends to compare planed wood and sawn with this disc, sawn always won in quality. Home planers often do not provide a high-quality planed surface, it turns out to be wavy, especially at the ends of the workpiece, and not everyone can afford industrial equipment.
Why am I all this, you can make a wooden window by having a circular machine and a good saw blade with a lot of teeth (soldering) at hand.
How to connect corners?
The most interesting question :) because most people make a simple spike connection into one spike.

These single-stud frames have already proven themselves to be extremely short-lived. If you want the window to serve for a long time and withstand a large number of opening and closing cycles of the sashes, then make a tenon connection in two tenons. Of course, it can be made in three spikes, if the thickness of the frame allows. 
The more spikes, the larger the gluing area of the parts and, accordingly, such a spike connection is several times stronger.
How to make a spike connection?
This is not as difficult as it seems at first glance, first you need to saw off four blanks to size, two vertical and two horizontal. It can be just rectangular bars or bars with a selected profile. The length of the blanks depends on the size of the box of the window block, of course it is better to calculate this on the drawing.
You can even cut the blanks by eye to length, attaching them to the finished box, but taking into account that the frame must overlap the box. Of course, in this case, a profile must already be selected in the blanks for the frame.
Thorns and lugs are usually cut on a milling machine, but we have circumstances, there is no machine, so the same can be done on a circular saw with the help of simple devices or without them at all.
It should be noted right away that the vertical parts of a wooden window or door are always eyelets, and the horizontal parts should be spikes.
For example, I will show you a video of how the guy makes spike joints on a circular with the help of his device.
Here's a trickier device:
In both videos, box spikes are made, they are small, there are a lot of them and it is difficult to make them without devices. If you make one or two windows, then you can do with a simple device as in the first video, but without a pin, then all the work will need to be done by marking with a pencil on the workpiece.
What fittings was the window designed for?
To be honest, I took the fittings and the profile of the plastic window as a basis. I don’t know if there are any differences between the fittings for a wooden and for a plastic window, but I think that having any of them you can adapt.
At the beginning of this winter, I installed a factory-made wooden window in my kitchen on my own. Below you can see a photo of the window, which elements can be taken from there when developing a drawing.


Today, I would depict my profile a little differently than four years ago: 
As you can see, I increased the size of the bars to 80 mm., All the same, we have severe winters, and I would like the warmth to remain in the house, besides, a more massive frame will be stronger and look better.
In this article, I again do not give you ready-made drawings and window sizes, because in order to develop them, you need to have window accessories in your hands and understand how it is attached and works. Unfortunately, I have no experience with such fittings, so I cannot yet develop a ready-made drawing. Below I tried to visually depict how the gusset spike should look like.


I found a few more photos on the Internet showing the elements of the spike joints of a wooden window. I hope the information I have given will help you to independently develop a drawing of a wooden double-glazed window and bring it to life. Good luck!


Is it possible to make high-quality wooden windows with your own hands? - It turns out that if you have the tools, the skill and a detailed plan, you can, and in this article we will tell you how.
This material is about handicraft production at home, about industrial production We talk about euro windows in this article:.
Plastic windows are in high demand among consumers, but wooden windows and doors are a budget and more environmentally friendly option. Since it is not difficult to make a wooden window on your own, many install them in their dachas. The main thing is to understand how the window structure works. In order for the product to be of high quality, it is necessary to observe the production technology, the rules of wood processing and the assembly method. A step-by-step instruction with a detailed description will help with this.
Do you want to order ready-made wooden windows from the Moscow production of Dentro Windows with a 5-year guarantee? Below are examples of prices per m2:
| Single leaf | Bivalve | Tricuspid | Balcony block |
| from 12 500 rub | from 12 800 rub | from 13 400 rub | from 12 500 rub |
Calculate the cost of wooden windows in the company
(Only for residents of Moscow and the Moscow region), send an application to calculate the cost:
With the current prevalence of PVC windows, double-glazed windows made of wood do not give up their positions and continue to be popular. The tree is environmentally friendly, besides, it solves the main problem of plastic models - the greenhouse effect.
In addition, the tree, due to its structure, is able to maintain a certain microclimate in the room in which it is installed. In addition, their aesthetic appearance allows you to make your home spectacular and unforgettable. Wooden double-glazed windows are made from the species of the most valuable trees, thanks to which they serve for a long time and complement the style of the room. Often, such window systems are chosen by people of more conservative views who prefer a classically decorated home.
Thanks to modern production, wooden windows are not susceptible to pests, ultraviolet radiation, and precipitation. All this is achieved by treating wood with special compounds that improve the characteristics of materials. Such windows are produced with double and triple glazed units, which will reliably protect your home from the cold. Despite all the technical innovations in production, it is quite possible to make wooden double-glazed windows with your own hands, you just have to be patient and have some skill in working with tools and wood.
Crafting tools
To make a double-glazed window, it is used:

- plane;
- jigsaw;
- hacksaw;
- chisel;
- roulette;
- level.
In some cases, for precise adjustment of grooves, for example, it is preferable to use electric tools rather than hand tools.
In the production of wooden windows, a fairly large assortment of wood is used, each has some specific qualities. For example, oak wood is the strongest of all, but it is also much more difficult to work with it, since it is quite hard.
Regardless of what kind of wood you prefer, it is necessary to remember that the wood must be thoroughly dried. Otherwise, during the drying process of the finished product, the frame may crack, and this will lead to the fact that the window cover will have to be completely replaced, which again bears additional costs.
Back to the table of contents
Frame fabrication: process features
First of all, all measurements are carried out. This is done using a tape measure. Windows, even in a standard "Khrushchev" building, can vary in size, not to mention private construction, where all windows can be of different shapes and sizes. Therefore, you should not limit yourself to measuring one window; it is necessary to carry out your measurements for each double-glazed window.

To connect wooden blocks into a window frame, the “thorn-groove” method is used. Such a connection of parts is considered the strongest and has a long service life. To make such a connection, it is enough to drill a groove in a vertical post, and cut a spike in a horizontal post. In this case, the depth of the groove must correspond to the width of the timber. Marking, in the absence of drawing accessories, can be done simply with a shallow cut with a hacksaw. From the end, a saw is made with an electric jigsaw and excess wood is removed. After that, you should find the center of the bar, it is most convenient to do this work with a caliper. A groove of the required shape is cut out with a jigsaw, and all 4 grooves should be performed according to the same principle.
After the work with the vertical racks is completed, they proceed to the horizontal ones. On them, you need to cut a spike, the thickness of which should slightly exceed the groove hole. This is done for a denser and more accurate fit of parts to each other. The base at the spike, which will connect to the bottom of the groove, should be rounded off with a chisel.
After completing all the preparatory work, cuts are made under the glass. The grooves for it usually come in the following dimensions: height 10 mm, width 14 mm. When all the grooves and spikes are completed, you can start assembling the frame, only for a better connection of the parts, it is worth applying glue, preferably carpentry, to all joints. Excess adhesive should be removed before it hardens.
Back to the table of contents

Before you start cutting the glass, you need to accurately complete all the markings. Its dimensions must exactly match the dimensions of the frame, even a deviation of 1 mm is not considered acceptable. When glass is cut, certain rules are followed:
- it is worth using gloves and glasses so that the glass does not get into the eyes;
- only clean glass is cut;
- before starting cutting, the surface of the glass is greased with oil;
- the incision is performed in a single, strong motion, without interruption.
To determine if the cut is deep enough, you need to lightly press down on the glass with the cutter. If you hear a creak, then the depth is sufficient. When the cut is made, the glass is pushed to the edge of the surface on which it is cut and pressed with little force. The part cut off from the glass will break off. After that, the edges must be processed with fine-grained sandpaper so as not to cut themselves.
 Poroshenko Petr Alekseevich
 Premonition of the Apocalypse: World War III in the predictions of analysts and the Holy Fathers
 Hereditary prisoner petr poroshenko-waltsman