Making a corner cabinet with your own hands, useful tips. Corner wardrobe - features, types of models and selection rules. Corner wardrobe drawings and diagrams photo L-shaped corner wardrobe download drawing
Modern furniture has a high cost, and various materials can be used for its manufacture, moreover, the models differ in size, shape, appearance and content. A perfect solution for a living room, bedroom or other room would be a corner wardrobe that does not take up much space, is distinguished by its high capacity and an interesting appearance. Creating a corner cabinet with your own hands is simple, if you carefully understand this process.
Immediately before the process of creating a structure, you should decide on the dimensions, materials and tools that will be used, as well as think over the purpose of the cabinet. Initially, a project is formed, for which drawings are created, according to which parts are prepared that are firmly connected to each other. A decision is made whether the corner cabinet will be triangular or L-shaped, trapezoidal or five-walled.
If you decide to assemble furniture yourself, you should prepare for this process and purchase the necessary materials and tools:
- direct material for creating a cabinet, and the formation of a structure from drywall is considered relevant, which is distinguished by an affordable price, ease of use, environmental friendliness and durability;
- profiles from which the frame will be formed;
- suspensions;
- screws and glue;
- mirrors, if you plan to decorate a wardrobe with them;
- fittings that ensure ease of use of the structure;
- rollers and guides, if compartment doors are made;
- lining material for the cabinet;
- drill, screwdriver, grinder, sharp knife for cutting drywall, level and other small tools.
Working with drywall is considered so simple that no specific tools are usually required.

Tools

Drywall Sheets
Preparation of parts
A do-it-yourself drywall cabinet is made only after the preliminary creation of the circuit. Initially, you should decide on the dimensions of the structure, for which the dimensions of the corner where you plan to install the furniture are taken into account.
It is necessary to decide what parts the corner cabinet will consist of. Usually one large section is made for things that are located on the hangers. The other compartment is narrow and divided into several smaller compartments, which are separated by shelves. Often, in addition, an open pencil case is formed on either side. The standard sizes of such elements are:
- the height of the cabinet itself can vary from 180 to 220 cm;
- the width of two different elements of the corner cabinet can be from 45 to 80 cm;
- it is advisable to leave a distance between the shelves within the range of 30 to 35 cm;
- boxes and shelves are usually 40 to 45 cm wide;
- it is advisable to make boxes with a depth of 25 to 30 cm.
It is considered optimal that there are two large sections on top, called mezzanines, which are used to store large and rarely used products and things, and a narrow compartment for shoes is organized at the bottom.
After determining the dimensions and compartments of the structure, you need to perform the following steps yourself:
- determine the angle where the cabinet will be located;
- depending on its parameters, determine the exact dimensions of the cabinet;
- create a sketch that allows you to calculate the base, cover and plinth;
- divide the entire internal space of the cabinet into separate sections, for which vertical and horizontal partitions are used;
- calculate the doors of the structure;
- calculate the required number of ends covered with end tape.
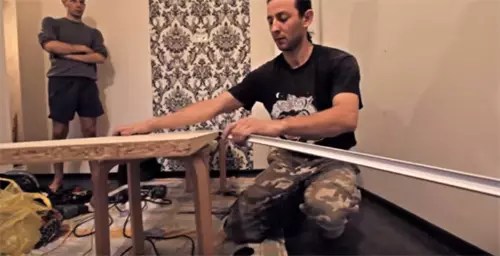
Based on the resulting diagram, you can prepare the main parts of the cabinet. For this, in accordance with the sketches, the main elements of the frame are made. Metal profiles are cut with a grinder, and the cuts are cleaned. Further, on the basis of pre-made drawings, parts of drywall are formed, and it is advisable to use a thin and sharp knife to cut this material. All elements must be of the same thickness.

Materials (edit)
Site selection and markup
It is advisable to decide on the place of installation of the cabinet in advance, since the structure itself is made for the available parameters of this angle. It is usually installed in the living room, but it can be intended for a bedroom or a children's room. The content and dimensions depend on the number of items that will be stored in the furniture.
After determining the installation location, marking begins, which allows you to determine where the main elements of the cabinet will be located. Since the product will be created from drywall, all the elements of the frame will have to be attached to the wall, therefore the fastening areas are outlined. You will have to navigate along them during fastening and creating a frame.

Surface preparation and marking
Frame installation
How to make a corner cabinet with your own hands using drywall? To do this, you first need to deal with the installation and fastening of the frame. The whole process is divided into stages:
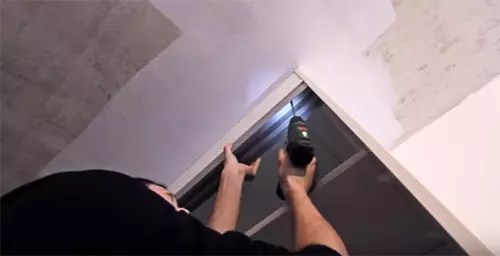
- if it is planned to have lamps in the cabinet, then the areas where they will be fixed are marked, after which electrical wiring is connected to this place;
- shock-absorbing rubber insulation is glued to the guide profile, and it is important to place it from the part that will be laid further on the base of the furniture;
- all guides are fixed along the lines of the previously applied markings, and dowel nails are used to secure them;
- then straight suspensions are fixed on the wall, and for this you need to constantly focus on the markup;
- fasteners for fixing the suspensions depends on what material was used to create the base, since if it is concrete or brick, then it is advisable to use a dowel with nails, and if the base is wooden, aerated concrete or expanded clay concrete, then strong screws or even nails are suitable, and it is also allowed use special dowels equipped with spacers and notches;
- vertical racks are inserted into the fixed guides, after which they are fixed with hangers, and for this it is advisable to use short self-tapping screws equipped with a press washer;
- strong and reliable stiffening ribs are installed between the rack profiles, and the more these elements are used, the more stable the structure will be, and there should be especially many of them in areas where it is planned to store heavy objects.
It is allowed to use not only metal profiles, but also wooden slats to create a frame, but this solution is used extremely rarely, since wood can absorb moisture or dry out, therefore the dimensions of the cabinet will change, which will lead to distortions or increased fragility.

Pasting profiles with damper tape

The metal profile is easy to cut

Finished frame
Frame sheathing
A corner cabinet made of plasterboard is quite simple to create, since after the formation of a high-quality, durable and stable frame, you can start covering it with plasterboard elements. For this, the following steps are performed:
- workpieces are made from drywall, for which, in accordance with the drawings, parts are cut, and it is recommended to use a hacksaw or an electric jigsaw for this purpose;
- it is advisable to choose a durable wall drywall to create a cabinet, the thickness of which will be at least 1.25 cm;
- all edges are processed with an edge plane;
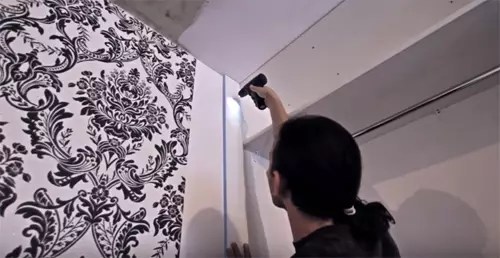
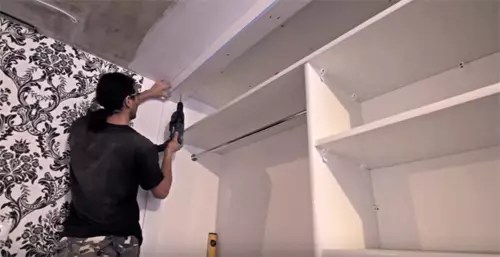
- ready-made drywall elements are inserted into the corresponding sections of the frame, after which they are screwed in with special self-tapping screws for metal;
- the sheets are finally fixed, for which it is important to calculate the number of screws so that there is a distance of 20 cm between them;
- all screw caps are recessed by 1 mm;
- furniture corners are installed in the areas where the shelves will be located;
- rods and lamps are mounted;
- according to the available dimensions, the creation of doors begins, which can be ordered ready-made.
After the completed work, a full-fledged wardrobe will be received, but in order for it to have an attractive appearance, you should take care of the use of finishing materials.

Drywall markings

Drywall cut

Fastening drywall panels

Driving screws with a screwdriver

Finished wall
Finishing
Finishing involves the following stages:
- all surfaces outside and inside are covered with a high-quality primer;
- joints are filled with gypsum plaster;
- then the serpyanka is glued;
- painting corners are mounted on the corners;
- putty is applied, which is sanded after hardening;
- it is advisable to make two layers of putty;
- then the primer is applied again;
- after that, the final finishing materials are applied, which can be represented by decorative panels, tiles or other materials.
It is advisable to use a mirror during finishing to increase the comfort of using the structure.

Perforated corner for corner processing

Cabinet finishing
Drawings and diagrams
The most important thing during the creation of a corner cabinet is the construction of a correct and accurate diagram and drawings. If there are any errors in them, then it will not work to build a full-fledged, durable and stable structure.
Drawings and diagrams can be obtained in different ways:
- independent creation, and the process can be performed manually or using special programs for a computer;
- an order from specialists, which will require significant financial investments;
- search for ready-made drawings, but you should only use them if you are sure that they are correct and accurate.
Corner cabinets are considered to be the perfect solution for different rooms. They can be created from different materials, but the most optimal is the use of drywall, with which the frame is sheathed from metal profiles. Such a cabinet does not require significant investment, and is also easy to create. During independent work, their own wishes and the available dimensions of the selected corner are taken into account, so the design will be ideal for the installation site.
have recently become one of the most common pieces of furniture. This design provides a comfortable experience. Most often they are not purchased ready-made, but made to order. But if there is an opportunity and the necessary materials, you can make a furniture set yourself. Before starting work, you need to decide on the number / location of shelves and drawers. It is also important to plan the structure taking into account the dimensions of the room. In any case, all these points need to be studied before making a wardrobe with your own hands. Drawings in this case are a kind of starting point, and our today's review will help you cope with this rather difficult task with a minimum of errors.
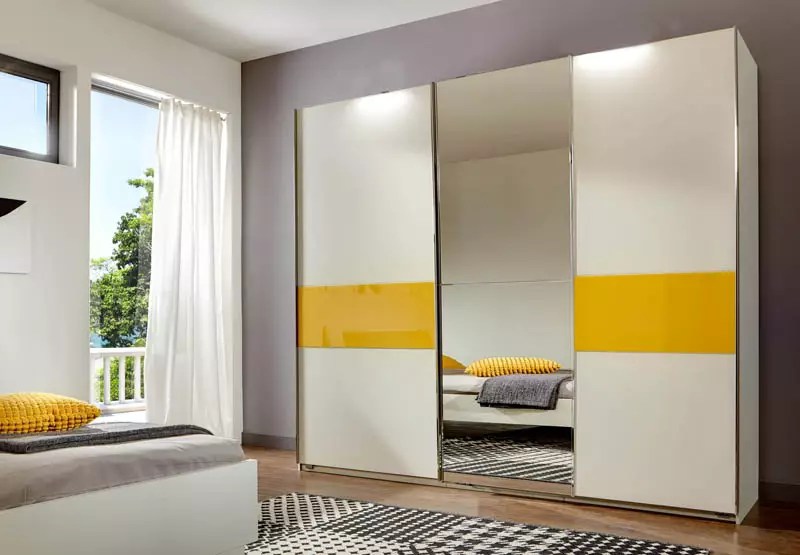
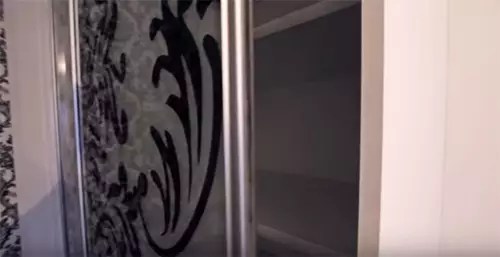
A feature of this type of furniture structures are that they allow you to save usable space in the room. At the same time, sliding doors for a wardrobe can be glass, mirrored, rattan, plastic or bamboo.
So, let's consider the main advantages of furniture sets:
- a variety of designs: built-in, rectilinear, hull and;
- furniture sets allow you to effectively use even a small space. This is the ideal solution for small spaces. At the same time, mirror surfaces allow you to visually increase the space;
- conciseness of designs;
- filling wardrobes. Such furniture sets allow you to hide everything unnecessary. They are used not only for clothing, but also for various household accessories and small-sized appliances;
- models can be built-in, cabinet and mezzanine;
- the wall of the room, as well as the floor or ceiling, can be used as the walls of the cabinet;
- sliding wardrobes are made to order;
- the possibility of self-design.

Some disadvantages are worth noting:
- quick wear of the sliding system;
- high-quality internal filling of the cabinet is required;
- aluminum profile can be deformed;
- requires careful maintenance: cleaning all surfaces and guides.
For your information! To prevent the door from leaving the rail, a schlegel for sliding wardrobes is used at the joints and ends. It needs to be glued, which will create shock absorption when the doors are suddenly opened.
Types of wardrobes
Consider the main types of wardrobe:
- embedded models that do not have a floor, back wall and ceiling. These headsets cannot be moved or repositioned. They consist of side walls, shelves and internal partitions. Built-in models are made to order, but you can also purchase individual items for self-assembly;
- freestanding sliding wardrobes are equipped with doors that move on a rail. This structure has a floor, a back wall and a ceiling;
- corner headsets are suitable for small spaces. It is compact but very spacious inside. Corner design is suitable for a small rectangular room or a square hallway;
- diagonal angular take up the entire corner. Such designs are more spacious and look stylish. Inside, you can hide not only a wardrobe, but also bed linen, as well as blankets.


Materials for the wardrobe
Before you start making a corner cabinet or any other with your own hands, decide on the material.
Tree
For durable headsets, choose solid wood. It is a prestigious material for furniture. It should be borne in mind that wood is not the best option for a built-in wardrobe. The humidity level is higher in the niche. For a cabinet made of wood, it is necessary to carefully select wood without cracks and knots. The sash frames are also made of wood. In this case, it is necessary to glue together.
Wood headsets have the following advantages:
- environmental friendliness of the material. The tree does not contain toxic components;
- increased level of wear resistance;
- aesthetics of products. Wood furniture is distinguished by natural colors and unique patterns;
- naturalness of the material;
- the ability to carry out restoration work;
- ergonomic use of space;
- variety of styles.
Drywall

One of the popular materials is that made from pressed wood shavings. A thermosetting synthetic resin is used to create a dense composition. This material is easy to process.

When working with plywood, consider the softness of the material. Products can deform when twisted. It is recommended to use washer-shaped gaskets for such connections.
Film faced plywood is also popular. At the same time, plastic reduces the effect of formaldehyde in resins.

Furniture panels
The best material for homemade designs is furniture boards. This material is known for its durability, environmental friendliness and reliability.
It is worth noting the following advantages of using this material:
- significant funds are not required;
- you can bring to life unusual design ideas;
- the product can have various shapes and designs;
- for a furniture set, you can choose functional fittings.

The location of the wardrobe in the room
Before you start creating a wardrobe with your own hands in the hallway or in another room, it is worth considering its location.
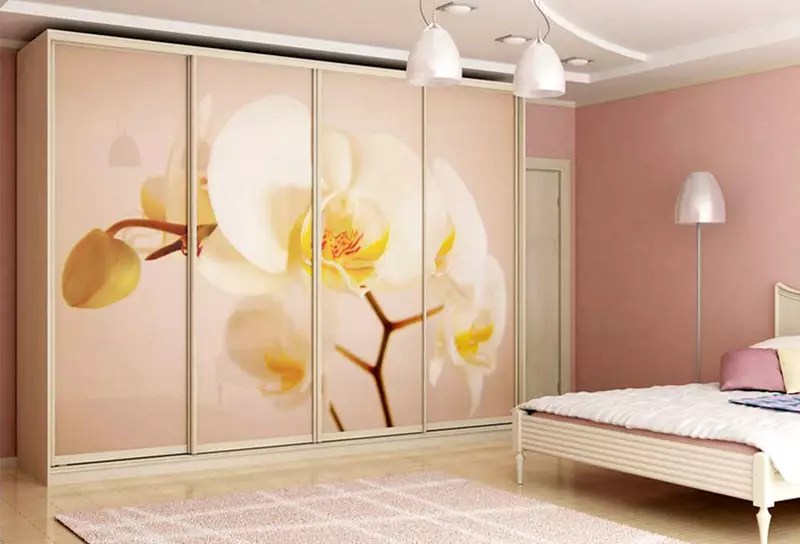
If you put the headset along a solid wall, then the furniture itself will be perceived as a wall. Better if the cabinet is up to the ceiling. Doors can be mirrored, which allows you to visually enlarge the room.

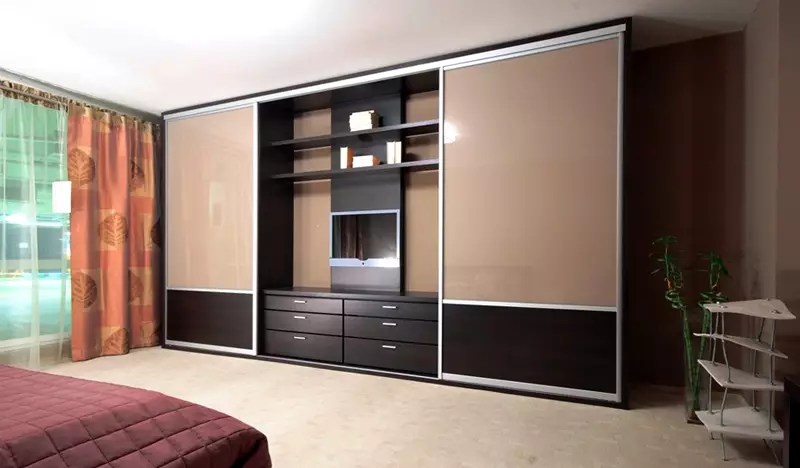
If you place two identical cabinets along the wall and leave a distance between them, you get an alcove. You can put or in the resulting niche. In the living room, an alcove can be used to create an area with a false fireplace.

A practical solution would be to install the headset along the edges of door and window openings. A mezzanine can be installed above the opening. The cabinet can be recessed into specially created niches. If the size of the room allows, then it can be small.
Depending on the particular style of decoration of the room, it is not necessary to make built-in wardrobes or mask them. For a retro or glam vintage style, bulky furniture will only complement the colorful design.

It is also necessary to choose the right sliding mechanism for the wardrobe. It shouldn't be noisy.
Hallway


Children
A lot of things need to be placed in the children's room. These are seasonal clothing and footwear, children's toys, board games and sports equipment. In addition, you need to find a place for books, notebooks and bedding.
The sliding wardrobe is a spacious set in which all things and objects can be placed. The doors of this piece of furniture move apart to the sides, which does not take up much space.
Keep in mind that cabinet furniture is selected for children, so the shelves must be at the required height. It is important that there are no sharp corners at the ends of the shelves and racks. For each thing, it is necessary to take a certain place, so the child will quickly learn to order.
Note! When ordering from outside, as a rule, it is not possible to control material consumption.
It is important to choose high-quality fittings, the correct adjustment of the doors of the wardrobe depends on it. Doors should not jam and slide out. Sliding systems consist of a profile and a sliding support. Roller mechanisms can be axial or bearing.

Choice of cabinet filling
The internal content helps to decide what the layout will be. Do not place the outerwear section in the center, as moisture from it can spread to the sides. It is better to place this compartment on the side. Bedding boxes are not recommended to be placed directly above the floor.

How to correctly arrange the elements and how to assemble a wardrobe with your own hands can be seen in the video below:
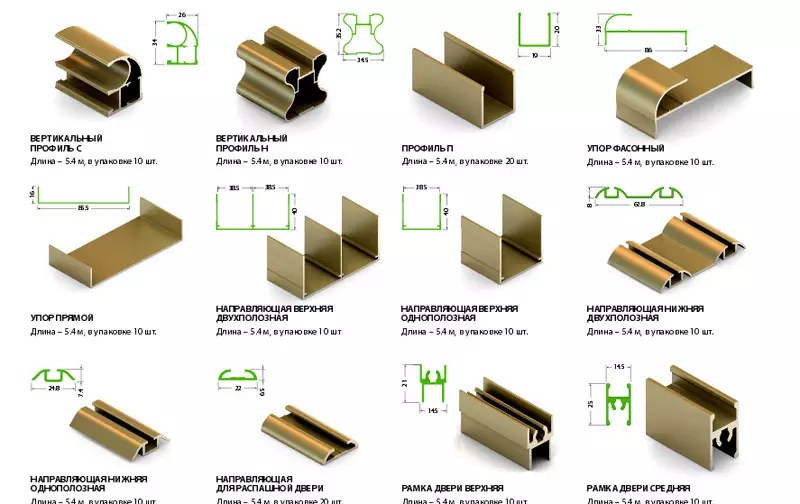
The number and dimensions of doors, guides, rollers for wardrobes
When choosing guides for a wardrobe, pay special attention to the material of their manufacture. The lowest cost has a plastic profile, but it is notable for its low reliability and short service life. The best solution would be to use combined rail guides, in which the bearing surface for the rollers is made of metal.

Steel profile for sliding doors has increased reliability. Aluminum is used to make rail supports for famous brands of furniture.
The rollers are made of metal, since plastic is not durable. The roller contains a ball-bearing internal mechanism that allows the doors to move freely in the horizontal direction.
Do-it-yourself wardrobe and compartment door assembly
We suggest that you familiarize yourself with the process of assembling a wardrobe with your own hands in the table below:
| Photo | Description of work |
 | To assemble the wardrobe, it is necessary to apply the markings. It should be noted the dimensions of the cabinet in width and the location of the vertical rack. The heights at which the shelves will be fixed are marked. |
 | We drill holes for dowels. |
 | The profile is put on before installation. |
 | We install a vertical stand. |
 | We apply the markings for the mezzanine shelf and install it. |
 | A side wall is installed. |
 | The markup for the shelves and their installation are performed. |
 | Marked by size and installed a bar for clothes. |
 | False panels are installed. |
 | One panel is fixed at the bottom. |
 | The supporting upper part is attached. |
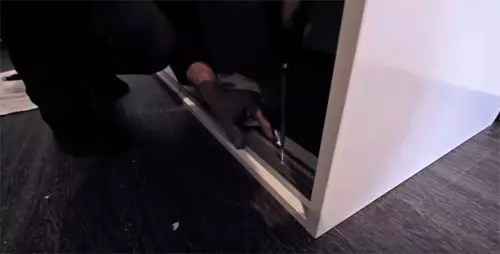 | The lower guide is fixed with a screw. |
 | The upper rail is attached in the same way. |
 | Doors are being mounted. |
The process is presented more clearly in this video:
Interesting solutions for sliding wardrobes: photo examples
Do not forget about the decor of the furniture set. Pilasters can be used as decoration. These elements are made of solid wood or MDF. A furniture cornice can be installed on the roof. An interior baguette is used for decoration. You can choose a baguette of different shades. Furniture with photo printing also looks stylish.
Article
Corner kitchen cabinets are quite popular furnishings. They do not take up too much space due to the unique location. Corner cabinets can be made at home from a variety of materials. Of course, you will be able to cope with the task at hand, doing as indicated in the instructions below.
 The positive aspects that distinguish the corner wall cabinet for the kitchen include:
- an increase in the usable area of the premises due to the competent placement of furniture. Installation is carried out in places where it is difficult to put other options;
- high capacity and functionality. At first glance, it may seem that corner floor cabinets are not so large, however, inside them you can install various shelves and equip compartments for organized storage of food and dishes;
- the ability to choose the optimal size, since floor-standing cabinets are diverse in their dimensions. Almost everyone is able to understand how to assemble comfortable cabinets in the kitchen, giving them the necessary parameters;
- a variety of techniques that can be used to decorate bezels. If desired, the kitchen base cabinet can be decorated with glass inserts or patterns. This will give the finished product more attractiveness. However, the kitchens of Leroy Merlin already look aesthetically pleasing and do not require additions;
- the ability to combine with other items in the kitchen.
Main features of corner models
 Some of the most important differences include:
- the presence of doors is not necessary. The open top cabinet is great for storing beautiful tableware;
- variety of forms. The design can be triangular, L-shaped and even trapezoidal (by the way, triangular variations are very widespread in our time). The choice of suitable varieties depends on the people who will be using the lockers and their preferences;
- the lower part of the structure located on the floor is often used to create sinks. The sink placed on top will be easy to use;
- the possibility of embedding large types of household appliances for its more efficient operation is provided;
- different methods are used to decorate the facade. The most common options are the application of a pattern to wall cabinets or their upholstery with any material;
- the lower cabinet for the sink is often equipped with legs, which makes it easier to clean the room;
- the top corner cabinet can be equipped with carousel shelves to store crockery and other utensils.
Dimensions of the corner kitchen cabinet
The dimensions of furniture for equipping a kitchen can vary widely. If they are included in a kitchen set, then they are of the optimal size for combining with other components of the set. If the cabinet is selected separately or is designed independently, then it must match the other elements.
For a person who is going to create a corner kitchen cabinet with his own hands, it is very important to determine the size of the future product. They spill depending on whether the new piece of furniture will be located on the floor or on the wall.
A corner-type hanging cabinet has typical dimensions. The width is 15-80 cm, moreover, this parameter must correspond to the shape of the cabinet and its width. The standard depth is 35 cm, however, the calculation must take into account the depth of the boxes, which will be located at the bottom. It is recommended to install the finished product at a distance of 50 cm from the pedestals below. These are the standard sizes for any wall cabinet. This should be known to those people who are interested in how to calculate the corner variation without making a mistake.
When it comes to creating floor furniture, then it will have other standard sizes. They need to be taken into account when planning to make a kitchen drawing. For a compact room, a cabinet 50 cm deep is better, no more. Typical height is 85 cm (however, this may vary in individual cases). The width can be 15-80 cm, moreover, the optimal indicator is 60 cm.
As a rule, the lower element is installed after the installation of the upper one has been completely completed. The owner has the right to choose furniture with or without legs.

Corner sink cabinet
A sink cabinet is a very common option. Its dimensions can vary widely, as they depend on the washing parameters. You also need to take into account the way in which the structure will be fixed. For such cabinets, standard dimensions are calculated on an individual basis. The width can be more than 60 cm, and the depth can reach 80 cm (the minus is that it will be very difficult to use such an element of the interior). As a rule, for large products, a pair of facades is chosen. However, if necessary, assemble models with one door.
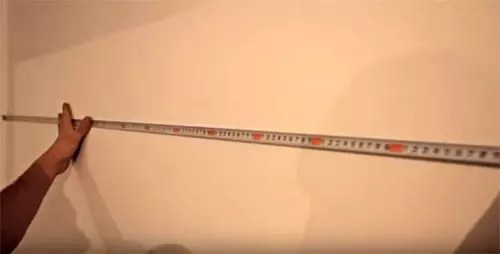
Measurements and drawings
Corner cabinet assembly cannot be started without creating a schematic. In turn, to carry out drawing work, you need to make measurements, and then create a kitchen diagram so as not to make a mistake. When performing these works, you need to take into account some of the nuances:
- the thickness of the walls should be chosen taking into account what objects will be located on them. It is important to display on the diagram whether the finished structure will accommodate household technical appliances or not. The thickness of typical shelves is 18 mm. If you plan to store something heavy on them, it is better to choose workpieces with a thickness of 21 mm or more;
- the depth of the underwear should not be more than 40 cm;
- Do not place the hanging cabinet too low if there is a stove directly under it, as the material will deteriorate under the influence of the increased temperature.
According to the standards, the size of the corner cabinet is 60x60 cm, while the width of the front panel is 42 cm and the depth is 30 cm. A corner kitchen is an excellent option for small apartments where it is difficult to implement another arrangement option. Take a look at the photos presented on our website to find the perfect one.
1
2
3
How to make a corner cabinet in the kitchen?
- Choose the right material and purchase it in the right quantity. It is very easy to calculate the purchase volume if you follow the scheme drawn up earlier.
- Prepare the necessary tools for the job. Their list includes: fasteners, hangers, sealing compound, furniture screed, drill, sandpaper, fittings and some other devices. It all depends on what model you plan to create.
- Prepare the basic details for the future locker. It is most convenient to cut them out of solid slabs. Be extremely careful when doing this job, use electrical tools to achieve the best result. Alternatively, you can contact a specialized company that will make the blanks at a professional level.
- Make through holes to insert dowels into them and hold together the individual elements that make up the furniture. Lubricate the chopiki with an adhesive to increase the reliability of the structure.
- Check the evenness of individual parts of the structure with a level.
- Screw the confirmates into the dowels using a hex key for this purpose.
- Install the feet and adjust the height. If the design does not imply the presence of legs, this step can be skipped.
- Make holes in the side elements, place the cross-shaped fasteners under the sashes in them.
- On the walls located on the sides, attach the elements for the rails, due to which the boxes will roll out. Secure the rails.
- Attach the back wall.
- Secure the hardware.
Corner cabinet diagram Corner cabinet drawing
The presented instructions will help each person understand how to make a corner cabinet for the kitchen with their own hands, the various schemes and drawings presented here will simplify the solution of this problem. If you do all the work correctly, you will enjoy the cabinet you made in the corner for a long time.
A sliding wardrobe is a very popular type of wardrobes, because it is not only roomy, but also takes up quite a bit of space. This piece of furniture is quite functional.
In this article we will tell you how to make a wardrobe with your own hands.

What is a coupe
The concept of a coupe first appeared in France in the age of horse-drawn carriages. At that time, the city streets, where common people lived, were so narrow that it was not always possible to open the carriage door. This led to the appearance of sliding-door carriages in the 17th century.
It is believed that the first compartment carriage was invented by the French coachman Jeanto. Whether this is actually so is unknown.

The crew of the compartment was referred to as flirtatious and frivolous concepts, because this type of transport was usually used for secret meetings with ladies. Some experts in the field of linguistics believe that the coupe comes from the word "couple", which translated from French means fornication.

Over time, compartment doors began to be used for train carriages. As for the furniture industry, any wardrobe with sliding doors is called a wardrobe.

Types of wardrobe
- Sliding wardrobes can be:
- Radial;
- Built-in;
- Case;
- Straight;
- Corner.

Do-it-yourself built-in wardrobe technology
Instructions on how to make a wardrobe with your own hands:
- Choosing a material;
- We determine the degree, nature and technology of how the filling of the cabinet will be placed;
- We design doors, choose a suspension option;
- Choosing a technology for fixing shelves;
- Preparing a niche;
- We make the necessary measurements and drawings;
- We purchase the necessary materials and accessories;
- We cut out the required blanks;
- We assemble the wardrobe and install internal lamps, if necessary.
What is the wardrobe made of
Before you start designing a wardrobe, you need to decide on the material, because it directly depends on what technology this piece of furniture will be manufactured using.
From wood and lining
Wood is a classic material for making furniture. Today it is very prestigious to have headsets made of natural wood. But for a wardrobe, this is not the best choice, since due to the higher humidity, the tree can begin to deform.

If you still want to make the cabinet wooden, then choose straight-grained wood that does not have streaks, knots and cracks. It must be processed with special compounds.

The lining can be made of plastic or MDF. You do not need to prepare it in advance. But the frame of the cabinet doors will still have to be made of wood.

Drywall
It is possible to make a cabinet from gypsum plasterboard, but it is rather difficult. In fact, it will be a building structure, not a piece of furniture.
Laminate, MDF, fiberboard
These are the optimal materials for the manufacture of this type of furniture. Of these, a wardrobe at home can be made easily and simply. They have all the advantages of wood and do not have its disadvantages.

Just one caveat, it is advisable to choose fiberboard with a density higher than average.
What the filling is made of
The filling depends on how the cabinet space will be distributed, where the shelves and drawers will be located. Experts advise you to follow the following guidelines:
- Wet to the side;
- The necessary little things - at the level of the gaze;
- Dry - on top;
- The most expensive thing is to distribute them in boxes.
The goal of filling planning is to achieve the smallest shelf width that is required when calculating doors. The distribution of the inner space of the cabinet must be approached responsibly.

The filling of the cabinet significantly affects how comfortable and convenient it will be and how many years it will last.

Sliding wardrobe doors
Doors are the most complex and most demanding part of the cabinet. It is necessary to determine how many shutters are required and what width, with the suspension structure and stoppers.
Note!


The fewer doors in the closet, the more convenient it is to use it. But this increases the risk of skewing and stalling. The maximum width that is allowed for the shutters is 60-70 cm.

In addition, the doors should not be wider than the narrowest shelf, otherwise it will be impossible to get to it. It is also desirable that the flaps overlap by at least 5-7 cm.
It is not necessary to buy such a necessary thing as a wardrobe, you can do it yourself. On the Internet, it is easy to find drawings of a wide variety of models of wardrobes. A self-made wardrobe will be your pride.

Diy wardrobe photo


Note!


Note!


The wardrobe, invented in the USA, began to be widely used as the main type of storage for household items and clothes. In our country, this type of furniture appeared only in the middle of the last century. This is surprising because many of us have lived in small apartments in which its benefits are evident.
Planning a corner wardrobe with distribution of space for storing things and shoes.
Domestic craftsmen were in no hurry to make a wardrobe with their own hands. The reason is that the case version, apart from sliding doors instead of swing doors, has no other advantages over the wardrobe we are used to.
It is much easier to make a built-in wardrobe with your own hands. To make it, much less material is required, and even an inexperienced carpenter can make such a compartment on his own. With a smaller occupied area of the room, such a storage option will have a larger volume than a hull one.
Sliding wardrobe device: distinctive features

Drawing of a corner wardrobe with dimensions.
The sliding doors of the first wardrobes produced by our industry did not have rollers for movement. There was a longitudinal spike at the bottom, along which the door moved, which had a groove along the lower end.
This simple design was quite reliable. Its disadvantage was that it was necessary to apply great efforts to move the doors, because the cabinet itself and the doors were made of heavy material, such as chipboard at that time.
You can make a sliding wardrobe with your own hands built-in or in a conventional mobile version. The corner cabinet can also be made built-in or cabinet on your own.
A do-it-yourself corner wardrobe must be made with reference to a specific place.
In terms of it, it can have the shape of a triangle, a trapezoid, be L or U-shaped. From other types, a five-wall can be distinguished. This design has the shape of a pentagon with 3 straight and 2 obtuse corners.
Related article: How to paint the lining inside the house in the country: options
This diversity is the versatility that the corner wardrobe has. If everything is clear with other forms, then the five-wall requires clarity. This version of the sliding wardrobe, occupying a slightly larger area, is much more spacious than, for example, a triangular analogue.
Stages of preparation for the manufacture of a five-wall
When making a wardrobe with your own hands, do not try to saw at home the sheet material from which the side walls and doors will be made. It is almost impossible to manually achieve the required dimensional accuracy, especially for a corner wardrobe. Having decided on the dimensions of its sides and doors, it is advisable to use the services of a workshop, where it is possible to provide the required cutting accuracy. It is also desirable to process the ends there, which will be visible from the outside. The elements located inside the cabinet can be made by yourself.

Assembly diagram of a compartment door for a corner cabinet.
Before making a corner coupe with your own hands, check the installation site. This is especially important for the inline version. Any unevenness in the floor or ceiling where the doors will move must be repaired. Otherwise, there will be problems with the installation of guides for moving the doors.
Make sure that there are no electrical outlets and other elements that may affect the installation of the wardrobe with your own hands. Take into account the dimensions of the skirting boards and, if available, the moldings on the walls under the ceiling.
It is impractical to save on the sliding door system. More expensive Italian or German designs will pay off due to their reliability and long-term operation.
It makes no sense to show the specific design of the carriages. There are a lot of them, and each of them has its own characteristics during installation. First you need to figure out how to mount: the dimensions of the cabinet elements will depend on this. More reliable is the option of doors with an upper running carriage. At the bottom of the door there will be a roller moving along a guide.
Before you start making a wardrobe with your own hands, you should have an appropriate tool. In the manufacture of the built-in version, a perforator drill is required. You will need a power tool to screw in the screws. It is advisable to have a hand-held circular saw with a fence. A hand saw will also work.
Related article: How to buy inexpensive interior doors? Tips from the masters
You will need an angle clamp, a tape measure, a stapler, a soft and hard hammer, a drill with a set of drills, a hex wrench for screwing in confirmations. Confirmation drills are required to drill holes for confirmations to the specified depth. For simple drills, a stop can be used.
It is necessary to purchase dowels, shelf supports and screws.
Drilling holes in chipboard is the main operation when assembling furniture

Diagram of the device of the corner wardrobe compartment.
Confirmates are used to fasten panels made of chipboard for furniture. Usually, confirmations with a size of D × L = 6.4 × 50 mm are used for furniture. This mount has d = 4.4 mm. The hole diameter for it should be in the range of 4.5-5 mm. With a larger diameter, the fastening will not be reliable, with a smaller diameter, the confirmation can destroy the fiberboard material.
For drilling holes, special drills are used, which are drilled to a depth of L and provide appropriate dimensions in the upper part of the confirmation (H and h). After countersink the surface of the plate under the cap. The confirmat is screwed in, without applying great effort, with a special hex wrench.
3 drilling options:
- full thickness drilling;
- drilling at the end;
- drilling in 2 pieces at the same time.
Another, the most difficult option is drilling for dowels. A common condition for all types of drilling is the perpendicular position of the drill to the surface.
Let's consider the drilling option in 2 details. The parts are applied to each other and secured with an angle clamp or other device. After that, markup and drilling are performed. This option is the fastest and most accurate. To determine the mark by the thickness of the chipboard, it is advisable to make a template out of wood or aluminum corner. If the chipboard thickness is 16 mm, then the center of the hole in the template should be exactly in the middle.

Options for corner wardrobes.
If the parts are connected so that the holes are drilled separately, then the strength of the fastening depends on the accuracy of the marking. So you have to drill when connecting parts to dowels. For example, to install the cabinet lid on the dowels, holes are first made in it with a drill with a diameter of 8 mm with a stop that does not allow drilling through it. Holes from the edge of the cover are drilled taking into account the indentation of the sidewalls, if provided. With the same drill, holes are made in the sidewalls to a depth of 20 mm. It depends on the accuracy of the marking whether the dowels will fall into the holes. The dowels are put on the glue at the ends. When assembling, the masters do not recommend pouring glue into the holes on the lid, you may have to disassemble the cabinet.
 Poroshenko Petr Alekseevich
 Premonition of the Apocalypse: World War III in the predictions of analysts and the Holy Fathers
 Hereditary prisoner petr poroshenko-waltsman