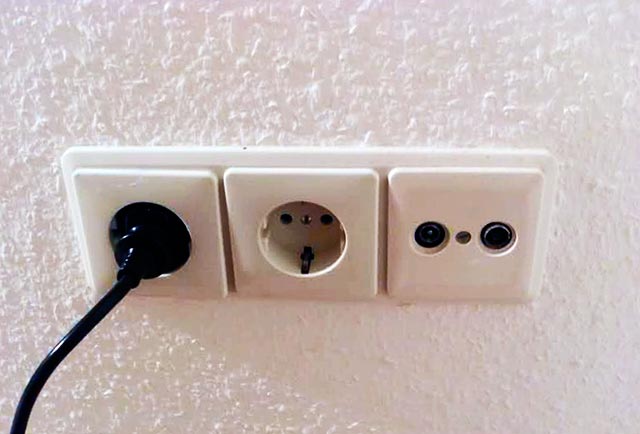
Types of wires for mounting hidden wiring. Installation of hidden wiring in the house: Tools, instructions, requirements. Requirements for conducting wires
In the practice of electrical work work, hidden wiring was widespread wiring, performed by the APAVS and ARTS with a gasket directly in the thickness of building structures: in gypsum, concrete partitions, under the plaster, in the voids and channels of overlaps and walls.
The hidden wire wiring is performed by following the following requirements: wires in thin-walled partitions up to 80 mm or under the layer of plaster are parallel to architectural and construction lines; between horizontally laid wires and slabs of overlapping distance should not exceed 150 mm; In building structures, the thickness of more than 80 mm wires are packed through the shortest routes.
In the premises of brick buildings, as well as in large-scale buildings with partitions from slabs of small sizes, hidden wiring with flat wires are performed as follows: in brick and plastered walls - directly under the layer of plaster; in the walls of large concrete blocks - in the seams between blocks, and separate sections in the strokers; In floors from multi-rolled slabs - in the voids of the plates.
The electrical wiring is started after the construction work and work on clean floor laying.
Installation of hidden electrical wiring is performed in a specific sequence.
First place the track of the wiring, determine the installation sites of the branch boxes for switches and plug sockets, hooks under the lamps. Markup starts with definitions for installation on the project of muckers, lamps, switches and plug sockets.
Next place the routes of wires. Flat wires are packed at a distance of 100 - 150 mm from the ceiling or 50 - 100mm from beam or cornice. Wires can be laid in the slit between the partition and overlapping or beam. The lines to the plug sockets are paved at the height of their installation (800 or 300 mm from the floor) or in the corner between the partition and the top of the slab of the floors. Descents and lifts to switches, lamps perform vertically.
When laying wires and cables in the channels of prefabricated building structures, the markup of the tracks and the installations of the device is not required.
Before tightening the wires, the caliber check the suitability of the channels. The diameter of the caliber must be at least 0.9 design diameter of the channel. Particular attention is paid to the presence of edema and sharp faces in the pair of building elements of buildings.
Then check the condition of the connective niches of adjacent connecting panels. Niche is performed by semicircular shapes with a radius of 70 mm. Tightening wires into the channels produce from the device to boxes and niches. The tightening force should not exceed 20 N per 1 sq. M. Current section lived. When the diameter of the channel 20 mm can be tightened to 5 wires, the seizure of 25 mm is up to 8 wires with a cross section of 205 mm square meters.
With a limited number of wires and a small length of the channels, the tightening is made manually, with a large number - with the help of steel wire, previously tightened into the channel.
Everyone who was engaged in repairs in the house is familiar with the concept of hidden wiring. Someone solved where and how to pave it, and someone had to be discovered. But they have a common one: it will have to tinker with wiring. This article will discuss basic principles that should be guided in work when installing and searching for hidden wiring, as well as equipment that should facilitate labor.
Advantages of hidden wiring
First you should decide what hidden wiring is? As it follows from the name, it is not visible for the eyes and can be inside the designs: in the walls, under the ceiling, under the floor, in the overlaps. As a rule, it is paved in the pipes, in PVC corrugation, metalworks or in the strokes.
Advantages of this type of wire laying a lot: 
- as it follows from the name, it is not visible, which means it does not interfere with the design and does not distract the eye - the room looks more attractive;
- this method is safer from the point of view of fire safety and electrical safety (being in an inaccessible place for air, sunlight and simple consumers, any closure will remain local);
- thanks to modern materials, once mounted all the wiring, you can forget about it for several decades, and it will work regularly.
Disadvantages of hidden wiring
With such quantities, disadvantages also have a place, but they are leveled by competent installation and further proper operation. Disadvantages:
- inaccessibility after commissioning (over time, situations are possible when it is necessary to replace, repair the wiring or simply not to get into it when installing new furniture or equipment, but due to the inaccessibility, this task may be complex);
- the work on the installation of wiring is quite time consuming (stroke walls, laying pipes in the shoes).
Hidden wiring in a wooden house is most susceptible to such disadvantages. Therefore, in such situations most often the entire electrician stretches into the cable channels.
Installation of hidden wiring
When installing electrical wiring it is necessary to remember some of the requirements for it:
- Requirements for fire safety. For example, it is forbidden to lay the wires without corrugations under the inner cover of a wooden house. It is worth putting metal pipes or PVC corrugations, and the corrugation must choose fire-resistant. The same requirements can be attributed to brick, concrete houses, as well as on installation of plasterboard;
- Wiring must be replaced. This is a very convenient property for future repairs. If the wiring is deep in the wall, but it can be free to stretch and replace it, it will greatly facilitate work. But as a rule, this requirement is not respected, because it is very difficult to put the pipe into the concrete wall, and PVC corrugations are often clarified by a solution or makes cool turns, through which then you will not stretch. So that in the future it did not have long to look for wiring in the walls, making extra destruction, it is worth immediately making a competent installation. For example, it is necessary to conduct an entry at a right angle, and not diagonally. This will allow in the future to easily trace the path of the wire. It is also worth trying to lay pipes strictly vertically on the walls or horizontally under the ceiling;
- After installation, it is worth making an accurate and detailed electricity indicating the location of the junction boxes and wires. This scheme should be kept for future repairs to accidentally not get into wire under voltage when you need to hang a new photo frame;
- To lay the wires with a hidden way, it is worth putting a big power. For example, for lighting it is worth using wires with a cross section of 1.5 square meters. mm, for sockets - 2.5 square meters. mm. It is also recommended to use a three-wire cable, even if the ground wire is not yet supplied to the house. Perhaps in the future it will appear, and in junction boxes everything will be collected properly;
- Strobin. This is the dirtiest work in the home electrician. It should be carried out at the initial stage of repair. Immediately with strokes, you should prepare holes for peasants. After laying all the wires, the shutters are sealed or plaster.
Search for hidden wiring
 Anyone who at least once did repairs in the house, came across the problem of finding hidden wiring. If you need to score a nail, and at the same time you fall into wire under voltage, it may lead to serious consequences. In addition, after such an unwanted contact, you have to change the wiring. Therefore, experienced builders before any actions are searching for hidden wiring. How to find wiring in the wall? If there is no executive electrical circuit, you can use the device to detect hidden wiring.
The cheapest tool is a voltage pointer or indicator screwdriver. Price of about 150 rubles. It works on the principle of capturing the presence of an electromagnetic field. As a rule, has three levels of sensitivity:
"O" - determining the phase in the supply network.
"L" is a non-contact definition of the presence of electrical wiring with low sensitivity.
"H" is a non-contact determination of the presence of electrical wiring with increased sensitivity.
You can detect this device only those wires that are currently under voltage. At the same time, it will show the finding of the field within a radius of 10-20 cm from the wire itself. Therefore, it is worth using a screwdriver only in cases where accuracy is not so important.
Those who have about 1500 rubles. May acquire alarm "E-121", in the people called "Woodpecker". It allows you to find the wiring at a depth of 8 cm. The essence of its functioning is based on the principle of electrostatic electrostatics. When an antenna approaches the current source, electrodynamic force begins, and the equipment gives a signal. It can be seen that the "woodpecker" finds only those wires that are under voltage. As the source approaches the source, the intensity of the signals supplied increases. Thus, it is possible to quite accurately determine the location of the wires and a break in the hidden wiring.
Metal Detector Zircon Triscanner Pro SL. It is just more expensive - about 2 thousand rubles. But the instrument allows you to detect metal structures, wooden structures, as well as hidden wiring, even if it is not under voltage. This is possible due to the fact that it works on the principle of metal detector. Therefore, this device can be quite accurate to determine the path for which the wires are laid. But the disadvantage is that, perhaps, there are no wires, but self-tapping screws, nails or fittings.
Outcome
When installing wiring it is worth thinking about to carry out it in a hidden way, because It is safe and looks aesthetic. The main thing is to remember where it is!
Retroges in brick in front of plastering
Attachment is carried out using plastic brackets. Of course, all the electrical pipes must follow the routes that are determined by the scheme (on the rules of the placement of the wires we will notice below).
In addition to installing the wiring, the most wires are immediately assembled. Here it should be borne in mind that these boxes should not stick over the plaster.
Therefore, it should be decisled with what thickness will have plaster and depending on this make holes with a drill in a brick wall. Fixing the mounting boxes in the holes made using alabaster. These boxes are displayed by the ends of the wires.
Also before the process of plastering walls, junction boxes are mounted. They should be in every room. Their installation is no different from the installation of peatheads. In the middle of them also remove cables.
As for the type of cables, the Copper Cable WGN or NYM should be installed under the plaster. The last cable is the most preferred option. They possess PVC-shell, which does not support combustion and, in the case of a short circuit, it highlights a reduced amount of smoke.
If there is a desire to use other wires (PVS, APV or PV), then they need to be mounted in boxes or pipes. To stretch the cable through pipes use an elastic plastic stretch. First, it is pulled through the pipe. Next, the cable is reliably attached to it and stretching the stretch, tighten the new wiring.
Useful advice: the most ideal option for laying hidden wiring will be the installation of plastic pipes on the walls of a brick house, through which the cables themselves will pass. The convenience of these pipes is that if in the future it will be necessary to replace the wiring, then no difficulties will arise with the dismantling of the old and installing new cables. It will not be necessary to stick the walls and the replacement process itself will be very simple.
When all the wires are laid, distribution and mounting boxes are installed, then the plaster is applied on top. This option of wiring is possible if the layer of plaster will be thicker than cables.
In the event that it is planned to apply a little plaster, i.e. Its layer will not be very thick and the cable is not possible to hide it in it, then in the brick walls you need to make shoes (tubing). In them, the gasket of hidden wiring will be made. About the features of the creation of the shit we describe below.
In practice, it often happens that the owners do not want to apply plaster on the walls, and instead, plasterboard plates are installed. In this case, everything is very simple, since each wire can be safely attached to the wall using a bracket, and all hidden wiring will be placed behind the sheet of plasterboard. Of course, the placement of the electrocabilities should correspond to the electrical circuit and the rules defined by PUE. 
How to place the electric pipe
Let us dwell on the rules for placing electrocabilities. They should be placed only in vertical or horizontal positions. Accommodation on the diagonal is prohibited. An exception may be a diagonal gasket on the attic, however, if the cable is placed parallel to the ceiling lines.
The horizontal laying of hidden wiring is recommended to do at an altitude of 30 centimeters from the floor level, or at the level, which is located 30 centimeters below the overlap level. Wiring can be brought above, but no less than 15 centimeters should be between the overlapping and wiring.
Useful advice: It will be better if the distance between the overlapping and hidden in the plaster or behind the plasterboard will be 30 centimeters. This will avoid difficulties in the case of mounting the suspended ceiling.
As for the vertical laying, there are also some limitations here. The distance from the corner of the wall, door frame or window opening to the cable must be a large 15 centimeters. If the wall will pass the gas pipe, then the wire should be located at a distance of 40 centimeters from it.
Stroke
The layers described above the hidden wiring methods concerning the case when the house is built and only the organization of all engineering systems is carried out.

Shooting in plaster
However, there are many cases where the owners of brick houses want to replace the old wiring with their hands. In this case, additional difficulties arise.
They are related to the fact that the whole old wiring is hidden under the layer of plaster and actually in this layer will have to lay a new wiring. In order to install it, you need to make the channels in which the electric pipes will be placed.
Features of the scruffing of the stroke depend on the thickness of the layer of plaster. If this layer is thicker than the wiring, which will be laid, or tubes in which cables will be placed, then strokes only plaster.
In this case, we can say that you are lucky because you do not have to apply great effort. However, if the thickness of the layer of plaster is insufficient, then you will have to stick the brick wall. And this is already much more difficult.
The stroke of brick walls is also carried out with certain rules. So, the channel should not be wider or deeper than 25 millimeters. One shtroba should not be longer than three meters. On the bearing brick walls you can not make horizontal channels. Also impossible to stick overlaps (except for plastering on the ceiling).
In addition, the channels should be made in such a way that there is a minimum number of corners between the location of the switch / socket and the junction box. Of course, it is better to make only one angle of transition from the horizontal shooter to the vertical. The joints of the walls in this case are not taken into account.
Methods for creating a stroke
They can be done with:
- hammer and chisel;
- perforator or shock drill;
- bulgarian;
- stroborza.
 The most ideal option is the use of strokeware. Thanks to him, the shit will have the necessary depth and width, and will also be smooth.
In a brick house and any apartment, the shoes are made according to the routes of laying new wiring. These routes are indicated in the scheme.
According to the diagram on the walls draw marking. It must be two parallel lines that depart from the junction box location to switches, rosettes and lamps.
Useful advice: Before applying markings in places where the shutters will be held, it is necessary to check for the presence of wires under voltage. This will improve the safety of all works.
According to the markup, the walls are carried out. This process is very noisy and during it a lot of dust stands out. Therefore, it is necessary to use glasses, gloves and a respirator to protect.
 If you are planning to stick the wall with a perforator, then you need to use a wide and short boos, as well as a blade. At first, equipping the perforator of the brown, make holes along the entire length of the shortfold.
The distance between them should not exceed 15 millimeters. The hole must have a depth equal to 25 millimeters. Next, remove the boring and install the blade.
After that, chop the necessary pieces of the wall. You should not put a shovel across the stride itself. This can lead to chopping a large part of plaster.
If you use the grinder, then it must be equipped with a diamond disk. She drank both edges of the shortfold. Next, take the perforator and release the part of the wall, which is located between the propylene lines.
It should be borne in mind that when using a grinder, a large amount of dust will be formed. This dust must be removed using a powerful vacuum cleaner. It is desirable that the tube of the vacuum cleaner keeps the second person.
As for the strokeware, it has two disks, which will cut two lines of our tube. Of course, these discs must be diamond. Strokorez has such a design, due to which the dust does not fall into the room. When the shoes are ready, they are cleaned and ground.
Similarly make places to place mounting and junction boxes. They are mounted on the alabaster. After that, the necessary wires are already installed.
Again, the wiring can be installed both in the most shoes and apply plaster on top and can be placed in plastic pipes. Cables or pipes are fixed using spacers, bracket or alabaster. After laying the wiring, the shutters are filled with plaster.
Some features of the compilation of the scheme
Such are ways to lay the wiring in a brick house with their hands. Accordingly, one of these methods must be taken into account during the preparation of the laying scheme of the new wiring. It is worth noting that the scheme is mandatory and necessary to be approved in the relevant authorities.
Previously, we indicated the rules for posting wiring. They must also be taken into account in the scheme. It is also worth noting that the scheme should provide for at least two separate branches of wiring.
One must feed the illuminated devices (for this you can use a wire with a cross section of 1.5 sq. Millimeter), the other is to supply the current to the outlets (the cross section of electrical storage should exceed 2.5 square meters. Millimeters).
There must also be separate branches for powerful consumers of electricity. Each room must have at least one junction box.
Needed materials and tools
After you accounted for and approved the wiring scheme in a brick house, you can proceed to the purchase of necessary tools and materials.
Materials must be presented:
- electrocabolic;
- assembly and adjustable boxes;
- alabaster;
- terminals;
- braces;
- metal sleeves and plastic sleeves.
As for the tool, in addition, with which the shutters will be made, you need to take:
- A hammer.
- Sideboards.
- Chisel.
- Passatia.
- Mounting knife.
- Screwdrivers.
- Voltage pointer.
- Multimeter.
When all materials and tools are prepared, proceed to laying wiring in brickwork with one of the above methods.
In the event that the wiring will pass through the wall, then in the wall you need to make a hole and insert the sleeve into it. Plastic sleeves are mounted on the edges of the sleeve.
At the end connect all the wires and conduct measuring work.
Conducting work on laying wiring in a brick house

In most cases, when the electrical wiring device is hidden under the layer of plaster. This method is more secure and reliable: after all, wires closed into the wall are reliably protected from mechanical impacts, moisture and corrosion. There is such a method of laying and cons - it will be impossible to transfer it to another place, and it will be difficult to determine the location of the cable in the absence of a scheme.
What first, plaster or wires?
When to make electrician wiring - before or after plastering? - This is a dispute between the electrician and plaster. For everyone, it is more convenient to first make it part of the work without any interference. But if you are repairing on your own, or it makes one master, then the procedure for action will be as follows:
Your opinion, what is first?
ElectricianPlaster
- The walls are cleaned from the old finish. They draw lines for which wires, places of installation of peavering and sawn boxes will be held.
- Under thick wires and corrugations are paved (grooves) along the entire length to the outlet points: switches, sockets. The use of corrugated channels is required when the walls are made of combustible materials. Also, they are used to be able to pull out and replace the wires. Laying cables in the plaster is allowed without corrugations.
- Thin wires can be paved directly on the surface without sticking, if the layer of the plaster mortar will hide them.
- Next, the wiring is laid and fixed on the wall.
- Walls are plastered by or without lighthouses. The ends of the wires sticking out of the channels can be wind and close the film.
- After drying the walls, the perforator with the crown drill places for the socket, distribution and switches. This is done after plastering, because otherwise it is not clear to which depth they will be mounted.
- The final finish is made - wallpaper or decorative plaster. After that, outlets and switches are inserted.
But there is one point in favor of the fact that the entire electric car should be carried out after the walls are plastered. If the shoes are laid in the walls, it is much easier to do in a layer of plaster, for example, on the second or third day, when it is still not completely afraid. Stroke concrete or brick will take longer, and dust will be more.
Electrician installation rules
Compliance with generally accepted building standards and requirements - security and durability of wiring. Therefore, before you prepare the shocks in the wall under the cable, you need to familiarize yourself with the rules of the device of electrical installations (PUE). The location of the posting is determined by such items:
- above 15-20 cm plinths;
- below the ceiling and beams by 20-30 cm;
- from corners at a distance of 10 cm;
- in the area of \u200b\u200bheating pipes, gas pipes with an indent of 50 cm.
This also applies to television cables.
Purchase wires better in the bays. In this case, the loops will be solid, and put the scrambled and insulated connections under the stucco.
The laying of electrical wires is carried out hidden in the walls, semi or corrugated pipes. When bookmarking in a non-flammable surface, including plaster, allowed by the absence of corrugations.
According to PUE, aluminum wires are allowed only with a cross section of 16 mm2 or more. Little section is only copper. This is due to the fact that aluminum has a greater electrical resistance than copper. With a large load, it heats up and can melt.
Depending on the laying conditions, the wires of the brand are used:
- WEGNG: Sustainable ignition, non-combustible, for laying under the plaster;
- VVGNG-LS: mainly under drywall, to protect against mechanical effects is placed in PVC box; Its analogue can serve as a gray cable NYN-LS with a layer of rubber, more expensive, easy to install, for the stroke is not too convenient, as it is not flat, but a round cross section;
- PVS: stranded, white, is allowed to use only as an extension or when the electrical appliances are connected directly to the outlet.
In old electrical wiring, 2-, and in the new 3-core cable. Two-blockable chandeliers require 4 livers.
Not depending on, from which material the walls of structures are made, a project is drawn up for all buildings, where the power supply scheme is specified with the location of all elements of the wiring:
- Switchboards;
- Junction boxes;
- Outputs for sockets and switches;
- Places of installation of lighting devices (chandeliers, plafoons).

In addition, the power supply scheme indicates:
- The power of protective automata on each group on the network;
- Type of wire;
- Wire section;
- Distances between the individual elements of the wiring, between the distribution boxes, to sockets and switches. From Rush to the first distribution box and places of connecting household devices of high power, to which individual lines are paved (heating boilers, electric stoves, pumps and others).
This information can be used to calculate the required length of the wires of each type given the cross section. The selection of wire sections is made according to a separate method, which requires detailed consideration, we will proceed from the data that is specified in the project documentation.
Brands of wires paved in the walls
Characteristics of wires paved along the walls of various structures depend on many factors:
- Functional design of the building;
- Operating conditions of equipment;
- From the type of building materials, from which walls are built;
- PUE requirements and other guidance documents defining the rules of the electrical installation device.
Given these requirements, manufacturers make various brands of wires, one of the most popular wires by consumers is considered the PPV.
PPV -the wire of a flat configuration, where the veins are placed in one row, has a layer of insulation on each core. A cable for power supply to the socket and lighting networks is designed to withstand the voltage up to 450.

Located in the walls in the residential premises, a cross section of up to 6 mm 2 is used. In standard packs of bays are so 100; 150; 200m, permissible temperature during operation from -50 to +70 ̊c.
VG -the wire has several models, there is a flat design, in appearance similar to the PPV, with double insulation.

There are circular, square and triangular designs.
| VVG brand cables having round veins | ||||
| Number of lived and nominal cross section (mm²) | Outer diameter (mm) | Mass of 1 km of cable (kg) | ||
| 660V. | 1000V. | 660V. | 1000V. | |
| 2:1,5 | 7,5 | 8,1 | 71 | 80 |
| 2:2,5 | 8,2 | 9,6 | 95 | 116 |
| 3:1,5 | 8,1 | 9,4 | 92 | 116 |
| 3:2,5 | 9,3 | 10,2 | 136 | 150 |
| 4:1,5 | 9,2 | 10,1 | 127 | 142 |
| 4:2,5 | 10,1 | 11,0 | 171 | 186 |
| 4:4 | 11,7 | 13,1 | 243 | 273 |
| 4:6 | 13,1 | 14,1 | 325 | 357 |
Table of the size of the external diameter and weight of the Wires of the VG
In some products in isolation there are additives preventing combustion, such a wire has a Vggling marking.
NUM - Cable (NY) -the analogue of the German wire DIN 57250, flexible, with stranded wires or with a rigid monolithic wire, is ideal for hidden wiring in the living rooms. This is justified with the composition of non-combustible insulation with low release of toxic gases. In the design of the round shape, three layers of insulation, on each wire, an intermediate layer of small rubber and an external, non-combustible polyvinyl chloride sheath.
Flat installation wire PUNP -the most common in retail chains and affordable cable. Flat-shaped with double PVC insulation in the design can be up to 5 wires.
Council №1. Experienced electricians do not recommend using PUNP to lay the wiring, due to poor quality. Statistics show that 60% of fires due to poor-quality wiring occurred in networks with PUNP wire. 80% on the market not high-quality products, many manufacturers do not comply with technology, the discrepancy is detected in many respects:
- Thickness and composition of isolation;
- The composition of the wire alloy;
- Cross section lived;
More expensive to buy a more expensive cable and be sure about security.
Criteria for selection of wires
First of all, it is necessary to be guided by the project, and the brand of the wire and its cross section are taken into account, taking into account the conditions of operation of the premises. In the absence of a suitable wire, its analogue or product is suitable for technical specifications.
In most cases, the PPV can replace the VG, the flat wires are often installed under the plaster on concrete and brick walls. They reliably adjacent to the plane and do not require a thick layer of plaster to hide the network.
Tip # 2 for lighting networks on areas from the junction box to the chandelier or hanging plafo is recommended to use a flexible stranded wire. At the site of the attachment of contacts to the lighting device, the plot of the chain is moving and rigid wires can be rolled, flexible in this case serve much longer.
According to the requirements of PUE in rooms with high humidity, wires with rubberized insulation with moisture-proof properties of all elements are not lower than IP 54. As a rule, such wires have a round shape and before laying punching shorts in brick or concrete walls. In wooden logs, they are placed in a non-flammable corrugated pipe.
For operation in conditions of high humidity, wires are used:
- The pass is paved in non-aggravated pipes;
- When - a universal wire, you can use in dry and wet conditions.
Laying wires in plasterboard walls
The design of plasterboard walls provides a large number of self-tapping screws for fastening various elements. Therefore, special attention is paid to the method of laying wiring so as not to damage the insulation and do not close the wires.
Plasterboard sheets are attached to a predetermined frame of metal galvanized guides.
Table of size of diameters of plastic corrugated pipes
| The diameter of the outer surface (mm) | Diameter of the inner surface (mm) |
| 16,0 | 10,7 |
| 20,0 | 14,1 |
| 25,0 | 18,3 |
| 32,0 | 24,5 |
| 40,0 | 31,5 |
| 50,0 | 39,6 |
For laying wires in such structures in the metal profile, technological holes are provided, the wire is defined in non-combustible plastic corrugated pipes.


At the same time, places with acute ends of the self-esteps are enveloped, before the fastening of the sheets of plasterboard, on the other side of the frame, the cable passing zone is noted into which the fastening elements are not screwed.

For the installation of peasants and distribution boxes, the openings of the corresponding diameter are drilled with crowns for drywall. Plastic glasses of peavering have a special design with straps, which pressed the body to the wall plane from the inside. To do this, clockwise screw the pressure screws to full stop. Wires are renovated in the technological holes of the peases for 15-20 cm on the outer side for cutting and connecting sockets and switches.

In the same way, the wires are laid and attached to the walls of plywood, chipboard and OSB, in any structures with hollow inside. For drilling holes in wooden sheets, appropriate crowns and other elements are used.
Laying wires on brick and concrete walls without sticking
In these cases, it is very convenient to use a flat-shaped wire. According to pre-marked routes, the wire is attached to the walls of plastic brackets with high-strength nails or plastic dowels with clamps. Previously, fasteners were carried out by tin plates, which were screwed to the wall with self-draws on a plastic dowel or simply shot to the wall with a construction pistol.
For peasants and junction boxes, the holes are drilled by a perforator with special crowns along concrete. The case of the peavercraft is inserted into the hole and is attached to the gypsum solution, the wires are breed before it in the side technological holes.
Tip # 3 It is recommended to drill holes for peasants after the surface of the wall with the wiring lines is attached. This technique will ensure the installation of the upper face of the glass of the peavercraft on the same level with the wall surface.
If you set the opposite before, it will be difficult to achieve a clear coincidence of levels, and the drops lead to problems when installing sockets. With deeply recessed submersion, the fastening bolts of the front panel of the socket can not get to the carving on the case. With the protruding glasses of peasants between the wall and the front panel there will be a gap.
Distributive boxes and submersers are manufactured according to certain standards. The diameter and the depth is selected depending on the size of the switches and sockets, the amount of wires are taken into account for the junction box, which are rented in it. With a large number of wires with a large cross section and the outer diameter of the cable of a round design in the walls, it is recommended to make shoes.
Stroke gasket in concrete and brick walls
The shoes make their way a depth of 1-2 cm by a puncher in shock mode with a nozzle, in the form of a chisel. Closer to rosettes and distribution boxes, the ships are made a little deeper to 3 cm, so that the wires are free to enter the technological holes of the glass of peasants.
Outer diameter and cable mass (kg)
| Section | Diameter (mm) | Mass of 1 km of cable (kg) |
| 1:16 | 12.3 | 288 |
| 1:25 | 15.3 | 460 |
| 1:35 | 16.5 | 568 |
| 1:50 | 19.0 | 778 |
| 1:70 | 21.8 | 1094 |
| 2:1,5 | 11.2 | 172 |
| 2:2,5 | 12.7 | 224 |
| 3:1,5 | 11.8 | 201 |
| 3:2,5 | 13.4 | 268 |
| 3:1,5+1,5 | 12.7 | 223 |
| 3x2,5 + 1.5 | 15,5 | 350 |
| 3x4 + 2.5 | 16,8 | 437 |
| 3x6 + 4. | 18,5 | 641 |
The width of the shirt is made taking into account the number and size of the wires deployed in this area.
Mix the wires in the same way as when laying without a stroke. After laying the wires, the layer of plaster is closed.

In the installation organizations, where the sticking is produced in large volumes, industrial manufacturing strokes are used. This tool provides for the adjustment of the depth and width of the sticking, in some models it is provided for the dust with a vacuum cleaner. The performance of the strokesis is much higher than when working in a conventional perforator, the channels are obtained more smooth, but the price is high, it is not advisable to use it for disposable work.
Tools and nozzles used when laying wires in the walls
Retrolers and holes for peavernits can be pierced with a conventional hammer and chisel, but in the 21st century, this is done only under small volumes in the absence of power tools or scuba, for sports interest.
Perforator is a universal tool. It can be used as a drill for drilling a tree and drywall, in perforation mode, you can drill concrete and brick walls, piercing the shoes.
Drillswith adjustment of revolutions, used for drilling only wooden and drywall surfaces, as a screwdriver with appropriate nozzles. The magnitude of the revolutions is established depending on the material being processed, for the tree more for metal less.
Nozzles for drills and perforators are the most diverse in design and appointment:
- Ordinary tree drills, metal, with winged diamond tips for drilling concrete and brick;
- Crowns for drilling wooden and plasterboard sheets;

- Crowns with fetal, diamond and victorious teeth, for drilling brick and concrete walls;

- Titanium four-sided bits with fiform spraying for screwing the screws.
Tip №4 When buying quadrogenous bits, do not save buying cheap Chinese metal products, they are quickly erased.
Errors when laying wires in the walls
- When laying wires in concrete or brick walls without a playing, they forget, make a short stroke near junction boxes or pickles. This must be sure to make the wires freely into the technological holes at the bottom of the glass.

If you start the wire through the top or do the hole at the top, the risk of short circuit or cliff appears. When installing the socket, its body will break insulation or transfer the wire;

- Do not install the wires on the lighting and rosetic groups of the larger cross section than this is indicated in the project, usually 2.5mm 2. With a section of 4-6mm 2, the veins are difficult to place a socket or switch in the contact group, especially when the alloy is hard and elastic. Sometimes in such cases, contact groups break under the elasticity of the wires, the ceramic or plastic housing is bursting.
- In order not to make a mistake in the width and depth of the shorter in a separate section, fold the width of all wires that are laid there and make 1 cm more with a margin.
- When drilling a perforator with a crown for drywall, do not forget to turn off the perforation mode, otherwise the sheet may simply break in this place.
Frequently asked Questions
- On the plots between the distribution boxes, the shrot width is 10 - 12 cm, cut the border with a brotcast with a disc on concrete, but knock out the middle part is still hard manually. How to speed up the process?
Rush another line in the center and knock out a puncher with a chisel, will be faster and easier.
- What wire and switches should be installed in the steam room?
Moisture-resistant with rubber insulation NUM or when, switches and lighting plaffers with a degree of protection not lower than IP-54;
- Can Flat Wire PPV be laid in the bathroom under the layer of plaster and tiles?
Almost possible and even everything will work, but to ensure your own security and fulfill the requirements of the PUE, it is better to pave NUM or another moisture-proof cable;
- The electric stove is powered by a copper wire with a cross section of 6mm 2, the main wire between the distribution boxes in the socket group is 4 mm 2. Can I put the wire 6 mm 2 between the boxes and from the nearest box to power the electric stove so as not to pull a separate line?
No, it is strictly forbidden to PUE, powerful heating devices, electric stoves, heating boilers must be powered by separate lines, through separate automata in RSch. In addition, in the proposed version, except the stove on the line will fall a load from the devices connected to sockets. This may exceed the calculated power and lead to a short circuit and fire.
 Why you can not give icons
 Is it possible to give icons as a gift: Signs, the opinion of the Church
 A year ago left her husband, and now I do not know what to do