The table in the yard do it yourself. Table do it yourself: we make wooden and folding tables, studying drawings and step-by-step instructions. Garden Furniture: Tables and Benches
The table for the country area is not just the object of the situation, this is a ritual place where all households are invariably. In the summer, go to the house to drink a seagull or lunch, no one seens desire. In the fresh air and appetite is better, and the food is tastier. In order not to carry furniture from the house for gatherings, you can make a street table for giving with your own hands, at the same time taking care of the benches.
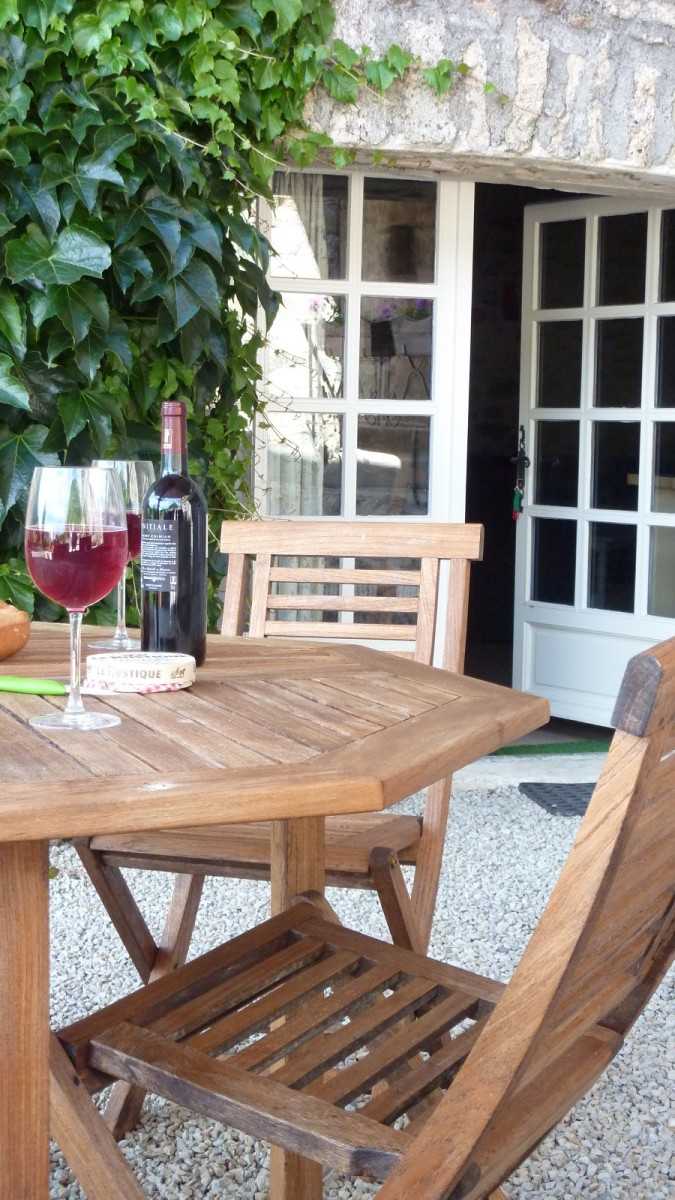
table for giving with a built-in bench
The summer table does not imply the complexity of the design, so it will not be even distant from the carpentry and creative work of personalities with its assembly. We will imagine you somewhat very simple and at the same time of the original ideas of its creation, perhaps something from the proposed by us will become an ornament and your site.
Cottage
Table for giving with your own hands: Interesting ideas
Conclusion
Photo Gallery - Table for giving with your own hands:

table for giving should be durable
Street furniture is subject to serious tests, so it is necessary to make it from durable materials. Specifically for the table you can take:
- A rock.
- Wood.
- Metal.
- Screw materials.
Tables from the latter look especially interesting. But first things first.
Wooden table

set of furniture for meals on the street
Selecting the material, pay special attention to wood. Board board - Return and use, in our case, not everyone is suitable. Supported and easy-to-wear breeds, alas, do not fit. In addition to the fact that they need a special impregnation, because too fires, so also the resin allocated by them will spoil the tablecloth and dishes.
Necessary elements need to be sought among hardwood blanks. On the table top you need to dial the boards with a thickness of 30-50 mm. For consumer strength, they are stuffed on the frame. The legs in the design can be saddled with straight or x-shaped. It is important to proceed well all the details so that there is no danger to drive the opposition, wiping the table. Communicable processing of finished product with protective impregnations.

folding wooden table in the country do it yourself
In order to make the table "on the century", cover him with varnish, and do it, which is called, do not regret the brush. The composition must be literally launched in wood, and this will be possible only if you are slightly warming it in a water bath. Varnish coating make three-layer.
Stone Table

round table and benches from stone will serve not one dozen years
You want to make a monolithic design, affecting the imagination and creating a special mood for the trapes - try working with a stone. The table of this type can be created with your own hands or buy a finished product. Shops offer granite and marble options in a wide range. There you can choose to choose a bench with a similar material.

to inspire life into the old table, it is enough to make the tabletop cladding tile
It will be expensive to cost it, but if you really want to have such a luxury in the garden, like a stone table, try to keep it. Lay out the foundations of shops and tables yourself. To do this, it will be quite good:
- Flagstone.
- Brick.
- Modern blocks.
- Normal cobblestone.

stump table lined with stone
These materials will be much easier to enter into the overall concept of the garden and combine them in already existing buildings. At the worktop, seats and backs, it is quite possible to take artificial stone. View from this, the composition will not lose.
Metal tables
Those who are "friendly" with iron and has a welding machine at hand, may be interested in a variant of metal furniture. Products are obtained elegant and aesthetic, with openwork decor inserts. The metal table will also need to be protected from early destruction. This is done by priming metal before final painting.

round table for giving with a stone countertop and curly metal legs
Forged tables will satisfy the needs of respectable owners, but they are unrealistic to do them with their own hands. Similar structures are ordered by professionals. For forging, the conditions for forge are needed. However, given the fact that products of this species can be miraculously combined with a tree, stone, glass, you can only purchase forged base for the table, and make it a tabletop yourself.
Table for giving with your own hands: Interesting ideas

stylization of the table and chairs under the fungal glade will create a kind of highlight in the landscape design of the country area
If you firmly decided to work on creating a country table yourself and are ready to make it a non-standard, look at the "unnecessary" things available in each shed. Perhaps among them there are objects that can become consumables for creativity.
Assorted team
No less practical option for the country table, along with wooden, metal, rathang, stone products, is the national team from all sorts of "Solyanka". This creation will become a multicolor "character" of your garden and will never be ignored. What to make it? You will not believe! Source materials will serve you:
- Broken flower stand.
- Metallic barrel cover.
- Color plastic trim or round glass.

set of bar
Take a sheet of paper and try to portray on it a circular ornament in the spirit of the Moroccan style. Increase creation to the desired size. Make it quickly will help xerox.
The resulting workpiece put under the glass and draw the line with copper contour. Leave to dry for a day or a little less. Recommended drying time The manufacturer indicates.

it is enough to decorate the side pieces of the bench and chairs with wheels to get original garden furniture for giving
Now a turn of the painting of the glass marked with stained in paints. Here the main thing is that the colors are smoothly located inside the site allotted. If you have never worked with specific paints, it makes sense to stretch on a separate piece of glass to understand what quantity they need to be taken for high-quality painting of fragments. The painted painting should also be carefully dried.
The finished glass can be additionally decorated with elements drawn by copper contour.
The barrel cover cover the white paint, which will hide the tracks of rust, and go to the preparation of the main part of the table top.

table for the cottage from vazanka wood
Metal part of the flower stand that will serve as a supportdesk for the cottage created by their own hands, it is necessary to primitive, paint the acrylic paint in the color of copper and partially register.
After granting will be ready, proof the places of contact with the glass window seal. It is necessary for its best fastening.
Now the final stage. Collect all the parts together: put a glass countertop in the lid and waters the composition on the stand.
It can lunch at this table and is not very comfortable, but drinking coffee in the evening coolness, it will be very nice.

decorating the usual foam mosaic, you can get the original table
Models from pallets
After building a country house, you probably have a few pallets left, on which a packed brick or building mixtures were brought. You do not even suspect what a wand-cutter for the decoration of the cottage. With their help, the table will be ready in a few hours, and the view it will have such that it will not be ashamed of it not only in the garden, but also in the home interior. At the same time, notice, you will not even incur special financial costs.

table for cottage from pallets
Table for giving, made with your own pallets, can be constructed in several ways. For example, for the most simple option, you will need:
- Screwdriver.
- Brushes.
- Sandpaper.
- Rotary wheels.
- Color antiseptic style.
- Screws.

mobile table for cottage from pallets
First of all, make a grinding pallet. At the first stage of the removal of the coarse layer, use a coarse sandpaper, fine-grained will be required for final processing. If there is a bodice of Bulgarian, in the configuration of which the grinding wheel is provided, use it instead of sandpaper rolls. This will speed up the preparation process.

master class manufacturer table for giving with their own hands
Turn the pallet and attach minor swivel wheels to the bottom. This is done using ordinary screws. For greater fastening reliability, put under the last washers, which can be removed from similar screws used for work with metal tile. Do not neglect this advice. The bases of the wheels have sufficiently large holes, and the screw without lining will not be able to qualitatively deposit the part to the wooden surface.

phased process of manufacturing table
Now it remains to open the finished product with a wax-containing antiseptic. If you want to highlight the tree structure, use a transparent composition. To give the color it will take a veil. You can stylize a table:
- under oak;
- larch;
- rosewood;
- nut;
- pine.
A low wide table will be appropriate on the veranda, in the attic room, the interior of the bath.

without additional processing, the table will serve at least two seasons
If you want to make a summer seating area more comfortable, make not just a table from pallets, but a whole set of cottage furniture, adding it stationaryly accumulated benches. Such a kit can be made portable and, if necessary, move it from the mangala, say, to the pool or pergola.

bright table from pallets for the whole family
A creative option for the country situation will be the pallet, transformed into a worktop and equipped with vintage legs, remaining from the old chest, table, closet. This item needs to be isolated by contrast.
You can use such furniture in the bedroom, gazebo, on the terrace.
Table of coil

vertical skulls allow you to place various items
"The coil is heavy by itself, but it is easy to construct a lightweight option. tables for cottages and again, do it with your own hands »
The coil from under the cable is also excellent material for creating a country design. Look at her - the same almost ready-made table! A little decor and it is ready to use. The easiest way to decorate the coil can be twisted twine. For this, it is enough just to wind her trunk tightly. The upper design of the design is grinning and opened with varnish. If you wish, add a functionality product. Set the vertical speech circumference. They can also be reeded by rope. With the advent of the cross, you can store the necessary items under the table.

table of coil with mount under an umbrella
The coil is heavy in itself, but it is easy to construct a lightweight version of the table for giving and again, to do it with your own hands. You will need only the top disk from the product that will appear as a countertop. The frame frame for its installation can be made of metal.
If in the shady garden there is a suitable height and strength of the stump, then it is also, with the help of a coil disk, can be converted to an improvised table. This idea will be good not only for the playground, it is rational to use it and when organizing a relaxal corner for adults. Peeling in half the wooden disk, it will be possible to collect original chairs, which can also be put on legs-hemp. Get a good garden headset.

the table from the coil can be decorated with any pattern.
Water table?
Why not? Such a brutal option can be the decoration of the barbecue area and even the living room. Works - everything is nothing. We find an old thick log, soak it with a verse and align the lower part, giving the product stability.

table on the wheels of stump
No less easy to manufacture and attractive in design Mobile table of hemp. By the way, his functionality can be expanded if not be lazy to sew a foam-wheel seat on it, which will allow a slight movement to convert the design to a comfortable pouf.
Not in the dacha deficiency and keyword. Of these, it is also not a problem to quickly build a comfortable desk design for giving with your own hands. Collect flat base and secure brushing bars in the tabletop belt screed. Put all this's legs and enjoy communication with primitive nature in full.

table for living room cottage from the old log
Tire garden composition
Do not rush to get rid of old tires. They can be made of the magnificent landscape decor of the extended functional: it is not easy to use the table as a table, and the pouf near it is not only like a pouf, but to equip the place within them for gardening inventory, for example.

the table and chairs are made in a single designer style from old tires
Pour the tires in an acceptable color for you, dry, fold the column, bonding the elements with silicone sealant or other suitable composition.
Now make a tabletop and seat. To make the first to do well from durable plastic or cutting into their tree. For puff, also cut the plywood disc of a slightly smaller diameter than that of the tires, glue the foam rubber to it and cover the cloth. Removable parts are ready.
Table welding

mobile table from old welding with wooden table top
Found in the bunches of Babushkina welded? Sumptuously! Transform it into a mobile table warehouse. Bottom with wheels, and for the top we collect a worktop from the boards. Drinking boards in size, we collect them together on transverse strips, the length of which should correspond to the welding diameter. It will help the table top to hold on the spot, and not to move aside and do not turn over with the slightest load. Inside the improvised table will be enough space for the organization of a minibar.
By the same principle, you can convert empty boxes, barrels, etc.

original table with metal big wheels instead of legs and built-in benches
Conclusion
As you can see, collect the table for giving your own hands - the occupation is very fascinating and absolutely unemployed. Here, even newcomers do not have to be afraid, to spoil something, because, it is originally unsuitable for direct use objects and elements. Try your hand in unusual yet for you. Perhaps the final results will be an incentive not to dwell on the achieved, but go further. From the submitted materials you can do many more unusual and necessary things in the country's dacha.
Photo Gallery - Table for giving with your own hands:


After a hard work week or on vacation there is nothing better to spend time at the cottage. With comfort, sit by the fire, drink tea, boiled on herbs, gather at the table for giving, who is collected with his own hands.
The modern market offers a large range of plastic furniture available at the cost of furniture. But, plastic tables for giving, unfortunately, do not differ reliability. Therefore, many owners of the garden plot dream of independently produce it from natural materials.
The process is completely simple, as it may seem at first glance, you should only competently prepare for work.
Country furniture set: What material to choose?
The street table and benches, constantly under the open-air, are exposed to natural precipitation, so they should be performed only from durable materials: natural wood, stone, metallic raw materials.

Natural tree
Please note that not every type of tree is suitable for work. The breed of coniferous trees have a loose, light structure, besides, they are prone to ignition, constantly secured drops of resin can spoil the tablecloth and dishes. Therefore, they are recommended to impregnate with special moisture resistant compositions.

For the wooden table, it is better to take deciduous species of wood, and each board must be at least 50 millimeters. The design of the legs can be performed both in direct and in the X-shaped version.

Make sure that all the surfaces of the components of the products have been carefully processed, to avoid getting offended in further use. And do not forget to apply a special impregnation on the finished product.
In order to extend the durability and strength of the table from the tree to the country, experienced professionals recommend covering it with a minimum of three layers.

A rock
Stone furniture will undoubtedly affect all their greatness and beauty. You can purchase finished furniture, but its price cost is too large. You can reduce costs by independently performing the base for the table and benches. For which you can apply affordable materials: plates, bricks, building blocks, ordinary natural stone.

Such a base will perfectly fit into the overall style of garden plot and other buildings. For the table top and the backs of the shop wisely take artificial stone.

Metal
Tables and chairs for the cottage from metal are not at all difficult, but for the work process you will need a welding machine. Such furniture looks very attractive, and the aesthetics will give decoration openwork inserts. But metal furniture is also susceptible to gradual destruction, therefore also needs special processing against corrosion.

If funds allow for financial resources, you can order forged products from a specialist in a professional workshop. Forging is perfectly suitable as a base, supplementable with glass, stone and wood.

Therefore, there is an option to buy only the foundation for furniture and in the future it is necessary to equip it.

Country furniture
To create real unique masterpieces of furniture, you can apply healthy unnecessary things, rummaged in a barn or garage, where it is undoubtedly possible to find suitable consumables:
- metal barrels;
- used plastic parts;
- glass surfaces;
- other.
The old cover from the barrel can be cleaned from rust and process, then cover the paint - it turns out an interesting countertop. Either for the base (legs) of the table, you can apply the iron part of the flower stand. It must be primed, covered with acrylic paints. Next, it is necessary to glue the window seal to the support, and the glass is a worktop to improve the consolidation.

At no wasteful owner, of course, pallets are stored from bricks sets, which can also be used as a countertop. For such a table, it is not ashamed to invite friends to tea drinking, or a soul dinner.

Stamp designs from pallet
An independent construction of old pallets will not require any special costs. You can perform it in several easy ways, for which a simple set of tools is useful:

- building screwdriver;
- sandpaper;
- brush;
- color Morid;
- wheels;
- self-tapping screws and screws.

To begin with, it is necessary to collect the pallet, this is first performed by large emery paper. At the stage of completion, the smallest sandpaper is already taken. Work will go much faster if there is a grinding circle to handle parts.

Next, you should turn over the finished treated pallet and arrive at the bottom of the small swivel wheels, with the help of a screwdriver. To better and reliably fix the product to the tree, it is recommended to use washers for lining under the wheels.

The finished base must be carefully treated with an antiseptic. The transparent composition will retain an interesting unique structure of the tree, and the veil will give the object a colorful look.

A small neat table for giving, as shown in the photo, can be placed on the terrace, veranda, or directly in the room.

Summer recreation area will look most comfortable and cozy, if you make a large set of furniture from the pallets. Such furniture set can be performed in a portable version, that is, with a possible transfer of it to different areas of the area.


Scope of Fantasy: Table Option
A heavy cable coil with a relatively heavy design that can be facilitated and reincarnated into the street table for the country. It will have to make a little effort to decorate, as well as the design itself is practically ready.

The easiest way is to wind the trunk of the product with screw twine, and the top thoroughly pollute and coat with a transparent varnish. And you can only take the center itself from the coil, adding a worktop to it, or vice versa - the base of the metal, and the surface from the top disk.

An excellent designer garden head will come out of the old tires: the table and the docks with the back. They can be painted into a favorite color, while engaging with a silicone sealant, or a similar adhesive composition. Perform a tabletop wisely from a durable plastic or a tree of strong breed. You can cut a foam rubber for convenience, covering it with a cloth.

The powerful brutal set will turn out of conventional thick beads, which should be carefully treated and soaked in high-quality versa. Then the lower part of the log should be aligned for stability.

Similarly, the pouf is a little smaller size. But an interesting table will come out of a long log, aligned from above for the table top.


Creating a furniture headset for a pretty plot of a fairly exciting occupation, and absolutely no costly. For work will be useful any old things prepared for the emission. Attach the maximum effort and the results will no doubt surprise you and your guests!

Photo tables for giving


The usual table can be safely attributed to the category necessary in the house of furniture. This item can, of course, just buy in the store. But it is quite easy to make a good good-quality table with your own hands.
The last option is most often choosing owners of our own homes.
Production of a table from boards with their own hands
As the easiest option, you can consider the manufacture of a table with a length of 120 cm, 75 cm high, 70 cm wide. For it, such materials should be prepared for it:
- 40x140 mm boards, stall and trimmed, or sex rake suitable size - for example, 36x135 mm;
- a pair of bars with a cross section of 40x60 mm, a length of 70 cm;
- 4 furniture screws 10 cm long, with a diameter of 8-10 mm and a flat hat;
- electrolovka or hacksaw;
- chisel;
- plane;
- grinding or bar with sandpaper fixed on it;
- screwdriver and drill set.
A variant of the wooden vintage table (sizes are listed in inches).
To make a worktop, you will need to act as follows.
The table top is to collect from cut-off on the size of the boards in the amount of five pieces. It should be attached to the bars with the help of self-tapping screws.
For the self-tapping screws, it is necessary to select the tabletop boards with their help to be reliably attached to the bars, while they should not pass through. When using a head board, the worktop is collected solid, but from the last board it is better to remove the punch with the edge with the support of the jigsaw, and the side is stripped.
If an ordinary planed board is applied, when assembling a table, it is better to leave the gap of about 3-4 mm, especially if the table is intended for cottages. Such a gap when using the table does not interfere, but greatly facilitates care and does not allow mud clusters in those places where the boards are adjacent to one another, making a worktop. To ensure the gaps of the identity is very simple: when assembling, the countertops need to lay the rail between the boards with the desired width or use the metal corner.
Back to the category
Legs for construction
From the same material as a tabletop, legs are made. One legs both details will be connected to "in Polterev". Boards for the manufacture of legs are placed as follows:
- on a sheet of fiberboard or plywood, it is necessary to draw a rectangle. Its dimensions are determined by the formula "A" x600 mm. Here a \u003d 750 - b (i.e., the thickness of the countertops calculated in millimeters);
- the board is placed on the diagonal of the rectangle so that different edges of the board are in opposite angles. Now you can post a line for which you will need to cut off the boards, the "junction assembly" on one and other boards.
After the markup made, the details of the legs are cut down in length, each make a sample in the Poltera. Further, everything is adjusted and assembled using PVA glue with the addition of small sawdust and several self-tapping screws. After the feet of the table are assembled, they must be attached to the tables of the table top with the help of furniture screws, between the legs need to strengthen the rigidity edge - this is done with the help of long screws. You can close the table top of the tablet, to close the bars, to use nails to be used, which are pre-"fell off" hats. To drag them into the wood follows one hammer blow.
Almost ready. It is very advisable to perform staining of the product. To do this, you can use the veneer or colorless acrylic varnish based on water. This ensures protection against precipitation and external influences.
Back to the category
Classic wooden product
Those who are more likely classic forms can be offered to do just such a table. Materials will require the following:
- 4 segments of timber with a length of 710 mm, the cross section is 10x10 cm;
- the board with a cross section of 10x2 cm, sliced \u200b\u200blike this: two segments of 800 mm, two to 1600 mm, two to 750 mm;
- four boards with a cross section of 250x40 mm, length 2 m.
The manufacture of table details is as follows. A wooden countertop will need to give a rounded shape on both sides. To perform marking, taking into account the fact that all the details are performed with your own hands, you can use the most common gymnastic hoop or the subject of similar shape. It is placed on the boards, tightly folded towards each other - first at one end, then on the other. According to the board, the board is cut with a jigsaw.
All table details have now adopted the form necessary to continue. The stripping is performed with the help of large sandpaper, then the surface is grouped and soaked in a mourn of two or three times.
The assembly must be performed in such a sequence:
- gather a box base from parts whose width is 1600 and 800 mm. For fasteners are used galvanized screws 4x60. Before assembly, the joints are processed using the waterproof PVA liner or a good joinery adhesive. Short box parts must be attached to the end longer;
- boards for making countertops must be put on a flat surface. The prepared box is placed on top - it must be centered and draw its inner contour with a pencil. After that, the box is removed;
- in the deregular contour from the corners, 110 mm indent is made - this is a place for the table legs. Next, the glue and galvanized screws of 4x45 are attached to the board countertop, which will ensure the integrity of the table top;
- the box is installed on the worktop, while the contour performed in advance must be taken into account. Details of self-drawing are fastened, while it is necessary to use steel corners. The place where the feet of the table will be installed, it is necessary to leave free;
- the legs in the corners of the box are installed, are fixed with glue, it is screwed from the outer side with the help of screws. The strength and durability of the design is more dependent on how tightly in the corner of the box to put the feet of the table. Therefore, before taking advantage of self-drawing, it is better to ensure fixation of the legs in the corner in any convenient way. The table is ready.
The table to use can be started when the joyful glue dries, and the design acquires the necessary strength.


There is not a single home master who would not want to assemble the wooden table with their own hands, and this desire does not depend on gender and age. It is important to comply with many aspects that the outcome of the work turned out to be really high-quality.
Figure 1. Wooden table circuit with legs in the form of cross.
Initially there was a tree
Initially, the type of table is selected, and then the material, with which it will be working. Tables are different (Fig. 1.2 and 3), and in each case, materials are used different from each other.
Chipboard among all the cheapest and easy-to-work, so enjoys the highest popularity. The thickness usually borders 1.5-3 cm, the color scheme is limited only by fantasy, and density depends on preferences. But there is a chipboard and its cons: low strength indicators, all the colors of artificial origin (even if desired, it is impossible to stylized under the original wood), as well as harmful chemical emissions from unplanned places.
An array, in turn, enjoys the smallest popularity due to the high cost. In this case, the work passes quickly and easily, because The slice you need to simply give the shape to get a worktop, after which it is possible to mount it, and the forms can be from simple to the most intricate.

Figure 2. Coffee table circuit.
The edged and timberboard - the main elements that are present in most cases as a supporting structure, but sometimes they are used as the main material, which makes the work much more difficult, but the result is different times more interesting.
It is the table from the board and timber and will be considered as an example, because Starting with a difficult one, you can easily learn to do simple.
Working activities
Tools and materials:
- electrolovik;
- schlifmashinka;
- screwdriver;
- roulette;
- bar;
- bar;
- edged board;
- rail;
- steel corners;
- furniture plugs;
- morilka and varnish;
- brush flat.
Initially, you need to decide on the dimensions of the future table, and after that it starts to cut. Let the table have a standard 110 cm height, 90 cm wide and 150 cm length, although any of the given data can be changed depending on the desire. And after the exact definition, you can start cutting:
- bar 75 * 75 mm - 4 pcs. 105 cm;
- bar 45 * 80 mm - 2 pcs. 75 cm and 2 pcs. 135 cm;
- cutting board 50 * 150 mm - 6 pcs. 135 cm and 1 pc. 90 cm;
- rake wooden 10 * 40 mm - 5 pcs. 145 and 2 pcs. 85 cm.
After the cut is complete, each working element is needed to thoroughly stabbing with grinding or sandpaper with zero, and the rest of the remaining dust is barely with a damp sponge. From above, wood is covered with antiseptic solution from moisture and insects, and only after complete drying can be continued.

Figure 3. Round table assembly scheme.
For a start, a support structure is formed from BRUSEV and BROs. For their compound, the bars will have to round 2.5 cm at the ends, and the very top of the bar do round holes with a corresponding diameter to a depth of 2.5 cm. They should be sharpened with some force application, but the glue on the tree inside is still preferably pouring (for the very bottom of the bottom a few drops).
The countertop is made much more difficult, because To begin, it is necessary to smoothly in half a longitudinally to cut the board 90 cm. Between the 2 cuts, all the others are paired alternately. As a result, a formed tabletop is obtained, but not yet adhesive.
In the front and rear board, 6 wide holes are made to a depth of 2.5-3 cm, and all the holes should be located exactly the center of those boards that are on the other side. After that, a thin drill is made of full-fledged holes at the depth of spinning a screw, and if this is not done, then it is likely to get a split wood.
Galvanized screws are used for hooks, because They are not affected by rust, and for wood it is very important. The rake is screwed at the bottom, and the fixation is made in a checker manner in a step of 20 cm in longitudinal, and in pairs on each board in transverse. Thanks to this tabletop, nothing is scary.
At the very end, it remains only to combine legs and a countertop in 1 design, for which it is used and steel furniture corners. When the junction on the brazing, it will be necessary to use glue again, after which it is 5-6 hours to press the table with a load of 20-30 kg, so that everything is fixed in this position. Corners, in turn, make the role of control fixation.
At the very end, plugs of interest to all visible screws are put on the caps of all visible screws.
Completion of work and additional aspects
After you managed to collect the table with your own hands, it needs to be fully covered with varnish and verse. What is especially important in this case is the ability to make an appearance from any breed. Varnish dries 30-36 hours, so after the coating you need to leave the finished work for this time. It is often misleading the fact that after 4-5 hours there is no smell, and the fingers completely cease to glue, but at the same time harmful chemical compounds continue to be thrown into the environment.
To form a large diameter holes, special boral nozzles and crowns on a drill are used, and they allow not only to form an inner circuit, but also cut out external.
Before making a wooden table, you need to highlight 1-2 free days to the whole process, because It will be very sensible to interrupt. Sometimes errors and shortcomings occur when working, but this is within normal, so it is necessary to have a margin of all materials in 10-15%.
Total with a hand-knitted hand, the table is manufactured in 1 day, after which it will be dried, and it can be started to use it.
If you have our own land, it can be furnished with beautiful furniture so that it is convenient not only for the performance of horticultural works, but also for resting the whole family or a large company. Qualitative cottage accessories can cost quite expensive. The maternity owners would like to offer a scheme for which it is quite possible to independently make a garden table with your own hands to get strong and reliable furniture. Carefully read the information presented below. She will help to understand how to make the table in the country with their own hands.
1
2
3
To construct the country table with your own hands, you need to take the minimum amount of materials and tools, moreover, most of them are quite accessible, and there is almost in every home. So, what should be prepared in advance:
- the material that will be used as the basis. Many modern masters prefer wood. The main advantage of the benches from the tree is that they are completely safe from an ecological point of view. In addition, their appearance is very aesthetic. To simplify the task, you can take new boards. When buying lumber, make sure that they are dry enough, the wet wood is completely unacceptable to apply to work. It is necessary to withstand it for several months in a room that is well ventilated, and only then to get started. If you follow this advice, then the table from the bar is your own hands made and installed, will serve for a long time. Of course, you can make a table of stone or metal, but it will require large investments and strength, time and means. Stone, as the main material, is distinguished by strength and reliability, however, to handle it is much more complicated;
- fasteners (nails and selflessness);
- drawings of garden benches and tables for giving with specified proportions. You can find ready-made options or create furniture schemes yourself. Select a project or make the original layout, pushing out from the options presented on our website. If you are planning to create a high-quality and aesthetic table in the country with your own hands, then the drawings will be useful to you;
1
2
3
4
5
6
- emery paper. If you have a grinding machine, it will significantly speed up the work process and help make a garden table perfectly smooth;
- lucky and antiseptic wood processing. They are needed in order for a table made from the boards, it was possible to use for a long time. If you use the funds presented in accordance with the instructions, you will get a wooden street furniture, which will not lose its functionality due to moisture or insects.
How to make a table for giving?
1
2
3
4
If you plan to construct a wooden table to give your own hands, then you can offer the following scheme of action:
- Cut the boards with a length of 140 cm, make a frame from them, fastening individual elements with screws. Make sure that the boards are located with each other at right angles. In order to check the correctness, measure the diagonal: if there were no errors, they must be completely identical. The finished frame is needed then to ensure the strength and reliability of the entire design.
- If you are planning to create a round table, then make the legs. To do this, cut 4 80 cm long boards, treat them with a grinding machine to give an aesthetic look. Fish from the heads of the chamfer using the appropriate tool for this. Attach the blanks to the frame from the inside. To each leg, select 4 fasteners to provide the most reliable connection.
- In the middle of the legs, fasten the crossbar. They will play the role of a frame for the shelf, which can be used for the purpose for the location of any things or dishes. On the other hand, this item will make the furniture more rigid. Fix the crossbars at an angle of 90º. In order not to make a mistake, check the accuracy of the coal.
- Put the base on a flat surface, check how stable it is. If the design does not stick, and you have no doubt in its reliability, bring surfaces in proper condition by grinding. For this type of work, it is recommended to use sandpaper or special typewriter. The application of the device will help simplify the task and faster to cope with the task.
- Collect a countertop. To create it, it is recommended to use boards of various breeds of wood. If you plan to construct a round table, then you will need to cut the tabletop suitable sizes from the solid wood plate. This will allow you to form a table with your own hands, which will look stylish and non-standard. Pre-process the material by the mourn. Fix the boards with nails, and fix the shelf with self-drawers. Align the surface with a special typewriter and apply paint on it (as an option, you can use a transparent varnish). You can significantly simplify work if you purchase or order ready-made wooden stands. On his processing you do not have to spend not the time or strength.
- Install the trained tabletop on the frame, secure individual items. Metal corner for these purposes will suit the best way. This is the completed assembly process on this.
- As soon as the country table was built, cover its surface with several layers of substance with antiseptic properties, and after it is completely absorbed into the surface - two layers of varnish. At the expense of these simple manipulations, you can make a table for the garden more resistant to the effects of the external environment. As a result, you will receive economical cottage accessories that will serve for many years without losing the entire presentation. You can place them in the garden without worrying about the fact that the tree table is cracking after the very first shower.
If you have a little material left, you can use it to construct wood benches with your own hands.
Outside, they can be put on the table or under the canopy to extend the service life. You can arrange finished furniture based on your wishes and skills. You can decorate the thread table for giving, made with your own hands (photo on our website will help catch inspiration).
How to make a table from logs?
1
2
3
If you wish, you can make a table for giving with your own hands using another type of material - logs. It also features environmental cleanliness and ease of processing. With its use, the street table for the cottage will be created according to the following scheme:
- Prepare a log house to further work: overstate the surface of logs with a planer, cut into separate parts, treat sandpaper to remove all burrs. Make the joints perfectly smooth, do the holes, following the diameter to coincide with the diameter of the reinforcement. It is important that individual holes are located apart at a distance of 30 cm.
- Make an element assembly forming a log table. When connecting the details "in the bowl", the deforestation should be started with inscriptions in the center. Make sure that the cutting is exactly the specified depth. To perform this work it is more convenient to use the bitter or ax.
- There is another option to fasten the details: in places where one part connects from the other, the holes are done, and the fittings are inserted into them. To make the table with your own hands for giving more durable and reliable, epoxy glue is used. All parts are folded, according to the drawing. If the armature is too long, then it is shortened. As a result, it turns out to create a detachable table of logs with your own hands, which is very convenient in operation.
Experts make high-quality objects with their own trees, connecting individual parts by self-draws. Such an option is also acceptable if you are going to make a wooden table for giving, take it to the note. The shops can also be constructed from logs when you have dutchritals.
To top, I would like to note: so that the garden tables do not lose their attractiveness over the years, they need to properly care for them, in particular, to protect against precipitation and hide under a canopy.
By the way, the canopy itself is quite simple enough, it is enough to use the most primitive means of hand, for example, blinds from the shower. They need to be copped together so that they form a dense canopy, under which precipitation does not penetrate. If the canopy is not allowed to be possible, it is better to move the furniture to the house.
 Why you can not give icons
 Is it possible to give icons as a gift: Signs, the opinion of the Church
 A year ago left her husband, and now I do not know what to do