Furnace three-rotation laying scheme. How to fold the oven with your hands drawings and construction technology: step-by-step instructions, video. Chimney - how to ensure safety and good craving
© When using the materials of the site (quote, images), the source indication is required.
The old kind stove from the brick does not give up its positions under the onslaught of modern highly efficient competitors. Disputes - why? - Do not consider, but actually the reason is one: the brick stove breathes. Stone, by the way, no.
What does it mean - breathe? When heating the microporous body, the furnace sends a heated room with a pair of moisture into the air, and when cooled, absolves them into itself. As a result, the brick oven supports T. Naz. Point of dew in the room in optimal from the point of view of physiology limits. When they say that the brick oven "Healthier" any other, then, led or unknown, it is in mind that this factor.
In addition to the beneficial effect on health, the breath of the furnace gives another important consequence: in the medical and heat engineering calculation of the house, the lower limits of temperature in it can be reduced to 18 degrees in comfort and up to 20 degrees according to medicine, because The relative humidity in the heating season will be close to optimal. In wooden and brick buildings, it can give supercontamia: at 16-17 degrees in them over 80% of physically healthy people do not feel discomfort, and bed linen remains dry. And in a stone or concrete house, heated batteries, and at 18 degrees may be zyabko.
When heating with water registers, the lower temperatures must be taken at 20 and 22 degrees, respectively, and when heating IR emitters, electrical or gas catalytic, even on degrees above; IR appliances are strongly dried air. Therefore, the brick heating furnace with the efficiency (heat transfer coefficient) can be 50% in the cost of heating to be more economical to the super-modern metal componositis with efficiency in 70%, because the heat loss of the house is strongly, in a power law, depend on the difference in the inner and outdoor temperatures (temperature gradient).
Note: a small breathing can be achieved by overlooking it with a convection screen (see Fig.) A thickness of 30-40 mm of plywood, weathered wood hardwood or several layers of plasterboard. At the same time there will be uniform heating of the room in height. But the breath of such a furnace is deep and even will not be. Here modern technology to bricks are not yet reached.

The breath of the furnace in combination with physiology gives an economic investigation of the second order: the heating season can be started later, and finish earlier. In the middle strip of the Russian Federation, the difference in the year can reach the week, and in Chernozem and South - 2-3. Who will not need to buy fuel. And if you consider that a good brick stove works on everything that burns, including a throwing and cheap alternative fuel (pellets, etc.), then the savings are still increasing.
Note: on a global scale, brick furnaces still fit into the ecology - the production and production of materials for them causes damage to the environment greater than saving from furnace heating to losses in thermal highways and LPP. But in this case, demand does not give rise no longer, but the proposal dictates. In leading stoves, quiet, but hard work on improving the technologies for the production of furnace materials and the creation of brick furnaces allowing transportation in the finished form and install immediately at the place of use.
Wishing to fold the oven does not decrease. People's professionals also do not break the price: their work is in demand, competition is quite high, and, moreover, most of them are enthusiasts of their case. But to take over the stove or with knowledge of the case to consider the proposed project, you need to know the basic principles of the construction of furnaces, which this article is written.
Is it just in the house?
The brick oven on the farm will be useful not only for heating and cooking. Stationary can bring very good income, as or a barbecue IP, working in the field of catering.
First of all, the high heat capacity of the brick is primarily important, providing long-term heat transfer after the protest. Once the furnace is empty, you can sleep well, without fear of Ugon. For production furnaces to the fore, the low thermal conductivity of the brick, which gives the opportunity to create a high heat concentration in the working area. In this case, the breath of the furnace becomes an already harmful factor, and it is most often supplied by placing a stove into a gas-tight case.
Small businessmen specializing in handicraft industrial production, it is worth thinking about such types of industrial furnaces that may well do:
- Vagranka - on Hozdvor in it can be overpowered to 50 kg of scrap metal.
- - For hardening metal products with simultaneous cementing.
- Flaking oven for ceramics, etc.
Note: Brick furnaces are not recommended for heating, greenhouses, poultry houses, livestock courtyards. Breathable by mias, the furnace and the air will spoil, and the very spoil itself.
The fact is that the factory samples of small industrial furnaces are designed for transportation in parts or assembled. Therefore, prices for them are exorbitant. But, laying out the stove in place, you can get not the worst, without climbing in a beyond loan, and deploy a profitable business. We will still stop more details on: they were the first to appear in everyday life and the principles of fair and others embedded in them.
Note: a separate parsing requires a stove for a bath. Here the brick also turns out to be at the height, but for several other reasons. Bath furnaces will further be devoted to a special section.
Oven in the house
The house does not necessarily build from the stove, you can choose the stove to choose a suitable home. But first you need to carry out the heat engineering of the building, taking into account the factors described above and determine the place for the furnace in the house. It is also necessary to know that the insulation of the house outside increases the efficiency of furnace heating a lot more than heating registers. And, in turn, the slaughter of the house siding much simplifies and heshes insulation. Those., The optimal project of the house furnace initially must be comprehensive.

As for the planning, there are different options here, see fig. The house on the left is suitable for example, for example, for the Hermit Bachelor, but not ascetic or the childless family of convinced Sibarites, there will be a warm bed in the bedroom. The oven is a warm-cooking. Russian in such a house does not fit down, but the Swedish (see further) is suitable. Excellent. The winner is a budget housing for a small family, then the bedroom turns into a nursery or a zone in penthouse is distinguished for children.
In the middle the house is more and more consolidated. The living room comes out the furnace-fireplace with a finished cast cast iron furnace, see below; Heat-resistant firebox door. There are also different options here. If, for example, a kitchen with a bathroom to change places, the heating shield (see below) to deploy 90 degrees, and move the veranda with a hallway to the right side, then you can hide another 1-2 bedrooms at some decrease in the living room. At the same time, a corridor will take place to public areas.
Plan on the right is more suitable for giving. In the summer, opening the window in the kitchen, the hallway, it will not be too hot. Camin Point in the corner - for evening gatherings at the light; In it, it will be possible in the case of bad weather to prepare a kebab or barbecue on Rashaper.
Already at the stage of layout of the house with the furnace, you need to consider the following:
- For a high oven with its chimney, or for a furnace by 500 and more bricks, a separate foundation is needed that does not have a mechanical connection with the foundation of the building, even if they are designed and are built together;
- Low and wide hob and the heating shield to it on the floor, made according to the requirements of SNiP (i.e., capable of keeping the load at least 250 kg / sq. M. m) can be put without a foundation by making only thermal insulation; About her Next. Floor flooring under the shield is desirable to reinforce additional lags;
- Cutting the chimney (see below) should not come into contact with the ceiling beams, it is very desirable that the distance from the cutting to the blocks closest to it is approximately the same.
- The chimney should act over the ridge of the roof at least 500 mm and defend it from it by no less than 1500 mm.
Claim 1 allows exceptions. If the oven is 1000 or less bricks, and the foundation of the house is a liner section, then the foundation of the furnace can be constructed at the intersection or T-shaped tape connections under the inner walls. In this case, the distance from the foundation of the furnace to the nearest other tapes of the foundation of the building should be at least 1.2 m.
Note: Because Already at a small Russian oven requires 1500 bricks, then all Russian furnaces must be built on separate foundations. But here there is an exception - the small Russian can be built on the penetration of a wooden bar of 150x150 mm, permerating the floor to the boot in the foundation of the building or soil.
Furnace structure
Actually the furnace is sometimes called the body of the furnace. The body of the furnace is installed on the hydro and thermal insulation of the foundation of the furnace or floor and is completed by the chimney over the attic and the roof. All this together is called the structure of the furnace. The structure of the brick heating furnace is shown in Fig. on right:

- foundation;
- hydrometerproofing;
- shanses - a kind of legs, they are done for lower heating and saving bricks;
- confused;
- the inlet of the dryer - air canal, providing uniform heating of the room in height;
- paddle door;
- grate;
- the door of the furnace - worked - with the progress of fuel supply - gon;
- topki fuel, or just a firebox, or just a fuel;
- hide joints;
- the mouth of the firebox, or her Hailo. Sometimes Khail is called only the vertical mouth of the furnace with a narrowing (nozzle), and in the Russian oven Haulo - nozzle at the beginning of the chimney;
- clean door or just clean;
- flow (pass) - inflection of the air convector of the dryer;
- air convector dryers;
- furnace shift valve (see below, is shown conditionally);
- gas (smoke) convector, or convective furnace system;
- the view is a valve, which overlap the chimney after the protrusion so that the furnace does not speak naturally or wind tag;
- outlook outlook with its door. In the summer, the dryer's door is closed, and air convection in it stops;
- chimney chimney;
- overlapping oven;
- inner chimney chimney;
- ceiling overlap;
- fireborne cutting;
- flap, or otter - expanding the mouth of the chimney.
Note: the side of the furnace with Classroom (in the Russian oven, sometimes called Zev) are called a brow furnace, and its side walls - mirrors or cheeks.
Let's give some explanations. The foundation is a solid reinforced concrete; For the oven on the chances - ribbonly concerned. The ending of the foundation is at least 50 mm. Isolation - 2-3 layers of rubberoid, on top of them - 4-6 mm asbestos or basalt cardboard, then a sheet of roofing iron, and on it a litter under the masonry - a sheet of felt or basalt cardboard, painted in a very liquid masonry solution for a furnace, see it . Further. The litter is put on the iron wet and give it to stop before starting the laying.
The first rows of the masonry of the body of the furnace (oblique hatching in Fig.) - from the usual ceramic red brick (not facial!) On the cement-sandy solution, this is a sub-level part of the furnace. Next comes the heat, or heat part (hatching in the cell), it is placed from ceramic chimney bricks in combination with chamoten, about bricks are also further on the clay-sandy solution.
The roofing iron sheet on the asbestos or basalt cardboard of a pillow of 4-6 mm is stacked in front of the underwear door and workl on the floor on the floor, its root edge is immutted into the nearest top seam of the masonry. Leaf removal forward is at least 300 mm, and on the side of the chela - at least 150 mm. The free edges of the sheet are separated and naked to the floor.
The clay masonry solution is not captured, but dries. With an irregular furnace during the cold season, he gradually squeezes from moisture. In this case, part of the body of the furnace, the temperature in which does not rise above 200-250 degrees, lay out from the chimney brick, but on cement-sandy solution, it is also much cheaper than the clay, bowing hatching with a gray fill in fig. The solution for this part of the masonry is portland cement from M400 and mountain sand without inclusions. Replacing decorative analogues is unacceptable!
The lower transitions from the channel to the gas convector channel (flowing) must be 30-50% more in the height of the upper (pass). This will ensure the accumulation of soot at the bottom of the convector (on his faith), from where it is easy to remove it. With the same purpose, the edges of the pass are performed rounded.
Starting from 80 degrees in chimney, the masonry lead again from simple brick on the usual cement-sandy solution. The inner cutting of the chimney is necessary, it keeps on itself a fire cutting (at least 50 mm of asbestos or basalt cardboard in a metal cable) and, most importantly, in the event of a sunbathing, the soot will take part for a time sufficient to take the necessary measures.
The role of the roller (otter) aerodynamic. It dissects the wind stream, forcing its upper part of it to jump out the mouth of the chimney, so the thrust does not matter much from the wind. The height of the roller is at least 2 rows of bricks, removal on the seal of the mouth - in Pollikirpich. Neglecting Flying is a very frequent cause of smoking furnaces.
Choosing a furnace scheme
The main circuits of convection of household brick furnaces are presented in Fig. Left - Channel oven with a serial gas convector, the simplest with the version. The consistent channel scheme is built and similar to them. In addition to simplicity, the advantage of the channel circuit is that it is very plastic constructively. The furnace convector is mechanically connected only by Hail, so the channel furnace can be developed under any finished room, see the next. Fig.
However, the efficiency of purely channel stoves rarely exceeds 40%, and it is very difficult to embed the water to the water: in the body of the furnace circulates a powerful inner stream of heat, and any of its violation leads in a drop in the efficiency and reinforced soot.

In the center in fig. With schemes the most perfect heating and cooking furnace of bricks -Her efficiency reaches 60%. It is a chamber furnace (the role of an air chamber, a streamlined flow of hot gases, plays an oven 1) and stretched from the floor to the ceiling of the channel convector behind it. In the chamber portion, the gas is warm the cooking surface in the cooking niche 2, and part of the heat convector enters the dryer 3. The benefits of the Swedish furnace:
- The convector and oven do not have an energy feedback with the furnace part, so in the oven you can embed a U-or W-shaped heat exchanger of the DHW system with a cumulative tank, and the tank is placed or in the drying niche, or on the covered oven.
- Roaking flue gases occurs in the chamber part of the furnace. In convector, they leave with a temperature below 800 degrees, so it can be made from the usual brick on the cement-sandy solution.
- The high narrow convector gives a uniform heating area in height.
- Part of the flue gases from the camera output can be reinforced, for example, in a laying, and then return to the convector, without worsening the furnace parameters.
- The size of the convector can be varied, move and rotate it relative to the chamber part, so the Swede also fits well into the finished house and can hear up to 3 rooms, see the trail. Fig. (after channel stoves).
- If you open the oven door, the powerful flow of thermal radiation will go out of it, which will allow you to quickly warm up and dry by people who come with hard work in the cold.

The main drawback of the Swedish furnace is high requirements for the quality of materials and work for the chamber part of the furnace. In addition, it necessarily needs a foundation, without it a high and narrow structure, parts of which are loaded in different due to thermal stresses in different ways, will be fragile and unstable. Make a Swedish-type furnace can only an experienced cook.

Finally, on the right in fig. With the schemes - the coat oven. Its efficiency may exceed 70%, because It is self-regulating: the flue gases will not go into the chimney, until they store under the arch of the cap and will not give their heat the body of the furnace. In addition, the cap has a property of a gas type: if you forget to close the standard, hot gases under the cap will not be allowed to dock heavy cold air from High, and the oven does not work. This guarantees from Ugon because of not on time a closed view.
However, the cap is just just in the diagram, and in version it is very complex due to the high loads in the design. Then, the cap is exclusively heating, it is impossible to embed a cooking surface into it. The heat selection for the water was possible only in two-collous furnaces, even more complicated, so the cap ovens in everyday life are common. Exception -, but such talented burns on the world rarely appear.
Plate and shield

The development of the idea of \u200b\u200bthe Swede gave rise to a very promising design: a conventional hob with a separate heating shield-convector, see fig. Everything that this needed is to refuse the cooking and drying niches, it made it possible to disconnect the chamber and channel part mechanically, i.e. build them separately; Perhaps even in turn.
What do we get in return? Lower load on the floor. The slab in most cases can be built directly on the wooden floor, putting the insulation on it as the foundation under the oven. And under the shield just just damping cushions from basalt cardboard. The problem of the sustainability of a high narrow panel remains, but it is solved by creating its mechanical connection with the wall, even if the partition in the Polkirpich, see fig. left.

Next, the shield can be shifted and deployed relative to the stove, then the plate can warm the kitchen with a bathroom, and the shield is still up to 4 rooms. To do this, insert into the horizontal section of the chimney between them a flexible link from the heat-resistant corrugation with good thermal insulation to avoid sedimentation of soot. In general, the price of refusal from almost unnecessary in our time the niche turned out to be a fundamentally new and very practical design.
Seasonal strokes of the furnace
In the summer, when it is hot, to warm the room to nothing. But the meager amounts of fuel will not be laid in the furnace: the limits of adjusting the power of the fuel supply of all furnaces is small. Heat from a small bookmark will fly into the pipe, the remainder is not enough for the scrambled eggs. But getting a summer kitchen with a slab the opportunity is far from all.
At such a case, the design of furnaces with switching stroke with summer on the winter is invented. The easiest way to switch in the channel furnace parallel diagram, two left poses. In fig. below. However, the maximum efficiency of the channel-parallel furnace can be achieved only at its power of more than 20 kW. There is a law of a square Cuba, and in a too small furnace, the heat "worst" into the pipe, without having time to heat the convector. In addition, all two-way furnaces are potentially dangerous: if it is not enough to close both valves, a volunteer will go. Finally, on the summer, the blocker and part of the cheeks of the furnace are still heated.

Meanwhile, there is a two-way scheme, especially suitable for heating flaps: a diagram with two chimneys, summer and winter, two pos. Right in fig. For it, only one catch is needed, so it is completely safe - with any position of the thrust switch will be. The position of the valve is not immediately felt on the heat transfer, but you can switch the move during the firebox. And smoothly adjust the heating, partially shaking the damper.
In the summer, gases in the winter movement will not be shattered: the aerodynamic resistance of the convector labyrinth is much more than that of a straight pipe. And the laboriousness of the chimney structures is not at all double: gases in the winter chimney go cooled below 80 degrees, so the winter tube may be lightweight and simplified, for example. asbetic. The only small minus of the system with two chimns - for each pair of convector channels is needed.
Special ovens
Before switching to a more detailed analysis of ordinary furnaces, we will focus on several special high-demand structures.
Barbecue oven

This is an ancient open source, see fig. Build it either in the open air under a canopy or indoors under a cap-smoke. Laying without any wisdom: in a pollipich with a spoonful dressing. 3-4 rows need to lay out the tilers so that the strubel and lattices are supported. However, for more about the laying, see below.
The foundation for the outer barbecue is the simplest, slab made of ready-made concrete monoliths or stone blocks on a sandy-choggy pillow. The room barbecue is built directly on the floor on the combined insulation described above.
Barbecue has one subtlety: a firing side, he warm in the right focus warming up with sides. Therefore, 2-3 of the upper rows are desirable to lay out of chammed bricks, he very well absorbs heat and slowly gives it. In order for imperative brazier to warm up faster, bricks need to take faceted shaped, as shown in Fig. below. According to the wedge-shaped varnishes between them, heat will be fast in the masonry. You can also make shaped bricks for a barbecue, but then you have to work with a grinder.

Bannaya
How the furnace is based in ordinary order; Here is the main secret - the device of the heater. A closed heater, through the flue gases pass (on the left in Fig.) Quickly heats up and gives the most useful dry pairs. But it is impossible to "pass" water or kvass to it, you will have to reap the oven again. In addition, the slightest flaws are incorrectly selected stones, poor fuel, the violation of the fire mode - leads to precipitation in the heater of the underworked organic organics, and dry steam can be toxic and carcinogenic.

Open heater (second left in Fig.) Safe, but long heats up. To bathe with the "Nadach", the furnace need to trample all the time, so it was created to go to the pre-banker: the avgar is especially dangerous at high air temperature. Fighting too much, the Kamenka can be taken at all, and the whole sauna will go to the pump.
The third left oven with a side closed heater is perfect: the bunker with stones is washed by hot gases from all sides, except for the front, therefore the Kamenka and heats up faster, and you can take it more. But the most perfect bath oven is a cap, extreme right. The Kamenka is arranged on the coat of the cap, the temperature under which is very high, there is the main floor of the heat dissipation, and there is nowhere to go to this warmth except in stones. Therefore, the Kamenka warms up in minutes and you can take almost without restrictions. It is not necessary to pour the furnace, the "Cap" itself will select myself a mode looking at heat consumption, if only fuel in the firebox was.
This furnace has 3 disadvantages. First, the overall complexity and high cost, like in caps in general. Secondly, the cap from the usual steel quickly roars, and from heat-resistant roads. Finally, you can only go to the chair of this furnace only from the built-in soul, and I will not refuel it.
Flowing furnaces
Flowing furnaces do not have convectors, but with a fire in a pipe or cave, they only have external similarities. Flowing furnaces can be very effective. The most popular species are the English fireplace and the Russian oven.
Fireplace
The scheme of the structure is shown in Fig. To obtain the maximum efficiency, comparable to the DOLLECA efficiency, the fireplace firebox must be pressed back from all sides to the right in Fig.

The main proportions of the fireplace are as follows:
- The portal area is 2% of the room area.
- The height of the portal - from 2/3 to 3/4 of its width.
- The area of \u200b\u200bthe erection is 1.5-1.8% of the area of \u200b\u200bthe room.
- The area of \u200b\u200bthe fuel is 70% of the portal area.
- The depth of the fifthly - 1/2 2-2 / 3 of the height of the fiber opening.
- The ohow of the rear wall of the fuel is - on 1/3 of its height.
- The angle of inclination of the "mirror" of the back wall - 20-22 degrees from the vertical.
- The angle of convergence of the side walls is 45-60 degrees, i.e. 22.5-30 degrees per each.
- If the fireplace is with a deaf bottom, then its rise is back - 4-7 degrees.
- The height of the podium above the floor is about 50 cm.
- Spectacle area of \u200b\u200bchimney - 7-13% of the field of firebox. A smaller value refers to a round chimney, more to a rectangular with 1: 2 sides. For chimney square section - 10%
Russian oven.
(Fig. But the design of the Russian oven is very conservative, to make changes to it, not risking to spoil the oven, can only a cook with extensive experience in Russian furnaces.

From the point of view of construction mechanics, the Russian oven is also a mansion. It is not a solid working as one, the module (hollow column, wall), but almost a complete analog of the building: a connected construction, parts of which interact through the angles. Therefore, the angles of the Russian oven need to post all the rules. Records in order is not enough, you need to constantly recover in a plunder. The key points of the masonry of the Russian furnace shows the markup.

Preliminary calculation of the furnace
Before choosing a furnace project, it is necessary to do its preliminary calculation. It is usually carried out on the basis of the heat transfer furnace in the kcal / hour. In the process of cooling the furnace, the heat transfer is reduced, but also the loss of heat is falling, because It also cools. The task of calculation is to withstand the temperature in the room until the next furnace.
This calculation is theoretically complicated, and on ready-made coefficients and simplified formulas requires greater experience. But for homes with good outer insulation, quite reliable results gives the proposed by I. V. Kuznetsov method for calculating the averaged thermal power unit of the furnace surface (TMEP). For normal firebox, it is possible to take 0.5 kW / sq. m, and for overgrowths in a heavy frost - up to 0.76 kW / sq. m for 2 weeks.
Using the TMEP, the capeful calculation of the furnace becomes completely simple. Suppose we have a furnace 1.5x1.5 m in the plan and a height of 2.5 m. The area of \u200b\u200bits walls is 3.75x4 \u003d 15 square meters. m, plus 2.25 square meters. m overlap. Only 17.5 square meters. m. Pay this furnace from 8.75 to 13.3 kW of heat. Taking into account the features of the chimney heating, this is enough for a house of 80-100 square meters. m.
Flak
To calculate the firebox, you must first determine the maximum fuel bookmark. It is found along the required thermal power, the calorific value of fuel, its specific weight and the intended KPD of the furnace. The calculation is carried out for all types of fuel for which the oven is intended, and choose the largest value. The volume of the fuel chamber of the furnace (combustion chambers) is charged 2-3 times more than the maximum volume of the fuel mass, calculated on the passage. In general, the maximum load of fuel into the combustion chamber is 2/3 of its volume.
The full calculation of the fireboxes - the lot is not lovers and even far from any heat engineer. Take at least such a "trifle" as a grate grille. She misses too much air - fuel will burn faster than the body of the furnace will take it warm, the residue will fly into the pipe. Little air - fuel to burn completely, and unrequided heat again in the pipe with smoke. And soot, and ash, scoring coopers? And all this needs to be linked to other, no less significant hubs of the furnace, and for different types of fuel.
Fortunately, there are now on sale there are many finished furnaces for different thermal power, under different fuel, with a deaf or transparent, for fireplaces, created. And the finished firebox will be cheaper than any self-made. It is only necessary when choosing to pay attention to the following:
- The size of the furnace and its fasteners (pins, mustache) must be consistent with the size of the brick. Chimney bricks are available multiple sizes (see below), and the same firebox can be on sale of several modifications for different bricks.
- For a furnace of long-term use, the furnace must be taken cast iron. Welded from sheet - for furnaces used episodically.
- It is also necessary to pay attention to the depth of the narrowing of the combustion chamber to the grinders - the ash mine, the ash well, or just the ash bar.
Let's explain the last item. If the furnace is predominantly high-calorie minor fuel in large slices (stone coal, peat), then the roller need to take deeper, to 1/3 of the height of the combustion chamber. In the small ashnik, such fuel too quickly prohibit. If the oven is under low-calorie wood fuel, including pellets, the depth of the ashtar should be no more than 1/5 height of the combustion chamber, otherwise the bottom of the fuel mass will quickly break ash, the air flow will decrease, and the fuel will not do the fuel.
As you can see, the plug of the depth of the ashbar is large. Therefore, it is better to overpay and take multi-fuel furnace. In such complete combustion of all fuels listed in the certificate are provided by special structural measures.
Note: raw firewood can be completely burned in a deep ash splash, and coal - on the smooth hill, correctly choosing the magnitude of the fuel laying. But this requires the experience of an expiratory and intermediate subtopers with shining that night is not suitable at night.
Chimney
The calculation of the chimney is a separate topic, hardly more complicated than the calculation of the entire furnace. Even the computer accounts for 2-3 times to restart the CAD, manually adjusting the initial data before everything does not happen. But for conventional conditions (the cross section is rectangular, the stroke vertical without fractures, the height of the mouth of the chimney over the grate 4-12 m) can be immediately given the finished values \u200b\u200bof the transverse dimensions for furnaces of different power:
- Up to 3.50 kW - 140 × 140 mm.
- From 3.50 to 5.20 kW - 140 × 200 mm.
- 5.20-7.20 kW - 140 × 270 mm.
- 7,20-10.5 kW - 200х200 mm.
- 10.5-14 kW - 200x270 mm.
These values \u200b\u200bare minimal. They are designed to avoid the "priceist" when the cold air is counted in the oven for too wide chimney. "Consistency" is fraught not only by heat loss, but also a lot of other serious trouble.
If the oven in the chimney chosen by the chimney smoke at least occasionally, it should be increasing, just 0.25-0.5 m. Once upon a time, for this, the protruding bucket turned to the pipe, now you can put a piece of asbotic pipe with a cross section not less than in chimney.
But the best way is not to be lazy and put another 2-4 row of bricks, not forgetting to make a new flush. Have you ever seen a pipe with two otters? This means that the initially short chimney according to the results of the proturters increased to the norm.
Note: increasing the pipe is often accounted for when the aerodynamics of the area changes. Let's say the forest around the rose or high-rise buildings set up.
Chimney materials and appliances
Brick
In sources are often confused with refractory chamoten. In general, they only have dimensions: if the single building bricks are 250x125x65 mm, then the oven 230x114x40 mm (standard) or, sometimes, 230x114x65 mm. In general, the chimney brick is a high-quality red M150. From it, it is entirely to build a Dutch and a Russian oven. In heat resistance (up to 800 degrees), he would go to the fireplace, but absorbing little heat and quickly cools, so only for the fireplace of the summer cottage, in which only admire.
Note: the dimensions of the furnace brick have developed historically in the old days so that anyone can distinguish it from the construction. The firing brick then cost large works and expenses, there was no concrete, and the field of good clay was rare. Therefore, the then wandering burns often halted, launching a weakly burned brick from unimportant clay.
Chamotte brick goes to the masonry of the furnaces of furnaces with a sufficiently stressful thermal regime: Swedish, baths, caps. The main dignity for household furnaces is not a heat resistance, 1600 degrees in household furnaces does not happen. It is more important here a large thermal conductivity of a chamot in combination with high heat capacity: chammed laying is an excellent heat accelerator.
Due to the large thermal conductivity, it is impossible to build a furnace entirely from the chamota: it will be unacceptable at first, and then too quickly gives it warmly radiation. Outside, the chamotte masonry should be covered with ceramic, at least in the Pollipich.

To judge the quality of chamotte brick only in the depth of his color is not entirely correct, because Chamotte clay from different deposits is very different outwardly. Almost black brick can be bad, but light yellow - excellent. The main sign of quality is a fine-grained structure without a variety of visible pores and inclusions (on the left above in fig; next to suspicious). The next stage of checking is the climbing light hammer. A good brick gives a ringing or clear ripple sound, and a bad - deaf stretched. Finally, if the knock really did not clarify anything, check on the scope, or, in modern, the crash test is carried out: the brick is broken or dropped from height on the solid floor. A good brick and spikes are good, it splits on large pieces with a grainy break. Bad gives more dust and crumbs than large fragments.
The sides of chamotte brick are called the same as construction, this is also shown in Fig. Like the construction, Shamot is in the case of full, in 3/4 lengths (three-rigs), halves and quarters. As they are designated in laying schemes, shown in Fig. Left below.
For the masonry of the internal responsible parts of household furnaces, clinker brick is well suited, or just a clinker (right in Fig.) It is the same ceramic brick, burned at high temperature. The view of him is non-fried, but the strength and heat resistance are increased. There is a clinker somewhat more expensive than ordinary red brick, but the chamot is significantly cheaper.
Note: Silicate brick on any parts of the furnaces is unsuitable absolutely. On the clay solution, it does not hold, and from the signage heat loads pulls moisture as a sponge.
Sand
Sand into a solution for laying furnaces requires special consideration. For a furnace designed for more than 10 years of regular use without repair, mountain sand is needed without inclusions. In other types, too many organic organic, due to which the laying seams are sharpening over time and crack.
Pure mountain sand roads. But the main thing is now on sale there is generally the perfect replacement: clay sand for ceramic masonry and chamoten for chamotte. Do not be surprised by the phrase "clay sand", it, like a chamoten, the ground battle of the corresponding brick species. Brick sand most often turns out to be cheaper than good mountain, and the laying on the solution with it is exceptional quality.
Masonry solutions
For masonry brick furnaces apply. Recipes know a lot, we give the simplest and high-quality. For the chamot, you need a chamotte mergel or white kaolin. For ceramic brick - any refractory threshing clay; Best of all Gray kaolin, blue or gray Cambrian. And in that, in another case, 100 pcs. Bricks will need 40 kg of clay.
When buying immediately check the clay on the smell: any clearly tangible, pleasant or unpleasant, indicates the impurities of the organicists, for the masonry of the furnace, this clay is not suitable. Next, it is necessary to determine the necessary stake of sand in the solution, because The clay of different fields of one quality has different fat content - a combination of adhesive ability with viscosity. It takes 0.5-1 kg of clay powder on the sample, poured with water in the dishes to the top of the backfill and give a day to cry, gain moisture. Chamotted Mergel completely pops in 1-2 hours, the overexposure is not terrible.
Thinning clay, adding a little water, was mixed up to the consistency of a very thick dough or plasticine. Then the chambers are separated on 5 parts and sand: 10%, 25%, 50%, 75% and 100% by volume. All samples are carefully, until complete homogeneity, again smear and dried 3-4 hours.
Now the samples are rolled into the sausages with a diameter of 1-1.5 cm, a length of at least 30 cm. Each sausage is turned around around any round item with a diameter of about 5 cm and look the result:
- The solution for a sample that is easy to absolutely without cracks is suitable for any furnace, including the fuel part.
- The frying crust was broken by forming a grid of small cracks - the solution is also suitable for all furnaces, incl. For the relief of Russian and the furnaces of Dutch.
- The cracks were departed by 1-2 mm - the solution is suitable for the parts of the furnace, heated not higher than 300 degrees, for the barbecue and the country fireplace.
- Deep cracks, foes, breaks - sand too much, the solution is not suitable.
The main meaning of the sample for the proportion of sand is to reduce the maintenance: brick sand is much cheaper than high-quality clay. Accordingly, the more it goes into the solution, the more it will be cheaper.
Note: this test is suitable only for the solution on the brick sand. For solutions on natural sand, other samples are used.
The working solution is prepared on the same principle as the sample, but already in the required volume:
- Clay soaked a day; Chamotted Mergel - hour.
- Mix the mass to the dough.
- Wipe through a sieve 3x3 mm.
- Add sand according to the results of the sample.
- By adding a little water, they smeared sour cream.
- Check the fat content of the solution in the usual way, for wetting the Kelma.
- If necessary, clay or sand are added (very little!), Smear and proceed to the masonry.
Note: on average, 3-4 buckets of the finished solution take place from the selling packaging of clay.
Oven
The furnaces (doors, valves) are attached to the body of a furnace either by a mustache on the seams of masonry (on the left in Fig.), Or the heat-resistant steel skirt, wrapped before installing a 5-mm asbestos cord, right there. The first, is understandable, cheaper, but for worked out the furnaces, ovens and heat dampers are not suitable: during the furnace service, they have to change several times, and break the masonry, pulling the mustache from the seams, badly. And, of course, the installation dimensions of the devices must be consistent with the size of the bricks, taking into account the thickness of the seam.

Laying and dressing
Brickwork is spoonful and twitch, depending on which side of the brick looks outward. Bricks are stacked by bed. "Bed" masonry, when bricks put on a margin or spoons, it is extremely fragile and a snip is prohibited, but in exceptional cases it is used for the external finishing of unloaded structures.
The masonry is led by dressing seams, i.e. Seams of individual bricks should have a dissemination (offset) in a row of masonry (in one or two directions horizontally) and between rows (vertically). In unsecured masonry, any microcrack, which cannot be avoided, will inevitably crawl further, destroying the design.
The methods of dressing seams are known only in construction are dozens, and they also have to change them in the bary to lay out complex smoke. However, check the finished furnace project either designed independently can be guided by simple principles:
- The masonry begins and ends with tiley rows.
- Any brick should be relying at least 2 others.
- Bricks of neighboring rows should be overlapped at least 1/4 in length or width.
- All vertical seams must be filled with mortar, otherwise the masonry will decrease on vertical layers.
- Vertical seams of tychk and spoon rows should not coincide.
- Protruding thresholds, areas under beams and liners must be tiley.
- Substainable parts of bricks should not appear out. Exception - bricks treated with a grinder with a diamond circle.
The normal width of the seam when laying the furnace - 3 mm, minimal - 2 mm. Permissible broadening up to 5 mm; At the subtopic rows and in the arch - up to 13 mm. In places of conjugation of chamotte and ceramic masonry and around inserts from any other material (furnace devices, concrete beams, pins under the cooking surface, etc.) The masonry is carried out with a seam of maximum width - 5 mm. Colonsets are stacked in the nest on the surface of the furnace to dry so that they can be removed for cleaning.

All rows of laying must be tied up vertically. In the extensive internal spaces of the rows, an incomplete tissue is allowed to row (see Fig.), Or the laying by the method of forceding, i.e. Filling them with bricks without dressing. Dressing between similar rows (for example, underlying) is convenient to make a mirror reflection method, like the intake poles are laid out, on the right in Fig.
Convector and shield laying

When laying partitions of convectors, it is necessary to leave the overlap windows at the top (passes) and at the bottom (flow). There are no problems with passages - not enough to report 2-3 bricks, and that's it. But the flow is so impossible, it turns out a hanging wall. Partitions above the flows are laid out, as shown in Fig. Supports from the chokes alternate through 3-5 rows. The windows of a spoonful row near the chips are closed with halves of bricks.
The walls of the furnace convector are laid out at its order, and the walls of the heating pad - spoons with a simple spoofing dressing. Its walls for the walls in the Polkirpich, in the brick and a half of the brick are shown on the trail. Fig. The latter uses the bandage to the method of mirror reflection.

Laying archives
In household furnaces, semi-curvous (as part of the cylinder) and flat vaults are used, see Fig. below. In the best Russian furnaces, very experienced cooks sometimes make a corner of the oval four-centrov, and in Pompiana furnaces, the arch is domed, but also the other requires high mastery and experience. In the mechanically slightly loaded chicken semi-curvous arch, the extreme stones of the wings - heels - and the central stone - the lock - do not differ from others.

The semi-curvous arch is laid out in the following order:
- Prepare drawing of the arch on the scale of 1: 1.
- According to him, the scales are pianked - bricks, which will be relying the wings of the arch.
- Putting the scales and masonry of the furnace interrupt until complete drying of the solution.
- In templates - circles - lay the wings of the arch, observing the dressing between the rows.
- Abundantly apply a solution in the groove of the lock and insert the castle stones into it in turns, inserting a wooden sledgehammer or polen. A sign of properly completed masonry will be uniform extrusion of the solution from seams on wings.
- It is waiting for a complete drying of the solution in the arch, cleaned circles, continue the masonry of the furnace.
Vertical locks of the castle should not coincide with the seams on the wings. For this, at the stage of drawing, the wings must be performed in the mirror reflection, and not a simple shift of one to the other side. The maximum discrepancy of bricks in the arch - 17 degrees. With standard size bricks, internal seam in 2 mm external 13 mm, this angle will be set aside.
The flat arch is laid out on a flat pan instead of circling from the shaped bricks, ready-made purchased or independently manufactured. The laying technology is the same, but consider - the flat arch does not tolerate the slightest asymmetry! A little shifted the whole to the side - it goes to collapse by itself. Therefore, the flat arch, even experienced masters are laid out of the shaped bricks along the template pattern.
How much do you need bricks?
What is the number of bricks on the oven? After all, the amount of solution is tied to it and, consequently, the main costs of building.
Sometime, the number of bricks was considered by empirical coefficients for typical projects. The method gave up to 15% of the battle (and on theft), which at the current prices is unacceptable.
Now the furnaces are calculated in computer systems of automated design (CAPR). The program immediately gives out how many fulfillment, dolly and shaped bricks need. But, since the houses are not built at home or the roasting furnace for the plant, and the Mastering of the CAD requires considerable work, time and special knowledge, then the home owl does not have anything other than just count the bricks in the furnace's friend. It will take it for the middle house stove hour-and-and-and-and-and-and-a half, but, believed carefully, you can reduce the fight to 2-3%
Note: A propulsion indicating the number of bricks, other materials and a complete list of devices with the indication of their type and variety, is required to the properly executed furnace project.
Tool
The tool for furnace work is generally the same as for other masonry (see Fig. Below): Hammer-Kirchka (training) with a wedge in the form of a wedge on the bricks of bricks, Kelma (trowel), cutting for convex and concave seams, dissolved shovel. But order is necessarily added. In this case, this is not a laying scheme, separated by its ranks, but a tool for checking its correctness.

The fact is that the laying of the furnace with uneven stones in the thickness of the seams soon cracks from temperature deformations. On the other hand, the laying on the clay will dry for a long time, not less than a week, and even dried seams can be twisted and rebuilt the design.
The order-tool (right in Fig.) - A flat wooden slack 50x50 mm, on the sides of which the numbers are applied for different types of bricks, taking into account the thickness of the seam. The furnace needs at least 4 coaches, and one for each additional angle, internal or external. Enjoy friends as follows:
- Podputy rows are laying out in the formwork.
- The corners are fixed by coaches, 2 brackets with pointed ends each. Staples are pressed in laying seams.
- The cozers are fascinated to the coaches, according to which the masonry leads. For the Russian oven, the corners are additionally imposed by plumbing.
- As the top bracket is calculated, shaking, remove from the seam and insert into the next one.
- Holes from the bracket in the previous seam are sealed with a masonry solution.
Working principles
In all sorrows, mechanical ties are relatively weak, and the loads are high. Therefore, "Brick on a brick - Goney, grandmother, Mogorch!" It does not take place unequivocally. The furnace has not yet been brought to the blockers, as described in Makarenko in the Pedagogical Poem. When laying the furnace, the following rules must be observed:
- Bricks are put only one by one. The newcomers are preferably postponed to put on dry, align, and then put stones for the solution.
- Each brick before laying Schwawruts (not to be confused with shabby!): Thoroughly clean from crumbs and dust with a hair brush.
- Ceramic brick for a second or two dip in clean water and shook well, then he immediately sticks to the solution.
- Shamotny brick do not "bathe" in no way!
- Apply a layer of solution exactly in 3 mM Kelma is difficult, so experienced masters are applied with a solution with hand. But this also requires a certain skill.
- Brick put in place in one movement, it is impossible to fit and tidy!
- If the stone does not immediately lie as it should, it is removed, it is cleaned with a solution with a brick and his bed and put it again.
- The removed solution is thrown into, it is no longer suitable!
Examples of structures
For example, consider a pair of structures from which you can start moving from theory to practice. In fig. - Scheme and order of the simplest brick furnace: a hob that does not require the foundation. It will take no more than 130 ordinary red bricks, given the fight from the hands of a novice master. It is possible to build a U- or W-shaped DHW heat exchanger with a cumulative tank from a metal tap, can be built into the chimney output (marked in red.).

Despite the simplicity and small sizes, the heat transfer of this stove is about 650 kcal / hour, which allows you to skip flue gases through a heating flap heating 20-25 kV. m. Living Square. The cooking surface of standard size 1 is laid free on the mustache 2 of 3-4 mm steel laced in the seam between 11 and 12 rows of masonry. Its thickness - 6 mm.
On the trail. Fig. - a small friend with a single-mounted hob. It is also performed from the simple red brick M150. They are taking into account the amateur battle will be needed 270-280 pcs.

The cast iron stove lies freely on the mustache, as in the previous stove. It can be removed and insert a rushper for a barbecue into her nest for a barbecue, or put skewers with kebabs on the opening. With an open (or transparent) coaching door oven turns into a fireplace.
It is no longer impossible to put this furnace on the floor, it is too high and narrow. But on the soils with sufficient carrier ability (loam, soup, forest land, etc. "Country" soils) The foundation for it can be a solid slab on a sandy-rubble pillow, as for a barbecue heart.
Video: An example of laying a simple brick oven
The most important principle
Finally, we will give the most important principle of construction of brick household furnaces: the furnace and the house are closely interconnected, they can be friends and enormous. Perform the stove with the house is very simple: any of them will show all their advantages only in a good, well instended house.
The construction of a brick furnace - the process is quite complex and time consuming. You can build it with your own hands, but in this case you should be extremely attentive and accurately observe the climbing scheme of bricks (order). If for you, this is the first masonry of a brick furnace with your own hands, it is better to get a detailed consultation of a specialist or lay the oven under his leadership.
Choosing a brick oven
In large private houses and cottages for heating, boilers with water heating are most often used. For the heating of the same buildings with 2-3 residential premises, it is enough to build a brick oven. It is not only much longer kept warm, but also creates a special microclimate indoors and can become a real decoration of the house. However, a brick oven has a significant disadvantage: this construction is very overall and takes too much space.There are several types of brick stoves:
in the ranking of such structures swede Honored ranks first; It is compact, has a cooking panel and equipped three-channel shield (heat exchanger that allows for a long time to maintain heat in the form of a wall with chimneys inside, can simultaneously perform the role of the carrier wall or located separately); their varieties include the designs of Kuznetsov, Buslaev, etc.;

Exterior view of the Swedish furnace and the construction of a wall with a three-channel shield
Despite its name dutch oven from vertical chimneys (channels in which heat remains and on which the smoke is derived) was invented by Russian masters; has high heat transfer; Usually has 2 channels: summer and winter, which simplify the extracts after a long break; In classical versions, the cooking panel is not provided, but there are variations of furnaces with an integrated fireplace and a hob;

Classical Dutch stove with vertical chims

Chimneys with vertical (like the Dutch) and the horizontal location of the channels
Russian oven. Hold heat for a very long time: up to 2-3 days; It has a gas threshold (the wall between the chamber and the mouth of the furnace); It warms it for a very long time, and there is plenty of space, its size is such that several people can simultaneously fit on her lament; That is why in recent years, such structures are rarely applied.


Russian stove
Through the walls of the walls All furnaces are divided into:
Thin-walled: in one brick, ideal option for country buildings;
Tolstown: Earls in rooms designed for permanent residence, long stored heat;
Combined: Thick walls are laid out only in the fuel cell; The chimney has thin walls.
Same and two-kip furnaces Kuznetsova is one of the most common variations of the Swedish furnace. In contrast to ordinary channelThe yield of hot gases in chimels is carried out not only by traction, but also naturally due to the special design of smoke channels. Smoke in them at first rises up, and when cooled downs down. Since the heat leaks in them are significantly smaller (after all, warm air, until it cools, can not find output), such furnaces are able to store heat for a long time.

Scheme of the cap chimney
The brick oven may not have finishes or watrated with a metal, plastering, put out the ceramic tiles or a facing stone or fit under the extension (with sealing and giving the seams of a special form).

Fishing stove seams

Preparation options
Do you need a foundation for the furnace?
Brick is a rather heavy material. The weight of a folded furnace can reach 8-10 tons, so the foundation for the furnace is needed solid. Otherwise, due to the movements in the ground and its expansion during the freezing, cracks may form or it can completely collapse. Sometimes for a more uniform shrinkage in the house there are several furnaces or fireplaces in the house, separate bases are made not only for them, but also for the root (located in a separate section) of the chimney.
Foundation for the furnace
Since the dummon drawdown under the furnace and the house will be different, the foundation for such a design should be erected separately from the base of the structure itself. Between the main and furnace foundations is necessarily a gap of 50 mm, which is filled with sand.
If the furnace is built in the already constructed building, it is allowed to install a structure weighing up to 1200 kg (300-350 bricks) on the overlap panel. On the wooden floor, it is permissible to build structures up to 700 kg.
Better for a massive heating furnace is concrete. For cement M400, the ratio of cement, sand and rubble will be 1: 3: 5. When using the M250 brand, the proportions change: 1: 2: 4. The depth of the mixing of the concrete pillow depends on the weight of the furnace, the density of the soil and the depth of the soil. In each region of Russia, it will be different (see photo).

Depth of soil freezing

1. The foundation should speak from the edges of the furnace in each side of the brick (10-15 cm). At the firebox, this distance can be slightly large - up to 30 cm.
2. The bottom prepared for the foundation is trambed. Then the layer of waterproofing is placed on it.
3. A 10-centimeter cushion from crushed stone and 15 cm of boob stone is falling asleep before laying a solution in the recovery. All free space between the stones is also filled with rubble and poured with a solution.
5. In order for the solution in the process of drying, it is filled with the layers, it should be no less than a day.
6. After removal of the formwork, the formed gaps are filled with sand, shed water and thoroughly tram.

Bookmark Foundation for the Furnace at the Stage Study of the Building
Important! It should be erected only after complete soloing of the solution. The foundation is gaining 50% of the strength in 15 days. Final consolidation occurs only in 28 days.
Tools for masonry
To work will be required:Kelma for scamping and laying the solution; most convenient to work a tool with a slightly shifted by a handle;
Kirk or Hammer - Kirk: For the Test of Incompact Bricks;
Bulgarian with a diamond disk for sawing them on halves and quarters;
Molding with a rubber tip for bricks picking in laying;
Twisted moor cord;
Plumb to check vertical surfaces;
Building level;
The coal to which the corners will be recovered;
Roulette.

Furnace Masonry Tools

For alignment of walls and angles, you can use the cord-moor and metal corner.
Masonry solution
The cement mixture under the action of high temperatures is quickly cracking, so it is used to lay out furnaces only clay-sandy solution. For a device, a limestone or lime-cement solution is used for the device under the attic. The cement-sandy mixture is used only for masonry pipes above the roof.The ratio of clay and sainted sand is experimentally selected. It depends on the type of clay. Most often mixtures 1: 2 or 1: 3. And the fatty clay, the less should be in solution. Initially, the clay is soaked, filter through the sieve, and only then add sand.
The solution must have a consistency of sufficiently thick sour cream. It is possible to determine the viscosity of the mixture as follows. Wooden stick or trowel lowered into the solution and shake. If it remains a layer of less than 2 mm thick, clay is added, more than 3 mm - sand is added. Too fatty solution will lead to cracking of the seam of masonry, with a lack of clay, sand from the seams will be poured.
Secrets of brick masonry
Baking better lay out fireproof chamotte bricks. To save funds, you can put it only to the furnace, for the rest of the furnace, use the usual silicate. However, combine them in one bundle, as well as bricks from different manufacturers, it is not recommended: at temperature drops, their extension will be different, so such a furnace can "lead". Effect hollow brick for masonry is not used.
Views, sizes and weight of bricks
1. For the device furnaces, the furnaces are used: detailed schemes in which the process of masonry of each row is indicated. The location in the furnace chamotte refractory brick in such schemes is indicated by hatching or highlighted by color. Change the order without the need is urgently not recommended: deviations in the scheme can lead to narrowing channels of flue moves.

Laying chamotte for firebox and chimneys and silicate bricks
2. Before laying bricks on the basis of 2 layers waterproofing: Tol or rubberoids impregnated with mastic. To protect the solution from dehydration, the brick is pre-for a couple of minutes soaked in water.
3. The first of its number is laid out dry without a solution. Next, the statement is conducted with overlapping junctions previous series. Each seam should be completely filled with a solution, without voids and shells.
4. Laying of the row is made from the corners (see photo). After that, between two angular bricks, a report is made of the entire row.

Laying row
5. Each row is checked by a building level for compliance with horizontal and vertical.
6. In order to avoid errors, the number first is laid out without a solution. Then the sequence number of each of the bricks is signed with chalk, they are removed and started fine laying. Not only horizontal, but all vertical seams with a layer of 3-5 mm are missing.
Important! When laying chimneys should not use halves and a quarter of bricks. In case of their loss, get them from the chimney will be problematic. Use parts of bricks better in the top rows of facilities.
7. The cooktop and the grate is laid with a gap of 5 mm to compensate for temperature expansion.
8. Fire doors and pondered insulated asbestos and are additionally attached to the wire, which is laid in the laying seams. For its attachment in the cast-iron frame, special holes are required.

Fastening the door of the furnace
9. The walls of the chimney must be perfectly smooth and smooth. Say lumps will accumulate in the joints and chips of bricks, so only perfectly smooth bricks without defects are used to arrange smoke moves. The residues of the solution in such places should immediately be climbing climber or rag.
10. If the pipe is erected, a plot passing through an attic overlap. The walls in this place increase so that their width exceed 38 cm, while the chimney cross-section remained unchanged.
At the following schemes provided order Little Furnace-Swedets with 570 bricks with a cookbook. For the device such a furnace will also be needed:
Cast iron plate with two burners;
Cast iron doors for firebox and devices pondered;
3 Clean soot removal doors;
2 valves;
Metal oven;
Corner
Steel band for the overlap device over a cooking recess.


Video: Laying a brick furnace with their own hands
Despite the fact that in very many today are those or other heating systems, brick heating structures do not lose their popularity. On the contrary, engineers and folk crafts are being developed by all new furnace models, more compact, including various functions. Indeed, the furnace heating will never be superfluous for a private house, as it will be able to rescue the owners in different situations. For example, in the fall or in the spring, when the nights are cold, but it seems to include autonomous heating, the drowning oven will create a cozy atmosphere in the rooms and relieve them from excessive humidity. The oven will help maintain the optimally favorable atmosphere and the temperature balance, comfortable for a person.
Therefore, a search query about how to fold the oven with your own hands the drawings of which will tell in detail about the correct sequence of masonry work, does not come down from the pages of the Internet. Today, even those people who do not have the experience of the liver, show the desire to try their strength in this craft. If it is decided to install the furnace in the house with its own forces, then beginners it is recommended to choose a simple version of this facility with an understandable order.
In addition to the availability of the design, when choosing, you should pay attention to its heat capacity, that is, it is designed for heating. It is important to take into account the functionality of the structure and decide what I would like to get from it.
Varieties of brick stoves
There are several main types of furnaces - some of them perform only one main task - this is heated at home, others are used only for cooking, and the third includes several functions in their "set of features". Therefore, in order to decide on the desired model, you need to know what is each of the species.
- The construction is capable of not only to warm one or two rooms, but also help cook food and boil the water. If the model is equipped with a brass cabinet and drying niche, then the possibility of bake bread appears, and peel vegetables and fruits for the winter.

The heating and cooking furnace is often embedded in the wall or itself performs the role of the wall - for this it is rotated by a slab and a firebox in the direction of the kitchen, and the back wall in the residential area of \u200b\u200bthe house. You can solve two problems immediately - the heating of the premises and the possibility of cooking in a separate room.
If the design is additionally equipped with a fireplace, the furnace will work not only as a functional structure, but it will become a decorative decoration of the house.
- The heating variety of furnaces is designed only for the heating of the rooms at home. Some models have not only a fiber chamber, but also a fireplace. Thus, the furnace can function in two modes - when only one of the functions is used, or they are involved both simultaneously. Most often, the heating stoves are embedded in the wall between the rooms or are installed in the middle of one large hall, separating it into zones.

Such a building is being built for both the main heating of the house and as an additional, which is used in the spring and autumn period to maintain normal temperature and humidity in the rooms. The heating furnaces are usually established when the kitchen has already implemented its ability to prepare food, or in a large total area of \u200b\u200bthe house, where several furnaces perform various functions.
In the country area in a small house, it is better to establish a multifunctional structure that can help immediately in several situations.
- The cooking furnace is erected in the kitchen, and its design is designed for quick cooking. However, this function does not deprive it and heating capabilities, since its entire body, the rear wall and the cast iron stove are well warmed, giving heat and room.
 The main function of this stove - cooking
 The cooking furnace is usually compact, so it is perfect for installing it in the country or in a small kitchen of a private house.
Having such a compact, but functional unit, one can exclude the risk to frozen or remain without dinner and hot tea, even if the electro- and gas supply is turned off.
A lot of different models of all listed types of furnaces have been developed. They can be completely miniature, and occupy a large area. Therefore, stopping at one of the models before stocking materials for its construction, you need to measure and draw it the base on the floor of the room in which it is planned to install it. Thus, it will be possible to visually determine how much the free space will remain in the room.
How to choose the right place to install the furnace?
So that the furnace worked effectively and maximally gave heat into the premises of the house, and was also a fireproof, it is necessary to choose the right location for it.
It is especially important to think about this moment if the furnace is embedded in the finished building, since the chimney pipe must pass between the ceiling overlap beams, and accidentally do not stumble upon them, so the installation option must be calculated as accurately as possible.
The furnace brick structure can be installed in different places of the room or between two rooms. What place it is better to choose - will be considered further.
- To get the maximum effect from the furnace, you should not install it near the outer wall of the building, as it will cool quickly and can hardly be able to heat more than one room.
- Some stove models are installed in the center of the room or shifting it from it in one or the other side. This location is selected if the room is required to divide into separate zones. Moreover, different sides of the furnace structure can have a different decorative finish, made in the style corresponding to the design of a particular area of \u200b\u200bthe room.
- Quite often, the furnace is built into the wall between two or even three rooms, which makes it possible to use the heat generated as efficiently as possible. In this case, for the purpose of fire safety, it is very important to provide reliable insulation of the walls, the ceiling and the attic overlap at the location of the passage
- When choosing a place of installation, it is necessary to envisage that each of the sides of the foundation under the furnace should be 100 ÷ 150 mm more than the base of the furnace itself.
- To accurately determine the size of the base and height of the furnace, it is recommended to always select the model to which the order scheme is applied.
By choosing and place for its installation, you can acquire all the necessary materials and prepare the necessary tools. The amount of materials will depend on the size and functional features of the furnace model, and masonry tools are always the same.
Tools required for masonry work
 To work it will be necessary to prepare a very "solid" set of tools.
 From the tools for masonry brick and fill the foundation, you will need:
- Rule - This tool is used to align the surface of the basement with concumen.
- Kirk's hammer is necessary for splitting and trimming bricks.
- Veel is a wooden blade, which is used for rubbing the clay and lime solution.
- The furnace hammer is used to split the brick and removing the dried, speaking outside the masonry of the solution.
- Makeup made of urine is intended to clean the internal furnace channels from sand and solution in them.
- The lead drain is needed for marking in the event that the furnace is separated by tiles.
- The construction level is necessary to control the levels of rows and the surface of the walls.
- The diaper is the rod applied for marking.
- The plumb is a cord with a load, designed to check the verticality of the output surfaces.
- Building corner with a ruler to verify the correctness of external and internal angles, as they must be perfectly straight.
- Pliers are used to bend and bite the wire for fixing the cast-iron elements of the furnace in the seams of masonry.
- Raspil - This tool is used to remove the influx and wrecking lumps in the dried masonry.
- The chisel is used to split the brick and the parsing of old masonry.
- The rubber hammer is necessary for the alignment of the brick-labeled solution.
- (Trusks) of different sizes are used to apply a solution when laying bricks and removing the mixture speaking from seams.
- Fishing - a tool for aligning the solution in the seams of masonry. It is used if the laying is produced "under the extection", without further lining.
- Manual tamping will be required to seal the soil and layers of frustration in the pit for the foundation.
- Capacities for kneading the solution and pure water.
- Sieve with a metal mesh for sand sifting.

- Stand for the convenience of working at height, called "goats". The surface of this device has sufficient size not only for comfortable movement of the wizard, but also for the installation of a container filled with a solution.
Foundation arrangement for brick stove
The foundation for the furnace is usually preparing together with the foundation of the house, but they should not be in contact with each other, and even more so - to be combined into a single design. New foundations, as a rule, give a shrinkage that can lead to deformation of one of them, and this will pull the damage to the other. That is why they should be installed necessarily separately from each other.
In the event of an end of the oven in the already built house with a wooden floor, you will have to do a fairly large-scale work. In the place where the furnace will be installed, the floorboards will have to be removed, drinking the hole to the size of the future foundation.
If the foundation under the house is monolithic, and the selected furnace model is not too massive, then the design can be erected on it, the material for waterproofing is pre-installed.
The foundation should be in the form of the base of the furnace, however, as mentioned above, each of its parties is made greater than the furnace at 100 ÷ 150 mm.
- If the floor in the wooden house, it makes the markup on which the boards will be peeling.
- Then in the soil of the sample in the form of the future foundation rotates, the depth of which can vary from 450 to 700 mm, depending on the composition of the soil.
- The bottom of the pit is rambling, and its walls are lined with a polyethylene film or rubberoid.

- Then, a sand pillow is 100 ÷ 150 mm thick on the bottom, depending on the depth of the pit, and is well compacted with a manual tamper.
- The next layer, on top of the sand, is falling asleep rubbing, which, too, if possible, is rambling. This layer can be from 150 to 200 mm.
- Next, a wooden formwork in the form of a box is installed along the perimeter of the pit. Moreover, polyethylene or rubberoid remain inside it, and then fixed on the walls using a stapler and brackets. This waterproof material will keep the solution flooded into the formwork, not giving to leave it moisture, which will give the plate the opportunity to dry and harden evenly.
- The foundation should have a height of approximately 250 mm below the level of "clean" floor, that is, the finished base will need to put two rows of bricks so that it rises to the floor with the floor.
- Some wizards in order to save brick, on the contrary, raise the foundation above the floor by 80 ÷ 100 mm. The convenience of such a solution consists also in a simpler docking of the side walls of the foundation with the surface of the floor coating.
- The next step in the formwork, for its entire height, the reinforcement grille is installed, made of 4 ÷ 6 mm thick with a thickness of 4 ÷ 6 mm. The bars are associated with a wire twist.
- Further, in the lower part of the formwork, a rough concrete solution, mixed from cement and gravel, can be pouring into a thickness of 250 ÷ 300 mm in the proportions of 1: 3, or cement, rubble of the middle fraction with the addition of sand in a 1: 2 ratio: 1. But, In principle, a conventional concrete solution from sand and cement can be used.
- If the coarse mixture is poured down, then immediately, without waiting for its setting, the thinly mixed solution is laid on top.
- The flooded is aligned with the rule on the upper facets of the formwork boards, after which it is recommended to put and drown on 15 ÷ 20 mm into the solution of the reinforcing mesh with cells of 50 mm.

- The surface of the foundation is resurrected again, and, if necessary, a concrete solution is added to the formwork, on top of the grid.
- Further, the foundation leaves to stick and recruit strength - this process will take from three weeks to a month, depending on the thickness of the layer of the flooded solution. So that concrete is more durable, recommended daily during the first week, starting from the second day, spray it with water.
- From the top of the frozen foundation, waterproofing, consisting of two or three rubber carriad sheets, which are stacked by one to another.

- To start laying the first row, it is recommended to make marking on the waterproofing material, denoting the location of the base of the furnace. Due to the outlined perimeter of the base, it will be much easier to assemble the first row of bricks and observe the solidity of the parties and the corners.
After these preparatory work, you can go to the masonry.
Dry masonry
Even experienced masters, starting the laying unfamiliar to this design, first produce it dry, that is, without a solution. This process helps to figure out the intra channels of the furnace and do not make mistakes during the main masonry. Every majority rises dryly, each of the rows should be posted in accordance with the furnace applied to the model.
Performing dry masonry, it is necessary to observe the thickness of horizontal and vertical rows. In order for this parameter to withstand the same throughout the masonry, you can use 5 mm thick racks. Of course, the vertical seams will be difficult to measure with small segments of the ridges when drunk dry, so they will have to be determined visually, but for horizontal seams, the rails need to be used. Applying them, after laying out the last row of the design, you can see the real height of the furnace.
As an example of using the RESEK, you can consider this photo.

It is especially important to adhere to a single thickness of the seams if the masonry is performed under the extection, and will not be further separated by additional decorative materials.
Mastering dry, it is important to understand the channel configuration through which the smoke will go from the furnace, and climb the pipe. If, when laying out this passage, an error will be made, you will have to shift a part or even the entire design of the furnace, as the reverse thrust can be formed, and the room smoke will go.
Having lifted the oven dryly before the laying of the chimney pipe, the design disassemble. Moreover, if the ranks used not only as well, but also their small fragments, then when disassembling, each of the rows can be folded in a separate stack, putting a number of rows on one of the bricks. Sometimes, additionally, the brick number is also affixed in each of the ranks. Such a system will accelerate the work, since all the material will be fitted and decomposed in the right order, and will remain only to soak it alternately and put into the ranks of the furnace, but already per solution.
Performing basic masonry, two rails are installed on the edges of the previous series, between which the solution of 60 ÷ 70 mm thick is applied. Then the brick of the top row is put on it, aligns and embarrassment until it is stored in the rail. It is necessary to have such calibration devices into three rows, since it is possible to pull it out of the seam only after grapping the solution. So, laying out three rows, the rails pull out of the lowest seam, clean and laid on the fourth - and so on. If there is no confidence that the vertical seams are the same thickness, for them you can also prepare a short rail, which will be rearranged in the next seam immediately after aligning two adjacent bricks.

After pulling out the calibration peeks from the seam, there will be a fairly deep gap between the bricks. It is filled with a solution, which is cleaned by a trowel, and then put in order using the bunch.
 Processing of seams "under the extection"
 If the calibration rails laid out of both edges of the brick, then the inner side of the wall will also leave the recesses between the seams. They are also needed to carefully close, since the seams should be hermetic, filled with a solution across the entire width of the brick.
It is very important, performing masonry on the solution, check each of the placed rows by the construction level so that the entire design does not occur.
Such simple auxiliary devices, as calibration rails, will help perform the masonry gently with the same width of the seams. Therefore, the entire furnace surface will look like the design is made by a professional master.
These nuances will help simplify the process of building a furnace structure, avoid errors that can lead to the need to rewar throughout work.
Brick stove construction schemes
O. O. Proskurin with Hepiculture and Hall Functions and Drying Chamber
A model developed by the engineer Y. Solkurin can be called one of the simplest structures of the heating and cooking furnaces, which even a novice master can be mastered. Despite the compact sizes of the structure, the stove is able to fulfill all the functions necessary for a small home, since it is equipped with a hob and a chamber for drying, which, if desired, can be replaced with a water tank.

Such a furnace is able to warm one or two rooms with a total area of \u200b\u200b17 ÷ 20 m², so it can be built into the wall between the kitchen and one of the small rooms at home. At the same time, it is definitely necessary to orient in such a way that the design is deployed to the stove toward the kitchen room.
The dimensions of this heating structure, without the height of the chimney, are 750 × 630 × 2070 mm. The stove has two modes of operation - winter and summer, which allows for the warm season to use only the hob, without unnecessary heating of the whole house. The heat transfer from the furnace with its full-fledged protostka is 1700 kcal / h.
The following materials will be required to build this heating structure:
| Name of materials and elements | Quantity (pcs.) | Sizes of elements (mm) |
|---|---|---|
| Red brick M-200 (excluding pipe masonry) | 281 ÷ 285. | 250 × 120 × 65 |
| Chamotte brick refractory brand sh-8 | 82 ÷ 85. | 250 × 120 × 65 |
| Opening door | 1 | 210 × 250. |
| Doors for cleaning channels | 2 | 140 × 140. |
| Door for confused | 1 | 140 × 250. |
| Summer stroke valve for chimney | 1 | 130 × 130. |
| Flashing | 1 | 130 × 130. |
| Hob | 1 | 130 × 130. |
| Colonnik | 1 | 200 × 300. |
| Single-mounted cooking panel | 1 | 410 × 340. |
| Steel band | 1 | 40 × 260 × 5 |
| 1 | 40 × 350 × 5 | |
| 1 | 40 × 360 × 5 | |
| Steel corner | 1 | 40 × 40 × 635 |
| 3 | 40 × 40 × 510 | |
| 4 | 40 × 40 × 350 | |
| Roofing iron | 1 | 380 × 310 |
| Foremost metal sheet | 1 | 500 × 700. |
To fill the foundation it will be necessary to prepare cement, crushed stone, sand, gravel, rubberoid, reinforcement rod or steel wire with a thickness of 5 ÷ 6 mm. If it is decided to replace the drying chamber on the hot water tank, you will have to purchase or make it.
So that work has passed successfully, before it began, it is strongly recommended to learn my friend very carefully, and in the process of masonry to keep this scheme is always at hand.

In this illustration, this furnace is schematically represented in several cuts. Here you can clearly consider how the chimney channels pass inside the design, trace the movement of smoke from the furnace to the chimney pipe.
| Illustration (order) | Brief description of the operation |
|---|---|
 | The first row is solid, it is laid out according to the configuration submitted on the scheme. The row should be perfectly even, since the reliability and durability of the entire structure will depend on its proper masonry. The series consists of 15 bricks. |
 | Second row. At this stage, the form of the ash bar is laid (a subpend chamber) and the bottom part of the two channels that will be vertically. Laying the row, leave the openings to install the door of the pensive and the clean cameras. On the same row they are installed. The row is laid out of 13 bricks. |
 | In the cast iron doors, for their fixing in the masonry, special ears are provided in which the harvested segments of the wire are inserted. Further, their ends twist together and fit into the seams between the side walls. To make the door not shifted from the installation site until its fully fixation, it is temporarily supported by bricks. |
 | The third row is laid out according to the scheme. It raises the walls of the pensive and the cleft chamber, and in the seams between the rows of bricks, the ends of the wire are fixed, with which the doors are fixed. For the masonry of the row, there will be 13 red bricks. |
 | Fourth row. The camera of vertical channels is divided into two, as they will be laid out separately. Channel cross-section over their entire height will be 80 × 120 mm. In addition, this row is overlapping the installed door. It is necessary to prepare 13 red bricks. |
 | The laying of the fifth row is made by refractory chamotted brick, as it is the formation of the lower part of the furnace. In bricks that determine the place of laying a grate grid, from the inner of their edge, is made at right angles. The cutout size should be approximately 10 × 10 mm ± 1 mm. Prepared bricks are stacked above the infideling chamber. For the masonry of the row, 16 chamotte bricks will be required. |
 | After that, in the fifth row in the prepared deepening in bricks, a grate is established. It is sometimes mounted on a clay solution, but often - completely without a solution. In the latter case, the gaps between the grid and the brick, which should be about 3 ÷ 5 mm, are filled with sand. |
 | Sixth row. The walls of two vertical channels continue to form, and the walls of the furnace begin to be erected. The laying is carried out only with chamotte brick. The series consists of 12 chamotte bricks. |
 | Further, on the sixth row, the coil door is mounted, which, as well as confusing, is fixed with wire in the seams of the side walls. However, the coil door before installation is equipped with not only wire mounts, but also wrapped around the perimeter asbestos cord. This process must be carried out to create a heat gap, which will allow expanding the metal during its strong heating. |
 | The seventh and eighth rows are laid out of 12 refractory bricks each and correspond to a co-order scheme. During their laying, the walls of the furnace continue to rise and the vertical channels are formed. It is clear that the laying of bricks in the ranks goes firstwarding. |
 | When laying a ninth row, the door of the furnace chamber overlaps. To remove the load from the cast-iron door, with bricks installed on the side walls, the edges turned towards the heat chamber are cut under the same angle of 30˚. These sections will serve as a peculiar stand for the middle brick cut from both sides at an angle of 60˚, that is, it should be perfectly signed between two extreme bricks. 12 chammatory bricks will be required to the row. |
 | On the tenth row, the fuel chamber is combined with an extreme vertical channel, since the smoke formed in the furnace went to this hole. In order to provide the smoothness of the stroke of hot air, on the middle brick, separating the flue hole and the closed channel, the cutting corner is made. For this row, 11 chamotte bricks will be required. |
 | On the eleventh row, the masonry, going around the heat chamber, is distinguished by the fact that it uses bricks with a cut-out bricks at 10 × 20 mm. This step is designed to lay the cooking panel. For masonry will need 11 chamotte bricks. |
 | After the 11th row is posted, the step on the bricks will be supplied with asbestos stripes or layer of clay, 3 ÷ 4 mm thick (under the condition of the thickness of the cooking panel in 5 mm). These gaskets will serve as a pillow and a thermal gap for the hob. Then, a cooking panel is installed on the place prepared for it. From the side where the cooking chamber will be formed, the angular part of the masonry is strengthened with a metal corner. |
 | From the twelfth row, the masonry will be made only with red bricks. At this stage, the walls of the cooking chamber are laid, and again closes the jumper open earlier vertical channel. For the masonry of this series you need to prepare 10 bricks. |
 | The 13th row is laid out according to the scheme, but in the outer part of the first vertical channel is formed a place to install a gate, designed to switch the furnace modes to a winter or summer course. To do this, cutches are made in the brick to deepen the metal element. Further, on the prepared place, the stationary part of the chimney valve is fixed on the clay-sandy solution. The row is laid out of 10 bricks. |
 | The 14th ÷ 18th row - for each of them it will take 10 bricks. The masonry on these rows has the same configuration, taking into account the dressing, and forms vertical channels and a cooking chamber. |
 | On the 18th row, the cooking chamber overlaps three steel corners, which form the basis for the masonry of the following rows. One of these elements is installed on the edge of the "ceiling" of the cooking chamber, the second turns to the first and is set at a distance from it in 250 mm (the size of the brick), and the third corner of the back side is pressed to the second. Looking at this design, it is quite possible to understand how bricks should be laid. |
 | 19th row. Laying it, 12 bricks overlap the cooking chamber, but the hill of the hood of the steam is formed above it, in which the valve will be installed. To install this item in the edges of bricks installed on three sides, cuts are made, and from the external brick is removed by layer, making it thick less. Further on the prepared platform on the clay solution fixes the valve. |
 | The 20th row is postponed according to the presented scheme. At this stage, the installed valve is overlapped, and channel holes are formed. The side brick in the first vertical channel is shy for a smooth flow of heated air. For a number it will take 15 bricks. |
 | On the 21st row, the first vertical channel and a hole for the vapor chamber pair is combined into the overall space. The masonry is carried out around the perimeter of the furnace, the brick is installed in the form of walls, and the second vertical channel is framed. Moreover, the angular inner brick is cut off to ensure smooth care of steam into the chimney pipe. For masonry you need to prepare 11 bricks. |
 | Further, on the same row it is overlapping the resulting space with steel stripes, which will provide the basis for the installation of the metal plate and the masonry of the following rows. |
 | The next step, which is performed on the same row is the installation of a plate of roofing iron. With the help of it, a chimney hole is formed, located in the opposite side from the window to exit the steam from the hob. |
 | On the 22nd row of brick masonry, a metal plate is overlapped. Next, the laying is carried out according to the scheme. Only channel holes remain open. Then, from the outside of the furnace, a metal corner is installed, which will strengthen the front of the bottom of the drying chamber. It will take 15 bricks on the laying of a row. |
 | The 23rd row - the walls of the drying chamber are formed. Its rear wall makes out of the brick installed side - it will separate the camera from the opening of the chimney channel. 12 bricks are used. |
 | On the 24th row of 11 bricks, the walls of the chimney and two vertical channels are formed, as well as the drying chamber. |
 | The 25th row - the work continues according to the scheme, the masonry is made of 12 bricks. The second brick of the rear wall of the drying chamber is installed in the same way as the first, on the side. |
 | 26th row. At this stage, vertical channels are prepared for combining into one space, so for the direction of smoke in the desired direction of bricks in the vertical channels are cut under a small angle. For laying a number, 11 bricks will be required. |
 | On the 27th row, with a masonry, two vertical channels are combined, and a clear door is installed on this general camera. The rear wall of the drying chamber rises another brick, which is installed on the side. The series consists of 11 bricks. |
 | On a 28th row, consisting of 10 bricks, a masonry is performed according to a scheme similar to 27 nearby. And then three metal corners overlap the space of the drying chamber. |
 | On the 29th row, all practically the area overlaps with brickwork, which is mounted in accordance with the scheme. It is left open only a hole above the drying chamber, where the valve will be installed in sections made on bricks framing this opening. The outer brick is cut, making less than its thickness. In the arrangement of the "nest" on the clay solution is installed valve. The series consists of 17 bricks. |
 | The 30th row, consisting of 16 bricks, completely overlaps the surface of the furnace. The exception is only the chimney hole, the size of which is equal to half the brick. |
 | For 31 ÷ 32rd rows, a chimney begins to form. |
If it is decided to produce independently, then work should be carried out slowly, approaching each stage of the process with full responsibility and maximum accuracy. Subject to all the recommendations and the provided scheme-co-order, even a novice master will be able to cope with this work and gain experience for new creations.
And at the end of the article - another example of masonry a miniature brick furnace for a country house.
Video: Compact brick oven for small kitchen
For giving heating today there are many options: centralized gas, boilers, electrical heaters. But if all this is not realized is possible due to the remoteness of the area from civilization, the stove for the cottage from the brick will become a great solution.
Reliable and durable - she will collect around themselves not one generation of households, providing a house with warmth and filling it with comfort.
Services of a good cook - the pleasure is not cheap. Therefore, if you decide to implement a brick furnace project at the cottage, you will be useful for you to read this article in which we will tell about the principle of work, features and scheme of furnace construction.
A brick furnace can become not only a functional device, but also the main highlight of the interior, if it is correct to beat. Today there are many ways to allow you to bust and decorate a stone stove.
No matter how much time has passed since the appearance of the first furnace structures and, no matter how far the heating technologies have not entered, the stone stove does not lose its relevance. Compared to other types of heating (electricity, gas), it is more economical. At the same time, thick stone walls allow you to keep the warmth of the day after cutting firewood.
In its appointment, the furnaces are divided into the following types:
- heating;
- cooking;
- multifunctional;
- combined.

- the heat chamber, which is already purchased in the finished form, is either laid out with chamoten brick;
- asolnik, where the ashes is going;
- chimney.
In the same type of design, a fireplace with an open or closed firebox can be attributed. It is used not only in decorative purposes, but also allows you to effectively warm the room with an area of \u200b\u200b15-20 kV. meters.
Depending on the material selected, wall thickness, masonry scheme, heating furnaces can have different heat recovery.
The most popular view of the furnace is a design with masonry in one brick. This allows you to warm the walls to 60 0 S. According to this scheme, the famous Dutch furnaces are laid out.
In terms of dimensions, the heating furnace can be wide and selected, and may have an elongated rectangular shape. It all depends on the area of \u200b\u200bthe room, the style of the interior and the personal preferences of the owners.
For lining such a furnace, a tile tile, decorative plaster, decorative stone is usually used.
A brick heating furnaces in the form of a trilateral prism look very stylish and originally, but this option will not be implemented, since there is a lot of experience. Much complexity represents trimming bricks and the requirements for holding the angle strictly under 60 0.
There are beautiful and unusual and round ovens, which are laid out according to the scheme of a well-known Russian engineer in a chimney of V.E. Gruum-Grizielo. The furnace works on the principle of free movement of gases. To ensure tightness, the construction is plated from the outside. Such a furnace is able to warm up a large country mansion and will become a real decoration for any home.

The design of the furnace consists of a brick case, inside of which the heat chamber is located, the ash bar, chimney. From above is the metal plate (the oven) can be built).
- Heating and cooking furnace already refers to multifunctional structures.
This is a more complex project in implementing, as it consists of:
- floor chamber;
- chimney;
- ash bar;
- hob;
- oven.
The furnace looks massively and is usually chosen for cottages, where the other version of heating is not provided.
In our country, heating and cookies enjoy the greatest popularity, allowing both the house to protrud, and make a delicious lunch for the whole family.
It can be additionally provided with a drying chamber where you can make blanks for the summer: mushrooms, berries, fruits. In cold and crude weather, in this chamber you can quickly and safely dry clothes, shoes.

By the way, the ovens with drying cameras were first invented in the countries of Northern Scandinavia, where the hunters and fishermen needed to dry clothes, boots in one night.
Many of the schemes of heating and cooking furnaces have additional devices in the form of a comfortable bed, drying for firewood, oven, water tank.
Device furnace for giving and its features
The main elements of any brick oven for the cottage are:

10 Basic Rules for Country Furnace

What brick stove to choose for giving?
The choice of furnace design causes the size and type of room. For large cottages, a massive chimney with thick walls will be required, which will be heated for a long time, but at the same time it will be able to hold the temperature for a long time. Fold such a furnace - the task is not simple. Here you will need some experience and knowledge.
But with a small stove for heating a small cottage, even a beginner can cope, if you follow a clear scheme and not change the masonry rules.

In the first place in popularity of heating and cookies, a Swede is adequately located, which enjoys deserved love and respect among Russian People.
This design is a compact ergonomic shape with a small cooking surface, a three-channel chamber. It is perfect for a small summer cottage, length ranges from 880 to 1250 mm.
For the location of such a furnace, the place between the kitchen and the living room is most often selected. Thus, the oven performs a double function: it serves for cooking and decorate the living room by the fireplace.
On the Internet today you can find hundreds of various laying schemes of the Swedish oven with a cooking surface, so it will not be difficult to implement for the cottage. Many people made additional options in the standard layout scheme, so each design is called by the name of its creator: Buselaev furnace, Kuznetsova, etc. But the principle of operation in them is the same.
Traditionally, a Russian oven can be called a bulky massive design, which adorns not only the cooktop with a brass cabinet, but also a spacious laying.

This furnace is already not only a functional device for cooking, but also a place to relax. It allows you to warm up the room, while holding the heat for a long time, has a beneficial effect on the human body, so the owners of such furnaces are less susceptible to colds.
Building usually has two fireboxes (main and extra). Thanks to the special design of the furnace, the heating is uniformly, from the bottom up. Any solid fuel is suitable for extracts, and especially strict requirements are not presented to the materials for masonry of the Russian furnace.
A special place among small heating and cookies is taken by Malytka V.A. Potapova, created by the famous engineer at the beginning of the 20th century. For her masonry you need only 211 bricks, and oven dimensions are only 630 * 510 mm.
At the same time, such a little girl accommodates a single-industrial plate, a small oven for baking and extract. Such a furnace will become an excellent solution for a small garden house or cottage in one room.
In this article, we suggest you to explore the rules and highlights of masonry with a small heating and cooking furnace.

Stove laying with their own hands
Step 1. Choose a brick and prepare tools
What brick for laying a small country furnace to choose? We will need 2 types of bricks: chamoten (heat-resistant) for the construction of fireboxes and red ceramic (not lower than M-150). Do not save on materials, further operational properties depend on this, safety and efficiency of the furnace.
Chamotte brick can easily learn on yellowish color and porous surface. The composition of this material includes refractory clay and crumb. This material, besides its heat-resistant properties, is even due to the ability to accumulate heat for a long time. Even after the fulfillment of firewood, such a stove is able to give heat for a long time.

The heat-resistant chamotte brick is able to withstand temperatures up to 1500 0 C, so the coil chamber should be laid out exclusively from this material.
The smaller the mass of chamotte brick, the greater the number of pores contains that aluminum oxide creates. Such a brick will be very cool. The cost of this material is almost 5 times the price of red bricks, but no need to save.
But it is not worth uploading the whole furnace from chamotte brick, the outer part of the design is not very hot, and it looks like a red ceramic brick more attractive.
When choosing a brick for a furnace, pay attention to the color and shape.

You can test the material. If you throw a brick from a height of 1.5 meters, and it will not split - take this batch. But the bad, the overexposed brick can split into several parts. Such a brick in the fall makes a deaf sound.
Brick brand for facing the furnace should be M150 or M200. The figure in this case means which weight brick is withstanding 1 cm 3.
Do not take a silicate and hollow brick. It's not even in the ability to withstand a high temperature - they will cope with this. Silicate brick does not spend heat and in a room with such a furnace will not be very comfortable.

For a masonry solution, we will need sand, red chimney clay and water. The appearance and durability of the furnace directly depends on its quality and consistency. For its preparation, the red furnace clay of the medium fluid should be used. In the frozen form, he should not fall, crumble.
The masonry will be produced with a thickness of 0.5 mm, in which case the precious heat will not quickly leave.
Also for construction, you can use the ready-made masonry solution, which is sold in stores. Usually in its composition there are various impurities that add strength and heat resistance of the design. In this case, it will be enough to dissolve a dry mixture with water and bring it to a homogeneous state with a construction mixer.
By consistency, such a solution should resemble a thick sour cream. If the solution rolls with a trowel, you must add a dry mixture. If he turned out to be too thick, it will be difficult to work with it and perform thin seams. Add some cold water and mix again.
So, for the construction of a furnace, we will need the following materials:

- Masonry solution (sand, red chimney clay).
- Red ceramic brick M150 - 120 pieces.
- Chamotte brick - 40 pieces.
- Material for foundation (cement, graphi, sand).
- Ruberoid.
- Asbestos cord, galvanized wire.
- Plywood or boards for creating a formwork.
- Reinforcing mesh to arrange the foundation.
- Grate.
- Metal plate on one mosquito (cast iron).
- Solnik and the door of the ash bar (pissed).
- Cast iron door for firebox.
- The catch of the chimney channel.
- Chimney view.
- Metal cap on chimney.
Tools that will be needed for the construction of the furnace.
- Building level.
- Soviet shovel.
- Construction marker.
- Coromet.
- Spatula, rule.
- Master OK.
- Measuring tape (roulette).
- Construction plumb.
Important! When laying a furnace, much depends on the quality of clay. Ideally use the red river clay of medium fat, which was outdoors at least 2 years. Do exactly so much solution as you can master for "1 okay". The solution quickly becomes thick, and it becomes hard to work with it.
Step 2. Ready Brick for Masonry Furnace
Before embarking on the masonry of the furnace, it is necessary to decompose the entire brick in advance and prepare it according to the co-order scheme.
This stage includes brick division on ½ or ¼ parts, shy at the corners.

Carefully learn the scheme and see what parts of the bricks will be needed for each row.
If necessary, you can then numbered the brick so that later it was easy to navigate, in which row to insert it.
How to split a brick? Before you "discard" the necessary part of the brick, according to the scheme, you first need to perform a groove. This can be performed using a hacksaw or a file.
To make ½ bricks - spend 1 groove.
For 1/6 or 1/8 brick, perform a furrow from all sides of the brick.
Step 3. Choosing a place for the furnace
This is a very important stage in the furnace bookmark, which is advisable to produce even at the construction stage of the house.
But there are cases when the decision on the furnace laying arises from household owners already during the operation of the cottage. In this case, determine the place where the chimney is easier to withdraw.

It is also important to estimate the distance between the furnace and windows and doors. After all, the cold air strangles from the door can prevent the natural circulation of heat in the house, reducing the efficiency of the stove.
In addition, the oven should not interfere with the free move around the room. It should become one whole with space without creating inconvenience. In many ways, the placement of the furnace depends on the destination.
The heating and cooking model is best spaced in the kitchen, and the furnace-fireplace will look beautiful in the living room.
- The distance to the nearest wall should be at least 25 cm.
- The chimney should not pass through the beams.
- The floor and the wall will have to be faced with fire-resistant material.
- The fireplace is better spaced near the inner wall of the house. To increase the efficiency, it makes sense to install the oven in the space between the kitchen and the living room. Thus, one furnace will dump two rooms at once.
An excellent place to accommodate the furnace is the angle of the room, only if the front door is not located opposite the corner, from which the cold air will be blown in the flame.
Step 4. Construction of the foundation
To build a brick oven, it is necessary to perform a separate foundation. If it is laid on one cycle with the construction of the house - to perform it is not a difficult task.

If you made a decision on masonry furnaces after the completion of general construction, then it will be necessary to shoot a part of the first floor and plunge into the soil.
Why is it so important to perform a separate foundation? Brick oven, whatever size it, has a lot of weight, which will create a large pressure on the foundation. When shrinking, the house will see. This in no way should affect the form and design of the furnace.
That is, the overall foundation of the house should not pull the stove behind them, as this can lead to a disruption of its sealing and deterioration of technical properties.


Attention! Before performing masonry bricks per solution, spread all the brick "on dry". First, it will allow you to see if you have a material. And secondly, you can still see the difficult moments on which special attention will have to pay.
Step 5. Masonry Furnace
Attention! Before masonry oven, lower bricks in a basin with cold water so that they absorb moisture. So they will not pull water from the masonry solution.
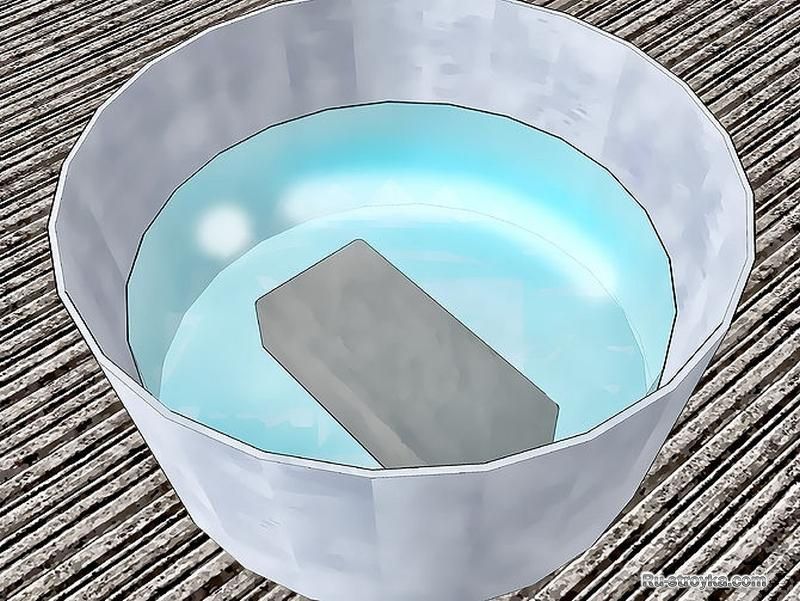

Fill this gap with sand. All under the furnace will almost be taken by grinding, which will ensure good and simple furnace care, as well as the complete root of firewood.
Overlapping the door to the door pissed.

Installation of the furnace door
We establish a flue door, after waking it with an asbestos cord. To make it easier to mount it, put the door onto the thick wire and on both sides, bring bricks. Then these bricks will need to be removed.

- 6th row. Closes the flue door.
Here, we begin to form a flue channel pipe, creating overlaps for two vertical channels.
Layout the base of the furnace, which is performed from chamotte brick.
- With 7-9 row lay out the furnace chamotted brick according to the scheme.
In this row, two bricks overlapping the grate should be cut at an angle of 45 degrees.
- 10 row - overlapping the oven. Create from brick a partition, lifting it by 2 cm. On the oven, to the level of the partition, we apply a clay-sandy solution. Prepare a place to install the hob.
It is necessary to perform excavations in bricks for reliable fixation with the stove and create heat niches to expand the metal. Immediately attach the slab to dry and numb the bricks - so it will be easy for you to put the brick on the solution and not make a mistake with the correct notches under the stove.
We pave an asbestos strip on the brick (on the expansion of the metal).


Step 6. The withdrawal of the chimney through the roof
This is a responsible step that should ensure the full safety of the furnace operation.
Guide Snipback standards when the brick tube is derived through the roof. According to these standards, the gap between the roof and chimney should be at least 13-25 cm.
Around the passage of the pipe through the roof, it is necessary to carry out insulation with thermal insulation materials. This will ensure reliable protection from blew cold air and will provide reliable fireproof.
If the furnace is performed in a residential building with a finished roof, you will need to take part of the roof. After the wire of the pipe, it will be necessary to fully ensure the integrity of the roof in this place, so that during the rain or snow, the moisture does not get inside.
For waterproofing the stone pipe, a special plate is used, which resembles a kind of pedestal around the chimney. The slate dosper and the metal plate is performed using the sealant.

If you want to simplify the task, then the chimney will not be difficult to perform with the help of steel pipes such as Sandwich. They have a stylish look and are easily going. In addition, they have much less scales than brick and will not create such pressure on the foundation.
Determining the necessary height of the chimney, guide not only the height of the roof, but also the height of the skate.
From properly calculated parameters, the effectiveness of the heating of the room and the presence of thrust depends directly.

The edge of the pipe should perform over the "skate" of the roof at least 0.5 meters, otherwise the swirls, which are formed around the roof, may interfere with good thrust, and they will constantly blend cold air into the chimney.
Complete the construction of the chimney - metal grille. It will prevent garbage from entering the chimney.
Top we wear a metal cap, which reliably protects the pipe from precipitation.
Step 7. Facing the oven
There are many ways how beautiful to bust the oven for the cottage.

Clinker tiles, tile tile, decorative plaster, artificial stone, etc. can be played as a decorative material.
And you can simply leave the oven in its original form, especially if you bought a high-quality beautiful brick.
Consider that any facing material reduces the heat return. Therefore, if you do not want to lose thermal properties, you can cover the furnace with a thin layer of decorative plaster.
Step 8. Mainstock oven
After a complete cladding of the oven, you need to make a technological break for 10-14 days, until the design is completely sucked. Leave the door to the open latch.

When you make sure the masonry solution is completely drying, you can pro-lead the first test extrovers of the furnace. No need to hurry and immediately, after masonry, getting firewood.
Premature extracts of a crude furnace can lead to her cracking. In the first time, use ¼ part of the firewood, lay small lamps. This will allow good dry design from the inside. Do not exceed the maximum temperature of 60-65 degrees in the first week of operation.
- Do not use garbage to extract.
- The firebox door must be closed when trash.
- War down the furnace gradually, do not immediately give a strong heat.
- Use high-quality, well-dried firewood.
For ease of operation, a cottage stove can be made with your own hands stylish, which will become a decorative and functional element in everyday life.
As you can see, if you follow a clear scheme of the coach - it is not so difficult to fold a beautiful and a good dacha stove.
Video: Laying brick furnace "On dry"
Below we give a detailed master class on masonry a brick furnace for giving.
Video. Master class on masonry oven for giving
Do it yourself, drawings, videos that you look will help you get an idea of \u200b\u200bhow the three-channel heating kitchen brick oven is done.
Consider the coach of the furnace, which we will do with your own hands:
First

Second

Install the door pissed the size of 130x140 (mm)
The third

Fourth

Instead of cast-iron doors to clean the channels, install two halves of brick on the edge.
Fifth

Sixth

We put the grille size 370x240 (mm). To install it with a spill niche in the bricks, so that the clearance around the perimeter of a single centimeter remains.
Seventh

Two bricks at an angle of forty-five degrees in the direction of the grate grid, for rolling coal in the furnace.
We establish the first smoke valve, which is in the open state, provides summer furnace mode.
We set the flue door of 250x180 (mm).
Eighth

Ninth

Tenth

We are in order to the edge of the brick in the form of an oval, for better passage of gases with the smallest resistance.
To clean the channels, install on the edge of the brick half.
Eleventh

Drink the grooves in bricks to install the kitchen plate with a size of 300x720 (mm).
Twelfth

Thirteenth

Fourteenth
Similarly, the twelfth.
Fifteenth

We are in the form of a brick in the form of an oval.
Sixteenth

Seventeenth

Eighteenth

Nineteenth

We establish the second smoke valve.
Twentieth, friend like eighteenth.
Twenty first

In addition, you can watch video, for full perception of the masonry process
So, you can collect an inexpensive oven with your own hands.


Device and schemes for home furnaces

1.Shem masonry heating furnace from two tiers
2. Masonry square stove with lower heating
3. Schemes for home furnaces with predominant Lower heating
4. Furnace laying developed by V.
Groom-Mr.
5. Masonry of the furnace created by the Heat Engineering Institute
Conditionally heating furnaces can be divided into two categories: modern devices and outdated designs. Instead of used for a long time of imperfect heat units, manufacturers produce improved, based on the latest technologies of the heating instruments model.
But in private households and country cottages, heating brick furnaces are still widely used, while the schemes of furnaces for the house are very diverse.

Unfortunately, from year to year there is less and less experienced liveshists who can repair or remake them.
Currently, classic woodwood stoves for houses with characteristic advantages are not used to heat the premises, but to give the interior of uniqueness and identity.
The laying scheme of the heating furnace from two tiers
The device of the bunk heating furnaces depicted in the photo is a design of two parts located one to another.
The parameters of each of them are 165x51x238 centimeters. The heat transfer of the lower part of the furnace is 3200 kcal per hour, and the top is 2600 kcal / hour.
In the furnaces for private households, it includes a brick calculation with voids in order to facilitate the weight of the structure and saving the material consumption. Both parts of bunk stoves have a fully identical device.
In such heat soldiers, a non-free smoke-free system is used. According to the furnace masonry scheme, the gas from the pop-up fall into the upper cap with the nozzle. After cooling, the gases are lowered down and at the location of the bottom of the fifuer, go through the exposure to the housing smoke tube.
At the bottom of the furnace, the chimney passes through the upper half of the design. For this reason, the last of them is less heating surface.
The top of the design has a separate chimney.

The bunk furnace device is characterized by simplicate masonry of bricks, and the gas movement scheme is simple. Clean the lower half of the unit is produced through the door located in the back wall, and for the top, such a door is located in the side wall (more details: "Heating furnaces for the house - laying with their own hands").
For the functioning of the heating construction, stone coal or anthracite is used. Pipes for both parts are equipped with two smoke valves.
Usually the upper part of the emptiness in bunk heating furnaces is overlapped with solid reinforced concrete plates, which contributes to the strength and stability of the entire structural array.
The masonry of such ovens must be performed at a high professional level, since their alteration or repair is a difficult task (read: "How to make a brick furnace repair with your own hands").
Thoroughly lay the smoke pipe for the lower part of the heating bunk design.
If in the masonry to allow a looseness, the wall that shares both pipes at the top will pass the heat even in the case when close two smoke valves.
In a single array, if you wish, you can combine different types of furnaces having a rectangular or square shape and functioning on various types of fuel.
Laying furnaces with your own scheme hands
Square stove masonry with lower heating
The furnace in the photo is characterized by a combined or mixed smoke-rotation system. The parameters of this design are 102x102x238 centimeters. Its heat transfer is 4,200 kcal / hour.
The device of the heating furnaces of the square shape with the lower heating assumes that the fuel cell in it has a relatively large height.
Located symmetrically on both sides of the side openings (2 pieces) serve to remove the gas in the chamber. They are in the outer side walls of the design.
Then gas drops across the cameras connected using a channel under the fifth socket behind the ash compartment.

From the side cameras, the gases through the lower exposure are in the risers and climb up.
There, the side chambers together form the so-called top cap, which consists of three cavities of the P-shaped form. There are these cavities in parallel. Preheated gases are delayed in the upper part of the middle and rear of them, and already cooled workflow products are moving through the holes into the front plane, which is upstairs connected to the housing chimney and disappear into the atmosphere. See also: "Heating stoves on the workout."
Consequently, the chases of the furnaces for the house of a square shape with the lower heating are 3 caps - the top cap and 2 large chamber size.
In such a heating construction, you can use any kind of solid fuel.
If it is planned that the furnace will function on a coal or anthracite, the walls of the fuel should be laid exclusively from refractory bricks.
Schemes for home furnaces with predominant Lower heating
If the heating construction has preferential lower heating, its size, as a rule, is 115x56x231Santimeter under heat transfer 2640 kcal / hour.
In accordance with the smoke-circuit system, this furnace refers to the combined channel heat soldiers with the lower heating.

When the scheme of the furnace heating of a private house is created using such a design, it is understood that the flue gases will first drop out of the fifuel, and then climb the riser to the blistle (read also: "Kuznetsov's heating furnaces: drawings and coach with their own hands").
From there along two parallel moves, they will go down to 16 rows of brickwork, and then go to the last of the lifting risers, turning into the smoke tube.
The above design is characterized by a rational solution and simplicity, since it can provide a good oven warm-up in its lower part and it has self-regulatory of the movement of gases in both channels located at the top of the cap with the nozzle.
The principle of functioning of the structure provides air the ability to take place at the bottom of the cap and at the same time it does not cool.
The masonry of this furnace is simple in the implementation and it can be built in the premises partition in such a way that the fuel door and the front wall will go out into the corridor.
The unit can be operated on a stone coal and on firewood.
Masonry furnace developed by V. Gruzh-Mramiahlo
Depicted in the photo, the infantless laying scheme of the heating furnace was developed by Professor V.
Groom-melmillo. There is no smoking in this heating structure. It has a rounded shape and placed in a case made of sheet steel. Gazes move in the furnace not due to the thrust created by the chimney, but under the action of gravity. As a result, the cooled and heavier gases are lowered to the bottom, and the lungs are rising to the top.
This device consists of a furnace for a house of two parts - the fuel is located in the bottom.
It has a small in size of Higho (mouth), which ensures the passage of flue gases into the upper part, which represents the camera without smoke.
It looks like a tilted cap, in shape resembling a glass.
Due to such a feature, such heating structures are called infantal or cap.
The heated gases in them do not come with their mouths into the chimney, as they first go up under the overlap, and cooling, falling along the walls to the base.
From here they fall into the smoke tube and under the influence of traction are carried to the atmosphere. One vertical cut is located across the fuel, and the second is horizontal - along it.

Along the walls of the design from the overlap in the direction of the arch, there are counterphorts intended for increasing the inner surface of heat-absorption and for better heat perception with a brick array from exhaust gases.
The ribs heated with gases allow the stove to maintain heat for a longer time.
The design of the design developed by Gruce-Mramihlo reaches 80%. The iron case allows you to carry out the thickness of the thickness of only a quarter of the brick, despite the fact that the unit is heated quite quickly. READ ALSO: "What a brick oven for home is better - views, advantages and disadvantages."
Creating this furnace is not difficult.
Its advantage is as follows:
- In the case when the smoke valve on the pipe is closed loosely, the upper part of the device will not cool from cold air entering the fuel.
The air penetrating the fuel compartment through the slots in the coil and fuel door, rises through the mouth. But since it is heavier than hot gases in the cap, it immediately overflowed into the side channels and goes to the smoke tube. As a result, the whole part under High is not cooled.
As for the shortcomings of the scheme of furnaces for the house of such a design, the main of them consists in preferential heating of the upper part. To a little to level this minus, you need to arrange a sheets in the walls of the fuel with a 5 row of brickwork.
The furnace works perfectly on the skinny coal and anthracite. If the unit is drowning with firewood, especially raw, gaps that are available between the counterphorts will be born soot. It will be quite difficult to clean them, since the cleft doors are located in 8 row, which does not fully get into all the intervals of the counterphorts and then smoke will fall into the indigenous pipe.
Theless structures created on the principle of free vehicle gases make a rectangular or square shape.
They are performed either in a metal case or without it. In the second case, the wall of the cap should be thicker up to half of the brick. READ ALSO: "Brick shield for a metal furnace".
Masonry furnace created by the Heat Engineering Institute
Schemes for home furnaces developed in the Heat Engineer Engineer Kovalevsky have the size of 100x85x217 centimeters.
They use a shaft-type fuel cell intended for the use of coal.
On the channel, flue gases fall under overlapping, from where in two side channels. Next, they follow the bottom and the national channel moves to the smoke riser. If the smoke valve is open, then the gases are discharged into the atmosphere.
The feature of the furnace arrangement scheme lies in different thickness of the walls of the channels of smoke rotations.
The first of them coming from the fuel canal is called a heat canal. It has an outer wall thick in 3/4 bricks. The rest of his walls are put in the Pollipich.
This heating structure does not fit into the iron casing. The laying is characterized by simplicity.
KPD Kovalevsky engineer furnace is 75-80%. The disadvantage of the heat unit is considered the possibility of overheating its upper part, since the hottest gases are sent to it. Down the furnace they will fall completely cooled, as a result of which the degree of heating the lower part is not sufficient.
A certain amount of gas from the fuel can be in the side channels through screws, which enhances the heating of the lower part of the outer walls (read also: "Gas stove for home - comfortable heating").
Smoker frets free from soot raids by cleaning them. The grille can be put forward and make it easier to facilitate the heat chamber by descending the slags in the ashtar or the steel box located under the grate grid. Smoke in the design is discharged into the housing pipeline.
To date, these brick furnaces prefer to build owners of country houses and country buildings.
In the struggle for saving fuel, and accordingly money, advanced designs began to appear.
Now there is a considerable number of different types of new heating devices, which you can also pay attention.
Interesting scheme of the furnace for the house is shown in the video:

Masonry furnace
First row bricks first lay out without a solution, taking into account the seam according to the coach. By determining the position of angular bricks, put them on the solution, using the level of checking the horizontality. Light blows of the queen are sedent on protruding bricks. Having achieved horizontal, fill in the perimeter of the first row of brick on the solution, controlling the laying level.
Roulette check the size of the furnace in the plan and diagonal. The diagonal in the rectangle must be equal. If the diagonals are not equal, then hanged the corner bricks until they achieve their equality, thereby having received the parallelism of the perimeter. After that, lay the brick on the mortar of the first row.
Putting the first row, put the angular bricks of the second row, controlling the verticality of the angles using a level or a plumb. Similarly, the first row lay out the perimeter first, and then the middle of the second row according to the order.
Having posted a second row, clog in the corners in the seam between the first and second next nails with a length of 80-100mm.

Then we lower the plumb alternately to all the angles of the second row and mark on the ceiling of the point, of which the plumb is omitted.


Then they score the same nails into these points, tie a kapron cord to the corresponding nails and stretch it.
Checking the vertical cord vertical. If there are deviations, they are eliminating the bending of the upper nails. Thus, the contour of the furnace in space is obtained. The masonry of subsequent rows lead, controlling the verticality of the corners on the cords, which significantly reduces the time required for control.


Subsequent rows put in the same way the first two, each row is checked with a friend.
In the course of the masonry, the inner and outer surfaces we clean from the excess the crown of the solution to the craftsman. After laying out every 4-5 rows, we wipe the wet rag of the chimney wall.
The thickness of the furnace laying must be as thinner as possible.
How to fold a brick oven with your own hands
In thick seams, the solution is painted and the masonry becomes fragile. The solution should fill the seam tightly, squeezing out of it. During the masonry, we observe the brick dressing rule. Each vertical seam should overlap the brick of the next top row.
Usually this seam passes through the middle of the above brick. This, however, is not always possible to achieve. In some places you have to lay a brick so that the overlap is obtained less than half of the brick length. In any case, it must be at least a quarter of the brick length.

The furnace furnace is better laying out of chammed bricks, because
it is withstanding a higher temperature. Pulling the seams of masonry from chamotte and chimney brick is not desirable due to the different linear extension coefficient.
Therefore, from chamotal bricks lay out or completely a number, or make a lining of the furnace on the edge. Between the lining and chamoten brick, we leave the clearance of at least 5 mm.


Installation of clear and configuration doors
Before installing the door, check on the linency adjustment density to the frame, the free rotation of the web in the hinges, the absence of distortions, the possibility of fixing the closure of them and the presence of holes for fastening in the masonry.
Detected defects eliminate or replace the door.
Insert the knitted wire with a length of 50-60 cm inserted into the door holes, we swear twice and twisted it.


On the brickwork at the installation site we apply a solution. We install the door, check vertical and horizontality and fix it with bricks.
Then we lay the ends of the wire in the laying seams.


Installation of grate
When installing furnace devices, it is necessary to remember that the cast iron and brick are not equally expanding when heated.
This is especially affected by the behavior of the devices installed in the high temperature zone. If they are tightly closed in the furnace laying, then when the cast iron heats the cast iron masonry. Therefore, the grinding door and the slab should be installed with gaps. The grille is placed without a solution with a gap of at least 5 mm from all sides. It should be freely removed to replace in case of exercise or breakage.

Installation of the cooker
The cooker is installed, as well as confusing, only turns around asbestos to fill the temperature gap.
Check the verticality and horizontal door and fix with bricks and boards.


With intensive operation of the furnace wire can burn. To prevent this, the top of the door can be fixed using a beater. Clammer makes a barrier with a cross section of 25x2.0 mm. The ears must be beyond the door of 100-120 mm.
Klemmer is attached to the door with rivets or bolts with nuts.
Overlapping door hanging around the Pollipich on each side

or brick in the castle.


For opening, more than 250 mm overlap is performed by a wedge.

Installation plate
The row to which will be installed, lay the plate at first without a solution.
We put on top of the slab and outline its location. Then choose the groove in the brick, taking into account the temperature gap of 5 mm in all directions from the plate. Lay out bricks per solution. Fill in the groove with a solution, put asbestos cord to it along the perimeter of the plate, omit the slab to the place and hesitate it with the image, achieving its horizontal level.
Installation oven
The oven is also wrapped asbestos around the perimeter and width in Polkirpich.
The side of the oven, emerging to the furnace, is laid out with a brick on the edge, and on top of it, it is smeared with a layer of a solution of 25-30 mm to prevent the root of the walls of the oven.
Masonry Arch and Arches
When laying furnaces, it is often necessary to overlap various flue holes, fifthms and all sorts of chambers, using jumpers simple and complex shape. The overlap in the wall is called the arch, and the overlap, suitable between the walls - the arch.
The number of bricks in the arch and rows in the arch should be odd. Average odd brick - Castle.
Any jumper starts from the Pyted tabs that are performed by the template. Since the height of the arch or vault is different, then the angle of the fifth changes.
It is impossible to use one form of the fifth for all arches and arches.
At these photos, the installation was shown and the laying of arched barbecue firebox.


And the following photos show the laying of the arch for overlapping a niche for firewood.


It is said that it is better to see once, than 100 times to read, so it was especially for you, I prepared a video guide with my own hands, "where all the nuances of the masonry of the brick oven in the video format are shown.
I define the basic rules for laying the slab, which may not even know the furnace journalist or a person who decided to turn on the oven:
The weight of the furnace with a pipe installed without base should not exceed 750 kg.
It is about 0.5 m walls or 200 bricks.
If you put the base of the plate, you must check the possibility of switching the chimney between carrier beams in the attic and tile.
The base of the furnace should not be tied to the base of the house, and the design of the furnace should not be covered by the supporting structures of the building.
You can allow them to be in places cutting and edema. This is done in order to avoid damage to the slab in the case of unequal settlement of the house.
Wooden elements of the house and smoke should be at least a quarter meter.
If the furnace should not be closed, the water for the wall-mounted solution should be drinking or rainwater without salt, otherwise the entire salt on the surface of the brick will appear as a white coating.
Sand for a solution should be used by a quarry (and not by the river), because the sand particles of the river have a rounded surface, which makes the solution fragile.
Plate and fireplace - brick column on a clay solution.
And even the smallest heels or side shocks from the supporting structures of homemade cracks are formed, which can cause a fire.
What you need to look for when making brick bricks
Protect yourself and make sure that the oven lasts as long as possible - this is the main task consisting in building a reliable base, horizontal wall and vertical of the massage itself.
Therefore, after booking the foundation, the upper platform must be carefully planned. A layer of roofing felt is superimposed on it, 1-2 cm of sand is poured on top and leveled, and the first colorless brick is put on. Restore the gasket and press the hammer on the protruding bricks. The horizontal of each row is checked using the level specified in the rule. The rectangle of the first string is checked by comparing the length of the diagonal.
When you place each string, check its flatness using the rule on the wall. After installing two types to provide the vertical of the furnace box, you need to pull the strings with a thickness of 1-3 mm in the corners of the wall.
The attachment points to the ceiling are determined by the towing line. Above, the water line is descended in such a way that the weight drops to the top of the outer corner of the furnace. On the floor on the ceiling, from which the groin is lowered, the nail is leaning, the rope is attached to it. At the lower end of the second nail connected and pulls the rope, insert a nail under the angular brick of the first row so that the cable is strictly stretched along the angle.
Then the vertical vertical is exposed to the tray, which in the desired direction bends the upper nail. Therefore, repeat all four corners.
The seams should be a thickness of 5 mm. To do this, place the styling stripes along the edges of the seam, distribute the solution, place the brick and place it in place with the handle shock. After drying the solution, remove the gaskets.
The outer walls should not have more than two types without stitching, otherwise cracks may occur.
The share of bricks can be obtained using the Bulgarian, and the wall must be minimized, as the brick is more susceptible to the destruction.
Parts of cigarettes are located near the seams.
In the area that changes the direction of the smoky bottom stream, the door is always defined as a hole for cleaning, or better "pushing the brick", which extends 5-10 mm from the wall, it is easier to understand than the needy chimney cleaning.
The gasket must be planned in such a way that the brick does not relieve exclusively on the door frame or in the oven, and closed over them or was made by a wedge-shaped castle or a vaulted arch.
This is done to simplify the replacement of unsuccessful furnace equipment.
Clips (narrow metal profiles), as well as other steel parts should be used less, since the metal heats up longer than clay, and can no longer collapse from this coupling. To avoid this, place steel tapes freely, without a solution or wrapped in a layer of asbestos.
The door of the oven, including the furnace, is located so that it can be heated without affecting the wall. If you want to do this, you can use asbestos with a layer of 5 mm, with which you touch with a vineyard.
The grille and the cast-iron plate are placed with a minimum step of 5 mm from all sides so that they can be easily removed to replace.
Place them without a solution (you can put the plate on the asbestos or asbestos layer) and fill the slots with sand.
The grilles should be placed in the furnace under smoke smoke to 70-150 mm, so as not to fall out when the coal door is opened and stacked along the seeds of the furnace, and the ashes will be difficult to clean the poker when preparing a furnace for subsequent ignition.
Doors and angles should be fixed in a wall that is screwed into holes and steel wire with dwelling wires.
At other ends of twisting by nail and pull the wire, keep it in the nearest vertical seam.
The space between the oven and the side wall of the oven must be covered with bricks.
The length of the chimney, regardless of the tube frame, should not exceed 7 m, otherwise the sediment will be insufficient, and the smoke will occur in the chimney.
Wall chimneys should be even and even.
To a solution in a chicken, vertical channels do not fall inside the furnace, and the foam plug is wrapped in a wet fabric and suspended inside the chimney on the wire.
Periodically, delete and clean it, make a canopy from the canal with a damp cloth.
For fire safety, the distance from the ceiling of the oven to the ceiling must be at least 35 cm.
For the same purpose, the overlapping should consist of at least three types of continuous blocks.
To protect the floor under the fireplace furnace, place the metal heating sheet.
The approximate ratio of the size of the fireplace inlet to the surface of the heated region is 1:70.
The ratio of the cross-sectional area of \u200b\u200bthe rectangular tube at an altitude of 5 m to the area of \u200b\u200bentrance to the fireplace should be approximately 13%, the height of the chimney is 10 m - about 10%.
In the case of the prevailing wind, the fire must be installed (or, as you call it, the smoke camera, an umbrella on the pipe, cap on the pipe).
Protects the oven from smoking into windy weather and protects it when it rains. Tags:
Knowledge, Domostroy
Heating furnaces of bricks
For a long time, a brick was used for the construction of the furnace. Thanks to modern technologies it has become possible to use other building materials for these purposes.
Despite this, the brick remained on a leading position among all the masonry materials, the heating heating apiceaces enjoy great demand.
Many build furnaces for home independently, since this process is quite simple.
For the construction of a brick furnace with their own hands it is necessary to have a small idea of \u200b\u200bconstruction. To put such a furnace will not be much difficulty, as it does not require further cladding. (See also: Bath furnace from brick)
For such work, a small number of tools is needed, namely:
- Capacity for the preparation of the solution.
- Emery tool.
- Construction pencil.
- Passatia.

Types of brick furnaces
Currently, there are separate types of brick heating stoves, some of which are intended for heating housing, others for the preparation of delicious and healthy home food, are the third perform only decorative functions.
Also known models that perform several functions at once, they include a heating and cooking furnace made of bricks. A similar type of furnace is also called "Swedish", and in some areas they are called "Dutch".
No less fame uses fireplaces.
In this case, the opinions of different people are divided. Some believe that the fireplace should stand separately, others completely satisfied the built-in oven.
The second option is most economical in terms of space and using consumables. Such a furnace quickly warms the room. In addition, the brick mini-oven does not require large knowledge and skills in construction.
So, it can be a decoration of absolutely any home.
A brick oven is a simple device, although it looks quite difficult. This furnace can be used as an alternative to ordinary mangala.
Therefore, its construction in the yard of his own home will not be much difficulty. (See also: Brick furnaces for cottages)
It is important to remember: the apartments of brick furnaces relating to a certain form are straightened from each other.
Requirements for furnaces
Most sites that are devoted to this topic set themselves the task of selling an already ready-made furnace project. And what to do to people who decided to build an independent stove, but they lack experience and knowledge to create a brick heating stoves.
To significantly make it easier for themselves, it is necessary to understand what requirements are presented to modern brick furnaces.
It is worth noting that these parameters use professional architects when drawing up projects of absolutely all types of brick stoves. The list of requirements includes: (see also: Construction of the furnace with their own hands)
- Efficiency.
- Ability to keep the heat for a long time.
- Compliance with fire safety standards.
- Good warming of the entire volume of the furnace.
- Easy to use.
- Convenience of maintenance.
- Durability.
- Beautiful design.
Preparation for the construction of the furnace: place definition
The laying of the heating stoves from the brick begins with the definition of its location, based on their purpose.
The heating furnace is best placed in the center of the house, because if it is at least one side to be brought to the wall overlooking the street, its effectiveness will be lost. In addition, unwanted temperature differences may occur, which negatively affect the service life of the home hearth. As well as on the efficiency of the chimney.

The combined furnace should be located just like heating.
The only condition is that brick fireboxes look at the kitchen. And the furnace-fireplace should be located a fireplace in the living room.
Preparation of solution
Next, it is necessary to make a cement solution. For its preparation, clay is poured with water. At the same time, it must be in advance sifted, without stones. This will make the laying more durable. (See also: Brick oven for cottages)
Important: Properly prepared clay solution is a guarantee of the durability of the stove.
Pushed clay is mixed with the same amount of sand.
After that, water is poured into the container, the volume of which is equal to the clay volume. The solution must be mixed thoroughly so that there is no single lump. The solution should have a liquid consistency so that when pressed on a brick, it squeezed out from the seam.
Dry masonry
Before you start laying a brick to the solution, it is recommended to produce dry masonry.
{!LANG-f459d340631b47b24d4f32be7c405a61!}
{!LANG-1512617c29473c32cd18f312b9308c1c!}
{!LANG-79a4374363609dbbd822cc591102eff9!}
{!LANG-ec7996cd797e05e21251649ecd8e5874!}
{!LANG-a5346fe2892eaafe8dc2efc943c62115!}
{!LANG-f0ec84ec419affd3fa05e12a61d3af53!}
{!LANG-e9391ae30fc9259fc2cfa66371a0db58!}

{!LANG-f16b1b301ee243c1289a340bbbb4c095!}
{!LANG-f7297f27eb11ac6d796bd15220037e40!}
{!LANG-59072305875f48c238becce8e494d248!}
{!LANG-07f849df7f25bd14c6289f06070d91a9!}
{!LANG-1680518179795d214b93f6757e109aa0!}
{!LANG-d33d6de5fffa964137d96903611b33ba!}
{!LANG-543d8c75eebfa783b525a20889b1eb57!}
{!LANG-8c98a2dbec7f487ef4664b3739d7f821!}
{!LANG-0fc2379a37beeecfeb47cf951015a2f8!}
{!LANG-510ff55ab330efaef6440db50d1f388b!}
{!LANG-0e08b4859648ebfc8ba5e8e8ed61f2eb!}
{!LANG-3319cc32e3b3de9f69b74a7429b13045!}
{!LANG-0a374c499f6a90d1977341e1fcc3a772!}
{!LANG-bf6d5d7484bf3b30b41cb788f05a3447!}

{!LANG-165717aad1b5558d33a5c0b75be8a711!}
{!LANG-ac5063ba80564aec36183b70dda0908a!}
{!LANG-a6da7c41b6989f5308c3a622535551f2!}
{!LANG-e6314f377a7c67b408cef4e98eedca8b!}
{!LANG-7d373f35b5e34ada697d4cd281a0aee5!}
{!LANG-fbe4b3cd0a6e4a95809d78ab62e0abf3!}
{!LANG-2d4dc35fdf3299ed0522069c812f5ce1!}
{!LANG-19b819831a2afdc8391a78ae40ec9776!}
{!LANG-f75595116f744726a5cbf3d54f2e719a!}
{!LANG-5ab75ba93fb185782e42bc1b9e44c818!}
{!LANG-d0962afae68ec12ca83b47e10643b637!}
{!LANG-4fe222b73e8f208ffb28b61a2e9dd983!}
{!LANG-daafb737733413e379a2ae75a74d67fc!}
{!LANG-72504effbafa018a020179ae1b0d1abd!}
{!LANG-44e4098fe086d151402665b0ade0733f!}

- {!LANG-d056acc9a1059b82e569701334a26a91!}
- {!LANG-02e6e81fe0e145e2d983efec04ea05da!}
- {!LANG-791215626782e844f514e268318fb0f8!}
- {!LANG-07160771d5334c1a4b927c0a6c47027e!}
- Grate.
- {!LANG-f0a57c4075c9c711b340dbb1ed0f7027!}
- {!LANG-f61b4d00aa6896df0a024df1100fe7e9!}
- {!LANG-74be89c1a80f6ebc413033e93cfb27fc!}
{!LANG-018154949a917bfe05ddee0aabec096f!}

{!LANG-9451d3e0646dcd7fecc6e51812a0345a!}
{!LANG-e480634a5e65812d3511af934ab87f77!}
{!LANG-de51f92151f19c7a23c1a0b74bf6de21!}
- {!LANG-8131ff91feb3690b777843876ad2247b!}
- {!LANG-2ecfe7c215cf8a1fffa25d337b09c6f7!}
- {!LANG-1aca88903a3e823913dbdafda3b785b8!}
- {!LANG-79dfc7e99ee8c674f6ae5d0f3ca07369!}
- {!LANG-5b1bbded6ed0396b736541ed256a1926!}
- {!LANG-7ef3e80ecf68516a0ef3e9521df7de7b!}
- {!LANG-57d9e071e95964b015f8823de503a2c3!}
- {!LANG-792a441132f90a48191aa2ac5b9f4424!}
- {!LANG-5e5875f6c36756f3b6799ec37022054f!}
- {!LANG-76b1790fcc33c443f469b9a7da2b527d!}
- {!LANG-c8a9adff45d72aeea9ea920c6b8221ce!}
- {!LANG-e5687b2c97dc918133afed6e507fe7e3!}
{!LANG-838a2dbafc2823b786b8198726b00a0c!} {!LANG-df57b81b8a9e89940e591f49dfdf8f77!}

{!LANG-7b81400c992e8a9089088cc5e29efc55!}{!LANG-b0cbb4124d89b91aed2dce9bc34dc797!}
{!LANG-be0809f9e907a7ed64348fef1099ad97!}{!LANG-033264cfedd4558e55d1123d3118a4f8!}
{!LANG-8caa4b26827e7e2a9a5e33fa8ad35b6e!}{!LANG-287d8dc0083226f158b92a0a5b4cec72!}
{!LANG-18151723d7f59521860e3449327294f5!}{!LANG-ffa51ea7df6ec4c049e354a827d85477!}

{!LANG-d06026a79ee694abf3e69c28dcc771bb!}{!LANG-b59c9f137bd734c282387d9d2bf3fc31!}
{!LANG-a6b641577564cb9e378c589947dce26d!}{!LANG-a19ac656e3a07894a7c3a89a9af514dd!}
{!LANG-403860454fbc702203146e11db7821fd!}
{!LANG-bbaab7d20cecd50dc752e013affb4376!}
{!LANG-9171b6d80ce8defd715f789c568b3e1b!}
{!LANG-abdf799ce1c7983fcfb912f73c147a27!}

{!LANG-8b411f2e9c3176fde2597db8b756a29a!}{!LANG-287d8dc0083226f158b92a0a5b4cec72!}
{!LANG-afc07cc02bbd1e9e826a09ac9e7030d6!}{!LANG-677890da24c51803cfd582649085e7bb!}
{!LANG-a757dade3ebe216640491a7a21ab0072!}{!LANG-287d8dc0083226f158b92a0a5b4cec72!}

{!LANG-ff2a02db4662203fe01f37755b27f05f!}{!LANG-287d8dc0083226f158b92a0a5b4cec72!}
{!LANG-8570cb8692b14e3fa1b146c4c2755b4e!}{!LANG-ab9dcc352d93fc962c2f12cfd4507a31!}
{!LANG-17ee6c8021fdedabc70042f1c2634fbd!}

{!LANG-e268cfc8e8253ac2aa26909f4e9d3024!}{!LANG-287d8dc0083226f158b92a0a5b4cec72!}
{!LANG-11b47fd2b2b4edcfd217920102e7b174!}{!LANG-51f507327089f964a840b5508e7d9bab!}
{!LANG-6b4189ea29eb5296235b534e7c3ff84a!}{!LANG-59a74349d1ea565de9bbca8dcce72391!}
{!LANG-2ae166a82b797c38672b9429a82848d3!}
{!LANG-f4e96fa6366f0e760c4b7a446a64fe5d!}
{!LANG-403860454fbc702203146e11db7821fd!}
{!LANG-d169ecdeae1c6d18d268f7ab8baf5605!}
{!LANG-dc2e769f44b6ccb455f12c58474d66ca!}
 {!LANG-90f113f5c396184363d407942bc28483!}
 {!LANG-c6a1bc58249a2c738835b1b47e1316e5!}
 {!LANG-2a4a15a57561840c501313280009843a!}