External electrical wiring. Open external and internal wiring. Installation of wiring on building structures made of non-combustible materials
Internal wiring is the indoor wiring.
Outside is the wiring laid along the outer walls of buildings and structures, under awnings, etc., as well as between buildings on supports (no more than four spans 25 m long) outside streets and roads. Open and hidden electrical wiring. According to the method of execution, the wiring can be open and hidden. Open wiring includes wiring laid on the surface of walls, ceilings, on supports, farms and other building elements of buildings and structures. At the same time, wires and cables are laid directly on the surface of walls, ceilings, on rollers, insulators, on cables, on brackets, in pipes, in flexible metal sleeves or directly by gluing to the surface. Open wiring can be stationary, mobile and portable.
Open electrical wiring includes wiring laid inside structural elements of buildings and structures (in walls, floors, ceilings), as well as in plastered furrows, without furrows under a layer of wet plaster, in closed channels and voids of building structures, etc. Wires and cables are laid in this case either in pipes, flexible metal sleeves, boxes, or without them.
Concealed wiring completely protects wires and cables from mechanical damage and environmental influences.
Replaceable and non-replaceable electrical wiring. Hidden wiring can be replaceable and non-replaceable:
Replaceable is a wiring that allows the replacement of wires during operation without destroying building structures. In this case, the wires are laid in pipes or channels of building structures;
Irreplaceable wiring cannot be dismantled without destroying structures or plaster. The design of electrical wiring in a garden house, cottage or residential building begins with drawing an electrical connection diagram tied to the floor plan of the house on a scale of 1: 100 (1: 200).
The electrical wiring on the plan is applied in a single-line design. Luminaires, switches, plug sockets, protection devices on the plan drawings are designated with conventional symbols.
In fig. 1 a shows a diagram of the electrical wiring in a three-room room.
Rice. 1. Wiring diagrams: a - a diagram of a three-room room with electrical wiring; b - a diagram of the simultaneous switching on and off of lamps; c - a circuit with a switch for 4 positions; d - circuit with switching on and off lamps from two places; e - circuit for turning on and off lamps from more than two places: 1 - two wires of the line; 2 - apartment lighting panel; 3 - single-pole switch; 4 - plug socket; 5 - two-pole switch; 6 - three wires in a line; on - switch
In room I two electric bulbs are installed, which are simultaneously switched on and off by a general switch. A schematic diagram of the wiring in room I is shown in fig. 1 b.
In room II the switch is installed for four switches (Fig. 1 c). In the position of the switch shown in the diagram, both lamps are on. At the first turn to the right, both lamps will be off, at the second - lamp L1 is on, and at the third - lamp L2. The room has a plug socket.
In room III, having two entrances, four lamps are installed, which light up simultaneously (Fig. 1d), and two switches. By any of the switches, all lamps can be turned on or off.
In fig. 1 e shows a lighting scheme in which lamps can be turned on from more than two places.
On the floor plan with applied electrical wiring near the lines indicate the brand and section of the wire or cable, conventionally denote the method of laying, for example: T - in metal pipes, P - in plastic pipes, Mr - in flexible metal sleeves, I - on insulators, P - on rollers, Tc - on cables ... The number of wires, cores in the wire and their cross-sectional area are shown as a product. For example, the designation PV2 (1x2.5) is deciphered as follows: two single-core wires of the PV brand with a conductor cross-section of 2.5 mm 2. The number of wires in the amount of more than two is indicated by serifs at an angle of 45 ° to the line. For luminaires, the power of the lamp (W) is indicated in the numerator with a fraction, and the height of the suspension above the floor (m) in the denominator. The receiver of electrical energy is also referred to as a fraction. The numerator indicates the plan number and the denominator the rated power (kW). In various climatic zones of the country, a variety of building materials and structures are used in the construction of garden houses, cottages and summer cottages.
All erected buildings are divided into three categories:
By the degree of flammability of building materials and structures;
By environmental conditions;
By the degree of electric shock.
In accordance with the requirements of "Building codes and regulations" (SNiP 111-33-76), all building materials and structures are divided into three groups: combustible, hardly combustible and non-combustible.
The characteristic of the degree of flammability of materials and structures is given in tab. one.
Table 1. Flammability of building materials and structures
Fireproof includes all natural and artificial inorganic materials used in construction; metals, gypsum and gypsum fiber boards with an organic matter content of up to 8% by weight; mineral wool boards on a synthetic, starch or bitumen bond with a content of up to 6% by weight.
Non-combustible materials include materials consisting of non-combustible and combustible components, for example, asphalt concrete, gypsum and concrete materials containing more than 8% by weight of organic aggregate; bituminous mineral wool slabs with a content of 7-15%; clay-straw materials with a density of at least 900 kg / m 3; wood, deeply impregnated with fire retardants, fiberboard, textolite, other polymeric materials.
Combustible includes all other organic materials.
The Electrical Installation Rules (PUE) adopted the following classification of premises for environmental conditions:
1. Dry: the relative humidity in them does not exceed 60% - these are residential heated premises.
2. Humid: relative humidity does not exceed 75%, vapors or condensing moisture are released only temporarily and, moreover, in small quantities (unheated rooms, canopy of residential buildings, warehouses, sheds, utility rooms, kitchens, etc.).
3. Raw: Relative humidity exceeds 75% for a long time.
4. Particularly moist: the relative humidity is close to 100%. The ceiling, walls, floor and objects in the room are covered with moisture (bathrooms, shower rooms, toilets, basements, vegetable stores, greenhouses, etc.).
5. Hot: the temperature exceeds 30 ° C for a long time (steam rooms, saunas, attics, etc.).
6. Dusty: they can generate abundant technological dust in such an amount that it can settle on the wires and penetrate into the electrical equipment.
7. Premises with a chemically active environment: according to production conditions, vapors are constantly or for a long time, or deposits are formed that act destructively on insulation and live parts of electrical equipment (premises for livestock and poultry, etc.).
8. Explosive premises and outdoor installations: explosive mixtures of combustible gases or vapors with air or other oxidizing gases, as well as combustible dusts and fibers with air (garages, gas and oil storage facilities, etc.) can form.
9. Fire-hazardous premises and outdoor installations: combustible substances are stored or used here (barns, barns, etc.).
According to the degree of danger of electric shock to a person, the premises are divided into three categories:
Premises with increased danger: damp, hot, with conductive dust and conductive floors (metal, earth, reinforced concrete, etc.), as well as those in which a person can simultaneously touch metal structures that have a connection to the ground and metal designs of electric motors and other electrical apparatus;
Especially dangerous premises: especially damp or with a chemically active environment, as well as those in which two or more conditions of increased danger are combined;
Premises without increased danger: they do not have conditions that create an increased and special danger.
V tab. 2 an approximate characteristic of the premises of country houses, cottages and residential buildings is given from the point of view of installation and maintenance of electric lighting wiring, the use of household electrical appliances and mechanisms with an electric drive.
Table 2. Characteristics of premises and outbuildingsAttention!
Electrical wiring used in residential and country houses must be safe, reliable and economical. Incorrectly designed and carelessly executed electrical wiring can lead to overheating and ignition of building structures and finishing coatings.
The reason for this may also be the wrong choice of conductor cross-section.

Wires and cables
In order to save scarce wires with copper conductors, wires and cables mainly with aluminum conductors are currently used for electrical wiring.
Copper wires and cables are laid only in cases stipulated by the "Rules for the Design and Operation of Electrical Installations", for example, in fire and explosive rooms, in buildings with combustible ceilings.
The laying of wires and cables with aluminum conductors, in principle, does not differ from the laying of wires and cables with copper conductors, but it is done with greater care in order to avoid damage to the conductors due to their lower mechanical strength compared to copper ones. When working with aluminum wires, you should not allow multiple bends in the same place, cuts of the cores when stripping the insulation.
A wire is one uninsulated or one or more insulated metal conductive core, over which, depending on the laying and operating conditions, there may be a non-metallic sheath, winding or braiding with fibrous materials. The wires can be bare and insulated.
Bare wires are those that do not have protective or insulating coatings on top of the conductive cores. Bare wires of the brands PSO, PS, A, AS, etc. are used, as a rule, for overhead power lines.
Insulated wires are those in which the conductive cores are covered with insulation, and on top of the insulation there is a braid of cotton yarn or a sheath of rubber, plastic or metal tape. Insulated wires are classified as protected and unprotected.
Protected are insulated wires that have a sheath on top of electrical insulation, designed to seal and protect against external climatic influences. These include wires of the APRN, PRVD, APRF brands, etc.
Insulated wires are called unprotected if they do not have a protective sheath on top of the electrical insulation (wires of the APRTO, PRD, APPR, APPV, PPV brands, etc.)
A cord is a wire consisting of two or more insulated flexible or highly flexible cores with a cross section of up to 1.5 mm 2, twisted or laid in parallel, covered with a protective insulating sheath.
A cable is one or more insulated conductors twisted together, enclosed in a common rubber, plastic, metal sheath (NVG, KG, AVVG, etc.).
For electrical wiring of power and lighting networks, carried out inside garden houses and summer cottages, as well as on the territory of garden plots, insulated installation wires and unarmored power cables with rubber or plastic insulation in a metal, rubber or plastic sheath with a cross-section of phase conductors up to 16 mm 2 are used.
The conductive cores of the installation wires have standard cross-sections in mm 2: 0.35; 0.5; 0.75; 1.0; 1.5; 2.5; 4.0; 6.0; 10.0; 16.0, etc.
The wire cross-section is calculated using the following formula:
S =? D 2/4,where S is the cross-section of the wire, mm 2;
? - a number equal to 3.14;
D - wire diameter, mm.
The diameter of the current-carrying conductor (without insulation) is measured with a caliper or micrometer. The cross-section of the cores of stranded wires is determined by the sum of the cross-sections of all wires entering the core.
The insulation of the installation wires is designed for a specific operating voltage. Therefore, when choosing a brand of wire, it should be borne in mind that the operating voltage for which the wire insulation is designed should be greater than the voltage of the supply electrical network. The mains voltage is standardized: - line voltage 380 V, phase voltage - 220 V, and the installation wires are produced for a rated voltage of 380 V and above, therefore, as a rule, they are suitable for wiring.
The installation wires must be suitable for the connected load. For the same brand and the same wire cross-section, loads of different magnitudes are allowed, which depend on the laying conditions. For example, wires or cables laid openly cool better than those laid in pipes or hidden under plaster. Rubber-insulated wires allow a continuous heating temperature of their cores not exceeding 65 ° C, and plastic-insulated wires - 70 ° C.
The cross-section of the conductive conductors is selected based on the maximum permissible heating of the conductors, at which the insulation of the wires is not damaged. Permissible continuous loads on wires, cords and cables are given in tab. 3-7.
Brands of wires and cords with rubber and PVC insulation, their areas of application and methods of laying are given in tab. eight.
Table 3. Long-term permissible current loads (currents) on wires and cords with rubber and PVC insulation, as well as on bare wires of overhead lines
Table 4. Permissible loads on aluminum wires with rubber and PVC insulation

Table 5. Permissible loads on rubber-insulated copper wires in metal protective sheaths and cables with copper conductors, rubber-insulated in lead, polyvinyl chloride, nairite or rubber sheaths, armored and unarmoured

(*) Current loads refer to wires and cables with or without a grounding conductor.
Table 6. Permissible loads on copper wires and cords with rubber or PVC insulation

Table 7. Permissible loads on cables with aluminum conductors, with rubber or plastic insulation in aluminum, lead, PVC and rubber sheaths, armored and non-armored

Table 8. Fields of application and methods of laying insulated wires and cords with rubber and PVC insulation


Technical requirements for electrical wiring
Protected wires and cables such as APRN, APRV, AVRG, APRG, AVVG, etc. are allowed to be laid directly on the surface of walls and ceilings. The height of their laying in insulating pipes with a metal sheath or in flexible metal sleeves from the floor level is not standardized.
Open wiring with unprotected insulated wires in rooms without increased danger should be laid at a height of at least 2 m from the floor, and in rooms with increased danger and especially dangerous rooms - at a height of at least 2.5 m from the floor. If this condition cannot be met in a real situation, then such wiring must be protected from mechanical damage or protected wires and cables must be used.
Protection of electrical wiring in places of possible mechanical damage is carried out with steel boxes, corners, thin-walled pipes, metal hoses, fences or laid hidden.
With open laying of protected wires and cables with a sheath of combustible materials and unprotected wires, the clear distance from the wires (cable) to the surface of combustible bases must be at least 10 mm. To ensure this condition, rollers, insulators, clamps, etc. are used. If it is impossible to provide the specified distance, the wire or cable is separated from the surface with a layer of non-combustible material, for example, asbestos, protruding from each side of the wire or cable by at least 10 mm.
With hidden wiring of wires and cables with sheaths of combustible materials and unprotected wires in the voids of building structures, in furrows, etc. with the presence of combustible structures, the wires and cables are protected with a continuous layer of non-combustible material from all sides where there is combustible material of the building structure.
When laying wires and cables openly along walls, partitions and ceilings, you must adhere to the architectural line of the room. Slopes to switches and sockets are laid vertically (along a plumb line); horizontal sections of the wiring - parallel to the cornices; branches to lamps - perpendicular to the lines of intersection of walls and ceiling. In rooms covered with wallpaper, it is recommended to carry the upper horizontal wiring above the upper edge of the wallpaper.
Apartment shields with an electric meter are installed at a height of 0.8–1.7 m from the floor in a place that excludes mechanical damage to the shield and has free access to maintenance (in case of emergency switching on and off of circuit breakers).
If the apartment panel has two or more circuit breakers, then it is advisable to connect the sockets and the general lighting network to different machines.
Connections and branches of wires and cables laid hidden or open in pipes and metal sleeves are performed in junction and branch boxes. Junction and branch boxes must be designed in accordance with the installation method and environmental conditions.
Making connections. Connections and branches of wires and cables are mainly performed on screw terminals or crimped. Single-core and twisted wires, laid openly on rollers and insulators, are connected by twisting, followed by soldering or welding.
The joints and branches of the conductors of wires and cables, connecting and branch clamps must have insulation equivalent to that of the wires, and also must not experience mechanical tensile forces. At the junctions of the conductors of wires and cables, their supply is provided, which ensures the possibility of re-connection. It is also necessary to be able to access for inspection and repair of joints and branches of wires and cables.
Junction boxes, boxes for switches and sockets for hidden wiring are embedded in a wall or partition so that their edges coincide with the surface of the plaster.
With hidden laying of wires before their final sealing with wet or dry gypsum plaster, check the wiring for breakage of current-carrying conductors of wires and short circuit in the network.
For the installation of electrical wiring in wet, damp rooms and outdoor wiring, lamps, wiring devices of a protected design with sealing caps and gland seals are used.
The height of the reinforcement suspension in rooms without increased danger must be at least 2 m from the floor to the cartridge. If the ceilings are low and these requirements cannot be met, then lamps are used in which access to the lamps is impossible without a tool. In rooms with increased danger and especially dangerous with a height of installation of lamps above the floor of less than 2.5 m, lamps are used, the design of which excludes the possibility of access to the lamp without a special tool, or lamps designed for a voltage not higher than 42 V.
The length of the wires in damp, damp and especially damp rooms should be kept to a minimum. It is recommended to place the wiring outside of these rooms, and the luminaires on the wall closest to the wiring.
Connection of copper and aluminum wires. The wires of the electrical wiring with the wires of the lamps are connected in the ceiling sockets. To connect the aluminum wires of the line with the copper reinforcing wires of the luminaires, clamping blocks are used.
When laying two or more flat wires in parallel with open and hidden wiring, the wires should be laid flat on the wall or ceiling, in rows with a gap of 3-5 mm. Laying flat wires in packages or bundles is not allowed.
In open electrical wiring, fastening of unprotected wires with metal brackets should be performed with an insulating pad installed between the wires and brackets.
Laying in pipes. When laying wires and cables in pipes, flexible metal sleeves, they provide the ability to replace wires and cables.
Hidden and open laying of wires and cables on heated surfaces (stoves, fireplaces, chimneys, etc.) is prohibited, since due to drying out of the insulation, wires and cables become unusable and, as a result, to a fire.
The bending radius of unprotected insulated wires must be at least three times the outer diameter of the wire; protected and flat wires - at least six times the outer diameter or width of a flat wire.
Cables with plastic insulation in a PVC sheath are laid with a bending radius of at least six times, and with rubber insulation - at least ten times the outer diameter of the cable.
Installation of all types of wiring is allowed at temperatures not lower than minus 15 C. At low temperatures, some insulating materials become brittle; when they are bent, cracks are formed in the insulation, which during operation can cause damage to wires and cables.
The types of electrical wiring and the methods of laying wires and cables are selected depending on the characteristics of the environment in accordance with the PUE, SNiP and in relation to the conditions of garden houses and cottages are given in tab. 9. For each type of wiring, method of its execution and environment, several brands of wires are indicated in the table. The first of the brands is preferable, and only if necessary, it can be replaced by the next one. Wires should be used for their main purpose, for example, wires APPV, PPV - for open laying directly on fireproof bases, APRTO - for laying in pipes, APRI - for open laying on rollers or insulators.
The selected type of wiring and the method of laying wires and cables must also comply with fire safety requirements ( tab. 9).
Table 9. Types of electrical wiring and methods of wiring, used depending on the environment


Notes:
1) Except especially damp rooms.
2) On casters for damp places.
3) It is prohibited to use steel pipes with a wall thickness of 2 mm or less in damp and especially damp rooms and outdoor installations.
4) With a lining of sheet asbestos with a thickness of at least 3 mm, protruding on both sides of the wire or pipe by 10 mm.
5) In a continuous layer of plaster, alabaster, cement mortar or concrete at least 10 mm thick.
6) In the plastering furrow, in a continuous layer of alabaster trail with a thickness of at least 5 mm or under a layer of sheet asbestos with a layer thickness of at least 3 mm.
7) Under a layer of wet plaster with a thickness of at least 5 mm.
8) Under a layer of cement or alabaster basting at least 10 mm thick.
9) Plastering of the pipe is carried out with a continuous layer of plaster, alabaster with a thickness of at least 10 mm.
10) In a continuous layer of alabaster (cement) basting with a thickness of at least 10 mm or between two layers of sheet asbestos with a thickness of at least 3 mm, protruding from each side of the wire by at least 10 mm.
11) Under a layer of wet plaster with a lining for the wire, a layer of sheet asbestos with a thickness of at least 3 mm or according to the outline of a plaster with a thickness of at least 10 mm, protruding from each side of the wire by at least 10 mm.
Table 10. Selection of the type of electrical wiring and methods of laying wires and cables according to fire safety conditions


Electrical work on wiring
Before purchasing electrical materials and devices and starting electrical work, the owner of a garden house or cottage needs to solve a number of preparatory issues:
Draw up a schematic diagram of the electrical wiring, tying it to the planning drawing of a garden house or cottage;
Determine the type of wiring (open, hidden) and the method of laying wires and cables, depending on the environmental conditions and premises by the degree of relative humidity. In areas with high humidity, the requirements for both materials and the quality of electrical work are significantly increased;
Determine the degree of flammability of building materials;
Think over the type of lighting, depending on the purpose of the room, lighting standards, choose the type and design of lamps: ceiling or wall, with incandescent or fluorescent lamps;
Determine the number and location of sockets, switches, junction boxes, routing of wires and cables;
Determine the power consumption of electrical consumers, accordingly select the type of meter and the type of protection;
Determine the cross-section of wires and cables.
Internal wiring
Internal wiring consists of the following operations:
Layout work;
Making passes and intersections;
Installation of electrical wiring;
Installation of switches, plug sockets, lamps;
Installation of apartment panels;
Checking the wiring.
The markup is carried out before the start of finishing work in the premises of the garden house or cottage. When marking, take into account the ease of use and maintenance of wiring in operation, as well as compliance with the rules of electrical and fire safety.
Wire routes for hidden laying should be easily determined during the operation of the wiring.
To eliminate the likelihood of accidental damage to the wiring during the subsequent installation of wall paintings, clocks, carpets, etc., the hidden wiring route is selected based on the following:
Horizontal laying along the walls is carried out parallel to the lines of intersection of the walls with the ceiling at a distance of 10–20 cm from the ceiling. The mains of the socket-outlets are laid along the horizontal line connecting the socket-outlets;
Descents and ascents to switches, sockets and lamps are performed vertically at a distance of 10 cm parallel to the lines of door and window openings or corners of the room;
Concealed wiring on ceilings (in plaster, in cracks and voids of reinforced concrete slabs) is performed along the shortest distance between the most convenient place to go to the ceiling from the branch box to the luminaire;
The marking of hidden wiring routes, deepened into the furrows of walls and ceilings, can be carried out in the shortest direction from the inputs to the power consumers;
Wires and cables are laid in places where the possibility of their mechanical damage is excluded, in other cases they must be protected.
Lighting switches or lanyard with pre-ceiling switches set:
In accessible places on the wall near the doors, on the side of the door handle, so that they are not closed by the door when it is opened;
For toilets, baths and other rooms with damp and especially damp conditions - in adjacent rooms with better environmental conditions;
In storage rooms, basements, in the attic and in other locked rooms - in front of the entrance to these rooms;
At a height of 1.5–1.8 m from the floor of the room.
Plug sockets are planned to be installed in places convenient for use, depending on the purpose of the room and interior design. They must be located at a distance of at least 0.5 m from grounded metal structures (heating pipelines, water pipelines, gas pipelines, etc.); for kitchens this distance is not standardized.
Installation requirements for wall outlets:
The installation height of sockets in rooms and kitchens from the floor is not standardized;
Above-plinth type sockets are installed at a height of 0.3 m from the floor;
Plug sockets are set for a current of 6 A from the calculation: in living rooms - one socket for 10 m 2 of the room area, in kitchens - two sockets, regardless of the area;
In damp, damp and especially damp rooms (kitchens, bathrooms, toilets, etc.), you should:
Reduce the length of laying wires and cables with the greatest distance from water supply and sewerage pipes;
Switches are placed outside these premises, and lamps are placed on the wall adjacent to the corridor;
Installation of plug sockets in bathrooms, showers and toilets is not allowed;
In these rooms, as a rule, hidden electrical wiring is used; wires are laid in PVC or other insulating pipes;
Open wiring with protected wires and cables is allowed;
Laying wires in steel pipes is prohibited.
Electrical work begins with marking the installation locations of junction and branch boxes, apartment panel, plug sockets, switches, lamps, since their location determines the beginning, direction and ends of the routes.
Layout of lines for laying wires. After the marking of the places for the installation of the apartment meter, switches, sockets, fixing points for fixtures is completed, mark the lines for laying the wires. Lines are beaten off, as a rule, with the help of a cord. The cord is rubbed with a coloring material (chalk, coal, etc.). When marking, the cord is pulled in the desired direction, pulled and then released sharply, thus beating off a clear visible line on the wall or ceiling, showing the direction of the wiring route.
The places of installation of fasteners (rollers, insulators, staples, fasteners, etc.) are marked with short lines drawn across the line broken off by a cord.
The installation locations of the supporting structures and fasteners are determined in the following sequence:
First, at junction and branch boxes, at turns, at transitions through walls and ceilings, and then mark the points of intermediate fasteners;
Places of installation of fasteners are located along the route symmetrically at the same distance from each other, not exceeding the maximum allowable SNiP;
The attachment points of the wires when they are inserted into the box or when passing through the wall are located at a distance of 5–7 cm, and at bends and turns at a distance of 1.0–1.5 cm from the beginning of the bend;
On straight sections, the dimensions between the supporting supports are selected in accordance with the recommendations tab. eleven.
Table 11. Standard dimensions when laying wires on insulating supports
In fig. 2 shows an example of the marking distances of the electric wiring on rollers.

Rice. 2. Marking distances of electric wiring on rollers: a - for laying routes; b - for installing switches; c - to avoid obstacles: 1 - funnel; 2 - rubber semi-solid tube; 3 - heating pipe
When marking, they use measuring rulers, plumb lines, folding rules and tape measures, a marking pole, marking compasses, levels and other special tools and devices. In addition, when marking, it is necessary to have a stepladder and marking templates for marking the holes for fastening the socket outlets, sockets and switches.
Open wiring with rollers and insulatorsOpen wiring using rollers and insulators is still widely used in suburban construction. V tab. 12 recommendations are given on the choice of installation materials when installing open wiring using insulated wires.
When installing the rollers on wooden walls, they are fixed with screws with a semicircular head. If the rollers are placed in a row on plastered walls and ceilings, then a steel strip is placed under them - a bar that protects the plaster from destruction.
On brick and concrete walls, the rollers are fixed on fasteners or brackets (Fig. 3 a, b) with screws or bolts. Staples and fasteners are smeared into the holes knocked out in the wall with alabaster or cement mortar. The rollers can also be installed using a wire spiral. The spiral is made of galvanized knitting wire with a diameter of 0.5–0.8 mm.

Rice. 3. Fastening of rollers: a - by fastening; b - a bracket; in - a wire spiral; d - on dry plaster; d - using a dowel or PVC tube on a brick wall: 1 - spiral; 2 - alabaster solution; 3 - fastener made of steel with a thickness of 0.5 mm; 4 - dry plaster; 5 - dowel or PVC tube; 6 - brick wall
Table 12. Installation materials for insulated wires of brands PR, PV, APR, APN, APV
(*) The length of the screws corresponds to the length at which the rollers are attached to unplastered wood. For attachment to the plastered wood, the length of the screws is increased by the thickness of the plaster layer - 20–30 mm.
A hole for a spiral, punched in the wall with a bolt or bored with a winder drill, is filled with alabaster mortar and a screw with a spiral is inserted into it. As the mortar sets, the screw is turned out, and then a roller is installed in this place. This method is recommended for wires with a cross-sectional area of up to 2.5 mm 2.
There are a number of other ways to attach rollers to brick and concrete substrates. Currently, the most convenient and reliable method of fixing the rollers using self-locking spacer metal, nylon and polyethylene dowels (Fig. 3 e). Nylon, polyethylene dowels are available for screws with a diameter of 3.5 and 5 mm. The dowels are cylindrical with outer annular ribs and longitudinal cuts. The ribs ensure reliable fixing of the dowel into the hole when the screw is screwed into it. The hole diameter should not exceed the dowel diameter by more than 1.0–1.5 mm. The depth of the hole must be such that the dowel is in brick or concrete, not just in plaster.
For fastening the rollers to dry plaster, special fasteners are used (Fig. 3d). When mounting, a hole is made in the surface into which the fastener is inserted. The fastener is wound behind the surface of the plaster opposite to the roller, after which a screw with a roller is screwed into it.
Insulators are installed on hooks, anchors, semi-anchors, pins, and with a large number of them, on brackets, which are reinforced in nests, in walls or on the ceiling with alabaster mortar (in brickwork) or cement mortar (in concrete walls). To seal the insulator on a hook or anchor, tow tow is wound onto the bar with burrs, and then the insulator is screwed on. In fig. 4. the fasteners for the insulators are shown. Hooks and brackets with insulators are fixed only in the main material of the walls, and frames for wires with a cross-section of up to 4 mm 2 inclusive are fixed on plaster or cladding of wooden buildings.

Rice. 4. Fasteners for insulators: a - a hook with a shank for screwing into a tree (above) and for embedding in concrete and brick walls; b - anchor; c - half anchor
Open wiring with twisted single-core wires PRD, PRVD
The laying and fastening of the wire is carried out after installing the rollers. The wire is delivered to the place of installation in bays. It is carefully unwound, measured according to the markings. The wire is straightened by passing it through a rag soaked in paraffin. Two measured pieces of wire are tied on the extreme roller and twisted together with a twist step of 5–7 cm. Having reached the first intermediate roller, the wires are passed along the roller neck and fixed in accordance with the recommendations in fig. 5. The wires are fixed in the same way on the remaining intermediate and outer rollers. A branch on twisted wiring to the switch and the luminaire is made in accordance with Fig. 6. The device of passages and bypasses is shown in fig. 7.

Rice. 5. Methods of binding wires to rollers: a - with a cross with a clamp; b - with a cross; c - PVC rings; g - viscous: 1 - wire APR1? 6; 2 - RP-6 roller; 3 - knitting wire; 4 - insulating tape; 5 - PVC ring; 6 - wire PRVD

Rice. 6. Branching of wires when laying wires of APR and PRVD on rollers: 1 - screw; 2 - knitting wire; 3 - RP-6 roller; 4 - wire APR1? 6; 5 - insulating tube; 6 - wire APR1? 4; 7 - to the switch; 8 - to the switch and lamp

Rice. 7. Passage of wires through the wall: a - from a damp to a dry room; b - from a dry room to a dry one: 1 - sleeve; 2 - insulating tube; 3 - funnel; 4 - wire
Passages through walls and interfloor ceilings are made in insulating tubes. At the outlet, porcelain funnels (in damp rooms) or bushings (in dry rooms) are put on the tubes. They are embedded in the wall with alabaster mortar. In this case, each wire is enclosed in a separate insulating tube. A double wire in a wall passage is allowed to be laid in one pipe (in dry rooms). In the furrows, wires are laid when avoiding obstacles. When passing through a wall, the hole of the funnel is turned down. If the wires pass into a damp room with a different temperature, humidity, etc., the funnels are poured on both sides with a sealing mass (bitumen mass). Open passages through the internal walls of normal non-explosive and non-fire-hazardous premises need not be sealed.
Open wiring with single-core wires APV, PV, APRI, PRISingle-core insulated wires are allowed to be laid on rollers in dry and damp, heated and unheated rooms, as well as under sheds and in outdoor electrical wiring. An independent row of rollers should be installed for each core. The distance between the rows of rollers is 35 mm, and between the rollers along the track in accordance with Table 11.
The prepared wire is tied to the extreme roller, stretched along the route, the branch points are marked on it. After that, the wire is removed, branches are attached to it, pulled again and finally tied to the extreme roller on the other side. After that, the wire is tied up on intermediate rollers. The wire tie technology is shown in Fig. 5.
The wires are tied with soft annealed wire with a corrosion-resistant coating. The diameter of the wire for tying wires with a cross section of 2.5 mm 2 is not less than 0.6 mm. In the places of knitting, two or three layers of insulating tape are applied under the wire.
The wires to the rollers can be secured with copper strands of the remaining wire cuttings. For fastening to intermediate rollers, you can use rings cut from a polyvinyl chloride tube with a diameter of 40 mm and a wall thickness of 1.5–2 mm.
The branches of the wires are performed only on rollers. The intersection of the branch wire with the main line is protected by an insulating tube that is put on the branch wire (Fig. 6).
Passages through walls with single-core wires are performed in the same way as with PRD, PRVD wires. In this case, each core is laid in a separate pipe.
The installation locations of lamps, switches, and sockets are marked in the same way as when laying with twisted wires.
Open wiring with flat wires APPV, PPV on rollersWiring with flat wires is allowed for existing buildings, as well as for newly constructed small residential, summer cottages, garden and cottage buildings on unplastered wooden walls, ceilings and partitions on rollers and clamps.
The rollers and clamps are fixed on the surface with screws according to the previously described markings.
Flat wires are attached to rollers in two ways:
1st method of securing. After fixing all the rollers, the wire is unwound from the coil, straightened and measured to the desired length. Then a longitudinal cut is made along the line of contact of the veins so that the roller head can pass through the resulting hole. The wire is put on the head of the extreme roller and fixed with a knitting wire or braid in the same way as when installing electrical wiring with PRD, PRVD wires. Next, the wire is pulled to the next intermediate roller; on the wire opposite the roller, the following longitudinal cut is made along the line of contact of the cores. The roller head is passed through the resulting hole, then the wire is fixed in the same way on the remaining rollers.
2- The th method of fixing a flat wire on rollers (similar to fixing a wire on the clamps) is as follows:
When installing the roller under the head of the screw, place strips of sheet metal 15 mm wide and 50–80 mm long. The most commonly used white sheet metal;
After fixing the entire row of rollers, the flat wire is placed on the head of the screw with a gasket of insulating material 17 mm wide;
After laying the wire, the ends of the metal and insulating plate are bent with a lock (or fastened with a buckle). The wire is pulled to the next roller and fixed in the same way (Fig. 8 a).

Rice. 8. Laying of wires on rollers, examples of bending of wires: a - APPV wire on rollers; b - wires APPV, APN, APR, APRV on wooden bases on the clamps; c - an example of bending of wires of the APPV and APPR brands; d - an example of bending of wires of brands APV, APN and APRV to the edge: 1 - wire APPV 2x6; 2 - strip; 3 - buckle; 4 - a gasket made of electrical cardboard; 5, 9 - screws; 6 - RP-2.5 roller; 7 - APR wire; 8 - clitoris; 10 - wire ALP 3x4
Laying of flat wires of APN, APR, APV, APRV brands on clamps. In this case, the flat wire is attached to the wall through the claw with a screw through the hole in the separating film between the cores. In this case, it is necessary to put an insulating washer under the screw head and, when screwing in the screw, be careful not to damage the wire insulation (Fig. 8 b).
When bending flat two- and three-core wires by 90 °, a separating film between the cores at the bend is cut out, one or two cores are taken inside the corner in the form of a half-loop (Fig. 8 c). When the track is turned by 90 °, a two-core and three-core wire of the APN type is bent on the edge, having previously cut the separating film, while the inner core at the turning point is partially superimposed on the outer one (Fig. 8 d). Single-core wires of the APN, APV and APRV brands are bent with a radius of 20 mm when the cross-sectional area is up to 10 mm 2, and with a radius of 35 mm if the cross-sectional area is from 16 to 35 mm 2.
Fastening flat wires to concrete and brick foundations. Flat wires have light-resistant insulation, so they can be used in open electrical wiring directly along walls, partitions and ceilings made of non-combustible materials, while flat wires are attached to concrete and brick bases using a steel strip (tape) 20-40 mm wide and 3– 4 mm, which is nailed to the wall with dowel-nails along the entire wiring route (Fig. 9). The distance between adjacent dowel-nails is no more than 1 m.

Rice. 9. Fastening of wires of brands АПВ, АППВ, АПН, АПРВ to concrete bases on the target steel strip: a - fastening the strip with a dowel-nail; b - wire fastening: 1 - strip; 2 - dowel-nail; 3 - electrical cardboard gasket; 4 - wire APN 3? 4; 5 - mounting tape; 6 - mounting button
The wires are fixed to the tape every 30–40 cm with strips 10 mm wide made of tinplate, galvanized or painted steel sheet, or with the help of normalized mounting perforated strips and buckles. The wires under the strips must be protected with insulating cardboard spacers protruding 1.5–2 mm on both sides of the metal strip.
Figure 10a shows the fastening of wires of the APV, APPV, APN, APRV brands to concrete and brick foundations along a targeting wire, and figure 10b - using targeting fasteners with strips.

Rice. 10. Fastening of wires of brands АПВ, АЛПВ, АЛН, АПРВ to concrete and brick foundations: a - along the wire to be targeted; b - on the fastened fasteners with strips: 1 - plate; 2 - dowel-nail; 3 - wire; 4 - APN 3x4; 5 - gasket made of electrical cardboard; 6 - steel strip; 7 - buckle
Laying wires on glued fasteners. Plastic or steel fastening parts for flat wires and cables of the AVRG and ANRG brands can be glued to concrete, reinforced concrete, expanded clay concrete, asbestos-cement, brick and ceramic bases, the surface of which is dry, durable, free from dust, dirt and soot, using special adhesives, for example, glue KNE-2/60 (electrotechnical coumaron sodium) or BMK-5K based on acrylic resin with kaolin filler.
Do not glue wires directly to the building base.
Plastic and metal parts are degreased with acetone or gasoline before gluing. The quality and strength of adhesion depends on adherence to technology. First, you need to clean the base with a metal brush and apply the glue with a spatula to the building base on an area slightly larger than the size of the part to be glued. Then apply glue to the part to be glued and press it against the building base for 3-5 seconds.
You can start electrical work after the glue has completely dried (20-25 hours). The glue can only be used at room temperature over 5 C and relative humidity no more than 70%.
When performing installation work using glue, it is necessary to observe the fire safety rules adopted for flammable liquids, to avoid getting glue on the skin of the hands, face and eyes. In fig. 11 shows some other methods of attaching wires and cables to concrete, brick and the like.

Rice. 11. Fastening wires of brands APV, APPV, APN, APRV and cables AVRG and ANRG to concrete and brick foundations: a - using a strip nailed with a dowel-nail (manual driving); b - with plastic brackets; c and d - using staples with one and two legs; d - using a strip embedded in the base: 1 - dowel-nail; 2 - APN wire 3? 4; 3, 10 - strip; 4 - a gasket made of electrical cardboard; 5 - plastic bracket; 6 - bracket; 7 - screw; 8 - nylon dowel; 9 - cable AVRG (ANRG) 3 × 10 + 1 × 6; 11 - buckle; 12 - alabaster
Laying on wooden structures. Flat protected wires АППР and cables in a sheath made of non-combustible and non-combustible materials are allowed to be laid along wooden walls, partitions, ceilings and other combustible structures with fastening with staples.
It is also allowed to lay on combustible structures of unprotected wires with PVC insulation with a mandatory lining for the wires of insulating non-combustible materials, for example, sheet asbestos with a thickness of at least 3 mm, protruding from each side of the wire by at least 10 mm.
Concealed wiring with flat stranded wiresConcealed indoor wiring is carried out in steel water and gas pipes (only in explosive areas), thin-walled and electrically welded pipes (in fire-hazardous rooms), in flexible metal hoses, boxes, in plastic (polyethylene, polypropylene and vinyl plastic), as well as in rubber-bitumen pipes.
Laying on non-combustible substrates. In residential buildings, permanent hidden laying of wires APPV, APN, APPVS is allowed directly on panels of fireproof structures - under plaster, in grooves of walls, in the seams between floor panels, etc., as well as directly under a layer of wet plaster in the thickness of the base or in continuous a layer of alabaster trail (Fig. 12 a).

Rice. 12. Concealed laying of wires: a - wires of the APPVS, APN, APV brands on fireproof bases under wet and dry plaster; b - the same wires on wooden bases under dry plaster; c - on wooden bases under wet plaster: 1 - wire APPVS; 2 - alabaster; 3, 13 - wet plaster; 4 - plaster basting; 5 - a nail; 6 - alabaster gasket; 7 - strip; 8 - dry plaster; 9 - APN or APV wire; 10 - rail; 11 - plaster shit; 12 - contour of wet plaster
On wooden bases covered with dry plaster, the wires are sealed with a continuous layer of alabaster tarmac or between two layers of sheet alabaster (Fig. 12 b).
On wooden walls and partitions covered with wet plaster - under a layer of plaster with a lining for asbestos sheet wires with a thickness of at least 3 mm or according to a plaster outline with a thickness of at least 5 mm. Asbestos or plaster basting is laid on top of the shingles, or shingles are cut to the width of the asbestos gasket. The width of the asbestos spacer must be such that the asbestos protrudes at least 10 mm on each side of the wire.
On wooden walls and partitions covered with a layer of dry gypsum plaster - in the gap between the wall and the plaster in a continuous layer of alabaster tarmac or between two layers of sheet asbestos 3 mm thick. In this case, the layer of alabaster tarmac or asbestos on each side of the wire must be at least 10 mm.
Concealed flat wire laying technologyWhen installing wiring with flat wires with hidden wiring, a number of operations are performed:
Wire straightening from the coil;
Route marking;
Wire laying;
Fastening the wire;
Bending and crossing the wire;
Passages through walls and ceilings.
To straighten flat wires, one end of the wire is fixed in a vise, after which the wire is pulled through a cloth or mitten. When melting single-wire wires with PVC insulation (PV, APV, etc.), it is not recommended to pull the wires with great effort, since the insulation can move.
Wiring is carried out in sections: apartment panel - branch box - plug socket; branch box - switch; junction box - luminaire, etc.
The wires are connected to each other only in junction boxes. Connecting wires to each other outside the boxes is not allowed. The wire is cut into pieces equal to the length of the individual sections. The wire is laid with light pressure along the entire length of the straight section from the box to the turn of the track and fixed with alabaster mortar (Fig. 12 a).
When the wire is rotated, the separating base is cut out to enable the wire to rotate in a plane.
After laying the wire at the turn, it is fixed with alabaster mortar. Similarly, the installation of the wire is carried out on the entire remaining route to the next box.
Providing wire connectivity. When installing the wiring, it must be possible to freely make wire connections in junction boxes, boxes for switches and sockets. Such a need may arise during the period of operation for the repair or replacement of switches, sockets, lamps. Therefore, the ends of the wire with separate cores are inserted into the boxes with a margin of 5070 mm. After that, the wire at the box is fixed.
For connection to luminaires, plug sockets, switches of open installation, hidden wires are put on the places where they exit from walls, partitions and ceilings, insulating tubes, porcelain or plastic bushings or funnels are put on in order to prevent the wires from breaking due to their repeated bending.
Wall penetrations of flat wires with hidden wiring are also made in insulating pipes, while the installation of porcelain bushings and funnels is not required.
Electrical wiring in steel and plastic pipesWiring in pipes is carried out only in cases when the use of other methods of installation is not recommended. Pipe wiring is used to protect wires from mechanical damage, as well as to protect wire insulation from adverse environmental conditions. To protect against mechanical damage, the pipeline itself can be made leaky, and to protect it from the external environment, the pipeline is made hermetically sealed.
The tightness of the pipeline is ensured by sealing the joints between the pipes and their connection to branch boxes and various electrical consumers.
When crossing with heating pipes, the distance to the wiring pipes must be at least 50 mm in the light, and when laid in parallel with them - 100 mm.
Steel pipes must be laid so that moisture and condensation cannot accumulate in them. To drain water, pipes are laid on horizontal sections of the route with a slight slope towards the box.
In steel and plastic pipes, unprotected insulated wires of the APRTO, PRTO, APV, PV, etc. brands are laid.
The minimum cross-sections of conductive conductors of insulated wires laid in pipes are 1.0 mm 2 for copper and 2.0 mm 2 for aluminum wires.
Wiring is installed in pipes so that, if necessary, the wires can be removed from the pipe and replaced with others. Therefore, if there are two bending angles on the pipeline route, then the distance between the boxes should not exceed 5 m, and on straight sections - 10 m.
It is forbidden to make connections or branches of wires in pipes, they are performed only in boxes.
The execution of electrical wiring in steel pipes can be carried out with open, hidden and external laying. Steel pipes are used as an exception when laying wires without pipes is not allowed and non-metallic pipes cannot be used.
In garden houses and buildings, steel pipes are required for the installation of inputs and electrical wiring in attics, in basements and for outdoor electrical wiring.
Pipes are cleaned of rust, dirt, burrs before installation. To prevent the destructive effect of corrosion products on the sheath of wires and cables, pipes laid openly are painted. Pipes laid in concrete are not painted on the outside for better adhesion of their outer surface to concrete.
When bending pipes, crushing (corrugation) at the corners is not allowed. It is not recommended to bend the pipes to an angle of less than 90 °, since it is difficult to pull the wires through the pipes with a complex configuration of pipelines and its long length. Therefore, the bending radii of the pipes are limited. When laying pipes, the bending radius must be at least six outer diameters of the pipe, with one bend or open laying - at least four outer diameters. When laying a pipe in concrete, the bending radius must be at least ten outside pipe diameters.
The distance between the attachment points of openly laid steel pipes in horizontal and vertical sections depends on the diameter of the pipes to be laid. Pipes with a diameter of 15–32 mm are fixed every 2.5–3.0 m, and at bends - at a distance of 150–200 mm from the angle of rotation. When pipes are laid open, they are attached to the supporting structures with brackets, clamps, linings and clamps.
After cutting, the ends of the pipes are cleaned of burrs, countersunk and terminated with bushings that protect the insulation of the wires from damage at the point of entry and exit from the pipe.
Steel pipes are interconnected with threaded couplings, unthreaded couplings, cuffs, as well as using junction and branch boxes and boxes. Connect the pipes with threaded couplings so that the pipeline can be easily disassembled at any time. Branches and connections are carried out in boxes with lids. The boxes are connected to pipes with threads or with clamps.
For open and hidden installation in damp, especially damp, fire-hazardous rooms, attics and outdoor installations, the joints of steel pipes must be sealed. Sealing of the joints of pipes and places of entry into boxes is performed with standard threaded couplings with hemp on drying oil, red lead.
When laying steel pipes openly in dry, non-dusty rooms, the pipes themselves, as well as the pipes and boxes, are connected without seals: sockets, cuffs on screws and bolts, sleeves, etc.
Laying of plastic pipes. For open laying in dry, humid, especially damp and dusty rooms, in rooms with a chemically active environment and in external wiring, on non-combustible and hardly combustible bases, plastic pipes are used.
The connection of plastic pipes and assemblies is carried out by welding using special torches, tools and fixtures. The bending radius of plastic pipes is taken to be at least 6 times the outer diameter of the pipe. Plastic boxes must be used for electrical wiring.
Fasten plastic pipes with brackets that allow free movement of pipes with temperature deformations up to 5 mm per 1 m of pipe.
The choice of steel and plastic pipes for wiring is made in accordance with tab. thirteen.
Table 13. Selection of steel and plastic pipes for laying insulated wires APR, APV, APRV, APRTO
If the length of the continuous piping exceeds:
50 m - if there is no more than one bend;
40 m - in the presence of two bends;
20 m - in the presence of three bends (angles of 90 ° or more), then intermediate broaching boxes should be installed and only in extreme cases, pipes of a larger diameter should be used.
Connection and termination of wiresInstallation of electrical wiring, connection of switches, sockets, sockets, etc. cannot be carried out without connecting and terminating wires. Correct and high-quality connections and connections to a greater extent determine the reliability of the power supply.
Requirements for wire connections. The connection of the conductors to each other and their connection to wiring devices must have the necessary mechanical strength, low electrical resistance and retain these properties for the entire period of operation. Contact connections are subject to load current, heat up and cool down cyclically. Changes in temperature and humidity, vibration, the presence of chemically active particles in the air also have an adverse effect on contact connections.
The physical and chemical properties of aluminum, from which the conductors are mainly made, make it difficult to make a reliable connection. Aluminum has (in comparison with copper) increased fluidity and high oxidizability, while a non-conductive oxide film is formed, which creates a large transition resistance on the contact surfaces. This film must be carefully removed from the contact surfaces before joining and measures must be taken to prevent its reoccurrence. All this creates some difficulties when connecting aluminum wires.
Copper conductors also form an oxide film, but unlike aluminum, it is easily removed and does not significantly affect the quality of the electrical connection.
A large difference in the coefficients of thermal linear expansion of aluminum in comparison with other metals also leads to contact failure. Given this property, aluminum wires cannot be crimped into copper lugs.
During long-term operation under pressure, aluminum acquires the property of fluidity, thereby breaking the electrical contact, therefore, mechanical contact connections of aluminum wires cannot be pinched, and during operation it is required to periodically tighten the threaded contact connection. Contacts of aluminum conductors with other metals in the open air are exposed to atmospheric influences.
Under the influence of moisture, a water film with the properties of an electrolyte forms on the contact surfaces; as a result of electrolysis, cavities are formed on the metal. The intensity of shell formation increases when an electric current passes through the place of contact.
Compounds of aluminum with copper and copper-based alloys are especially unfavorable in this respect. Therefore, such contacts must be protected from moisture or covered with a third metal - tin or solder.
Connection and termination of copper wiresIt is recommended to connect, branch off copper wires with a cross-section of up to 10 mm 2 by twisting followed by soldering, and copper single-wire wires with a cross-section of up to 6 mm 2, as well as stranded wires with small cross-section areas, are brazed along the twist (Fig. 13). The cores with a cross-sectional area of 6-10 mm 2 are connected by bandage soldering (Fig. 14 a), and the stranded wires are connected by twisting with preliminary unwinding of the wires (Fig. 14 b). The length of the joints by twisting or brazing must be at least 10-15 outer diameters of the wires to be connected. Soldered with lead-tin solder using a rosin-based flux. It is not allowed to use acid and ammonia when soldering copper wires, since these substances gradually destroy the soldering points.

Rice. 13. Connection by twisting followed by soldering: a - connection of wires PR and APR; b - branch of wires PR and APR; в - connection of wires of PRVD; PC - soldering point

Rice. 14. Connection and branching of wires: a - connection of single-wire bands by soldering; b - connection of stranded wires by twisting; in - a branch of stranded wires; d - connection of stranded wires by crimping
Crimp connection. The method of connecting copper wires by crimping is widely used (Fig. 14 d). The ends of the wires are stripped by 25–30 mm, then wrapped with copper foil and crimped with special pliers such as PK.
Connecting and terminating aluminum wiresAluminum conductors of wires are connected by welding, soldering and mechanically (Fig. 15).

Rice. 15. Connection of wires by welding and soldering: a - connection of single-wire aluminum wires by welding in a sleeve; b - samples of welds; c - solder connection
Aluminum wires are welded in a special mold using carbon electrodes powered by a welding transformer.
For soldering, aluminum wires are twisted (Fig. 15 c), and then the place of twisting is heated in the flame of a blowtorch and soldered with solders, the compositions of which are given in tab. 14.
Table 14. Composition and melting point of solders
The technology for soldering aluminum wires is as follows:
Remove the insulation from the ends of the wires to be connected, then strip the bare cores to a metallic sheen and overlap with a double twist to form a groove at the point where the cores touch. The length of the groove for connecting and branching with different cross-sections of conductors is shown in Fig. sixteen;

Rice. 16. Soldering solid cores
The twisted wires are connected with a flame of a gas torch and a blowtorch to a temperature close to the melting point of the solder. After that, wipe the groove (with pressure) on one side of the connection with a solder stick previously introduced into the lamp flame. As a result of friction, the oxide film peels off, the groove begins to be tinned and filled with solder as the junction warms up. No flux is required. Then the groove is tinned and soldered on the other side of the joint. At the same time, wipe and irradiate the outer surfaces and twisting of the veins of the connected section with solder;
Clean the soldering points of the wires to be connected, wipe with a cloth soaked in gasoline, cover with a moisture-proof varnish and insulate with insulating tape.
The termination of the wires is performed after they have been laid. Single-wire wires with a cross-sectional area of up to 10 mm 2 and stranded wires with a cross-sectional area of up to 2.5 mm 2 are connected directly to the current collectors. In this case, the bare core is inserted under the clamping contact screw. The ends of the stranded wires are twisted and soldered. Depending on the type of contact, the end of the wire can be given the form of a pestle (Fig. 17 a) or a ringlet (Fig. 17 b).

Rice. 17. Termination of wires: a - with a pestle; b - a ring; c - tip soldering: 1 - tip; 2 and 3 - insulating tape or bandage thread
The ends of single-wire wires with a cross-section of more than 10 mm 2 or stranded wires with a cross-section of more than 2.5 mm 2 are equipped with lugs (Fig. 17 c), which are soldered or welded to the core, and in some cases are crimped.
In all cases of connection, branching and termination of wires, the places where they are connected to each other and the tip are wrapped with insulating tape in several layers. In accordance with the rules, the dielectric strength of the insulation at the point of connection or branch should not be lower than the strength of the insulation as a whole.
In suburban conditions, for connecting aluminum and copper wires to each other, the most acceptable method of connection is with screw clamps, since no special tools and devices are required. Contact design should provide constant pressure and limit wire squeezing out. It is necessary to assemble the clamp when connecting aluminum wires with all factory parts (screw, pressure washer, flat washer, contact plate), since the absence of any part will necessarily lead to deterioration of the contact.
To connect the wire to the clamp, the insulation is removed from the end of the wire. The knife is held at an angle of 10-15 ° to the surface of the core, this eliminates the cut of the aluminum core. The wire is stripped to a metallic shine and lubricated with quartz-vaseline paste, then the end of the core is bent in the form of a ring. Bend the wire clockwise, i.e. in the direction of rotation of the fastening screw.
The inner diameter of the ring should be slightly larger than the diameter of the contact screw (Table 15).
Table 15. Parameters of the ring on the terminated wire
The connection of wires by crimping is widely used in the installation of internal and external electrical wiring and overhead power lines.
This method provides reliable contact, the required mechanical strength, and is easy to implement. Crimping is performed with manual pliers, mechanical and hydraulic presses using replaceable dies and punches.
To connect the cores, sleeves GAO, GA are used, for termination - tips TA, TAM, etc.
Aluminum conductors in connecting sleeves are crimped according to the following technology:
The type and size of sleeves, as well as dies and punches, are selected in accordance with the dimensions of the sleeves;
Check for the presence of factory grease in the sleeves and tips, in the absence of lubrication, the sleeves and tips are cleaned with a metal brush and lubricated with a protective quartz-vaseline or zinc-vaseline paste;
The insulation is removed from the ends of the cores: when terminating - at a length equal to the length of the tubular part of the tip, and when connecting - at a length equal to half the length of the sleeve;
The ends of the current-carrying conductors are cleaned with sandpaper to a metallic sheen, wiped with a cloth soaked in gasoline, and covered with quartz-vaseline paste;
A tip or a sleeve is put on the prepared cores;
When terminating, the core is inserted into the tip until it stops, and during connection - so that the ends of the cores to be connected are in contact with each other in the middle of the sleeve;
Install the tubular part of the tip or sleeve into the matrix and carry out pressure testing;
Insulate the connection with several layers of insulating tape.
It is not allowed to pressurize a copper tip on an aluminum conductor, since the connection will be fragile due to the large difference in the coefficient of linear thermal expansion between copper and aluminum.
Crimping of single and stranded copper conductors with a cross section of 4 mm 2 or more is performed in copper tubular lugs of the T type or connecting copper sleeves of the GM type. The technology for crimping copper wires is similar to the technology for crimping aluminum wires, with the exception of the imposition of quartz-vaseline or zinc-vaseline paste. Do not press with a hammer and chisel.
Installation of switches, plug socketsWiring accessories include: switches and switches; plug connections - plugs and socket; sockets for electric lamps; circuit breakers.
The wiring product must not be overloaded by current. Loading in excess of the rated current leads to burning of the contacts, impermissible overheating and can cause a fire.
Switches and sockets are available in two versions: for exposed wiring and for hidden wiring.
Sockets with open wiring are installed on socket outlets. Socket boxes are discs with a diameter of 60–70 mm, a thickness of at least 10 mm, made of non-conductive material (wood, textolite, hetikans, plexiglass, etc.). The socket boxes are fixed on the wall with countersunk screws or glued with BMK-5 or KNE-2/60 glue. On brick or benton walls, the socket boxes are also fixed with screws, having previously drilled a hole in the wall and installing a dowel or a wooden plug.
On combustible bases, it is recommended to install 2-3 mm thick asbestos gaskets on wooden socket boxes, which provide protection against fire in the socket if the contact connection in the switch or plug socket is faulty.
Wiring accessories are fixed on the socket with two round head screws (with the top cover removed). Then, pre-terminated wiring wires are connected to the terminals of the wiring product.
The switches are installed in the break of the phase wire going to the lamp holder. This allows you to quickly de-energize the power grid in the event of a short circuit and ensure electrical safety when replacing lamps and sockets. When installing the switches, you should pay attention to the fact that the electric lighting is turned on by pressing the upper part of the button or the upper button of the switch.
The sockets are connected in parallel with the main wires of the electrical network.
The pre-ceiling switches have a metal base, they are attached directly to the wall without a socket outlet. The presence of cavities under the cover for placing wires allows you to dispense with a branch box.
With hidden wiring, switches and plug sockets are installed in metal or plastic boxes of the U-196, KP-1,2 types with a diameter of 69 mm and a height of 40 mm. The boxes are installed in recesses in the wall and fixed with alabaster mortar.
To fix the switch or power outlet in the box, remove the top decorative cover from them, attach the terminated wiring wires to the terminals, unscrew the screws from the spacer brackets so that you can push the switch or outlet into the box. When screwing in the screws, the tabs move apart and firmly fix the switch or the socket outlet in the box. The screws are screwed in all the way, alternately, avoiding skewing with such an effort so as not to split the base. After fixing the base of the switch (sockets), decorative covers are fixed to them.
Installation of luminairesArtificial electric lighting in living quarters should provide normal hygienic conditions of visibility, the necessary comfort and coziness. To fulfill these conditions, general and combined lighting systems are used.
General lighting serves to illuminate the entire area of the room.
Combined lighting is performed using general lighting lamps that provide the desired illumination throughout the room, and local lighting lamps create increased illumination in the workplace. Combined lighting is the most economical, allows you to create the best conditions for work and rest.
To distribute the luminous flux in the desired direction and protect it from glare, electric lamps are installed in the fittings. The lamp together with the fixture is called a luminaire.
The types of luminaires are selected depending on the nature of the environment, suspension height, lighting requirements and the interior of the room.
Depending on the type of light source, luminaires with incandescent lamps and fluorescent lamps are distinguished.
Incandescent lamps are light sources that work on the principle of thermal radiation. Incandescent light bulbs are by far the most common light source. In fig. 18 shows some types of incandescent lamps. As a filament in modern lamps, a spiral made of a refractory metal is used - most often of tungsten. The filament can be single-stranded or multi-stranded. Bulbs of incandescent lamps are evacuated or filled with a neutral gas (nitrogen, argon, krypton). The temperature of the heated filament reaches 2600–3000 ° C. The spectrum of incandescent lamps differs from the spectrum of daylight by the predominance of the yellow and red spectrum of the rays. The luminous efficiency of incandescent lamps, defined as the ratio of the power of the rays of the visible spectrum to the power consumed from the electrical network, is very small and does not exceed 3.5%.

Rice. 18. Some types of incandescent lamps: a - gas-filled; b - double spiral; c - bispiral krypton; g - mirror
The industry produces various types of lamps, differing in power and voltage ratings, sizes, bulb shapes, base materials and sizes, etc.
In the designation of incandescent lamps, the letters mean:
B - vacuum;
G - gas-filled;
B - double spiral;
BK - bispiral krypton;
DB - diffuse (with a matte reflective layer inside the bulb);
MO - local lighting, etc.
The number following the letter indicates the supply voltage, and the second indicates the lamp power in watts. Mirror lamps are produced with concentrated light distribution (ZK), medium (ZS), wide (ZSh), mirror lamps made of niodimum glass with concentrated or wide light distribution - ZKN, ZSHN. Mirror lamps are designed for lighting high rooms and open spaces, decorative lighting. Niodimium lamps are used where high quality color reproduction is required.
Decorative special lamps (D) can emit white (BL), yellow (W), green (W), red (K), opal (O) rays.
Incandescent lamps with a mirror reflector are produced - thermal emitters, quartz halogen (KG-220-1200; IKZK-220-500).
Incandescent lamp holders are divided into two main groups: threaded and pinned. In household lighting fixtures, as a rule, threaded sockets are used and are subdivided according to the size of the threaded sleeves - E14 - with a diameter of 14 mm (for minions), E27 - with a diameter of 27 mm, E40 - a diameter of 40 mm (lamp power more than 1.0 kW) ...
Cartridges are made from non-ferrous metals, steel, porcelain and plastics. According to the form of execution, the cartridges are divided into cartridges for screwing onto a nipple, cartridges with a flange and cartridges for suspension.
If the cartridge has a current-carrying screw sleeve, then the sleeve must be connected to the zero, and not to the phase conductor. This ensures electrical safety when replacing an electric lamp.
Electric lamps, in which electricity is converted into light directly, regardless of the thermal state of the substance, due to luminescence, are called luminescent.
The principle of operation of these lamps in a simplified representation is as follows. If a voltage is applied to the electrodes inserted into the ends of the glass tube, which is filled with a discharged inert gas or metal vapor, at the rate of at least 500-2000 V per 1 m of the tube length, then free electrons in the tube cavity begin to fly towards the electrode with a positive charge. When an alternating voltage is applied to the electrodes, the direction of movement of the electrons changes with the frequency of the current. In their motion, electrons meet with neutral gas atoms - filling the tube cavity and ionize them, knocking electrons out of the upper orbit into space or from the lower orbit to the upper one. The atoms excited in this way, once again colliding with electrons, again turn into neutral atoms. This reverse transformation is accompanied by the emission of a quantum of light energy. Each inert gas and metal vapor has its own spectral composition of the emitted light.
So, tubes with helium glow with light yellow or pale pink light, with neon - red light, with argon - blue, etc. By mixing inert gases or applying phosphors to the surface of the discharge tube, various shades of glow are obtained.
Fluorescent lamps of daylight and white light are made in the form of a straight or arched tube made of ordinary glass that does not transmit short ultraviolet rays. The electrodes are made from tungsten wire. The tube is filled with a mixture of argon and mercury vapor. The inside of the tube surface is covered with a phosphor - a special compound that glows under the influence of ultraviolet rays generated by an electric discharge in mercury vapor. Argon contributes to reliable combustion of the discharge in the tube.
The main advantage of fluorescent lamps in comparison with incandescent lamps is a higher efficiency (15–20%) and a 7-10 times longer service life.
Along with the positive qualities, fluorescent lamps also have disadvantages:
The complexity of the wiring diagram;
Dependence on ambient temperature; when the temperature drops, the lamps may go out or not light up;
Additional energy losses in the control gear, reaching 25–35% of the lamp power;
Luminous flux pulsations harmful to eyesight;
The presence of radio interference;
The light source and fixture form the luminaire. The armature redistributes the luminous flux in the desired direction, protects the light source from dust, moisture, etc. The luminaires are placed, whenever possible, in places that are convenient and safe for maintenance.
The luminaires are charged with flexible copper wires with a conductor cross-section of at least 0.5 mm 2 inside buildings and 1 mm 2 for outdoor installation and connected to the network wires using plug connectors or a chandelier clamp.
To decorate the place where the lamp is suspended, sometimes a ceiling lamp socket is used, inside which there is a chandelier clip. It is allowed to suspend the luminaire directly on the wires supplying it, provided that they are intended for this purpose.
Chandeliers, suspensions are hung on hooks (Fig. 19). Direct suspension of luminaires by wires is prohibited. The hook in the ceiling must be insulated from the chandelier, lamp with PVC tube. Hook insulation is necessary to prevent the appearance of a hazardous potential in the metal reinforcement of concrete slabs or steel pipes for electrical wiring if the insulation in the luminaire is broken. If you attach hooks to timber joists, you do not need to insulate the hook. To install the hook, a hole is made in the hollow floor slab, and then the hook is fixed (Fig. 19 b). In solid reinforced concrete ceilings, the luminaire is suspended from a hairpin, passed through the entire ceiling.

Rice. 19. Hooks for hanging lamps: a - on wooden ceilings; b - on hollow reinforced concrete slabs
All fixtures for suspension of luminaires are tested for strength with five times the mass of the luminaire. In this case, the suspension attachment parts must not have any damage or residual deformation.
Electrical wiring in cellars and basementsCellars and basements, as a rule, are built from non-combustible materials and structures (brickwork, reinforced concrete blocks, ceilings, etc.). The floors are usually conductive, namely: earthen, concrete, made of broken bricks, etc. Depending on the condition of the soil, the efficiency of ventilation, the relative humidity of the air, the cellars and basements are classified as damp and especially damp rooms, and according to the degree of danger of electric shock - to especially dangerous premises.
Increased requirements are imposed on electrical wiring in cellars and basements, namely:
The mains voltage should be not higher than 42 V. For this, step-down transformers should be used;
Carry out the electrical wiring directly on the base on insulators and rollers with insulated protected wires or cables. For hidden wiring, it is prohibited to use steel pipes with a wall thickness of 2 mm or less;
Luminaires of a sealed design should be used to prevent moisture from entering the electric cartridge;
The switch should be located outside the cellar and basement.
Electrical wiring in the atticAn attic space is a room above the top floor of a building, the ceiling of which is the roof of the building and which has load-bearing structures (roof, truss, rafters, beams, etc.) made of combustible materials.
Electrical wiring in attics is performed mainly for laying the inputs from overhead lines into the building to the terminals of the apartment panel. In country houses, lighting of attics is not required.
It is better not to install any electrical wiring, apart from the gasket of inputs, in attics with structures made of combustible materials.
Attic spaces have a number of features. They are subject to temperature fluctuations, as a rule, they are dusty and have an increased fire hazard. Accidental damage to the electrical wiring can lead to a fire in wooden structures and subsequently to a fire. Therefore, increased requirements are imposed on electrical wiring in attics.
The following electrical wiring can be used in the attic:
Open - with wires and cables laid in steel pipes, as well as protected wires and cables in sheaths of non-combustible and non-combustible materials at any height;
Unprotected insulated single-core wires on rollers and insulators at a height of at least 2.5 m from the floor.
At a height of less than 2.5 m, they are protected from touch and mechanical damage. The distance between the attachment points of the rollers should be no more than 60 mm, insulators - no more than 1000 mm, between the wires - no less than 50 mm. The rollers must be at least 30 mm high. The rollers are installed on boards hemmed to the rafters.
Concealed electrical wiring is carried out in walls and ceilings made of non-combustible materials at any height.
Open electrical wiring in the attic is carried out with wires and cables with copper conductors. Wires and cables with aluminum conductors can be laid in buildings with fireproof ceilings, provided they are laid in steel pipes or hidden in fireproof walls and ceilings. Transit lines in attics up to 5 m long are allowed to be made with wires with aluminum conductors.
When laying steel pipes, it is necessary to exclude the penetration of dust into the pipes and junction boxes, for which sealed threaded connections are used. Pipes can only be connected using unsealed threaded couplings only in dry and dust-free attics.
Pipes are laid with a slope so that moisture cannot accumulate in them.
Connections and branches of copper or aluminum conductors of wires and cables are carried out in metal junction (branch) boxes by welding, crimping or using clamps corresponding to the material, cross-section and number of conductors.
Branches from the lines laid in the attic to electrical receivers installed outside the attics are allowed provided that both the line and the branches are laid openly in steel pipes, hidden in fireproof walls and ceilings.
Disconnecting devices in circuits supplying lamps located directly in attics are installed outside attics, for example, at the entrance to the attic.
Steel pipes, metal luminaire bodies and other metal structures of electrical wiring must be neutralized.
It is prohibited to lay any non-metallic pipes in attics.
Installation of apartment panelsThe account of the consumed electricity and the settlement for it with the energy supplying organization is carried out according to the meter. The meter, as a rule, is mounted on the apartment panel along with the necessary switching and protective devices and devices. Mounting of meters on wooden, plastic or metal shields is allowed.
The industry produces single-phase and three-phase meters for various voltages and currents. The main types and characteristics of meters are given in tab. sixteen.
Table 16. Counters

In single-phase current circuits, active energy is measured by single-phase induction meters of direct switching (Fig. 20 a) or by switching through a current transformer (Fig. 20 b). When switched on via a current transformer, the meter readings are multiplied by the transformation ratio of the current transformer.

Rice. 20. Turning on a single-phase meter: a - single-phase direct-on meter; b - switching on a single-phase meter through a current transformer; G - generator clamps; Н - load clamps
In three-wire three-phase current circuits with uniform or uneven phase load, the energy is measured by two-element meters, for example, type SAZ-I670M or SAZ-I677 of direct connection (Fig. 21) or switched on through measuring current transformers (Fig. 22). The current transformers in both phases must have the same transformation ratio.

Rice. 21. Inclusion of three-phase meters SAZ-I677 and SAZ-I684 directly into a three-wire network

Rice. 22. Scheme of connection of SAZ-I670M and SAZ-I681 meters through current transformers into a three-wire network
Energy consumption is defined as the product of the meter reading by the transformation ratio of the current transformers and the transformation ratio of the voltage transformers, if applicable.
In a four-wire three-phase current network with a uniform and uneven load of the phases, energy can be counted using three single-phase meters, included as shown in Fig. 23, or using a three-element four-wire meter of type CA4 or CA4U (Fig. 24). When counted with three single-phase meters, the energy consumption is equal to the sum of the readings of all three meters, multiplied by the transformation ratio of the current transformers.

Rice. 23. Scheme of energy metering in a four-wire network with uneven phase load using three single-phase meters connected through current transformers

Rice. 24. Scheme of energy metering in a four-wire network with an uneven phase load using a three-phase CA4 meter for direct connection
In front of the meter, which is installed on the apartment panel, it is advisable to install a switch or a two-pole switch for safe meter replacement.
The load is necessarily connected to the meter through a protection device. Protective devices are used so that in the event of a malfunction of the internal wiring or an emergency overload of the network, it is automatically disconnected from the main line. For this purpose, fuses, circuit breakers or residual current devices are installed in the circuits of different wires of the network.
Disconnection should take place by breaking the line of the phase conductor. Therefore, fuses, as well as single-pole protective or switching devices, for example, A3161 or AB25 circuit breakers, are installed only in the phase conductor. Installation of these devices according to the PUE in the neutral wire is not allowed.
The neutral conductor line can only be broken simultaneously with the phase conductor line. This is ensured by two-pole switching or protection devices. A three-pole device can also be used, but with a single-phase (two-wire) input, one of the poles is not used.
In practice, it is common to install fuses in the line of not only the phase, but also the neutral wire, which contradicts the requirements of the current PUE.
The installation of fuses both in the phase conductor and in the zero conductor was justified by the unskilled operation of the apartment wiring. Indeed, if a fuse-link burned out in the line of one wire, grossly violating the rules, was replaced with a wire jumper ("bug"), then protection was provided by a serviceable fuse in the line of the other wire. In addition, it was possible that in the wiring section before the fuses, the external difference between the phase and neutral wire will be lost. In this case, the presence of two fuses allows you to safely carry out repair work by unscrewing both plugs. Recall that initially, electrical energy in everyday life was used mainly in residential premises with non-conductive floors. Central heating was not yet common, and there were no piping or radiators in the rooms. Under these conditions, touching an electrical appliance with damaged insulation usually did not lead to electric shock, and grounding of the housings was not required as a means of increasing safety. Now the electrification of everyday life has gone beyond living rooms, and grounded heating, water supply and gas pipelines are increasingly encountered in rooms. This means that there is a possibility of being in contact with the ground or with a grounded metal object while using an electrical appliance. Under such conditions, damage to the insulation creates the risk of electric shock.
One of the means of ensuring safety is grounding, that is, the connection of metal non-current-carrying parts of electrical equipment with a grounded neutral wire. If a fuse or an automatic device is installed in the neutral wire circuit, then under certain conditions it can work and turn off the neutral wire, and this is tantamount to disabling the neutralization, which ensures the safety of the worker. Therefore, the installation of protective devices in the neutral wire in the presence of electrical appliances that require grounding is unacceptable.
Installation of the shield. Below is an example of how to install an apartment panel with fuses. The shield panel is punched out of steel or plastic with dimensions 360x170x27 mm. Fuses are placed in the upper part of the panel, a meter is installed under the fuses. The meter is secured with three screws. In the lower part of the panel under the counter there are four holes framed with plastic bushings for entering wires to the clamping device of the counter. The shield (Fig. 25) is mounted after completion of work on the installation of internal wiring in the house and entering the building from the overhead line.
Rice. 25. Connecting the apartment panel: 1 - input wires; 2 - disconnecting device; 3 - outgoing line screw; 4 - fuse; 5 - central contact screw; 6 - wire from meter to fuses; 7 - asbestos gasket; 8 - counter; 9 - shield body; 10 - wooden base
The shield is installed on a wall with a rigid structure, in places convenient for access and maintenance. It should be located away from the zone of possible mechanical stress (opening doors, shutters, etc.) and from heating pipelines, water supply, gas pipelines, no closer than 0.5 m.
The shield is fixed on a solid base strictly vertically with a slope of no more than 1 °. The distance from the floor to the terminal box of the meter should be within 0.8–1.7 m.
When installing an apartment shield in places where it can be damaged, for example, under stairs, the shield is placed in a cabinet with a window for a counter or in niches.
A fuse is one of the most common protection devices. For domestic consumption, fuses are designed as single-pole threaded fuses with E27 thread. The fuse consists of two main parts (Fig. 26 a): a rectangular base and a screw-in cylindrical body with a fusible insert. The base is installed on the shield in the phase conductor circuit. A wire coming from terminal (2) of the meter is connected to the terminal connected to the central contact; to the clamp of the threaded part - a wire going to the load. The fusible link is placed in a porcelain cylinder with two metal caps on the side of the ends. The insert is installed in a cylindrical body, which is screwed into the base.

Rice. 26. Electrical protection devices: a - PRS series fuse: 1 - fuse base; 2 - a screw-in cylindrical body with a fusible insert; b - automatic switch PAR-6,3 (PAR-10): 1 - power button; 2 - shutdown button
Fuse-links for fuses are available for a rated current of 6.3; 10; sixteen; 20 and 25 A.
Automatic switches. For use in apartment shields with fuse-links, automatic switches of the PAR type for 6.3 and 10 A have been developed with connecting dimensions the same as for threaded fuses (Fig. 26 b). Unlike fuse-links, the circuit breaker is ready for operation again after tripping. To turn it on, just press the large diameter button, and by pressing the small diameter button, you can turn off the chain. These circuit breakers have a combined release: electromagnetic - for instantaneous disconnection of short circuits, and thermal - for disconnection of overloads.
Single-pole automatic switches A3161 or AB-25 with thermal releases for 15, 20 or 25 A, or AE1111 with combined releases for currents from 6.3 to 25 A.
At present, the industry produces introductory apartment shields of various modifications and types (SCHK, SCHO, SHKI, etc.)
The shields can be open or closed, respectively, for installation on a wall or in niches. They are equipped with fuses for one, two groups or single-pole circuit breakers for two or three groups. Panel dimensions - 260x150x129 mm. The machines and the counter are closed by a plastic case (cover) with a window for the counter and an opening for the control knobs of the machines. The cover is mounted on side latches and can be easily removed. The design of the shield allows the entry and exit of wires from above or below, the possibility of sealing them is provided.
It is advisable to power the main line of plug sockets and the lighting circuit from different fuses or circuit breakers. This achieves the preservation of lighting in the house during overload in the line of socket outlets.
Each installed settlement meter must have seals with the stamp of the state overseer on the screws securing the meter casing, and the seal of the power supply organization on the clamping cover.
Newly installed three-phase meters must have state verification seals no more than 12 months old, and single-phase meters - no more than 2 years old.
State meter verification is carried out once every 16 years.
Tools, fixtures, devicesWhen installing electrical wiring, a different tool is used in accordance with the type of work performed.
When installing wiring accessories and wiring, they use fitting tools: pliers, round-nose pliers, side cutters (diagonal cutters), a set of various screwdrivers, pliers for removing insulation, scissors for cutting metal, a core rod, an awl, a knife, a soldering iron, etc. of the above are shown in Fig. 27.

Rice. 27. Electrician's tool
In the production of construction work for the laying of electrical wiring, hammers, sledgehammers, chisels, bolts of various diameters, drills, electric and hand drills, perforators, a set of drills with victorious solders, etc. are used.
For marking work, it is necessary to have plumb lines, a level, rulers, measuring tape 5-10 m, templates, compasses, vernier calipers, etc.
When working on connecting, branching and terminating wires and cables, use the KU-1 tongs, PK-1, PK-2M press tongs, cord tape brushes, gasoline blowtorches, soldering irons, etc.
To check the circuits during installation, you must have special devices.
The simplest is a conductivity tester, consisting of a battery, a light bulb and two wires (Fig. 28). To test the circuit, the tester is connected to the circuit under test using alligator clips. If the light is on, then the circuit is short-circuited, if the light goes out, the circuit is broken.

Rice. 28. The simplest conductivity tester
To measure the insulation resistance of the network, meggers of the M-4100/4 type are used, designed for a voltage of 400 V. The resistance of the grounding devices is checked with an M416 type device.
To determine the presence of voltage in the network, voltage indicators and indicators are used.
Single-pole voltage indicators UNN-1m, UNN-90, IN-90, IN-91 are designed to check the presence of voltage and determine phase wires in AC electrical installations when connecting electric meters, switches, lamp holders, fuses, etc.
There are many ways to route the wire. It is buried in the ground, walled up in a wall, attached to supporting structures, suspended in the air. We will consider the simplest technology from the point of view of installation: open wiring.
The definition sounds like this: this is a way of laying the cable, in which it is not located in the supporting structures, and is not hidden under the finishing materials. At the same time, the external wiring is properly secured, that is, it does not swing under the influence of weather conditions.
Therefore, the laying of air networks between the poles does not apply to this method. The technology is called "air suspension".
The rules for the arrangement of electrical networks (PUZ) provide for the following types of laying open (external) electrical wiring:
- On the surface of vertical walls or floors (ceilings). The method provides for direct fixing of the wire to the surface using special devices. The cable is flush with the wall (ceiling).
- Laying with point fixings: insulating rollers, hangers. In this case, the exposed wire does not touch the surface, but does not have long loose sections.
- Gasket on strings. Unlike free suspension, the cable still has no sag. The fundamental difference from the previous methods: a cable is mounted on the bearing surface, and the wire is attached to it. The technology is used when there is a danger of mechanical impact on the wiring.
- Installation of open wiring in special sleeves (pipes). It can be a rigid structure or flexible corrugation. The cable is loose inside and can be easily removed for replacement or repair. The fixing to the wall is organized behind the outer shell.
- Exposed wiring can be stored in special trays. Professional electricians call them kabelrost. Moreover, the guides can be fixed both along walls (floors) and between objects (supports). This method does not apply to free suspension, since the cables do not have the opportunity to mix.
- Installation of external wiring in special boxes. Perhaps the most common way to protect wires from external influences if necessary. The boxes, as a rule, have easily removable covers. This allows quick access to content.
- Open wiring in a house or apartment can be laid in decorative elements: hollow platbands, plinths made of electrical plastic.
Any of the listed methods does not contradict the requirements of the PUE, if safety measures are followed. Given the availability, and poor protection from mechanical stress, open wiring can cause electric shock.
Therefore, compliance with the Rules is not just a formality, but your life and health.
Security measures when organizing outdoor wiring
First, let's define the terminology related to cable products:
- A cable is an insulated conductor with an additional coating around it, often armored. It must withstand the effects of the external environment without violating the insulating parameters. As a rule, cables are trunk cables, they are rarely used to connect the end consumer.
- A wire is the same conductor (most often in insulation, but non-insulated products are also used: for example, for grounding). An outer sheath may be provided around the main cores if required. No special strength is required, just additional insulation.
If the installation of external wiring is carried out with a wire, the presence of a second sheath is highly desirable (at a voltage of more than 42 volts, it is mandatory). With mechanical stress, there is a chance to damage only the outer insulation, but there will be no contact with the bare conductor.
And now the basic safety requirements:
- Installation of open wiring on the surface of the walls inside the room is allowed only with the use of a cable, or wire with an outer sheath. In this case, the walls (or their decoration) cannot be made of combustible material. It is a method of attachment directly to the surface.


Consider several options for open wiring using examples
Loft open wiring. This fashionable trend allows you not only to be in trend, but also to save on the aesthetic component. That is, you just lay industrial corrugation without worrying about matching color and shape (this is the loft style). Fasteners and materials can be the cheapest, the main thing is reliability.

Although custom-made spaces can look and price quite expensive. But the technology of installing open wiring has nothing to do with this.

Another trend that is costly is retrowiring. If you are ready to purchase expensive accessories (fiberglass braided wire is an order of magnitude more expensive than usual), you can perform wiring beautifully and safely.
All fittings are made of ceramics. By the way, it is one of the best dielectrics from the point of view of fire safety. There is no point in organizing common harnesses and cable ducts. Vintage design just means that the more wires, the more stylish the room looks.

In addition, the retro style involves routing wires in metal pipes. For wooden rooms, the same thing: both beautiful and fireproof, and the wiring is reliably protected from mechanical stress.

And if these same pipes are also connected to protective ground, you do not have to worry that the wiring will break through the phase to the pipe body.
It is equally aesthetically pleasing to organize open wiring in cable ducts. This is generally a classic. Initially, professional pipes were used only to optimize harnesses with a large number of wires. And today it is a way of laying single cables.
In addition, the modern design of these accessories allows the box to fit into any interior.

If you want - a contrasting white color. But no - pick up a cable box with a wood finish: the choice in stores is huge.
Important! Laying wiring in a box has undeniable advantages:
- By opening the cover, you can always add a new conductor (if this does not contradict the PUE restrictions).
- The wires in the box can be used without the outer sheath - again, savings.
- No ties, fastening clips, beautiful styling. The main thing is that there are no knots and kinks in the wire. The rest will be hidden under the cover.
The situation is a little more complicated with the so-called electrical skirting boards.
Important! When buying such a product, check with the seller: what type of wiring can be laid in a niche of a decorative element. Otherwise, you will buy a skirting board not protected from fire, in which you can only mount a telephone or Internet line.
With the only drawback: low roominess, a skirting board for open wiring can actually replace chasing.

By using this technology in conjunction with cable routing behind a false ceiling, you can leave the walls intact at all. In this case, all electrical wiring will be replaced.
Advice! When laying the power and signal (telephone, television, Internet) wires together in the baseboard, remember about mutual interference. Ferrite filters at the ends of the wires will not interfere.

Finally, let's talk about the advantages and disadvantages of this method.
What we have in the black:
- Ease of installation. No heavy and dirty work associated with chiselling walls, deepening sockets and switches, and subsequent plastering of the room.
- When organizing new wiring, there is no need to start repairing the premises. The impact on the interior is minimal.
- Inspection access: the wiring is easily inspected at any time.
- Possibility of replacement, modernization, adding new lines. And all this at any time, without the use of sophisticated equipment.
- If you change your mind, the wire can always be hidden in the wall. But the reverse process is difficult.
- The organization of open wiring is suitable for any premises. But hidden in the walls has limitations. For example, it cannot be laid in wooden houses.
There are also disadvantages:
- The main one is that there is no 100% compatibility with the design of the room. If you are not a fan of the "vintage" or "loft" style, there is only a garage left to experiment with open wiring.
- No matter how strong the sheath (cable duct, corrugation, etc.) is, the likelihood of damage is higher than that of a cable in the wall.
- The ability to grab the wire with your hands and get an electric shock is negligible. But it is there.
What materials will be required for the installation of open wiring
Cable ducts are fastened with ordinary hardware, or even just with adhesive tape. Vintage and other "loft" sets are already equipped with no less "old" ceramic rollers and clips. For other methods, you will have to select sets of fasteners.
Corrugation and cable pipes are conveniently mounted on special clamps.

They have a standard configuration, and allow you to neatly organize "tracks" from any number of wires.
Fastening the wire and cable directly to the wall is also carried out with quick-mounting clips.

For any size and shape. We just drill a hole in the wall and drive the fastener there.
Finished kabelrosty also do not present any difficulties during installation.

Although at home such a picture is rarely seen.
Outcome
There is no need to be afraid of open wiring, you can always determine by location: which installation method is suitable for your premises. And for any emergency, there is a compromise: a skirting board with a cable box inside.
Related Videos
Even 15 - 20 years ago, the load on the power grid was relatively small, but today the presence of a large number of household appliances has provoked an increase in loads at times. Old wires are far from always able to withstand a heavy load and over time there is a need to replace them. Laying electrical wiring in a house or apartment is a matter that requires certain knowledge and skills from the master. First of all, this concerns knowledge of the rules for wiring wiring, the ability to read and create wiring diagrams, as well as wiring skills. Of course, you can do the wiring with your own hands, but for this you must adhere to the rules and recommendations set out below.
Wiring rules
All construction activities and building materials are strictly regulated by a set of rules and requirements - SNiP and GOST. As for the installation of electrical wiring and everything related to electricity, you should pay attention to the Rules for the Arrangement of Electrical Installations (abbreviated as PUE). This document prescribes what and how to do when working with electrical equipment. And if we want to lay electrical wiring, then we need to study it, especially the part that relates to the installation and selection of electrical equipment. Below are the basic rules to follow when installing electrical wiring in a house or apartment:
- key elements of electrical wiring, such as distribution boxes, meters, sockets and switches must be easily accessible;
- installation of switches is carried out at a height of 60 - 150 cm from the floor. The switches themselves are located in places where an open door does not impede access to them. This means that if the door opens to the right, the switch is on the left side and vice versa. The wire to the switches is laid from top to bottom;
- sockets are recommended to be installed at a height of 50 - 80 cm from the floor. This approach is dictated by flooding safety. Also, sockets are installed at a distance of more than 50 cm from gas and electric stoves, as well as heating radiators, pipes and other grounded objects. The wire to the sockets is laid from bottom to top;
- the number of sockets in the room must correspond to 1 pc. by 6 m2. The kitchen is an exception. It installs as many outlets as necessary to connect household appliances. Installation of sockets in the toilet is prohibited. For sockets in the bathroom, a separate transformer is installed outside it;
- the wiring inside or outside the walls is carried out only vertically or horizontally, and the wiring location is displayed on the wiring plan;
- wires are laid at a certain distance from pipes, floors and other things. For horizontal, a distance of 5 - 10 cm from the floor beams and cornices and 15 cm from the ceiling is required. The height from the floor is 15 - 20 cm. Vertical wires are placed at a distance of more than 10 cm from the edge of the door or window opening. The distance from the gas pipes must be at least 40 cm;
- when laying external or hidden wiring, it is necessary to ensure that it does not come into contact with the metal parts of building structures;
- when laying several parallel wires, the distance between them must be at least 3 mm, or each wire must be hidden in a protective box or corrugation;
- wiring and connection of wires is carried out inside special junction boxes. The joints are carefully insulated. The connection of copper and aluminum wires to each other is strictly prohibited;
- grounding and neutral wires are bolted to the devices.
Project and wiring diagram
Wiring work begins with the creation of a project and a wiring diagram. This document is the basis for future house wiring. The creation of a project and a scheme is quite a serious matter and it is better to entrust it to experienced specialists. The reason is simple - the safety of those living in the house or apartment depends on it. Services to create a project will cost a certain amount, but it's worth it.

Those who are used to doing everything with their own hands will have to, adhering to the above rules, as well as having studied the basics of electrical engineering, independently make a drawing and calculations for network loads. There are no particular difficulties in this, especially if there is at least some understanding of what an electric current is, and what are the consequences of careless handling of it. The first thing you need is a legend. They are shown in the photo below:

Using them, we make a drawing of the apartment and outline the lighting points, installation locations for switches and sockets. How many and where they are installed is described above in the rules. The main task of such a scheme is to indicate the place of installation of devices and wiring. When creating a wiring diagram, it is important to think in advance where, how much and what kind of household appliances will be.
The next step in creating a diagram will be the wiring to the connection points on the diagram. It is necessary to dwell on this point in more detail. The reason is in the type of wiring and connection. There are several such types in total - parallel, sequential and mixed. The latter is the most attractive due to the economical use of materials and maximum efficiency. To facilitate the laying of wires, all connection points are divided into several groups:
- lighting of the kitchen, corridor and living rooms;
- toilet and bathroom lighting;
- power supply of outlets in living rooms and corridor;
- power supply to kitchen sockets;
- power supply of the socket for the electric stove.
The above example is just one of many lighting group options. The main thing to understand is that if you group the connection points, the amount of materials used is reduced and the circuit itself is simplified.

Important! To simplify wiring to the outlets, the wires can be tucked under the floor. Overhead lighting wires are laid inside the floor slabs. These two methods are good to use if you don't want to gouge walls. In the diagram, such wiring is marked with a dotted line.
Also in the wiring project, the calculation of the estimated current strength in the network and the materials used are indicated. The calculation is performed according to the formula:
I = P / U;
where P is the total power of all used devices (Watt), U is the voltage in the network (Volts).
For example, a kettle of 2 kW, 10 bulbs of 60 W each, a microwave oven of 1 kW, a refrigerator of 400 W. The current strength is 220 volts. As a result (2000+ (10x60) + 1000 + 400) / 220 = 16.5 Amperes.
In practice, the current in the network for modern apartments rarely exceeds 25 A. Based on this, all materials are selected. First of all, this concerns the cross-section of the wiring. To facilitate the selection, the table below shows the main parameters of the wire and cable:

The table shows the most accurate values, and since quite often the current strength can fluctuate, a small margin will be required for the wire or cable itself. Therefore, it is recommended that all wiring in an apartment or house be made of the following materials:

- VVG-5 * 6 wire (five cores and a cross-section of 6 mm2) is used in houses with three-phase power supply to connect the lighting panel to the main panel;
- VVG-2 * 6 wire (two cores and a cross-section of 6 mm2) is used in houses with a two-phase power supply to connect the lighting panel to the main panel;
- VVG-3 * 2.5 wire (three cores and a cross-section of 2.5 mm2) is used for most of the wiring from the lighting panel to junction boxes and from them to sockets;
- VVG-3 * 1.5 wire (three cores and a cross-section of 1.5 mm2) is used for wiring from junction boxes to lighting points and switches;
- VVG-3 * 4 wire (three cores and a cross-section of 4 mm2) is used for electric stoves.

To find out the exact length of the wire, you will have to run a little with a tape measure around the house, and add another 3-4 meters of stock to the result obtained. All wires are connected to the lighting panel, which is installed at the entrance. Circuit breakers are mounted in the shield. Usually these are RCDs for 16 A and 20 A. The former are used for lighting and switches, the latter for sockets. For the electric stove, a separate RCD of 32 A is installed, but if the power of the stove exceeds 7 kW, then an RCD of 63 A.

Now you need to calculate how many sockets and junction boxes are needed. Everything is pretty simple here. It is enough to look at the diagram and make a simple calculation. In addition to the materials described above, various consumables will be required, such as electrical tape and PPE caps for connecting wires, as well as pipes, cable channels or boxes for electrical wiring, socket boxes.
Installation of electrical wiring
There is nothing super complicated in wiring work. The main thing during installation is to adhere to safety rules and follow the instructions. All work can be done alone. From the installation tool, you will need a tester, a hammer drill or grinder, a drill or screwdriver, wire cutters, pliers, and a Phillips and slotted screwdrivers. The laser level will not be superfluous. Since without it it is quite difficult to make vertical and horizontal markings.
Important! When carrying out repairs with the replacement of wiring in an old house or apartment with hidden wiring, you must first find and, if necessary, remove the old wires. For these purposes, a wiring sensor is used.
Layout and preparation of channels for electrical wiring

We start the installation with the markup. To do this, using a marker or pencil, we put a mark on the wall where the wire will be laid. At the same time, we observe the rules for placing wires. The next step is to mark the places for the installation of lighting fixtures, sockets and switches and a lighting panel.
Important! In new houses, a special niche is provided for the lighting panel. In old ones, such a shield is simply hung on the wall.

Having finished with the markings, we proceed either to the installation of the wiring in an open way, or to the chipping of the walls for hidden wiring. First, using a perforator and a special crown nozzle, holes are cut out for the installation of sockets, switches and junction boxes. For the wires themselves, grooves are made using a grinder or a perforator. In any case, there will be a lot of dust and dirt. The depth of the groove of the groove should be about 20 mm, and the width should be such that all the wires can easily fit in the groove.

As for the ceiling, there are several options for resolving the issue of placing and securing the wiring. First, if the ceiling is suspended or suspended, then all the wiring is simply fixed to the ceiling. The second - a shallow strobe is made for wiring. Third - the wiring is hidden in the ceiling. The first two options are extremely simple to implement. But for the third one will have to make some explanations. In panel houses, floors with internal voids are used, it is enough to make two holes and stretch the wires inside the floor.
Having finished with the gating, we proceed to the last stage of preparation for the installation of the wiring. The wires must be pulled through the walls to bring them into the room. Therefore, you will have to punch holes with a punch. Usually such holes are made in the corner of rooms. We also make a hole for the wire plant from the switchboard to the lighting panel. Having finished chipping the walls, we begin the installation.
Installation of open wiring

We start with the installation of the lighting panel. If a special niche was created for it, then we place it there, but if not, then we simply hang it on the wall. We install an RCD inside the shield. Their number depends on the number of lighting groups. The assembled and ready-to-connect shield looks like this: there are zero terminals in the upper part, grounding terminals at the bottom, automatic machines are installed between the terminals.

Now we put the wire VVG-5 * 6 or VVG-2 * 6 inside. From the side of the switchboard, the electrical wiring is carried out by an electrician, so for now we will leave it without connection. Inside the lighting panel, the lead-in wire is connected as follows: the blue wire is connected to zero, the white wire to the upper contact of the RCD, and the yellow wire with a green stripe is connected to ground. We connect the RCDs in series with each other at the top using a jumper from the white wire. Now we turn to open wiring.

We fix ducts or cable channels for electrical wiring along the lines outlined earlier. Often, with open wiring, the cable channels themselves are trying to be placed near the baseboard, or vice versa, almost under the very ceiling. We fix the wiring boxes with self-tapping screws with a pitch of 50 cm. We make the first and last holes in the box at a distance of 5 - 10 cm from the edge. To do this, we drill holes in the wall using a puncher, drive a dowel inside and fix the cable channel with self-tapping screws.
Other distinguishing features of exposed wiring are sockets, switches and distribution boxes. All of them are hung on the wall, instead of being embedded inside. Therefore, the next step is to put them in place. It is enough to attach them to the wall, mark the places for fasteners, drill holes and fix them in place.

Next, we proceed to the wiring. We start by laying the main highway and from the sockets to the lighting panel. As already noted, we use the VVG-3 * 2.5 wire for this. For convenience, we start from the connection point towards the dashboard. At the end of the wire we hang a label indicating what kind of wire it is and where it comes from. Next, we lay the VVG-3 * 1.5 wires from the switches and lighting devices to the junction boxes.

Inside the junction boxes, we connect the wires with PPE or carefully insulate. Inside the lighting panel, the main wire VVG-3 * 2.5 is connected as follows: brown or red core - phase, connected to the bottom of the RCD, blue - zero, connected to the zero bus at the top, yellow with a green stripe - ground to the bus at the bottom. With the help of a tester, we "ring" all the wires in order to exclude possible errors. If everything is in order, call an electrician and connect to the switchboard.
Installation of hidden wiring
The hidden wiring is quite simple. A significant difference from the open only in the way of hiding the wires from the eyes. Otherwise, the actions are almost the same. First, we install the lighting panel and the RCD machines, after which we start and connect the lead-in cable from the side of the distribution panel. We also leave it unconnected. An electrician will do this. Next, we install distribution boxes and socket boxes inside the niches made.

Now let's move on to the wiring. We are the first to lay the main line from the VVG-3 * 2.5 wire. If it was planned, then we lay the wires to the sockets in the floor. To do this, we put the VVG-3 * 2.5 wire into a pipe for electrical wiring or a special corrugation and lay it to the point where the wire is output to the sockets. There we place the wire inside the groove and put it into the socket. The next step will be to lay the VVG-3 * 1.5 wire from the switches and lighting points to the junction boxes, where they are connected to the main wire. We insulate all connections with PPE or electrical tape.

At the end, we call the entire network with a tester for possible errors and connect it to the lighting panel. The connection method is similar to that described for open wiring. Upon completion, we seal the grooves with plaster putty and invite an electrician to connect to the switchboard.
Laying an electrician in a house or apartment for an experienced craftsman is quite easy. But for those who are poorly versed in electrical engineering, you should use the help of experienced specialists from start to finish. This, of course, will cost money, but this way you can protect yourself from mistakes that can lead to a fire.
Ecology of consumption. Manor: How to choose the right way to lay electrical wiring indoors, taking into account the features of building structures.
Features of the installation of electrical wiring directly depend on the characteristics of the building materials from which the building is built. And this is due to the fact that any building material has its own degree of fire hazard. In this article, we will consider this dependence, based on the current rules for the design of electrical installations (7th edition of the PUE, updated on 02/12/2016) and on the practical experience of users of our portal.
Cable routing rules
The location of cable lines in the room is subject to certain rules:
- the wiring in the room should be laid in accordance with strictly horizontal or strictly vertical lines, while the rotation of the cable route is only possible by 90 ° (creating all kinds of diagonals associated with saving conductors is unacceptable);
- horizontal sections of the wiring should run at a distance of 10 ... 15 cm from the ceiling;
- vertical sections of the wiring must be at least 10 cm away from door and window openings.
Types of wiring
In modern buildings, it is customary to mount two types of wiring: hidden and open. Concealed wiring is laid in the voids of building structures or inside walls (in channels made by slitting, drilling, etc.).
Open wiring is laid directly on the surface of the walls. In this case, the wires are either attached to special insulators, or laid in standard cable channels.
When choosing the type of wiring when building a house, you should not be guided by your own preferences, because only SNiPs, GOSTs and PUE should be taken as a basis.
Least of all, self-taught builders have questions if the electrical wiring is mounted on walls made of non-combustible building materials. To begin with, let's talk about just such cases.
Installation of wiring on building structures made of non-combustible materials
Modern PUE rules allow the use of wires and cables in rooms exclusively with copper conductors (clause 7.1.34.).
If the room has walls and ceilings made of non-combustible materials (concrete, brick, aerated concrete blocks, ceramic blocks, gypsum boards, etc.), then it is advisable to install hidden wiring in it. Firstly, it is aesthetically pleasing, secondly, it is safe in terms of accidental mechanical damage and, thirdly, the rules of the PUE (clause 7.1.37) quite allow mounting hidden-type wiring in walls made of non-combustible materials.
In this case, we are talking about living quarters. In attics, in basements (especially in unheated ones) and in technical premises, it is recommended to make open wiring.
The PUE rules state: if the building structure consists of non-combustible materials, then it is allowed to lay monolithic non-replaceable wiring along it, using technological channels, grooves and voids for this. In this case, it is sufficient to use insulated cables or wires in a protective sheath as conductors (for example, VVG cables). In this case, the installation of wiring is carried out without the use of metal pipes, protective corrugation and other additional elements.
If the rough wall is subsequently planned to be plastered, then, as a rule, it is not necessary to resort to chipping the walls for wiring.
Of course, niches for sockets and switches will still have to be created in the wall itself. But dust and physical work in this case will be much less than with the widespread chipping of walls.
As for the power supply scheme: it should be available from any self-respecting owner. Indeed, in the future it will certainly be needed. The circuit is needed at least so that during the repair of the room you do not get the drill into the wire connected to the electricity.
If you are laying the wiring on walls that are not planned to be plastered in the future, then chipping in this case cannot be avoided. You will also have to gouge the walls if the old wiring is being replaced during the overhaul, and there is no need to remove the layer of old plaster.
Should or shouldn't you create horizontal grooves? Can load-bearing walls and concrete slabs be channeled? There are no unequivocal answers to these questions among professional builders. Of course, from the point of view of the theory of strength of materials, man-made furrows can significantly weaken the strength of building structures (just like a thin cut in a glass cutter weakens strong glass). Nevertheless, the rules of the PUE (clause 7.1.37) allow the laying of electrical networks in the grooves (in the grooves) of walls, partitions and ceilings. The main thing is not to overdo it with the depth of the groove and with its width.
In this case, the existing technological voids should be used to the maximum (for example, in floor slabs).
In grooves, in steel sleeves, in special trays and technological channels, joint laying of wires and cables belonging to different lines (with the exception of mutually redundant conductors) is allowed.
Installation of wiring on building structures made of combustible materials
A lot of questions regarding the rules for installing electrical wiring arise from people who begin to independently electrify premises from combustible building materials. These are mainly frame and timber houses. The answers to most of the questions can be found in the same rules of the PUE.
The construction of houses from combustible building materials allows you to mount both types of wiring (hidden and open). Which one to use depends on the preference of the homeowner. As for the protective elements that protect the wiring from damage, and the building from fire as a result of a short circuit, their choice depends on the type of cable route.
There are two ways to run exposed wiring indoors:
- Installation of retro wiring.
- Laying of wires in cable channels.
Retro wiring installation
To what extent the design of the retro wiring complies with the rules of the PUE is a moot point. In this regulation, the creation of a posting of this type is not even considered. Nevertheless, let's try to understand this issue.
In the case of retro wiring, a special twisted cable ("retro") is mounted directly on the wall, to which it is attached using small insulators. Considering that such a conductor is coated with artificial silk impregnated with a non-combustible compound, it can be quite classified as a flame retardant wire. Therefore, the installation of retro-wiring on walls made of combustible materials does not violate the rules of the PUE.
In accordance with the rules of the PUE, the distance from the conductor to the surface of the combustible material must be at least 10 mm, which is fully ensured by the design of insulators for retro wiring.
If the wire sags a lot, then the distance between the insulators can be reduced to 50 cm.
When installing retro wiring, one important nuance should be taken into account: most modern electrical appliances must be connected to the ground loop without fail. For this reason, a three-core cable should be used as part of the wiring (if one is not on sale, then it is advisable to weave it yourself).
In places where wiring passes through a wall or ceiling made of combustible materials (for example, wood), the cable (wire) must be laid in a metal pipe with localization ability. The ends of the pipe should be sealed with a non-flammable compound (for example, fire-resistant polyurethane foam).
The localization ability of a pipe is a quality that allows it to withstand short circuits in electrical wiring without burning out the walls of the pipe itself. In order for a pipe to have this ability, its walls must be of a certain thickness:
- for copper conductors up to 2.5 mm², the wall thickness is not standardized;
- for copper conductors with a cross section of 4 mm², the pipe must have a wall thickness of at least 2.8 mm;
- for copper conductors with a cross-section of 6-10 mm², the pipe must have a wall thickness of at least 3.2 mm.
Open wiring in cable ducts
If open-type wiring is laid in cable ducts and electrical skirting boards, then cables (wires) with high fire resistance (VVGng or NYM) should be used as conductors. At the same time, the material of the cable channels must also prevent the spread of fire.
When installed on walls made of combustible materials, the flush-mounted boxes must have fireproof linings (for example, made of asbestos cement or gypsum mortar) 10 mm thick. In places where wiring passes through combustible structures, metal sleeves with localization ability must be installed.
Concealed wiring in flammable walls
The peculiarities of laying hidden wiring in walls made of combustible materials (for example, wood) boil down to the fact that the wiring in the voids of such walls and partitions must run inside metal pipes with localization ability (rules of PUE 7.1.38.).
There is only one rule, and in relation to its implementation, there can be no indulgences. All other options (the use of plastic corrugations, metal hoses and other protective elements) should be deliberately excluded, because from the point of view of fire safety, they are unacceptable.
When laying wires and cables along combustible structures (or inside them), in all cases, it must be possible to replace the conductors.
By the way, electrical wiring, spread over the floors, is the most convenient way of arranging hidden wiring in rooms from combustible materials. In this case, the strobes to the sockets and switches will simply go down from the main highways.
When laying pipes and ducts for electrical wiring in the technological voids of combustible structures, the ends of the pipes and ducts should be covered with a quickly removable non-combustible material (for example, polyurethane foam).
In order to create a sufficient number of turns when installing removable wiring in metal pipes, junction boxes must be used in the corners of the electrical route. Access to these elements must always remain open.
The inner diameter of the pipe must be selected in such a way that the cable laid inside it occupies no more than 40% of the total free space. This rule applies to all protective elements (cable channels, corrugations, trays, etc.).
It should be noted right away that the creation of hidden wiring in rooms with wooden walls is a laborious process. After all, the channels for wiring will have to be equipped on their own. The space for the pipes must be freed up by drilling, grooving and recessing.
Vertical channels in the walls should be drilled while laying the log house. In this case, horizontal holes are made after the walls are ready. To make it more convenient to pull the cable through the pipes, an auxiliary cable for pulling (conductor) should be laid in their inner lumen in advance.
Cable routing under drywall, suspended and suspended ceilings
The laying of hidden wiring inside frame partitions, under plasterboard or plastic sheathing, as well as behind various types of ceilings, is regulated by the code of construction rules SP 31-110-2003 (clause 14.15) and the rules of the PUE (clause 7.1.38.). In accordance with these regulations, hidden wiring is allowed to be mounted in two ways:
- If partitions, wall bases or their sheathing are made of combustible materials, then conductors (for example, with VVG marking) should be placed in metal pipes with localization ability, or in closed boxes.
- If building structures are made of non-combustible materials, then the wiring should consist of wires (cables) that do not spread combustion (for example, VVGng), while it should be mechanically protected with non-combustible non-metallic boxes or pipes (for example, a corrugated self-extinguishing pipe).
In both cases, the wiring must be removable.
If the wiring is mounted under a plasterboard sheathing, and the bearing profile is close to the wall, then it is advisable to lay the wires in grooves made in the wall or in plaster.
When laying conductors under ceilings, under plasterboard or plastic surfaces, as well as inside frame partitions, you should be guided by the general rules for installing electrical wiring on combustible or non-combustible building structures (presented in the previous sections of the article).
Underfloor wiring
Underfloor electrical wiring is the ideal way to create hidden cabling without the need for horizontal wall slitting. In this case, the cable (trunk wire) is led directly to the locations of sockets, switches and junction boxes.
The method of creating floor wiring directly depends on what material you plan to make the floors from. In general, it is necessary to be guided by the rules of the PUE already known to us.
If the wiring is installed in the lower layers of the cement floor, then a simple protective corrugation is sufficient for laying it. Of course, inside the screed, you can lay the cable completely without corrugation, but replacing the wiring without resorting to the destruction of the floor covering will not work in this case. By the way, the complexity of repairing and replacing cables (wires) is the only significant drawback of floor wiring, and it must be taken into account when deciding on the type of electrical wiring. published by
Sorted out with sockets and switches, we turn to the essence of things
Electrical wiring refers to all electrical wires and cables laid in a house or apartment. They are designed to supply electricity to household and lighting fixtures. Today we are nowhere without technology, so let's take a closer look at all these cables and junction boxes.
Types of electrical wiring
There are two types of electrical wiring: hidden and open. The structure of the wiring itself, regardless of its type, is always the same: the main power cable is introduced into an apartment or house, which is connected to an electric meter. From the meter to all rooms, supply cables-branches leave. In rooms, cables branch out even more: to sockets, to switches, to lighting fixtures.
1. Hidden wiring
The very name of the hidden wiring implies that the electrical cables are hidden inside walls, partitions and ceilings, they are not visible. Only intermediate or end points are available to our view: junction boxes, switches, lighting fixtures, sockets and meters. Concealed wiring is used in modern panel, monolithic and brick houses. Electrical cables are located in special channels inside walls or behind decorative or plasterboard panels. The cable duct is an ordinary PVC tube, which is embedded inside the panel or laid in specially cut grooves in the walls or ceiling. Such channels end, as a rule, with installation boxes, into which sockets and switches are mounted. The main advantage of hidden wiring is its invisibility. But repair, replacement and redevelopment, especially in monolithic or brick houses, is a rather troublesome procedure: you have to open the walls, and after replacing them, cover them up and paint over again.
 2. Open wiring
 Exposed wiring runs over a wall or ceiling. But open doesn't mean unprotected. For open wiring, either ready-made cable ducts (cable runs) or PVC pipes are used in the same way, in which the wires are laid. In some cases, open wiring is made with cables in double or even triple insulation. So, for example, they do wiring in summer cottages and in country wooden cottages. For open wiring, special sockets, switches and junction boxes are used. They have a closed housing and are mounted directly on the wall.
 Interior designers sometimes use exposed wiring as a decorative element, for example, when implementing a steampunk, country or loft-style project. For such projects, multi-colored wires and cables, wires in a fabric braid, special designer fasteners are used.
  An important plus of open wiring is that its repair, replacement or connection of new branches is carried out without much labor: you do not need to hammer the walls and restore them after work. Minus - the wiring is visible, but for someone this minus can be a plus.
 Wire types
For the laying of electrical wiring, cables and wires are used. For a layman, there is not much difference between these concepts, but when laying the wiring, it is important to know what it will be done with: a cable or a wire.The wire

1. PVS wire

This wire is often used to repair power grids. It is also suitable for making extension cords and cords for any kind of technique. Flexibility and lightness make PVA an irreplaceable assistant for lighting and installation of sockets.
2. PBPP wire

Flat electrical wire with two or three monolithic copper conductors. This is a universal conductor of electric current, of high quality: PBPP can be used when carrying out electrical work in a private house, apartment or in the country. It is suitable for connecting lighting, as well as for mounting electrical outlets and switches.
Cable
 A cable is a series of insulated wires in general protective insulation. The number of wires in a cable may vary. For household electrical wiring, two-, three- and four-core cables with a cross section of 2.5 to 4 mm are used. Wires and cables for household electrical wiring are made of copper or aluminum. Older houses over 15 to 20 years old used to have aluminum wiring. Modern houses are equipped with copper cables: with the same wire cross-section, copper cables are capable of withstanding a large electrical load. In addition, copper cables are more flexible and less prone to oxidation. Important: Try to avoid connecting copper and aluminum wires. In the place of such contact, a chemical oxidation reaction occurs with the release of a large amount of heat. Fire possible. Do wiring with cables of the same material.
1. CableNYM

High quality German cable, consisting of 1-5 cores. It is used for laying lighting and power networks both indoors and outdoors. Its distinguishing feature is a high degree of security. This cable is also moisture and heat resistant, but does not like sunlight, so it must be protected from direct rays.
2. VVG cable

Cable with excellent insulating properties. It consists of one core, which makes it easy to lay inside walls. Most often, VVG is used when they are independently engaged in the installation or replacement of electrical wiring in an apartment. The service life of such a cable is at least 30 years.
Powerful wiring
 For household electric stoves and electric ovens, it is recommended to lay a separate branch of electrical wiring. For this branch, more powerful cables with copper conductors in double insulation, with a cross section of at least 6 mm, are used, special power sockets are installed.
 Junction boxes

 To organize the electrical network of a house or apartment, junction boxes are used, or, as they are also called, branch boxes. They are installed at the connection points, or, if you prefer, the branching of the individual cables of the electrical wiring. There are such boxes in every room. They are usually located under the ceiling. There are two types of junction boxes: flush-mounted and outdoor.
  Concealed junction boxes are recessed into special slots under the ceiling, at the convergence of several cable ducts. The main power cable comes into the box, and cables for powering outlets, a cable for a switch, cables for powering lighting devices: chandeliers, sconces, spot sections, etc. branch off from it. Open boxes are mounted directly on the wall in the most convenient place for this ...
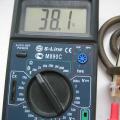 How to make a boiler with your own hands from improvised means?
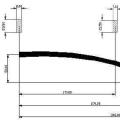 How to make a crossbow: throwing an office battle!
 What to do if neighbors steal electricity What to do if electricity is stolen from a house