How to raise the floors in a private house. How to equip wooden floors in a private house. How to make a wooden floor on the columns
Falling the foundation, the walls are raised, the roof is mounted and windows with doors are installed. You can proceed to laying floors in a wooden house with your own hands. The stage of work is not complicated, but requires a careful approach to detail.
Proper laying of the floor cake is the key to its longer service life. A rather small error with waterproofing and will have to be transferred all the coating in a few years. The lack of info ventilation will result in the same result. And without insulation, it will be necessary not only to walk around the house in warm slippers, but also to fork on additional heating costs.

Chernovaya floor - what is it?

Wooden house It is important to protect against moisture - rotting the buildings very quickly. Therefore, you should not cut the lags in the first crown of the cut, even if they are made of larch and processed by an antiseptic - in any case they will once be changed. Optimally ladding to the foundation and fix after raising the walls.

It is also important to ensure good ventilation of the underground, organizing a sufficient size in the basement or foundation. According to regulations, in the subfield without forced ventilation, the area of \u200b\u200bproduction must comply with 1: 400 sub-field squares. Otherwise, regardless of waterproofing events, the picture under the house will be impartial.


When the floor is ready, you can proceed to insulation. But before laying the insulation, it is worth solving a question with his protection against moisture - after all, the wet of Minvat not only does not preserve heat, but also contributes to the formation of fungus and mold on the adjacent wood.
Waterproofing and vaporizolation - what is the difference?
Waterproofing protects materials from direct water from entering, and vaporizolation prevents the penetration of wet evaporation. Thus, all waterproofing films are stacked outside, and vaporizolation - from the inside. With the walls everything is clear. But how and what to put on the floor?
Under the hygroscopic insulation, on the black flooring of the first floor, it is better to lay any riceproof films, you can even simple polyethylene. They will protect the crumbs or basalt plates from evaporation raising directly from the wet land. At the same time, the expensive membranes, withdrawing moisture, will not be useful here - all evaporations are still rising up. But, given the ventilated underground, increasingly return to the proven time of Pergamin, as the "breathing" material.

But on top of the insulation, it is necessary to put the vapor-permeable films that displays a possible moisture. To do this, leave a special ventilation (minimum 5 cm). If the boards of the lag are not high enough, along them, on top of the membrane, nourish the interface on which the finishing floor is laid.

Floor insulation - why is it necessary?
Even schoolchildren know the principle of convection - warm air rises up. According to this logic, the radiated floor can not produce heat from home. In fact, the heat loss with a cold field reach 20%!

All due to the same convection - the air from the sample rises into the house, turning it out, and the energy is also spent on heating the air in the unheated basement or sudfol.
Each type of insulation has its advantages and disadvantages:
- perlite, vermiculitis, Shungizite - analogs of clamzit, do not absorb moisture, but cost more;
- the foam and its derivatives are not subject to moisture, so it does not need waterproofing, easy and inexpensive, but creates a "greenhouse effect" in the house and is not recommended for wooden houses.


The bulk insulation stacked on solid flooring, the plates and mats can be placed on the rarefied rough floor, it is only possible to put waterproofing and protect the insulation from rodents.
Clean floor and its types
Depending on the desired interior design, almost any gender can be seized in a wooden house:

Wooden floors are perfectly suitable for residential rooms. The main thing is to put good waterproofing to protect the insulation. But the tile is better to put in the kitchen and in the bathroom - places with high humidity.
In addition, there are variations with a warm wooden flooring device and even a concrete screed of lags. So the choice depends only on construction skills and design preferences.

Technology laying floors in a wooden house with their own hands
Warm floors are comfortable, economically and extremely functionally. Especially when you have to dry the winter overalls, jackets and mittens of three children after winter games on the street. And so the entire floor area turns into a spacious battery - sin does not take advantage!
Concrete screed in a wooden house - reliability and functionality
In a wooden house, a warm floor in a concrete tie to do though difficult, but it is quite possible:
- The most important thing when pouring a concrete screed is to correctly calculate the load on the lags in advance. After all, the weight of the finished slab, taking into account the first floor there will be about 150 kg / sq. M and this is excluding furniture and tenants. The pitch of the beams during the pouring concrete is shrinking twice, the lags themselves are lowered to the height of the screed (if the fill is made only in the kitchen and the bathroom, and not in the whole house).
- An excellent way to reduce the weight of the overlap is not to fit the draft floor. It is enough to fix on the bottom of the vapor barrier film by the rails so that the insulation plates do not resist.
- On top of the lag with a mandatory ventilation gap of 5 cm, dense waterproofing is laid. It is very important for all the places of its attachment to the beams to glue with butyl rubber scotch - so that no holes remain through which the insulation wooch.
- Waterproofing is mounted slate or cement-chipboard - they have the best adhesion with concrete. Over the level, the formwork is set to the same height as the future screed. The reinforcement grid is stacked on the substrate from the same slate. The substrate height is about 1 cm.
- The "Snail" of the pipes of the warm floor is laid out. To the grid it can be attached to ordinary cable clamps. It is important not to forget to make a damper tape between the formwork and reinforcement - to compensate for the expansion of the future sex.
- To protect yourself, we produce a trial start of warm flooring systems with high pressure. If the leakage is not detected - you can begin to fill.
- After filling, the screed is better to vibrate and only after that align the long rule. Water with concrete you need 1-2 weeks so that it gained strength. A month later, you can start laying any floor covering.


Wooden floors - simple and beautiful
If the lags are not enough durable to withstand the weight of the concrete slab, do not be upset! After all, you can make a dry warm floor with water heating. For this, there will be boards with grooves under the pipes, and foil is used as a heatwise layer. Laminate is raised over on top. Detail of the whole process is presented to the video:
In the construction of cottages and private house, the important part of the work is occupied by the issue of laying gender. In this case, many nuances and several types of technologies to choose from. The result should delight the entire seven appearance, warmth and quality of the design. The most suitable for these types of buildings flooring is wooden boards, parquet or parquet board.
Why exactly from these materials?
- Compared to tiles, the tree is profitable financially.
- Installation and laying of such sex are possible with their own hands.
- Wooden boards or parquet are characterized by environmental friendliness and have many design solutions.
- The floor with natural wood coating can withstand low temperatures and, with a proper installation in a private house, serves a host for a very long time.
Wooden floor - types
The type depends on the fact that the material is used in operation and for which technology it is stacked. Charming array with sheets and grooves on both sides of the board is the most popular. One such board is in length from 2 to 6 meters, its thickness can reach 60 mm. The presence of fixing elements makes the demand for this type of floor covering one of the highest.
The solid board of glued bar is reliable, there are many options for the thickness of such boards. The folded board has passed all the necessary processing, so it does not need to spend additional forces on Okarivania.
Parquet is familiar to everyone, these are small planks with grooves and tongs on all four parties. For this type, special symmetric laying is characterized, today this option for use in a private house is inferior to the following type.
A parquet board is an enlarged and thickened in several layers of a simple parquet. Length is from 50 cm to 2 meters, and thickness from 18 to 25 mm.
In budget cases, sheet materials are placed on the floor - it is plywood, OSB or chipboard. The appearance with such a type somewhat suffers, but if it is planned to put a carpet or carpet or carpet, then it is justified and the most appropriate case. And also it is suitable for the draft floor, like the uncircumcised board.
Select quality material

Wood, from which boards are made, should not be raw or overwhelmed. If you have made a wrong choice, it will affect the appearance of the flooring. With bad indicators of the board, the floor will be deformed and creaked. Material for the floor cannot have traces of rot, chips, bypass and cracks. When the boards are already purchased, you need to take care of their proper storage: they should be contained in the room, not exposed to moisture or direct sunlight.
In order not to worry about the development of the fungus, before laying each board on the back side, you need to carefully process the antiseptic. There will be no extra solution that reduces flammability of wood, security should always be at the head of the angle when working in a private house. Before mounting, the front side of the board is treated with sandpaper and a planer.
For simple ideas, conventional planed boards will fit, sanded materials are well looking at the design floor. When it comes to wood for the floor, it is better to look at the solid types of wood - this is a larch, pine, cedar, less frequently, oak or birch.
Required tools
The modern owner of the house in the arsenal already has many tools, but the floor laying with their own hands implies the use of a set of consumables and specific tools:
- water or laser level for alignment of lag;
- sandpaper for floor grinding;
- plates for problem areas on boards;
- hacksaw for plating boards length;
- drill for fastening self-tapping screws;
- hammer for plating boards;
- roulette for measuring boards;
- mounting to correct unsuccessful installation;
- mounting stapler to fix the hinders;
- self-tapping screw, anchor, dowel, nails are purchased depending on the type of material used and the area of \u200b\u200bthe room.
Preparation of the foundation and installation of lag
The wooden floor is mounted with their own hands fast enough, most of the time and finance takes the preparation of the base. First of all, you need to take care of waterproofing in the house. This function performs sand with rubble or gravel of the middle fraction. The thickness depends on the humidity of the soil and low temperatures in the cold season. Often, instead, a sufficiently thick layer of clay is poured. It should be used only in dry form, he quickly absorbs moisture, but it gives it for a long time.
The first layer is thoroughly tamped, after which the hard waterproofing is also stacked on top, these are the rubberoid sheets. Some prefer to increase the strength of the design and additionally put the reinforcement grid.

After the end of the waterproofing work in the course of concrete blocks or bricks. They should be at a distance of 60 cm, as this is the standard width of the insulation, which will be placed between them.
The next step of the work includes the installation of the lag on the base in 2-3 cm. Lagging starts from the opposite ends of the room, the level is checked and, if everything is in order, the installation is gradually conducted to the middle of the room. Fasten the lags are most reliable using anchors. To adjust the single height of the lag, you can put additional stands on the base, but not to get involved in it, if the floor has a strong curvature, the problem in the lower layer of waterproofing, which it was necessary to be well dissolved. In order not to redo the first stages of work, specialists use a laser level or stretch the threads, you too can follow their example.

Wood floor as insulation allows you to apply a lot of materials, the main property is high vapor permeability. Sometimes they are combined for better effect, because the floor is the coldest zone in a private house. For example, the first layer is put a foam, and the second mineral wool, often use tree fiber plates in 2-3 layers. But before this, experts are advised to put additional construction boards on the rubberoid between the supports, it will improve the properties of the insulation. They are fixed on the underside of the lag with the help of small bars. This type of installation is called a draft floor.
Stop the insulation is needed tightly to each other, avoid gaps and cracks, it will be best to walk with a sealant or mounting foam. A layer of hydro-vapor insulating material is placed on top of the lags, it is not used in all cases, and when mineral and ecological wool used as the first layer of insulation. Isolation sheets are mounted in the adhesion. In addition to specialized materials, it is possible to use a simple polyethylene film. The jokes pass tape.
Methods for preparing the base for laying lag also include concreting, it is much easier than the previous multi-layer option. Concrete is a solid base and you can choose lags easier, construction studs are used for their fixture 8-10 mm. Nuts the hairpin is limited on both sides. After installing the lag, the sheet material for the trim is applied immediately or the insulation is placed.
Wooden floor - styling do it yourself
Mounting in the house from the window opposite the entrance begins. It is important to remember that the vent hole in 10 mm should remain between the walls and boards.

Conventional boards are fastened with self-tapping screws. Nails in our time are much less used, as they are not protected from rust and when wearing fasteners, make the creaking in the flooring. If the board lengths are not enough to cover the entire floor, it is cut so that the joke is above one of the lag. With this, they avoid sending boards and extraneous sounds.
The laying of boards with sheets and grooves will go much faster, for dense adjacent grooves, one auxiliary board with a blunt edge is used, which strikes hammer blows. If the boards are short, then you can immediately lay them in two jokes.
Without the last place it is worth paying the figure of an annual rings on the boards, they should be laid so that the rings are rotated in different directions. Where tubes pass, you need to leave slots by 5-10 mm more diameter of the pipe itself.
The latter element of the floor laying in the house becomes the plinth. Since when installing the boards it was necessary to leave 10-15 mm, the plinth will start this space and the wooden floor will "breathe".
The concluding stage in the installation of a wooden floor with their own hands - grinding, if it is necessary and covered with the whole surface with varnish. In compliance with all these conditions, the floor will last long and will delight with its warmth and quality.
Normal living conditions in a private house are unthinkable without flooring of warm floors. From how correctly the carrier floor design was chosen, elements of isolation and protection were made, it depends on how healthy the atmosphere in the room. Would we like the floors in a private house with their own hands, any person who has a clear idea of \u200b\u200ba home-floor device will be able to collect and put the coating, even without having a joiner or carpenter.
Wood floor device options
Concrete or stone varieties of sex in a private house today - a rarity. Even with a powerful thermal insulation, turn them into truly warm floors in a private house is almost impossible, so most owners prefer to build a wooden floor in a private house with their own hands. With proper care, the floors from wooden boards can stand out several decades, but they still need to be repaired periodically, update and restore.
Traditionally, a warm floor option in private home ownership can be made in three ways:
- Make the laying of classic flooring from boards, with insulation of minvata or frosting from the clay;
- Flooring from boards on lag beams laid on concrete pie, with thermal insulation of polystyrene foam;
- Make laying lag beams on columnar supports.
In the first two cases, the fertile soil is replaced by the rammed layer of gravel and sand, a switched rubberoid cloth. If the insulation of the floor in the private room to make a filling of clay, then, in addition to the main floor, it is necessary to put the draft base from the board. On top of the backfill, you need to make a film vapor barrier, after which make the laying of the new floor from the polished board.

In the second case, make laying of warm sex on lags, based on a double concrete tie, insulated EPPS and reinforced by reinforcement grid. Lagged beams can rely on the base of the walls or threaded studs.
Both options are quite effective, but today they are considered too expensive, since the studio with a concrete cushion and massive suspended lags will explicitly cost a decent amount. To date, in this way the flooring is made in a relatively small private room, with an area of \u200b\u200b10-15m 2. How to make a warm floor in a private house in an affordable way?
The most modern and easy assembly is considered to install the floor of the boards on the columnar supports. When choosing a way, how to properly make the floor in a private house, you have to take into account the complexity, the cost of installation and the opportunity in the future to repair the wooden floor in a private house. Installing beams on the columnar supports allows you to cheap and safely make the floor assembly in a private house of almost any size. You can make the repair of floors on the pillars within one day, and to repair the studs or a long massive beam of the suspended lag is not so simple.
The concrete pillow under lags allows you to dramatically reduce the humidity and the loss of heat in a private house. Initially, it will be necessary to make a crushes with sand with sand, lay the waterproofing film, a layer of insulation, and close the concrete layer, 40-50mm thick. Experts are recommended to make a screed, if the soil is soft, and there is a danger of penetration into rodents underground.
Build wooden floor by optimal scheme
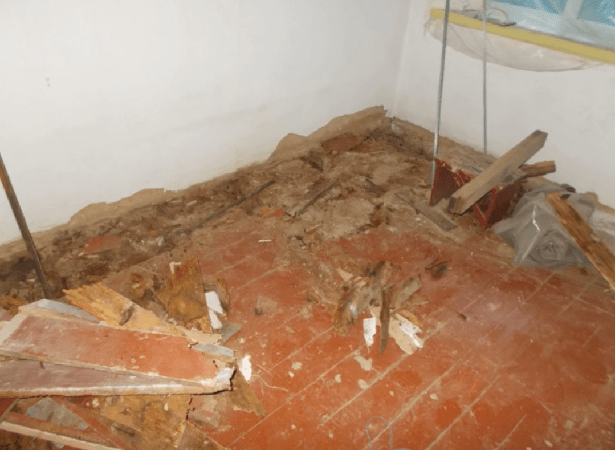
The most difficult version of the floor arrangement is associated with the replacement and alteration of the entire carrier structure in old private houses, which is several decades, and most of the lag beams and boards are rotten and turned into a duch. The situation is complicated if the primer in the subfield of the private house is too wet. In this case, you have to look for a way to make wooden floors in a private house so that they are preserved and stood at least a couple of dozen years.
The sequence of new flooring in private house-building can be divided into several stages:
- Make cleaning and preparation of soil in the subfield;
- Collect columnar supports and waterproofing;
- Establish lag beams;
- Make the preparation of a t-shirt to laying;
- Perform installation of insulation and vaporizolation;
- Make the boarding board and decorative coating finish.
Tip! If you plan to make a rework and replace the wooden floor in a private house, purchased a pre-t-shirt board to fold in the room where the repair is assumed. In this case, in a couple of weeks, the dry board will take the background moisture content of the room, which will save from the squeak and skew of the flooring in the future.
Preparing supports and ground base
How to make the floor in a private house? Initially, it is necessary to free the room in a private house from all elements of the design of the old floor. To make sanitary processing, any boards are mercilessly cut and removed, even those that in appearance do not look amazed or rot. Often in the boards of the old fired floor there is a large number of dispute of pathogenic microorganisms, so it is necessary to make floor repair in a private house.
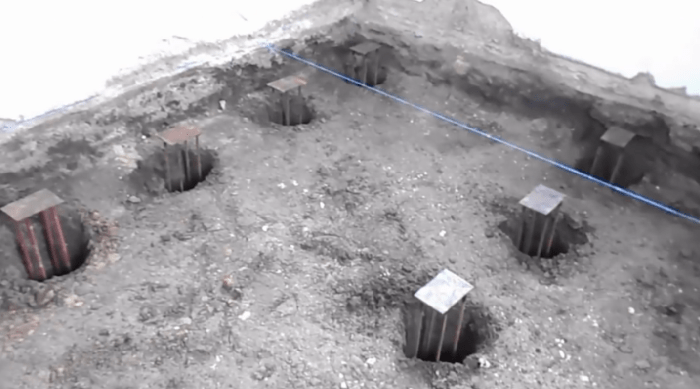
The ground pillow will be removed by 25-30 cm, and make a thorough traam. By the area of \u200b\u200bthe room, several rows with increments of 100-120 cm drills a hole of the hole with a diameter of 30 cm. An intercussion interval is 0.6 m.
Make reference poles can be used in two methods - folded out of the brick or make the concrete mass casting into a polystyrene form. The second method is more accurate and fast. Each support is reinforced by four vertical twists, a thickness of 12 mm, welded to steel horizontal plates, in size 15x10 cm. The support frameworks are laid into the bored holes, the upper plates of all supports align in the same plane by hydraulic level. The room with dimensions of 3x4 m took 18 supports.

Four-grade polystyrene molds are installed on the aligned frames, pour them with concrete M300, with an additive of 10% haired lime. After 4-5 hours, the shapes are removed that the welding goes fine, the metal frames of frames must be made clean to the brilliance.
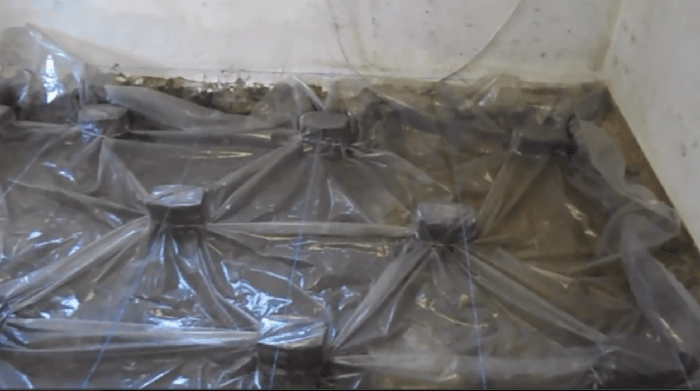
Waterproofing the floor in a private home room is made of thick, at 0.8 mm, a plastic film that is stacked on the ground. In places of lifting of the column supports, the film is primed to each tape support, the film section on the ledge of the support is cut to release the metal plate on the post.
A five-point meter of fine rubble and a ten-grant layer of a mixture of dry sand mixture with an overexheasted lime, in proportion of 1: 5, is poured on the laid fiber of waterproofing. Such a mixture will make it impossible to penetrate the remnants of rotten microorganisms from the soil to the floorboards in the private house.
How to make a support lag, laying vaporizolation and insulation
For fastening the lag beams on the bar supports, it will take to each horizontal plate to weld the vertical shelf. The support beams are attached to the welded plates with the help of a threaded stud, pairs of nuts and carbed washers.


Due to an increased 1 mm diameter of the hole in the beam, during installation, the carrier surface of the lag can be cut and aligned in the horizontal plane, as in video:

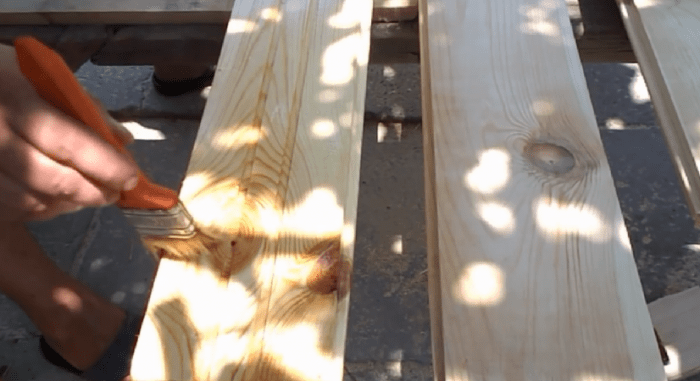
Beams, cross-section of 100x60 mm, before installation are processed with oil varnish and oil.
At the next stage, it will be necessary to make the laying of the 15-centimeter layer of mineral wool and vaporizolation. Mineral wool is placed in space between lags, after which the lag beams in the transverse direction stretch the vapor insulation material. Film Brepim to lags with a stapler. Separate canvases can be glued together with the help of bilateral construction tape over the red separator line.
Tip! Do not use for the insulation of gender, ceilings and the inner surface of the walls in the private structure of the foam, especially Chinese or domestic production.
Stacking board and finishing wood floor in a private house
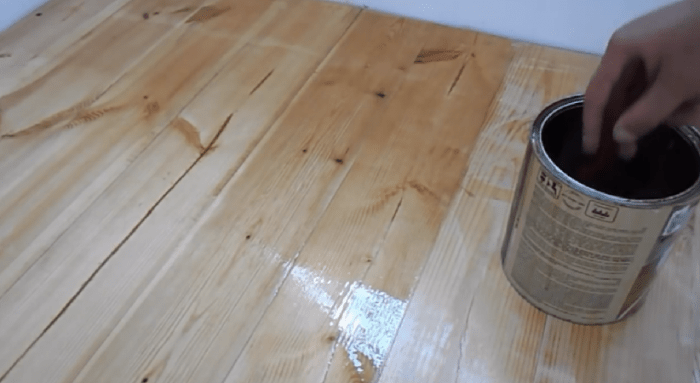
For flooring in a private house, a pinned pine board is used, a thickness of 40 mm. The presence of a groove and protrusion allows you to get a very strong connection of all boards in one plane. Before making laying the floor in a private house, the boards must be treated with an antiseptic, thoroughly dry, and then cover with varnish.
Before laying boards to lags, it is necessary to make a gap with an indentation from the wall of the private house in 10-15 mm. The air clearance allows you to align the moisture in the subfield of the private house, and at the same time plays the role of the compensator when expanding the boards. Stacking the first board must be made spike to the wall. Each board is fed to the lag with black carpentine screws, 50 mm long, threaded along the entire length. Halves - self-tapping screws with rolling threads ½ fastener length, for installation of floor in private house-building is not suitable.

Self-tapping screws in the groove boards at an angle of 45 o with the help of a screwdriver. Before fastening the board is brought with a hammer through a wooden bar.

After screwing the self-pressing in the grooves of the board, microscols are formed from the deformation and raising individual fibers of wood, they must be neatly cut off with a knife, otherwise the spike of the next floor will not go completely into the groove, which will result in the formation of the slot.
After laying the boards, it will be necessary to make additional surface treatment. One layer of lacquer coating is not enough for reliable protection against moisture penetration into the thickness of the wood. Therefore, before re-lacquer, the floor surface is treated with a sandpaper to knock the gloss and make the floor covering smoother. After the end of the work, the surface is cleaned with dry, pure rags or vacuum cleaners.
A 10% solvent is added to the pentafthalic varnish, achieving the lacquer mixture easily fluid. It is better to make the floor varnishing with a wide soft brush, intensely rubbing the lacquer into the wood surface. Gradually, air bubbles will leave, and the second layer acquires a smooth surface. After twelve hours, the lacquered floor surface is moisturized, and after a day, make a dry polishing.
Conclusion
Purchased boarding boards purchased to repair the floor, before proceeding to flooring, it is necessary to go through and measure the size of the groove and spike sizes, the presence of defects in the form of bitch and sleep. If in the array of the board there are ring defects, when laying and climbing, they can fall out like plugs. On average, a hundred calibrated boards accounts for a couple of defective, even when buying a building material for repair in a private house in a corporate store.
The simplicity of the facilities of the board was the apparent. And it's not just that it is necessary to take into account the limit load; For example, for floors of the ground floor of the private house and attic it is different. Wood - Material Although fatty in the processing, but in its own way "capricious", since it is easily exposed to deformation when moisture and temperature changes. In addition, there is a specificity of its laying depending on the type of base (overlap). With your own hands, mount the quality wooden floor really, only sobering with all the nuances of this work.

Wooden floor - the concept is somewhat blurry. Basically, when it comes to this design of the lower part of the room, it is implied by laying on the carrier board. But if further, "finishing" finishing with a different material (laminate, parquet or something else) is supplied, then used mainly products (slab, leaf) based on wood - plywood multilayer, chipboard, ardam, MDF.
The main purpose of such a flooring is the maximum leveling and ensuring sufficient surface strength. But about the wooden field in a private house as such in such cases, it is not necessary to speak; This is its intermediate option, "purish".
How to choose the boards? When arranging wooden flooring in a private house, it is not worth unequivocally about them. Otherwise, there will be such problems (cracks, grooves in the flooring, deformation of individual flooring) that subsequent repairs (taking into account the complexity of the work related, including, and with the need to free the room from everything) will be significantly more expensive.
Type of blackboard. Only tipped. Its processing it with your own hands at home is a very complex process that requires practical skills corresponding tools (which is not in every home), time and separate room.

There is another option - from the adhesive bar. But this lumber is used, as a rule, in the rooms of the private house with a high load on the floor, as it is worth it is expensive.

- Linear parameters (mm). Here it is necessary to take into account that the tree should ensure not only the high strength of the flooring, but also good thermal insulation of the lower part of the room. The optimal dimensions are considered: the total thickness is 45 ± 5 (depending on the specifics of the room), width - in the region 150.
- Wood moisture. 12% is the permissible upper limit of its value. Therefore, the industrial drying board should be purchased. Naturally, it will be expensive. But all the recommendations on the issue of how to remove the excess moisture from the tree on their own - no more than profanation. It is necessary to choose an appropriate place on the site, produce a competent stacking of lumber, organize its protection against moisture, good ventilation, an acceptable temperature mode. And what is important - wait. And this is time. Moreover, the high result is not yet guaranteed.

- Tree fortress. And in this regard, to acquire cheap boards is irrational. Not only are the big flaws in the form of bitch, chips, and so on will not hide even paint, especially lacquer. The defects of the flooring during the operation of the floor of the wooden will begin to manifest everything more effectively. Cracks will only increase; Bounds to fly out of the boards, and in their place will appear "pits" or through holes.
- Wood breed. It is advisable to withstand the optimal ratio between such properties of lumber, as durability, beautiful texture and resistance to changes in geometry under the influence of external factors. Experienced masters recommend paying attention to oak and ash. Such boards are expensive, but for wooden floor is considered the best, as they are able to carry an increased load.

If this factor is not determining, larch, fir, cedar or pine are perfect for floors.
- Degree of protection of wood. In production, more expensive products are impregnated by special / preparations from rotting, ignition. This can be realized (even recommended) with your own hands, but only in terms of secondary (additional) processing. Industrial technology at home will not be able to recreate, therefore, the quality of work will be low.
What are lags used? Here you need to understand that in the process of operation, any materials (let it be visually and imperceptibly) change their geometry. Consequently, the integrity of the design depends on how the coefficients of the deformation of its elements coincide. For the wooden floor, metal products (although it is more convenient to work with them) are not suitable, only lumber. Recommended timing parameters - 100 x 100. This is a universal choice for floors in any room. Smaller samples (for example, 50 x 50) will have to tightly "fasten" to the screed (otherwise the flooring will "play"), and this is not always possible or rational.
When should it be engaged in wooden floor? The best period of experts consider the end of March - the beginning of April, that is, before the end of the heating period. Justifications are several.
- At this time, it is easy to achieve the most comfortable conditions for such work. If necessary, you can organize effective ventilation so that wood dust does not overwhelm the room. Then the technical devices will not be needed.
- Optimizes air humidity indicator in the room. This ensures that the lumber does not build water, except in minimal quantity.
- The nuances of the arrangement of the screed is such that we will have to expect her complete hardening. And the worse the external conditions, the longer.
As an option - in the summer. But to the arrangement of the wooden floor, it is necessary to proceed if the weather forecasters guarantee sustainable dry weather at least for the next 10 days.

Preparatory work
Next - all stages, regardless of the specifics of the premises in the private structure. What needs to be performed in relation to the specifics of a particular room (location in the house, dimensions, degree of furniture, and the like), it is easy to understand.
The foundation
It may be overlapping, and the ground, if the floors are arranged on the ground floor. In any case, a number of events are held.
Estimation of the state of the surface and elimination of deficiencies
With regard to the Earth, it is thoroughly aligned, compacted (the simplest tamping is easy to make it with your own hands), and the sand pillow is satisfied (the recommended thickness of the layer layer is about 20 cm). It performs two main functions - more accurate planning (alignment) and mitigate the possible deformation of the upper levels when the load changes.

- If we are talking about concrete overlap (inter-storey), the plates are carefully laundered, after which the existing defects are detected during the inspection. Any cracks, saved joints close up. Otherwise, in the future, it is not possible to avoid possible leaks to the lower room and heat loss.
Waterproofing base
If the base is soil, then it is advisable to immediately cover it right away. Depending on the size of the room, you can buy or a membrane that the floor will cover completely (it will be more expensive), or produce its peculiar analog, which has a few cloths by welding (need a special device) or scotch, putting them with the allen. The nuance is that the edges of the film should be cut up, approximately the level of the intended installation of the plinths. They are excess waterproofing and closed.

Streach arrangement
This is a separate and fairly large topic (the composition of the mixture, the ratio of components, the rules of the kneading nuances are sufficient). Therefore, only the highlights.
Materials are chosen based on the financial capabilities of the owner of the private house and the type of surface. If we are talking about overlap, the screed is made thin, leveling compositions. For the ground base, it is advisable for waterproofing to float clamps.

Pros of this decision:
- round (comparatively) granules P / E film under no circumstances will be damaged. If you use rubble, then its breakthroughs in several places will be unambiguously;
- ceramzite is a good heat insulator. Therefore, on the insulation material (if it is mounted) can be somewhat saved.
The recommended layer thickness (in mm) is from 40 to 100. It follows to the dimensions of "pebbles"; Than they are larger, the more the layer is required, since the gaps that increase the heat loss are formed between them. The small granules are stacked quite tightly, therefore the layer can be done smaller.
Council. Costs can be optimized if you purchase grazit of different fractions. Then it will be enough of its thickness no more than 50 - 70. But only well-dried granules are needed; They will delay the surplus moisture "on themselves" (that is, absorb), additionally protecting the tree from dampness.
Lighthouses are preferably installed and dug away immediately, to fill the solution. After it, the alignment will have to wait for a complete burden of the screed (at least 4 weeks, and then, under favorable conditions in the house). This largely explains why experts recommend certain periods for the organization in the private house of wooden floors.

Accelerate this process artificially (using technical devices in the form of calorificates, heat guns, and so on) it is impossible. Such rationalization will turn into the fact that the screed across the depth to seek will be unevenly. The top layer will grab quickly and literally burst the surface. This sharply reduces the intensity of the evaporation of moisture from the lower levels. As a result, a decrease in the strength of such a base and the appearance of cracks.
Installation Lag.
In a private house, they can fit directly on the basis, without the arrangement of the screed (for example, in the basement). In this case, it is advisable to prepare small brick racks. Here, the main attention is to the upper cuts of such supports. They must be located in one (horizontal) plane. To prevent the displacement of the bar in the center of each rack, a metal pin or wooden insertion is placed. How to fix a lag in one case, guess it is not difficult.

If the lags are laid directly on the ground or tie, the lower planes of the bar preferably to be treated with tar. The work is simple, and there is no money for it. Plus this solution is an additional protection of the tree from absorbing moisture from the raw surface.
Sometimes the carrier frame (suit) is mounted on the supports to which lags and "fasten" with self-draws. As a rule, this is done when they are placed directly to the ground or stove, since the cushion of the perfect alignment can still not provide.

The recommended interval between lags is the order of half a meter. If more - the strength of the flooring is reduced; Less - the consumption of materials and the load on overlapping increases. In addition, there will be problems with the installation of the heat insulating layer.
Wood floor insulation
Do this or not worth it - to solve only the owner. This largely depends on the specifics of the room. But if it is unheard, or dwelling, located on the lower floor, then additional thermal insulation in the form of clay and the boards themselves are clearly not enough. The optimal choice for wood floor insulation is Minvat. It is sold in various modifications, but products with the ECO prefix are considered the best for a private house.

The material is elastic, therefore, even when the axial lines of the lag (the curvature of the "cells"), the mats simply put quite simply; They are slightly compressed and easily installed at the place. And after the straightening, it is securely held between lags, while there are no slots along the line bar - insulation. Consequently, the sealing of gaps is not required.
Choosing Minvatu in thickness, you need to focus on after installing mats (plates) between lags, they have been slightly lower than their upper cut. It is necessary for education under wooden floors of a small space, which can freely circulate air. Natural ventilation contributes to the removal from under the flooring of the excess moisture, thereby preventing the boards and the insulation from dampness.
Installation of clean floor
It is conducted in 1 or 2 rows. The single-row floor is arranged, as a rule, in the subsidies, country houses, sheds, and the like. For most of the rooms of the residential building - only if a thick board is selected or an "finishing" manifice is expected to parquet or laminate.

With a double milkboard, the board field is taken by a thorough (here the main thing is the total thickness of the flooring). The advantage is that a cheap sawn timber is suitable for the first level; And it gives some savings. Sometimes the hosts of private houses are laid between the rows of the film, which also partially reduces heat loss and increases the degree of waterproofing.

Wood floor laying features
- A small gap is left between the walls and flooring (about 1.5 - 2 cm) in order for the flooring not to start brewing in the temperature expansion of wood or its wetting. In addition, such a mounting scheme ensures effective natural ventilation of space under the floor. Consequently, the risk of appearance on molds and fungus comes down to a minimum.
- The first board (from any edge) is attached to lags hard; And self-drawing. If you use nails, then there will be problems in the future - separate floorboards will begin to "play", and the creak of boards will be heard in the house.
- Their fit is done with the help of a hammer and a piece of blackboard, carefully, so that the spike tightly entered the groove along the entire length of the sample. But this is in the case of the profile board. If the usual edged, the technology changes.

First, extreme boards are fixed on the lags. All others, in turn, are stacked between them simultaneously with both directions. Naturally, the center of the room will arise complexity; The last floorboard will not be skilled at the place. They put "house", and then pressed, getting up on his "horse".
The last stage is to screw all the boards to lags in advance points. The chamfer is pre-in each of them so that the fastener head is completely "drowned" in the tree.

- It has already been noted that self-tapping screws should be used as fasteners. The nuance is that it is necessary to choose not ordinary products, but coated against corrosion. Otherwise, spots of rust will appear rather quickly in the locations of the boards.
- On the lines of the joints of the flooring, it is advisable to "walk" with a grinding machine. If wooden floors are equipped in a private house, it is worth buying it; She will be needed, and more than once. The processing of seams will smooth out the existing irregularities between the boards. This is especially true for the flooring, which is supposed to be covered with varnish, which is most often done to save wood texture.
It turns out that when the wooden floor is in a private house, it is quite possible to do without services of professionals. Following the recommendations given, all stages of the work is easy to fulfill and do it yourself.
A very important stage of home arrangement is the choice of a suitable floor covering and its proper installation. One of the most preferred options is the flooring of a wooden floor. Wood - environmentally friendly, "breathable" material with excellent operational and properties. In the presence of due knowledge, you can cope with the installation of such a coating with your own hands.
Choose suitable wood for flooring. At this stage, you need to take into account the climatic conditions of the region, the level of planned loads on the surface, the features of the operation of the room and, of course, their financial capabilities.
In small residential premises, it is best to lay filling from coniferous rocks. Such material is sold at a relatively affordable cost, differing, with quite high strength and durability.

From representatives of the middle and highest price range, give preference to the oak. Also, the aspen wood is used to improve the floor. Such material especially is well suited for floors in children's rooms, as well as in bedrooms.
For independent flooring, coverage in residential premises can be used exclusively dry wood. The problem of raw boards is that in the process of drying, they decrease in the amount, which is why ugly and absolutely unnecessary cracks appear in the coating.
When buying a material, make sure that there are no noticeable defects like splits, third-party spots, cracks, etc. Do not buy such wood even with a good discount.

Pre-calculate to determine the required amount of material. To do this, you have enough to know the area of \u200b\u200bthe premises. Book the material itself with a 10-15 percent reserve.
For the flooring, it is recommended to use a board with a length of 200 cm. It is extremely desirable that all the boards suggested to you are in one batch. So you will be confident that the entire acquired material has been manufactured and processed in equal terms. Therefore, the texture, color and other external characteristics of the boards will be approximately the same.
The flooring is best done using a edged and tipped board. Such material does not require additional grinding, which will allow you to significantly save time on the installation of installation.

Wood flooring can be performed using several different materials, namely:
- array boards;
- parquet board of massif;
- glued parquet board. It has the same appearance and practically does not inferior on the operational characteristics of the parquet chalkboard from the array, but it is cheaper;
- parquet.

Preparation for flooring
The flooring is performed in two layers. First placed the basis after - directly wood.
There are two main ways to install the flooring: styling on the soil to lags and on the beams of overlapping. When choosing a suitable method, consider the specifics of a particular room and your personal preferences.
Before installation, carefully treat all the wooden elements of antifungal and fire impregnation.
The base of the elevated floor is necessarily waterproof. For moisture insulation, it is convenient to use foam or polyethylene. Penofol simultaneously provides high-quality hydro and noise insulating properties, therefore it is more preferable.
Installation of the base
Foundation functions for independent flooring can perform lags, plywood and concrete. Check out the features of the methods and select the most suitable for your case.
Base on lags

The fastening of the flooring on the lags is the most popular option for the flooring. This design allows you to easily and effectively hide the irregularities of the floor and without any problems to lay various communications under the basis.
The base is collected from the bar 10x5 cm. In low rooms from this method, it is better to refuse - the finished design takes about 8-10 cm of height.
Before starting to mount the base, the lags should be taken into the room and give them to lie down a couple of days so that the wood material adapts to its surrounding conditions.
Step fixing the lag pick up in accordance with the dimensions of the boards used. It is important that in the future the boards did not begged.
First step. Place the opposite walls in one lag at the same level.
The second step. Tension between lags lags dense parallel threads. The distance between the threads depends on the thickness of the flooring boards. If your boards have a thickness of more than 3 cm, pull the threads at a distance of about 80 cm, if the elements of the flooring thinner 3 cm, then the threads need to be stretching at a distance of no more than 60 cm. In the case of boards, more than 4 cm thick can increase the distance between the threads up to 100 cm.

Third step. Set lags, focusing on the strained threads. Adjust the height of their installation with wooden wedges. It is important that all lags are installed strictly at one level.
Lags must be copped with the base. If the base is made of wood in your house, fix with screws or nails, if you use a dowel or anchor from concrete.

Fourth step. Fill the space between adjacent lags heat-insulating M material. Can be laid foam, minvatu, ceramzite, etc.
In the process of flooring, the board will need to be attached to each installed lage. Pre-in the material you need to prepare holes for self-tapping screws. In this you will help the electric drill with the drill of the corresponding diameter.

Excellent foundation for the future flooring of high-quality floor can be made of plywood. Quality plywood is almost not exposed to strain during the use of sex. The material is characterized by high strength and reliability.
If necessary, the floor on the plywood sheets under consideration can be quickly and easily removed. When laying a reason, you do not have to carry out any additional work - the flooring is mounted directly to the plywood sheets.
First step. Place the plywood sheets on the base and with the help of an ordinary chalk draw a scheme of future laying of elements. Focusing on this markup, you set the lags, and put the sheets of plywood on them.
The second step. Set lags. The optimal step is 400 mm. Align the lags with linings from the same plywood. All items must be installed strictly at the same level. Aligned lags attach to the base. Pick the fastener according to the base material.

Third step. Clear the finished glue design so that in the future the floor does not crack.
Fourth step. Cover the system with rolled pergamine or other material with similar properties.

Fifth step. Lay the Phaneur. The edges of each sheet must lie on the lags. Plywood sheets themselves place with a small gap, not more than 1-2 mm. Use the screws for fastening sheets - about 8-9 fasteners for one sheet. The joints of the joints carefully polish.

If you wish, you can align the concrete base using a screed and lay the flooring directly to the floor, without an additional base device.
In such a situation, it is important that the boards cannot directly contact concrete. With the functions of the intermediate layer, the ground mastic or ordinary foamed polyethylene will exceed perfectly. When using polyethylene isolation sheets, place 10-15 cm with an adhesive.

First step. Getting Started with boards from any wall. Between the wall of the room and the starting row boards, leave a 15-millimeter gap. After the installation is completed, you will close it with a plinth. Self-tapping screws or nails drive under a small angle, trying to deepen fasteners in wood for about 2 mm.
1 - lag; 2 - bracket; 3 - wedges; 4 - Dobobochnik
The second step. After installing the first board, the flooring back up about 50 mm from the edge and led into the bars of the brackets with a non-essential gap, and then insert a thin rail to the slot after this.
Third step. We take a wooden wedge with a slightly longer clearance between the installed rail and fixed brackets. Thanks to the wedge of the edge of the placed boards, it will be pressed as close as possible, which will prevent the appearance of the gaps. Staples can be removed after fixing the boards with self-draws or nails.

a - construction bracket; b - wedge shy with a movable bracket; in - Walking
1 - bracket; 2 - wedges; 3 - lag; 4 - spur; 5 - emphasis; 6 - mobile bracket; 7 - clamping screw; 8 - stops; 9 - gear wheel with ratchet - a dog; 10 - handle; 11 - Screw with focus
That is, you need to work according to such a scheme: they put a couple of boards, pressed them with the help of the rail and wedge, recorded themselves with self-draws. At such a scheme, put all the flooring. Before the attachment of each next board, it must be additionally sealed using a pile.

Fourth step. Collect the locations of the butts of the boards.
Fifth step. Hide the slots between the walls and boards using an outdoor baseboard.
Sixth step. Place the finish coating, for example, a parquet board or any other material at its discretion. You can do without the finish line, and simply paint the boards, cover them with varnish or other composition.
Wood is high-quality and durable material with excellent operational and properties. However, that the flooring is able to fully show its properties, from you, from you, both the performer requires the exact execution of the instruction and compliance with the obtained recommendations at each stage of work. Follow this simple leadership and everything will work out.

Good job!
Video - Wooden flooring with his own hands
 Why you can not give icons
 Is it possible to give icons as a gift: Signs, the opinion of the Church
 A year ago left her husband, and now I do not know what to do