Crafts from wood do it yourself for beginners. Tree crafts: Interesting options and methods for making crafts from rustic water trees
Each season, designers come up with new interior design options. Some offer to use ultra-modern materials, others insist on an old-kind classic, and the third are used as elements of the decor of the ex-in-use wood. If you look closely, the third option looks quite effectively.
1. Floor design

Creative designer coating consisting of a variety of pieces of small wooden bars with their unique patterns - a brilliant idea for the design of the floor in the hallway or indoor patio on the country site.
2. Parquet on the walls

Parquet has long ceased to be material used exclusively for flooring. Walls decorated with parquet boards folded into the original ornament look much more effectory, making the room amazing and completely dissimilar to others.
3. Tumba

The easiest and most practical way to use unnecessary wood, make a small tube from it. The finished product can be painted and decorated to your taste, every time getting a unique item made by pattern.
4. Narrow shelves

Thick pieces of coarse wood can be used to create original narrow shelves designed to accommodate dishes and decor items.
5. Hours

An extraordinary watches in rustic style, which can be made from small pieces of wooden bar.
6. Coffee table

From wooden bars of different magnitude, you can make a completely unique coffee table, which will not be exactly from any of the acquaintances.
7. Staircase

An interesting, unusual ladder in the style of Loft, built from dark wooden boards, will become an amazing detail of the modern house.
8. Coffee table

The original coffee table, which can be made with your hands from thin wooden planks and glass countertops. The finished product will fit into any space, regardless of the appointment and style of its design.
9. Stellazh

A completely unique rack that is not difficult to make a piece of coarse wood and several narrow glass shelves.
10. Organizer

The desktop organizer, made of thin wooden sleepers, with a place for a phone and several handles, will become a small, but significant and stylish desktop item.
11. Rama

Transforming an ordinary mirror will help a massive frame made of coarse boards. This frame is not difficult to make your own hands or buy an already ready copy.
12. Tray

A decorative tray made of coarse wood can become a spectacular detail of the home decor and a stylish basis for various compositions.
13. Accent Wall

The accent wall, sheathed with wooden boards, will help create a comfort and bring the latter nature in the interior.
Products made of wood, created with their own hands, do not lose their relevance. The room or garden with wooden crafts looks comfortable and originally. Often, the remnants of boards from repair or construction are used as a material, so such products not only decorate space, but also save the budget.
Production of wood products with the right choice of a niche may be a very profitable event. At the same time, this earnings has both pros and cons.
Wooden products are not difficult to create with your own hands, but so that they use constant demand from buyers, it is necessary to do things modern, therefore, without a creative approach and fantasies here can not do.
Consistent consumers show interest in wooden toys. Among the usual filled toys, which are already created for more than one century - a bear, horses on wheels, machines and cubes, modern parents more often buy educational toys. These are a variety of visuals, puzzles, puzzles, catal.
No less interesting direction - the creation of souvenir products. Tourists are happy to buy ethnic crafts for memory, created with their own hands. The interior products made of wood remain at the peak of fashion for a week. Moreover, the tree looks great even in the most modern interiors, such as Loft and Haytec.
Plus wooden things that they can be manufactured from remnants from wooden production, such as furniture. This means that the cost of material is low.
Tools for working with wood
Tree soft material and relatively easy to handle. In order for the work to be enjoyed, safe and fulfilled with the best result, it is necessary to have a standard list of tools in arsenal.
Instruments:
- Ax. Need to carry out draft preparatory work.
- Hacksaw. This is a hand tool for sawing wood in different directions.
The focus should be based on the sizes of teeth. Little teeth allow you to do neat cut, but it will have to perform it for a long time. Big teeth on the contrary - saw quickly, but after cutting it will be necessary to additionally handle edges.
- Plane. Used to align the surface of the tree.
- Chisel and chisel. Both instruments are needed to perform holes, holes and other recesses in the product. The chisel is used for more accurate, "jewelry" work and there are different configurations, depending on the task.
- Stuslo - A device that is intended to perform accurate and smooth cuts at different angles.
- Electrolzik. Used to cut the board with a thickness of up to 0.5 cm.
- Circular Saw. Tool that saws thick boards.
- Grinding machines. This power tool is possible to quickly and efficiently perform the finishing processing of the wooden surface.
- Drill for drilling holes.
You also need to have a roulette, ruler, clamps, a screwdriver.
How to make simple wood furniture do it yourself
Wood products with their own hands for home or garden is not difficult, but the presence of desire, product schema and some tools for wood work are required.
Stool
Start the manufacture of wooden furniture is better from a simple toaster.
For work it will be necessary: 
- Bruks with a cross section of 50 mm.
- Sitting boards.
- Saws.
- Metal corners.
- Carpentry glue.
Stages of work:
- From the bar you need to cut 4 legs with a length of 50 cm.
- Next follows from the boards to form a layout of the future seat with a size of 35 * 43 cm.
- From the bar you need to cut the kings (placed immediately under the seat) and the prodes (fasten the legs with each other for greater stability).
- All billets are required to sand emery paper. First, you should use the sandpaper with medium grain No. 40-60. Finishing need to perform fine grain - 100-150.
- Alternatively, it is impossible to fix the details of the stool only with the help of self-tapping screws, because it quickly looses and come into disrepair. At each end of the kings and prodes, the spikes should be cut off, and on the legs the grooves for spikes.
- The size of the spike must correspond 30% of the width of the tsargi, the length is 80% of its width.
 Wood products do it yourself: step-by-step
 - Then you need to cut the grooves, taking into account the calculated spike sizes. For this, a drill with a thin drill to make holes around the perimeter of the intended groove. After that, using the chisel, it is necessary to make a deepening in the leg. It is important to monitor the sizes of the groove.
- Next, the jigsaw and the rashpil on the kings and prodes should be chipped. During drank, it is necessary to try the spike to the groove, if necessary, to fit it under the desired size.
- It is recommended to collect stool gradually by connecting 2 legs with each other with the help of the Tsarg and the pod. Before inserting a spike, you need to put a drop of joinery glue on the inside of the groove. Collect the product is required carefully, since it takes a complete drying of the glue 24 hours.
- Seat boards also need to glue. To do this, you need to cry with one side and pull the clamp until the glue is dry.

- Final work must be carried out after drying the joinery glue.
- Tsargi and legs must be copped with corners, for stability and fortress.
- The seat is required to fasten on the legs with self-draws.
Folding table
Such a table will be appropriate on the balcony or loggia, as well as in the kitchen, if it is small. The main thing in the manufacture of the folding table is to make a strong and safe mount.
It is also necessary to take into account the conditions in which it will be operated. For example, if the balcony is open, then the materials are worth taking stronger and durable and use special protective coatings for wood.

Stages of work:
- Making countertops. The tabletop can be any form and from any material.

- Preparation of fastening parts.

From how accurately will be accurate and interconnected by the planks depends on the stability of the structure and its durability.
- All wooden parts of the table should be cleaned with sandpaper with small grain or with a grinding machine.

Then, to handle the antiseptic so that the tree does not rot, and the top is covered with varnish.
- Assembling table.

With the help of screws to the wall attach a vertical and horizontal plank. Next, the loops are fixed, and then the foot of the attachment and the worktop directly.
Interior items for a tree home
A tree is a material that is able to decorate any interior. Moreover, than the authentication looks like a tree, the more it is modern.
Lamp
Wooden products can be made from the balance of boards, as in the example of this bedside lamp.

Materials:
- LED flashlight feeding through USB port.
- Meter extension for USB.
- Plexiglass sheet.
 For the manufacture of the lamp, you will need a LED flashlight feeding through USB port
 - Wooden plank.
- Epoxy adhesive.
Stages of work:
- Depending on the desired lamp sizes, it is necessary to prepare 2 the same in the size of the bar.

On the first bar, a rectangular recess with dimensions of 16 mm per 40 mm and a depth of 9 mm should be made. To perform the groove, you first need to make the saws carefully at the angle.

After that, the bar should be fixed on a flat surface with the help of the clamps and form a deepening using the chisel and the hammer. For this work, it is better to choose a wide chisel with a working surface with a width of 12 mm.

The greater when the chisel will be located in case of hollowing out the woods, the easier it will make a deepening with even parties. It is important to remove part of the tree as thin plates as thin, otherwise there is a risk of chipping on the bar.

- On the second part of the lamp, you should prepare a recess that will correspond to the size of the USB connector.

The deepening is also formed, as in the first case, however it will require a little longer time and spent effort. It is recommended to use a 6 mm millimeter.

The connector should eventually get into the recess, so it is necessary not only to repeat its shape, but also take into account the existing height difference: at the connector itself and in the cord area. After the deepening is ready, it is necessary to place the connector and consolidate 2 self-stakes.

- The next step needs to cut the plexiglass for the lamp.

The height of the part will correspond to the height of the lamp. In this example, it is 210 mm. Depending on the skill, you can cut out the necessary shape from the plexigla, using a saw (tape or circular) or to reverse this operation to the professionals of laser cutting.
- Next, all parts should be glued together with epoxy resin. And fasten the clamps until complete drying.

- For finishing training it is necessary to process the resulting lamp with sandpaper. First, you should use larger grain, and finish grinding small. It should be remembered that the better the plexiglas, the more matte surface it will have that in the end it will give soft muted light when the lamp is turned on.
- Covered with special means of the surface of the lamp should be for the best preservation of the tree, as well as to give the product a finished look. You can use wax, acrylic paints, simulats or varnish.
Simple wooden shelf
For colors or books, you can make a shelf with mount on the ropes.

For work it will be necessary:
- Board of the desired size. Recommended width from 25 mm.
- 4 meters of rope with a thickness of 8 mm.
- Drill.
- Hooks - 2 pcs.
- Perforator.
Stages of work:
- On the board should be placed places and a drill to make holes for the rope.

The drill must be taken a little thicker than the thickness of the rope.
- The tree needs to be processed to protect against dust and time, as well as for beauty. To do this, the surface must be pulled out by sandpaper. It is possible to emphasize the natural pattern of wood, using a veil, and top covered with varnish or wax.

- Using the perforator, drill the wall and fasten the hooks.

- The rope should be cut into 4 equal segments. Each segment is required to secure under the board using the node.

- Using nodes must also be connected to the tops of the rope.

Variations of such shelves are possible.
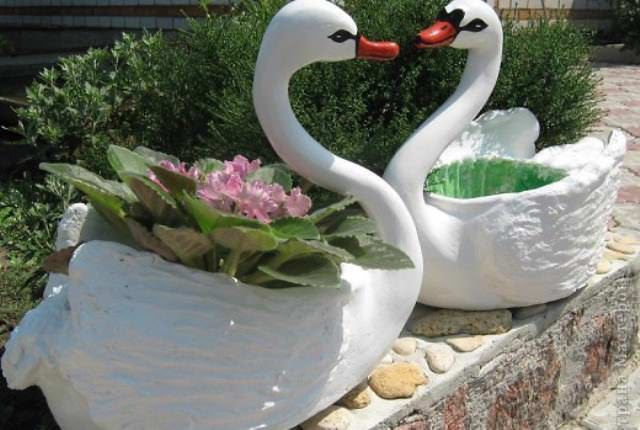
Crafts for Garden
Wooden products created by their own hands can not only decorate the garden plot, but also bring significant benefits.
Wooden hammock
For work it will be necessary:
- Pallet or boards.
- Strong rope.
- Tools (chisels, drill, mites, sandpaper, pencil, roulette).

Stages of work:
- It is necessary to disassemble the pallet on the boards with ticks and the chisels.

For hammock you need 16 boards.
- The boards need to be made as smooth as possible by treating them with a sandpaper or grinding machine.
- On each board it is necessary to place places for holes for the rope. The distance from the opening to the edge should be made more than 2 cm.
- Marking the drill is required to make holes.

The diameter of the drill must be taken thicker than the diameter of the rope.
- All wooden parts need to be copper with each other rope.

- In the corners of the extreme boards, it should be drilled elsewear for the rope, on which the hammock will hang.
Bedroom
The more birds on the plot, the less insects of pests. To attract bird families, it is recommended to raise birdhouses.

Doing a bird's house is necessary using the following scheme:

To work, you will need:
- 2 cm thick boards.
- A hammer.
- Nails, diameter about 2 mm.
Stages of work:
- From the boards, you need to cut the parts in the size specified in the drawing. It is important to remember that the chicks at the beginning of their lives do not have enough plumage, so when preparing parts and subsequent builder assembly, you cannot allow slots. All parties should fit tightly to each other.
- The construction of the birdhouse should be started from the assembly of the front wall with a round hole and 2 side, located at right angles to the front.
- For each link, it is enough to drive 3-4 nails.
- The next step insert the bottom between 3 sides and nail it. Then you need to kill the 4th wall of the nesting room to the side walls and the bottom.
- To make a visor, you must first connect 2 parts (small square and rectangular). The visor must perform above the birdhouse for a distance from 5 to 10 cm. The longer this protruding part, the less chance to get a catam to the hole of the nesting block.

If, after feeding 2 parts, the protruding ends of nails will remain, they must be beaten with a hammer.
- The roof should be densely cover the nest. If it is bad or not to the end, then you can correct the workpiece by the chisel. Then pin it to the walls.
Toy from wood for children
Wooden products, with their own hands made for children, have many advantages. They look modern, eco-friendly, tactful and pleasant.
African animals
For work it will be necessary:
- trim thick plywood board
- lobzik,
- sandpaper.

Stages of work:
- It is necessary to make paper details of future animals and glue them to Phaneur.
- Next, you should cut the blank by the loop along the contour.
- Using emery paper, you need to stall each workpiece.
- For drawing parts (eyes, ears), you can use the device for burning or draw animal faces with paints.
- To the toys served for a long time, it is recommended to cover them from above with varnish.
Domino
Domino is a popular game among adults and children who are already able to count.
For work it will be necessary:
- plywood with a thickness of 0.5 cm,
- lobzik,
- sandpaper.
- line
- pencil,
- decorative contour,
- varnish (optional).

Stages of work:
- Of the plywood, 29 rectangles of size 4 cm * 2 cm are required.
- Each item needs to be good to skirt with a small grain so that the tree is smooth.
- Pencil should be scheduled to locate points.
- Decorative contour You need to hold a line in the middle of the rectangle and make points. It is recommended before applying the contour to the details, stretch the point in another place to learn to squeeze the same amount of paint. Full circuit drying usually occurs after 12 hours.
- From above, every Domino chip need to be covered with varnish for wooden surfaces.
For kids, you can make an option that does not require an account skills. For this, instead of points you need to use pictures. For such a domino, you need to propagate the necessary pictures on the printer and glue them. It is recommended to glue as follows.

Cove the wood with a plow glue using a brush. When drying, the white glue will become transparent and the functions of the primer will perform. Next, the desired picture is required to put on the wood and on top to wash it with glue.
Paper will wet, so you need to move with a brush carefully not to break the picture. After drying, it is recommended to miss the entire wooden part of the PVA again. The surface will become a glossy and smooth, pleasant to the touch.
To make your own hands the subject of the interior of the tree, it is not necessary to be a wood master. After examining the foundations of carpentry, you can choose a simple model for newbies, and instead of a professional electric tool, use manual.
Article clearance: Natalie Podolskaya
Video about wooden products
Wood products with their own hands:
Catering, repair and finishing - processes that take out a lot of free time and finance, and when after completing useful cases, many remnants of various materials notice, it becomes a little offended for the money spent. But we will not get upset, because all the remnants can be applied with benefit, throw them out optionally ..
Never hurry to throw out the construction trash and the remnants of building materials. All that is not included in the main works can still be useful for giving.
Crafts from drywall
Truly, universal material can be useful to you and in the form of cropping and broken pieces.
From drywall, you can do the following:
- Small vases for dry bouquets, it is worth only to cut GLCs on smooth pieces and fold it into a form with a mounting profile;
- Various geometric shapes for dacha house decor, gazebos and patio;
- There are enough interesting solutions for miniature furniture items in a children's house on a tree. For example, the same shelves, racks, various decor.
If you cannot apply the plasterboard, give it to the kids, because any piece of spoiled material can be simply painted on asphalt or stoves, applying material as chalk.
What can be done from pieces of tin
This material is very practical, because it, like slices of stainless steel, can be bend in any forms. This makes it possible to create the most unusual crafts for giving.

- First of all, these are original lamps that, with the help of scissors for metal or grinder, acquire bizarre forms;
- Also, from a similar material, fine steel or trimming, you can make small country urns and ashtray;
- If a large sized pieces, there may be quite good containers for flowers, even suspended;
- It is possible to use a stainless steel and thin steel for more useful cases, for example, put patchballs on a cracked linoleum, strips of tinted to connect the joints of the flooring in the country house, making clamps under the bolts and nuts, cut the washers, pulling the material of the material wooden buildings and fences, install them As a lining with a garter of large branches of trees, so that their bark is not crossed by a rope.
Useful use of balances and cutting boards
From the tree you can make almost anything, as if, in reasonable limits, of course. Naturally, we are talking about the garbage residues, because we create a lot of useful things at the cottage from whole sawn timber.
- So, if a thin rail remained, it can go to drawers, as, in principle, and a small board with a timber;
- Trimming furniture shields, for example, from the press, will become excellent containers for vertical landscaping;
- Larger boards can be seized and cut into the kitchen accessories - tables for cutting and cutting, coasters under hot;
- Naturally, if there are good quality materials, they will always rise to country furniture - shelves and racks, small stools and chairs, stands for shoes, so on;
- It is worth noting that the benefits of the dacha bring and sawdust, but all our readers know it perfectly.
From the tree you can make a lot of interesting things, and therefore it is not worth throwing away from his residues.

If among readers there are masters of a wood thread, they will find all the materials another original application!
Useful trimming plates OSB and plywood
The construction trash obtained from these materials will become a find for people with a fantasy.
But what would you come up there, we also have ideas:
- A nesting house and a lodge for proteins - the first thing that comes to mind!
- Further, bird feeders and even for animals, where the material will perform the function of the roof base;
- OSB trimming and plywood can turn into sufficiently good drawers for storing food and non-food products, a variety of bulk;
- An interesting idea is the use of plywood pieces and slabs to create a formwork in the construction of small architectural forms;
- To participate like garbage can both in the production of country furniture, together with lumber, about which the conversation was above;
- If there is an electrolybiz available, you can always cut out of the remnants of the original garden figures or their fragments.

Using old polyethylene
In addition, the old film can be covered by anything ... The same heaps of sand for construction, stacks of brick or decorative tiles for the arrangement of cottages, bulk materials, feed. It is worth only to fold it several times, and even the old and thread polyethylene film will become a good protection against moisture.

Excellent use will be found in the capital construction. Film You can cover the foundations and only flooded platforms so that the concrete does not save and not cracking in the sun.
In the question with the film, we slightly moved away from the main topic of crafts and remnants of building materials, but now we come back to it.
Foamed insulation: Using trimming in the country
Most often, such materials are applicable before the New Year holidays, as one of them can no problem cut snowflakes and stars of a wide variety of forms. But it is often possible to use them for standard decoration of the premises.

One side of such a foil material or reflective material. That is, she glitters. This makes it possible to create bright shapes that will tolerate solar glare on the walls, gender and ceiling. It is especially interesting to watch such crafts in a suspended state, on a fishing line or thread.
More often all the work on thermal insulation, where such materials are used, occur with the insulation, follicitized on the one hand. But if you need a bilateral object, you can cut two mirror-reflected forms, and glue them with the opposite side. Then a star, snowflake or a figurine, will glitter on both sides.
Clariy dackets find a lot of other applications with foam, for example, additionally warm the greenhouses on the sides, make small portable refrigerators with their own hands, simply navigating the material inside on the walls of a small drawer. But the fun use is tailoring from the material of children's suits and various elements.
Crafts for giving with their own hands (video)
Remains of plastic, polycarbonate, acrylic
- First of all, various lanterns come to mind. We have learned a lot of lighting options for the garden and cottage territory, and therefore it will be easy for you to come up with lights and plastic lamps and polycarbonate, especially if the trimming materials are colored;
- It looks very nicely colored plastic and polycarbonate with shades in the fence decor. Somehow we have already raised a similar topic and even showed you a photo of such decorations of fences;
- From small acrylic trimming, you can make boxes and chests that can perform both decorative and economic functions;
- In addition, these materials can be fully participating in the production of garden figures. Combining wood, steel, plastic and other materials, you can make with your own hands of garden gnomes, fabulous locks, various animals.

Remains and fight bricks
Construction garbage of this plan We are perfectly used as the outerness of the territory and materials for alignment. But today we suggest thinking about more useful facilities.
- It may be the same decorative fabulous castles located in the garden, which will act as a basis;
- In addition, small luminaire columns can be built out of the brick;
- Application Building Material will find in the production of heavier and overhaul, for example, as a base for a bench or even under the table in a new gazebo.

What to do from PVC plastic panels
The lifting of walls and ceilings, various buildings outside and inside plastic - quite popular dacha refurbishment processes. But, in mind the small cost of the material, or for the causes of the wrong counting, we often buy PVC panels with a margin. Then, when the material remains, we think for a long time where he can still come in handy.
We have previously mentioned certain options, but there are more interesting ideas:
- The miniature fence from PVC panels will last for several years until the material deteriorates due to the influence of atmospheric phenomena;
- Great material and for distinguishing garden beds, flower beds. It turns out a multi-colored and very colorful decor;
- If you return to the country's crafts, then the plastic can become the roof of small garden buildings, to be used as a gutter for collecting rainwater, even simple, but quite attractive shutters for the windows of the country house, if you combine the panel with a wooden bar.
Bulk mixtures and use of their residues
It can be both several scoops in the package and a whole bag of material. Naturally, such material in the country will not disappear - to smear, dress cracks, repair the garden paths and so on.

But you can use mixtures and decorative purposes, for a wide variety of crafts.
- We have already talked about how simplest, even homemade forms produce decor blocks for walls;
- Also, they told you how to make colder from cement, quickly and quite simple;
- But you can turn on the fantasy, pick up special molds and pour out whole figures for the garden, which will easily serve until ten years even with the most bad conditions on the street. It is only necessary to treat ready-made crafts with protective paints, which will give and brighter.
Remains of ceramic tiles and mosaic
It is said that materials of this kind in the country are indispensable, but mainly in the economic plan.
- The tile residues can be separated by the base of the house to protect it from external influence;
- The same material you can cover a new breakfast;
- If there are few tiles, and it is a fight, then it, like a mosaic, should be transferred to the garden. Here are pieces of multi-colored, glossy and with a variety of material drawings, garden figures can be decorated. For example, you make garden gnome ... so now it is optional to paint, you can decorate it with pieces of tiles. The turtle from the remains of cement in the garden will also receive an exclusive shell. Tile or mosaic will serve as an unsurpassed trim and a small decorative pond at the cottage.

We have hundreds of advice in the arsenal, but we simply cannot put them all in one article. We mentioned almost all the popular materials used in the country, and now you can only focus on the fact that it is not necessary to immediately send to the garbage, because any piece or trim can be useful.
Crafts from building materials and useful use of construction debris - topics interesting and popular. Thousands of summer houses across the country every day come up with an incredible decor of metal and wood, residues of foam and paint, polyethylene trimming and dry mixtures. So why don't we try? We are confident that with our experience crafts will not get worse!
Things made with their own hands are characterized by their beauty and decorativeness. They add particle of heat and coziness to the interior space. Crafts made of wood for home and garden have aesthetic look and allow you to reveal your internal potential. They help to decorate a residential interior and add a kind of highlight for the nursery.
Perform such products can both adults and children. Modern drawings of crafts from wood will help to cope with the task. Good fantasy and a little patience allow you to get the desired result.

Original wood decoration ideas
Since a long time, a natural massif of wood was widely used as a finishing material. Beautiful texture and unusual coloring amazing human imagination. Luxurious furniture and decor furniture are obtained from wood.
To create unusual crafts. You can not do without plywood, plywood, on the site https://faneramonolit.ru/katalog-fanery/fanera-1520-h-1520/ You can choose the size and place an order.

Crafts from wood with their own hands add a particle of heat and conciseness into the surrounding environment. For example, a beautiful photo frame with carved patterns will be an excellent decoration in the reception area and loved ones. To do this, you can use various breeds of wood crops. Add colors and emphasize the texture will help special simulats and impregnations.

For the summer cottage, animal figures will be the original solution. This will require flat wooden elements. For example, thin sleeps are used to create owls.


The design consists of five main details: head, torso and eyes, wings tail. Head and torso make round sleeps. For wings, you will need a bark or grape vine, pre-fixed with each other.

Crafts from the spikes of the tree will become a real decoration of the household plot. Thin parts of wood are used for making a lot of longline racks and shelves, in which flower arrangements will be located. The surface of the array can be treated with emery paper or leaves in primeval form.

Wooden sleeps are widely used as the basis, on which various decorative little things are located in the future. For example, crafts in the form of a picture. Flat pebbles will be located in the foreground. They will help imitate the body and the head of small little men.

From gift paper, you can make beautiful clothes. Other minor elements are drawn using a thin marker.


On the same technique, natural landscapes make. Add luxury marble or granite crumb will help. For these purposes, you can use petty amber. Paint-coating will help the result. On the photo, crafts made of wood presented exclusive variants of scenery. They will add elegance to the surrounding environment.

Master class on creating a volumetric wooden applique
Wood applique is striking with its beauty. Modern technologies allow you to create a complicated pattern made of fine wood. We bring to your attention a detailed master class to create an applique from a natural array.

Before proceeding with the workflow, it is necessary to prepare the following tools and materials:
- thin wood;
- simple pencil;
- the image, based on which we will create an applique;
- paper;
- thin plywood;
- adhesive for wood;
- impregnation. It will be needed to give the color of the future craft.


The workflow is divided into several stages:
- On a sheet of paper, we draw a future sketch. Weight details sign and numbered.
- Further, the whole drawing is cut into separate parts;
- Sharp corners neatly cut off.
- Each detail is grinding sandpaper.
- After the surface is prepared, it begins to tint each application element. To do this, it is necessary to need a thin brush and a water-based simulator.
- When all the details were dried, you can start making a wooden panel.
- Each element is coated with glue.
- After that, fix them on a sheet of plywood.
- When all the items are in place, we leave our panel to complete drying.
- You can give a clear contour using a thin marker.

As you can see creating a beautiful thing simple enough. The main thing in this case will show a little fantasy and perseverance.
More instructions, how to make crafts can be found on the site of our friends.


Stock Foto Crafts from wood


Good day. Today we begin to unload articles on the topic of crafts from the tree do it yourself. In this first article, I want to show you what simple crafts can be made from wood - both children and adults. Many ideas will fit for labor classes at school - for boys. Some ideas will fit for school competition crafts from natural material. Some wooden crafts will be able to become decoration of your cottage or yard. Here you will find a storehouse of inspiration and joy from anticipation of such interesting and easy work. In this article I will prove - what to do beautiful crafts from wood maybe each. Because here you will find simple and worships. Even a fragile woman with a manicure can take half of the crafts from this article. So - let's fall in love with wooden creativity.
Let's start with simple magic.
Tree + Sun.
Crafts that are glowing love.
Here are the simplest and cute country crafts from a tree. For a craft, you need a speaker of the log (ask when you cut the sawing with a grinder of firewood to make some thin sleeps). Or you can without drink - just take the board of any size.
In the tree we drill holes such a thickness so that a glass pebble bought in the store is entered. Such sets of multi-colored decorative glass stones are sold - in the gifts department, and in the department where candles, vases and everything for the decor of the holiday.

You can screw such holes with glass just in the board - and hang it on the apple tree. You can drill such holes in the fence - if the sun is at least once a day shines at a low angle.
That's very beautiful. Magically. As in the country of Fay. Your children will be delighted with such a craft from a tree.

Simple wooden crafts
from sleep logs.
If you have in the courtyard in the courtyard there is sawing logs on the firewood - you are lucky. You can freely gain invaluable diverse material. Ask men to cut to you flat sleeps, both from small logs and from large. Lovingly fold them away from the woods of firewood and start to come up with future crafts from the tree. For example, let it be wooden owls. It is done just and looks beautiful. Spies can be tipped to each other with nails. You can plant them on liquid nails (like glue).

The surface of the sleeps can be rude unusual (as in the photo with a craft bunnies). And you can pass out sandpaper and even coat with varnish such an intermediate material. Or paint the color you need.

From large sleeps, you can make large country crafts from the tree. And small logs (from thinner bans and logs) are suitable for miniature crafts - for example, such birds. Brying of such a thickness you yourself can be knocked out - manually, without chainsaws.

Spiles from the logs can become canvas for artistic installations. Such wooden crafts paintings can be made from any natural material. Go to the river and find smooth flat pebbles. They will become a source of interesting crafts. Stones are easily painted with markers, office fat markers or just a gouache (after work, fasten the gouache with a lacquer for hair, or nail polish).

And here is another way to make beautiful air crafts from wooden sleeps. Openwork end-to-end pumping of electric jib (photo with a maple leaf) looks simply magical.

Here is a small master class, from which it can be seen how the process of drinking openwork patterns on the thick heap of the tree is.
First, we will supply the stencil with a pencil. Then drill drill holes in key nodes of the pattern. And then the jigsion go from one holey knot to another.

You can come up with the device yourself which will help you drink products from wood with the help of a regular drill.Do it yourself make an electric jigsaw. Holding hands for comfortable handles You just move the device - following your drawing lines. The thinner the drill the smaller details of the picture you can cut them out. Perfectly invented.

Or it is possible buy electroballs - It stands on average 100 dollars. You can find and for 50 it is not on an industrial scale to work, so it is not necessarily a very powerful expensive tool to buy.
Mosaic crafts
From spirits thick branches.
If you have a boring wall of the shed right on you on the summer yard. That you need to make it disqual. Explain the Saratik using a craft from a tree. Do it applique Mosaic From wood spins small size. Such sleeps are obtained if you cook with hacksaw (or chainsaw) thick bows or thin logs.
Foundation Under such a craft from a tree, cut out of the sheet of plywood. First, we draw a silhouette of the future craft on it. We cut the plywood base with a manual logby or special power tool. And we stick wooden rounds on it - on liquid nails, on joinery glue or hot glue from a pistol.


And even at home you can make from sleep decorative frame for mirrors from wooden greek(master class in the photo below).
- Also buy a circular mirror. Put it on a sheet of plywood - to circle a pencil.
- Around the resulting circle, retreat several centimeters (on the width you want for the frame). And with this indentation to draw a second circle.
- Cut a large circle from plywood. And enclose the outer ring with spikes from the tree. It turns out a beautiful wooden dealing frame - it remains on liquid nails into the middle of the mirror.

Puff crafts
from wood.
This is probably my favorite view of a tree craft. Here, the boiled shields fall on his friend creating a puff volume of crafts.
Here is a drawing of a cow of three layers of a wooden shield. The first layer is the body, the second - head, the third - bangs and nose.

You can paint all the layers of your crafts in one color (as a craft polar bear from wood) or in different colors (like a craft mouse on the moon - photo below).

Or you can leave the factory pattern of the tree (as on the crafts with the photo below).
Wooden Lisa It has a two-layer design - a layer of the back, and the head and tail are stacked on it.
Slicer duck It has 5 layers - the central layer of head, and two layers on both sides (tummy + wing).

The more layers You will apply on each other, the volume and convex will be your craft. Here is an example with a craft "Lions from a tree" can be seen like put forward the face of the beastThanks to the four layers of the thick wooden board.

If you paint your crafts. Dorisupe a fairytale, add small parts - folds, stains and so on. You can get very realistic and expensive crafts from a tree. Your little hobby can be your business. Such work can be safely put up for sale.

You can invent your characters yourself. Patch on a sheet of paper of their layers. Increase the cradle first in the paper template - to translate the contours to the wooden shield and cut off. Or find pictures in a children's brazer - and redraw them in an enlarged amount.

Crafts from wood
For school at school
In class lesson.
Such puff crafts made of wood can not be cut out of thick shields, but from thin plywood sheet. And then such work can be carried out in labor classes within the framework of the school program. On the topic "Lobzik on plywood".
Here's the idea - how out of 3 plywood shields Make a two-color craft-puppy. The first top layer of white plywood peeps only the tips of the ears, tail and one rear paw. We will cover the second layer (so that it darkened). Eyes, nose and lines can be drawn with a marker, or burn a special device to burning on wood.

In the same technique of shields with different colors, you can make a lot of volumetric crafts from the tree in school lessons in school or in a circle of wooden creativity.

Crafts from wood
in the form of appliqué.
In a very similar technique, you can make an applique of wood. It also takes the basis of a wooden tree array board (that is, not glued shield, but a solid board). Because we will grind it, and the glue shield from grinding can fuse and glue seams will be visible.

- On the paper drawn all the future handicraft. Shares lines to the details. Each detail is numbered. And is photographed (to then check the location of each element in the photo).
- Next, the drawing is cut through the lines to the elements. Each element we circle on a pencil board. Drink element from flat board. All elements are flat on top, rude over the edges of the cut and with sharp edges of the saw.
- Now our task all edges of each detail smoothed, wrestral. We put the sharp edges of the sawing agent. And we are calculated on the grinding machine (if you have it) or we make grinding by hand with sandpaper of varying degrees of rigidity-roughness.
- After grinding all the details stain in the satellite veil (Sold in construction stores). Depending on how many times you wipe the Detail of the Morilka - you will get the tone lighter or darker. Very bright details can be wrapped in just vegetable oil. You can check in advance Shades of painting on tree trimming left after sawing crafts.

You can also collect the details of the crafts from the tree in watercolor or gouache(Using not a brush, but a foam sponge). After painting, the item does not pack your hands, you can sprinkle her hair lacquer or impregnate with a cracker with another turning maker for wood (only before trimming what color will be).

It only seemsWhat a cow (in the photo of a craft from a tree above) is located behind the moon. In fact, all the details are in the same plane. On a sheet of paper. But thanks to the streamlord of the edges of the parts - everything looks in bulk, soft and as if depressed in friend. In fact, nothing is pressed - everything is simply lying along with each other.
Ideas for such flat craft appliques from wood You can take inside children's bookkeeping books. There are just pictures with large details. Children's picture-rationa can be found in Google - zoom and print. Or redraw directly from the monitor screen, putting the paper sheet on the glowing screen.

Methods of pollovka details
for crafts from wood
(instructions to help).
So that it was easier to open smooth edges of the details, without rubbing the corns in your arms, I want to give a few useful tips.
You can clamp a sandy grinding tape in special vice, also chocated from wood. This is how it is done on the left photo below. Or come up with your version of the device.

Here on the left photo - sandpaper turns around a thick plate with a semicircular edge. And the edges of the emery paper are wrapped in the grooves, and clamping the bolt twisted through the round cylindrical wood-clamp.

Also there are grinding nozzles on the drill. And then you can make a silvism of parts using rotary power drills and magic power strength.
Here we see grinding nozzles on a drill - plate and drum form.

There are grinding devices for a drill, where you yourself can change Entround paper - remove the old screaming sand and refill a new one.

By the way, it is possible to buy on Aliexpress at once the grinding drums on a drill for 3-4 dollars per batch of 100 pieces. If you can look and cheaper to find.

And in order for the drill when working, you cannot create a special fastening structure in your hand, which fixes Your homemade grinding machine in one place, and all that you will remain to bring items to the grinding drum.

The design of the mounting pallet may be different, with a wooden clamp (photo above), or with a retainer in the form of a metal bracket (as in the photo below).

With such an assistant to make crafts from wood with their own hands - one pleasure. Quickly nice and immediately beautiful the result. Such work can be put on the flow - and establish a whole manufacture of beautiful wooden (smooth and safe) toys for children, gift wooden paintings.
You can become a successful master. Completely unexpected for himself. That's so simple, looking at this article and falling in love with the idea.

Fantasy wooden craft is limitless. Remember the success formula - everything can be done from the tree. The main thing to start ... then continue ... and finish.
For example, puffing toys. Beautiful fun and for children and to decorate cottages. Such a hammer or woodpecker can knock on your door, reporting a guest on the porch. As in the fairy tale, you can drown for the rope, and you will open the door.

You can do your own decorations for the children's room. In essence, reincarnate and become a designer of interesting interior crafts from a tree. Any boy will be happy if his children's room will play with the jungle motifs.

You know ... I will probably continue the theme of wooden crafts for the design of the children's room in one of the following articles. I want to see what ideas are glowing here. And fall in love with someone in this good thing.
And also, perhaps, you need to create an article with wood toys for children - handmade. Also need to write. And then it will earn link.
In the meantime continue ...
Crafts from wood
and throwing material.
Where do future crafts live? .... Old half-satiest boards. For example, from grandmother's fence. Which usually go on firewood or exported from the yard as an extra garbage. Stop. Let's not throw them out. Run in this heap and create something wonderful - do it yourself from the tree.
Wooden mop-brush, if you cut it in half - turns into a mouth of an evil pp. A little fantasy and work. And now the service dog has grown and rocks on you.
Elegant artistic design. Tree and throwing material.

Any throw material (hardware, plastics) and old woods can populate your house with fabulous characters. They are alive. They have a soul and their own story.


Crafts from wood
Intense beauty.
Displaced veneer , from old furniture shields, quietly reacted in your Saraike - can also be a source for craft appliqués from a tree.
From this thin woody material It is possible to cut the details of the future craft right scissors and stick on hot gun glue (or on joinery glue).


And instead of a veneer, you can use a thin birch bark. And also make interesting flat crafts from the tree.

Crafts from wood
(lamps, firewood and bark)
Ordinary firewood from your lunite can become a source of inspiration for wooden crafts to the cottage.
If the round is crawled to cut down the painter, then you get a figurine with a person turned to you. It remains only to draw this face, add the elements of the eyes, ears, nose to it.

You can fold the body of the animal from the lanes and round chumbs. Churbans will be legs and laminated back. You can do the head from the round sleeve a small log. Or sleep the ax The face to the desired form from the same is full as the body of your four-legged trees from the tree.

Show fantasy, do not stop before a difficult task. Squirrel from a tree or a snail from the lane - there is nothing complicated. We turn on the head and sense of humor - it will tell the most ridiculous, but effective ways to convey the delicate image of the animal using a coarse tree and another natural material.

You can work with a chainsaw or ax - drinking or shining your craft from a tree. You can make such pretty pigs with your own hands as a funny craft from a tree to the cottage.

And in the thickets of shrub, you can put a beautiful proud deer - too, a simple and fast craft of wood and branches.

Wooden crafts
from the chip from the village.
It happens that when the cutting of firewood, a figured big chip is chopped off. This church often has a bizarre form - already similar to something (bird, panther, face profile). You need such a gift of fate carefully to put aside in order to return to him and complete the cradle, started by nature. Something to cut a knife, to allocate paint, stick something like an additional part. And it turns out an exercise from the tree with their own hands - beautiful and original.


These ideas managed to find me for masters of wooden creativity.
Now you can also make beautiful crafts from wood with your own hands. Especially since this article is only the first of the cycle on the topic of wooden craftswhich are understandable and easy to do at home. You probably already fell in love with some ideas and fulfill their determination - I hold the cams for you - let everything get out best. And your handicraft from the tree will enjoy your whole family pile.
 Why you can not give icons
 Is it possible to give icons as a gift: Signs, the opinion of the Church
 A year ago left her husband, and now I do not know what to do