Hard disk generator. Powerful generator made of magnets. The generator manufacturing process
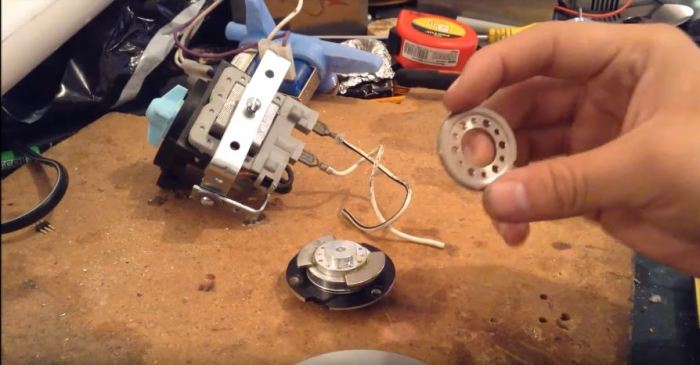
Be sure to enjoy this material, since in it we will look at the method of obtaining a simple generator from the old CD / DVD of the computer drive.
First of all, we propose to get acquainted with the author's video
Consider what we need:
- old CD / DVD drive;
- nippers;
- soldering iron;
- any plastic case;
- Wires;
- Hexagon;
- Washer.
According to the author of the self-made generator, the idea is quite effective, since the ratio of the transfer number of revolutions per motor, which leads to a move of a gear that extends the tray for a disk is quite large. Thus, it is possible that with small speeds of the same gear, it will turn out good turns on the electric motor, and we can get the generator. It will turn out to be conceived or not, we will learn at the end of the review, and now we will proceed to work.
First you need to disappear board on which the motor is mounted.

Next, cut off the part of the plastic drive body, which keeps the motor, as well as the gear we need. Later from this gear, we will bring the handle so that you can twist it and generate electricity.


We take the first wire and solder it to one of the motors' contacts.

The second wire is soldered to the second contact.

To test the generator, the author of the idea uses UBS inputs that are installed in the plastic case. Therefore, it sticks a slice of a drive with a motor and gear into this case using a glue gun.

For the manufacture of the handle, you will need a hexagon and washer. These parts need to be attached to each other. The author does it by soldering.

We solder wires to USB connectors.

On the second half of the plastic case, you need to do a hole under the protrusion of the gear.

Finally glue a homemade handle to the protrusion of the gear. Our generator is ready.
In this article, consider the model of a powerful generator from magnets that can produce 300 watt electricity. The frame is assembled from duralumin plates with a thickness of 10 mm. The generator consists of 3 main parts: hull, rotor, stator. The main purpose of the hull is the fixation of the rotor and the stator in a strictly defined position. The rotating rotor should not touch the stator coil magnets. Dulely housing is assembled from 4 parts. The angular layout provides a simple and rigid design. The case is made on the CNC machine. In this and plus and the lack of development, since for the high-quality repetition of the model you need to find specialists and a CNC machine. The diameter of the disks is 100 mm.
You can take the finished electrical generator in the online store.
Rotor electric generator I. Belitsky
Rotor It is an iron axis. It is fixed 2 iron disks with neodymium magnets located on them. A rail sleeve is pressed between discs on the axis. Its length depends on the thickness of the stator. Its appointment is to provide a minimum gap between rotating magnets and stator coils. In each disk, 12 neodymium magnets with a diameter of 15 and a thickness of 5 mm. For them are made on the disc seat.


They need to be glued with epoxy resin or other glue. At the same time, it is necessary to strictly observe the polarity. In the assembled, the magnets should be located so that in front of each there was another from the opposite disk. At the same time, the poles should be different towards each other. As the development author itself writes (Igor Beltetsky): "It will correctly be exactly different poles that the power lines would come out of one in another, uniquely S \u003d N. You can purchase neodymium magnets in a Chinese online store.

Stator device
A sheet textolite is used as the basis with a thickness of 12 m. The sheet has a hole for coils and a rotor sleeve. The outer diameter of iron coils, which are installed in these holes - 25 mm. The inner diameter is equal to the diameter of the magnets (15 mm). The coils perform 2 tasks: the function of the magnetically conductive core and the task of reducing sticking in the transition from one coil to the other.


Coils are made from an isolated wire with a thickness of 0.5 mm. 130 turns are wound on each coil. The direction of winding at all is the same.
When creating a powerful generator, you need to know that the higher the turns that can be ensured, the higher the output voltage and current of the device for free energy will be.
Driving on a bike past dacha sites, I saw a working wind generator:
Large blades slowly, but rightly rotated, the fluger oriented the device in the direction of the wind.
I wanted to realize a similar design, albeit not able to produce power sufficient to ensure "serious" consumers, but still working and, for example, charging batteries or feeding LEDs.
Stepper engines
One of the most effective options for a small homemade wind power generator is to use stepper Engine (Shd) (eng. stepping (STEPPER, STEP) Motor) - In such a motor, the shaft rotation consists of small steps. The stepping motor windings are combined into phases. When the current is supplied to one of the phases, the shaft moves one step.
These engines are low-speedand the generator with such an engine can be without a gearbox connected to a wind turbine, a stirling engine or another low-speed power source. When used as a generator of a regular (collector) DC motor to achieve the same results, it would be required 10-15 times a higher speed of rotation.
A feature of the header is a fairly high moment of start (even without electrical load connected to the generator), reaching 40 grams of force on a centimeter.
The efficiency coefficient of the generator from the SD reaches 40%.
To check the performance of the stepper motor, you can connect, for example, a red LED. Rotating motor shaft, you can observe the glow of the LED. The polarity of the connection of the LED does not matter, since the engine produces an alternating current.
We store such sufficiently powerful engines are five-year-free floppy disks, as well as old printers and scanners.
Engine 1.
For example, I have a shd from the old 5.25 "drive worked as part ZX Spectrum - compatible computer "byte".
Such a drive contains two windings, from the ends and the middle of which conclusions are made - the engine is derived from the engine six Wires: 
First winding (eng. cOIL 1.) - blue (eng. blue) And yellow (eng. yellow);
Second winding (eng. cOIL 2.) - Red (eng. red) And white (eng. white);
brown (eng. brown.) Wires - Conclusions from midpoints of each winding (eng. center Taps.).

disassembled stepping motor
The engine is visible to the left, on which the "striped" magnetic poles are visible - North and South. It is clearly visible a stator winding, consisting of eight coils.
Half resistance of the winding is ~ 70 ohms.
I used this engine in the original design of my wind generator.
Engine 2.
At my disposal less powerful stepper engine T1319635. Firms Epoch Electronics Corp. From scanner HP Scanjet 2400. It has five Conclusions (Unipolar Motor): 
First winding (eng. cOIL 1.) - Orange (eng. orange.) And black (eng. black.);
Second winding (eng. cOIL 2.) - brown (eng. brown.) And yellow (eng. yellow);
red (eng. red) Wire - connected together conclusions from the midpoint of each winding (eng. center Taps.).
Half resistance winding is 58 ohms, which is indicated on the engine housing.
Engine 3.
In the improved version of the wind generator, I used a stepping motor Robotron SPA 42 / 100-558produced in the GDR and the voltage designed for 12 V: 
Wind turbine
There are two options for the arrangement of the axis of the impeller (turbine) of the wind generator - horizontal and vertical.
Advantage horizontal(most popular) Location The axes located in the direction of the wind is more efficient use of wind energy, disadvantage - complication of the design.
I chose vertical location axis - Vawt. (vertical Axis Wind Turbine), which significantly simplifies the design and does not require orientation in the wind . This option is more suitable for mounting on the roof, it is much more efficient in the conditions of fast and frequent changes in the direction of the wind.
I used the type of wind turbine, called the Savonius wind turbine (eng. Savonius Wind Turbine.). It was invented in 1922 Sigurd Johannes Savonius (Sigurd Johannes Savonius) From Finland. 
Sigurd Johannes Savonius
The work of the Savonius wind turbine is based on the fact that resistance (eng. drag.) The airflow of the air - the wind of the concave surface of the cylinder (blades) is greater than the convex.
Aerodynamic resistance coefficients (english drag Coefficients) $ C_D $
Two-dimensional bodies:
concave half of the cylinder (1) - 2.30
Convex half of the cylinder (2) - 1.20
Flat Square Plate - 1.17
three-dimensional bodies:
concave half hemisphere (3) - 1.42
Convex half hemisphere (4) - 0.38
Sphere - 0.5
The specified values \u200b\u200bare given for Reynolds numbers (English. Reynolds Numbers) In the range of $ 10 ^ 4 - 10 ^ 6 $. The Reynolds number characterizes the behavior of the body in the medium.
Body Resistance Power Air Flow $ (F_D) \u003d ((1 \\ OVER 2) (C_D) S \\ RHO (V ^ 2)) $, where $ \\ rho $ - air density, $ V $ - Airflow speed, $ s $ - body cross section.
Such a wind turbine rotates in the same side, regardless of the direction of the wind: 
A similar principle of operation is used in a cup anemometer (eng. cup Anemometer) - Device for measuring wind speed: 
Such an anemometer was invented in 1846 by Irish Astronomer John Thomas Romney Robinson ( John Thomas Romney Robinson):
Robinson believed that the cups in its four-stage anemometer were moved at a speed equal to one third of the wind speed. In reality, this value varies from two to a little more than three.
Currently, three-dimensional anemometers developed by Canadian meteorologist John Patterson ( John Patterson.) In 1926: 
Generators on DC collector engines with vertical microturbine are sold on eBay. For price about $ 5: 
Such turbine contains four blades located along two perpendicular axes, with a diameter of a 100 mm impeller, a height of a blade of 60 mm, a length of chord 30 mm and a 11 mm segment height. The impeller is attached to the DC collector micromotor shaft with marking JQ24-125H670.. The nominal supply voltage of such an engine is 3 ... 12 V.
The energy produced by such a generator is enough for the luminescence of the "White" LED.
Savonius wind turbine rotation speed can not exceed wind speed , but this design is characterized high torque (eng. torque).
The efficiency of the wind turbine can be estimated by comparing the power generated by the wind generator with a power concluded in the wind blowing the turbine:
$ P \u003d (1 \\ Over 2) \\ Rho S (V ^ 3) $, where $ \\ rho $ is air density (about 1.225 kg / m 3 at sea level), $ s $ - oven turbine area (eng. sWEPT Area), $ V $ - wind speed.
My wind turbine
Option 1
Initially, four blades are used in the impeller of my generator in the form of segments (halves) of cylinders cut from plastic pipes:
Size segments -
segment length - 14 cm;
segment height - 2 cm;
The length of the chord segment is 4 cm;
I installed the collected design on a high enough (6 m 70 cm) of a wooden mast from a bar attached by self-drawing to a metal frame: 
Option 2.
The lack of a generator was quite high wind speed required for the promotion of the blades. To increase the surface area, I used blades cut from plastic bottles:
Size segments -
segment length - 18 cm;
segment height - 5 cm;
The length of the chord segment is 7 cm;
The distance from the start of the segment to the center of the axis of rotation is 3 cm.
Option 3.
The problem was the strength of the blades holders. At first I used perforated aluminum planks from the Soviet children's designer with a thickness of 1 mm. After a few days of operation, the strong gusts of the wind led to a breakdown of slats (1). After this failure, I decided to cut the holders of the blades from the foil textolite (2) with a thickness of 1.8 mm: 
The strength of the textolite for bending is perpendicular to the plate is 204 MPa and comparable with aluminum bending strength - 275 MPa. But the aluminum elastic module $ E $ (70,000 MPa) is much larger than that of the textolite (10,000 MPa), i.e. Texolit is much more elastic aluminum. This, in my opinion, taking into account the greater thickness of the textolite holders, will ensure much greater reliability of the fastening of the wind-generator blades.
The wind generator is mounted on the mast: 
Experienced operation of the new version of the wind generator showed its reliability even with severe wind gusts.
The disadvantage of the Savonius turbine is low efficiency
- Only about 15% of wind energy is converted to the energy of the shaft rotation (it is much less than it can be achieved with darier wind turbine (eng. Darrieus Wind Turbine.)), using lifting force (eng. lift). This type of wind turbine was invented by the French aircraft designer George Daria (Georges Jean Marie Darrieus) -uS Patent from 1931 No. 1,835,018 .
Georges Darier

The disadvantage of the turbine Daria is that she has a very bad self-timing (to generate a torque from wind turbine should already be promoted).
Electricity transformation generated by a stepper engine
The conclusions of the stepping motor can be connected to two bridge rectifiers collected from Schottky diodes to reduce the voltage drop on diodes.
You can apply popular Schottky diodes 1N5817. with maximum reverse voltage of 20 V, 1N5819. - 40 V and maximum direct medium straightened current 1 A. I connected rectifier outputs consistently in order to increase the output voltage.
You can also use two rectifiers with a midwater. Such a rectifier requires two times less diodes, but the output voltage decreases twice.
The pulsating voltage is then smoothed using a capacitive filter - a condenser 1000 μF by 25 V. to protect against increased generated voltage parallel to the condenser included Stabilion on 25 V. 
scheme of my wind generator
electronic block of my wind generator
Application of the wind generator
The voltage generated by the wind generator depends on the size and constancy of the wind speed.
With wind, pelling thin branches of trees, the voltage reaches 2 ... 3 V.
In the wind, the pelling thick branches of trees, the voltage reaches 4 ... 5 V (with strong gusts - up to 7 V).
Connection to Joule Thief
The smoothed voltage from the wind generator capacitor can be supplied to - low-voltage DC-DC converter 
Resistor resistance value R. It is experimentally selected (depending on the type of transistor) - it is advisable to use a variable resistor by 4.7 kΩ and gradually reduce its resistance, achieving stable operation of the converter.
I collected such a converter on the basis of Germany pNP.-Transistor GT308V ( Vt.) and a pulsed transformer MIT-4B (coil L1 - conclusions 2-3, L2. - Conclusions 5-6): 
Charge of ionistors (supercapacitors)
Ionistor (supercapacitor, eng. supercapacitor) It is a hybrid of a capacitor and a chemical current source.
Jonistor - unpolary The element, but one of the conclusions can be marked with an "arrow" - to designate the polarity of residual voltage after it is charging at the factory.
For initial research, I used an ionistor With a capacity of 0.22 ° C voltage 5.5 V (diameter 11.5 mm, height 3.5 mm):
I connected it through a diode to the output via germanium diode D310.
To limit the maximum voltage of the charging of the ionistor, you can use a stabilion or a chain of LEDs - I use a chain from two Red LEDs: 
To prevent the discharge of the already charged ionistor through restrictive LEDs HL1 and HL2. I added another diode - VD2..
To be continued
A simple wind generator can be made of several faulty hard drives and water pumps from a washing machine. Alternative energy is closer than it seems, the rubble is now for the manufacture of such necessary soot more than abuse. Such a design certainly will not feed all your home with electricity, but for charging all sorts of USB gadgets is quite good.
Need
- Pump from automatic washing machine. It is at the bottom and serves to ribbon water from the drum into the sewer.
- Four hard drives, you can from different manufacturers.
- Six - long pipe to install a windmill to height.
- Bolts, nuts, washers.
- Wires.

A few words about water pump
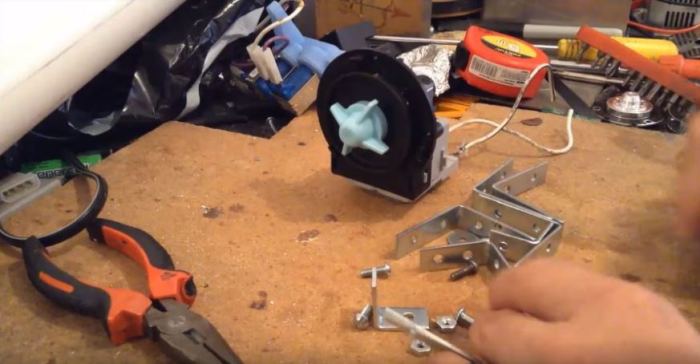
The role of the generator that produces electricity will be used by a water pump. It consists of a movable rotor on permanent magnets and a movable stator with a P-shaped magnetic core and a coil on it.
The rotor is quite easy to pull out.

Thanks to the use of permanent magnets, such a pump works perfectly in the role of a generator, capable of issuing up to 250 V. Of course, our windmill will not give such revs and the output voltage will be several times less.

Production of wind generator
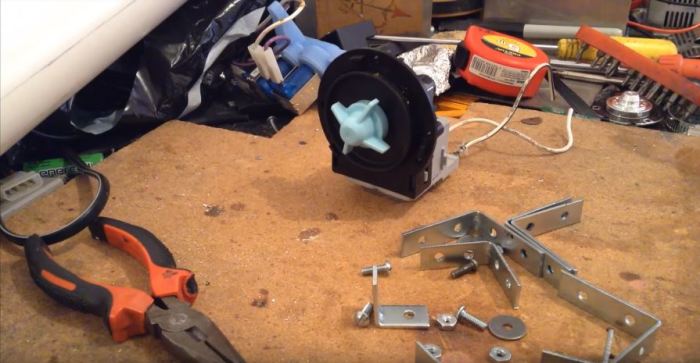
The pump was decided to fix the construction steel corners, bent and cutting them in the right way.
It turned out this, peculiar clamp.

A hole for more reliable fixation was made in the pump magnetic circuit.

Node assembly.


Windover blades
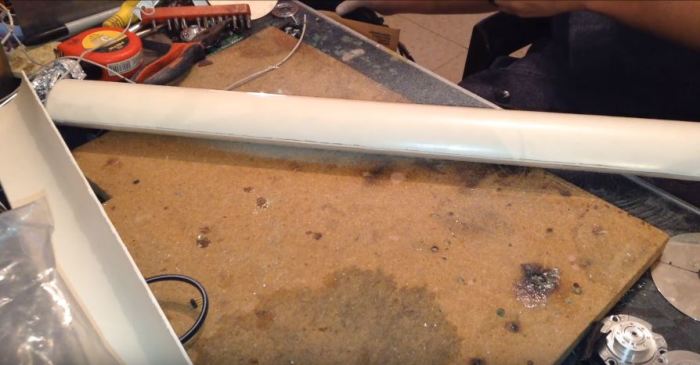
Make the blades from PVC pipe.
We cut the pipe into three smooth parts along.

And then cut your blade from each halves.


In places attaching blades to the generator we make holes.


Fastening blades
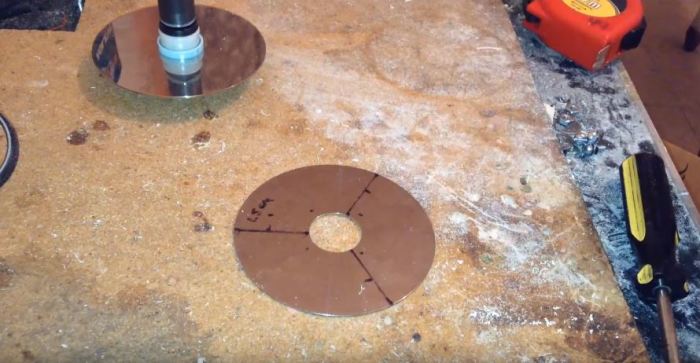
Two disks from HDD were used to fasten the wind turbine blades.
The hole in which perfectly approached the diameter of the impeller.

Location.

Drills.

The discs are attached to the rotor bolts with washers and nuts.

We screw the blades.


Swivel knot
So that the windmill, depending on the wind, it can be rotated in different direction, it must be installed on the rotary platform, which will be used by the engine from the hard disk, as there are very good bearings.
It will later dress the disc on which the generator will be attached.

Under the mounting drill hole and sawing the unnecessary part.

General assembly
The HDD engine that will be used as a swivel platform is secure corner in three places.

From cardboard or plastic cut the tail blade so that the wind itself directed the fan.

Now proceed to the assembly of everything.

We take the pole and fix the wire for power.

Take the swivel knot.


Insert into the pipe and tightening nuts wept to the sides.

In principle, it keeps normally.
There is a way to receive electricity absolutely free. It is enough to make and install the wind generator on its site. The traditional sources of electricity today will not be able to replace this, but several pleasant interest in proud independence will add a household. The most important thing is to "comprehend" a full-fledged generator can be literally from any old trash and garbage.
We will need
First of all, you need to get the pump from the automatic washing machine. It is used to pump water from the drum into the sewer and stands at the very bottom. You will also need four faulty hard drives, a long pole to install the design, numerous bolts, nuts, washers. Finally, the wires are needed.
Why do you need a pump

Pump will be used as the generator itself, which will produce electricity. It consists of a pump from a movable rotor on permanent magnets and a movable stator with a P-shaped magnetic circuit, as well as coils that attached to this design. The rotor can be easily pulled out. Thanks to the constant magnets mentioned, from such a pump and it turns out a great generator capable of proving voltage up to 250 V.
The generator manufacturing process
Bold the pump is best with the help of a clamp that is easiest to make from steel corners. Most likely, they will have to trim accordingly. In the pump magnetic circuit, you can safely make an additional hole for more reliable fixation. So in general, everything you need to do at this stage.
The process of manufacturing blades and their mount
The blades for the wind generator can be made from PVC pipe. To do this, cut it into three identical parts along. Of these billets, then you can make more "elegant" elements. In places of fastening the blades, do not forget to do suitable holes for the subsequent mount. It is also necessary to make a tail blade from a similar material that will direct the generator.

Fix blades will be on two disks from HDD. The whole complexity of this stage of work is to make holes in the disks in suitable places, and then fasten their blades with the help of harvested bolts and washers.
Swivel knot
Little but very important item. To make a rotary angle, you can use the engine from the hard disk. It is very good bearings, and therefore this item will ideally cope with the task. It is on this element that the disc will dress with the generator.
General assembly

Now it remains only to assemble a wind generator, attach the wires to our six, set a swivel element on it, as well as raise and put the "mill" in a suitable place. After completion of the work, small tests will correctly. The maximum 250 in the wind generator will certainly not give, but the outcome will still be pleasant! The detailed assembly process can be seen in the video material below.
I want even more interesting and useful tips for the country area for the future season? What about finding out also to turn it into a useful thing for the farm.
 Why you can not give icons
 Is it possible to give icons as a gift: Signs, the opinion of the Church
 A year ago left her husband, and now I do not know what to do