How to make a wooden laundry box with your own hands. How to make a wooden box with your own hand drawer wheels with your own hands
The rooting of several dozen cuttings is more convenient to produce in a portable container - spring soil warms up faster than in a cold greenhouse, and in the fall seedlings easily move to the place of wintering. Make a drawer with your own hands is easy: there will be a little time, and suitable trimming of lumber will be found in every farm.
In a wooden box, there must be enough space for the normal growth of cuttings for 4-6 months to the autumn transplant or even 1-2 years, if it requires a rooting agrotection. Optimal drawer dimensions: 300x350x750 mm (height / width / length). In a less deep container, the cover will interfere with the lid, and it is even more difficult to move a cumbersome design.
Preparation for work
For the construction of a homemade box, you will need a tool:
- Handman hand,
- plates,
- a hammer,
- Drill,
- drills on wood,
- furniture stapler,
- knife,
- Roulette,
- Galnik,
- Pencil,
- Brush.

Pine wood is suitable for work without traces of posting:
1. Boards with a thickness of 16-25 mm.
2. Brucks with a cross section of 30x50 mm.
3. Thin rails 10x30 mm.
Riding the boards, rebel the sword-bored and twisted - with high humidity they will become even worse.
Consumables:
1. Nails 50x2.5 - 28 pcs.
2. Nails 60x3.0 - 20 pcs.
3. Carnations Furniture decorative - 10 pcs.
4. Antiseptic.

The lid of the homemade box can be a piece of polyethylene film or white nonwoven material with dimensions of 80x60 cm.
Production of details
Drawing drawer elements for shilling

Wooden details: 1 - longitudinal bar for sides and bottom; 2 - insertion; 3 - slats for the end walls; 4 - Reiki; 5 - handles; 6 - connecting bars.
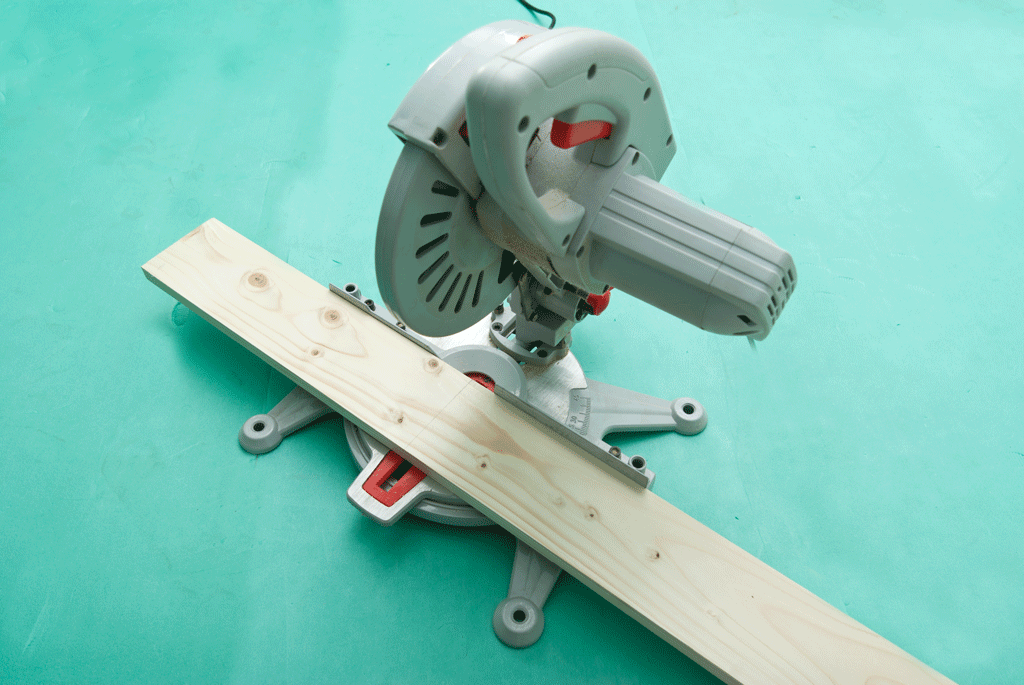
Using the pencil, the kitchen and roulette, mark the blanks according to the drawings, cutting off the cracking and plumbing ends.

Split boards in size and process the surface with the plane. Cover parts 2-3 layers of protective impregnation, following instructions on the package.
Build the box with your own hands
Fold two short boys into the shield, spend 30 mm from the cut parallel to it. Repeat marking from the opposite side. Attach connecting lines along the lines. Felt the details of nails and generate the protruding ends from the reverse side.

Take two longitudinal planks and "hug" around the edges of the cloves. Collect the workpiece of the letter "P", push the ends and score nails.

Turn the design and secure the side planks of the opposite side. Try to blow the nails vertically to avoid the exit of the island from the wood.

Send the details of the bottom, placing the narrow bar in the middle and leaving the lumens between the planks in 2-3 mm for the possibility of expanding the wooden elements during swelling. Attach the handles with nails closer to the top of the box.

Drill two rows of drainage holes in the bottom of the box.

Make an improvised lid for the box. Obtain one rack with a film and secure the material with brackets.

Wrap a second rack with the opposite edge of polyethylene, put a third bar on withdraw and lift with small cloves.

Attach the canvas on the wall of the box at three points, pre-extended guide holes in the rails to prevent the split of thin wood.

When using polyethylene, make a knife with a knife for dragging water, otherwise the film will get into heavy rain.

Put a fertile soil in your hands made with your own hands and put the harvested cuttings.

Placing a container on the soil surface, put the bricks under the bottom. After determining the seedlings in "School", free the drawer from the ground, clean the walls and dry the wood.
When mentioning the phrase "Wooden Box", many immediately imagine a standard Fruit Box. Although in fact the boxes can be the most different and used for all sorts of goals. This is a very useful product that can be used in everyday life, moreover, not only somewhere in the country, but also just in the house. We will understand how to make a tree box with your own hands, because only a self-made thing may not be just unique and most comfortable, but also completely safe.
general information
The box is the type of container or the subject of the interior, which is a product having a cubic shape or form of parallelepiped. It can be made of various materials, including plastic, cardboard, metal, but, mainly manufactured by the tradition of the tree or its derivatives. Depending on the design, the box can have solid walls and the bottom or the net surfaces, as well as it can have a lid and be both simple and decorative.
On a note! Categories of boxes include trading boxes that complement the furniture and make it more functional and convenient to use. Such boxes usually do not have the top cover, but the bottom is equipped with special wheels, driving on a small rails, fixed inside the cabinet or the cabinets on the spot where the box itself should be located directly. It simplifies its use.

The story of the box as such an unknown. Summary of ages people used various containers for storing all sorts of household goods, transportation and packaging of goods, etc. Historians believe that, most likely, the first boxes appeared during the start of development of trade relations and were invented just with the aim of simplifying the transportation of goods and products preserved it in proper quality before receipt of the sales point.

Now the wooden box is still used for transportation and storage of goods, but at the same time it is used in everyday life, and even in gardening. It is actively used to collect harvest, growing seedlings. By the way, at one time even appeared standards for drawers for potatoes, storage of apples, etc.
At the same time, the boxes are durable and in the house. Can be applied not only as elements of furniture, but also as individual products. For example, there are boxes for storing tools, small parts, sewing accessories, etc.

Serious competitors of an ordinary wooden box - products and packaging from veneer, plastic, cardboard. But none of them are able to fully replace themselves simple, but reliable and high-quality boxes, and therefore they continue to actively produce and do their own hands.
Wooden drawer properties
Why, despite the appearance of cheaper and simple competitors, the usual drawer from the tree does not lose its popularity? Everything is simple - the answer to this question lies in the unique properties and features of such a container.
Table. Comparison of the characteristics of the boxes.
| Type of box | Advantages and disadvantages |
|---|---|
| From veneer | Such a box is made of planks that are practically no processing. It is quite fragile compared to wood, but it is cheaper. Suitable for storing and transporting fruits and vegetables, as well as other products. It is afraid of moisture. |
| From plastic | A sufficiently convenient view of the box, which is absolutely not terrible moisture. Depending on the quality of plastic, it can be both very durable and quite fragile. But it is still easier to damage this kind of drawer than the usual wooden. It is not much, but more expensive than a wooden product. Suitable for storage and transportation not only dry, but also wet products. |
| Metal | The view that meets quite rarely. Metal boxes did not become popular because of their inclination to the appearance of rust, as well as due to gravity and high prices. At home without special equipment, a metal box is not easy. |
| From wood | The most optimal view of the box. Different with sufficient strength, may have a different design, suitable for storing all sorts of products. It looks much better than the usual veneer box. When using decorative trim, it can be used at home, durable if the tree has been processed by protective compositions. |

On a note! Conventional wooden boxes of simple design are actively used when decorated with loft style. They are an excellent attribute of this designer solution.
The manufacture of wooden boxes in production occurs according to GOST 20767-75. And for them it applies a certain quality wooden board, having a thickness of 1 cm. Such boxes are fine-weded, but durable. They are easy and easy to use.

Prices on construction boards
Building boards
Boxes in the house
As a rule, drawers for transportation and storage products do not have good processing - almost not polished and, of course, not covered with varnish. But for use at home, they are recommended to be treated and covered not only by protective compositions, but also paints. Then the box will look beautiful, and a person who uses it does not risk getting the opponel to the finger.

Usually in the house are rarely used boxes made directly for the transport of cargo or storage of the same fruits. More often to those who need a simple, but a nice drawer, you have to contact the carpentry workshops and order their definite product in their size and wishes. So do not confuse production and carpentry boxes.
Boxes in the house, as already mentioned, can be used for different purposes. This is the storage of utensils in the kitchen, and the storage of small items in the hall, storage of toys, clothing, shoes, cosmetics, household chemicals, etc. The main thing is that such a type of packaging fit into the interior and did not cause bewilderment.

The easiest thing is, of course, get the boxes in the store or in the warehouse, polish them and cover with varnish to use at home. But such a container can be done independently, good is not a difficult task, whether it is a box for the decor of the room, storage of things or the cultivation of seedlings.
Prices for various types of wooden boxes
Box wooden
Why is the tree?
The tree is the same material that is used most often to create household products. The reasons why this happens, simple. First of all it is important to say that a tree is an environmentally friendly material that does not represent danger to human health. It does not exude a unpleasant odor and does not emit any toxic substances into the air, so it is not necessary to worry about the emergence of allergies or health problems.

Also, a tree is one of those materials with which you can easily work at home. You do not have to use complex specialized equipment, it is enough to have a sawing tool, a drill and a screwdriver or a screwdriver. Also, for grinding and other material processing, it may be required for at least the costs and effort.
The tree is durable and beautiful and covered with varnished, can maintain its appearance over long years. Only nothing covered material is able to darken over time and lose the former natural beauty. Fresh wood looks very nice.
![]()
There is nothing surprising that the tree was and remains one of the most popular types of materials. Although now almost in any specialized store you can buy its derivatives - Faneru, panels, furniture shield, etc. But none of these options in any case will be better than the usual natural fresh board.
Furniture Shield Prices
Furniture Shield
Making boxes: What do you need?
So, to make an absolutely any drawer of wood (regardless of its use goals), a number of instruments and materials will be required. The list is small, but still without these things it will not move forward. Read:
- the sawing tool for cutting a wooden board and bars on the plank of the desired length. It may be a jigsaw or a tree knife;
- device for grinding wooden surfaces - grinding machine, sandpaper with special bar, etc.;
- hammer (in case nails will be used);
- self-tapping screws, nails, possibly - metal corners;
- screwdriver (if screws will be applied as a fastener);
- varnish and tassels or paint - to cover the surface of the tree or give it a certain color;

On a note! Before applying paint, the tree is best preliminarily progress. This will reduce the amount of paint spent, and will also provide it more rich color.
- pencil, square, ruler, roulette - tools that will help make the necessary markup.
Important! Before you begin to create a box, you must definitely draw it a diagram or download ready from the network. This will make it a smooth and neat product that has the desired parameters.

Prices for popular models of screwdrivers
Screwdrivers
We make a box for plants
Step 1. First of all, you need to decide on the dimensions of the constructed box. It is important to choose and place where it will stand. Based on this, the drawing drawing should be drawn with the size of the size parameters and calculate how much material will be required.


Step 3. Now you need to apply the appropriate markup on the board - mark the side and end sides of the box on it. Measurements are better to make a tape measure, but it is better to use the square to get smooth marks.


Step 5. The sideboard boards of the box must be combined with each other with the help of self-tapping screws. You can also use nails, but connections with self-drawers are much stronger and better.


Step 7. At the bottom of the plant for plants, it is important to drill several drainage holes. They will provide an outflow of excess water, which will fall into the ground during watering or rain.

Step 8. All the surface of the box is important to polish so that they are smooth, pleasant to the touch and safe.

Step 9. Finally, the box can be painted, but it is better to cover it with varnish. So it will be possible to make the box beautiful and additionally protect it from moisture.

Video - Make a simple box
Box from Rosek
Step 1. First of all, you need to eat blanks for creating a box. The bars of the selected length will be required, the racks of 1 cm thick. Bars need to cut down the length so that their profile is triangular.


Step 2. Next, you need to take bars, put them on each other (2 bars on each side) and start making the walls. On the smooth surface of the bar, it is necessary to apply glue on a tree and decompose the rails so that they rest on the smooth side surface of the bars. Reiki are located at a certain distance from each other to make gaps.


Tip! If you plan to make several boxes of the same size, it is convenient to use a wooden pattern to create walls.
Step 3. Then the rails additionally need to be fixed on corner bars with nails or screws. Thus, two side walls of the drawer are made.


Step 4. Next, the prepared walls need to be located in a special template (or simply to keep them correctly) and on the same principle, as in steps 2 and 3, to attach regular rails to the sides of the free sides. Thus, it will be possible to create two other side walls.


Step 5. Then the bottom is done. You need to put two rails (length equal to the length of the box) in parallel to each other, and they will fix other rails on them, but without gaps, so that the bottom it turned out to be solid.


Step 6. It remains only to fix the bottom on the bottom of the drawer, and it is ready. If necessary, all parts of the design can be seized even before the bin assembly began. Lacquer or paint products are better after the assembly.


Video - Box on Spikes
Video - We make a tool box
The box was and remains simple, but an indispensable subject for storing all sorts of things. It is especially necessary in the country or in a private house, as well as those people who love all the simple and uncomplicated. In any case, the product made by your own hands will be most reliable as possible and will serve not one year, or even one decade. Moreover, it turned out to make a wooden box simply - it is only important to understand which form you want to get a product.
We are very rarely worried about things and items that we are forced to enjoy at home, in the country area or in the office. We decided to think with you about the usual drawer from the tree. In it, you can store different things, make a beautiful flower pot from it, box for letters and correspondence. We look at the photo of a wooden box for different purposes and tasks.
At the manufacturing plant, such a container is indispensable as a container, we will tell about the benefits a little later. The most important question that occurs: "How to make a wooden box?" To make it, apply a chipboard plate, Faneur and a pine rail.

We will proceed today for the manufacture of ordinary wooden boxes with their own trees for correspondence or giving. No special materials and tools here will be needed, a sufficient standard home dialing.

Advantages and disadvantages of a wooden box:
- Less weighs than metallic packaging;
- Only natural material applies;
- Simple construction assembly, elementary elements;
- By strength, higher than the usual cardboard and parchment;
- Low purchasing value of material, widespread;
- With proper surface processing, the life increases.

Advantages from the use of a wooden drawer:
- Increased weight of transported things;
- Antiseptic treated tree serves sufficiently long.


Wood drawer use methods:
- In domestic conditions for storing vegetables, fruits and products.
- Souvenir packaging for a gift.
- Packaging of expensive devices and equipment.

Attention! Making a box under a certain product or product, it should be taken into account its size and weight. Toy boxes have type sizes and characteristics.

Required tool and technique
Before you begin to implement a wooden box project, you need to collect all the tools and equipment in one place.

We will need a machine for treating a tree, there must be a fuganok and circular saws. Otherwise, we buy the planks we need in the store - size and thickness. Do not do without a pencil, roulette, building angle and hammer.

The machine we will use for untreated wooden billets, which we will do from the board 2.5 x 25 x 150 cm.

Pop Pop Making Wooden Box
We take a circular saw and cut it on the wooden elements we need to size, cutting pieces. First we spill around the edges, then we put on a width of 20 cm and crucify completely.

In the process of work, be sure to put on special safety glasses. Better, if you have a good partner, sticking off boards.

By installing a carriage at an angle of 90 degrees, cut the board for 5 segments, 4 of which 20 cm, and one more - 24 cm.

Set the parameter values \u200b\u200bof the plane at an altitude of 1 mm and treat each of the workpieces from all sides to make the draft chalkboard options. For pure work, the height value must be installed at a 0.5 mm mark. The thickness of the finished boards should be equal to 2 cm. We get the board 2 x 20 x 20 cm.


Polishing to shine blanks is not required, the box will be used for storing vegetables and fruits. Toolboxes make the same principle.

The remaining billets are cut in a width of 4.5 cm, given the direction of the fibers. If you want to make a box with ventilating, there will be even additional 3 blanks in stocks.

Build wooden box
The entire assembly process is very simple, no tricks and hidden riddles. Take the most ordinary nails 5 by 0.15 cm. Why are thin nails? So that the design is tightly bonded and the boards did not crack.

First, from the end you nourish the top and bottom planks, then place the remaining wooden blanks. On the bottom we screw to the wooden base of the plank with a length of 24 cm, use 35 mm screws.

Drawings and sizes of wooden boxes are presented below.

Wooden box as a flower pot
A tree in terms of its properties and qualities is a universal material, it can be used for making boxes where we will place our plants.

In the last example, we already figured out that the tree is very easily processed to the piston state, you can remove absolutely all irregularities and make the surface perfectly smooth. Special skills and abilities are not required for this.


Just below, we suggest to get acquainted with the variants of boxes, which can be made independently without any skills with your own hands. The form and appearance of the design will depend on your personal fantasy.

You can not use the electric tool when working with a tree, saving some money, but the time will be lost much more, consider it. With a set of all tools, you will get exactly what was planned in the shortest term without accompanying practically no effort.

Be sure to bask the paint and the antiseptic to cover the surface of the finished products.

If the box was originally planned to plant colors, then you can pre-purchase ordinary plastic pots, where the flowers will be planted or plant them directly into the box. If they gathered to plant in the box, do not forget to spread the polyethylene film and do the holes for drainage.

Stock Foto Wooden boxes do it yourself


This article is about how to make a wooden box for tools. If you have a lot of tools and you want to keep them in order, the best thing you can do is create a simple tree drawer. From our experience, we consider them very useful, as they are easy, durable and give a lot of places to store tools Do not forget that you can adjust the size and design, according to your needs.
The main components of the toolbox are made of 20 mm boards, as they have a beautiful appearance, and very durable. In addition, we recommend that you glue offices of connections and copold everything by itself by cuts. Try to screw the cuts as possible as possible.
Upon completion of the assembly, it will be necessary to open the entire surface of the box. Make sure that all the edges are smooth, otherwise you can damage your hands about sharp edges. Also, do not forget to check that the caps of all the screws are at a level with a wooden surface. Get rid of dust and chips before painting.
In order to make a wooden tool box, you need the following:
Materials
Instruments
- Protective gloves, glasses
- line
- Chalk, roulette, level, joinery pencil
- and drills
Advice
- Pre-drill holes in wooden components, before spinning screws
- Make a cylindrical stick handle
Time
- 1 hour
Drawer design
Creating the simplest wooden box for tools is one of those projects that can be done in less than an hour, but it can make your life easier, especially if you work a lot with tools.
Smart Tip: Before connecting parts, add some glue into the joints. Immediately remove excess glue with a dry cloth, otherwise it will be difficult to remove it after drying.
The first step of the project is the markup. As you will see in the next stage of the project, we will use 1 × 8 boards to make a box for tools. Therefore, you must use a joinery pencil and a carbon line for marking lines on wooden boards.

In order to get accurate cuts, we recommend using electric jigsaw or a good circular saw. Make sure that the saw has smooth teeth, otherwise it can tear the edges.
Smart Tip: In addition, check that the blade will pass exactly along the section line before sawing.
In the picture, all the components needed for the drawer. The circular machine can simplify work, since many cuts must be made at an angle.

You must use this plan in the manufacture of components for the box. Make sure you checked all measurements twice, otherwise the components may not match each other.

After creating wooden parts, you need to drill holes across the edges. As you can see in the picture, you need a plank on a wooden bar to prevent surface damage. Drill three holes at the bottom and two holes on the sides.
Smart Tip: If you do not have experience in wood processing, you must figure out the guidelines for pilot lines. Make an indent from the edges to prevent wood cleavage.

If the edges of the bottom are not smooth, you must thoroughly take it with 120-sandy paper, before assembly.
Bottom ends Mix the joinery glue to strengthen the connection. Excess glue Remove with a dry cloth, otherwise you will spend time to clean it.
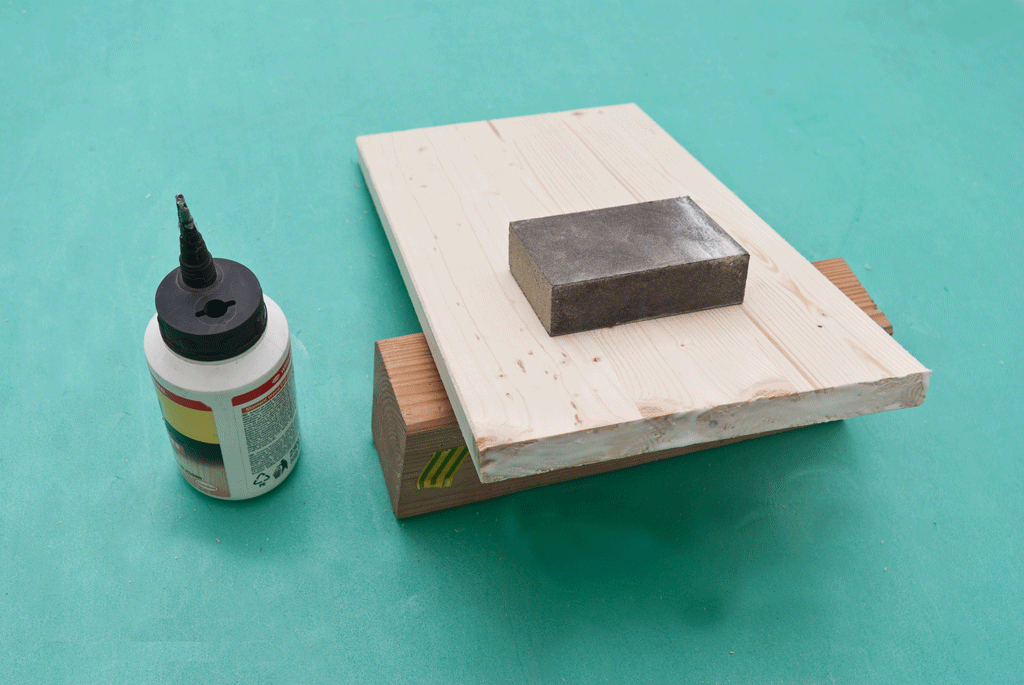
Press the components strongly and leave half an hour. If you use good glue, it will sprinkle the joints of the joints well.
Nevertheless, turn the cuts itself in the drilled holes.

In order to get a solid design, we recommend using the cuts. Work carefully to prevent damage to the wooden components.
Smart Tip: Align all parts before twist. As you can see in the picture, the edges must be smooth.

After installing all components together, the tool box should be similar to the one that in the image.

Make a handle from a cylindrical wooden rod. The diameter of the handle is about 20 -25 mm.
Smart Tip: Use the ruler to cut the rod of the desired length.

Add a few carbon black glue to both ends of the rod before installing it in place in place. Then, drill the hole and tighten the res. Hold the handle while spinning, otherwise it can be shifted.
Smart Tip: Leave about 15 mm from the top edge to a wooden handle.

Do not forget to smooth out the edges of the wooden components with emery paper.
Smart Tip: Clean the drawer from dust and chips before painting.

After completely Okarite the entire surface of the box with sandpaper.
Smart Tip: Apply several layers of paint, varnish or verse to improve the appearance of wood and protect the materials from rotting.

Thanks for reading our article, how to make a wooden box for tools. What a tool box you have. Tell us in the comments below.
In the process of his life, a person accumulates a lot of small property, which can only be useful for any need. In our close residential spaces, there is often a problem with the location of such things.
To solve this issue, you will need a neat capacity that can be positioned in any corner of your residential space. The most practical and environmentally friendly option, of course, is a wooden box.
With its independent production, you can apply all your fantasy and make a unique masterpiece. The benefit that the tree is the material that allows you to make truly original designs.
Why a tree
For a long time, folk craftsmen were used to make a tree of various designs. From this material they built houses that served their owners for many years, providing them with comfort and comfort.
A tree is a natural material that is well treated and has high ecological indicators. Wooden designs have aesthetic appearance and exuded favorable smells.
Of course, this material has its drawbacks, the main of which are rotting and flammability. But with the right approach to wood processing and caressing for her later, such trouble can be easily avoided.
Any man wants to make some product with their own hands. The tree is exactly the material with which you can experiment and make a thing that will not only with the necessary object of furniture, but will add unusual aesthetics to the interior of the residential premises.

To work with the tree you will need a special tool that a good owner is always at hand. It is necessary to approach thoroughly to choose a material, preferring the most durable wood rocks so that the product lights up as long as possible.
The very first thing to do is determine the place where the wooden box will be located and carefully remove the necessary dimensions.
- according to the obtained measurements, cut the design elements of the box - four walls, lid and bottom;
- we connect alternately lateral walls using nails or self-tapping screws;
- screw the bottom of the product, starting with opposite angles to avoid its offset;
- finally, we mount the lid of the drawer, which we provide the possibility of folding with the help of piano loops.
Using simple manipulations, a wooden box is ready for operation. Product reference is made on the basis of your preferences and flavors.
 Why you can not give icons
 Is it possible to give icons as a gift: Signs, the opinion of the Church
 A year ago left her husband, and now I do not know what to do