What to insulate and make the inner finish of the loggia. Hearth balcony and loggia - materials, technologies and tips. Material has an impressive list of advantages.
Send the material to you on E-mail
The process of insulation of the room is very important, because with the help of such repairs, drafts are removed, cold, and the space of the connected room is expanding. But it is not enough only to put the double-glazed windows and smear the gaps, the holes of the mounting foam. It is necessary to inspire it. To save money in the wallet, it is better to warm up the loggia with your own hands, step-by-step photo instructions, presented in the article, will help to do the work.
Amazing balcony with environmental materials
Initially, it is necessary to choose a building material. It is important to remember that not only thermal indicators may depend on the selected components, but also. If the building material will be too thick, then the useful area will steal.
Note! Any material to maintain heat should be environmentally friendly, as well as correspond to thermal and steam characteristics.
The room can be insulated with the following materials:
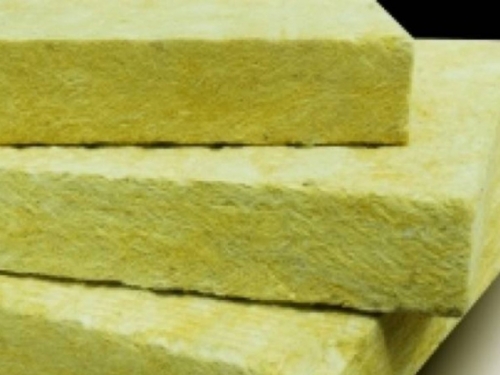
- Penophol . Great mineral wool substitute. It has a multilayer coating that also has a reflective effect.
- Polyurene Foolder . For balconies suitable as it is impossible. Very bad flashes, created from eco-friendly materials. Installation is performed by fill.


- Polystyrene foam . A fairly economical choice of material is also very effective for the balcony.

- Faith . Produced in the form of sheets. Created from mineral wool, with fiberglass particles.

As a rule, polystyrene foam is mounted on the walls and ceiling. It is good to use it, because its properties have a high thermal conductivity coefficient, as well as a small thickness. It is perfectly cut in a kitchen knife. An alternative option can be considered a foam. For the cold winter, sheets of 10 cm thick are suitable, for soft weather it is better to use 5 cm.
Article on the topic:
Preparatory work and loggia insulation with their own hands: Step-by-step photo instructions
Before the main process, preparatory work should be made. Only then will it work out to make a loggia with your own hands, and step-by-step photo instructions will help. This will require:
- Select those places that will be accurately processed. In any case, it is necessary to handle the parapet. Walls can be processed as needed. If there are no neighbors on the sides, then they also need to be covered with building material. Often the walls are insulating everything.
- Before repair, you need to endure and clean the surfaces.
- It is recommended to change the windows and put the double-glazed windows, if there are no such.
- Next, you need to pave the wiring for sockets, lamps and switches.
- The next step will be required to choose the material.
- After selecting the material, you can move to work with the floor, walls, then the ceiling.
- Upon completion, finishing works should be made.
Fastening for thermal insulation, it can serve as a glue composition and a dowel. If the glue composition is used, then in the process of work it will be necessary to smoke the area of \u200b\u200bgluing and the material itself.
Helpful advice! The formed seams that are obtained directly in the process of insulation should be filled with mounting foam.

Penoplex and how to insulate the loggia with it
Many people dream of reworking the balcony in a full-fledged room. But in order to use such a room, it was comfortable, it will be necessary to inspire it. As a rule, in the apartments Parapedes have thin walls. In connection with this, at the initial stage, it will be necessary to demolish and lay it out on a new one. Thus, the wall will turn out the thicker, which means that warmer. It is recommended to use a brick that is placed on the adhesive composition of the edge. For such a masonry, silicate brick is perfect.

After the fresh masonry gave shrinkage, you can start using windows. This is recommended to use the services of professionals. Next, you can move to insulation. will be installed on the ceiling, walls and sex. Following instructions, you can proceed to work:

- Cooked pieces should be put in the frame. You can also not create a frame, and mount the plates immediately on the walls using special mounting fungi.

Helpful advice! Plates should be customized so that they become tightly one to one. This will make rid of the slots, which means that the loggia will be much warmer. Recommended at the joints to walk by mounting foam or sealant.
- On the walls, ceiling, and the floor should be placed reflective thermal insulation. Perfect is perfect. The joints are recommended to smoke foil scotch.

- After that, the balcony will be ready for the final finish. To do this, you can use lining from wood or plastic or install other panels.
We do with your own hands. How to insulate the floor on the loggia?
The very first should be processed by the floor, and then all other surfaces. The work process is as follows:
- It is necessary to clean the floor from garbage and dust.
- Next, you need to close all holes or cracks with foam.
- Now you should use thin and put it on the entire floor. Locked it in such a way that there are no joints or there was their minimum quantity.
- When the first layer is laid, it is necessary to walk by construction foam at its perimeter, including joints and seams. Then stacked by the second layer.

- Now you can mount a frame of a wooden bar. The distance between the bars should be about 50 cm.
- The resulting distance should be filled with polystyrene. From the thickness of the bar will depend on the thickness of the insulation. Ideal when they are flush.
- Next, it is required to cut off the foam in the size of the balcony and put it with a foil side up, but in order to look out for about 20 cm for each wall.
- Now you can fix the floorboard bars and mount decorative coating.

Alternatively, the floor can be installed with a warm floor or make the loggia of the penplex.

Ceiling insulation and loggia walls
Almost for all types of premises, the insulation of the walls and the ceiling occurs equally. Thus, the walls are insulated as:
For, the best foam is suitable. The process is made by analogy to walls and semi.


Warming of the loggia from the inside: how best to do?
To select the right material, some important factors should be taken into account:
- Purpose of the room.
- If the balcony will be used as a pantry, then you can use any building material, by mounting it in 1 layer.
- When the balcony turns into one room, it is necessary to use different building materials, which are stacked in 2 layers, throughout the area.
- If combination with the room comes, then you need to use a two-layer insulation. Walls can be made in one layer, and Parapet will pay special attention.
- Using insulation for interior decoration, the useful area will be less, so such a factor should be taken into account.
The choice directly depends on the described factors and tastes of the owner of the room.
Finishing work
Finishing works are needed. This is connected not only with aesthetic species, but also affects protective factors. If we are talking about the outer finish, then the parapet can be seal or siding.

Internal works, can be any. It all depends on preferences and fantasies. But it is worth noting that the finishing of the loggia inside with their own hands will bring more pleasure and joy. Often, work is performed using PVC panels. You can also punish the wallpaper or just paint the walls. Very good loggia looks in a tree decoration. It will not only be beautiful, but also environmentally friendly.

Article
Many residents of apartment buildings face the problem of a shortage of square meters. An excellent solution of this issue can be an independent warming of the loggia. This is a painstaking, requiring certain construction skills and time from the artist. However, the finished result is worth it. The warm balcony expands the possibilities of using space, "reflects" residential premises and can be the subject of the pride of a homemade master.
The need to warm the loggia
Each apartment owner independently decides for himself how to use additional square meters of loggia. Some shut down on the balcony the storage room or workshop, others exploit the room more rationally - create a "winter garden" or a separate room. Insulated loggia will be able to convert to a cozy place to relax, work, a compact gym or a zone for children's creativity.

In addition, a warmed balcony solves a number of problems:
- the heat loss of the room and the cost of heating the apartment are reduced;
- reduces the risk of mold on the walls of the balcony.
You can perform outer or internal insulation. The obvious advantages of the outdoor method:
- not "eaten" the useful area;
- simplification of interior wall decoration.
The essential advantage of internal insulation is the ability to perform work independently, without hiring workers.
Selection of thermal insulation material
Various thermal insulation materials are used as insulation, ranging from traditional, inexpensive, and ending with modern high-tech. For the insulation of the loggia from the inside it is better to use thin, lightweight materials. Thanks to their minor width, it will be possible to save useful space.
Consider the characteristics of the main thermal insulation materials for the insulation of the loggia / balcony.
Foil polyethylene - one side of polyethylene is applied by a foil layer, which reflects the IF radiation and "throws" heat fluxes back. Heater Characteristics:
- roll width - 1 m, thickness - 2-5 cm;
- easy installation - Polyenethylene canvas easily cuts into a knife;
- method of laying - online or brass;
- the effectiveness of thermal insulation increases almost twice;
- material is used for ceiling insulation and walls.
Loggia insulation: step-by-step instruction. Use of foam
Mineral wool has good thermal insulation qualities and affordable cost. However, experts do not recommend using this material for the insulation of the loggia for a number of reasons:
- bad moisture resistance - minvat absorbs liquid, so you will have to additionally enhance the waterproofing;
- when using the miniral wool, the arrangement of natural ventilation is required - over the insulation, it is necessary to leave a gap, which slightly "beautifies" the area of \u200b\u200bthe balcony;
- for lining of the loggia, it will take reinforcement of the wall and carrying an additionalness.
Polyfoam - foam plastic of different density. The bulk of the material is gas. Polyfoam has the following characteristics:
- plate size - 1 * 1 m;
- heater thickness 2-10 cm;
- polyfoam density - 15 or 25 kg / sq. Cm;
- durability.
Extruded expanded polystyrenex (PESEROPLEX) is a modern thermal insulator, resembling a foam, but characterized by a stronger structure and functionality. Properties of polystyrene foam:
- plates of rectangular shape 1200 * 600 mm;
- thickness - 2-10 cm;
- polympoth density - 35-45 kg / sq. Cm;
- countertileness;
- frost resistance;
- plates have a chamfer for a more dense styling;
- low weight and simplicity of installation;
- class of flammability - M-1;
- the material is not used in open places where UV rays penetrate.
Warming of the loggia do it yourself: a step-by-step instruction. Photo of the installation of Polymplats

Methods of fastening insulation
The choice of a method of insulation, first of all, depends on the heat insulating material used and the further decoration of the walls.
Warming under putty and plaster is suitable when using the foam or foam. The heat insulating panels are glued to the base with tiled glue. Plates are additionally recorded by fungi-dowels. To the plaster / putty the walls or the ceiling can be proceeding every other day after mounting the insulation.
Laying foil polyethylene is under the foundation of the frame. It does not matter the method of fastening profiles - to the wall or by means of P-shaped fasteners. The foam sheets are applied to the ceiling / wall of the loggia and are fixed by the rails. In this case, the compound is permissible, and the docking strip can be glued with scotch.

Warming under the base of the frame is possible only when using a thin insulation with a thickness of up to 20 mm. Pressing the thicker thermal insulator will affect the rigidity of the rails and fastening
If it is planned facing the balcony with plasterboard or PVC panels, MDF, then laying the thermal insulation material is advisable in the frame cell. As a heater, foam of the 15th density or mineral wool is used. Minus this technology is an increase in the thickness of the heat-insulating "cake".
Options for arrangement of "warm" floor
Floor insulation technology on the loggia is somewhat different from the heat insulation of the seating and the ceiling. Through this element of the balcony is inflated requirements.
There are several basic options for arranging the "warm floor":

Warming of the loggia do it yourself: step-by-step instruction
Below is a step-by-step instruction in the insulation of the loggia of the penplex.
Tools and materials
For work you will need:
- plates of fasteners;
- construction level, stationery knife, marker;
- pVC pipes for cable laying;
- capacity for kneading glue;
- construction mixer;
- trowel;
- polyuritan foam;
- mounted gun;
- grater for grinding thermal insulation sheets;
- plastic smooth grater for floating floor;
- metal grid;
- peskobeton M300 large-phrase;
- polyurethane glue.
Loggia insulation: step-by-step instruction. The photo is the diagram of the heat-insulating "cake".

Preparatory work
First of all, on the loggia it is necessary to install energy-saving plastic windows. It is not worth saving on the glazing - it is better to choose glass windas and fittings of firms that have proven themselves at the "window" market.
If high-quality windows are already installed on the balcony, then you can move to the insulation of the balcony.
Preparatory activities:

Heat ceiling

Installation of thermal insulator on the walls and parapet

Flooring of the floor loggia penplex: Step-by-step instructions
Consider the stages of creating a "warm floor" with the help of fasteners and cement-sand tie:

- If you need to install the carrier frame, it is better to use galvanized metal products. Unlike wood, it does not rot and not heavy.
- Heat insulation work should be performed in dry weather. Many glue mixtures and primer compositions have features of use in high humidity.
- The gaps on the loggia are treated with foam, resistant to low temperatures.
- The wood used must be dried, and then processed against fire and rotting.
Loggia insulation with its sleeves: step-by-step instructions. Video.
A balcony in a modern apartment is a fairly functional room, so such a question as insulation and the balcony decoration is important, and it should be approached very responsibly. Especially if you want to increase the total living area at the expense of the balcony. Compliance with the basic rules of insulation and finishing will help turn the balcony in a cozy and beautiful lounge.
The easiest way to get a beautiful lawn in front of the house
You, of course, saw the perfect lawn in the cinema, on the Alley, and perhaps on the neighboring lawn. Those who at least once tried to grow a green platform in their own area, without doubt they will say that this is a huge work. Lawn requires careful landing, care, fertilizer, watering. However, only inexperienced gardeners think so, professionals have long known about the innovative agent - liquid lawn Aquagrazz.
Basic rules of balcony insulation
Works on the insulation of the balcony, as a rule, begin to dismantle the previous finishes, old window frames and the installation of new double-glazed windows - this will significantly reduce heat loss and increase the temperature in the room for several degrees. Then you should proceed to the insulation of the floor, walls and ceiling. Before starting work on the replacement of double-glazed windows, determine the material of the window profile (wood, aluminum or PVC profile) and additionally strengthen the balcony parapet using reinforcement. The profile is the optimal option. It has a high level of thermal conductivity, not exposed to moisture and temperature differences, corrosion and rotting.

Main types of windows:
- with two, three-, four-, five-chamber windows;
- with an extended profile;
- with swinging sash;
- with a sliding or swivel-folding system.
The window profile may be not only metal-plastic, but also wooden. Modern wooden frames are significantly different from their predecessors - they are fitted in size, have a beautiful appearance, high-quality accessories and mechanisms similar to plastic models. However, the tree is a leakage material, so its use is more justified in the regions with a warm climate. Commonly performed glazing not only maintains heat, but also reliably protects the room from wind, rain, dust. Therefore, it is necessary to choose not only the profile, but also the thickness of the glasses. The optimal solution will become glass with energy-saving coating, which have reflective properties and have a higher level of thermal insulation.

To fulfill this stage of work, we recommend using the services of specialized firms, since without certain skills, experience is difficult, and most importantly, the main profiles are correctly installed.
The algorithm of the insulation of the balcony includes:
- Clearing the territory from foreign objects.
- Dismantling of old structures, the strengthening of the parapet (especially relevant for buildings of the old building).
- Installation of a new window profile, heat-saving double-glazed windows.
- Laying wiring, installation of heating system.
- Selection of insulation materials, floor insulation, walls, ceiling.
- Decorative surface finish.
If all work is performed independently, you will need the following tools: drill, perforator, screwdriver, construction level, square, roulette, gypsum kart, electric jigsaw.

The main types of insulation materials for warcia or balcony
The modern market offers a wide variety of materials with which you can perform high-quality insulation of balconies or loggias, but the most popular is: foam, polystyrene, mineral wool, clamzite, foil polyethylene, isolan, foams. The care of the insulating material directly depends on the operating conditions, grounds and Floors balcony. For example, with high humidity it is impossible to use mineral wool, as it is prone to accumulating water vapor, which provokes damage to the coating and contributes to the formation of mold during operation. The most optimal option will be the use of polystyrene foam, foam or isolon. Polyfoam, despite the affordable price and ease of installation, has one significant drawback - fast flammability, therefore it is preferable to use more modern insulating materials with a high level of fire resistant. Exploded polystyrene foam is a modern insulating material that is characterized by ease of installation, durability and moisture resistance. His only drawback is a high cost, which, by the way, is fully justified by ease of use and high quality thermal insulation. The material of the material also depends on the work season, because some insulating materials change their operational properties under the influence of dampness or negative temperatures.

If the insulation of the balcony is made in spring or autumn, take into account the increased humidity, which makes it difficult to stick the layers and adversely affects the operational characteristics of most insulating materials (exception - foam, foam and penplex). In this case, the main works should be started on top, because the insulation of the ceiling will continue to work even with a sudden rain. If insulting work must be carried out in winter (if the air temperature is not lower than 20 degrees), then special adhesive and adhesive cement mixtures should be used, which, in contrast to conventional cement, do not freeze, and are frozen even under conditions of low temperatures.
It is important - the mounting foam should also be selected, given the temperature regime, since some of its types are destroyed in frost.
Basic Floor Insulation Rules

If you want to warm up your balcony, you should pay special attention to the flooring. To perform this stage, you will need at least: wooden rails, self-tapping screws, mounting foam, insulation. The insulation of the floor lies in its alignment, laying the waterproofing layer (with the mandatory treatment of the joints with a sealant), the heat-insulator, the fill of the concrete screed (if necessary, a warm floor system can be installed) and the finishing finish. Soviet: if there is no possibility to fill the screed, you can skip This stage. Then you will need to lay special lags (wooden plates), between which the thermal insulating layer should be placed (for example, clamzite or penplex). On top of the lags are covered with chipboard or plywood, then you can proceed to the finish finish of the floor. For the insulation of the floor of the loggia, you can use inexpensive insulating material - clayzit, which in addition to thermal insulation properties raises the floor level, which is very convenient when expanding residential space at the expense of the loggia. In addition, its use does not require the use of the waterproofing layer, it is sufficient to use a vapor barrier film, which places a claymzite coated with a reinforcing grid. The tightness of the structure is ensured by the fill of the cement solution, which, when frozen, forms a solid smooth surface. Linoleum, laminate or tile can be used as an outdoor coating.

The list of work at this stage includes:
- purification of surfaces from garbage and dust;
- climbing cracks and cracks (using sealant, mounting foam or polyurethane mastic);
- high-quality steam and waterproofing;
- installing a wooden frame;
- installation of the thermal insulation layer;
- fixing basic boards;
- decorative interior decoration.
- Wall insulation balcony
Before proceeding with the insulation of the walls, the surface should be treated with a special antifungal solution and thoroughly close all the slots on the balcony. For this purpose, polyurethane sealants and mastics, which have high plasticity and frost resistance are most suitable. Then you can begin the installation of a vapor barrier film (the docking seams are squeezed by a special construction vapor insulation scotch). Next, we follow the installation of a wooden or metal crate and laying out the selected insulation (for example, foam plastic, foam). The final stage will be the cake of the frame profile with moisture-resistant sheet materials (plywood, plasterboard) and decorative wall decoration. Use attention - if the wall of the loggia goes outside, you should use a double layer of insulation. If the insulation was chosen a penplex, it is necessary to make sure that the docking seams of the layers do not coincide.

Basic principles of ceiling insulation
The ceiling insulation is an important aspect that cannot be left unattended. Especially if you have no neighbors from above - in this case, in addition to insulating work, you should choose high-quality roofing material.
Tip: Before starting work on the inner side of the roof, it is recommended to apply a special soundproofing spraying.
In any case, the choice of materials for the insulation of the roof depends on the set of factors - the climatic zone, wind direction, the side of the world.
The roof insulation algorithm includes installation:
- waterproofing layer;
- windproof membrane;
- anti-condensate layer (for additional protection of insulating materials);
- wooden frame;
- thermal insulation materials;
- additional vapor insulation for insulation.
The insulation of the ceiling is performed in the following sequence:
- Installation of a metal frame (suspensions).
- Laying a vapor insulating layer.
- Fixing the insulation (foam, isolon, penplex).
- Applying a foil insulating layer.
- Finish finish.

How to avoid mistakes when insulation balcony
Please note that when performing any construction work, you should accurately comply with the technology and recommendations of manufacturers. Even if you have certain skills, it is a complex multi-step process that requires compliance with all technological conditions. This is especially true of the insulation of the balcony with their own hands, because any misses will affect the final result. So, insulating the "zocking" territory, observe the sequence of layers - vaporizolation is established only after the heat insulating layer, and not vice versa. The presence of vaporizolation is a prerequisite that reduces the risk of destruction of insulating materials under the influence of moisture. The price of glass stacks and the installation of the heating system without internal insulation will not reduce energy consumption and is an ineffective way of heat saving. Using low-quality materials contributes to heat lines, so the selection of building materials should be approached as responsibly.
Excessive rushing also affects the quality of insulation - non-compliance with technology, insufficient close-up sealant, ignoring the rules of waterproofing, of course, affect the final result.
Methods of additional balcony insulation

If you plan to use your balcony as a residential room or leisure room, you should take care of its additional heating. In order for the temperature to be comfortable even with severe frosts, it is necessary to install an additional source of heat: radiator, air conditioning, or a warm floor system. Please note: you can combine the heating method, for example, if the room is installed in the room, it is enough to install a warm floor on the balcony to maintain a comfortable temperature. However, if the apartment is heated using central or autonomous heating, batteries should also be installed on the balcony.
Decorative trim of a warmed loggia
Properly performed insulation and the finishing of the loggia will not only reduce heat loss, but also will save money. For the decorative finishes of the loggia or balcony, plasterboard and plastic panels are most popular. Moisture-resistant plasterboard is one of the best ways to finish the balcony. It is featured by convenience of installation and suitable for further decorative finishes (painting, plaster, fabrics with wallpaper, facing with tiles or artificial stone). The flow of clapboard and decorative panels also has a lot of advantages. Their distinctive characteristics are: ease of installation (work forces even newcomer), a large selection of colors, moisture resistance, frost resistance, durability, ease of care.

The finishing procedure with decorative panels consists of several stages:
- Preparation of the surface: disassembly of the previous coating, removing mold traces (if necessary).
- Installation of a wooden frame.
- Fixing the panels (work is performed from the doorway, along the wall, the outer side of the sheets is fixed with special brackets).
- Installing plinths, window and doorways.
Please note that the panels can be used for decorative ceiling finishes (in this case, they are not fixed along, and across). By following the features of the warriology of the loggia and balcony, you can independently perform all the basic works, which will allow to expand the living space of the apartment, creating comfortable living conditions , make a workbook or corner for needlework. Warming and decorative decoration of the balcony is not particularly difficult, so everything you need is the desire and availability of the necessary materials and tools.
Warming a balcony, we create a buffer zone on the way of cold air into residential premises, add some square meters to create a pantry, or even a small room - but this is if you connect the heater. In our step-by-step instructions, we will tell you how to correctly complete the insulation of the balcony with your own hands and what materials are applied for this.
The insulation of the balcony begins with checking the bearing structures. To do this, it is desirable to look at the balcony slab from the balcony of the neighbors below: if the beginning of the destruction is visible with the naked eye, then the concrete and reinforcement layer can be strengthened as it is shown in the figure. If you doubt the strength of the stove and the ability to carry an increased load of glazing, insulation, floors - it is better to seek expertise. Although, as practice shows, the balconies are withstanding with ease of increased load and collapse is, fortunately, an extremely rare exception to the rules.
 and the concrete is knocked in damaged places. b - the surface is cleared and repairs are applied: 1 - contact layer; 2 - anti-corrosion protection; 3 - repair solution; 4 - leveling putty
Before starting work, it is necessary to remove the old finish and frame (if any), clear all surfaces from the collapsing elements, if necessary, make a small concrete tie or to close the slot with a concrete solution in the stove.
Warming work can be divided into:
- outdoor skin;
- glazing;
- internal insulation;
- finish.
Parapet siding Outside
The easiest all the outdoor balcony is made from vinyl siding.
Outside the parapet collects a vertical incise thing so that it forms it to form a single level area (checking the strained thread). The bars or metal profile of the root fixes are fixed at a distance of about 40 cm from each other. Next, the guides for siding (closing profile) are mounted along the bottom and upper perimeter, and the angles are decorated with a special vinyl profile - "outer angle".

Starting Siding Plank is fastened with a long side to the bottom guide using self-tapping screws. It is better to start with the side wall - and the panel is shorter and can be seen from the street less - you can take strap. Between siding and balcony grille, you can immediately lay soft mineral wool slabs. At the top of the parapet, it is necessary to mount waterproof.

Very short video about the main stages of the trim:
Glazing is a mandatory phase of balcony insulation. At the same time, you can independently make frames made of wood, aluminum or steel profile (corner, profile tube) and glazed, and you can buy ready-made double glazing. The first option will cost cheaper, but it is more laborious and, most importantly, it will only slightly raise the temperature on the balcony in the winter. Sealed windows without the use of glass technology, you are unlikely to succeed, they will have to warm them up for winter or not to wave and leave the balcony in principle cold, which will only reduce the wind load. So it is better to order ready-made glass windows for glazing.
If the balcony was not glad, and you insulate not a loggia, then the parapet to install the frames is most likely missing or is insufficient. Create a retaining wall can be created in the form of a reinforcement frame with concreting or brick. To facilitate the design to concrete, clamzite can be added, reducing the overall load. The top of the parapet should also be strengthened with a metal profile.

If the balcony protective grille is rather durable, and the double-glazed windows are single-chamber, aluminum are very light, then wooden boards under the windowsill can perform as a support that are attached to the top of the lattice.
If the balcony has a small area, then you can boil the frame on the brackets, protruding beyond the concrete slab. At the same time, the windowsill is not "eating" valuable balcony. Such a device balcony is called removal.

After that, the windowsill and the framework of the future glazing are installed - without frames and sash, which will be mounted later. For this purpose, the metal structure is welded to the metallic profile of the parapet and supports fixed behind the balcony plate of the neighbor from above. If you live on the top floor - the design will be more difficult, as it will have to do a canopy roof, for example, from a professional flooring, polycarbonate, etc. At the same time, the racks should be more durable.

After the frame is fixed, mount the upper waterproof (visor) and set windows according to the instructions.

On the characteristics of the glazing of small balconies without increasing the area, see the video:
Balcony insulation from within
From the inside the balcony is insulated by the walls, gender and ceiling. To do this, you can use various thermal insulation materials.
Materials for the thermal insulation of the balcony
The thermal conductivity of building heat-insulating materials is different in wide limits, so it is unambiguous to call the recommended thickness cannot be unambiguously. For information, see how optimal thicknesses are distinguished to achieve the same thermal resistance when using popular materials.

The basic requirements for materials also include:
- long-term strength;
- nonhygroscopic;
- fire safety.
Most often use:
- mineral or stone wool - fibrous insulation;
- lightweight foam and penplex (different types of polystyrene) - slab materials;
- polyurethane foam or "Penoflex" - mounting foam.

Sometimes the composition is used from these materials.
Fibrous insulation is convenient in the installation when it is made in the form of soft plates or blankets with a foil surface.

Polyurethane foam is applied with the help of special, preferably professional equipment.

To compare the consumer properties of materials, we reduced their main characteristics in the table.
Stages of balcony insulation from within
Now that the basic properties of heat-insulating building materials are known to us, consider the procedure for performing work.
Tip! If there is an illumination or connection of the heating devices on the balcony, make the wiring to the lamp, switch and socket in advance, by placing cables into plastic boxes. So the wiring will be hidden, which is significantly more attractive than open wiring.
Before working, take care of the dust, small particles of the insulation or the solution did not contaminate the apartment - close the battlefield.
Floor insulation
Begin insulation follows from the floor. First, lay a layer of waterproofing on the balcony slab. It can be ordinary polyethylene or pholoisol. At this stage, the waterproofing material can be fixed on the walls.


To protect against condensate, the layer of vaporizolation is placed on top. If you acquire a relief film, then you need it to be embossed up.
The device is completed with a plywood black floor with a thickness of 10 mm in two layers. It is attached to the self-tapping screws to lags. Instead of plywood, you can use Fiberboard or chipboard sheets.
Heat ceiling
Apply the antiseptic layer on the purified ceiling. For thermal insulation, you can take foil minvatu or foam. A good solution will be used by foam - foamed material coated with aluminum foil, which is glued to the PVA, and from above is nailed with a shap for fastening the finishing layer of the finish - a set of ceiling, drywall or siding.

The foam can be fixed on the ceiling using mounting foam.

Minvata is placed on a plasterboard false ceiling, which is fixed on the frame of the aluminum profile or a wooden bar of 40x40 mm.

If required, fix the lamps.
Wall insulation
Waterproofing was already performed at the first stage, so immediately on top of it mounted a vertical or horizontal cut from a bar. The distance between the bars is equal to the width of the heat insulating material. It is better to use polystyrene foam or mineral wool plates for the walls.

PPS can be glued to special glue or mounting foam, be sure to blow it all the joints and slots.
On top of the insulation fasten the vapor barrier film.
Finishing work
Materials that can be separated by a balcony. It is a plasterboard that can be plastered or covered with wallpaper, and tile, and vinyl siding, and lining.

Most balconies mount stationary or mobile laundry dryers that can climb the ceiling.

If the area allows, on the balcony you can install compact furniture or furniture-transformer: folding tables and seats, and some happy owners of wide balconies even equip the sleeping place. The windowsill can be made wider and turn it into a tabletop - for morning coffee or business practices.
If you wish, you can install a fan heater on the balcony, which will allow you to use the additional area in spring and autumn or install an electroconvector that will make a balcony all-season for equipment there is a cabinet or winter garden.

In conclusion, we suggest you see the photo of the design finishes of the balcony space - for inspiration and source of ideas.


In winter, have to forget about the balcony? It is time to change - make a warm cozy corner from the warehouse of unnecessary things or even! Heat the cold balcony and in a new building, and in a private house is not so difficult, as it seems: it is enough to know which materials can be used and in what sequence to carry out insulation work.
To begin with, it is worth saying that you can warm the balcony in two ways - from the inside and outside. Outdoor insulation, of course, more convenient - not "eaten" the precious centimeters of the square, and the facade of the balcony becomes more pleasant. But this is a time-consuming process that requires the involvement of a building brigade and industrial climbers. Therefore, in the article we will focus on how to warm the balcony in the apartment from the inside - this can be done on your own.
For insulation inside the balcony, first of all it is necessary to carry out preparatory work. They include several important stages:
- How to start the insulation of the loggia or balcony? Free the space from all extra. Best of all, if the balcony is completely empty: it is much easier to work so much easier. Also get rid of the old finish in advance.
- Get all the gaps - a lot of heat leaves through them. For small cracks, the weather-resistant sealant is suitable, more significant fill in the mounting foam - it will not only fill the emptiness, but also serves as an additional heat insulator.
- To make it easier for you to carry out work on insulation, it is important to level the cracks and irregularities on the walls and the ceiling with the help of a cement solution.
- If you plan to place on the balcony light bulbs or lighting devices, it is worth taking care of the wiring in advance. To hide non-sustainable cables, place them in plastic boxes.
- Before starting work, close the head of the opening between the balcony and the room adjacent to it so that the building dust and other pollutants do not get into the apartment.
Is it possible to warm the balcony in winter? Yes, you can. Only during the work in winter it is necessary to choose frost-resistant materials, in particular the mounting foam.
What to warm the balcony: what materials it is better to choose

To understand how to insulate the loggia or balcony, let's see first, what properties should be the materials:
- high strength;
- fire safety;
- water resistance;
- environmental friendliness;
- relatively low cost;
- easy installation (if we want to do all the work with your own hands).
Most often for insulation, minvatu, polystyrene foam, foam, etc. are used. Sometimes they combine several of these materials. The pros and cons of each thermal insulator we reflected in the table:
| Insulation | Benefits | disadvantages |
| Keramzit\u003e | Low cost; Durability; Fire safety; Not afraid of mold and fungus; Low weight; Easily takes any form |
High moisture permeability; Suitable only for floor insulation; Difficulties may occur when laying |
| Mineral wool | Good sound and thermal insulation; Environmental friendliness; Fire safety; Easily takes any form |
Deterioration of properties when water getting into; The thickness of the insulation "steals" the useful area |
| Styrofoam | Low cost; Ease of installation; Low weight; Not afraid of mold and fungus |
DISTRIBUTY; Spray |
| Extruded polystyrene foam in plates | High strength; Ease of installation; Moisture resistance; Durability |
Relatively high cost |
| Polyurene Foolder (liquid insulation) | High strength; Moisture resistance; Durability; Fills cavities of any form |
Relatively high cost; Mandatory availability of special equipment |
| Penophol (foamed polyethylene with a layer of metallic foil) | Moisture resistance; Durability; Small thickness; Good heat and waterproofing |
It is rarely used as an independent heat insulator, usually only in combination with other materials. |
What insulation is better for the balcony? The answer to this question depends on your preferences and financial opportunities. In more detail about the characteristics of insulation, as well as on the general, you can read in our blog.

First on the floor, it is necessary to lay a waterproofing layer of polyethylene or foam, so that the dampness does not disturb us. Masters advise to lay foam reflecting up. Along the way, we can fix the waterproofer and on the walls. The junctions between the sheets of the waterproofer is better glued to fooled by tape.
Another good waterproofer is a bitumen mastic. It dries about a day, the surface treated to it cannot be touched.
Then we install lags - wooden bars or metal beams that serve as the basis for floors, cereals and other surfaces. Wooden lags will fit the floor for flooring. Lags made from high-quality materials should be chosen: the moisture content in the wood should not exceed 12%. Also, in order to prevent fungus and rot, the bars are treated with an antiseptic or primer.
The distance between the lags should be equal to the width of the insulation, and the height of BRUSEV builders recommend making 10-15 centimeters - it is necessary to reliably protect the floor from frosts. To close the holes between the lags and the wall, as well as fix the bars in the desired position, use the mounting foam. For accuracy, do not worry: excess foam can be cut off with a knife after drying it.
Thermal insulation layer, slab or fibrous is laid on. Carefully follow that there are no cracks between the heat insulator and lags: "Cold Bridges" will be reduced to not all your insulation efforts. If you are placing the thermal insulator in several layers, be sure to shift each new layer so that the seams between the insulation sheets are not in the same place.
To protect the floor from condensate formation, you will need a layer of vaporizolation.
With the help of self-tapping screws, attach to the lags "Chernovaya" floor of boards, plywood sheets, fiberboard or chipboard. This is the last step before finishing the floor, such as laminate, linoleum or carpet.

There are two ceiling insulation technologies - with or without framework. Before starting work, it is recommended to apply an antiseptic layer on the ceiling: so you protect the surface from the appearance of mold.
If you decide to make a crate, you will need wooden bars and dowels. In the crate lay the insulation - minvata or foam is suitable as the heat insulating layer. Minvatu is fixed by mounting foam, and the foam is kept and without additional attachment. Then the ceiling finishes: plastic panels, plasterboard, lining - any materials are suitable, it all depends on your idea.
Without the framework of work on insulation, the ceiling is carried out as follows: The surface of the ceiling must be cleaned of dust and dirt, as well as to handle the strengthening soil - it will help to continue to fix the insulation. Then the glue is applied to the sheets of the fox (it is enough to apply glue around the perimeter and a bit in the middle). We glue the sheets to the ceiling, for reliability they are attached with the help of a dowel mushroom. Shakes close up by mounting foam.
The glue that you will use, in no case should contain toluene.

We are already ready for waterproofing, so we can immediately install a laminate from wooden bars. The distance between them should be equal to the width of the heat insulator, and the height of the bars - the width of the insulation. For the walls, polystyrene foam plates, foam or high-quality minvat are suitable. The junctions between the insulation, as always, fill the foam. On top of the insulation, you need to fasten the vapor barrier film.
As a rule, the wall between the balcony and the room is insulated into one layer, and the remaining walls are in two layers, or the thick heat insulator is used.
And what to do with windows?

Think: Is it worth it to warm the balcony with cold glazing? If you want a truly warm corner, you should not save on the windows. You can insulate the ceiling, gender and walls to the highest level, but the cold air will still be seized through old or low-quality double-glazed windows.
If your balcony is not glazed, first of all, pay attention to the parapet - a low wall that protects the balcony from the street. It must be strong enough to withstand the window design.
What windows choose? If you are planning to make a balcony living room, two-chamber plastic windows with swing sash are suitable. They are airtight than sliding window systems, such windows have better heat and soundproof properties. The only negative - as the balcony area is mostly small, the placement of furniture can hinder the open windows.
In general, it is possible to install plastic windows with your own hands. But it is better not to risk if you do not have experience: after all, even some companies specializing in the installation of windows make annoying mistakes in their work. In order not to face the mount-installers, wind pressure and, be sure to explore the reviews of the people who collaborated with a company.
If you install new windows, there is still no possibility, it is quite realistic to find another output. On the balcony is easy with the help of girlfriend.
Even on the perfectly insulated balcony may be a little cool in winter. So that you can be comfortable on the balcony in the frosty days, an ideal option will be an electric heater. Usually it is placed at the wall separating the balcony and an apartment. Next to the windows, the heater should not be put, otherwise the glass will begin to fog.
It is impossible to carry out central heating on the balcony: it is prohibited by building standards.
Also a good solution for heating will be electric warm floor or water floor. Modern technology of warm floors will delight you as long as the balcony itself will exist. Many systems are equipped with a thermostat, so you can set a comfortable temperature.
After you spent all the necessary insulation work, you should take care of. If you embedded all the slots on the balcony, fresh air will simply be reached. Therefore, regularly
 Why you can not give icons
 Is it possible to give icons as a gift: Signs, the opinion of the Church
 A year ago left her husband, and now I do not know what to do