How to make two-level stretch ceilings - step-by-step guide. Installation of a two-level stretch ceiling with your own hands using ready-made ceilings stretch 2 x levels for the hall
Tension ceilings from several tiers have long been not surprised. This finish does not only look spectacularly, but also allows you to hide the structural elements or communications. Thanks to the emergence of special profiles to move the level, make a two-level stretch ceiling is easy to hand. Most of the work takes on the manufacturer. Based on the sketch provided, the calculation and cutting of the material is carried out, as well as the preparation of structural elements. It remains only to collect the frame and pull the canvas. So it will be possible to save significantly at the expense of the value of the installation. We have prepared a step-by-step instruction in which we consider in detail what profile to choose to create two levels how to properly prepare a drawing for the manufacturer and install.
Types of duplex designs
On the device, there are three main variants of bunk tension ceilings. They differ according to the materials used and the complexity of manufacture.
Normal
The canvas stretch into two levels, the design is a simple transition without a niche and hidden backlight. PVC film is mainly used. First install the frame from special profiles, then both levels are tensioning the cloth. Often, tiers make from materials that differ in color and texture. Contrast emphasizes the difference.


Combined
In such a ceiling for tiers, different materials are used. The second level (nearest to the floor) is collected from plasterboard. For this, the framework is mounted and crushed GLC. Then the design is putty or color.
As the top level (located closer to the basic overlap), the film or tissue canvas stretch. Baguette is fixed to the vertical part of the plasterboard design. So that he did not deploy under the action of tension, the connection site is pre-enhanced. For this, they put an additional aluminum profile or a wooden bar, since the plasterboard does not have sufficient strength.


The main minus of such an option is a longer installation. For the stretch ceiling, it is enough to put a frame and pull the film or cloth. And in the case of plasterboard, it is necessary to additionally separate it and wait until the twin driving, paint, etc. It is spent on this time.
With backlit
The general principle is the same as for a conventional two-level ceiling. But additionally mounted backlight. To do this, take a special framework, which is then stacked by the LED tape. There are such baguettes for installation both around the walls and between levels. The backlight can be located all over the perimeter, only on one tier or in niche between them.


Minimum room floor height
In the process of installing any stretch design, the ceiling is lowered. If the room will result in too low, it will be inconvenient and uncomfortable in it.
- for residential rooms and kitchens in a temperate climate - 2.5 m;
- in hot or cold areas - 2.7 m;
- for corridors and hallways - 2.1 m.

The smallest distance to which the ceiling drops is determined by the profile width. For the first-level baguettes, it is 3-4 cm, the second is 8-10 cm. That is, the height will decrease at least 11 cm. Calculations are valid for rooms with a slight overlap dropper vertically.
It turns out that the height is 2.7-2.8 m is enough for a two-level stretch ceiling. Host and halls may be lower.
Selection of material
A thin polyvinyl chloride film (PVC) or synthetic polyester fabric impregnated with polyurethane is used as a web.
From the point of view of two-level structures, the most important differences in options are:
- The film is more elastic, so you can make any form of levels.
- PVC fabric has more color options (about 200) and textures (glossy, matte, satin and various textures). Polyester can only be matte and has only 20 colors.
- Baguettes with different types of fasteners are manufactured for fabrics and films. Special profiles for the transition of the level are released only with a harpoon fastening under the PVC-cloth.


The film is cut in production precisely in size. Garpun is welded to the edges (a strip of a thicker polyvinyl chloride in the form of a hook). When installing, the canvas are simply refueling into the baguette using special spatulas. Garpoon is inserted into the profile groove, snaps up and reliably fixes the material. The installation is performed quickly and easily, since the size of the canvas and tension is designed for production.


For these reasons, the fabric is rarely used in similar structures. It is pulled only with combined (that is, in combination with plasterboard). The most common version of the ceiling in two levels is a polyvinyl chloride canvas with harpoon. It is so easier to choose a baguette and create a complex design.
Profile selection for two-level ceiling
There are also several options here. You can take a separation baguette, which is used to connect the cloths at one level (marked by the BC) and the bump. This is a profile in section resembling the letter "Y" or "Z".


With this method of mounting the frame of the second level, the dividing baguette is not horizontally, but vertically. It is fixed to the top of the beam or a solid bar. And to the bottom screw the bump. One cut film is inserted into the upper part of the separation profile and stretch at the same level. And the other - fill in the lower gap and spend vertically to the bump, where the film changes the direction to the horizontal.

But this method is relatively complicated in the implementation. More often take baguettes specially created for bunk ceilings. They are divided into several varieties, each with its marking and appointment:
- PP - For a simple transition between levels (the height of the tier can be 5, 6.5 or 7.5 cm).
- NP. - To create a niche with cross-line backlight (the height of the transition is 5 cm).
- KP - Used along with the previous profile, performs a carrier function (height 9 cm);
- PL - To transition a backlit level, the baguette has a niche for the installation of the LED tape, which is closed by a light scattering insert (height 7.5 cm).


All types of profiles are used to create both direct and curvilinear structures (circles, ovals, waves or spirals). So that the frame is bent, the baguette is inscribed every 15 mm. And then for strength to be fastened with aluminum ribbon and self-drawing (approximately one strip on three inscribed or 2-4 cm).


Consider in detail the technology of mounting a simple two-level stretch ceiling. The material of both tiers will be PVC film. As a frame, we use the Ceiling Profile of PP 75 for the step of the level transition. In the lower tier, build point lamps. This is the most simple design of the two-level stretch ceiling for self-installation.


Required tools
For installation you will need:
- a stepladder (can be replaced with a stable table or stool);
- roulette and pencil;
- laser level or hydraulic level;
- marking cord (chokline);
- perforator with a drill with a diameter of 6 mm;
- screwdriver or screwdriver;
- bulgarian either hacksaw for metal and a file;
- gas thermal gun (you can rent);
- set of spatulas for filling the film;
- a sharp knife.


Preparatory work
Before starting the installation of a two-level stretch ceiling, you need to remove the size of the room, draw the scheme and transfer it to production. Then prepare the basic overlap.
Measurement measurement and construction of the ceiling circuit
It is necessary to accurately determine the length of each wall and calculate the magnitude of all angles. Even in a rectangular room, these sizes may differ slightly. It is also important to determine where electrical wiring and other communications are located if they are.

Considering this data, it is necessary to schematically draw the room and build a sketch of the future ceiling. It is noted on it:
- room dimensions;
- which of the tiers will be the top, and which is lower;
- distance from border level 2 to the walls.

The pattern of the stretch ceiling along with the size is transmitted to production. Experts will create a frame and take out the film (if the ceiling is wider than the roll, the segments are smeared on the TSF machine).
Attention! It is better to order everything in one organization. So the frame and the canvas will accurately approach each other.
Preparation of the basic foundation
Waiting for materials you can do a rough ceiling. From him remove the remains of the previous finish: paints, plasters, wallpaper or tiles. To do this, use a spatula and water, sometimes with the addition of special means. If you do not remove the old coating, it can fall on the film after installation. Then the ceiling will ugly promiscuous under the weight, and if the corners are sharp, it will break. It is easier to prevent similar problems than later to repair or fully change the canvas.

The surface is carefully examined in search of slots and joints of concrete slabs. They need to be embedded, otherwise the ceiling can be inflated or stick to the base when opening the window or door. For sealing, the slots are used by mounting foam, sealant or plaster, which is sometimes put into several layers. Before applying the next, wait until the previous one dries.
Careful level alignment is not required, as it will be hidden. But you need to progress the ceiling with an antiseptic agent. This processing serves two goals: strengthens the surface and does not give to develop mold. This is important, since a wet microclimate is created under the film, favorable for fungus.


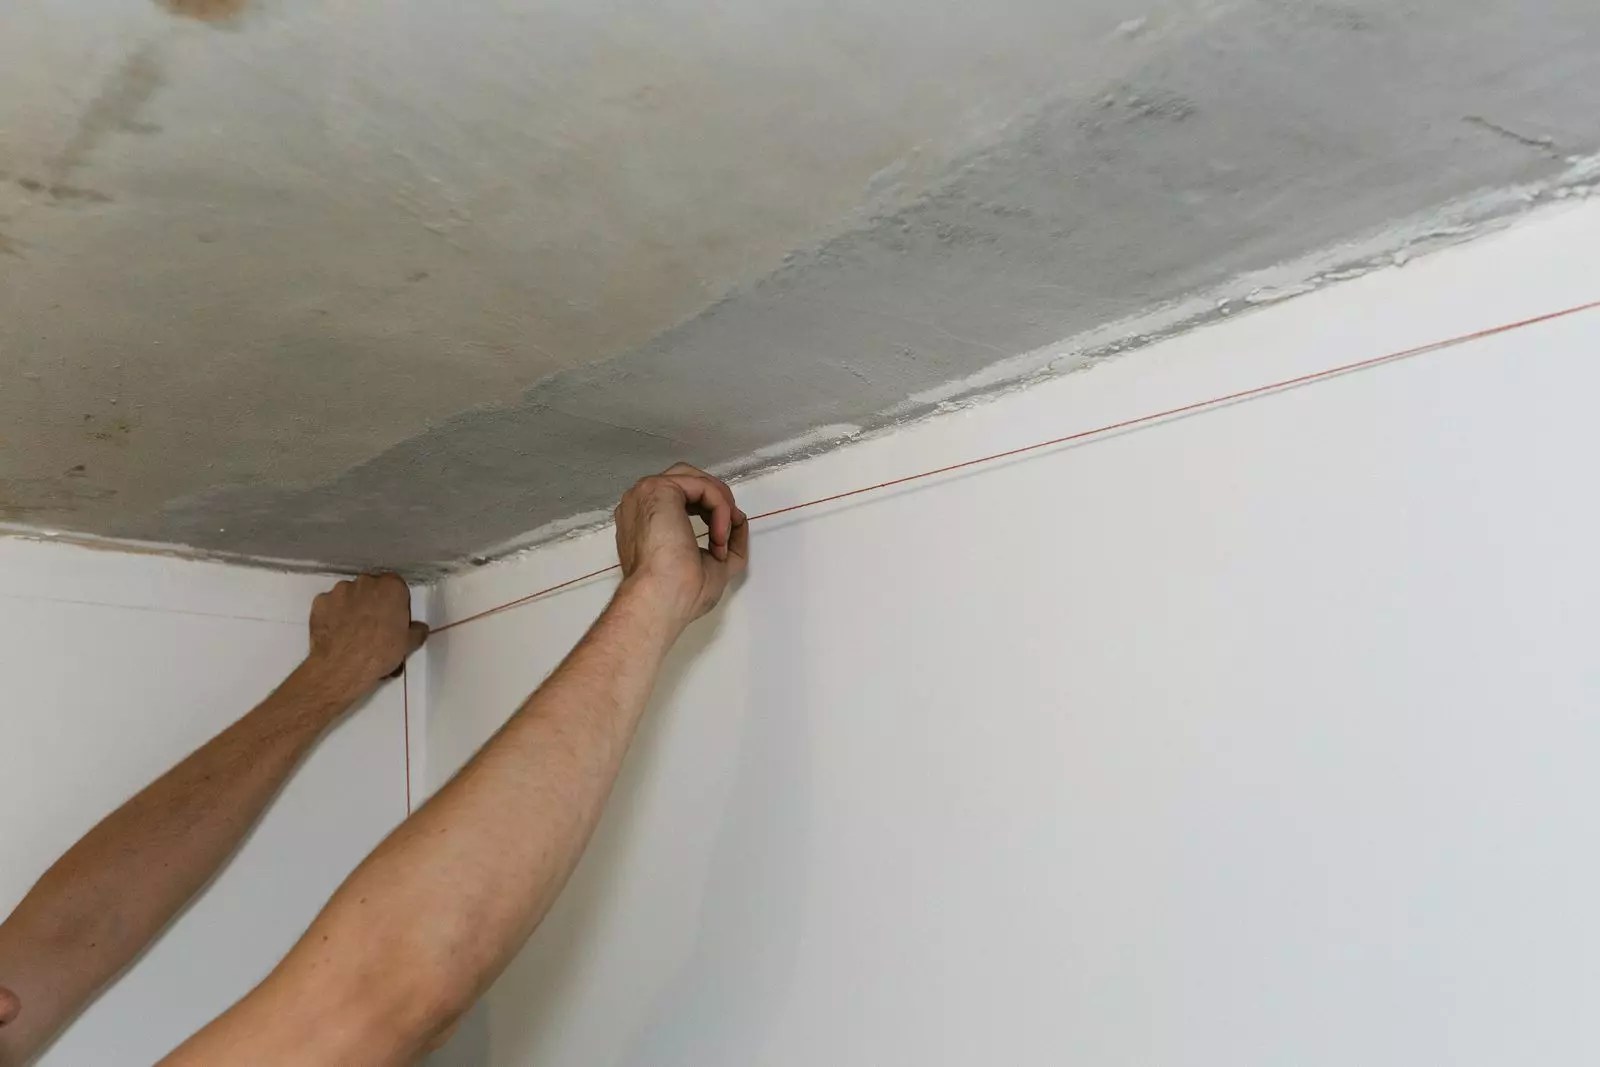
Marking ceiling
Drawing must be transferred to overlapping and walls. First measure the heights in the corners and places of the level transition. From the lowest point, the required distance is postponed (which the ceiling drops). Then between the marks pull the bulk cord, we will be discharged and released. Thus, with the help of chocline, horizontal lines are applied to all walls.


The second level is placed similarly. The border between the tiers is denoted on the ceiling. For smooth lines use a marking cord. Curved noted using different devices: templates in the form of geometric shapes, threads attached at one point with a pencil at the second end, etc. In the case of finished structures, simply apply the workpiece to the ceiling.

Also celebrate the location of the lamps. Check that the necessary distances (between them, to the walls or before the transition level) were the same.
Tip! The location of the lights is best noted on the floor. Then they will be easier to find after installation.
Montage Karcasa
If the dimensions of the design of a 2-level ceiling are too large, it is delivered by separate parts. Then you have to collected in place.


Then profiles are attached to walls and overlap. If you screw the baguette of PP 75 straight to the stove, the height will decrease by 9.5 cm. Sometimes it takes more, then the frame for a two-level stretch ceiling is installed on metal corners or a wooden bar. To withstand the horizontal plane, use level or thread, stretched between points on the walls.

Then mounted a wall baguette. The mounting step is 10-15 cm. On loose and fragile partitions, as well as closer to the place of joints it is better to reduce it to 5, and sometimes even up to 2-3 cm or reinforce the struts.


Baguette pricing is made closely without gaps and level drops. To do not damage the cloth at the junction when installing, the edges of the profile are treated with a file, and the connection is sealed with aluminum scotch.
Installation of mortgage bars and laying of electrical wiring
We will need platforms, flexible steel suspensions for fastening and screws "Blinds" 3.5x9.5 mm. For point lamps produced (fixed different diameters and universal).

Considering the distance from the basic overlap to the film, the height of the suspension is determined. Superior cut off, the plate is bent "harmonic" and attach to the site. So it will be possible to regulate the height of the structure in the future, and the strength will not suffer. In the slab overlap drilled holes, then the mortgages are fixed in them with self-draws.


After that, we begin to lay the electrical cabin. To the network, the lamps are connected in parallel. If one of them is overrigent, the rest will work.
The wire is pulled to the first place, make a loop of about 10 cm long, and then to the next, etc. So that later the cable does not hurt the stretch ceiling, it is fixed to the suspension. To do this, it is convenient to use small cuts Perflectors or plastic clamps.

Important! The wire cannot be tightened, there must be a small sagging.
The ends of the loops are cut, cleaned and insert into terminal blocks. Such a connection of lamps is safer and more convenient than a twist. So that the wires do not interfere when installing, they are raised up and removed for mortgages.
In order for the film to stretch and became more elastic, it is heated by a heat gun. Before starting this stage, the doors and windows are closed so that there are no drafts.

The canvas gently unfold on the floor, and then with crocodile clamps suspended to the corners. The film is heated and gradually refuel the spatula in the baguette. This sequence is:
- first one of the corners;
- then the opposite and the rest;
- mid wall;
- between these points;
- and then all over the perimeter.

Thus, it turns out a smooth canvas without wrinkles and folds.
Note! First stretch the lower tier, and then - the top.


Installation of point lights
By floor marks determine where the mortgages are located. The ceiling is glued to the thermal coil, which are needed to protect PVC films from overheating. During operation, the material is not melted when the light is on and will not disappear from the cut.
The protector is missing with mounting glue (better "Cosmofen CA-12") over the entire surface so that emptiness is not formed. Then the ring is applied to the ceiling and pressed for 2-3 seconds, without moving and not smooth.


When the defense was glued, the film inside is cut with a construction knife. Muffd up the mortgage so that it is to be flown with the ceiling. Pull the wire, connect the lamp and put it in place. Built-in models have on the housing of the springs-retainers that you need to press and insert into the hole on the ceiling.

Masking of jigs
Due to the characteristics of the baguette design after the installation of the tensioning canvas remains: between the ceiling and the wall, as well as the upper and lower tiers. To close the gap, use a decorative plug. This is an insert from PVC, which is chosen by the color and texture of the film.
Masking tapes are produced multiple varieties. On the perimeter of the room with a harpoon attachment insert:
- T-shaped plug - for smooth walls;
- SL - wide insert, allows you to hide the slits on the curves of the plots;
- M-shaped (corner) is more elastic, suitable for hard-to-reach places or curved baguettes.


To disguise the level transition, other models are used, since the size and shape of the slit in the separation profile differs:
- oval (looks like the most aesthetics);
- "fungus";
- tube (circular section).


The polyvinyl chloride canvas is a sufficiently supportive and not complicated material in the processing material that allows you to create a variety of stylish, original designs for decorating the ceiling. The harmony of functionality and aesthetics in the design of any residential or economic premises of the apartment and a private house provides the creation of an exclusive interior and composite solution.
Simple on its geometry and not quite complex in installation, in the presence of sufficient experience with suspended structures, single-level ceilings are inferior to two-levels, which are characterized by a magnificent appearance.

The photos presented on the page photo of two-level stretch ceilings help to pick up for their housing the best version of the ceiling and in accordance with modern design projects.

Features of the canvase for duplex stretch ceilings
Magnificent ceilings in two levels with highlighting various sources of lighting with the use of energy-saving lamps provide a combination of aesthetic and functional characteristics of decorating.


Depending on the texture of the polyvinyl chloride ceiling, the two-level ceilings are divided into several species, from the appearance of which the overall style of room design changes:
- dull mat. Matte, muted colors and special textures allows you to create unique designs of two levels for stylish ceiling design;
- structural satin. It has not such a grown texture as a matte cloth and is used for medium-sized space or bathroom bathrooms;
- bright gloss. Brilliant and sparkling varnish looks great in the living rooms and common halls, perfectly reflects the light of natural and artificial light sources.

The design of the suspended ceiling is a profile frame, which firmly recorded PVC film, various color solutions and textures, the method of heating and stretching to the required length and widths.

After the installation of the installation, the surface of the web is a perfectly smooth and smooth surface, even when soldered multiple films, for a combination of colors, there are no traces of seams or ribs.

Design solutions in the design of two-level ceilings
Exclusive and unusual design of two-level ceilings, the choice of suitable options depends on the architectural features of the entire dwelling, the overall concept of the design of the rooms or the zones selected in them.

PVC canvas perfectly combines with drywall structures, which make it possible to embody any, even the most unusual design solution, and the advantages of suspended ceilings include:
- smooth and smooth surface. To install, it does not require the use of ceiling surface alignment technologies, the leaf is stretched by heating, which ensures perfect smoothness;
- aesthetic appeal. The rich variety of palette of colors and shades, textured texture and photo printing on the ceiling canvases, makes it possible to create any composition and pattern;
- increased protective parameters. PVC Film When flooding an apartment from above, does not pass the liquid that can damage the design of walls and gender, bring the furniture to the furniture.


A simple care for such structures makes it possible to maintain them in a normal form, without making a lot of effort in the general, seasonal or periodic cleaning of residential rooms and the whole apartment.

Individual sketch of a two-level ceiling
Duplex structures are a functional combination of the frame created from a reliable profile, dry carnote inserts and stretched PVCs, and decorated with any room.

Beautiful and stylish multi-level ceilings in the interior This is an opportunity to create a game of flowers and various geometric shapes, unusually and brightly decorating a living room, hallway or bedroom.

Pre-creating a sketch helps to imagine how the entire room will look, with spectacular accents to highlight individual functional zones, emphasizing their purpose.

Using two-level suspension systems, you can hide the unevenness of the ceilings and improve the lighting in the room, distributing the efficient and energy-saving light sources throughout the area.

Installation of a two-level ceiling
Thinking on how to make a two-level ceiling should be understood that only qualified specialists can be made, which are at the disposal of specialized equipment.


For glossying and smoothing the surface, a high-performance heat gun is used, a professional, construction hairdryer is used to eliminate small rates.


Housing owners cannot participate in the installation of the ceiling construction, but they are available to them to interact with the designer, which develops a sketch of the interior solution.

Independently make the future concept of ceiling design with suspended design and come up with a two-level composition that will meet the overall style of the design of the room or a separate zone.

What are the advantages of a two-level stretch ceiling?
In addition to decorating the room, the design of the two-level ceilings helps to practically divide the area of \u200b\u200bthe room, allocate individual zones for family holidays or independent work.

With the help of suspended systems, you can qualitatively disguise any engineering and communication wires and cables, emphasize the interior solution and ensure a normal level of lighting.

Supporting the overall concept of the design of the room, the stretched canvas, depending on the selected color and the texture, perfectly focuses on the decorating theme.


Creating the necessary atmosphere of comfort and heat, the games of bright colors or muted shades and color solutions.


Stock Foto Two-level stretch ceilings


How to transform the interior of the room quickly and spectacular? And you try two-level stretch ceilings - one of the most attractive design elements. Install them into the kitchen - and she spoils the dazzling whiteness, order a 2-level stretch ceiling for the bedroom - and sleep in it will be much more cozy. When you need to hide an uneven ceiling cover or hide the wires, the installation of a two-level stretch ceiling also comes to the aid.
After reading this thematic article to the end, you will learn about other advantages of the coverage, learn how to install two-level stretch ceilings without assistance. And this is a significant savings! In addition, when you install the frame of a two-level stretch ceiling in my own apartment, trying doubly. Consequently, the two-level stretch ceiling will be made on conscience.
Everything was heard about the exclusive ceilings, but what is two-level stretch ceilings? This is a rather complicated ceiling design, which consists of a ceiling itself, baguette and spatial frame with plasterboard sheets. There are no rigid frames in the drop-in level, the dimensions and the form of the plasterboard frame are also different.
The material uses matte, satin canvas, as well as PVC films. Photos can be seen how different the multi-level stretch ceilings are. Now you know how the two-level stretch ceilings do - we can move on.


The stretch ceiling in two levels has a lot of quite obvious advantages, which allows them to stand out profitably against the background of other structures:
- canceled aesthetic qualities. If we talk about beauty, the present visual enjoyment, a two-level ceiling - ahead of the planet all;
- many variations. The second is an obvious plus, thanks to which you should choose, for example, two-level stretch ceilings for the kitchen are limitless design capabilities;
- there is the possibility of zoning. Using a multi-level ceiling, you can do it yourself;
- universality. Today you install a two-level stretch ceiling in the kitchen, and in a week you can apply it in the hall, bedroom and in the hallway. See 2-level stretch ceilings in residential premises, offices, public institutions;
- protection against flooding. If the ceiling coating has a second level, stretch ceilings will save you from unrelated neighbors who have burst the battery or flowing the crane. The consequences of the Flood will not have such a deplorable, suspended frame will help keep large volumes of water;
- masking flaws. Using a 2-level stretch ceiling, it is quite realistic to hide communications, pipes and any wires.


Tips of professionals: what to choose a ceiling with 2 levels?
Before starting the installation, we need to decide on the design and appearance of the future coating. Only after that it will be possible to think through some constructive solutions.
You already know that the bunk tension ceiling consists of a plasterboard box. The design of the box can be absolutely any: there are round, curved, traditional rectangular and even mixed forms. And also you can order a box with a special niche for backlighting or do without it.
Choosing two-level stretch ceilings, consider the features of the room in which the installation will be performed. If there is too wet, without moisture-resistant finish, you definitely do not do. The box is trimmed by plastic panels. As an alternative, pasteing wallpaper or plaster with painting can be used.


To install two-level stretch ceilings in the living room, such canvases can be used:
- monophonic panels (gloss). Their distinctive feature is a rich color scheme. Due to the mirror surface, the two-level stretch ceilings in the living room increase the height of the room. For zoning the room, stretch ceilings are recommended, the two-level framework of which is made in several colors;
- monophonic fabric panels (matte). The colors are not so diverse as in the first case. But the matte panels are distinguished by rich textures - from the skin and suede to velvet;
- duplex stretch ceilings in the bedroom with a pearl tint. Depending on the lighting, satin ceilings can change its shade on the pearl.
- "Star Sky". Two-level ceiling with amazing star luminescence. LED ribbons and fiber-optic threads can be used to create such an effect, as well as crust lamps. You can make a glow of multi-colored or monochrome;
- stretch ceilings for the hall with photos printed on them and drawings. Modern technology of widescreen printing allow you to apply absolutely any drawing on the ceiling coating.


Step-by-step installation guide
When the ceilings in the hall, for the bedroom or in the living room are chosen, proceed to the installation. Briefly tell me how the installation process looks like, on the example of the wavy ceiling of the fabric:
- sketch an exemplary work plan. In order for the two-level stretch ceiling in the hall to be installed correctly, add 15 cm of the web to the length of the walls. Such a number is taken about the reserve;
 Plan Project ceiling
  Scheme of fastening levels
- setting the frame 2 frame, and in our case - from the wave. Take the plywood sheet of the desired width, cut down and abundantly moist it with water. After an hour of plywood will acquire the necessary flexibility;
- next on the ceiling is made wave. Screw the dowel-nail into the overlap, tiring a cord with a pencil. The mechanism made will allow to outline the necessary circumference and arc;
 Creating a wave
  Final result
- stretch ceilings are installed with their own hands. Pine bars are fastened to overlapping from concrete along the line defined line. Double fasteners (two screws) will be optimal. Length and width - 10 and 6 cm, respectively. The plywood veneer (width 12 cm) is mounted on them with screws on a tree (length 4 cm). Its length will be equal to the wavelength. Why 12 cm? Each ceiling lamp requires just such a distance;
- where lines were marked, baguette is attached. Since we will have two levels with you, the first goes close to the already existing overlap;

Elements of the design of the two-level stretch ceiling
- next to the frame of the plywood, baguette dowels is mounted in a step of 10 cm. In the 2nd level, point lamps are mounted, wiring is connected;
- stretch ceilings in the kitchen will look great if you expand the canvas in advance on the floor in advance, and then reflect it with a spatula on the perimeter of the frame. Any folds on the canvas can be fixed with a hairdryer. The 1st level is tensioned by the same scheme.
 Visual scheme 2 levels
  Scheme inserting the lamp
Congratulations - you just installed our own 2-level masterpiece. It has a double level and looks excellent. Knowing how to make a two-level stretch ceiling, you will save a family budget and make such a ceiling coating that you like.
Video Installation Guide
Photo gallery
Under the two-level stretch ceiling with highlighted is the suspension system of decorative purposes. It consists of metal or plastic profiles decorated with an elastic web.
Purpose
Duplex stretch ceilings have a huge potential for creating a unique atmosphere in the premises. With their help, you can implement numerous design ideas. Modern systems of this type are based on their own fabric or PVC film. For reliable fixation of the material, a frame design is provided, consisting of a durable profile of aluminum or plastic.
Thanks to the two-level ceiling, it is convenient to achieve the effect of expanding space when zoning premises. When using satin and glossy cauldons, the dwelling can be made lighter and comfortable. Despite its versatility, in the hall two-level stretch ceilings apply most often.
Mounting work
To install a two-level design, a certain construction experience will be required.
Preparation
The advantage of any suspended ceiling system is the ability to hide the irregularities and flawed a rough base. In contrast to painting or sticking wallpaper, in this case it will not need a thorough alignment of concrete overlap.

Preparatory activities are carried out as follows:
- Liberation of the room from unnecessary things. Any ceiling finish requires free access to its entire area. The perfect option is to completely remove all the furniture from the room. Too cumbersome items can be shifted into the center, covering the waterproof film. Also from the surface of the ceiling you need to dismantle chandeliers, lamps, eaves and all other elements.
- Cleaning the base. If the old finish was used by whiten or paint, it is desirable to remove it. The fact is that in the future squeezing of small particles can damage the tensioning canvas. Ideally, you need to clean everything to the concrete slab. This procedure is carried out with a solid scraper.
- Sealing joints. In some homes, the ceiling consists not from one solid slab, but several. Connecting sections between them are beginning to crumble. The same applies to the corners. All these sites must be chopped up with a new solution, previously removing the old one. As a mixture, it is more convenient to use the starting putty type of rotband or isogene. From the tools, you need a set of spatulas and plastic containers for kneading.
- Applying primer. The impregnation used forms a moisture-proof layer at the overlap, which subsequently does not allow the development of fungus and mold. Excellent proven in this regard, acrylic primers of deep penetration: the liquid is poured into the plastic bucket and apply a scroll or roller. If traces already have traces of mold, there is an additional processing of the affected places with a special antiseptic.
- Laying communications. It is necessary to take into account that at the end of the installation of the structure of the two-level stretch ceiling, access to the draft base will be closed. Therefore, all the necessary electrical work on the laying of wires and cables must be carried out at the preparation phase.

In the course of this procedure, many dirt and dust usually occur, so the walls, the floor and the windows are desirable to further protect the polyethylene film. You should also take care of the availability of workwear and respiratory protection.
Development of the installation scheme
During the preparatory activities, the circuit of two levels of the stretch ceiling is drawn up. The main task is to determine the installation points of the lamps.
Considering the specifics of the system, it is best to apply two levels of backlighting:
- Main. Includes traditional chandeliers and lamps.
- Local (hidden). It is organized with the help of LED tapes and built-in point luminaires.
Arrangement of the system
Mounting measures are allowed to start only after the primer and sealed areas completely dry. To lift the drying procedure, it is recommended to apply ventilation. The level of humidity in the room should not exceed 75%, with an average air temperature of +24 degrees. It is such a microclimate that most contributes to the correct disgrace of the tensionable canvas, preventing its shrinkage. While the premises dries, you can develop a sketch of a two-level ceiling, with a clear indication of the configuration of each level and location location of the main lighting.
The finished drawing of the stretch ceiling in two levels with paper is transferred to the base. To apply curved lines, it is best to apply a plastic profile. This detail of the design can be calmly bending, without prejudice to smooth transitions. After completing the process of creating a drawing for setting levels, you need to decide on the height of the lower level of the stretch ceiling. The optimal indicator is at least 15 cm.

If there is no more convenient to use the laser level at the overlap of irregularities and drops. With it, each of the walls are marked with marks of the profile fastening points, on top of which elastic fabric or film will be stretched. The location of the lamps and chandeliers are equipped with wooden lining, allowing the level to customize. Upon completion of the installation work at these points with the help of the soldering iron, holes for lamps are made. For their installation, special brackets are used, and for closing holes - decorative inserts.
Plastic frame
Mounting frame for a two-level stretch ceiling includes several stages:
- Fixing wooden bars, which will be attached to the future profile. Dowels are used as fasteners. Strictly speaking, we are talking about a simplified type of frame. There is a possibility of using metal U- and C-shaped profiles to create it, but in this case there will be a certain experience with similar elements. The beginners are encouraged to choose wooden bars when the installation of which is used step 20-30 cm.
- Installation of plastic profile. The guideline is the previously applied markup. For fixing on wooden bars, ordinary wood screws are used. The combination of profile ends in the system's package includes special plastic adapters, also fixed on lining. To close the plastic profile from below, apply an angular flexible perforated insert. It is fixed with polyurethane glue. Due to this, the lower plane of the system is deprived of sharp protrusions, which often become the causes of the elastic canvas.
- Conducting the installation of the structure of the two-level stretch ceiling, you should in every possible way to avoid any damage to communication lines or fire alarms. Cable cable are used as wiring protection. There is also an option with fixing the ceiling with a special bracket. Frame portions that come into contact with cable are equipped with small cuts.
- The task of the plastic profile is the determination of the height of the lower level of the system. Its fixation should be as reliable as possible (the normal point load indicator is at least 15 kg). A similar margin of safety is able to transfer even flooding from above, which sometimes happens in high-rise buildings.
- In areas of plastic contact and wall, angular parts of the profile must be placed. For this purpose, the Bulgarian with a sandpaper or ordinary file is most often used. This ensures a smooth bias towards the wall. It is very important to achieve smoothness of the point of contact: rude transitions should be avoided. The adjustment point is equipped with a metal profile with harpoon - this line will also be prepared by the tensionable web.
Metallic profile
Upon completion of the installation of plastic elements, go to a metal profile. The location of its fixation is the perimeter of the walls at the previously defined height. This uses a laser level. Apply only the profile that is included in the tension ceiling package. This element is specific to the fact that inside it has an elastic clamping insertion (in other words - harpoon). Thanks to the inset, the edges of the edges stretched over the frame of the canvas are carried out. Dowels are used to fix a profile to the wall.

Another metallic profile is equipped with a plastic element from the other side where there are no bars. After that, there is a masking of all the standing fasteners with light painting tape. If this is not done, they will be shifted against the white two-level stretch ceiling. This is especially true of bright sunny days, or when all the lamps will burn.
Choosing a web
The design of two-level stretch ceilings involves the possibility of using two types of canvas:
- PVC film. Durable material for which the elasticity, moisture resistance and low cost is characteristic. In the case of contamination, the film is allowed to wash with sponge and soapy water.
- Polyester fabric. I am inferior to the film in terms of moisture resistance, surpassing it with decorativeness. During installation, heating is not required (in contrast to PVC). The fabric passes the air, so the effect of the closed space does not occur. It is used mainly in bunk tension ceilings in the hall.

Duplex systems can be equipped with several materials at once. It often happens that a glossy PVC film is used to arrange the first level, which achieves a visual expansion of space. Stretch ceiling 2 levels can be issued as a textured cloth under satin. Such a combination looks very beautiful, which explains its popularity in the implementation of designer ideas.
The final choice of material for the canvas depends on the taste of the customer. In specialized stores there is an opportunity to independently evaluate the parameters of materials, determined with shades and textures. An opportunity is given to order a photo film according to an individual figure. Depending on the complexity and quality, the cost of production is formed.
As for the combination of the stretch ceiling in two levels and a drywall base, then such a decision is not very practical. The exception is the forced zoning of the room of a significant area. In this case, the rigid base should be equipped with an aluminum frame from C-shaped profiles.
Installation of tension material
The first thing is equipped with the lower level of the design, and then the upper one. Let's figure it out how to stretch the stretch ceiling, and what a sequence of actions.
Installation order 2 level stretch ceiling:
- PVC springs is accompanied by a blowing with a gas heat gun. When using polyester fabric, this procedure is not needed.
- The straightened canvas need to be fixed at an altitude of 1.5-2 meters with special rubber clothespins. To achieve complete removal of all folds, the film from the bottom is once again blown by a gas gun. Despite the increase in air temperature in the room, it is prohibited to open the windows.
- The tensioning procedure must be started from the plastic profile, from the corner area. As a tool, in this case there will be a plastic spatula. The edges of the material are put on the protrusions, pushing in harpoon. Special inserts are securely fixing the web. Similarly, comes in each of the corners. Next follows another blade with a heat gun.
- Having waited for the cooling of the film, it is fixed around the perimeter of the two-level stretch ceiling. It is important to achieve the uniformity of tension, otherwise the screeds will appear. Plots of fixation of the canvas to the plastic profile are made up with a reinforced tape: in these places, a profile for the top level of the stretch ceiling is fixed on the screw.
- Installation of the second web is completely identical.

Illuminated two-level ceiling
To determine the points of the holes for the lamps, the canvas are pressed with hand, groping bars or plastic rings. Cutting in this case does not fit: accomplishment needs. To do this, you can use heated rounded fittings. The main thing is to achieve melting edges, otherwise the film is bullied. Cutting can be used only in combination with a special plastic thermal gland glued on the site of the future hole. To cut a hole on the inner contour of the ring, problems usually do not occur.

After that, you can start fixing the lamps using suspensions. Decorative inserts are used to mask fastening points. If necessary, power supplies and machine guns are attached to the ceiling slab. In the course of the implementation of this procedure, the voltage on the electrical panel is turned off. There is an option to illuminate the stretch ceiling with the help of LED tapes installed behind the ceiling cornice. Such lighting allows you to use colors and a remote control unit.
The beauty and comfort of your home depends on many things. Every day, designers come up with new solutions that become not just fashionable, but also practical. Today we will look at the same 2-level stretch ceilings.
This is a complex design consisting of a special material with a baguette carrying frame, with the presence of external trim from durable grades of drywall. Features that have 2-level stretch ceilings, give greater freedom of designer thought and allow them to give them a different shape, and the variability of the plasterboard box does not have a limit.
2-level stretch ceilings are used as a web various materials, including fabric, matte, satin and PVC film canvas. The selection of the canvas varies only by your own preferences.
Example of a two-level stretch ceilingAdvantages of 2-level stretch ceilings
Against the background of various design solutions for the ceiling 2-level stretch ceilings occupy an honorable place and have a number of key advantages.
- Aesthetic look. These ceilings are considered one of the most beautiful with the use of stretching canvases.
- Design variability. 2-level stretch ceilings are practically not limited in terms of the design solution. They allow combining the form, color and surface texture without restrictions.
- 2-level ceilings facilitate the functional breakdown of residential space.
- Latitude application. These ceilings can be used almost in any room, ranging from the living room and ending with the bathroom. The restriction on such ceilings imposes only the height of the room.
- Functionality. Under the construction of the ceiling, you can easily hide even the most bulky communications.
- Barrier during flooding. 2-level ceilings will not allow your neighbors unexpectedly to flood you. Their design is durable, and some types of web (PVC film) are capable of withstanding large volumes of fluid.
 Ceilings can be used almost in any room.
 Design 2-level ceilings
Before becoming the owner of such beauty, you need to choose how your future 2-level ceilings will look like. From this will depend on the frame of the canvas and the material of its execution.
The ceiling itself most often consists of a carrier drywall design and stretch canvas, but sometimes all levels are made from the stretched canvase.
 Typical example of a classic ceiling, plasterboard
 2-level stretch ceilings possess the following design options for the carrier box:
- rectangular;
- spherical;
- box with curved lines;
- combined.

At the same time, it is possible to integrate the elements of the backlight, which are also distinguished by a large variety.
There are practically no restrictions in the ceiling decoration, the main thing is to observe the combination of the color palette between the box and the tensioning web. Plus, the trim will be moisture-resistant materials.
When they make a finish under a box on 2-level stretch ceilings, most often use plaster (with the ability to paint), wallpapers, plastic panels.
Personal selection options for stretch ceilings:
- The canvas is monophonic, mirror. Due to the reflection in the mirror canvase, the volume of the room grows visually. Such canvas have a large color choice.
- Satin or matte canvases (monotonous). Such 2-level stretch ceilings are made of tissue cloth. They may be velvet, leather, suede. Their color palette is not so diverse, but they have a chic texture.
- Pearl, metal canvas. These canvases have a glossy surface, and visually such 2-level stretch ceilings increase the size of the room.
- Starry sky. In such a ceiling, a special system of LEDs, light bulbs, lamps are used. The brightness and color of the glow can be configured using the remote.
- Frames with seal. 2-level stretch ceilings with such canvases contain any drawing or favorite photos.
 Stretch ceilings are absolutely different
 Installation of 2-level stretch ceilings
By choosing the design younger, placing the appearance of the ceiling, you can do it. To do this, first of all it is necessary to have a working tool:
- level;
- drill;
- screwdriver;
- corolnic;
- putty knife;
- clamps for cloths;
- air heater (for PVC film).
2-level stretch ceilings, the following materials are required:
- stretch canvas;
- plasterboard;
- metal profiles;
- selflessness, dowel;
- putty;
- primer;
- baguette (fixes the canvas, best aluminum);
- lighting elements (if required).
Installation of the ceiling
Before installing the ceiling, you can familiarize yourself with the schemes and sketches.
2-level stretch ceilings are installed in compliance with the following sequence:
- Preparation of an old ceiling. It is cleaned from poorly sitting plaster so that it does not creep and damaged the canvas. Possible foci of fungus, mold are removed. Communications are held, the bases for lamps, lamps are prepared.
- Installation of the first level, plasterboard boxes. We measure the line of the future box using a level, as a rule, below the old ceiling by 14-21 cm. The line is started to postpone from the lowest angle of the room, then use a laser level to facilitate work.
 Framework, design for two-level stretch ceiling
 - Installation of the main frame. Metal frame for 2-level stretch ceilings is attached to the wall along the applied markup with a dowel, with a distance of 20 cm.
- Installing profiles. The remaining bearing elements of the box are attached to the installed frame, which are fastened with self-draws. If necessary, the protrusion is made to the future backlight.

- Plasterboard sheath. Now the future 2-level stretch ceiling can be seized with drywall. Its sheets are given the necessary form, for this they can be slightly moistened with water (wet drywall bends). Then the prepared sheets are attached to the box.
- Primer, putty. The resulting box is stigled, spitting, we clean.
- Lighting. We put and install communication for lighting.
 Prepare the design and all necessary profile for mounting a two-level stretch ceiling
 - Installation of the second level. The first thing is fixing the baguette on the box, taking an indentation from the initial ceiling. The baguette is attached by self-drawing with a distance of 12 cm.
- We put the canvas. We cling to the baguette using fasteners in the corners.
- Heating room. With the help of an air heater, heating the room to 41 degrees. This temperature makes the canvas more supple.

- Installation of the canvas. With the spatula, refuel the cloth into the baguette. Perform work starting from the center, with a gradual shift to the corners.
 Stretching the tension ceiling cloth
 - Installing the fixing plank.
- Installation of lighting. At the stretched canvas at the place of future lighting, we install locking rings, we cut the cloth inside the ring. We connect power to lighting devices.
Your 2-level stretch ceiling is ready!
 An example of a finished two-level stretch ceiling
 Cost 2-level ceiling
So, we have dealt with the fact that 2-level ceilings are presented, how to install them. And now it remains to find out the most interesting, how much does this beauty cost?
The specific fixed cost will not be called. Much will depend on your choice of materials, room area and design option. We present approximate prices for the most popular 2-level stretch ceilings.

Video: How the 2-level stretch ceiling is mounted
 Why you can not give icons
 Is it possible to give icons as a gift: Signs, the opinion of the Church
 A year ago left her husband, and now I do not know what to do