DIY wooden bread box. Drawing. Wooden breadbins, manufacturing descriptions and drawings How to make a breadbasket from plywood yourself
More often whole), the lozenge is stored either in the refrigerator or in a plastic bag. But the best place to store bread is considered to be a wooden bread bin, which breathes and maintains a constant level of humidity. For this reason, the bread in it may not grow moldy and stale for a long time. Such a wooden bread box) (well) of course under the arm is easy to make with your own hands.
How to make a wooden bread box with your own hands?
The interests of making a bread bin will require riveting with a thickness of about 10 mm. For the bread bin, best suited are swindle, ash, oak and birch. You should not make a bread bin out of pine, so (that is) in this case, the bread will be saturated with the smell of resin. Excluding this, you will need only wooden slats for the manufacture of a flexible cover, fasteners and a hand.
From the board you need to cut out the bottom, the top bar and two sidewalls. Inside, take both sidewalls, you need to choose a semicircular slot so that a flexible cover can be wound around it. Better goodbye to make grooves with a milling cutter. To do this, you can use a finger cutter installed with a drill.
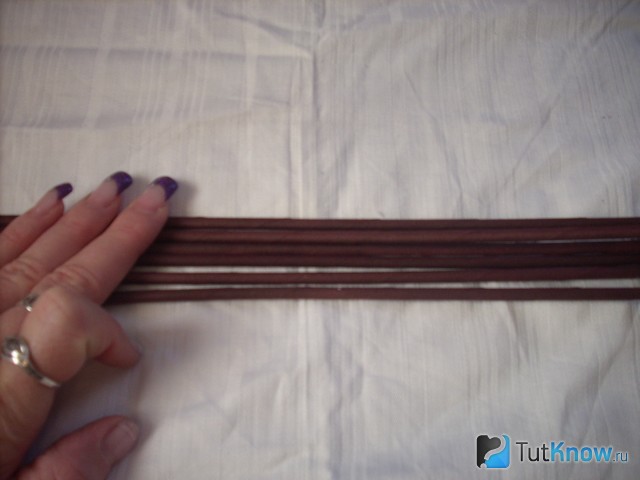
The cover is made of thin wooden slats, which you can either stick to a fabric base or insert a cord inside.

If you do not have a big surname, then you can make a two-tier bread bin using the same principle.
The breadbox, as an integral attribute of any kitchen, should be stylish, comfortable, practical and functional: in this case, it will favorably emphasize the aesthetics of the room, give your space individuality, and indicate the excellent taste of the owners. PDF drawing is available for download.
DIY plywood bread box
The "Air" bread box was made by Lyudmila Pelymskaya, a master of artistic cutting.
To make the craft, you will need the following accessories:
Workplace preparation
Before you start cutting the bread bin, you need to prepare a work surface - a table (workbench). On it you will create your craft.
Observe the following rules:
- Order - during work, on the workbench, there should be no unnecessary items.
- Tool - must be at hand, for this it is necessary to store it in the place designated for this.
- Workbench - should be located in a bright, spacious, ventilated place.
Not everyone can place a workbench in a suitable place for this. In the apartment, as an alternative, the workbench can be placed on the insulated balcony. In this case, you can work on your product at any convenient time.
Which plywood to choose
For the bread bin you will need lumber - a sheet of plywood. When choosing a workpiece, pay attention to common defects - knots, cracks, delamination and other defects. The thickness of the workpiece is determined by the dimensions indicated in the diagram. (download link is at the end of the article)
Before starting to transfer a drawing to plywood, you need to prepare a blank, for this:
- The workpiece must be processed with sandpaper, starting with coarse grains and ending with finer ones.
- The surface must be flat, for this fix the sandpaper in the sander. Don't have an instrument? - An alternative is to choose a flat and not large block wrapped with sandpaper.
- Sanding must be done along the layers of wood.
- Sand until the surface of the workpiece is flat and smooth to the touch.

Transferring the template to plywood
In order to start cutting, you need to transfer the drawing to the workpiece, for this:
Print the template at the desired scale. Using tracing paper and a ballpoint pen to translate the diagram onto plywood. For convenience, fix the template with tape, buttons, or just by hand. Consider how best to arrange the elements of the bread bin in order to save lumber. Take your time, your future product depends on the correctness and accuracy of the translation.
Sawing a Bread Box
The basic rules to be followed when cutting:
- The position of the jigsaw in relation to the workpiece must be perpendicular (90 degrees).
- Be sure to ride up and down smoothly - do not jerk and take your time.
- Use the Sawing Table
- First of all, cut out the internal elements, then proceed directly to the contour of the product.
If suddenly you left the cutting line, do not be discouraged. It is possible to correct the lines using needle files or sandpaper directly during assembly.
Recreation
Due to prolonged stress, fatigue occurs, productivity decreases, concentration of attention decreases, eyes and fingers get tired. This can lead to injury, so I recommend that you take short breaks and do simple gymnastic exercises.
Assembling a bread bin from plywood from plywood
Look at the drawing of the finished product; assembling a bread bin is not very difficult. Before gluing, make sure that all the elements come together without problems, if necessary, correct with a file. When the craft is assembled without problems, proceed with the gluing process. To connect all the parts together, use glue "PVA", "Titanium" or "epoxy resin". Avoid glue drips.
Varnishing crafts
To add sophistication to the breadbox, it can be stained, imitating precious woods. You can cover the product with varnish, matte or glossy, depending on your preferences. Choose a quality varnish, you can apply it with a brush or spray gun. Do not leave bubbles, lint or visible streaks on the surface of the product.
Learn to make bread bins out of wood, birch bark and the most unexpected materials such as plastic bottles, cardboard, paper.
DIY bread box from a plastic bottle: master class

The video of the master class itself:
To make such a bread tray, you will need:
- five-liter canister;
- scissors;
- five-ruble coin;
- napkins;
- PVA glue;
- water;
- halves of dry peas;
- acrylic paint in brown, lilac and gold;
- acrylic lacquer;
- brushes;
- marker.

Do not throw away the bottom of the bottle, cut it in half.

You will need two semicircular rings from it, which you need to glue from both sides to the main part. With the tape across, attach them to 1 and 2 half of the bottle, which will soon turn into a bread bin.

Cut the newspapers into strips, dilute PVA glue with water about two times. Dip strips of newspaper here, glue them over the plastic blank outside and inside in two layers.

Now liberally grease this paper surface on both sides with PVA glue using a brush. Take the top of the bottle, cut off the neck from it, it is not needed. Glue the blank with newspapers as well.

Wait for these parts to dry completely. Then glue the small rounded to the large one with a hot gun.

Draw wavy lines around the edge of the bread bin and the rounded leg part that will become the stand.
It is convenient to draw an openwork edge with a coin, applying it next to the previous outline, and also outline it with a marker.
Cut along these lines with scissors. Dissolve PVA glue with water again in a ratio of one to one, coat the workpiece with this mixture, glue thin napkins here in one or two layers.
Take thick napkins with a pattern, separate this upper colored part, you only need the lower white one. Roll a thin tube out of each on the table, moistening with water. With these elements you will need to make an edging, glue them along the wavy edge of the bread bin.

Now glue the dry pea halves around the edges, with the convex side facing out.
This is how the bread box is further transformed.

With your own hands, you will need to draw patterns on it, then glue here various curls from napkins pre-rolled into a tube.

To do this, apply glue with a thin brush, then attach paper elements here. When it's dry well, paint the bread bin with black acrylic paint.

Then apply lilac paint to the loops and other decorative elements, and then go for a golden one.

It remains to cover the product with acrylic varnish, wait for it to dry completely. Now you can lay a napkin inside, lay out the bread and serve it to the table.
DIY fabric and cardboard bread box
Surprisingly, these materials will also help you craft a bread basket. In such a container, it will look good, this device will help to set the table in an unusual way.

To sew it, take:
- two pieces of cotton fabric of a square shape with sides of 28 cm;
- a square sheet of cardboard with sides of 27 cm;
- ruler;
- Scotch;
- pins;
- ironing board;
- iron;
- scissors;
- braid.
Insert a piece of cardboard here, stitch on the unsewn side. To make the edges of the bread bin look the same, make the same stitching along the entire edge of the rectangle.
Having stepped back 7 cm from the edges, draw a square inside with chalk, which also needs to be stitched. Connect the corners, pin them together, sew here on a typewriter.

If you want to sew a round bread bin made of fabric and cardboard, then with your own hands you need to draw a circle on thick paper, this will be the diameter of your product along with the sides.

It is necessary to cut 2 canvases, put a circle of cardboard between them, sew the edges using braid. You will sew it on the edges perpendicular to this surface. A total of 12 tapes are needed, two for each fragment. Then you tie them up, make a bread box with sides.

Instead of fabric, you can use a blank that you knit yourself. This is very easy to do. The result should be a square like this, but without corners. Two identical parts are required.

Put it on a piece of cardboard, cut it out according to this template. Fold the product so that the two cut pieces are on top and bottom, and the cardboard is inside. But first, the sides of the cardboard must be bent to give the product a shape.
Sew it in the corners and you have a bread basket like this.

If you want to close the device so that the bread does not stale, then take on the following type of needlework.
Weaving bread bins from newspapers, paper: master class

This is how beautiful bread bins are made from tubules. To do this, take:
- newspaper and magazines;
- thin stick;
- clothespins;
- tray with sides.
If it is a decorative bread box, you can use newspapers, but for a real one it is better to take thick paper that does not contain dyes.
First you need to. Let's start weaving a lid out of them first. Take 6, place them next to each other.
Place two more on top of them, secure those with the third.

Using the same technology, attach two more tubes, placing them next to the ones that have just been fixed.

Take a couple more of these elements, place them next to the ones you just made. Also secure the data with the third tube, positioning it with a cross.

Continue to weave further, but in a circle with a string of two tubes.

See what should happen at this stage.

As you can see, this blank needs to be attached with clothespins to a rectangular base. Then, use a tray for this. To give the tubular breadbaskets an oval shape, then weave only on the elongated sides.

After that, weave again in a circle, then braid the sides of a deep tray or other container of a similar shape.

In the same way, not only the lid is created, but also the base of the bread bin with your own hands with lower sides. Run a handle on the lid so that you can remove and put on the item.

This is how weaving from newspapers or paper is carried out. If you have the opportunity to work with wood, then look at another option for making this useful item.
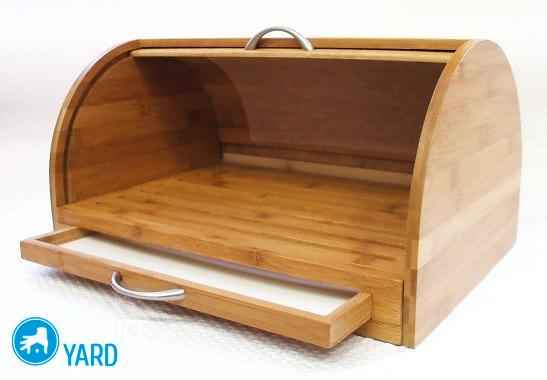
Diy breadbox made of wood
For this kind of work, you will use:
- planks;
- bamboo mat;
- joiner's glue;
- small carnations;
- wine stopper;
- furniture handle;
- plastic food mat;
- furniture stapler.
- under the number 1 there are four parts - 2 will go for the bottom, one is the top, another one for the back panel;
- under the number 2 there are two sidewalls;
- number 3 is the front panel.

Everything is extremely simple. You need to cut out these parts, knock them down with small nails. Then the corners at the top are sawn off.

Cut the wine cork into 7 pieces and glue them to the bottom of the bread bin. They will become the legs of this item.

Attach a furniture handle to the bottom of the mat, and attach it to the front of the bread bin using a furniture stapler.

Use a plastic cutting board as a pallet, you can saw off the excess. To make the sides, make small cuts in the corners, lift the edges of the pallet up.

This is how you get a wonderful bread box, made with your own hands from wood and a mat.

Birch bark bread box: master class

Before doing it, read the rules for preparing this material.

- In order not to destroy the tree, it is necessary to harvest birch bark in permitted places where trees are to be cut down.
- Collect the bark during the period of sap flow, then it is most pliable.
- The birch bark is dried naturally, without the use of fans and radiators.
- After that, various irregularities are cut off so that it becomes as smooth as possible on both sides.
- Boil water, put birch bark here, boil for half an hour.
- The last stage is drying the material, after which you can move on to creativity.

You can use two weaving options. For the first one, you need to put an even number of stripes horizontally. Starting at the left edge, interweave them through one. The second strip is also attached vertically, but staggered in relation to the first. The third tape repeats the amplitude of the first.
For the second method, you need to bend the edges of the previous tape to the next.
To secure the edge of the straight weave, add stainless steel wire when creating this piece of birch bark bread bin.
See how you need to attach additional tape during the weaving process.

To create a birch bark bread bin, take 24 strips cut from this material. Half of them will be needed for the vertical, half for the horizontal.

When you complete the body, you need to arrange the corners between 5 and 6 with tape, using the same method described above.
Then you need to make a bread bin lid, the height of which is 1.5–2 diagonals of strips. Decorate the edge with cloves.

In such a birch bark bread bin, the bread will remain fresh for a long time, it will not grow moldy, since this natural material has bactericidal properties.
You already know how a wooden bread box is made. But not everyone has such planks and tools for cutting them out. Check out another master class that will solve this problem.
DIY bread box made of available materials

To do this, take:
- thick cardboard;
- bamboo napkin;
- scissors;
- self-adhesive tape;
- the cloth;
- lace;
- glue;
- ruler;
- pencil;
- Furniture handle.

Calculate the size of the bread bin parts based on the size of the napkin. In this case, the napkin is 30 cm wide, so the bread bin will be 28 cm wide.Based on these dimensions, cut out from cardboard:
- front wall 28 by 3.5 cm;
- the bottom is 20 by 28 cm;
- two sidewalls measuring 20 by 17 cm;
- back wall measuring 28 by 17 cm.

Now you need to paste over this blank with self-adhesive film. Choose the color so that it is in harmony with the color of the kitchen. If you like wood products, then you can also use rattan cling film.

Stick it on not only from the inside, but also from the outside. Take a napkin, cut a strip from it, which you will use to decorate the front panel of the bread bin. Glue this piece, decorate the upper edge with lace, attaching it in the same way.
We continue to work with most of the rest of the napkin. Sometimes on such things, the reverse side is decorated with a canvas of fabric, if you do not have this, then glue the fabric on the back of the napkin.

On the front side, glue the lace on the sides and bottom.

Glue a part of this napkin to the back wall so that it goes down, covering the bread bin in front. Now you understand why the napkin should be a couple of centimeters wider than the breadbox.

To make it easier to fold the napkin, take out or put bread, glue a small wooden handle to the bottom.

Here is such a wonderful device for storing bread. You will spend a minimum of money on it, and if you decide to buy a bread basket in a store, it will cost you much more.
DIY step-by-step decoupage of a bread bin
You can not only make a bread bin from scratch, but also decorate an existing one. If it is monochromatic and you want a holiday, cover it with Provence-style flowers. This way you can renew the old bread bin.

For creative work, you will take:
- acrylic primer;
- napkins of the desired pattern;
- brush;
- water;
- PVA glue;
- scissors;
- acrylic lacquer;
- acrylic paint of the right tones;
- sandpaper.

Acrylic primer will make wood more durable. Acrylic paint is better on such a surface.
When the primer is dry, coat the bread bin with the paint you want. In this case, white was used. Side stripes are covered with blue.

Cut the napkin into the desired pieces, separate the upper part. You will need it for further decoration.

If you have a special glue for blending, use it, if not, then take PVA, slightly diluting it with water. Using this solution, glue the napkins on the surface of the bread bin, let it dry.
If you want to add an antiquity effect, then in some places rub the surface of the bread bin with sandpaper.

Apply three coats of varnish, letting each dry. This is how you can decorate a bread bin using decoupage.
If you want to see how the breadbox decoupage is done, then you have such an opportunity.
The second plot will reveal the subtleties of how a bread basket is made from tubules.
The bread bin made of wood is an environmentally friendly item that allows you to keep the bread soft for a long period of time. In addition, it is a beautiful decor item that complements the chosen kitchen design. If you are a creative person and like to fill your home with original, hand-made things, you should definitely make a bread bin yourself!

Initial stage of work: preparation
First you need to prepare the necessary tools and materials, as well as make drawings in accordance with the dimensions, think over a way to open the door on the bread bin. The first step is to decide what material to make the case from.
This could be: Wood. Bamboo. Birch bark. Plywood.

On a note! All of these materials are able to regulate the humidity inside and allow air to pass through. Sometimes they are combined with each other to create one product.

To make fasteners, you need to stock up on screws and wood glue. The choice of fittings depends on the way the door is opened.
Bread storage containers are:
- simple;
- carved;
- with roller blinds


Important! To make the product, you need a carpentry kit.
Making a bread bin out of wood yourself
To make a piece of wood, choose varieties such as linden, birch or ash. Conifers have a pungent odor that will be passed on to the bread. For manufacturing, you will need to perform the following stages of work:
Cut all parts out of wood in accordance with the drawing. A prerequisite is the tight joining of all elements with each other.
Product dimensions may vary. Parts can be fastened together with screws, furniture nails or wood glue can be used.
If you are experienced in joinery, then you can use a tenon to create a bond.
To improve the joining, the joints are coated with wood glue.
Do not forget to sand the cuts with sandpaper.
The door is made separately.
Most often it is a curtain, which is made of small strips.
To ensure the movement of the shutter, a groove is made on the body along which the door moves.
The structure is coated with a special varnish or stain.

On a note! You can make a curtain door that opens outward. It is also made from narrow slats, which are sometimes replaced by a bamboo rug.

Natural material is sustainable and can be combined with different styles of interior design.
Bamboo Bins - Another Easy Option
This material can be used as a decoration for a wooden product or made from it small in size breadbins. The main advantage will be the speed of work. It only takes you a few hours to create a bread bin!
To carry out the work you need: Bamboo napkins. Thick fabric. Durable cardboard. Scissors. Self-adhesive. Pencil. Door fittings.


For quick work, it is worth adhering to some recommendations:
- dimensions are limited by the size of the napkins; the body of the structure is made of cardboard;
- on one side, the side walls are rounded - this allows the door to fit snugly and move smoothly; - all parts are connected with glue;
- outside and inside, the structure is pasted over with self-adhesive, which will provide the product with additional strength;
- at the final stage, finishing with bamboo takes place. For this, the napkin is cut in two: the first part is suitable for the door, the second for the bottom.


Decorating options Tip!
A product variant with multiple compartments can be produced. Such manufacturing makes it possible to conveniently use and sort flour and bakery products. The divider is made of slats or thin boards.
Hand-made bread boxes are distinguished by their individuality and original design, and all this thanks to exclusive decor methods. Several centuries ago, rich decorative elements were applied to bread storage products using veneer, carving, engraving and painting. In aristocratic houses one could find boxes with monograms. In poor houses, items made of birch bark were used. Peasants used wicker options for storing bread.


Different methods can be chosen to create a beautiful and personalized piece of jewelry:
- Wood carving allows you to create relief compositions from ornaments, patterns or images. You can choose natural motives and create them using milling.
- Decoupage is a technique of pasting with napkins with bright, beautiful motives. This design option is well suited for wood products. The surface must be made smooth, then the napkin will repeat the silhouette of the structure without flaws. Newspaper clippings or postcards are also suitable.
 On a note! To get inspired by ideas for creating a bread bin, you can watch a variety of photos or videos with design options. An original design made with your own hands will look attractive in different interior styles and will last a long time!
A wooden bread box with your own hands is not as popular a piece of kitchen interior as an ordinary bread box. But, unlike the more modern "brothers" made of plastic, it looks solid and very beautiful, it is an environmentally friendly item, and the bread in it stays soft and fresh longer. And if you also like to experiment and are ready for further creativity in order to equip your home with items of your own unique production, we offer you drawings and a master class in this article on how to make a bread bin with your own hands.
Preparatory work
You must prepare the room before starting production. Stock up on all the necessary materials and tools, prepare drawings of the future product that will correspond to the dimensions, and also think over the way the door of your bread bin functions. You can even make a rough example if this is the first time this kind of work is done. Last but not least, the design of the bread bin is thought over.
To begin with, you must decide on the material from which the case will be made. The bread box can be made from:
- Plywood;
- Bamboo;
- Wood;
- Birch barks.
Important! Any of the listed materials is excellent for air permeability, and also regulates the level of moisture inside the bread bin. Quite often they are combined in one product. It is thanks to such special properties of wood that bread retains its smell and taste for a long time.
Bread box made of wood
Making a wooden bread box with your own hands is quite easy.
Important! You should definitely take into account that ash, linden and birch will be the ideal material for this product. Spruce and pine have an extremely persistent smell, which will subsequently absorb the bread.
The manufacturing procedure itself can be immediately divided into several stages:
- According to the drawing, all the elements are cut out of the tree, which must necessarily be tightly joined together. The sizes can be varied.
- All cut out parts can be connected with screws, furniture nails or wood glue. More skilled craftsmen use a thorn to connect. A spike is formed on one part, and a notch on the other.
- The joints are coated with glue for a better connection. In this case, absolutely all compounds must be thoroughly processed. This is done using ordinary sandpaper.
- At the end, the doors are made. A modern wooden bread bin is usually equipped with a curtain-like door made of thin slats.
- In order for the shutter door to move, make a groove inside the housing, inside which this door will move.
- You can open the surface with varnish, but always with wood varnish, not nail or hair varnish, after having painted it with a pattern.
Important! You can make a simpler version of the door. In this case, the curtain opens outward. It, like the previous version of the door, is made of strips of low height. Often times the planks can be replaced with a bamboo rug that is held together with strong thread.
In any case, the bread bins will be incredibly spacious and functional.
Important! Thanks to the material from which the product is made, the bread bin is completely environmentally friendly and will suit all kinds of interior styles.
Bread boxes made of bamboo
The bamboo material is not only a decoration for the lining of the finished product body. Quite often, some craftsmen make small bread boxes from bamboo napkins.
Important! Such a product will be manufactured within 2-3 hours, not days, and this is the main plus.
To make such a bread bin with your own hands, prepare the following tools and materials:
- Bamboo napkins;
- Cardboard;
- Self-adhesive;
- Textile;
- Scissors;
- Marking pencil;
- Decorative handle made of wood.
 Helpful Crafting Tips:
- The dimensions of the future product are limited exclusively by the parameters of the napkins.
- Make a case out of cardboard.
- On one side, the side walls must be rounded. This is done so that the door closes without interference and adheres carefully to the structure.
- Glue all parts with glue.
- From above, from the inside, cover the finished body with self-adhesive. Thanks to it, your cardboard body will become much stronger.
- The last step is the bamboo finish. Cut the napkin into 2 parts. The first must necessarily correspond to the size of the bottom, and the second - to the door.
Do-it-yourself open bread bin
To make a small, beautiful, comfortable and original open bread bin that will decorate your table during lunch, stock up on the following materials.
Thick cardboard
You can take a box from under some device, cut out a piece of the required size.
Catchy fabric
You should like the fabric and fit perfectly into the interior of your room, where the bread box will be located. It will depend on the fabric whether the decor is interesting with your own hands.
Important! Take better linen and cotton. Linen is especially relevant for the simple reason that it is incredibly durable, natural, and bread crumbs will not clog in the middle of its threads. But if you take cotton, then this situation will occur.
Threads
You can also use bright threads if you want to make the seams stand out. In certain cases, the fabric is sewn with thick threads and in a chaotic manner to make it more noticeable.
Important! However, in order to permanently store bread, such a product may not be suitable. Even if you cover the bread with a towel for longer than one night, it will not stand - it will just start to dry out. That is why it is more profitable to make a small open bread bin.
- In order for the interior of your kitchen not to contain extremely catchy and large-scale products, the bread box must be made small.
- In no case should it resemble a container or a tray with high sides, which is why 20-25 cm in diameter should be enough.
Breadbasket making:
- Cut a square or rectangle about 20x20 cm from one sheet of cardboard, plus about 5 cm for the height of your future bread bin.
- Using a pencil, mark the bends of the sides and bottom on the inside of your future bread bin. Take a ruler or knife and make curves. This must be done very carefully so that the cardboard gets the minimum number of cracks during work.
Breadbasket case
A particularly interesting sewing method - even at the stage of forming the cardboard form along all the side walls, you can make cuts right down to the very bottom. And for all the details to do on a separate cover, why.
 Plaster bandage roll elastic "sticky bandage", Adhesive plaster on a polymer base with absorbent pad, Sterile elastic bandage with absorbent pad Elastic fixing bandage
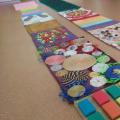 Orthopedic massage mat for feet: how to use at home Why do you need a massage mat for children
 Anatomical and orthopedic shoes: what's the difference?