How to make beautiful furniture. Build cabinet furniture with your own hands: the main stages. Coffee table from an old suitcase
Each person seeks to organize its space in such a way that the maximum comfort is felt. However, in addition to a worthy aesthetic species, its functionality is important, so the cabinet furniture is made with their own hands by many residents of country houses and summer cottages. Many in this case do not have experience, so they often turn to ready-made instructions.
Before studying the assembly process, it is primarily important to prepare the necessary tools:
- Screwdriver. It will be needed to twist various details: bolts, confirm, screws. With their help, compile with the prepared parts of the fittings are mandatory. There is an alternative assembly method - with the help of ordinary screwdrivers, but in this case, the whole process can delay for a long time, and not every person has such an opportunity.
- It is desirable to immediately purchase drills of different diameter. In many building stores, they are sold complete (from 4.5 to 10mm). It will also save time for the search for all necessary materials, the more such a tool can be useful in the future;
- Separately acquired a drill for confirmation. In this case, drill a hole in 5 mm in a very short time. For the step without special costs, the hole expands to 7mm;
- To high quality and tightly spin the confirmation, it is recommended to purchase a hexagon. Alternatively, some homemade craftsmen use a surnupture equipped with special bits, but it is impossible to crash with such a design to hard-to-reach places;
- Forcelarel drill must have every wishes to collect cabinet furniture, because with its help hinges and other fittings are twisted;
- Markup accessories: ruler, pencil or bright marker, metal square, roulette, knife for office;
- Circular saw;
- Lobzik electric;
- Hammer, preferably with a nail-holder (need if it is necessary to disassemble individual elements);
- Dryer construction.
If the furniture does not have any features, when assembling, it is recommended to use universal schemes that are calculated on the angle of drilling 90 degrees. Unfortunately, such a device cannot be called a budget option, so this acquisition is advisable only when the assembly becomes professional fishery.

Manufacturing technologies
Answering the question of how to make cabinet furniture at home, we divide the whole process into several stages.
Cutting parts that make up the overall design
When working with chipboard is planned, it is impossible without cutting. With the help of the machine we saw the chipboard, in which all the workpieces are distributed in advance. This will help reduce material consumption. It is recommended to use a high-performance machine, due to which the optimal heating frequency is achieved, since the cutting saw is installed here.
It is easier to work with already ready laminated chipboard plates. In stores you can buy options covered with a decorative layer for every taste. Of these, only cut the necessary details will remain. If the furniture is made of raw raw materials, then you need to have cut out parts. Facing can be performed by self-adhesive film or special plastic.

Perform measurement

Making a cutting machine
Treatment of slices
Before assembled outline parts, you need to process sections. To do this, use the edge tape on the adhesive basis. Before work, it is important to pay attention to the conditions indoors:
- The percentage of humidity should be as low as possible;
- It must be warm to avoid the deformation of the material.
For stacking parts, the edge ribbon is prepared by a maquet or construction knife and an ordinary iron. Most often, the edge is sold with an already sticky layer, and additional surface treatment is not required.
You can use professional iron. In the process of work, it is important to keep it at a certain distance from the surface to avoid displacements and firmly consolidate all the details in its places.
It is important to remember that the iron should be held on the edge a small amount of time, otherwise it will overheat and go with bubbles. As soon as the edge gain and take a certain position, we take a knife, cut the edge and clean all the irregularities using the sandbreaker.

Cut extra details

Glue edge
Marking Points for Accessories
Ready parts need to be decomposed on a flat surface. Next, note the places of attachment of the fittings, in accordance with the plan of the finished product. Check for all sizes, the error is only 1 mm can provoke a skew of the entire design. The lockers will stop opening, the doors will be incorrect. Next, you need to drill all the holes of the required diameter to fix the elements of the fittings.

Lay out parts on the floor

Create marking

Drill holes

Fresh fitness
Installation
After working with accessories is completed, go to the assembly of all elements. Many newbies in this case preliminarily addate video instructions where not only the order of assembling a certain model is shown, but also have practical advice, as not to confuse the whole process. We collect nodes. This is the final stage, when all prepared parts must be assembled into a single design. It is important to perform all operations sequentially.

Step-by-step instruction
First you need to determine what makes cabinet furniture is made. The most common and affordable materials are considered LDSP, Fiberboard or Chipboard. An array of wood is more reliable and stronger, but it is more expensive, and it's more difficult to work with it.
Design
All instructions for creating cabinet furniture can be divided into two stages. The first is the design of cabinet furniture. This stage implies an artistic or graphic image of all elements (cabinet furniture drawings). This is a difficult event, because the project scheme must be developed correctly, helping visualizing the necessary furniture functionality.
A few years ago, such a project could develop an exclusively qualified designer, but with the help of modern applications and programs, you can work on the task yourself. To make a clear plan for designing cabinet furniture with your own hands, it is worth determining which information should contain:
- On a separately plan, you need to draw the overall design of the room to visualize the position and type of cabinet furniture;
- All dimensions are entered into the project - dimensions, height, depth;
- All items are being worked out that will perform the base of cabinet furniture, drawings of facades are made with the desired dimensions;
- Separate texture, color solution.
On the Internet you can find special 3D programs with which it is possible to recreate absolutely any furniture project. In features, you can set special parameters and even select the material from which it is planned to create the desired interior items. The main advantage of such services is the lack of need to study information, how to calculate the size or draw "in the old manner", especially since not every person has such skills. The finished version is printed on the printer as a photo project, and then the case of technology and practical skills.
The graphic drawing of the common project determines the success of the conceived case, but the creation of details is an equally responsible event. First of all, everyone should think about what functions should perform furniture and only after that proceed to the drawing. The correct calculation of the size is the determining factor for the success of the entire further assembly. Otherwise, the item may not stand up in its place, which means that it takes the adjustment of its shape, which implies additional financial spending. Even if the plans are facing the manufacture of an ordinary storage cabinet, each detail must appear in a separate angle in the drawing:
- Back wall;
- Front Panel;
- Side walls;
- Each shelf;
- Door.
As for the details that will be retractable, they are also drawn separately from the rest.

Create a general design

Approach measurements

Create color decoration
Creating details
Production of parts is made according to the general instruction:
- The choice of material from which parts will be formed;
- Creating a project on a computer using a 3D program or execution of a hand drawing on Watman;
- Manufacturing patterns by printing on a printer or making patterns manually;
- Transfer of blanks to the material by stroke with a pencil or a bright marker;
- Cut with a high-performance machine;
- Processing edge, if necessary, grinding;
- Drilling holes for fasteners.

We choose manufacturing materials

We do the project

Creation of lecturers and cutout materials

We carry out the cutting chipboard

Spin coating

Making holes
Assembly
When moving the furniture constructing with your own hands to the assembly, the whole process can be described in the following steps:
- All those present elements of accessories (loops, locks, screeds, passings) are fixed to the main details;
- Collect the frame and the rear wall, minting mirrors;
- Check the accessories, fasten the handles, plugs, set the retractable elements to their locations.
Depending on which object of furniture is planned to be collected, the process can be somewhat different, but the main procedure remains unchanged. In order for each person to plan to create furniture with his own hands, he understood how he needs to act, you can disassemble the whole process on the example of creating an ordinary cabinet.

Fresh fitness

Collect the carcass

Mount the handles

Fresh plug
Stage 1. Frame
Corrected parts are connected according to the plan. To perform a screed, it is recommended to prepare a screwdriver with special bits. A twist will occur much faster than with a screwdriver. In addition, the forces will be consumed much less for such work. It is important to take care of the maximum strength of the design, so it is not recommended to use nails to strengthen the cabinet bottom. The optimal choice will be a screw of 4 to 16. Side surfaces, as well as top and bottoms are connected at right angles using furniture corners. You can kill the back wall of the cabinet to the finished carcass.

We collect the foundation

Making holes

Installing the bottom of the frame

Stage 2. Sliding System
To ensure the correct movement of sliding doors, primarily fasten the guides. They are mounted in parallel to the upper and lower plane of the cabinet. One of the optimal options will be the use of a specially designed system called "Commander". Without much effort, you can not only move the doors to the desired position, but also easy to adjust. As a rule, adjustment is needed if slots are observed during the assembly, which not only spoils the appearance, but it makes it difficult to operate. In most cases, at first after the assembly, a shrinkage of cabinet furniture occurs, as a result of which slots may also appear. This is considered normal due to the specific features of the material.
Special rollers are screwed to the doors. The finished design is installed in the guides and check the move.

Install the stopper

Mount the rubberized lining

Installation of guides

Adjusting the system
Stage 3. Installation of fittings
At this stage, all shelves, drawers are inserted into place, and other small elements are attached. The cabinet is ready. Even a person who does not have experience in creating cabinet furniture with his own hands will not spend on creating a lot of quality a large amount of time. The average assembly time is no more than three hours without the preparatory work. In addition, the cost of the product made with your own hands is much lower than the price of finished furniture in the store.
The assembly of cabinet furniture is your own hands - this is a combination of an optimal designer solution, the choice of high-quality materials, as well as the purchase of new skills, with the help of which in the future you can create entire furniture headsets.

Some modern interior items have a high cost, but not too high quality. This leads to the fact that many people think about making furniture with their own hands at home, for which various materials can be used, and environmentally clean wood is considered the most preferable. With an independent embodiment of unique ideas, you can count on the formation of truly original and unique designs that will fit well into the interior.
You can make furniture with your own hands from different primary materials or high-quality raw materials, for example, from natural wood. The choice depends on what kind of design should work out how much tools are planned to be spent on these purposes, as well as with what materials it is convenient and comfortable to work to work with the future owner.
Most often to create furniture with their own hands at home, wood is selected. It is not necessary to be bars or boards, and ordinary shields are suitable. It is convenient to work with them, and they are not too high.
Before directing work, it is important to decide on the tree of wood, and the selection depends on what loads will be provided on the design, as well as under what conditions they will be used. The most often selected wood:
- solid rocks to which beech, elm or apple tree belongs, and they are considered optimal for creating frame furniture, which should be designed for high loads;
- soft breeds - pine, fir or will, lungs in processing, due to which the creation of numerous decorative elements with an attractive view are ensured;
- for rear walls, which are not visible outside, chipboard plates are used.
If you have financial opportunities, you can purchase expensive wood species to which Henge or Mahagon belong.
As soon as it is decided, from which material the furniture will be made with your own hands, the necessary tools will be prepared:
- swivel stub;
- handmade electric jigneck, equipped with a tilted shoe, which will ensure the ability to make even the most non-standard and unique products;
- grinding machine for wood processing;
- the milling mill for working on a tree, and there should be somewhat cuts to it, allowing to obtain different holes in the sizes and the groove;
- fasteners, screwdriver, glue for wood and nails.
The exact number of different tools depends on which furniture is created with your own hands.

Instruments

Furniture Shield
Nuances of creating furniture
The manufacture of different interior items certainly begins with certain preliminary stages to which refers:
- selected specific furniture created by their own hands at home;
- further, drawings and schemes are formed, on the basis of which the subject of the interior is made, and if it is non-standard, it is best to create a detailed interior design in the examples containing all the items that will be manufactured and installed in a particular room;
- preparation of materials necessary to create specific furniture;
- applying the markup, on which the details are further cut;
- all elements obtained are carefully processed by special protective compositions that prevent rotting or drying material;
- holes are created for different fasteners, for which it is necessary to use previously made drawings;
- if necessary, the surface is painted in the desired colors;
- at the end, the construction is assembled.
Additionally, it is required to furniture created by their own hands according to drawings and schemes, pick up optimal fittings, and it is also desirable to take advantage of different unique decoration technologies.
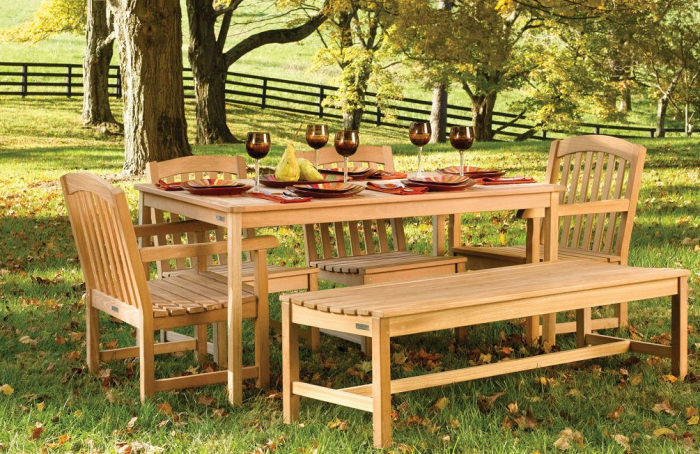
Table
Such furniture with your own hands is simple enough, so the process is caught even newcomers. The procedure is divided into steps:
- a diagram and drawing of the future design is formed;
- details of the future table, to which the countertop and legs include, as well as other elements, if it is planned to make an unusual design;
- preparing a canvas that is well sled and is cleaned;
- the material is covered with antiseptics and antipirens;
- if there are cracks after inspection of the material, they are well closed with a putty on the tree;
- marking on the canvas;
- high-quality drinking is produced;
- form legs and planks for the table;
- on the legs are made of horizontal;
- as soon as all the details are ready, the furniture assembly begins with their own hands, for which high-quality bolts, self-tapping screws are used or other fasteners.
If the work is performed for the first time, it is advisable to view the video instructions in advance, allowing you to look good in the stages and rules of this process.
If different chatting elements are revealed after creating the design, the design is reinforced with special belts or glue. The resulting product is processed, for which the table tops are smoothed by the edges, after which all parts are covered with varnish and paint. It is provided to decorate in different ways. To create furniture with your own hands, this master class is considered simple and understandable. It is allowed to make even folding tables or products transformers.

Preparation of details


Blets Bohokin

Build details

Cupboard
It is easy to make furniture furniture, so often the owners of residential real estate prefer to even create a wardrobe. For this, actions are performed:
- choose boards or slabs of chipboard, the thickness of which is in the range of 18 mm;
- it is solved whether the doors will be standard swing or sliding, and in the latter case, the system can be ordered in the finished form or do it yourself;
- before creating furniture, with their own hands, it is originally necessary to prepare all the necessary details, for which the sketch is formed, according to which parts from the prepared materials are discharged;
- first, the framework is made consisting of the rear and side walls;
- below and above are the robust foundations;
- for fasteners, self-tapping screws or confirmates are used;
- once the frame will be ready, drawers and shelves are made, for which the dimensions of the resulting design are taken into account;
- facades are attached;
- if necessary, the backlight is mounted;
- the resulting design is decorated in different ways;
- attached accessories represented by different handles or decorative elements.
In the manufacture of the cabinet, with their own hands, is taken into account how many people will be used.

Materials

Development of drawing and markup

Fastening the carcass


Cutting drywall

Mounting plasterboard

Puttail

Fastening shelves

Door installation

Bed
In the manufacture of furniture with your own hands, many prefer to make a high-quality bed. For these purposes, wood is usually selected with a low moisture indicator. The whole procedure is divided into steps:
- drawing is done, materials are bought and the tools are prepared;
- work begins with the creation of a frame, for which durable bars are used, fastening with self-draws;
- edges are processed by a semicolon or grinding machine;
- the resulting frame is recommended to immediately paint a special paint designed for wood;
- next, we make supports that will be used to create a rack bottom;
- for this, the desired holes are made in the frame and bars are attached;
- during operation, the level is constantly used, allowing you to get a perfectly smooth design;
- wooden rails attached to supports at the same distance from each other are made;
- next are the legs of the wood bars, which have a cross section within 10x10 cm, and their length should be approximately 10 cm;
- it is advisable to make no less than six such bars;
- the legs made are attached to the bed frame;
- the resulting product is grouped and varnished;
- as soon as the design is fully prepared, it is possible to decorate it, for which different methods can be used, for example, staining, manual thread or painting.
The mattress is placed on the bed, after which it is effectively used for sleep and rest. Having understood how to make furniture, will not be difficult to get a high-quality bed. It will last for a long time, and you can also be sure that in the process of its manufacture, only reliable and environmentally friendly materials were used, so it will be suitable for residential buildings or apartments.

Preparation of details

Scheme backing bed

Build details backing

Compound of the back and internal legs


Side fences


Bedside
You can make furniture with your own hands for different rooms. It is enough to simply form a standard bedside table that can be installed in the bedroom or hall. The procedure is divided into steps:
- creating a drawing on which you can see what appearance and other parameters will be created by the created furniture items;
- assembly of the island bedside tables, for which the sidebar and the board are connected by screws;
- holes are made for planned drawers;
- pocket supports are formed, after which the second side panel is screwed;
- from above, the design is closed with a wooden panel, and you can make a top with a small canopy or without it;
- the mount is performed by screws;
- installed guides for drawers;
- the main elements that are part of the boxes are connected;
- facade panels are mounted;
- boxes are inserted;
- the finished bedside table is decorated in different ways.
Make furniture represented by a small standard bedside table, simple enough. To do this, you can use not only wood, but also by other handicraft materials. Do the design for the house, and this will allow you to get an ideal tube with the desired number of boxes and additional compartments.

Instruments


Build side panel


Ready carcass

Build a box


Ready box

Ways to decorate
It is important not only to figure out how to make different interior items, but also how beautiful and interestingly decorate them. There are many methods that allow decorating different structures unique ways:
- decoupage submitted by the use of various applications made from various materials;
- wood carving that allows you to decorate wooden products unusually beautiful, exquisite and unusual patterns;
- hot stamping, designed for wooden surfaces. For this, special equipment is used, which allows to soften wood due to high temperatures and make bulk drawings using press forms;
- inlauses suggest insertion into interior items of different elements of glass, stones, metal or other materials;
- the invoice decor is to use different sockets, corners, layouts and bas-reliefs to get a really unique product.
Thus, you can create different interior items with your own hands. Multiple bedside tables, beds or lockers are considered the most simple in the formation. To do this, different materials can be used. Each person can embody his ideas in the process of work, which allows you to get really unique designs.
With the arrangement of the living space, the furniture plays an important role. She can decorate the interior you have created or spoil the entire appearance of the room. Therefore, it is worth considering her choice. If you are looking for original solutions, you may encounter the fact that the market has a wide variety of furniture of one type of MDF and a similar material.
If you look at the furniture from the tree, then its prices may seem values. Given this, many homemade craftsmen decided this problem by doing wood furniture with their own hands. In this article we will tell about how and where you can use this furniture. The main question is how wooden furniture is manufactured with their own hands.
What to do is best
To begin with, it should be understood from which it is best to perform the manufacture of furniture made of wood, or rather, from which breed of wood. Remember, high-quality wood does not necessarily have a high cost. So, as a basis, you can take special wooden shields that can be made from a solid piece of wood or prepare by pressing.

Regardless of which material you will use, the process of producing furniture made of wood requires a special approach. So, you need to select the basic material correctly. Wood is divided into two categories:
- Soft.
- Solid.

It is easier to work with soft, but it is short-lived and is subject to mechanical effects, that is, after impact, traces / dents may remain. As for solid, it is more difficult to work with it, but it has a much long operational period. To speak for wood, then among solids can be allocated:
- Acacia.
- Ash.
- Apple tree.

This material can be used in the manufacture of frame furniture. That is, the furniture that will be subject to serious loads. As for soft breeds, this list includes:
- Fir.
- Pine.
- Juniper.

From these wood breeds, decorative parts are preferably made, which are not intended for high loads.
When choosing wood, the conditions for the operation of future wood furniture should also be taken into account. So, there are rooms in which the level of humidity is significantly increased. As a result, one wood should be chosen, which is resistant to the negative impact of moisture, that is, moisture resistant. For example, the blender of the bathroom can be used the following wood species:
- Linden.
- Cedar.

So, if you split it all by category, then this picture may turn out. Furniture frame is often manufactured from pine and other soft wood. Also done all sorts of decor. Among the more reliable rocks is a beech. However, he is unstable to moisture.

As for oak, his excellent characteristics, both hardness and appearance, are very popular in the manufacture of chest of drawers, beds, cabinets and so on. If you want to make a coffee table, then the optimal option is to be birch. From it you can make chairs, tables and other items.
Tip! You can not always use an array in the manufacture of wooden furniture with your own hands. You can use a healthy material, such as pallets, bars, logs, and so on.
Features of the production of furniture in the workshop
To understand all the difficulties of the upcoming work on the manufacture of wooden furniture with their own hands, we suggest familiarizing yourself with the process of its production in the conditions of the workshop. So, all raw materials are necessarily kept in a special warehouse. There is also a workshop, which provides for a room for assembly and painting. Mandatory there is a drying chamber. After, the furniture goes to a warehouse with finished products.

In the process of its manufacture, specialized equipment applies. A large number of processes are automated by means of installed machines. For example, such equipment can be used:
- Grinding machine.
- Raysumovoy machine.
- Edgebanding machines.
- Machines for linear planing and so on.
However, at home this may not be. Therefore, we suggest you consider the features of the process of how to make furniture with your own hands.
We make furniture with your own hands

No matter what kind of wood furniture you make, the whole technological process will consist of the following steps:
- Marking.
- Cooked all billets.
- Processing billets.
- Drilling technological mounting holes.
- Assembly of all parts in one design.
- Painting.
- Varnish.
- Drying.

As for the combination method, there are two types in the manufacture of wood furniture:
- Connect connection.
- Low connected connection.
Now consider important nuances of how furniture made of wood:
- Children's
- For gazebo.
- For giving.
For the children's room

In this case, it is extremely important to repel from certain requirements that are presented to wood furniture for the children's room. First of all, the finished product should be environmentally friendly, safe and convenient during operation. Also, such furniture should not fall out of the overall interior.

Plus to all, some requirements are presented for the treated surface. It should be missing any roughness. That is, all that can lead to a child by the child. As a result, everything should be treated with varnish or paint. As for the choice of coverage, it is better to choose a varnish-based lacquer. If we talk for the form, it is advisable to avoid sharp corners. This will reduce the likelihood of injury.
For gazebo

For arbor, wooden furniture do it yourself drawings and schemes can be found in this article. There are many original solutions for arbors. And in this you will be helped by ready-made drawings of furniture. So, for the table you can use a wide board, which is assembled in one tabletop design using a bar. The tabletop can be given a rounded shape. The surface is thoroughly polished and varnished. The legs, crossbars and discolitions are connected using self-tapping screws.

So, in any case, when choosing wooden furniture for a gazebo, the following nuances should be taken into account:
- What it will be laptop or built-in.
- If the gazebo is open, then the wood must be moisture-resistant.
- Determine the length and width of the bench so that it was convenient to sit on it.
- Stripping from the configuration of the arbor, determine the form and future furniture.

For dacha

In this case, you can use a variety of materials, for example, IV rods. You can weigh the armchairs and other exquisite wood furniture. You can also use pallets. But for this, they should be carefully treated, and at the end paint and open with varnish.

Important! If the furniture made of wood for cottages is made for the street, then think about it, in the period of rains and severe frosts, it was possible to carry it into the covered room. This will significantly extend the life of its operation.
Conclusion
So, we considered the possible options for how and from the tree from. Of course, you can connect fantasy in this matter. If it is missing, you look at the photo in this article. We also offer viewing a prepared video.
The kitchen and the wardrobe are almost the simplest types of furniture for beginner masters in the assembly (not counting only the bedside tables and shelves). In general, the living room and bedroom furniture usually requires a more serious approach, the use of non-standard materials, glass. This article will help beginners to understand how to make furniture on their own.
A tree in pure form is already practically not used in cabinet furniture; The array is considered expensive elite material.
Now the tree is replaced with a cheaper material - laminated chipboard (abbreviated LDSP). Most often, these plates have a thickness of 16 mm, you can also find a 10 and 22 mm thick chipboard. 10 mm Sheets are usually used to fill the door wardrobes, and 22 mm - for bookcases and shelves, where high bending strength is required. Also, sometimes with the help of elements from LDSP 22 mm decorate the design.
Almost all furniture details are made from LDSP 16 mm (except doors and facades).
Laminated chipboard
Cutting LDSP is produced on special machines on the guides. Of course, you can sprinkle it and at home with the help of an electric bike, but at the edges there will be chips and wavy irregularities. Smoothly sprinkle LDSP at home almost unreal.
Edbles
The most vulnerable place in LDSP - he was sleeping. Through it, moisture to penetrate inside the easiest, so, with bad protection, the ends can soon wake. Therefore, the ends are closed with edges, there are several types of them.
- The melamine edge is the cheapest, but poor-quality. It is possible to stick it at home with the iron.

- PVC edge 0.4 and 2 mm - the optimal option. It can be glued only on a special machine, so they make it immediately when ordering sawing. To save money 0.4 mm glued to invisible ends, and 2 mm - to external, which will experience permanent loads and friction.
 PVC edge 2 mm
 - The edge of the ABS is similar to PVC, only made of eco-friendly material.
- A mortise T-shaped profile is inserted into a pre-made milling groove. It is rarely used.

- P-profile invoice - can be easily pasted at home on liquid nails. The main minus - the edges will perform a few millimeters, so dirt is clogged under it. On the other hand, this disadvantage allows you to hide a poor-quality cut.

Facades
Kitchen facades and furniture doors are usually made of more elegant material. But if you make a drawer door inside a wardrobe, which no one can see, for it you can use the usual 16 mm LDSP with PVC edge 2 mm. But the cabinets in the kitchen should look more presentable.
The facade is a separate furniture element. Usually it is made to order. If the dimensions of the facades are non-standard, their manufacture can take several months.
According to standard sizes, it is easy to navigate: usually the facades are made by 2 mm less than the cabinet itself on each side. Therefore, a facade of 596 mm is used for a standard cabinet 600 mm.
The height of the kitchen cabinet also depends on the facade and ranges from 715 to 725 mm for outdoor cabinets (without legs) and low attachments, and 915-925 mm for high hinged cabinets.

Types of facades
Since the facades perform, mostly decorative function, the choice is huge, they differ in appearance and material.
- Facades from laminated MDF. This extruded material, more moisture-proof and dense, compared to the chipboard. Most often, the surface is laminated "under the tree". But no matter how strong the film is, over time, at the edges it can move and crack. The main plus of this material is in a low price and rapid manufacture.
 Facades from MDF.
 - In addition to standard deaf facades, there are options with figure cuttings for stained glass. Glass fasten on the pad on the reverse side.
- SoftFooding - Such facades are similar to ordinary MDFs, but have a characteristic two-color layout with a relief from two sides. They can only be used in dry rooms, bedrooms or living rooms.

- Postforming is even better quality and durable products. Thin plastic over the edges wock 90 ° or 180 °, due to which extra seams on the corners are excluded. As the basis use chipboard or MDF plate. Usually postforming make strict shapes, without unnecessary firm decorative elements.

- Plastic facades are high-quality, but expensive. Consist of base (chip / MDF), lined with thick plastic on both sides. They always have a strict design and a flat surface, glossy or matte. The edges of the plate are sometimes protected by an abs edge or aluminum profile. Recently, the superval acrylic plastic is especially popular.
 Plastic facades in aluminum profile
 - Facades of wood and veneer are suitable for fans of natural materials, but they are expensive. In addition, about ecology go long disputes: there is an opinion that the varnish and impregnations here are so much that only one name remains from the tree.

- Painted facades under enamel. Have a significant drawback - the surface is vulnerable to the appearance of scratches and deformations, has low chemical resistance. Previously, it was popular thanks to a saturated color, but with the arrival of glossy acrylic plastic, everything changed.

- Aluminum facades with glass - suitable for the kitchen in the style of Hi-tech. They look modern, but are complex in manufacturing and installation. For their fasteners, non-standard fittings are used.
Rear walls and bottom boxes
The back wall and bottom of the boxes are most often made from LDVP. The smooth side of the sheet should look inside the cabinet / drawer. The thickness of the sheets is 3-5 mm, the color is selected under the LDSP.
Some prefer to attach LDD on the furniture stapler, but you can not do that. Over time, the brackets are ocked and the design can squeeze. About the bottom of the boxes and it is not worth talking - the stapler for fastening is clearly not suitable.
 Furniture LDVP
 Sometimes it is inserted into the prepared grain groove, but all sizes must match up to a millimeter.
Most often, LDDP is fixed on nails or self-tapping screws. It is better to use self-tapping screws with a press washer, but before screwing them, you need to drill the hole, otherwise the product can crack.
In rare cases, for example, to create a "rigidity edge" in a high closet or in high loads, the Fiberboard is replaced with LDSP. These materials can also be combined.
Countertops
The countertop is a horizontal working surface on which you can cook food, there is, read, write, etc.
Most office and written tables, as well as cheap dining, countertop from the same LDSP as the main details. The thickness is 16 or 22 mm, necessarily framing the PVC edge of 2 mm.
For the kitchen use special countertops. They are a leaf of chipboard with a thickness of 28-38 mm, which is covered with a durable plastic on post-forming technology. Moisture-resistant countertops are green on the cut, and the usual chipboard is gray. The right kitchen countertop must have a kippler, which will prevent flowing fluid on the facades and in the boxes.
The weak place of such countertops is the edge of heard. Usually they are closed with a simple melamine edge, so they come into disrepair already in the first year of operation. To avoid this, it is recommended to protect the edges with special aluminum profiles (end plank), and to protect against moisture, it is pre-wrapped with silicone sealant.
There are also other types of profile: angular and connecting plank, which are needed for docking several cabinets with different table tops.
 Corner, connecting and face plank for table top
 Another element is a decorative corner that closes the gap between the wall and the worktop.

For finishing, the apron sometimes use a wall panel. Unlike tile or mosaic, it is more practical thanks to the absence of seams and inexpensive, compared with glass aprons.
Mounting countertops to the cabinets is made from the bottom to short screws to horizontal struts, so as not to spoil the smooth facial surface.
Countertops from natural or artificial stone are better and more durable than others. Natural stone is heavy and requires special care due to high porosity. And the artificial stone does not have such shortcomings, it can be given any size and shape. The main minus of stone countertops is a high price, for small cuisine, they cost 40 thousand rubles. and more.
Alternative - table top from tile or porcelain stoneware. You can make it yourself, but the tile can not be attached to the usual fane or chipboard. Previously the base must be seen by cement-fibrous sheets.
Location details
The detail is called any element of cabinet furniture: covers, table tops, walls, facades, shelves. Each item can be either nested or overlap. The correct choice of type of location is very important.
Consider examples of two kitchen cabinets: one of them will stand on the legs, and the second will be suspended.
Outdoor cabinet:
As can be seen in the photo, the operational voltage in the outdoor cabinet is directed down from the lid and in the first embodiment is naturally transmitted through the parts on the cabinet legs.

In the second, incorrect version, the load is transmitted through the confirmation (furniture screw), and because of this it will be removed on the break from the part.
Hinged cabinet:
In the second example, the opposite: the load will go to the bottom shelf, and the attachment point will be from above.

If you apply here the same fastening scheme, as in the outdoor cabinet (1 option), all 4 bolts will be constantly under loading load from wood. Therefore, it is better if the confirmates will experience a load on the break (see "correctly" scheme).
Furniture fasteners
Furniture fasteners are hardware (metal products), which are used to connect parts. Most often, the compounds are performed at right angles.
- Wooden specks - inserted in advance drilled holes in both parts. Use them for pre-fixing and enhancing the load "on the cut", then the parts are fixed with a more reliable way.

- Furniture corners - popular, but outdated view of the furniture attachment. Among the minuses: appearance, loosening over time and bulky.
 Furniture corner
The main disadvantage of this type of fastening - the screws screwed the caps remain in sight. To hide them, plastic plugs under the color of LDSP are used.


Furniture fittings
- Handles - everything is clear here. Usually attached to the screws.
- The legs are easy to indoors where a wet floor cleaning is often made, for example, in the kitchen. From daily contact with water, any wood, and especially chipboard, quickly deterrent. In addition, at the expense of the legs, you can align furniture on uneven grounds.
- Silicone damper is cheap, but a very useful detail that allows you to reduce the noise of shocks from the door of the cabinets. It is glued on top and bottom to the door or the end of the cabinet to mitigate the impact.

- Furniture loops. Round cutouts for them (additives) in the facades can be made in any furniture workshop if the manufacturer did not make them in advance. The loops differ in the degree of opening the door. Standard loops have an angle of opening 180 °, and in a closed position - 90 °.
The loops have a special mechanism that allows you to adjust the doors in the height and depth of landing. Separate loops for sale for glass doors, you can climb the glass without drilling the hole.
- Furniture loops. Round cutouts for them (additives) in the facades can be made in any furniture workshop if the manufacturer did not make them in advance. The loops differ in the degree of opening the door. Standard loops have an angle of opening 180 °, and in a closed position - 90 °.
From inexpensive fittings manufacturers, Chinese Boyard can be recommended, from the world's serious world - Austrian Blum.
Boxes and guides
There are many ways to manufacture furniture boxes. The easiest of them is to collect a perimeter from LDSP. If a beautiful facade is required, it is screwed into the main frame from the inside (as well as the table top). The facade can also be fixed on the eccentrics as the fourth wall of the box.
But the main thing is not to collect the drawer, but correctly consolidate it.
Guides for drawers are divided into roller or balls.
- Roller guides are usually attached to the bottom of the box. He will ride them on two rollers. A pair of such guides costs about 150 rubles, but it is extremely recommended to use them. The main minus is that they do not allow the drawer completely, a heavy box in an open more than half, the situation may simply fall.
- Ball guides, or as they are also called, "telescopic guide full extensions" are capable of increasing the length smoothly twice. Inside, they have a lot of balls, both in bearings, so they provide a smooth move.
 Roller and ball guides for drawers
 - In addition, Blum has metaboxes and tandempoxes. These are ready-made side walls of drawers with installed guides. It remains only to install the facade, the rear wall and bottom.
Doors for wardrobes
The wardrobe is a separate (with side and rear wall), or built into a niche or angle (with one side wall). Internal filling can be any: ordinary shelves and mezzanine, retractable boxes and baskets, rods for clothes, special hangers for trousers, ties, etc.
The main element of the wardrobe - sliding doors. You can not save on them, you need to buy high-quality accessories, otherwise you are tormented with falling and joining the doors. Almost in any city find in specialized stores Domestic sliding ARISTO systems is not a problem.
The wardrobe usually has 2-3 doors. They consist of a profiled frame, inside which insert decorative elements: mirrors and glass, LDSP, rattan sheets, bamboo, artificial leather (based on). Each door can be collected from a combination of several materials that are separated by an aluminum profile. In width, it is not recommended to do the doors more than 1 m.

Standard profiles are calculated on the thickness of the cloth of 10 mm. But how to insert a mirror with a thickness of 4 mm? To do this, the silicone seal is put on the edge of the mirror. In order for the broken glass in case of a strike, it should not praise anyone, you need to order a mirror with a film glued to the invalid side.
Door movement goes on the guides, they are installed on top and bottom. The lower doors provide forward-back movement, and the top fix the door relative to the depth of the cabinet.
The lower rollers are usually made of plastic, have a shock absorbing spring and a screw for adjusting height. Top rollers have a rubberized surface.
With proper approach, homemade furniture is cheaper and better than displayed in stores. But besides this, it will be exclusive, accurately approach the needs of the owners and features of the room.
Furniture to furnish the apartment is not cheap. And although today the furniture market is quite wide, it happens that choosing the necessary items corresponding to the already existing design, or the headset that meets all the requirements is not so simple.
And here the wide field of activity opens for home masters. At the same time, as practice is evidenced, it is not necessary to have large chambers of the cabinetry or a joiner.
It is possible to make interesting items without much material costs and difficulties: it is enough to pay attention to the simple things that surround us and see the possibilities of their transformation or use to create new furniture elements.
Furniture made with your own hands will decorate any apartment
No one will argue that at home you can make high-quality furniture headsets of a sufficient level of complexity, even without having experiences of such work. But make simple comfortable and inexpensive furniture, which will be comfortable and beautiful - it is possible.
Its creation with his own hands has a number of advantages that will be used by the home Master:
- serious budget savings;
- independent choice of the most suitable material at an affordable price;
- the possibility of using objects available in the household that can be used to make new furniture elements;
- color range in the required designer solution.

You can order details Furniture for cutting on the layout, after which you collect it yourself

Designing of cabinet furniture, taking into account the interior of the room allows you to create furniture suitable in size and design
Our apartments are furnished with objects reflecting various stylistic preferences and financial capabilities, but the most acceptable option for the arrangement of residential and office space was the use of cabinet furniture:
- it is relatively inexpensive;
- has a high functionality;
- aesthetic looks;
- differs in compactness and good capacity;
- it is easy to install and maintain clean.
The base of cabinet furniture are boxes (boxes) of different sizes and configurations with or without doors, depending on the purpose, so the homemade masters most often independently make precisely furniture elements.
Nevertheless, it's not a simple matter, and requires serious preparation of the necessary materials and components. The rates will be the source for its manufacture, which will be connected fastener.

Details for assembling individual elements of cabinet furniture
To make cabinet furniture at home will need:
- plates of various sizes for shelves and boxes;
- fasteners;
- glue;
- other materials.
Accessories for the creation of cabinet furniture are:
- lifting mechanisms;
- loops;
- designs of extension and guides;
- separation systems;
- special products and accessories.

Furniture accessories and components for creating furniture of their own manufacture
Lifting mechanisms are presented in several species.
![]()
Mechanisms of transformation of furniture
Main material: LDSP

LDSP panels have a wide color gamut
The most affordable and inexpensive is the laminate (LDSP). It is widely used in the manufacture of furniture, and at the expense of its low cost almost completely replaced the tree. It is used for decorating structures.
LDSP production is based on the use of forest waste disposal, which is converted by hot pressing to the stove. Product components are binding to carbamide-formaldehyde resins.

Set of children's furniture from LDSP
The material is used for the manufacture of various types of furniture and individual parts, in particular, countertops, taking into account the properties with which it possesses:
- it can withstand high temperatures;
- separate species have moisture resistance;
- produced in a wide color and satellite palette;
- easily processed;
- withstands heavy loads;
- sold at an affordable price.
At the same time, LDSP is not an ideal material and has drawbacks. It is not suitable for creating figure parts and negatively refers to elevated moisture: when the water enters the water, the fat-resistant look swells and deformed.
In addition, it requires a neat handling when sawing, otherwise a varnish coating is damaged. A certain skill is necessary and when drilling a laminated surface.
Other materials
In addition to LDSP, other materials are used to make furniture with their own hands. It can be:

Wood and fibrous products are made in the form of pressed sheets. Fiberboard is suitable for manufacture:
- rear walls of Tumb and cabinets;
- shelves of sofas;
- drawers;
- various partitions.
Fiberboard has elasticity, so you can make betented elements from it.
MDF is also made in the stoves. When they are produced, a dry method is used, which is more modern and efficient.
For the production of veneer, it will take solid wood; For its manufacture, it is applied a way of impact or planing. Used to clamp various surfaces or in the production of plywood.
What tools you will definitely need

Tools that need for self-making furniture
Depending on the selected view of the model, which will be performed with your own hands, as well as the material, you may need a different set of tools. However, there is a list, without which it is impossible to do, for whatever the type of furniture neither the home master took. It includes:
- shurtpers;
- electrolovik;
- roulette;
- drill, screwdriver;
- set of desired fasteners.
Learning to make furniture
Learning to make various furniture items can independently can any domestic master. However, it is not necessary to count that this work will be easy, and everything will work out the first time. There are also failures, but that this does not happen, you need to know how to make furniture with your own hands. And you need to start with the simplest: benches, small tables, you can make a wardrobe, the design of which is quite simple.

Table and benches for gazebo, made with your own hands
The process from the sketch and the construction of the drawing, which should be carried out with the place where the self-made furniture and the parameters of the room and the product itself will be located.
Then you need to decide on the material from which the furniture will be manufactured. Experts argue that it is better for these purposes to take LDSP - the cheapest and affordable one.

Open white wardrobe from chipboard with their own hands
The next step will be the preparation of the tool that will be needed to perform work.
When preparation is completed, you can start directly to the manufacture:
- prepare details on the size provided (cut);
- carry out an element assembly by connecting them with fasteners;
- check the collected design for strength;
- install in the selected place.
If there is a desire, it is possible to decorate, decorating the product performed, in accordance with your aesthetic addictions.
Despite the fact that the chipboard is an affordable and cheap material, it does not mean that it does not have its own characteristics that need to be considered when using it. If they are ignored, then errors and failures cannot be avoided.
The main complexity of working with chipboard is sawing sheets. It is usually produced on special machines, access to which homemade craftsmen, most often, no. Large luck will be if it is possible to agree on an enterprise that has such equipment so that the material is squeezed on the necessary dimensions.

Crucified sheets of chipboard and LDSP require special equipment
But at home, most likely, this work will be carried out by an electric bike, which will inevitably lead to chips and wavy irregularities. The resulting "open wound" is exposed to moisture. And if it is not eliminated in a timely manner, the material will absorb moisture and very soon will begin to swell and lose its shape.
To avoid these troubles, you need to use a special edge that covers the spot. Today on the market you can find several of her species:

The cheapest is the melamine edge. Its without any problems can be pasted with the iron. True, it does not differ in quality.
Council. The polychlorvinyl edge will be the most optimal option, but it is possible to stick it only on special equipment. Therefore, if such an opportunity is, it is done immediately when the material is cut into the details.
The ABS edge is very similar to the previous one and has the same specifications, but is made of the best materials that are not hazardous to health and poisonous components.
The use of T-shaped mortise profile, which is inserted into the groove, made of the cutter - the phenomenon is quite rare.
It is convenient in the work of the home master of the P-profile. It is easy to stick to liquid nails. The only minus - the edges will perform a few millimeters, so dirt clogs under it, which means you need to follow the purity of the edges and to clean them in a timely manner. But this profile can be hidden a low-quality cut.
Features of the assembly of natural wood

Wooden pine products with their own hands
Furniture from wood is distinguished by the strength of reliability, durability, environmental safety. If preference is given to it, it is worth remembering that when assembling it is necessary to take into account the characteristics of the material:
- assembly to hold strictly according to the drawings;
- for self-making it is better to choose such rocks such as pine, birch, spruce, linden: their wood is softer and easier to process and assemble, but it is important to consider that coniferous breeds must be well dried so that the resin is discontinued;
- before installation, you need to handle the design details of the compositions that prevent rotting.
Features of wicker options
Furniture can be made not only of wood or chipboard materials. For a long time, the durable and beautiful products made by weaving are known for them:
- prucks willow, willow, rockers and other plants;
- roots of coniferous trees;
- birch bark (berson) used for weaving decorative elements;
- rattan - Rotan palm shoots;
- bamboo;
- mochal - lime bark
- and any curly plants with a fairly dense and flexible base.

Beautiful wicker furniture for home and street
Weaving can be used for furniture:
- fully made of vegetable raw materials by weaving various types;
- wooden, for decorative braid;
- combined, where various materials and furniture elements made of them are used.
With the help of weaving, different items are made: from chairs and stools to cabinets and dresser.
Frameless furniture with their own hands
Recently, frameless products have been specially popular. They are very convenient and able to provide comfort and comfort. At the same time, they are easy to make it with their own hands, even if there are no skills in work.
It is a two bag that is easy to sew, silent the cloth of the desired size. One of them is filled with filler; It is usually a polystyrene foam in a round-shaped granules, easily restoring the form after exposure to the load. The second bag is used as a case. It is performed from various dense tissues of different colors, natural or artificial leather or combined from different materials. In order to more convenient the bag with the filler, the side of the cover is stitching the robust "lightning".

Frameless chair from old jeans with their own hands
It is very convenient for children, since it does not have sharp and hard surfaces, and also easily restores the form. She uses when conducting various holidays, parties, if the chairs are clearly lacking.
Attention! For the manufacture of frameless furniture, special reinforced threads will be required.
How to make furniture from chipboard do it yourself
Homemade masters who even have the minimum work experience in making furniture, argue that making furniture from LDSP is not so difficult.
The simplest option in this case is to order on the drawing in the company. Consulted material on the necessary elements, after which you get a finishing edge in the store, then connect the parts in a convenient way (using fastener or special glue) and glue it.
If we cannot cut the blanks from professionals, you have to do it yourself.
How to avoid mistakes in the manufacture of furniture
The main problems when they make furniture with their own hands, occur in cases:
- the dimensions of the parts are incorrectly defined;
- incorrectly selected material;
- the dimensions and set of fasteners do not correspond to the furniture parameters.
To avoid unpleasant surprises, it is important to take into account these features.
Finishing Stage - Decoration
When furniture "masterpieces", made with your own hands, are completely ready, the last barcode remains decorating. And here - a full scope of fantasy! Depending on the material from which the furniture was made, it can be decorated:
- painting acrylic paints;
- mosaic panel;
- translated pictures, covering varnish;
- to conduct artificial "actions" by the method of cracker;
- use decoupage features
and other ways to decorate products.
Video: furniture do it yourself
 Why you can not give icons
 Is it possible to give icons as a gift: Signs, the opinion of the Church
 A year ago left her husband, and now I do not know what to do