How to properly align the walls
There are many ways to finish walls, but most of them require an even and straight base, but in reality everything turns out to be not so smooth. The walls of modern houses, and even more so of old buildings, only seem to be flat, but are not suitable for facing with tiles, laminate or panels, since they have horizontal or vertical differences that are invisible to the eye. In this article we will tell you how to properly level the walls for finishing with any materials.
Any renovation begins with preparation, and leveling the walls is no exception. In this case, first of all, it is necessary to determine the degree of unevenness of the surface in order to know the best way to level the walls and how many materials are needed.
How to determine the degree of curvature of a wall:
- Arm yourself with a long building rule 2-2.5 m long. Drive a nail into the corner of the room closer to the ceiling, leaving the cap sticking out 2-3 mm (so that a string can be tied behind the nail). This nail is your starting beacon.
- Tie a nut or any other weight to a string or strong thread and hang it by the nail so that the weight does not touch the floor. Wait for it to stop wobbling and the thread forms a straight line.
- Drive in the second lighthouse nail at the bottom of the wall and drive it in just enough so that the head and thread are on the same level.
- Repeat this procedure with a different angle on the opposite wall. As a result, you will get 4 beacons around the perimeter and 2 straight lines, respectively.
- Take a long string or cord and pull it between the top nail on one side of the wall and the bottom nail on the other (diagonally). Repeat with a second pair of beacons. When you fasten the threads crosswise, make sure that they do not touch the surface of the wall.
- Now, with the help of these threads stretched over four points, you can determine the state of any wall in the room.
Choosing the alignment method
Leveling with dry mixes
To level the walls with plaster, as practice shows, is the most versatile option, relevant for any finishing material, be it wallpaper or tiles. Despite the high labor intensity of working with mixtures, you get a better and more durable result.
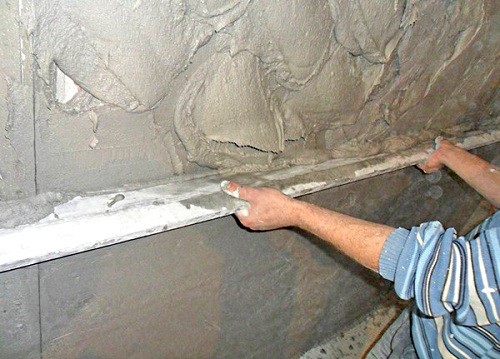
How to level the walls with putty:
Helpful Hint: When choosing a dry mix, pay attention to the thickness of the layer, as well as the nature of the binding component. For example, it is recommended to take gypsum solutions for rooms with a low or normal degree of humidity, since in a kitchen or bathroom such walls will quickly become damp and cracked. For humid rooms, choose a mineral-based mixture. Cement plaster can be prepared with your own hands by mixing 1 part of cement of a brand not lower than 400 with 6 parts of sifted fine sand and diluting everything with water to a creamy state. You can vary the amount of sand in order to obtain different plasticity of the solution - the less sand, the more plastic the solution is, and it is easier to work with it (but then more cement will be needed, which means that repair costs will increase). Attention! You need to use the ready-made solution in 1-2 hours, otherwise it will harden or lose its properties, so do not mix large volumes at once.
Plasterboard leveling
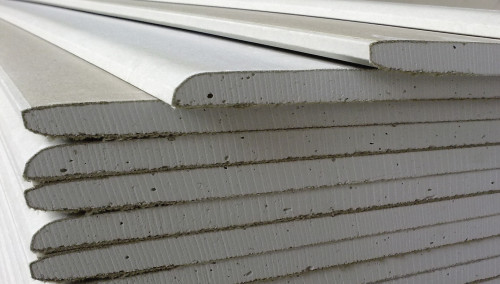
It is much easier to level the walls with plasterboard than with dry building mixtures. This job is much cleaner, faster, and more suitable for novice builders. A wide range of gypsum boards allows you to work in almost any room, even with a high level of humidity. In addition, drywall allows you to level walls with strong differences in height and horizontal, which would require an overly thick layer of plaster. And although this method is relevant for wallpaper or paint decoration, in some cases this is the only way to get even and smooth walls.
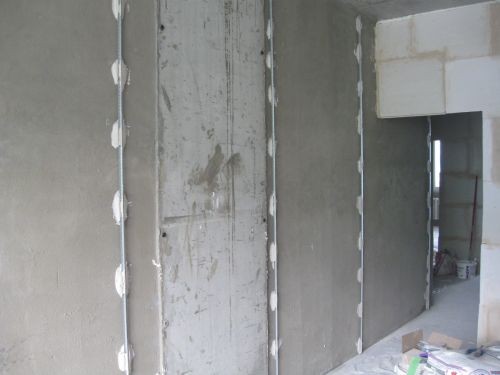
There are two ways to install the gypsum board for leveling the walls: on the frame and on the glue. The first method is suitable for surfaces with serious differences and helps to level wooden walls, the second can hide minor surface defects and get a perfectly flat base for finishing. It is also permissible to combine these two options in order to achieve a neat joining of the walls and ceiling. The wireframe method is the most common, so we will look at it first and in all details.
For the manufacture of the frame, a special metal profile is used under the gypsum board. Fixation is carried out by means of self-tapping screws and screws. Before telling the instructions on how to level the walls under wallpaper or tiles, one should mention one nuance of the frame method - due to the large thickness of the resulting cladding, several centimeters of the usable wall area on each side (about 4-5 cm) leave. And if in a spacious room this may not be noticeable, then for small rooms it is better to use a different method.
Instructions and video on how to properly level the walls:
- Remove the old wall covering and sand the surface.
- In this case, priming is necessary not to increase adhesion, but to strengthen and protect the walls from moisture and fungus. If you are covering an exterior wall or wall in a damp room, treat it with an antiseptic.
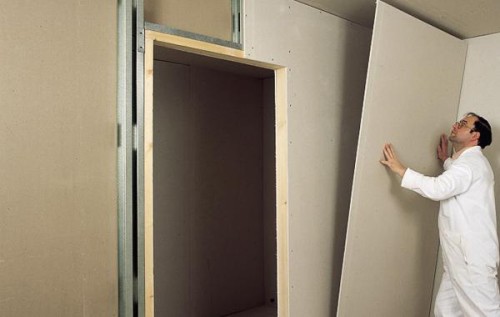
- Build a frame from a galvanized profile by first mounting the UD profile on the floor, ceiling and adjacent walls to create a frame. Then, inside this frame, jumpers can be fixed from a thinner CD profile, which will hold the plasterboard sheets. In more detail, all the subtleties of the fastening process are described in the article "".
- When the frame is ready, you can start installing the gypsum board, but before that you need to measure, draw and number them so that they clearly fit into the given area. GKL is convenient in that it can be easily processed at home with improvised tools. In the article "" everything is described in detail.
- Use a self-adhesive mesh to seal the seams between drywall sheets. Apply it to the seams and then cover with starter putty to bring it flush with the surface. The subsequent treatment of the wall depends on the selected cladding. If you will be laying tiles or other dense, non-translucent material, you can simply cover the joints with putty and that's it. But before painting or gluing wallpaper, the wall should be completely covered with a white finishing putty with a layer of 1-2 mm, sanded and primed. The article "" says a lot of useful information on this topic.
Now you know how you can level the walls with tiles, wallpaper or any other finish. We hope this article will help you quickly and efficiently make repairs with your own hands. Finally, we suggest that you familiarize yourself with another useful video on how to level the walls with drywall:
 Country house facade design: a variety of stylistic trends
 Wooden ceilings - 25 interior examples
 How to make a children's playhouse with your own hands