How to align the walls under the wallpaper in the apartment with your own hands: Easy, quickly and efficiently
From the author:welcome to you, dear reader. We are glad that you decided to visit our repair and construction portal. On our site there are articles dedicated to the description of the surface preparation process for painting. Today we will talk to another topic, which can be considered related. We learn how to level the walls under the wallpaper in an apartment or private house do it yourself.
In new buildings, there is often no need to level the walls - they are both in proper form, but in old houses the degree of flatness of the walls clearly leaves much to be desired. Strategy for repairing walls should be determined based on the solution of several important issues.
First, - whether we need an ideally smooth surface (with a degree of irregularity of no more than 2 mm per 2 m²) or it will be quite enough for "superficial", so to speak, visual evenness.
Secondly, whether we need strictly straight - under 90 ° corners. The fact is that if you plan to install large-sized furniture, so to speak, on the whole wall, for example, the wardrobe, then the corners should be straight, and the walls are strictly vertical, that is, in relation to the floor they should be strictly at 90 °. Otherwise, after installing such furniture, even those flaws that were not visible to the naked eye will be noticeable.
So, we already understand what kind of result we would like to see after the end of work. Now it's time to proceed directly to action. For a start, we take a two-meter construction level and determine if our walls are smooth.
It is also necessary to measure two diagonals of rooms. If they are equal, then excellent. If not, then the geometry is clearly broken. The permissible degree of inequality of two diagonals is up to 12 mm. If in your case this indicator is not exceeded, then you can only congratulate you: the level of alignment is not the same global.
Ways alignment methods
In this section of the article, we will call the main ways of alignment of the walls, as well as consider what they imagine that you have the opportunity to choose the most suitable. Naturally, no one will leave you without practical advice, it became after familiarizing with text materials, you can already go to the store and buy already building materials for work.
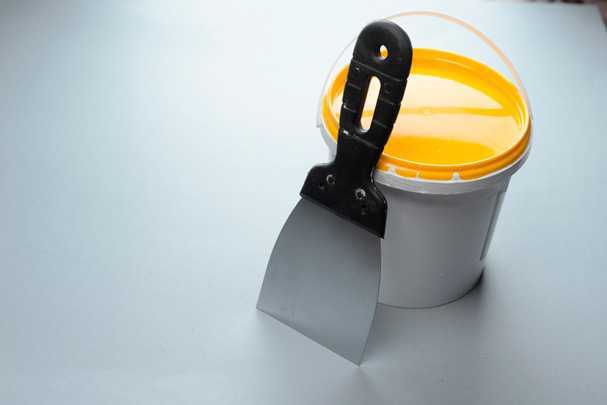
Shpaklevka
Here we will not make advertising by any of the firms producing putty mixtures, since the article is not advertising. We only note that the building materials market does not limit the consumer in choosing: you can buy anything, as they say, for every taste, color and wallet. But truly high-quality products cannot cost too much. For building materials, this truth is quite valid.
But before shaking the walls, it is necessary to conduct preparatory work. Here, how to prepare the surface to the shtlock:
- remove the remains of old wallpaper and pieces of detached plaster, if any. In a word, it is necessary to make anything prevented anything to be further work;
- treat the wall with antifungal composition (antiseptic). This is especially true if there is an increased humidity in the room, as it provokes the formation of fungal colonies, which not only emit harmful disputes to health, but also gradually destroy the walls, literally "eating" them;
- treat the wall with penetrating primer. It is also a very important stage that cannot be left without attention. The primer improves the adhesion of the finishing materials with the surface of the wall and prevents it premature destruction.
Now go to the preparation of putty mass. The consumption of the material is determined by a simple formula, which and the formula cannot be called: 1 kg per 1 m² with a layer thickness of 1 mm, or, in a different way, - (1 kg: 1 m²) × 1 mm.
Keep in mind that it should be prepared to make a putty at exactly in such quantities in which you intend to use it, because it is not a borscht and no soup that can be cooked for several days. The putty mass is not designed for such a practice, as it freezes it pretty quickly.
It follows in a metal bucket, because the plastic may not withstand the tricks of the harsh mixer. In addition, it will be much more convenient for you if the bucket is not round, but, say, square. In addition, this will reduce the consumption of a spacion mixture. So, if you have a square metal bucket at your disposal, then it's time to use it. But if there is no such - nothing terrible, use what is.
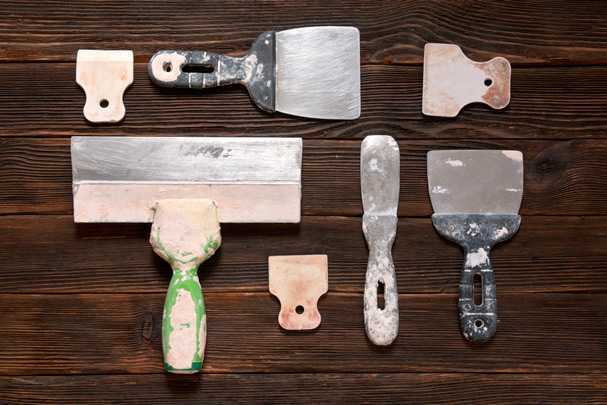
In addition to the bucket, we will need to get two spatulas:
- the first is narrow (10 cm). It will come in handy in order to recruit the spike mass of the bucket (of the very, metallic and square). In addition, a narrow spatula will be put on putting on the second, more "serious" tool - a wide spatula. They will also purify the last of the putty putty;
- the second is wide - "serious" - the spatula. Its "degree of seriousness", that is, the width will depend on how we are twisted the working surface. Than it is wider, the wider the alignment band, which is logical. Although there can be no strict standards relative to the width of the instrument, - one digit to give it all the same: it should not be (!) 40 cm.
The starting putty of the walls should be performed in two layers, and between them, for better clutch and preventing microcracks, the painting mesh should be paved. This will not entail large material expenses and does not take much time and effort, but it will ensure reliability, and, as we understand, it is fundamentally important for us.
Keep in mind that the wall should be aligned in all directions: not only from top to bottom, but also from left to right. How to do it? - very simple. It is necessary to apply the layers of putty mass perpendicular to each other - only and everything.
The gun to the spatula must be taken into account another important nuance. The less the angle of inclination when applying putting on the wall, the thicker it turns out the layer. The finishing putty should be applied by a thin layer, which practically moves away after applying primers in front of the direct painting or.
To bring a spacchable surface to an ideal state, wait for the shunt mass (± 24 hours at 15-20 ° C), and then use a fine-mellular grater to finally poll the surface.
Here, in principle, the entire level of alignment in this way. Go to the next.
Plaster for beacons
This method of alignment is appropriate if the walls are quite curves, which is noticeably purely visually, that is, the naked eye. Be prepared for the fact that this process is quite long, dirty and time consuming. But it is very effective if the putty does not help, and GLC (drywall) will take too much useful space from and so not a very large room. Only in this case will be advisable to resort to this method of alignment.
Prepare a plaster mix yourself - also rather rashly, if, of course, you are not a professional in this matter. In fact, diminish all the necessary components in the correct proportions is quite difficult. But the output from the position is very simple: buy a ready-made mixture - and proceed to work without unnecessary, unnecessary televitations.
Be sure all sorts of polymer components that are added to the plaster mixtures in the manufacture contribute to the strength and durability of the plastered surface. You can not even resort to the use of a polymer mesh when working.
If you need to stack a concrete or brick wall, use the cement-sand mix. This method is suitable if there is a level of moisture level above average. In turn, for walls made of wood suitable plaster, alabaster or clay-cement.
If the indoor moisture is at a normal level, then there are many options: it is lime-clay / hinhypsum, and cement-lime, and lime-gypsum mixes.
Before proceeding with the leveling of the working surface, it is necessary to conduct a number of preparatory activities. In the previous section, we have already been listed, exactly how to prepare walls to align.
When everything is ready, it is necessary to install two vertical guides of the lighthouse at the edges. It goes without saying that without the use of the construction level it is not here. By the way, instead of special metal beacons, you can use ordinary planks made of wood, which subsequently have to be removed.
In turn, the alignment of intermediate guides is carried out at the expense of threads stretched between the main two lighthouses. The distance between them should be 20 cm less than the rule by which the working surface will be aligned.
Secure lighthouses on the wall is necessary for special plaster glue.
Now, when the beacons are placed and fixed in their places, it is time to start alignment that will be held in several stages.
First, - applying liquid plaster. It should be applied to the working surface follows a solid layer (± 4 mm thick) to the surface, pre-sprinkled with water. If you work with a wooden surface, then the thickness of the plaster layer can be all 9 mm.
The main purpose of this first layer is to create a transition between the main working surface and plaster, which will be applied subsequently.
Secondly, - applying the soil. If the previous solution may contain up to 60% of the water, then everything is already somewhat different. In this case, the solution must contain up to 30% of water, and therefore it should be much thicker.
As for the thickness, it should be not more than 7 mm. If irregularities are very significant, then the layers should be somewhat. Each of the applied layers should be carefully loosened - to work well a rule.
Thirdly, - apply the last layer (up to 4 mm). In construction, this process is also referred to as the "corner". To make this layer firmly cluttered with the soil, the latter should not be completely dry. If you are lazy, and soil is dry, then before the start of applying liquid plaster, the previous layer should be moistened with water.
GLK (Gypsum Carton Lists)
Often resort to the method of alignment of walls with plasterboard sheets. What to say here? Plasterboard is good in everything: it is durable, durable, environmentally friendly material from which you can do anything. In addition, it is environmentally friendly and harmless to people and animals. The only drawback is that the size of the room will decrease somewhat somewhat, but if it is not fundamentally, you can safely use this method of alignment.
If the curvature of the walls is not critical, it is possible to fix the GLC on the wall using a special gypsum composition and dowels with self-draws.
If the walls are brushed to a large extent, then the plasterboard sheets must be mounted on the frame. Here, how to make it:
- mount UD profile around the perimeter;
- mount the CD profiles in a vertical position in a step of up to 60 cm;
- fix the GLC to the frame using the screws (25 mm) in 30 cm increments.
The joints between the GLC and the place where the self-tapping screws were screwed, they are covered with a special plaster mass. Now, theoretically, the wallpaper can be glued on the surface of the drywall, but in view of which in this case they will be problematic to be removed when repaired without damaging the plasterboard itself. To avoid this, the surface should be further pricked.
On this we say goodbye to you, dear reader. Thank you that you read the text to the end. If it does not make it difficult, then share the link to our portal through Facebook, VK, Twitter or other social network you use. All the kind, we will be glad to see you again!
 Facade design of a country house: a variety of stylistic directions
 Wooden ceilings - 25 interior examples
 How to make a children's game lick with your own hands