How to make a roof tray with your own hands. How to make drainage with your own hands: the choice of material and the manufacturing process. Watering system made with your own hands
For the extension of the service life of the foundation, flowing from the roof rainwater must be left away from the building. This function is performed by metal or plastic roof drainage. From this publication, you will learn how to properly make a roofing system with your own hands.
Installation of metal water pipes
First of all, we consider the device of waterfront from semicircular elements of the factory manufacture depicted in the photo.
The mounting kit consists of such details:

When assembling, additional materials are also used - sealant, rubber gaskets and fasteners - rivets, screws for metal.
Drawing up the scheme and selection of parts
Since manufacturers offer 2 sizes of pipes and gutters, before purchasing components you need to select the appropriate diameter and make a scheme of the water-feling system.
When drawing drawing, follow the following instructions:

Vertical drains in the form of pipes are attached to the wall on the brackets, the maximum distance between them is 1.5 m. The height of the lower cutting of the waterproof over the ground is not more than 30 cm. Only galvanized screws or nails are used as fasteners.
How to assemble the system
To mount metal drainage with your own hands, prepare a standard set of measuring and plumbing tools plus a drill for drilling walls under the brackets. One Caution: Use the rubber hammer and scissors for metal instead of the Bulgarian, in order not to spoil the powder paint of parts.

The assembly of the water-feling system is made in this order:

Important moment. After snaging the chute you can not move, otherwise you risk hardying the polymer coating. The item is important to immediately put in the project position.

The most responsive stage of the installation of the drainage system is the correct installation of hooks, collect and hang a chute is much easier. Brackets screwed to the crate must be installed before installing the roofing coating, otherwise the professionalist or metal tile will have to raise. Each hook must be bent in such a way that the suspension is at the project height.

Council. The best way to comply with the calculated slope to tighten between the extreme brackets of the cord and to unwind the rest of the rest.
Another way is to put short hooks on the windshield with smaller gaps (provided that the cornice is sewn with wood, not plastic). The bias of the future runoff is maintained by attaching brackets with a small vertical offset. Details The assembly process is shown in the video:
Boxed gutters - installation features
Homeowners who wish to independently assemble square-form waterproofs will have to take into account several nuances. Installation is carried out on the same technology, but part of the operations is done otherwise:

When docking the straight and angular elements, the total is 5 cm. To insert one part to another, it is necessary to trim the upper bent edge.
About plastic waters
If you have well learned the method of assembling drainage from painted steel, the installation of PVC systems will not be a big problem. The procedure for work and technology of implementation is preserved, but there are a number of differences:
- the diameter of the small pipe is 87 mm;
- in view of the small weight of the details, it is possible to arrange a drainage system alone;
- maximum hook installation step - 50 cm;
- the funnel is a separate element embedded in a chute, no cutting hole is required;
- plastic parts are allowed to cut with a grinder, but you have to clean the influx;
- the distance between the pipe clamps is not more than 150 cm.

Steel and plastic waterproofs are equally "afraid" of the snow masses from the roof. From a large number of snow, the first are deformed, and the second can break. Therefore, snowstores are required on the roof, and the outer edge of the gutter should fall on 2 cm below the coverage line, as shown above in the diagram.
Homemade Sweets from sewer pipes
The cost of high-quality metal "drainage" is quite essential, and plastic for the price of slurred cheaper. Therefore, for utility buildings, baths and sheds have more economical options made from well-made materials:
- waters of roofing galvanis;
- sewer PVC pipes Ø110 mm;
- plastic bottles;
- old plastic pipes with a diameter of 8-15 cm.

Two drainage cars come from one cut pipe
From the point of view of the aesthetic and ease of manufacture, the most acceptable option is PVC pipes for internal sewerage with a small wall thickness (gray). To turn this material into a homemade drainage system like this:

How the plastic pipe drainage is going to tell the master in his video:
Conclusion
Modern watersystem systems are designed with an eye on the ease of installation, therefore, anyone who wants to cope with these works. The installation is correctly checked by filling the gutter with water at the highest point. So that the channels are not clogged with large garbage and leaves, the gutters close on top of a special grid.

Designer engineer with experience in construction for more than 8 years ..
He graduated from the Eastern Ukrainian National University. Vladimir Dalya in the specialty "Equipment of the Electronic Industry" in 2011.
Related records:

Without drainage systems, fixed on the roof of the house, it is impossible to do, if I don't want rainflow, it is splashing from the height of the roof, sprayed on the walls and washed the foundation. Washing from the roof with your own hands can be collected by purchasing ready-made systems of well-known firms, and can be made independently, for example, their galvanized sheet or even from plastic sewer pipes.
By purchasing professionally made and structurally thoughtful kits, you can choose all the necessary elements - from small fasteners to complex angles and connections.
If the decision is made, then you will have to try and well think out from which the elements of this system will be made and how much they become functional.
From what the drainage systems are made

The most popular materials for the manufacture of drainage currently are special polymers that calmly solve low and high temperatures, as well as their sharp differences. Such systems are manufactured by companies relevant to the development of plastic products for the construction and external design of buildings. Kits, professionally manufactured systems are quite expensive, and they are mainly installed on the roof of respectable mansions and less often in — Conventional homes of the private sector, although they are able to transform any structure.
 Galvanized steel drains - a kind of "classic of the genre"
 Since time immemorial, the drainage system is made of galvanized metal. Such elements are usually ordered from tinsmithmasters or acquire in specialized stores. Metal drains are more accessible at a price, and therefore apply more often. Despite the low, compared to other systems, the price, and possibly not such an aesthetic appearance, galvanized drains have their positive parties for which they even exceed similar sets made from Plastic or metal alloys. The main disadvantage of systems from galvania can be called the discrepancy between the connecting seams when the temperature modes drops. However, much depends on the skill of the tinsmith, which makes them.

Steel drains can be with a proposed layer of high-resistant polymer paint. This significantly improves their decorative characteristics and gives additional protection against corrosion.
 Almost "eternal" drains from zinc-titanium alloy
 The drains systems are also made from a metal alloy called zinc-titanium, which at the final stage of production is also covered with polymer paints. The content of pure zinc in the alloy reaches 98 - 99% - the warranty of corrosion resistance, the additive of titanium is the condition of the strength of the products, and completely small inclusions of aluminum and copper give this material high plasticity when processing it.
Such drainage systems look as aesthetically like plastic, but they are characterized by higher reliability, since it is better to withstand the effect of the external environment. To their external disadvantages, with poor-quality coverage, there is a possible detachment of the polymer coating, therefore, stopping at this option, it is better to purchase the sets of a proven manufacturer using a steady authority.
All listed materials are well suited for drainage - they are easily processed, mounted and carefully look, organically merging with the exterior of the building and becoming at the same time the desired functional part of the structure, and an important addition to its design design.
Basic elements of the drainage system
If the drains are purchased in the store, do not have to think about how to make one of the elements of the system - the manufacturer has already thought out all the nuances of the roof design. Measuring and specifying in CE Parameters on your own home, you can buy all the necessary details.
Despite the variety of varieties of drainage systems, they all have about the overall structure and consist of similar design details:

1. The chute is the main part of the drain, which collects water flowing from the rods. Usually the gutter is manufactured up to 4 meters long.
2. Hooks-brackets for which the chute is placed. Plastic brackets are usually used for systems, also made of polymers.
3. The plug for the edge of the gutter for the right and left side.
4. Funnels installed at the edges of the gutters.
5. Central funnel, fixed with glue or applying grooves and seals (5a).
6. Connecting detail (clutch) for chute. It can also be mounted on glue or well-thought-out groove compound using sealing pads (6a) ..
7. Universal connecting angle of 90º external and internal (7a).
8. Truck drain with connecting couplet
9. Clamp coil, tightening the coupling of pipes and other elements.
10. Tee, providing the connection of two drains pipes.
11. Transitional coupling - used with the need for pipe connections of various diameters.
12 and 13. Taps (knee) for connecting drain pipes. Usually have a corner of V.60 ÷ 70º - different manufacturers can apply own Standards. It is clear that in one system there must be elements with the same corner values.
14. Running terminal with an angle of 45 º - for the direction of wastewater in the rainer of the storm sewage. This item is differently called omnor.
15. Hook-bracket made of metal.
In addition to the elements presented, for some drainage systems, instead of brackets, an eats of an eaves, which is an additional bracket holder or even itself performs their function.

Before you go to the store, you need to make a drawing of the roof edge with all the turns and protrusions, measuring the angles. A drawing with detailed drainage parameters must be provided by a specialist who should help choose all the necessary elements for a complete set.
Video: An example of the installation of the finished gamrat drainage system
Prices for drainage systems
Drain systems
Independent manufacture of waterproof elements
1. If a system made of galvanized metal is installed, then, in order to save, the gutter can be made independently, since the sheets of the material are much cheaper than the finished elements.
From galvanized steel, a semicircular or square chute can be made, but the semicircular form is still considered traditional.

The thin sheet of metal is easy to give the shape along the pipe of the desired diameter by making special bends at the edges, so that they are securely held on the bracket mounts.
If it turns out to make a gutter for the drain, then the brackets will also do not be at ore. Their semicircle should have a slightly larger radius, as the chute should be easily placed and secured in the bracket.

It is easy to make a galvanized metal and a boxed chute. Its form is displayed on a wooden bar of the desired size. One side is made a little more and feces to the side, in order for flowing water to fall into the right place. Then, its edges are flex a special way.

2. If it is required to make drain only on a straight plot to the ruins, then the chute can be made of plastic sewer pipes. Such gutters will cost, in price terms, almost for nothing, as two chute is obtained from one pipe.
- The pipe at the beginning and end is fixed on two boards with the help of self-tapping screws, in the upper part of it, exactly opposite the lower points of fixation, is not fully screwed into one self-tapping screw. On their protruding parts stretches thin rope, it marks a smooth line. According to this markup, the pipe is cut from beginning to the end.
- Then the pipe turn over and repeat the process. Thus, two halves are obtained, which will serve as chubs. When assembling, individual parts can be twisted with screws from the inside. Using sewer pipes, corner parts can also be taken from the same system, also spraying them along.
Video: Production of gutters from plastic sewer pipe
Of course, homemade details will not have such a spectacular species, as professionally made, but it can be saved on a decent amount.
3. If you wish, you can choose other components to collect the whole complex, as you can currently find a lot of suitable materials that serve concrete. The only details that still have to order or buy is a funnel. Independently make them, without having experiences of tin work, it is quite difficult.
Installation of the drain system
Installation of the system is made in different ways, depending on the selected mounts and installation period.

The optimal is considered to install on the extreme crossbar or raftered the pitched roof to the flooring and fixing the roofing coating.

On the diagram presented, it is clearly seen how the brackets are fixed and closed by a cornice bar. In this case, it is a kind of shield for sofit, protecting it from direct moisture.
In other cases, the cornice bar is performed from the board, and if the brackets are not fixed before laying the roof, they are attached to it.
Sometimes attachments for the grooves are fixed on the bottom of the skate directly on the roof, but it is not quite the right option.
Wherever the brackets for the gutters are fixed, their location must be calculated in such a way that the water flowing from the roof with a large flow falls in this channel, and not spilled on it.
This parameter depends on how much the edge of the roof. If it goes to a sufficiently long distance, sometimes there is a sense of the PR named the variant of the cr of the eruption, installed on the roof itself.
Video: Example of calculating and editing the drainage system of the house
So, by purchasing or making a suitable waterproof system, you can start it.
1. The first step is the process of installing bracket holders of the waste chute.
They are fixed at a distance of 550 — 600 mm from each other, with a slight slope toward the drain. Brackets must be fixed in such a way that the sinks of the roof find on gutter On 1/3 of the size of the semicircle, and 2/3 of the gutter will "catch" water from the roof.

If the brackets are fixed on a wooden cornice bar, then in order to clearly see the slope and the fixing line, the following actions are carried out:
- First install the bracket that will maintain the highest edge of the gutter, given all the rules and recommendations.
- The next step is to consolidate the last bracket in the row. It is fixed with a bias of 4- 5 mm on one mongon meter. Incorrectly calculated and installed system will not work efficiently, and over time, leaks will appear in it.
- Then, the brackets are fixed in the marked places. This will be respected by the required shared slope of the drainage gutter
- The chute is placed and collected, and the plug is installed on his raised edge.

- If at the end and in the middle of the gutter will be installed a funnel, and it is necessary to make a hole corresponding to the size of the funnel, then it is installed on the chute and fixed.

- An additional middle funnel is established if the side of the side of the house exceeds 12 meters. If it is shorter, it is enough to establish this element tons at the end of the gutter, in its lower part.
- Fixing the gutter occurs by putting on the groove on its edge on the protrusion bracket.
- If a ready-made drainage system is installed, then individual parts of the gutter are fastened with each other with special connecting parts, in which the exact interface is provided and the corresponding seal. If the system is made independently, the gutter is stacked and twisted with self-drawing. In this case, in this case, also provide a subtle sealing gasket, for example, from a rubber strip.
- When the sewage canal is laid and funnels are installed in it, the waste pipes and knee -ans are mounted to them, which in compounds are tightened by clamps. To the wall drain pipes are attached to the clamps. The use of taps will allow you to locate pipes along the wall so that the racks of the clamps are not too discovered.

- If the water from the roof will go into the ground, then the waste pipe attached to the wall must end 300 — 350 mm from the ground surface.
- If for collection and assignment rain or melt water around the house is arranged raining sewage, then pipe with roof sometimes It is connected directly to it or placed the edge of the drain pipe with a currency right above the hole of the rain period or a catchment tray.
Learn how to make various systems from our new article.
That which many forget about or simply do not know. It is highly desirable to install a protective grid on the gutter, which will not allow to be assembled at its bottom of a large mouste and fallen leaves. In finished systems, it is usually provided in the form of a strip that is attached to the edges of the gutter.

For a homemade system, you can purchase a mesh by a metro station, and put in a chute, rolling into a roll, which is fastened with special plastic clamps.
 You can make such a "filter" and independently, turning the grid into the tube diameter of the drain
 Video: An important element of the drainage system - a grid to protect against large garbage
Whatever the water system is set on the roof of the house, it needs periodic control and regular prophylactic cleaning. Even if a grid is installed on the chute, it is sometimes necessary to rinse, since a large amount of dust and dirt fall into the roma of large fragments from the roof, and the spinning leaves that have fallen into the grid are not always blown away by the wind. If the drain system is clogged, the entire water accumulating in it together with the mud will one day on the walls of the house.
Taketing for the installation of the finished system or for the independent manufacture of the drainage, you need to correctly calculate all the parameters and slopes, make a drawing and, of course, evaluate your strength to perform this work. If there is no confidence that it will be done with due qualities, it is better to seek help from specialists.
The drain helps to keep the roof and walls of the house from excess moisture. Now buy your favorite system of drainage is easy in the store. Famous brands offer protection against moisture, and specialized firms with warranty.
The cost of this is rather big, the amount goes big. You can purchase a drainage system in the store, and save on the installation. And even better to make such a device itself, putting a little effort and knowledge.
Materials for homemade drains:
- plastic bottles;
- pipes for sewage;
- wood;
- galvanized metal sheets;
- copper sheets of metal;
- profiles for drywall;
- ceramic water disposal.
Sewer pipes are suitable at their price, fortress, weight and availability of various adapters.
Important! Not all sewage pipes are suitable for external work.
- Gray pipes, fear of strong frosts.
- Brown pipes, the strongest, patient to loads and large frosts. Under the influence of prolonged sunlight, ultraviolet destroys and the surface begins to crack.
- White pipesUsed for home installation work.
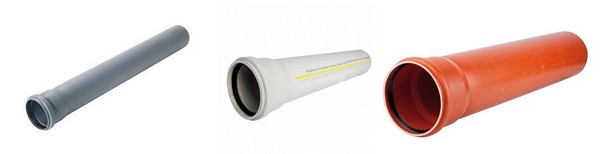 Therefore, choosing pipes for drainage should be on weather conditions in its region.
After determining the material for the drain, the consumables are calculated.
Different diameter of pipes is suitable for different area of \u200b\u200bthe roof skate:
- S.< 50 кв. м – трубы диаметром 8 см;
- S.< 125кв. м – трубы диаметром 9 см;
- S\u003e 125 sq. M. M - pipes with a diameter of 10 cm.
For the drainage scheme you need to know some parameters:
- the perimeter of the roof;
- length and number of grooves, stocks;
- places of joints and fasteners.
The perimeter of the roof divided by 2, and will be the length of the gutters. Pipes will be cut in half. For example, the perimeter of the roof is 60 m, it is necessary to buy for the grooves of 30 m of the sewer tube.
Water-graded risers around the perimeter are at a distance of 5 m. Their length is equal to the distance from the eaves to the Earth. Multiplying, the number of risers on the length of the risers, we obtain the number of parts for the gutters.
Required for construction Details:
- drain pipes;
- brackets (10 m goes 18 pcs.);
- taps and funnels (how many plums);
- plugs;
- angles (depending on the angle of water drop from the roof);
- connecting for gutters;
- knee;
- adapters.
Required tools:
- screwdriver and self-tapping screws;
- screwdriver, hacksaw;
- bulgarian, Lobzik electric;
- roulette, rope, level.
For convenience, construction is needed with scaffolding or goats.
After buying materials, the preparatory stage begins. Prepared for pipe grooves, it is necessary to cut into 2 parts. To do this, you will need a Bulgarian, a jigsaw or hacksaw for metal.
Attention! The places of the gutter entering the tee do not cut up!
Installation
The chute passes under the slope. Attached brackets at a distance of the half meter from each other. The fastening of the grooves occurs under the level and with a stretched thread. 
The junctions between individual parts are embarrassed by a sealant or put on clips. The next stage is the installation of drain pipes, the joints are stuffed with sealant.
From plastic bottles
Lightweight and cheap material is plastic. Having a sufficient amount of plastic bottles can be made from them drainage. For this, dark bottles of beer or kvass are suitable so that garbage is not visible. 
As in the first case, we draw a scheme of the future drainage. We find the perimeter of the roof and calculate the number of bottles. Of 1 bottles will be released 2 halves 12-15 cm.
From the bottle, cut off the bottom and the neck, cutting in half the remaining part and model the chute with the help of a stapler.
Bottles to impose a mustache for 2 cm. The chute is attached to the roof with a screwdriver and wire. 
Watering is made from cut, but not sawdust parts, inserting one to another. The funnel is made of a bottle with a cropped donkey, inserted into the drain. The drainage tube can be placed in the container or bring to the soil.
From galvanized steel
Galvanized steel is considered a durable metal resistant to rust, frost and ultraviolet. The only problem - due to the temperature drops, fastening seams are diverged.
First you need to prepare the sheets of galvanized. Billet is cut off with scissors for metal, adding 1.5 cm for widths in width.
This material is easy to change the form. For foldings, it is enough to attach a ruler or a piece of timber to the sheet and knock off the hammer. To give a round shape, a pipe or log wraps with a sheet and pass with a hammer or a xy.
The finished design is cling to brackets. The gutter is laid by 10 cm. Funnels are made using scissors, bending the metal in its ideas. Pipes are bonded by clamps.
Pipe manufacture
For a start, the funnel should be designed and make an exemplary drawing on a sheet of paper. After you begin to endure the drawing on tin.
 From the edges, a straight line with an indention from the edge of 0.5 cm and from the other in 1 cm is 1 cm. Cutting the part is bent, the precipitated edges at the right angle indent with 1 cm, and the other at an acute angle.
Folding the workpiece, the edges of the corners must enter each other. The hammer add tenacity on the tube seam. Having special metal bending machines, the process will take less time.
Funnel
The funnel consists of two different parts. The diameter should be equal to the diameter of the pipe. Parts of the funnel separately drawn on a sheet of tin. Cutting with scissors, as in the manufacture of pipes is left from the edge of 1.5 cm on the pitch. They must be shy.
The funnels at home are difficult to make a newcomer, so if it does not work, ready to buy in the store. It will not hit the pocket so much.
Brackets
Brackets help support chute. This important hook object can be made independently. It is better to take the material of the same width to make the brackets identical.
For this you need steel with a thickness of more than 2 mm, it will allow to keep weight. Stripes for electrical work work perfect for blanks. Dimensions: 40 cm for 2 cm. The workpiece is bent with a pipe and drunk nails into a tree using a lever.
After the manufacture, the two holes for fastening are drilled. Painted brackets, therefore, protected from rust, serve much longer.
The painted metal is protected from rust and corrosion. So, the life of the product from it increases.
For temporary design, brackets are made of wood. Cutting into a piece of bar of the groove in a piece. Some nourish them to the roof rafters.
Metal profiles for drywall
The profile is lightweight and durable metal is perfect for draining water. We go to the desired amount of material based on the perimeter of the roof of the house. 
Profiles around the entire perimeter of the house can be attached to:
- brackets;
- wire;
- bruks.
To protect against pouring water from the grooves, it is cut into 2 parts, the end above the funnel leave and bend to make an open source at the corner. Drain pipes and funnels will have to do from other materials.
From wood
Having a cottage or country house is easy to find this material. For temporary use for a short time, it is enough to spend a couple of hours.
 Temporary drainage is made from the board of 150x10mm. The length of the board is equal to the double perimeter. For example, the perimeter of the oxle of the roof is 100 m, which means that the sum of the boards should be 200 m.
Boards are riveted with nails at right angles. The resulting corners of the mustache are connected by receiving long gutters. For temporary construction, there are temporary hooks from boards and iron. The resulting brackets cling to the gutter.
Bracket can be made of wood. A triangle with a planting for gutters is cut out of a wooden bar. The brackets are nailed with nails or screw the wire to the roof. When installing the edge of perpendicular chutes should be overlapped.
Adjusting the tilt of the gutter, proceed to the drainage. It can be made of fastening chips or making another chute that gets to the Earth.
The main task of such a drainage is to take water from the foundation of the house. Next, you can cut the groove to drain the water or lead it under the tree. Water from home should leave about 1.5 - 2 m.
Temporary drain looks a bit ridiculous, but he can serve for more than a year.
While the owners will not accumulate money or come up with another option. To protect the tree from moisture, it is possible to use a polyethylene film, fixed with tape, furniture stapler or small carnations.
There is another version of the manufacture of a gutter. Reducing a small log into 2 parts. The chisel, cutting the oval, it turns out a great chute. The method of attachment to the roof remains the same.
System Operating Tips:
- Get rid of fallen leaves and garbage put protective nets. It is easy to do it yourself. To do this, you need a small mesh, which is cut by strips with a 6 cm wide larger than the width of the gutter (3 cm more on each side). You can attach it with a clamp or wire.
- Cleaning the drainage from dirt and garbage will extend his life, protects against blockages. Clean with a brush or hands, cleaning sticks. The clogged drainage contributes to the flow of water on the walls and the foundation of the house.
Output
It is possible to make an independent water system. It is necessary to determine with the material to work, draw the scheme and proceed to work.
The main thing is to comply with safety. These types of drains will significantly save the budget and allow to make exactly the option that is closer to the owner of the house.
Useful video
How to make water from sewer pipes below:
In contact with
When planning the construction of a new house, do not forget about the drainage system, which allows you to extend the service life and protect it from the destructive action of atmospheric precipitation. The following questions arise: what is better to do drain? How to make waterproofs for the roof with your own hands?
Nowadays, the market offers different options for modular systems that make the drainage assembly as fast as possible and easy. In order to save money during the arrangement of a country house or garage, you can make the system details on your own using plumbing tools.
Materials: their pros and cons
The roof drainage system must combine reliability, durability, aesthetic appearance, and comply with the financial capabilities of the developer. Based on these criteria, attention should be paid to the advantages and disadvantages of each type of material before deciding, from which to make the drain itself.
- Galvanized sheet steel. This is an inexpensive option, more often than others used in utilities. Minus: possible deformation of the grooves when they are cleaned from having a mechanical manner.
- Steel with polymer protective film. Such systems are preferable for houses with roofing from metal tile. Pros: frost resistance and atmospheric precipitation, the possibility of selection of the tone to the color of roofing or wall material. Cons: when water passes through the grooves, a lot of noise is created.
- Steel with paint. Not a very practical option: requires periodic update of decorative coating. If such a drainage is mounted under a soft roof, then the rain gradually washes off the abrasive particles in the gutter, destroying the metal.
- Heat-resistant plastic. It provides strength, corrosion resistance of parts, ease of installation, resistance to sunshine. The polymer is not destroyed by the action of acid precipitation and abrasive, absorbs noise.
Sometimes the drainage systems are collected from copper parts - it is almost an eternal option that gives the building a special charm. The only minus copper is its high cost.
How is designed and what is the bundle system with roofs
Any drainage system is collected from standard elements that perform their functions. Here are the main components of the drainage:
- gutter - for water intake and its move in a horizontal direction;
- drainage pipes - they provide the movement of the water flow down;
- plugs - to limit the flow of water;
- couplings and adapters - to connect direct sections;
- funnels - they are installed at the junctions of gutters and pipes;
- knee, tees, squares (90, 120, 135 degrees) - for the distribution of streams, approaching the pipe to the wall and bypassing the corners;
- hooks (holders, brackets) - for fixing the grooves;
- clamps with pins - for fastening pipes to the walls.

If the waterproof from the roof of the house is design independently, except for the selection of the material, several main tasks solve.
- Determination of the diameter of the drain pipes and gutters. They depend on the angle of inclination of the rod, the area of \u200b\u200bthe roof, the greatest intensity of precipitation in the area of \u200b\u200bthe arrangement of the building.
- In order not to overflow water, it is most often picking elements with such diameters: for garages, a garage, a small house - the diameter of the grooves 70-115 mm, pipes - 50-70 mm; For a home or cottage of medium sizes - the diameter of the grooves is 115-130 mm, pipes - 75-100 mm.
- Selection of the scheme of the location of the waterborne and water impact points. It is determined by the type of roof and the length of the sink. Drainage pipes are usually placed in the corners.
- Calculation of the amount of material. First you need to calculate the head of the grooves: measure the perimeter of the house and add about 5% (taking into account the slope). The number of pipes and funnel depends on the length of the walls - for every 10 m of the gutter you need one drainbox complete with funnel. The length of each pipe is determined by the distance from the ground to the oxle of the roof. Connecting, angular and distribution elements are calculated individually, based on the building configuration.
How to install drainage for roof with your own hands
Installing the roof drainage with your own hands, using universal tools - a technically simple task that requires compliance with a number of rules for the organization of water discharge without damaging the foundation and walls.
Assembly nuances depend on the selected system type, but the installation sequence is almost the same.

Customized by the length of plastic and steel drainage for the roof is easy - for this use the metal with the metal, curly cuts are performed by metal scissors. Cut edges are flattering and cleaned with a file, anti-corrosion coating is applied to sections of steel products.
How to make drain item with your own sheets
Systems from galvanized sheet remain the most accessible and popular. This is a practical material that is well withstanding the harsh climate of the northern regions and abundant sediments of the middle strip. To make the drainage with your own hands, you need a sheet galvanized steel with a thickness of 0.7 mm.

The manufacturing technology consists of several stages:
- Place sheets, with the help of scissors for metal cut blanks.
- The longitudinal edges of the blanks are bend for the subsequent folding compound.
- With the help of mechanical or manual rollers form cylinders (pipes) and half-cylinders (gutters). You can make the elements of the system without special equipment, by pulling out manually. As a mandrel, a pipe or wooden bar is used - the sheet is under them and bend it until the edges come together. They are connected by a folded seam.
- To make a funnel, cut out and roll three parts: a cone, a rim and a glass (its diameter must correspond to the diameter of the drain pipe).
- If the drainage tube has to be made up of several links, they should be made with a small taper. To do this, one side of the workpiece is waged by 0.5 cm. To limit the input depth of the links into each other, rings from the rolled wire are dressed.
A pre-manufactured pipe is used as a drain, which is trimmed at an angle.
![]()
 How to return the love of her husband to his wife - Tips of the psychologist
 Why you can not give icons